|
|
Post by afx on Oct 1, 2018 12:17:57 GMT -8
Thanks Gary - fabrication is the part of the build I enjoy most. I adapted the Fujimi EM kit hubs so that I could use their Fuchs wheels but everything else comes in the Italeri kit. 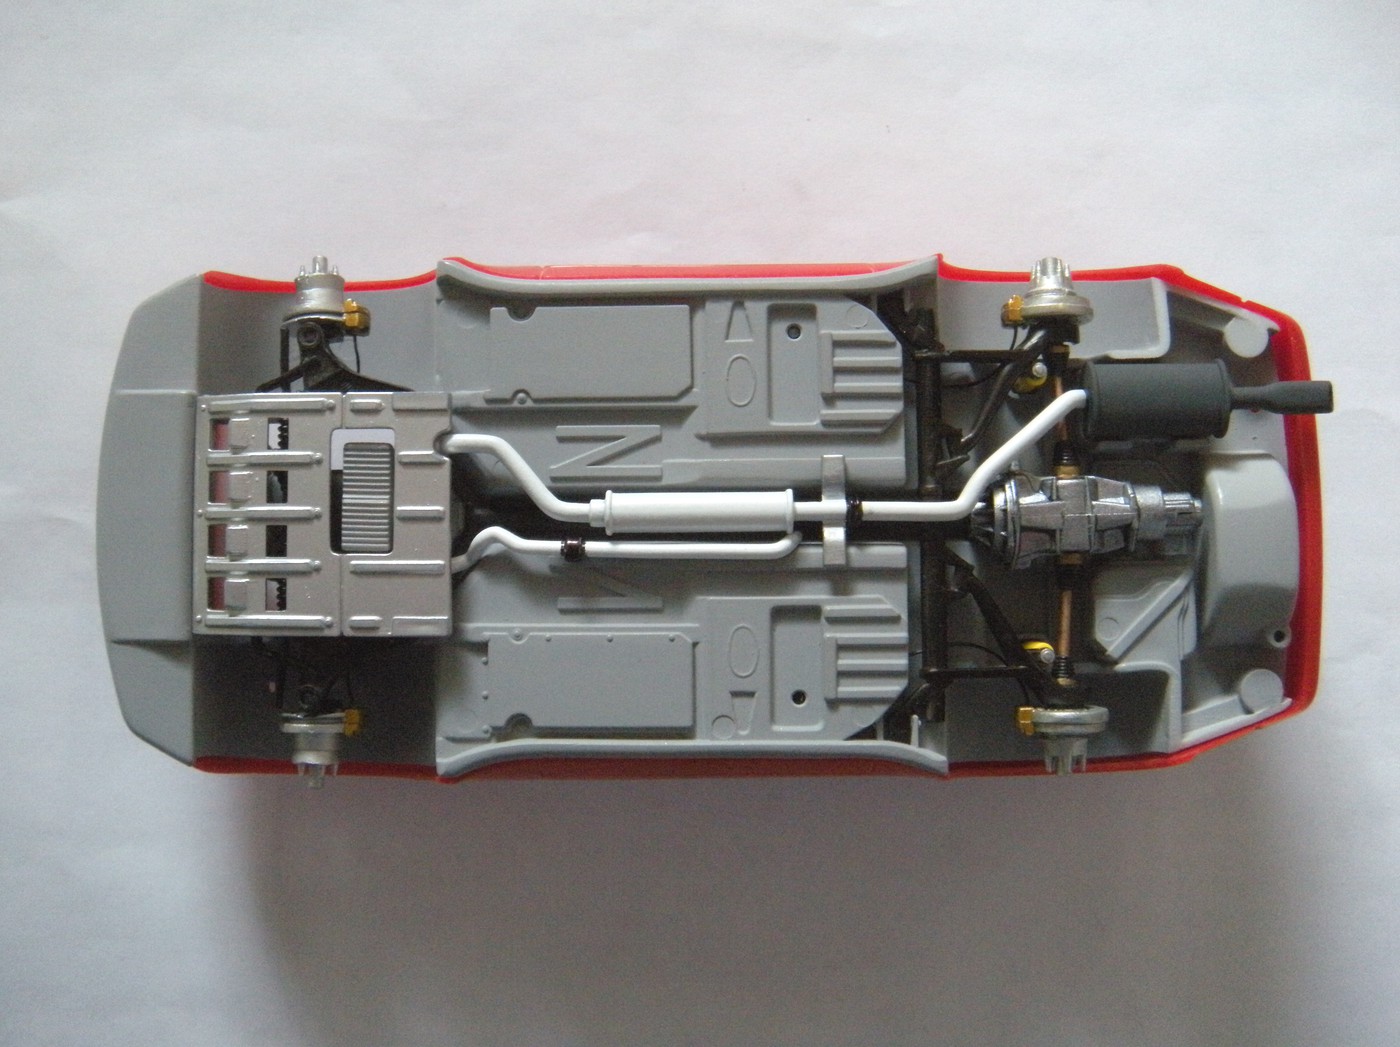 |
|
|
|
Post by afx on Oct 8, 2018 2:08:28 GMT -8
With an all black interior and nearly full glass I decided not to super detail the interior. Still need to paint the rim and anchor post for the spare. 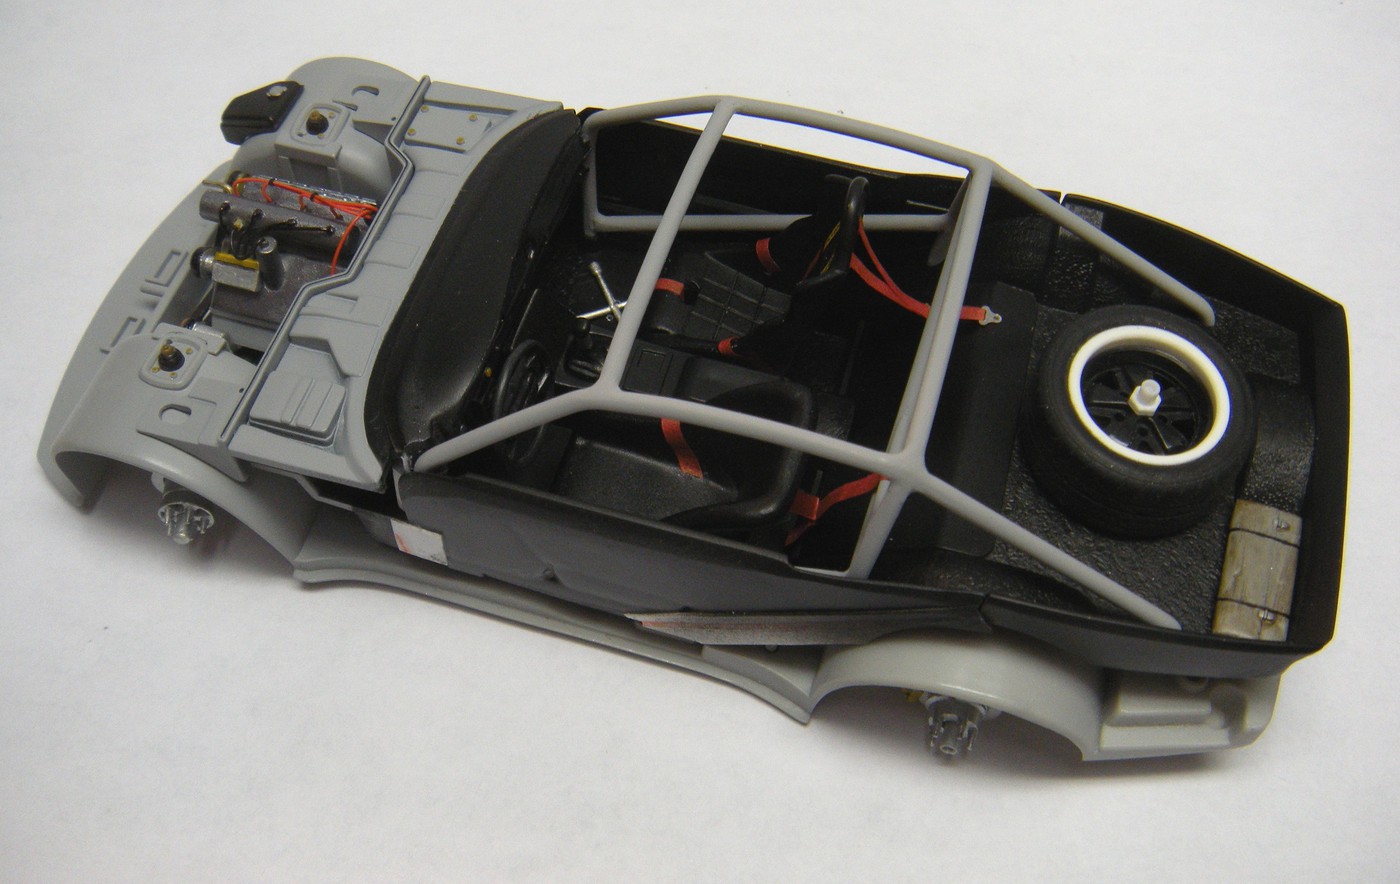 |
|
Deleted
Deleted Member
Posts: 0
|
Post by Deleted on Oct 9, 2018 12:58:19 GMT -8
JC this looks great I love watching you"pull" something together always spot on and clean as a whistle.....teach me oh svengali of calm how to build like that WOW!!!
|
|
|
|
Post by afx on Oct 10, 2018 2:34:12 GMT -8
Thanks Bill. My approach: 1. Study/research my subject 2. Develop a plan of what I want to accomplish with the build 3. Pre-assemble the kit to the extent possible before I start painting. 4. Create single color sub assemblies to simplify painting 5. Add pins, cleats whatever I need to accomplish secure and repeatable parts location/mounting 6. Mock-up, mock-up, mock-up throughout the build 7. Ask for divine guidance during painting  |
|
|
|
Post by afx on Oct 10, 2018 2:35:30 GMT -8
Finished engine: 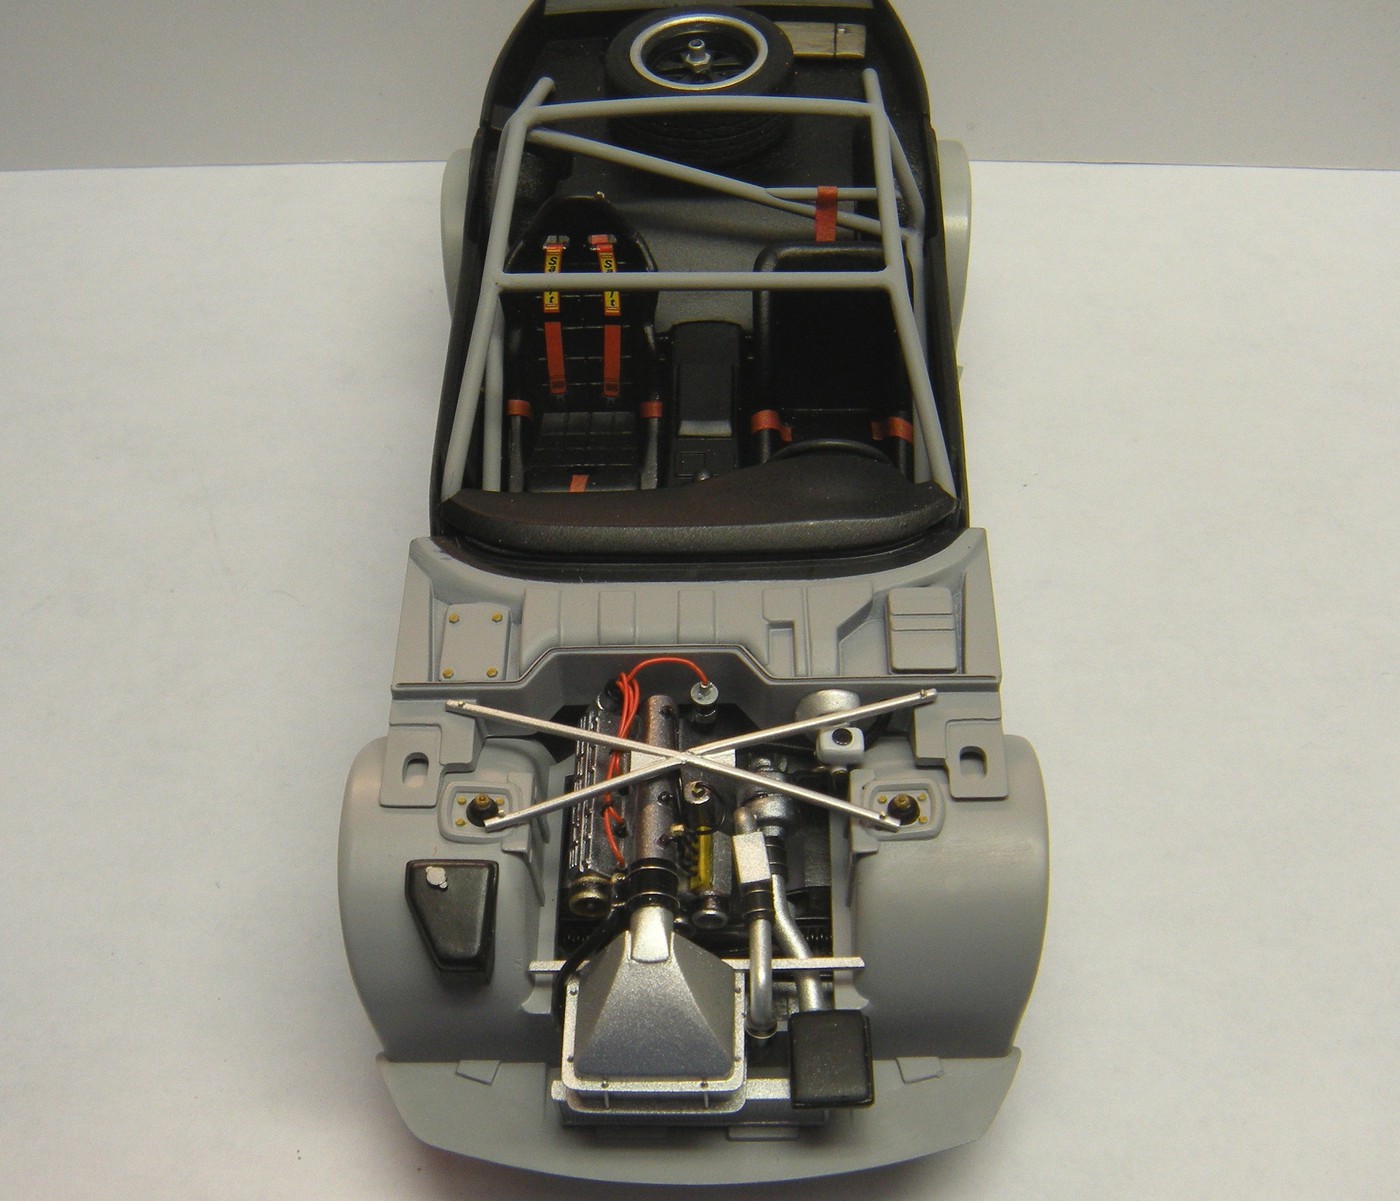 |
|
|
|
Post by robhart on Oct 10, 2018 4:59:18 GMT -8
It looks great! I'm wondering why the passenger gets the better seat.
|
|
|
|
Post by afx on Oct 10, 2018 5:50:58 GMT -8
Thanks Rob. Didn't find a lot of photos of the car I'm using as a general reference but in this photo you can see the difference in the seats. Maybe it was driver preference? 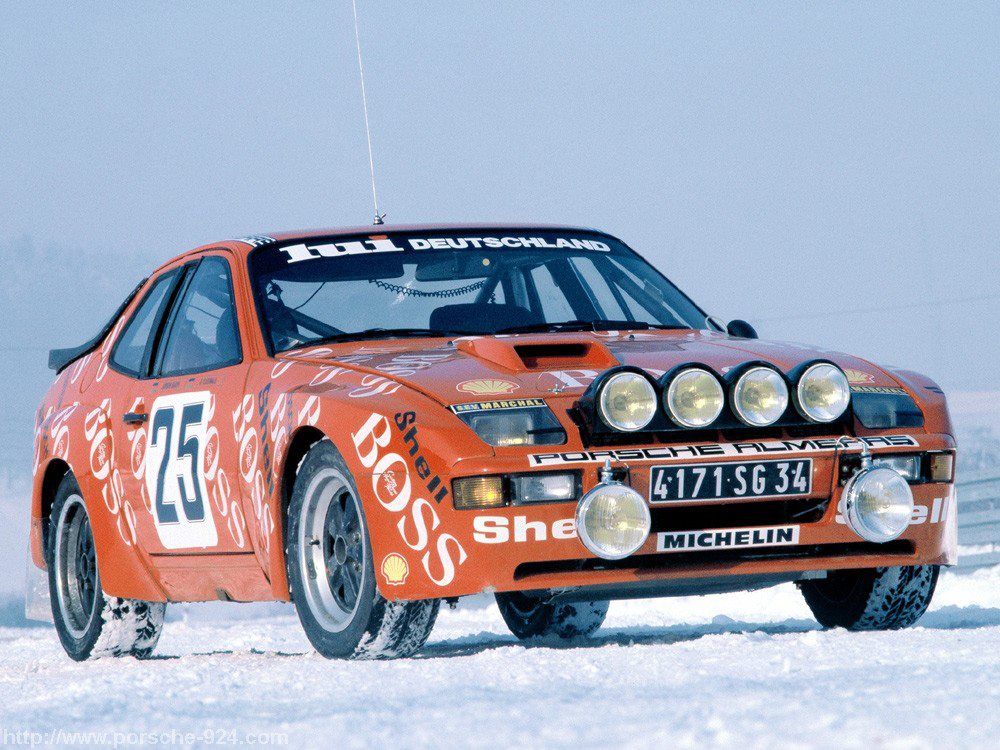 |
|
|
|
Post by Chris K. Hale on Oct 10, 2018 7:45:35 GMT -8
Outstanding work JC, I have found a lot of driver seats were switched out in favor of their personal preferences. The Alan Mann 68 GT40 I am scratchbuilding was driven by G. Hill and I ended up making a seat from brass , since their was nothing even close in any kit. Good call JC lots of modelers would overlook that detail.... Chris
|
|
|
|
Post by afx on Oct 11, 2018 2:32:34 GMT -8
Thanks Chris. Mock-up to confirm stance with the chassis complete. Wheels will get additional detail painting. Rear hatch fit needs work. 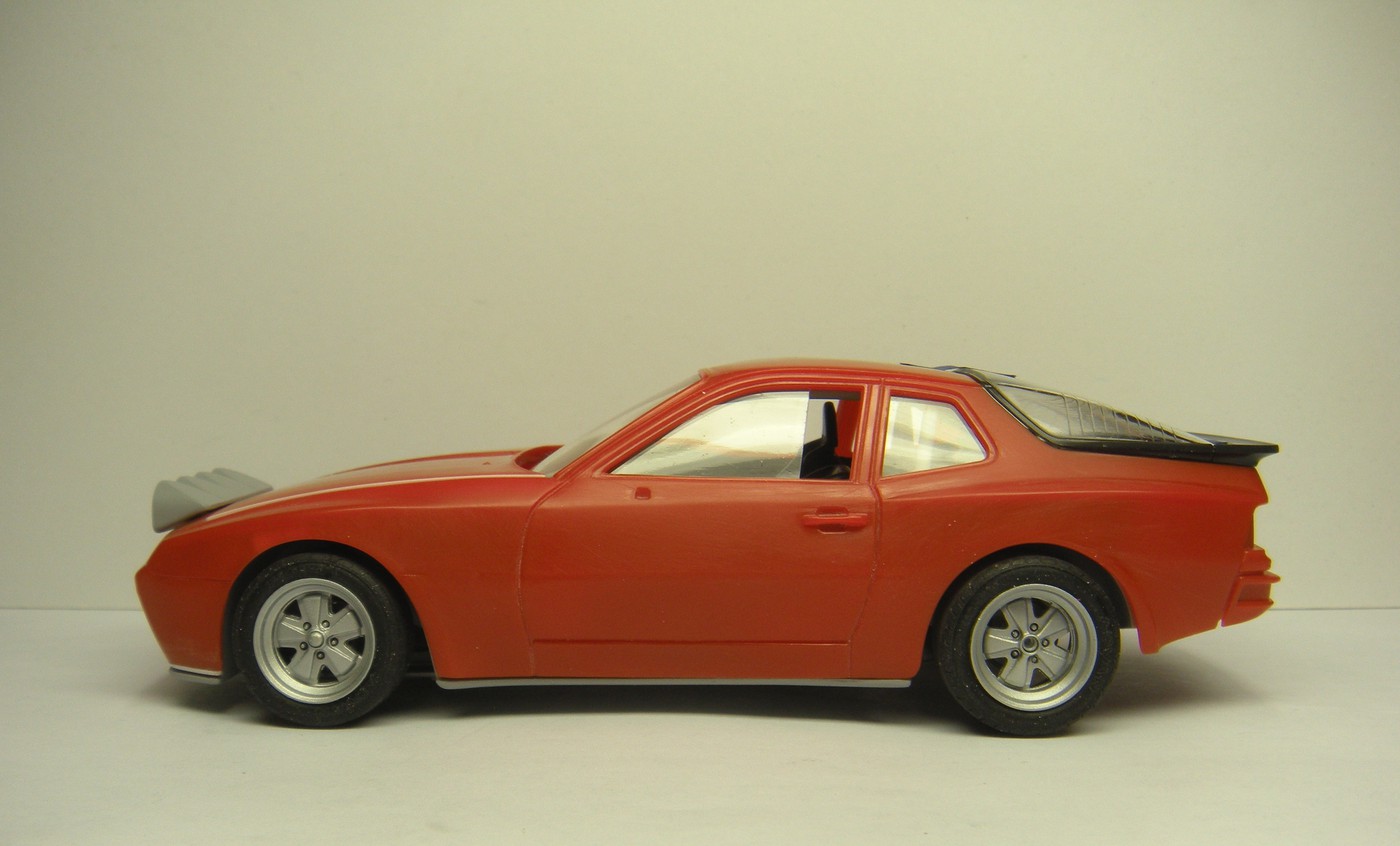 |
|
|
|
Post by afx on Oct 12, 2018 4:38:38 GMT -8
Did some work on the hatch, more happy with this fit. 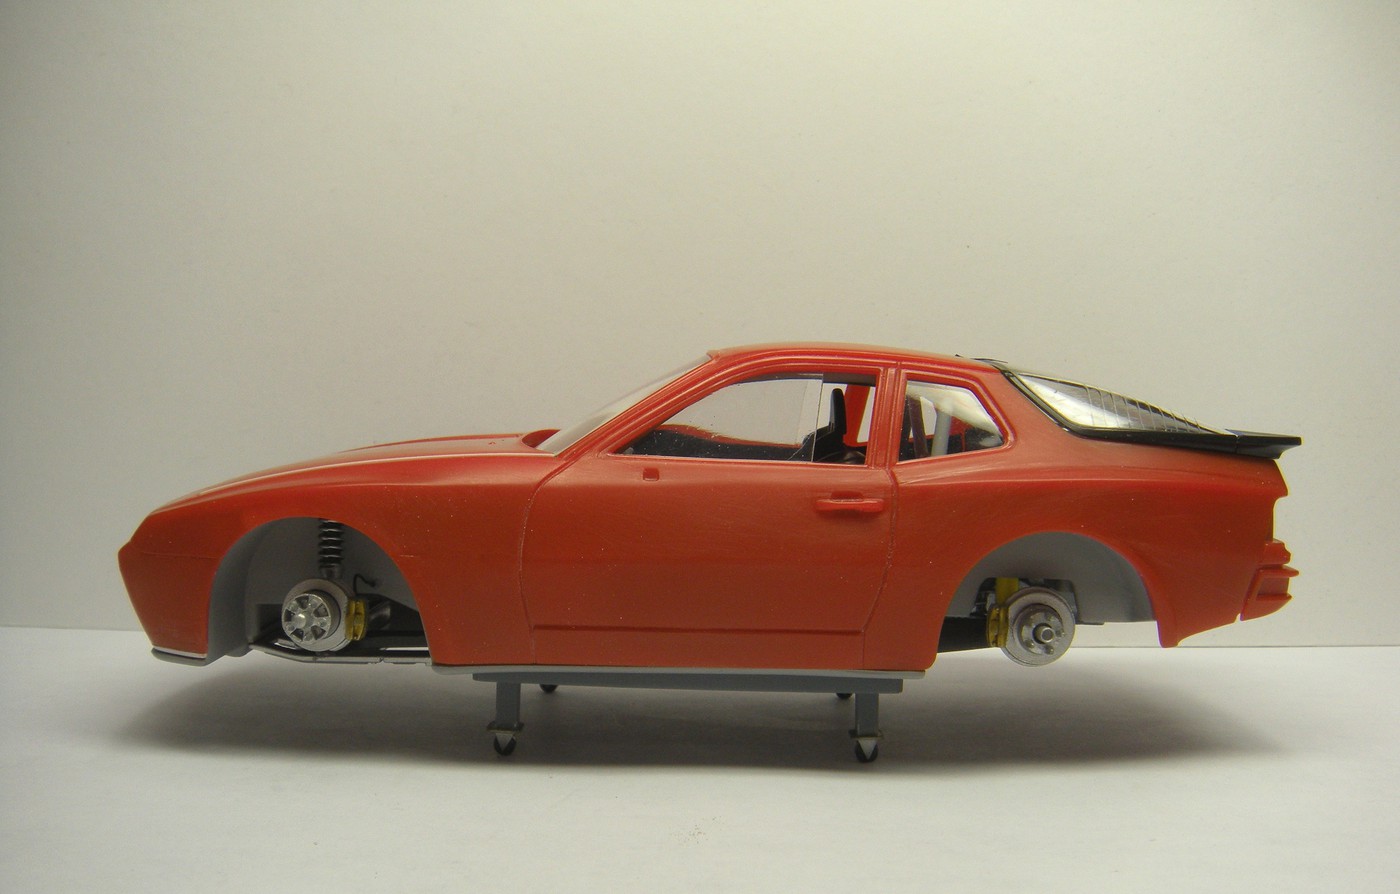 |
|
Deleted
Deleted Member
Posts: 0
|
Post by Deleted on Oct 12, 2018 19:59:04 GMT -8
Thank You very much JC for the advice very much appreciated and absorbed!
|
|
|
|
Post by afx on Oct 14, 2018 4:52:39 GMT -8
Rally teams moved the fuel fill to the back of the car. 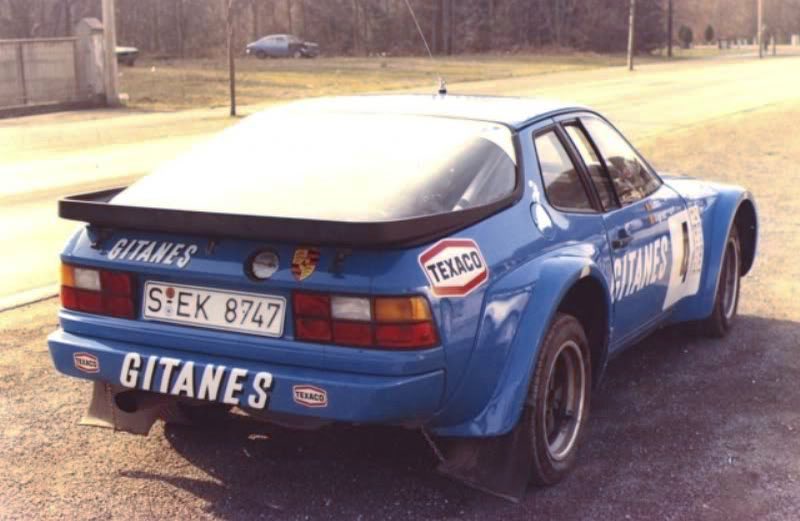 Drilled and chamfered a hole in the body and fabricated the simple fuel cap. 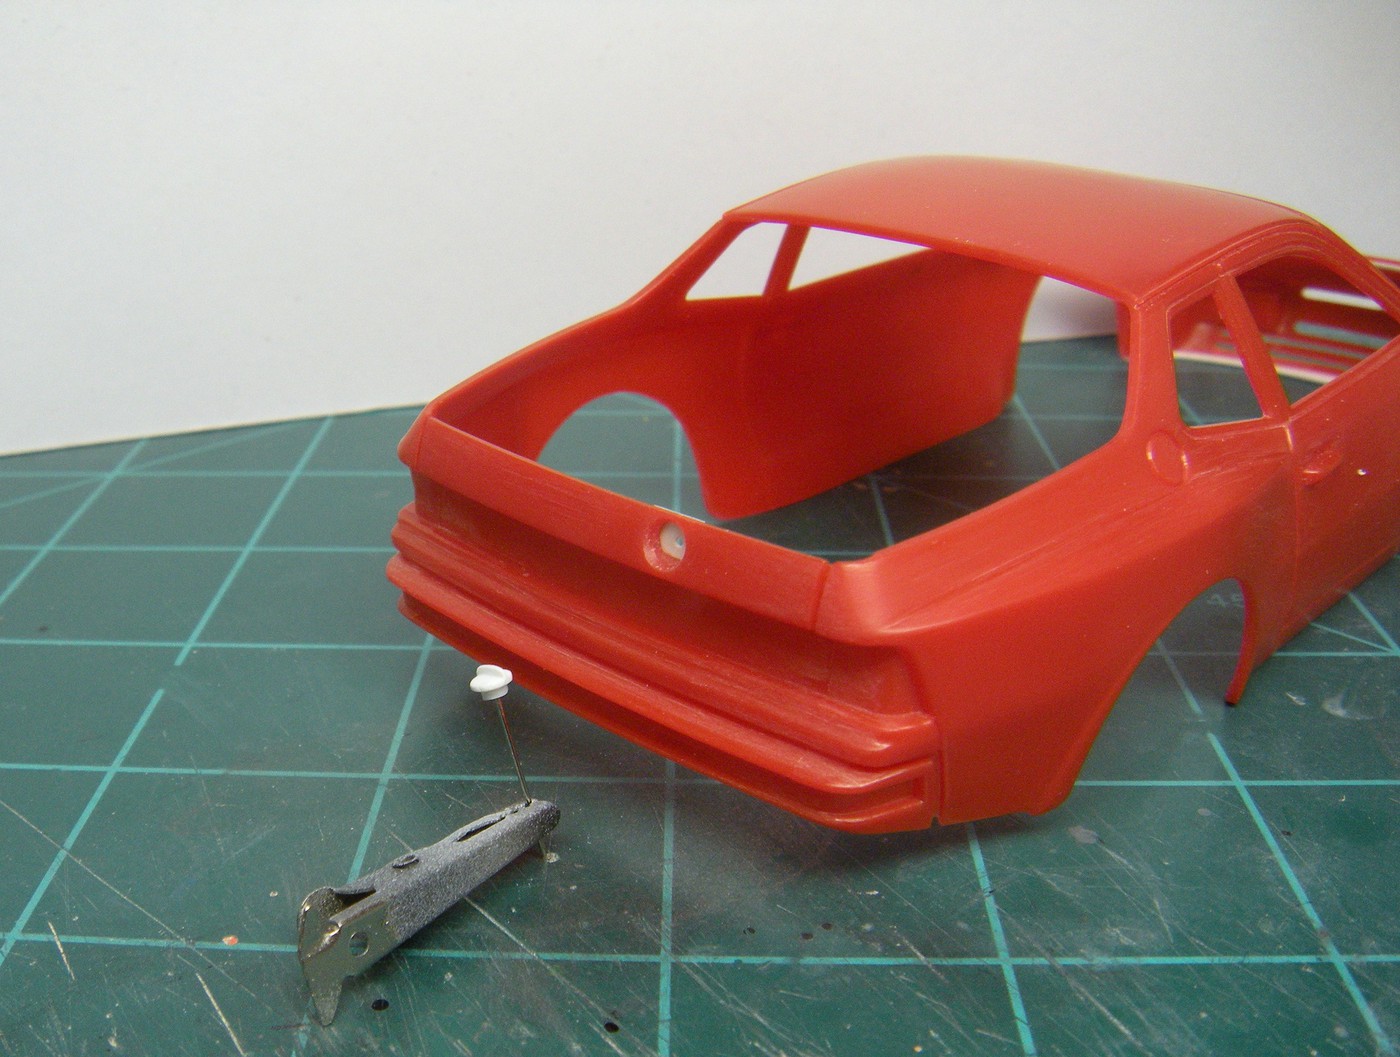 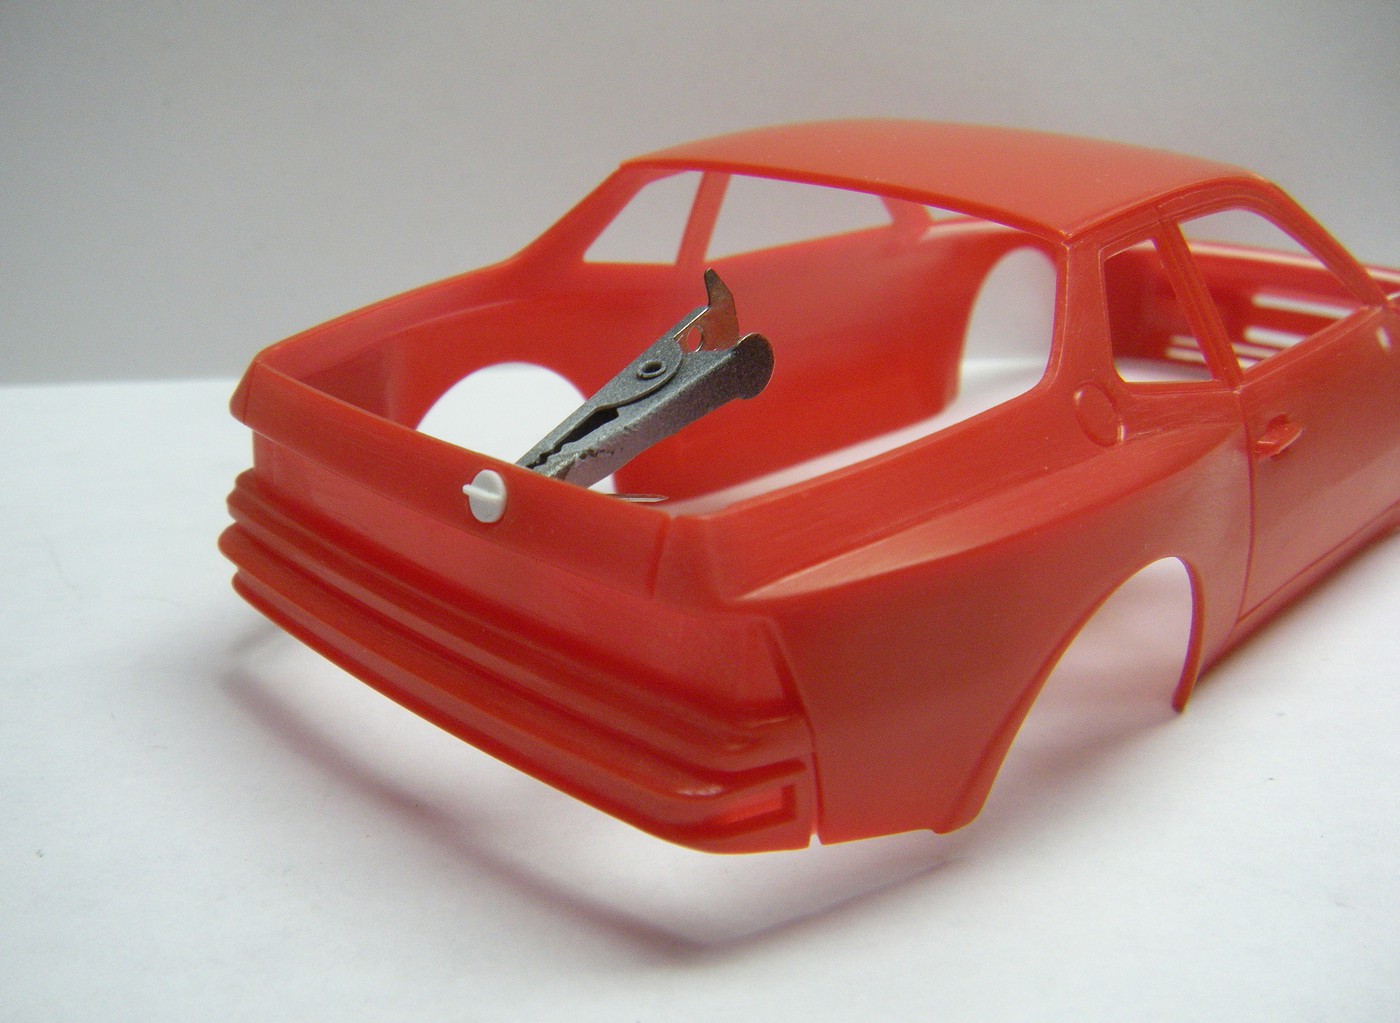 |
|
|
|
Post by robhart on Oct 14, 2018 11:17:24 GMT -8
How did you fix the rear hatch fit?
|
|
|
|
Post by garydavis on Oct 14, 2018 13:55:52 GMT -8
Great fab work JC...as usual..this is going to look killer. Are you going to flare the wheel wells like the 1/1 blue car in the picture has. They really look cool..
|
|
|
|
Post by afx on Oct 14, 2018 13:57:32 GMT -8
I added a tab long the rear edge of the hatch that provides a solid connection and a repeatable location. With that established I filed/sanded the edges to get a better fit. 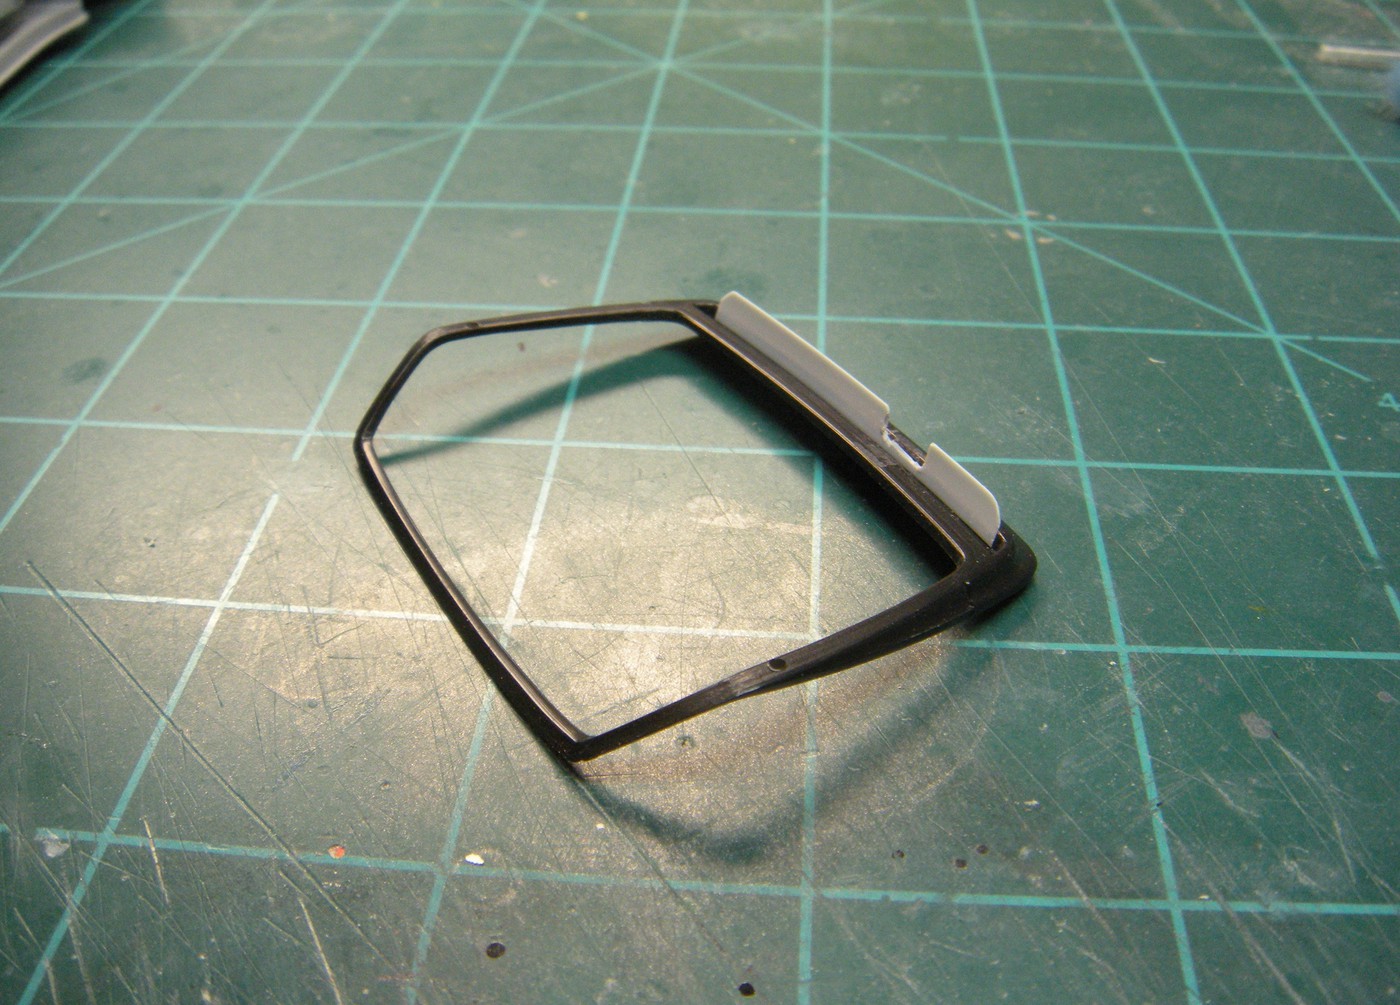 |
|


