|
|
Post by Oldtimer on Dec 5, 2018 10:19:56 GMT -8
Someone else already had this wet dream. 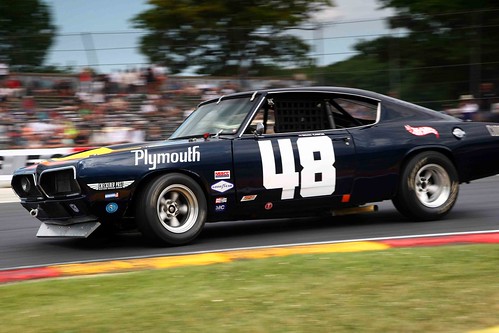 Can I finish it in 1/18 scale? Here are some stock photos of the two donors. Highway 61 1968 Barracuda (this is from the eBay auction I won) 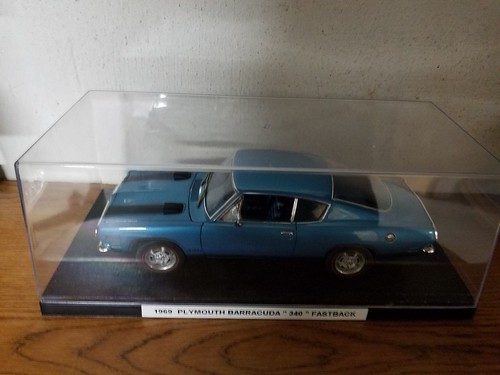 ACME 1970 Dan Gurney "Street" Trans Am Barracuda 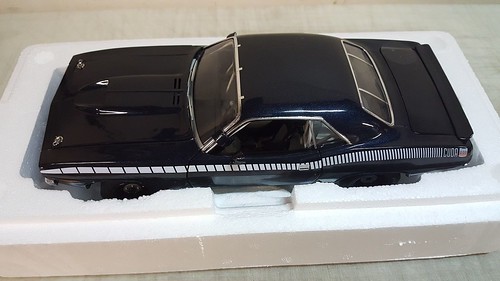 Chassis Comparison: Top - Highway 61 1968 Barracuda/Bottom - ACME 1970 Barracuda Trans Am 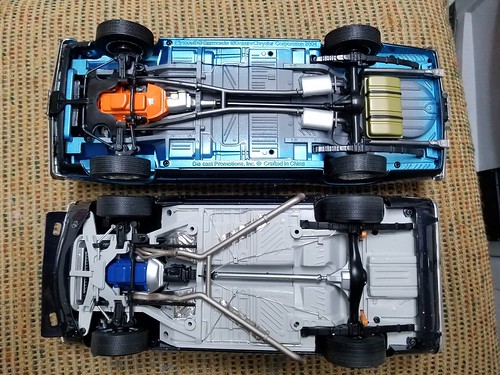 Got the body off the donor '70 ACME Barracuda, and with a little bit of disappointment, looked at some of the details (such as the A-pillar/front of the roll cage - pure crap), but figured it would make a suitable donor. Last night I got the body off the donor Highway 61 '68 Barracuda, and put them together to see how much work we are talking about. 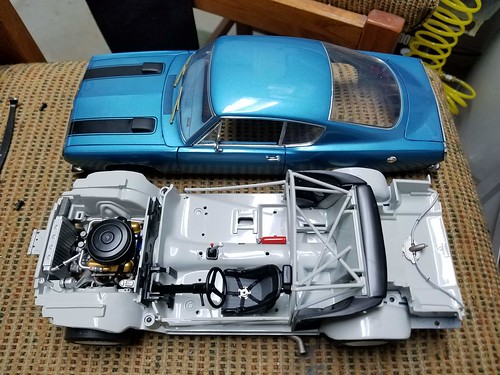 Not a bad fit, wheelbase and track-wise, but going to take some shaping of both the front and rear wheel tubs to allow the '68 body to sit down onto the '70 chassis, but first blush, doable. 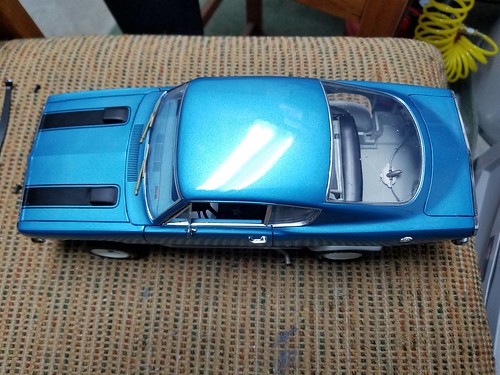 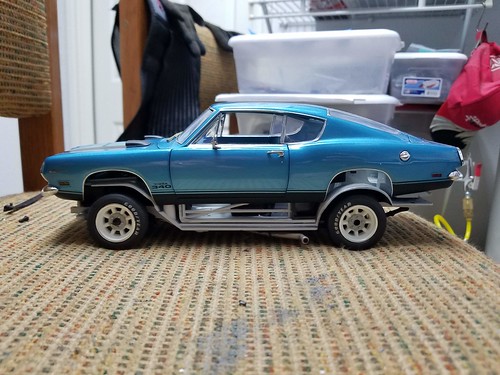 Stay tuned! |
|
|
|
Post by afx on Dec 5, 2018 17:19:59 GMT -8
Looks like a great project.
|
|
|
|
Post by Oldtimer on Feb 5, 2019 5:39:35 GMT -8
Progress shots. 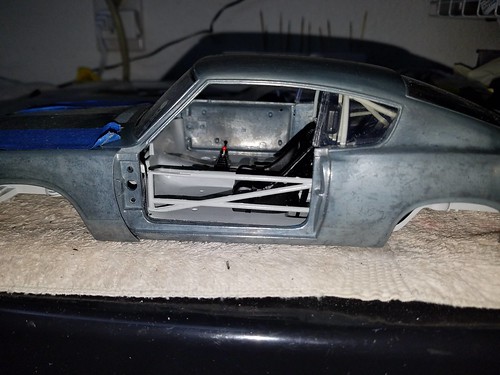 Closing the gap between the fastback early model and the slant back of the '70 model will prove to be an origamic challenge. 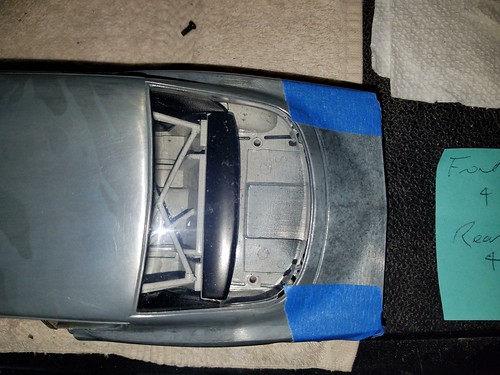 Had to sand both sides of the chassis, and at an angle at that, in order to get the late model chassis to fit into the early model body. 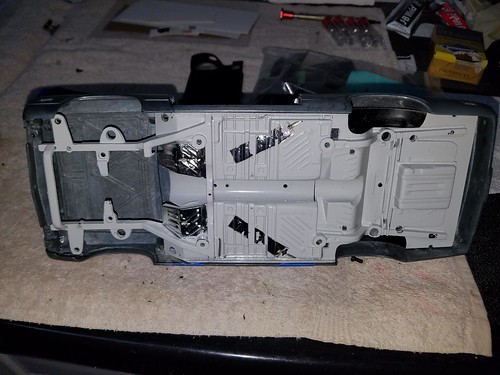 |
|
|
|
Post by Joel_W on Feb 12, 2019 13:31:05 GMT -8
Another incredible conversion. The knowledge and skills on this forum is just simply amazing.
Joel
|
|
|
|
Post by Oldtimer on Feb 14, 2019 7:07:04 GMT -8
Another incredible conversion. The knowledge and skills on this forum is just simply amazing. Joel It is my pleasure. I get more input from the participants on this Board than all others that I contribute to combined. There is a great knowledge base here, all I am trying to do is advance the skills that I acquired while building them for real to a much smaller scale. Thanks! |
|
|
|
Post by Oldtimer on Feb 18, 2019 12:48:44 GMT -8
So, an update on a little bit of forward progress, and as usual, a little bit of rearward regress. With almost any build, and I am sure this applies to those of you who work in plastic, as well as those working in diecast and plastic. So, you fit some parts together, and for simplicity and ease of working, you leave other components off, assuming that it will all come together eventually. Well . . . Got quite a bit of work done on the new rear package tray, which will separate the fuel cell from the passenger compartment (per SCCA rules). 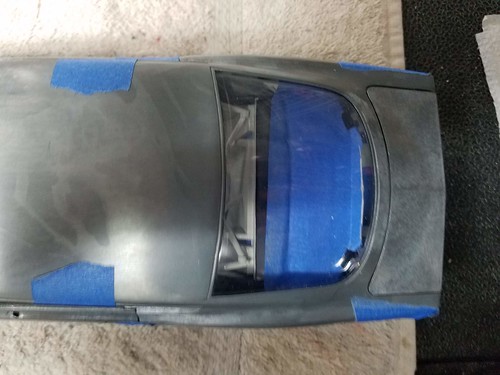 I will not disclose how many pieces of cardstock were sacrificed to get to this point. However, before I took this picture, I thought the fit was much closer. I had not replaced the front inner fender panels onto the frame, but thought that was a logical next step. Looks pretty good.   But wait, if you look above (in my February 5, 2019 post), you will see a very close fit between rear inner fender well and wheel opening, but alas, when the front panels are in place, we're off close to 1/4 inch! 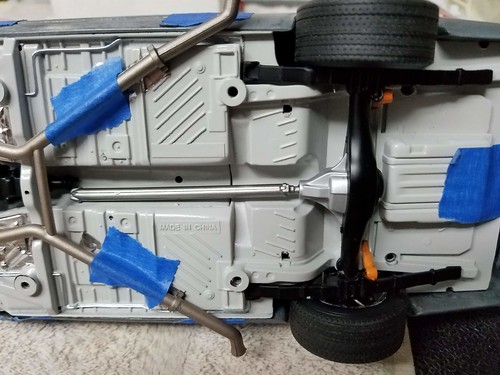 Turns out that there is some interference between the later model inner panels, and the diecast metal of the early model body. Now, which do we trim, and how much? Might be hard to see, but the pencil line on the black paint is where the interference is. 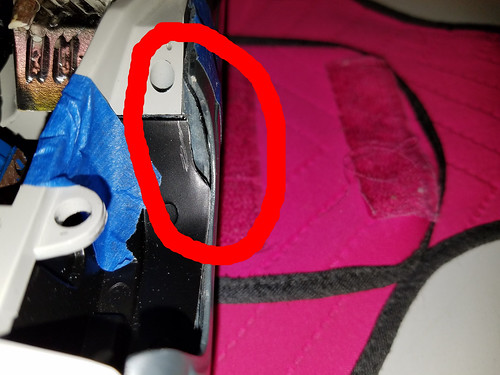
Time to take Dremel in hand! I'll be back. |
|
|
|
Post by Joel_W on Feb 18, 2019 13:18:22 GMT -8
Oldtimer,
Still, you've made a tremendous amount of progress, and nothing seems to be unfixable. The rear deck just needs to be stretched with a mid-section of cardstock. The inner fender wells look like the hardest correction to correct, but I'm sure that you'll get there sooner then later.
Joel
|
|
|
|
Post by garydavis on Feb 18, 2019 13:28:13 GMT -8
As always OT...your builds are very cool. You sure put in a lot of work on the diecast cars you build. I sure enjoy watching your wips that's for sure.
|
|
|
|
Post by Oldtimer on Feb 19, 2019 5:53:32 GMT -8
I was pretty sure that the new package tray I had fabricated fit better than the picture showed, and I was right (this picture is taken without the rear window in place, the two notches are to clear its attaching points). 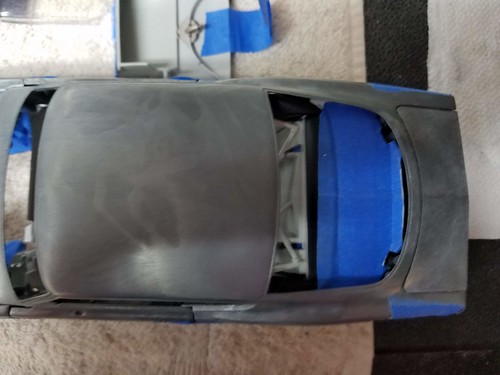 And, of course, now the rear wheel wells match up much better. 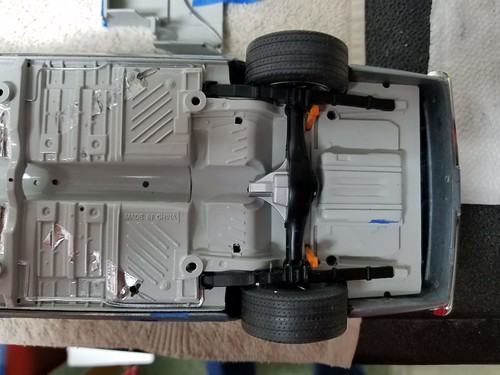 Had to take a bunch of material off the inside of the lower part of the body under the A pillar, plus still had to provide a little clearance on the fender well itself. Took about an hour to grind down all the diecast metal. 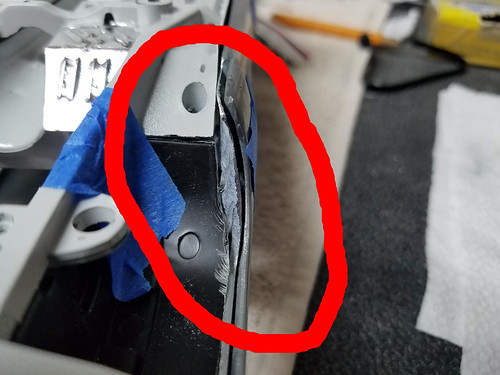 Now, on with the show! 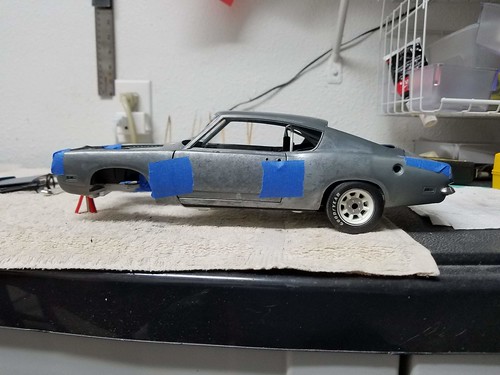 |
|


