|
|
Post by wardsmodelbuilder on Feb 22, 2019 2:27:17 GMT -8
Chris, what are you using for Weld lines? Chris I just use modeling putty, then shape it with a tooth pick as it dries. |
|
|
|
Post by wardsmodelbuilder on Feb 22, 2019 2:34:43 GMT -8
A couple more photo of the progress of the Porsche, the rear suspension is now on the chassis but there is further work to be done on the swing arms to remove the join lines after they were installed. 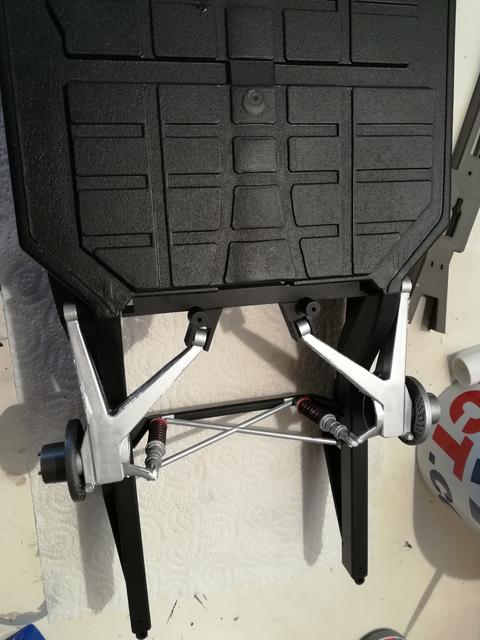 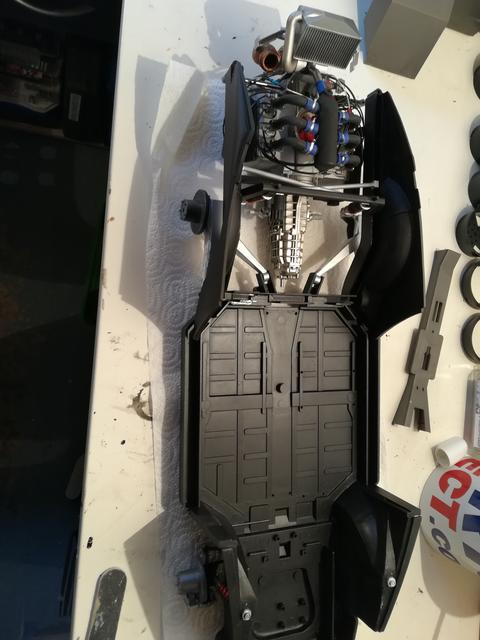 The silver base coat is now finished, took a lot of work painting, sanding, and re sanding to get a smooth finish and work out the small imperfections in the body. Especially with it being in such a large scale. Still need to finish the doors, they will then be positioned so I can paint the red areas, as the original red decals are too damaged to be used. 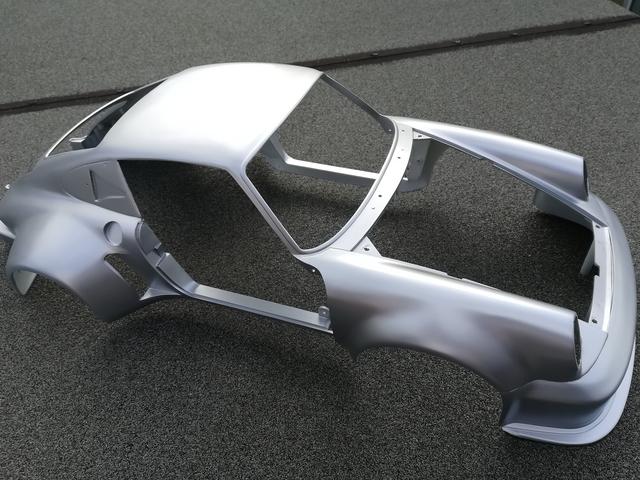  Chris www.wardsmodelbuilder.com |
|
|
|
Post by wardsmodelbuilder on Feb 26, 2019 9:29:44 GMT -8
Few more photos of the work carried out this week, Started work on the interior, firewall, fuel tank, seat and dashboard. There are not any decals for the dials on the dashboard, not sure is they have been lost over the years or if in fact the kit didn't include any, but I have been able to make some which should do the job. 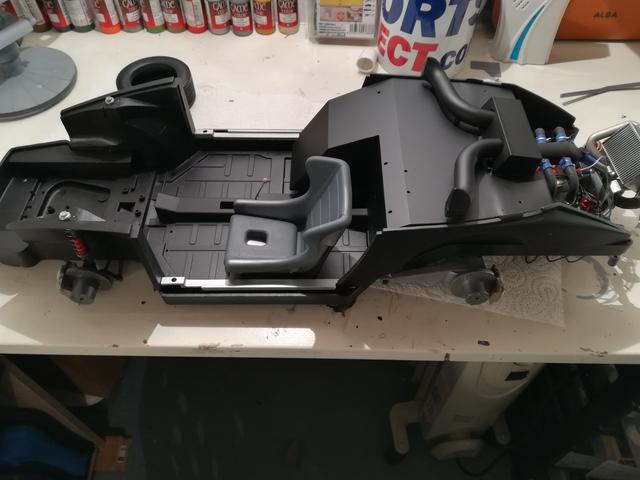 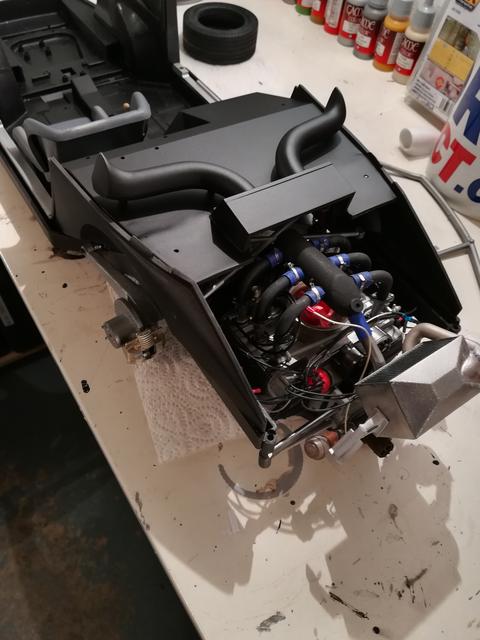 I have now prepared the hood and the doors in base coat, and masked the body up for the red paint to replace the red decals that we are not using. 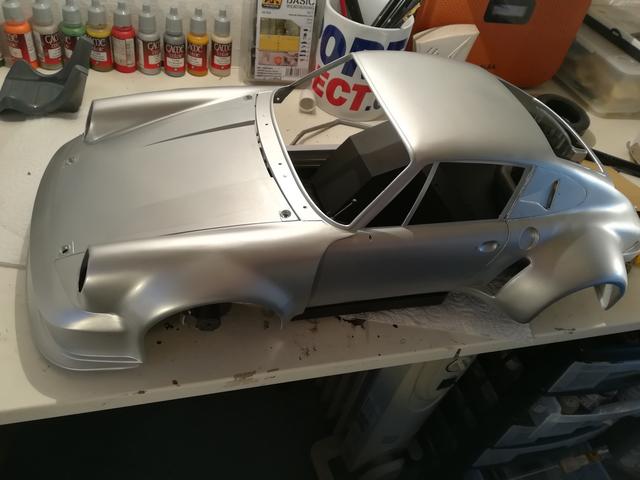  Next on the list is to finished the dashboard, seat belts and some wiring that I plan to add to the back shelf which will be viewable through the rear window. Thanks _________________ Chris Ward www.wardsmodelbuilder.com/wardsmodelbuilder@outlook.com |
|
|
|
Post by Joel_W on Feb 26, 2019 13:04:36 GMT -8
Chris,
Looking forward to seeing some color on the body.
Joel
|
|
|
|
Post by wardsmodelbuilder on Mar 3, 2019 12:56:58 GMT -8
Its been quite a good week regarding progress on the porsche build, after masking off the body shell I went ahead and painted the red sections. Probably by more luck than judgement I got the masking just about right for the curves of the blue decals that separate the red and silver. We decided to give the original decals a try before committing to purchase a new set, and I'm very happy we did as even though they were in pretty poor condition with many cracks I was able to apply them without them deteriorating any further. I did suffer a few further little cracks on the rear bumper sections, those that needed bending around the curve but after a lot of trial and error I managed to get them to bend and stick, and hold together!!!! 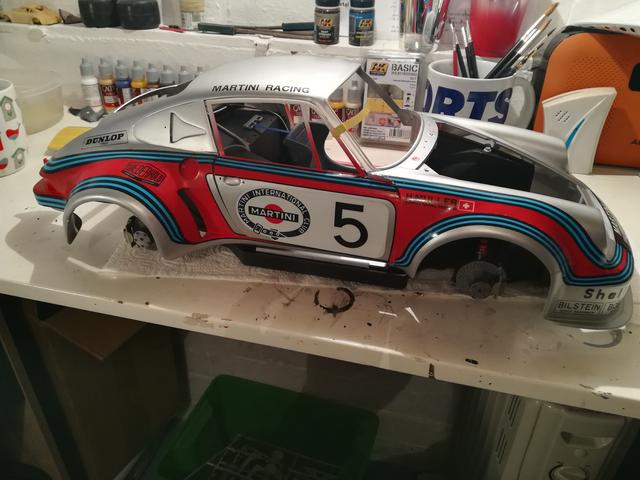 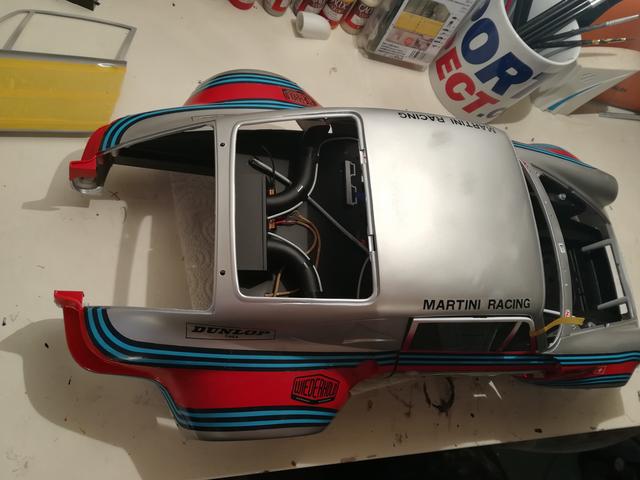 Still a little bit of tidying up needed but very happy with the results so far considering these decals are so old. In the next few days will be clear coating the body. Also been working on some details for the back shelf, and although not historically accurate I believe its adds a nice touch to the model, and more importantly the client does too. Due to this models scale I made my own electrical wire, using some braided tubing, fine modeling wire and shrink tubing. I'm finding working in this larger scale makes this kind of work quite a lot easier. 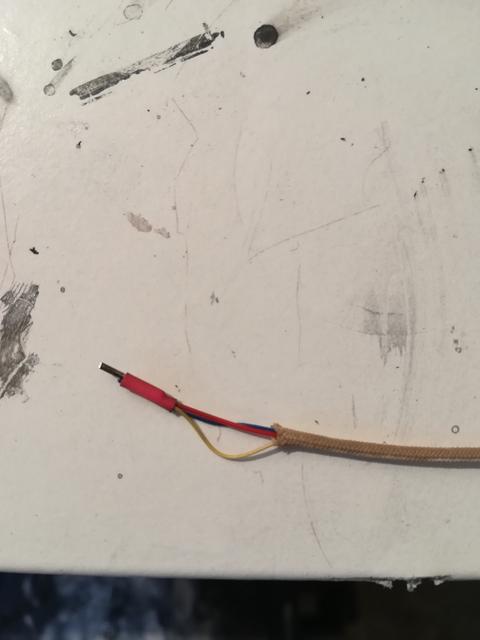 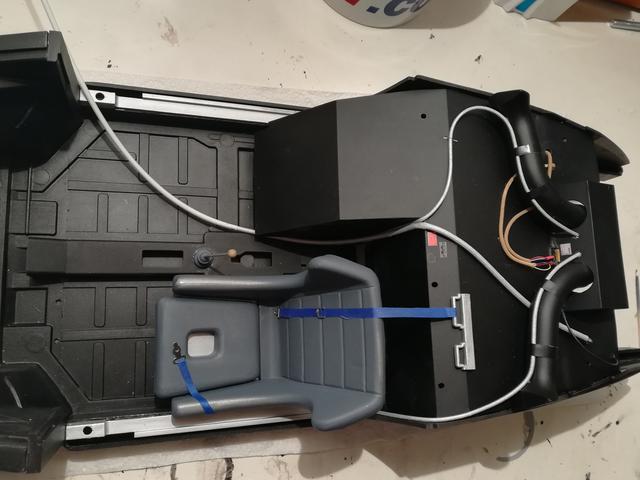 Next up is to finish the front end of the chassis with the parts included in the kit, battery, oil tank, fire extinguisher etc, along with added a few more bits of extra wiring, while at the same time finishing the body ready for final sanding and polishing. Getting there!!! Thanks Chris www.wardsmodelbuilder.comwardsmodelbuilder@outlook.com |
|
|
|
Post by wardsmodelbuilder on Mar 12, 2019 10:12:40 GMT -8
Here are a couple more photos on the build, not a major update as I have had a busy week. I have been able to get the dashboard in place and the steering mechanism is complete. 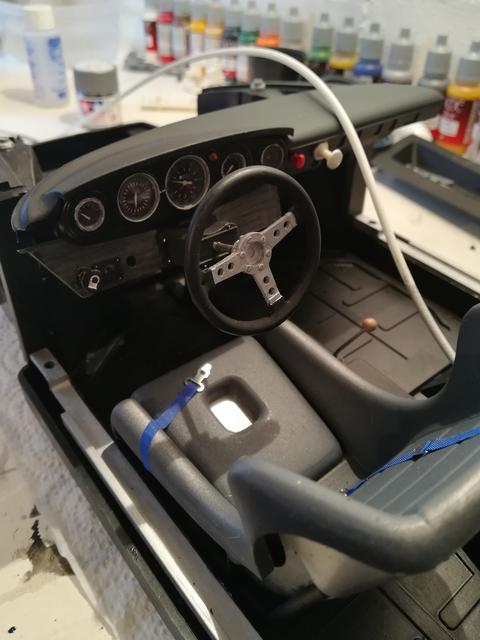 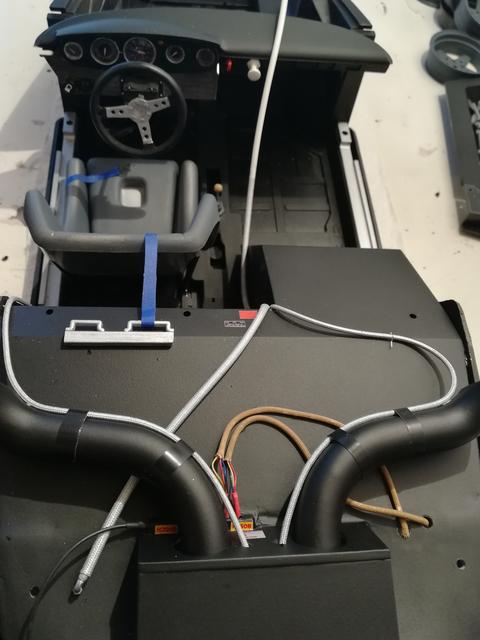 Currently working on the details for under the hood, two tanks, battery and fire extinguisher which will all have some additional wiring and piping. Thanks Chris www.wardsmodelbuilder.comwardsmodelbuilder@outlook.com |
|
|
|
Post by sam on Mar 12, 2019 12:09:06 GMT -8
I think I need to add this kit to my wishlist. WoW!
|
|
|
|
Post by Joel_W on Mar 12, 2019 15:32:16 GMT -8
Chris,
The finished painting and associated decals came out simply spectacular. As for your detail wiring, it's really quite impressive.
Joel
|
|
|
|
Post by wardsmodelbuilder on Mar 23, 2019 3:32:46 GMT -8
I've included a few more photos as the chassis section is now almost complete. I've added a little detailing around the front under the hood section, and the roll cage is now complete. This did not fit correctly out of the box and need a little manipulating to line up with the holes in the body section. 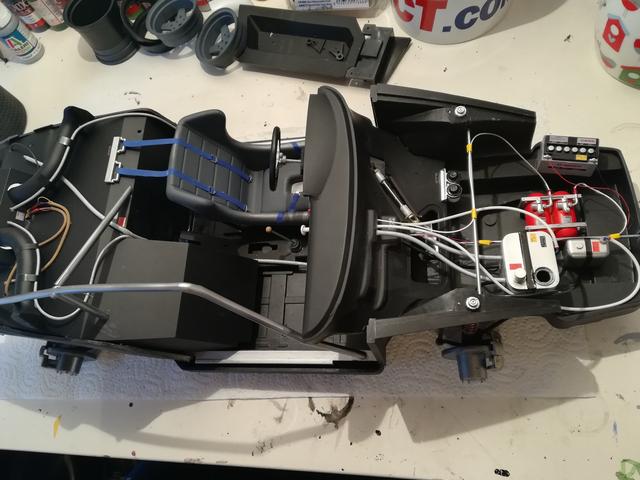 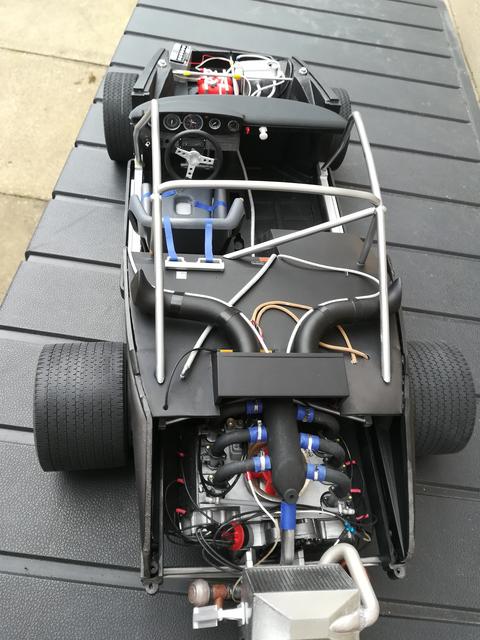 I've also been able to get the engine installed, which I was expecting to be tricky, but was surprising quite easy as everything lined up correctly. 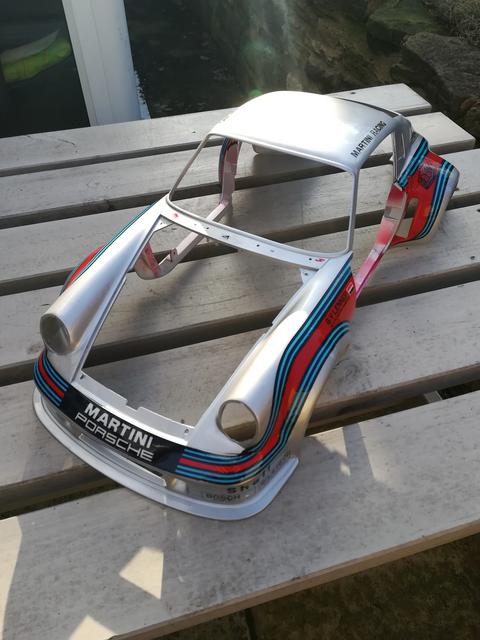 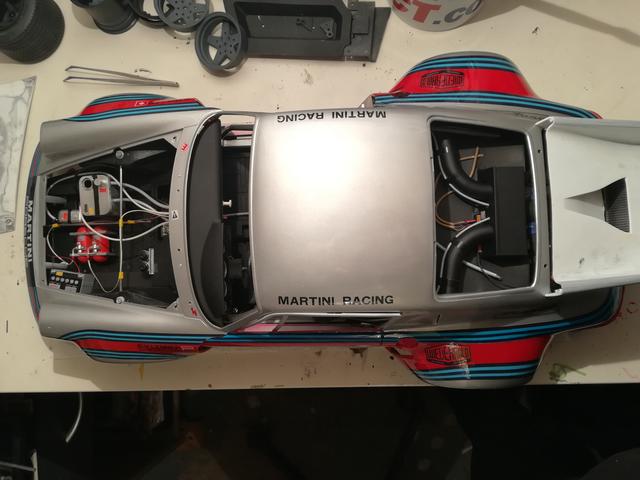 Just waiting now for the body sections to fully cure before I can sand and polish them, the body needed a lot of adjustments made to the fitting brackets as the were very far off. Its not a kit that just goes together, needs a lot of tweaking both on the inside of the body shell and the top side of the chassis. But with a little trial and error and a lot of patience Ive got it to where i'm happy with it. Same goes for the rear spoiler, at the moment it doesn't fit the body opening and will need quite a lot of adjustment to make it fit correctly. Hopefully in the next update I will have the body finished, windows installed and finally positioned on the chassis. Thanks Chris www.wardsmodelbuilder.comwardsmodelbuilder@outlook.com |
|
|
|
Post by Joel_W on Mar 23, 2019 6:28:00 GMT -8
Chris,
Jaw dropping for sure. Those added details really are jumping right out at the viewer. Well worth the time and effort. I'm sure that all the needed tweaking that you'll get all the body panels to fit, and the shell to the chassis.
Joel
|
|
|
|
Post by wardsmodelbuilder on Apr 10, 2019 9:16:04 GMT -8
Here is the final update on the 1/8 Porsche RSR that I have finally got finished. Once the front end detailing was done the model came together pretty quickly, with just the windows and external details that remained. Its been quite a challenging build, I think fitment wise was the worst problem either due to the quality of the kit or the age of it. There was definitely a fair bit of warping of the body and especially the doors, The rear boot lid also gave me some issues. All in all I think its turned out pretty well for a stock build other than a bit of wiring detailing that I added, its definitely a kit that you could really enhance if a full replica was required, but I think built straight out of the box it still is a good quality model. 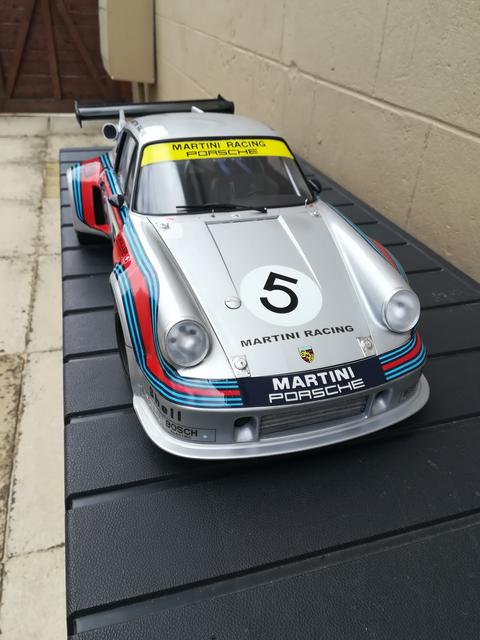 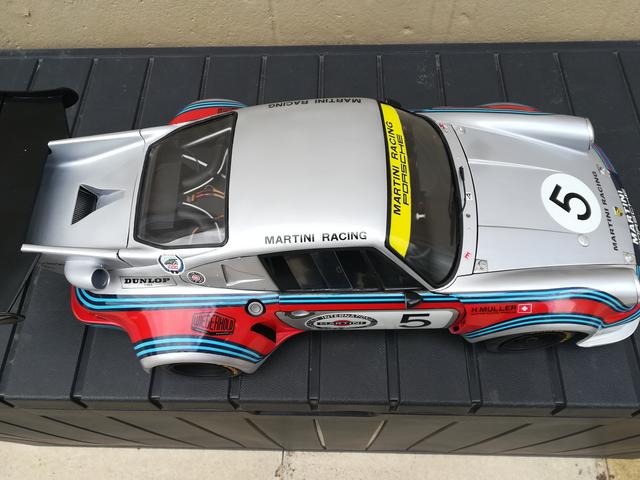 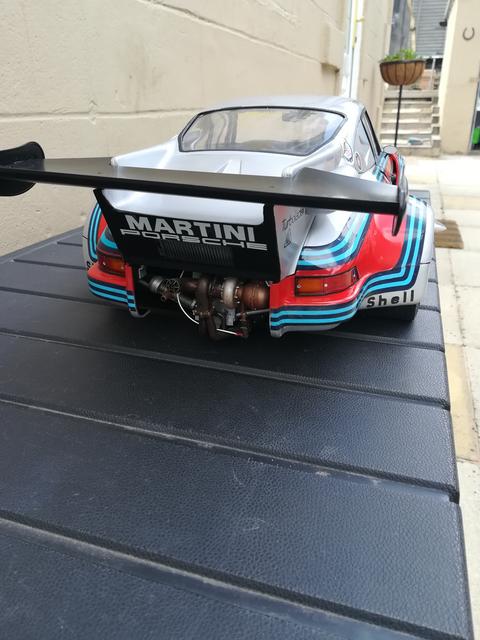  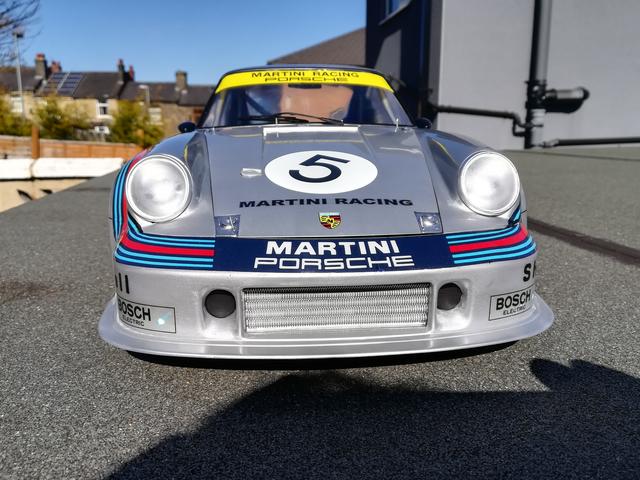 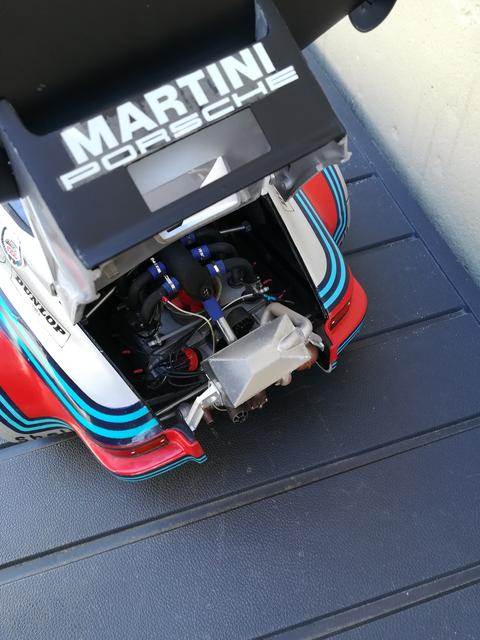 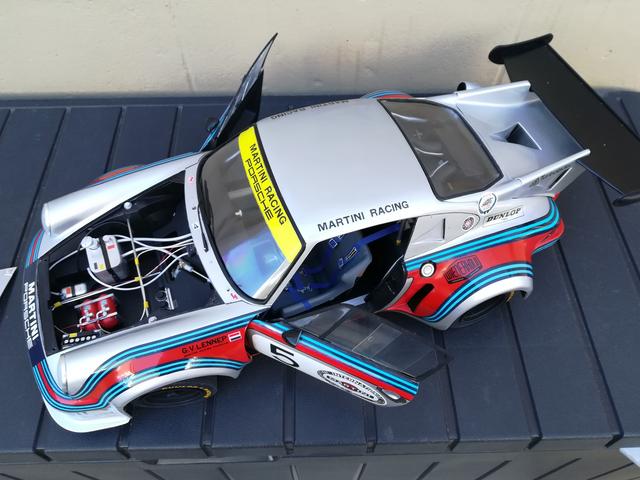 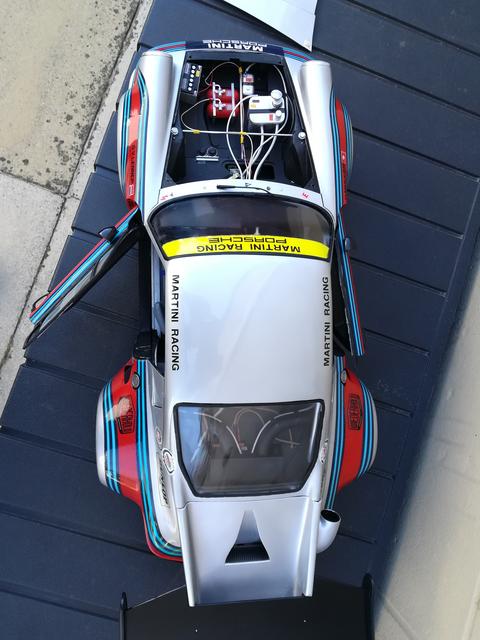 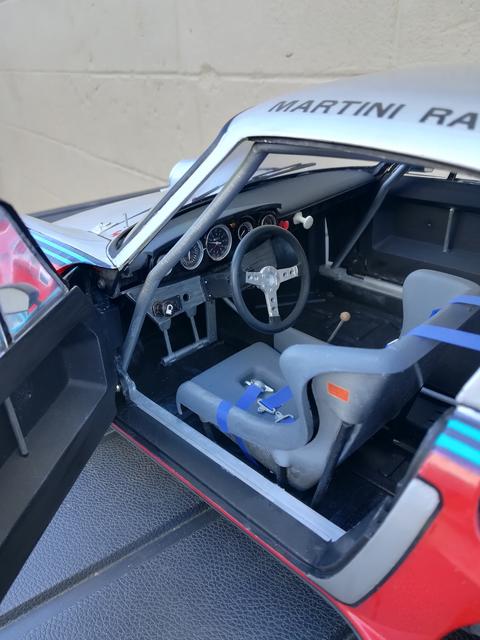 I also made the changes to the seat belts to proper scale after the client agreed this was the way to go, thanks to Wim at bestbalsakits for offering the options to me that he had available in stock. Hope everyone has enjoyed the build, now it's time to move onto the next one, Thanks Chris wardsmodelbuilder@outlook.com www.wardsmodelbuilder.com |
|


