|
|
Post by Joel_W on Oct 14, 2019 12:40:39 GMT -8
Bill, No big deal, we all have our moments. Just take care of your health is priority #1. I'm going to repost your pictures as we discussed. I'm still amazed how you matched the actual colors. I'm sure that if I'm interested in how you went about it, so are others. Joel Primer on: 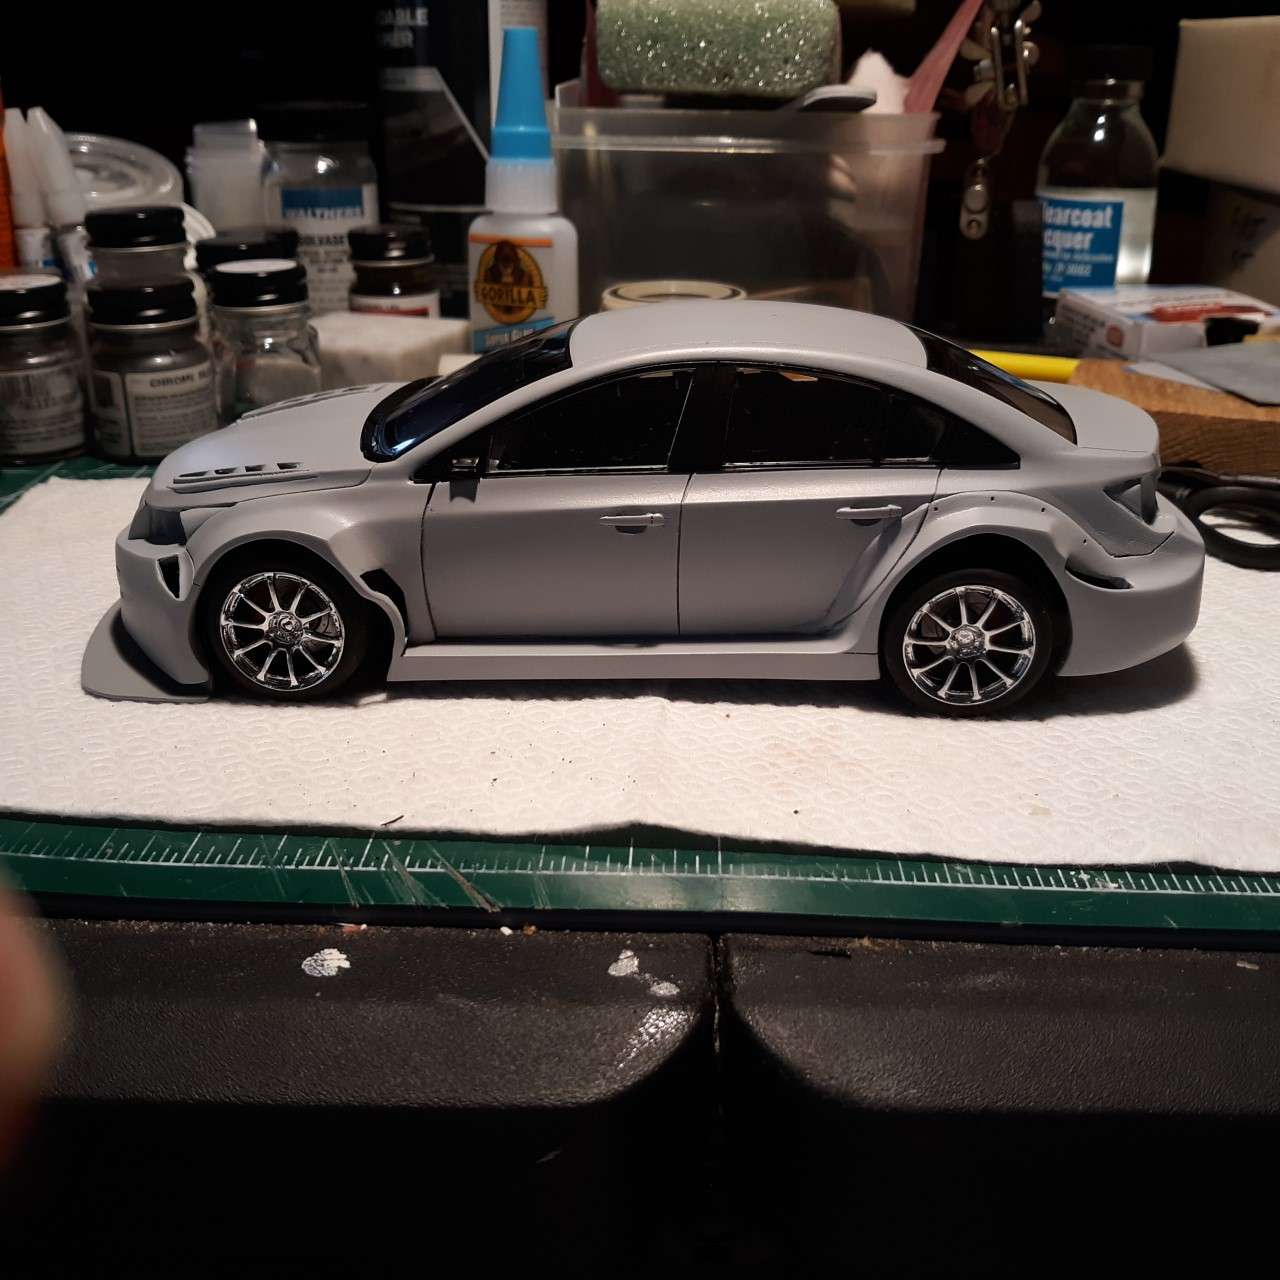 Test fit of the chassis. 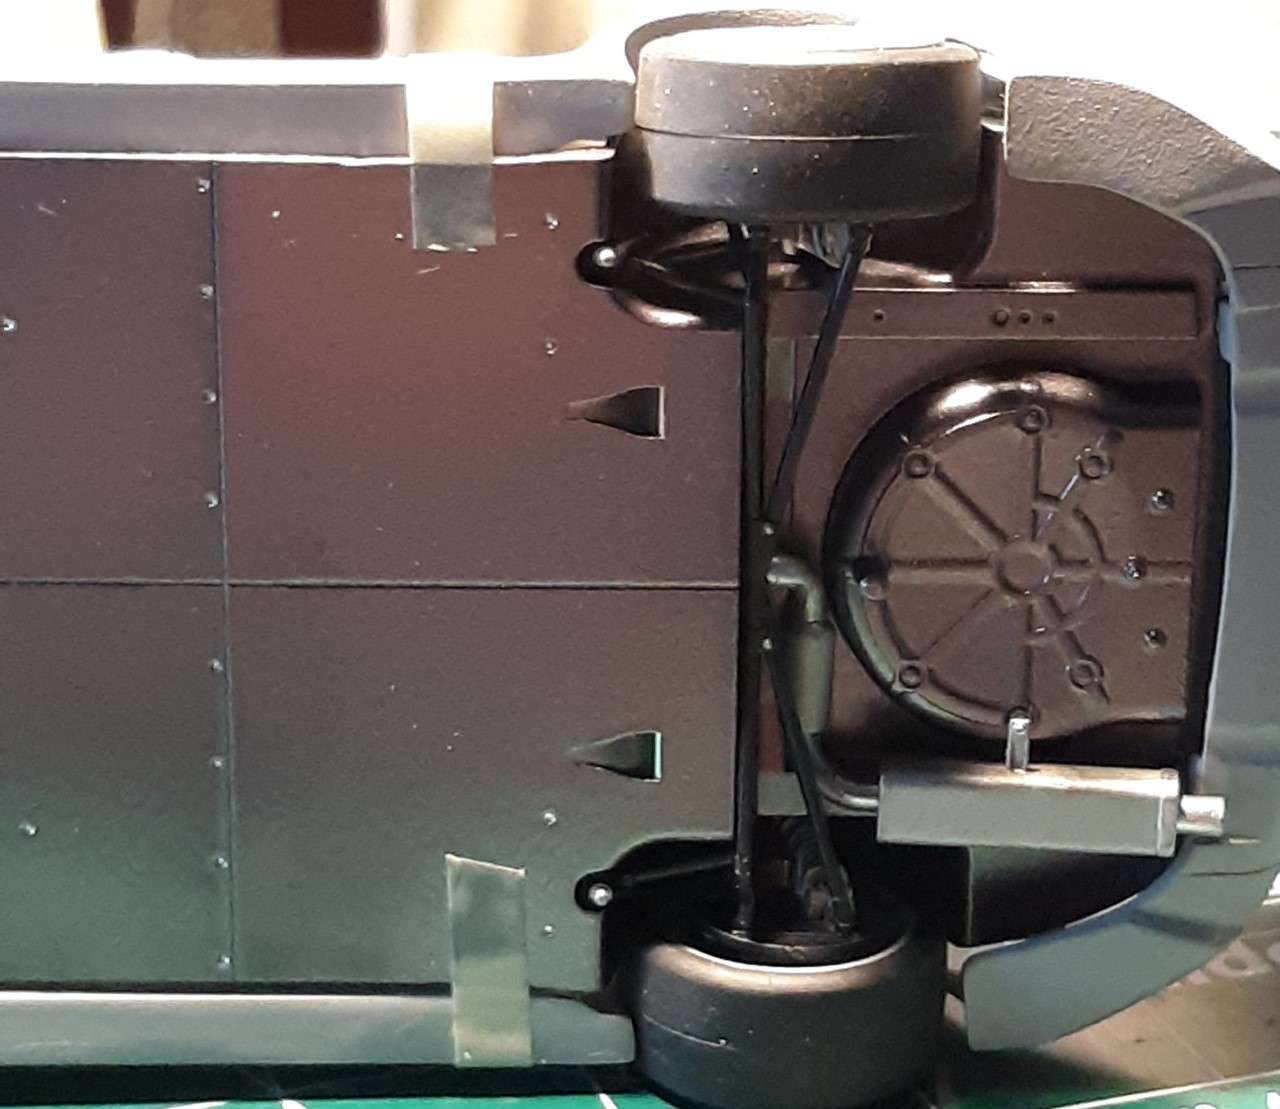 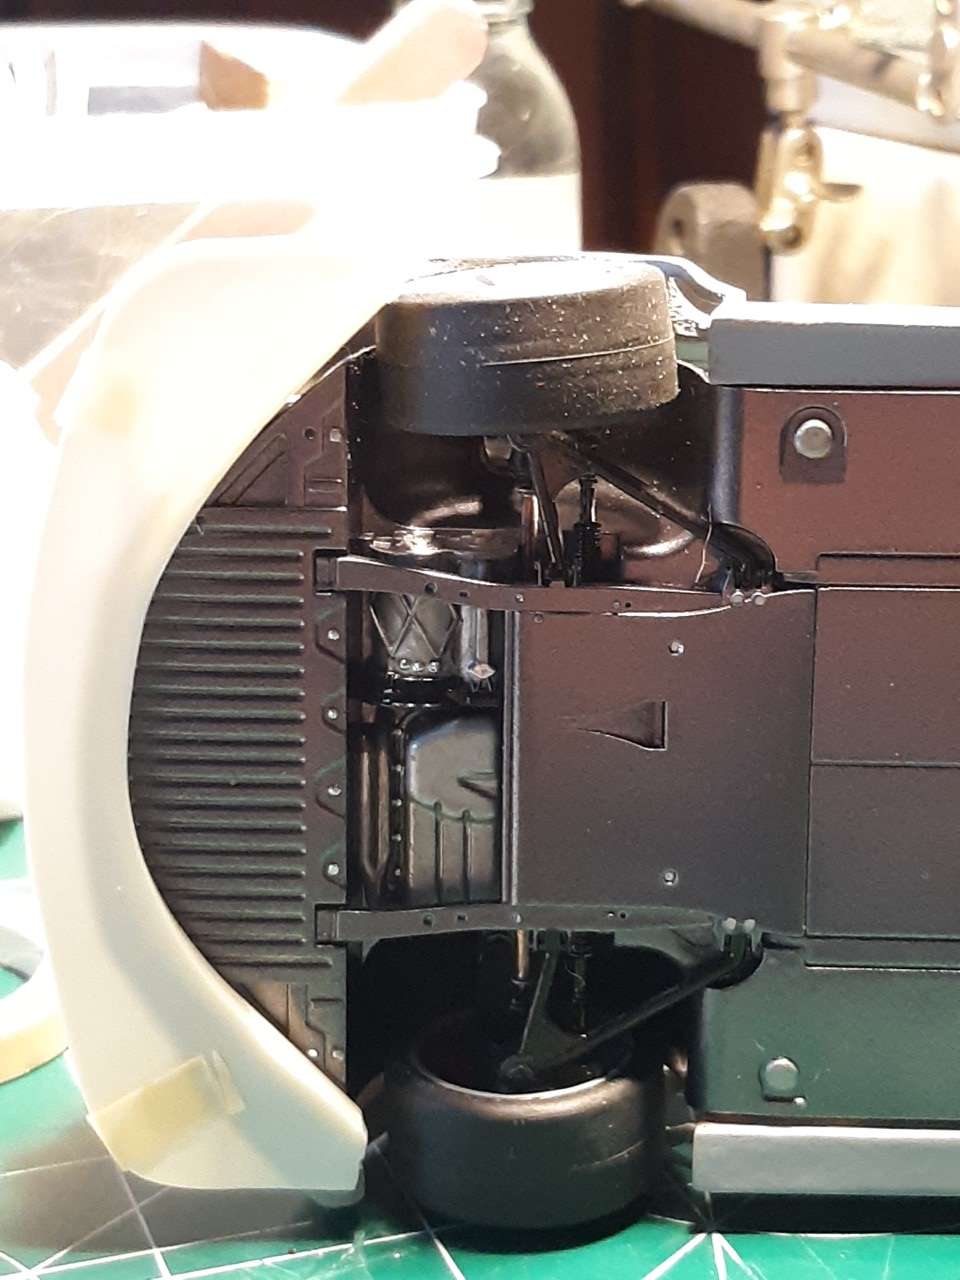 body Shell painted and decaled: 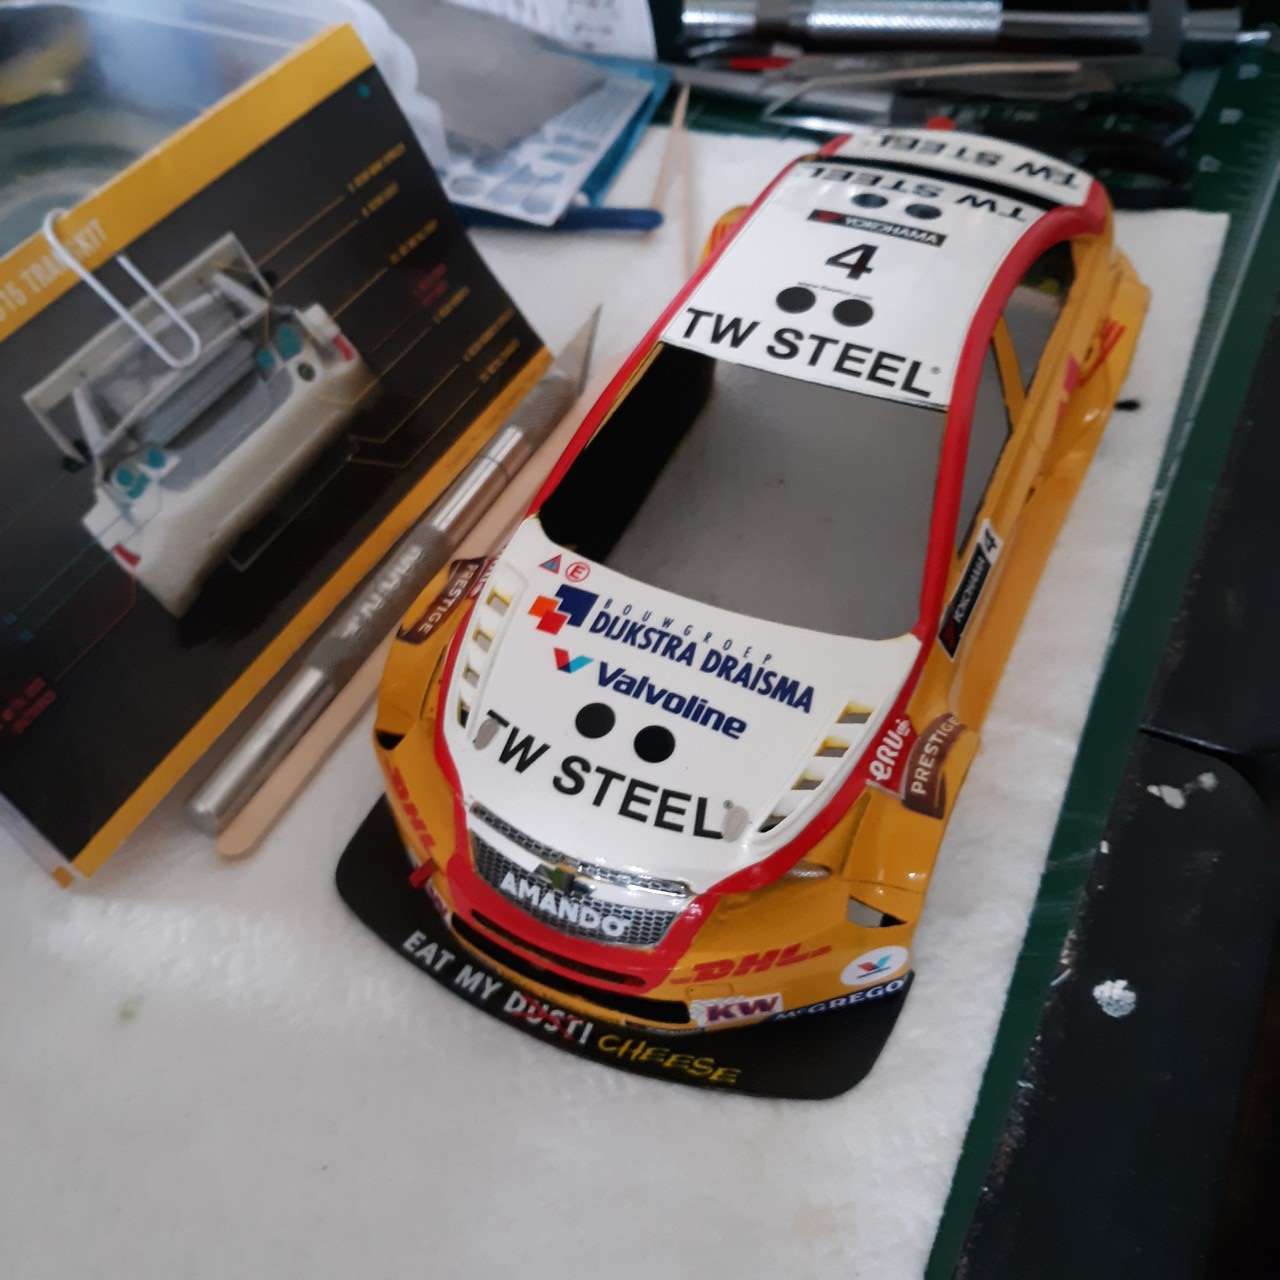   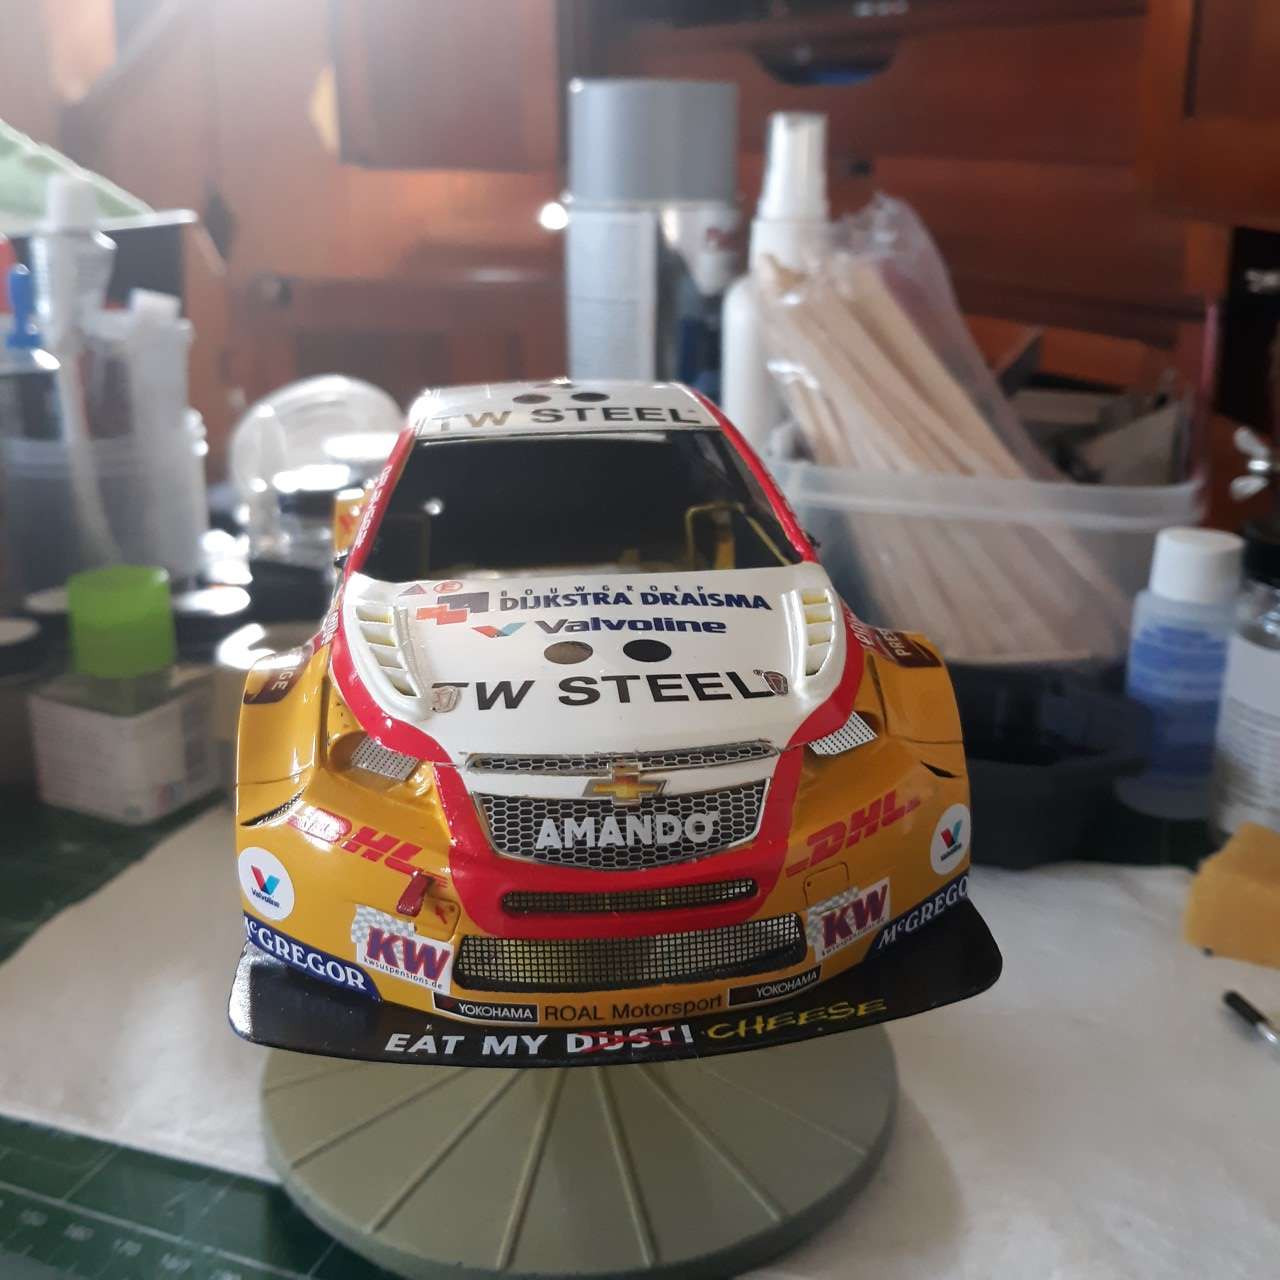 Fitting the body to the chassis: 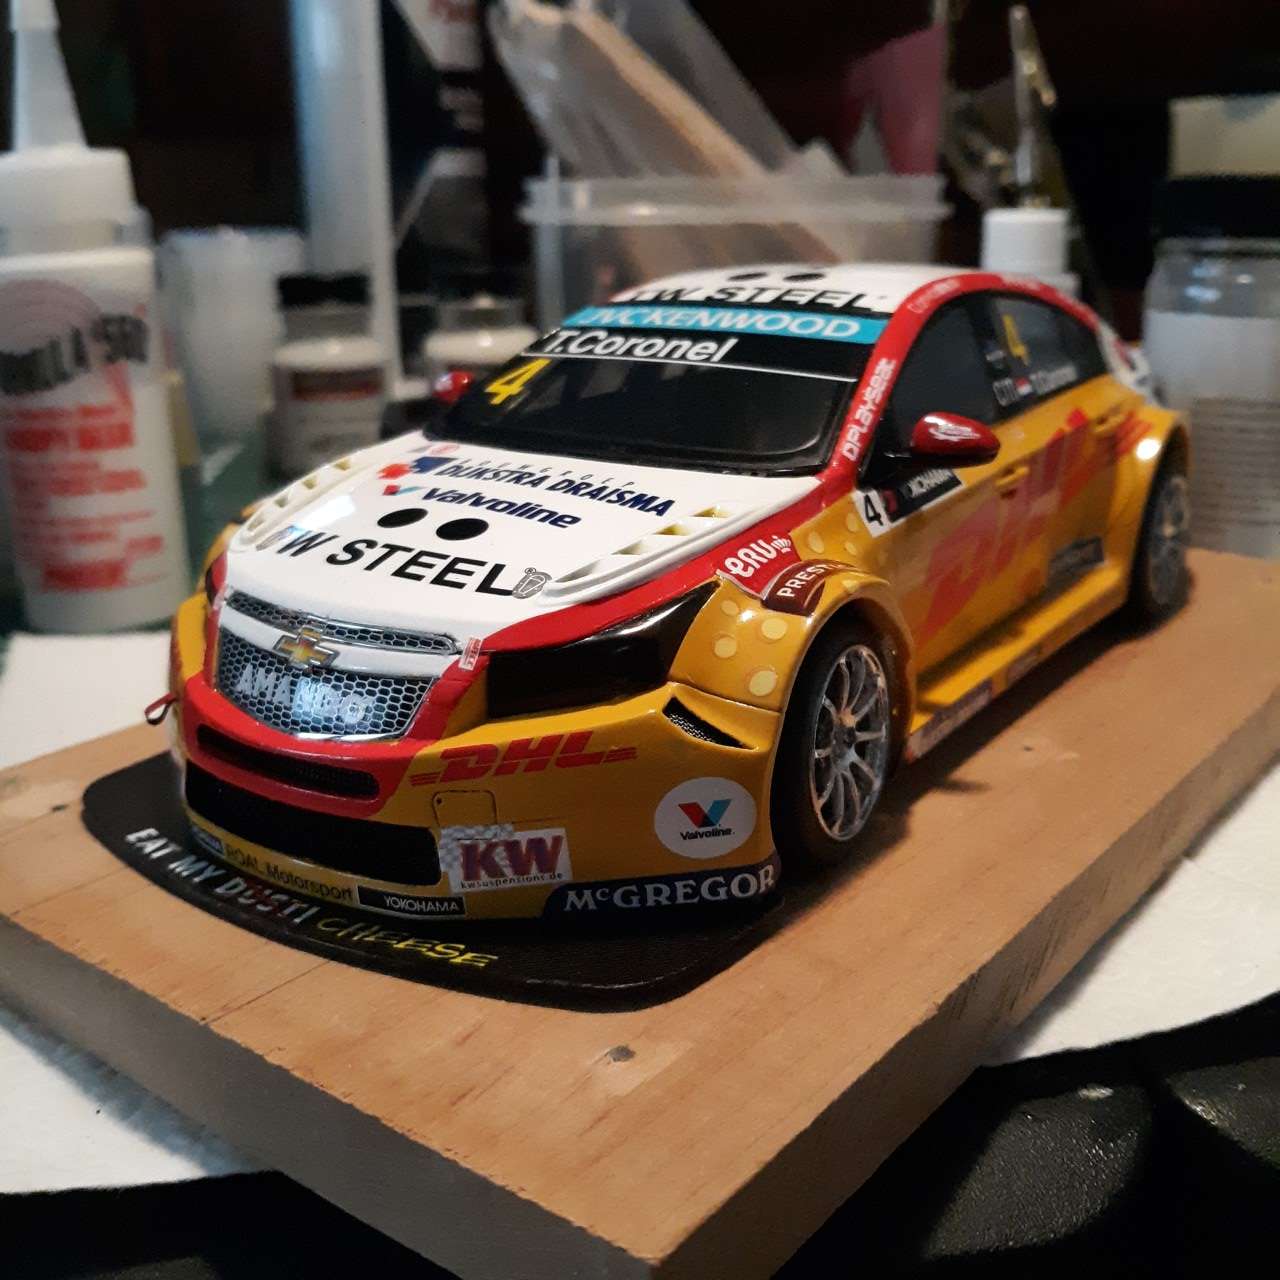 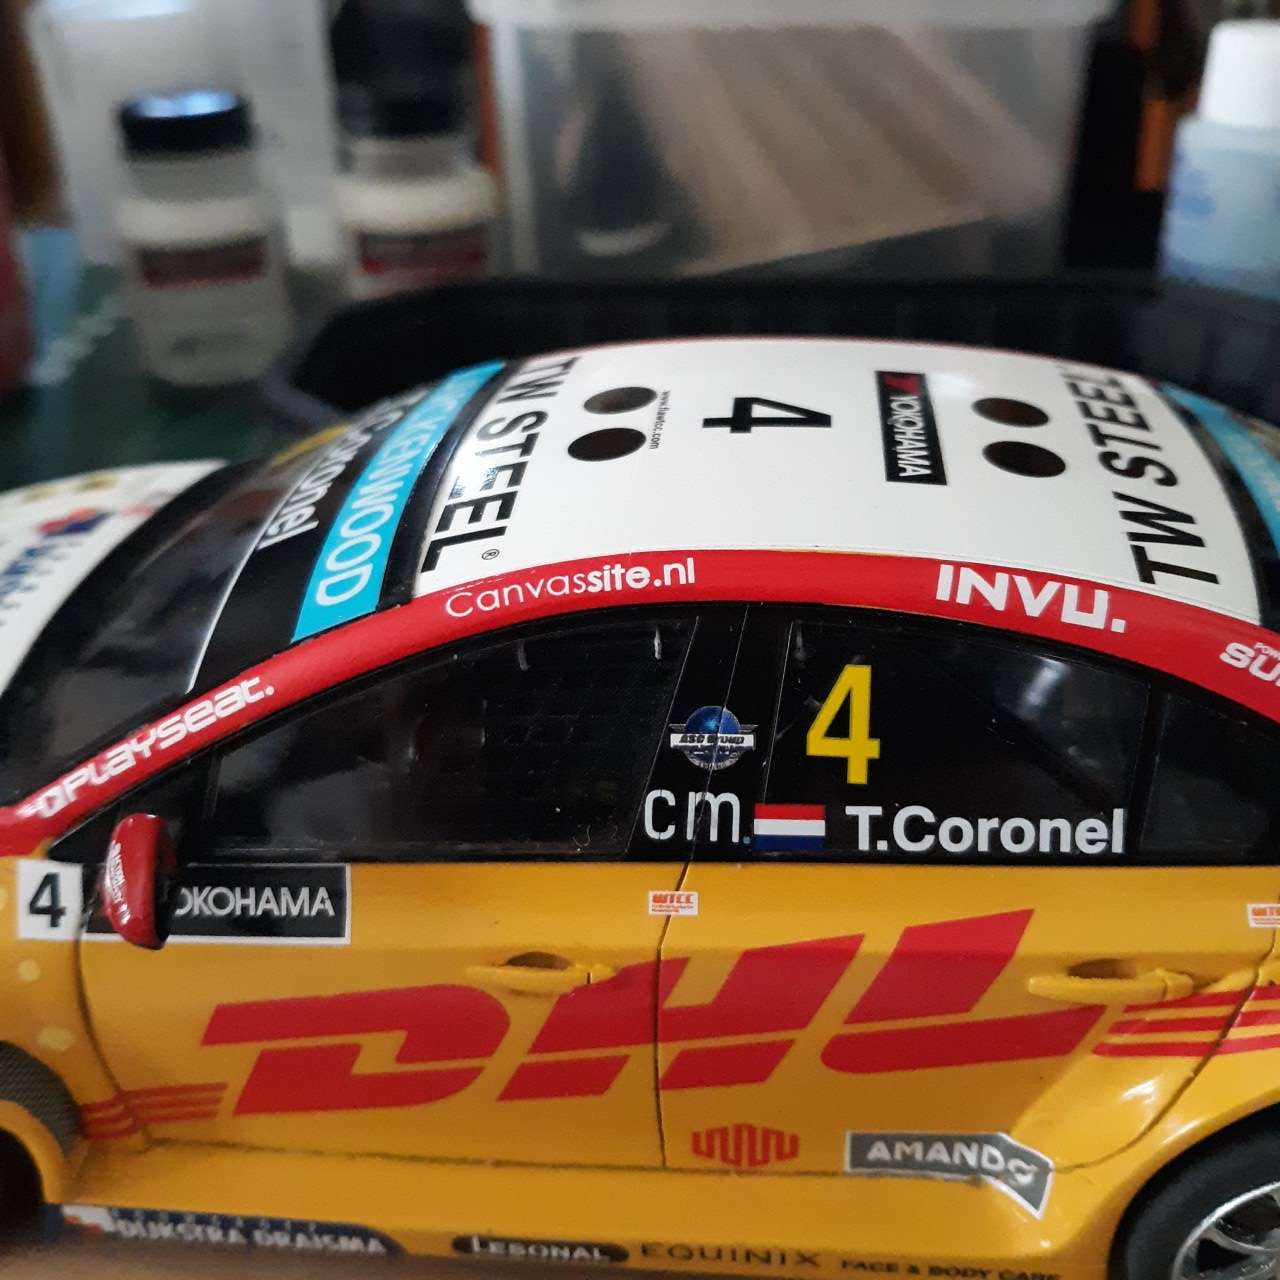 |
|
|
|
Post by Chris K. Hale on Oct 16, 2019 5:46:48 GMT -8
We appreciate your sharing on this journey, I hope you can wrap it up and enjoy a beautiful piece of art you have created. We are our worst critics! so go easy on yourself.. Chris
|
|
|
|
Post by Ben_B on Oct 16, 2019 12:41:41 GMT -8
Beautiful work, Bill!
Ben
|
|
|
|
Post by Joel_W on Oct 16, 2019 12:49:49 GMT -8
Bill,
Looking at your pictures, your decaling is consistent, and just about perfect decal after decal. I'm interested in how you prepare the paint for decaling, and your decaling procedures.
Joel
|
|
|
|
Post by Joel_W on Oct 17, 2019 3:21:24 GMT -8
Bill.
So other then a rub down of just Novus #1 after paint, the surface is smooth enough for decaling. Now that's really impressive. I even have to rub out the primer coats with Tamiya 3,000 sponge before the color coats, other wise the color coats just never lay down correctly. I'm also impressed that you generally don't need any decal setting solutions other then Solvaset for those really difficult compound curves.
Joel
|
|
|
|
Post by Joel_W on Oct 17, 2019 4:37:16 GMT -8
I guess I did skip the biggie. I DO wet sand my primer I usually use 4000 and if need be I'll go up the chain 6000, 8000, 12,000 if REALLY necessary. After I lay my color coats. Polish that out, and now using clear coat with my NEW favorite, ZERO paint. When I'm happy with that I let it "rest" a week. Then the Novus clean up to remove smudges and other kaka the decaling comes next after which comes touch up. On any nasty compound curve areas I use a really small moist sponge to coax the decal along with the solva set application. This model has quite a few multiple layer decals. The most difficult and prominent being the large Valvoline decal on the rear quarters. Bill, Thanks for the clarifications. For the primer coat, I found that 3,00-4,000 wet does a great job, yet it leaves just enough tooth for the super thinned out tack color coats to adhere to. One IPMS National winning modeler I've followed for many years is Paul Budzik. He's paint prep for decaling, and decal method just opened my eyes, so I've basically adopted it. Honestly, my decaling and finishing has so improved that I should send him a check and a thank you card. Getting the color coats smooth enough to decal right on top of without any clear Glosscoat with military flat paints was super hard for me, but I eventually got the hang of it. The advantage of not using a Glosscoat to decal on top of, keeps the recessed panel lines from clogging up so that a panel line wash has some place to settle in that won't be sucked up with the cleaning phase. Joel |
|
|
|
Post by Art on Jan 22, 2020 15:22:50 GMT -8
Hey Bill, Nice work on this one. I have this kit, but I really like the scheme you have here better than the stock one. I wouldn't say this kit is at the top of my queue, though, so I may never get to it, but it definitely interests me. All that decal work scares me, though. I can't seem to get through a build without messing up at least one crucial decal...  You nailed them, though. -Art |
|
|
|
Post by 2lapsdown on Jan 22, 2020 16:25:16 GMT -8
That's a beautiful car and a great build. I never dreamed a Cruze could make such a cool race car. What yellow did you use? The paint is flawless.
John
|
|
|
|
Post by tatocorvette on Jan 22, 2020 16:40:58 GMT -8
WOW Bill! That is looking great! Paint and decals are great but I also love the mesh grilles. Cool!
|
|
|
|
Post by 2lapsdown on Jan 23, 2020 4:34:56 GMT -8
I like that you don't clear your decals and your reasoning for it. Thanks for the paint info
John
|
|
|
|
Post by Joel_W on Jan 25, 2020 6:47:44 GMT -8
Bill,
I really don't think that one can compare real car decals which are made out of vinyl to model car decals with various amounts of clear film. Over time uncoated decals will all Yellow especially the clear unprinted portions, and the lighter the color ink, the more it will Yellow. Clear coating helps to reduce or even stop the Yellowing. I've got models from more then 25 years ago that haven't the slightest amount of Yellowing. All my models are clear coated, and the display cases/shelves are never in direct sunlight. I've got a few friends from my old Model club days that didn't clear coat back then, and those builds have yellowed decals, and his coated ones almost none.
Joel
|
|
|
|
Post by afx on Jan 25, 2020 7:41:31 GMT -8
Rarely do I clear my builds.
|
|
|
|
Post by Joel_W on Jan 25, 2020 7:57:22 GMT -8
Rarely do I clear my builds. JC, Interesting. As you and Bill are about the only guys I know that don't. Any issues with yellowing on your older models? Joel |
|
|
|
Post by afx on Jan 25, 2020 9:34:26 GMT -8
Rarely do I clear my builds. JC, Interesting. As you and Bill are about the only guys I know that don't. Any issues with yellowing on your older models? Joel Not yet at least Joel. However I would guess the oldest build I have is 10-15 years. |
|
|
|
Post by Joel_W on Jan 25, 2020 13:44:24 GMT -8
Guys that great. Believe me if it was my models they'd be bright yellow by now.
Joel
|
|


 You nailed them, though.
 Pro Tech | MAD | Scale Motorsport
