|
|
Post by pg265 on Dec 14, 2020 14:14:46 GMT -8
Hi, First of all, thanks a lot for following the build!  Yes, I use Gravity Colors (Europe!) Grey Primer under the Titanium White. All the painted parts (resin, metal, White metal, PE) are primed with the same primer. The process is pretty easy. I just print a copy of the decal sheet on a Tamiya Kabuki sheet. You can see the printed sheet under the parts. You then just have to carefully cut the film following the printed shape. That’s all. The varnish is passed and the pieces dry in their box.    In the meantime, I have done a temporary assembly of the upper frame. The hoses of the water pipes and installed their clamps are installed. I have represented the latter in self-amalgamating tape intended among other things ... to repair hoses.  ![]() i.servimg.com/u/f12/12/38/43/52/ca90f410.jpg i.servimg.com/u/f12/12/38/43/52/ca90f410.jpg [/img] 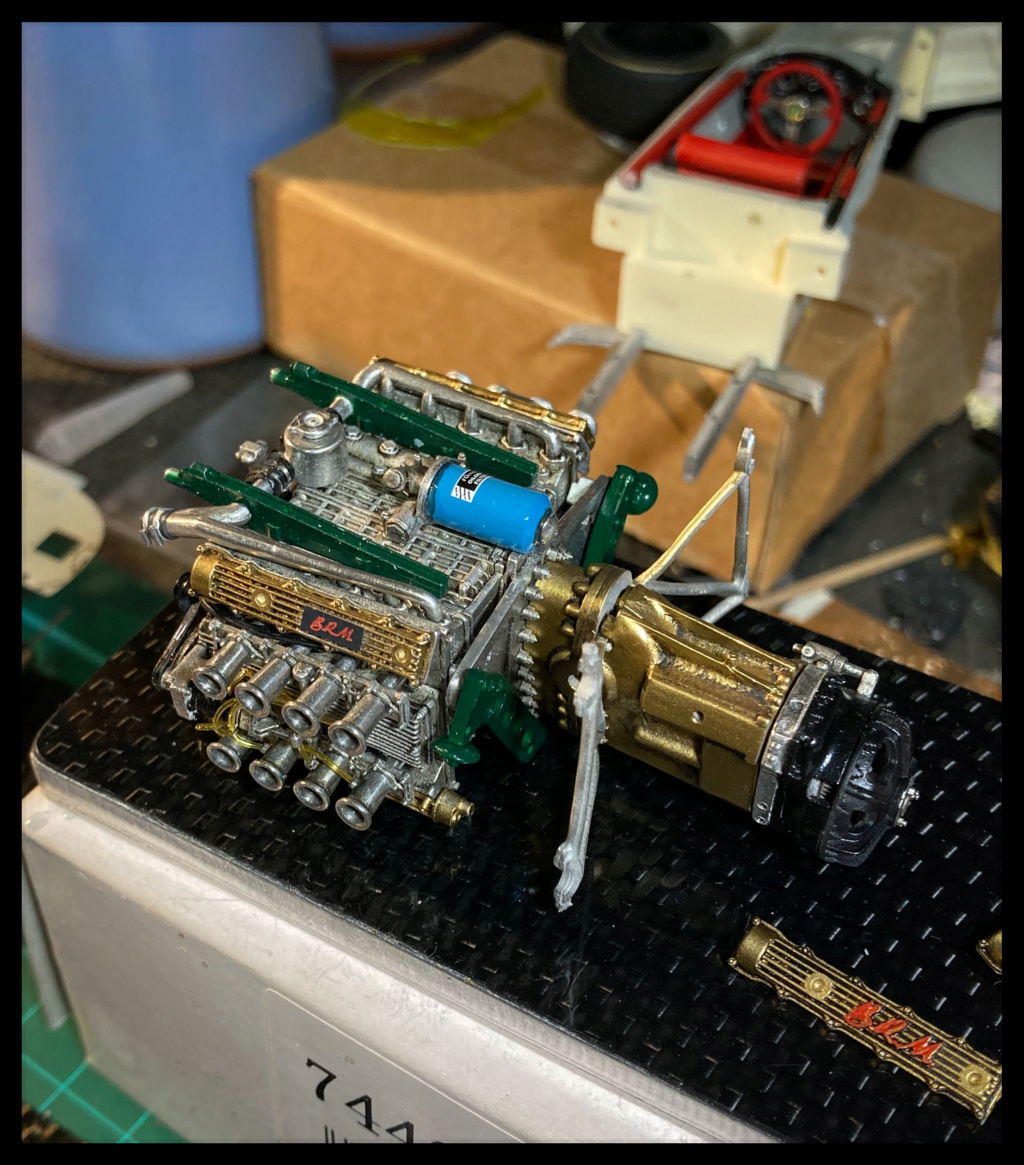 I also tested a new, easier method for the tires gold ring using a template and a gold pen: it could be improved, but it could be worse. 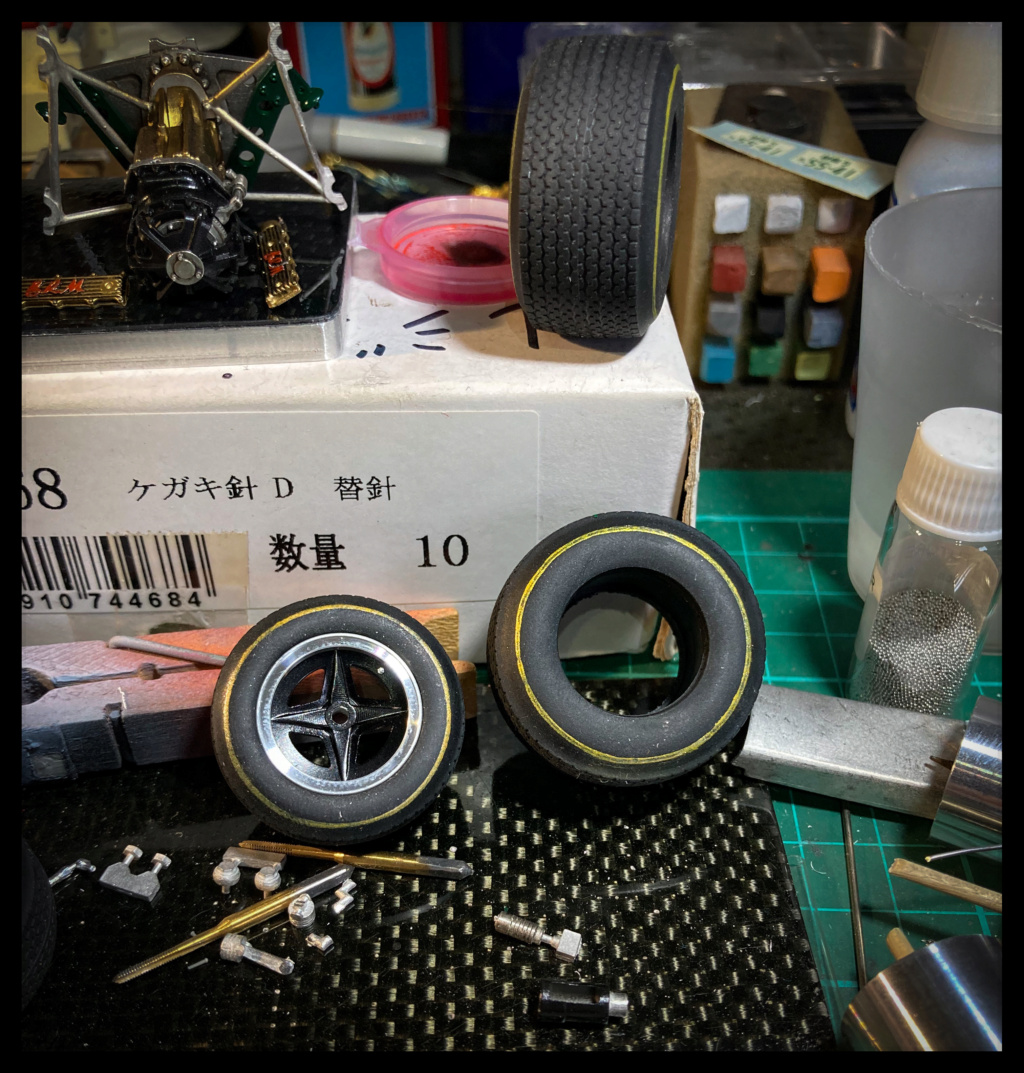 Pascal ]I also tested a new, easier method for the tires gold ring using a template and a gold pen: it could be improved, but it could be worse. Pascal |
|
|
|
Post by pg265 on Dec 27, 2020 10:01:54 GMT -8
Good evening, Merry Christmas to everyone!! I hope Santa has spoiled you and placed some kits under the tree! Not much time for the model at the end of the year, but we are making progress. Otherwise, the decoration is at the beginning and the assembly is progressing slowly. I also made a small aluminum plate for the presentation of the finished model. I photocopied the instructions on a Kabuki Tamiya mask sheet, as already done for the body parts masks. I then cut out the lettering freehand ... and it can be improved upon (sighs ...) Then a fairly thick primer coat followed by a semi matt black coat and a very light sanding with 8000 to give this aspect and this very slight relief effect. Four rivets, the cam covers for the BRM recall and voila.        We are not that far from the end and the next one will certainly be blue! Pascal |
|
|
|
Post by 2whl on Dec 27, 2020 13:08:59 GMT -8
Looking spectacular, Pascal
|
|
|
|
Post by Joel_W on Dec 29, 2020 9:15:03 GMT -8
Pascal,
I'm simply speechless at the finish you've achieved on all the body sections. Even the name plate is top quality.
Joel
|
|
|
|
Post by arcticwolf on Dec 29, 2020 10:14:34 GMT -8
Pascal, I'm simply speechless at the finish you've achieved on all the body sections. Even the name plate is top quality. Joel I'm just amazed that it's 1/20th scale. I don't know how he does it. |
|
|
|
Post by Joel_W on Dec 30, 2020 6:25:55 GMT -8
Paul,
Over the years that I've known and followed Pascal's amazing work, I've become convinced that he's really a true Alien. What's easy as ABC for him, is almost always way over my head. He thinks nothing of drilling out a few thousand holes for rivets (all seam to be in perfect alignment), then gluing in those rivets without a hint of excess glue. For me, just getting one rivet glued into place is an exercise of extreme needed skills.
Joel
|
|
|
|
Post by pg265 on Dec 31, 2020 10:47:34 GMT -8
Good evening, Thank you very much for all the kind comments Mates! I wish you a very happy new year and a lot of cool builds! I’m far from being an Modeling Alien! It’s really very easy to have a well aligned rivets lines with the MFH engraved bodies and parts. The rest is just pleasure and passion! Progress, but few images. A test allowed me to confirm a problem with the transparency of the decal of the white roundel on the nose. So I cut out a mask, put on a very light coat of primer, then titanium white. Here is the result after rapid removal of the masking. I will wipe it down tomorrow to smooth the outline and apply another decal and the # 1.  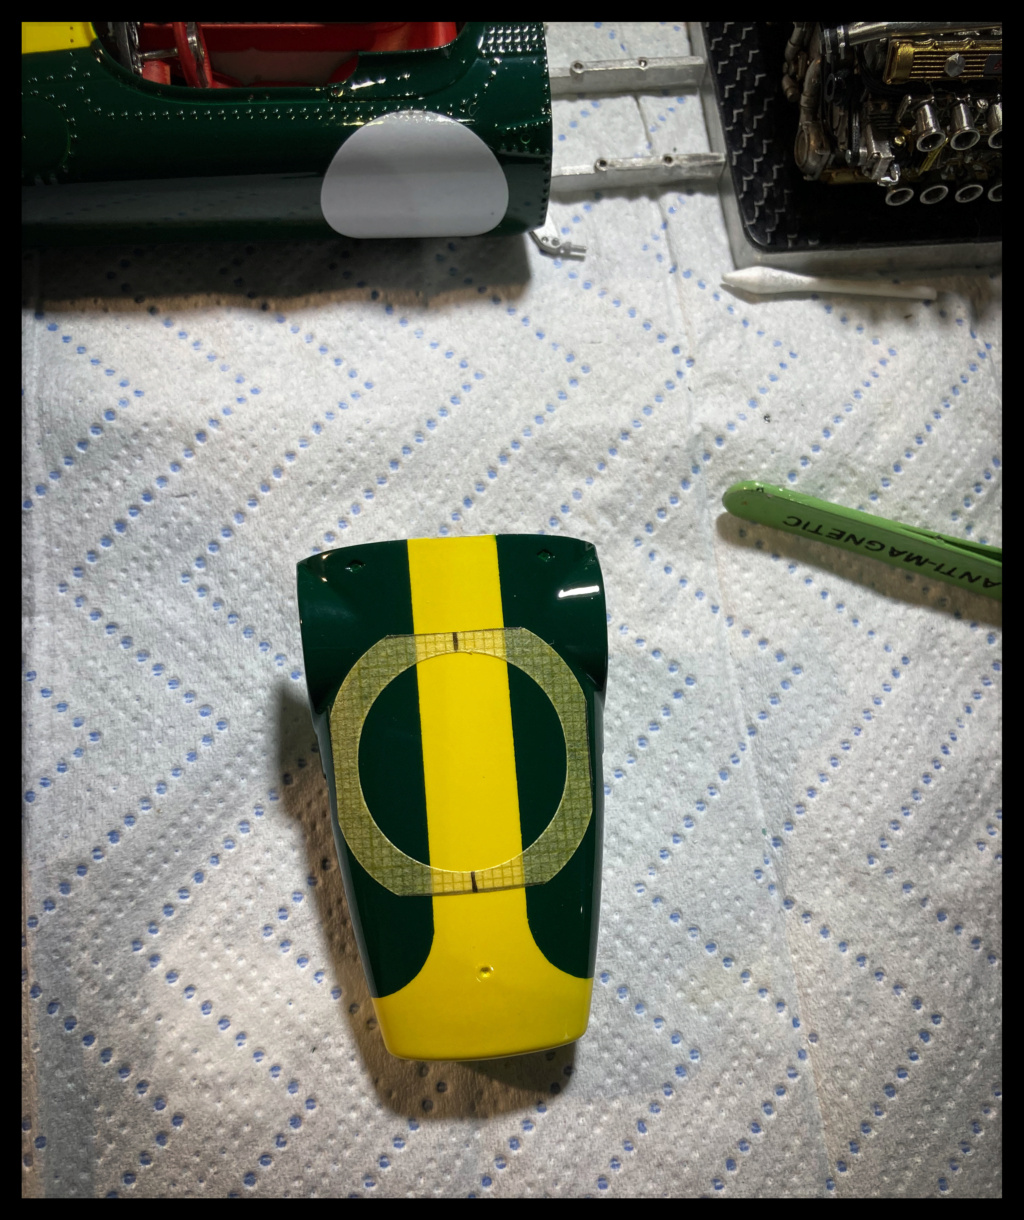   Pascal |
|
|
|
Post by 65slotcar on Dec 31, 2020 16:18:05 GMT -8
awesome build ! all the colors go great together and the gold on engine really stands out.
|
|
|
|
Post by Joel_W on Jan 2, 2021 6:07:00 GMT -8
Pascal,
Happy Holidays my friend.
I'm sorry that I have to differ with you from your claim of not being an alien. The truth be told you are. In my way of thinking, an Alien is a modeler who possesses skills, and the ability to consistently apply them at a level far above what someone like me, whose basically your Golden Year's Mr. Average modeler, whose more then capable of building an out of the box model with a pretty good finish. What you do on a consistent basis allows you to produce one true masterpiece after another. And that my friend is a very good thing.
As far as the front nose rondel, I'd say that your fix worked perfectly, as the end result certainly proves that point.
Joel
|
|
|
|
Post by pg265 on Jan 3, 2021 12:11:06 GMT -8
Good evening, Thank you. Thank you very much Joel for the kind words. I’m really glad you enjoy the builds and my way to build kits. Work on the front of the car and more particularly on the radiator and its bracket. The inside of the radiator is filled in with 1/10 aluminum foil covered with rows of 0.5 lead wire to simulate the coil ... not much can be seen. The set is adjusted and ready to paint.  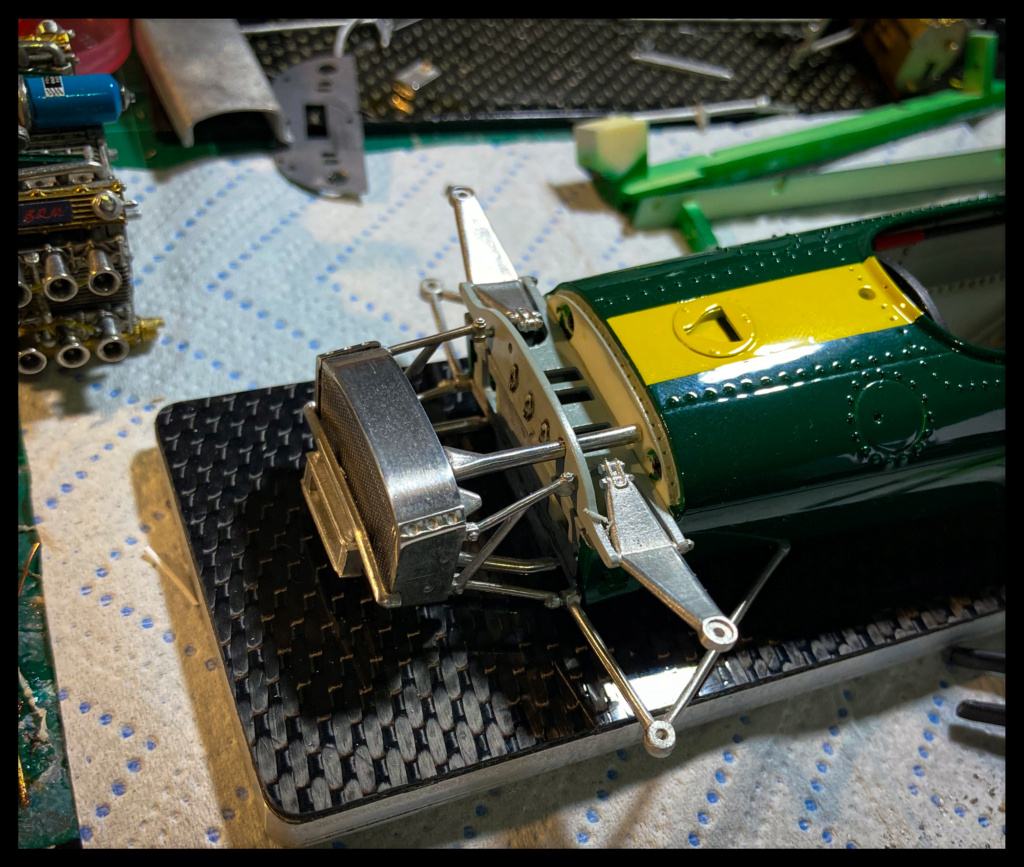  I also worked a bit on the H16 and its exhaust. Adjusted, sanded and prepared he also receives a weld bead at the exit of the 4 in 1. A little bi-component tomorrow on the exits and we can move on to primer and white paint.  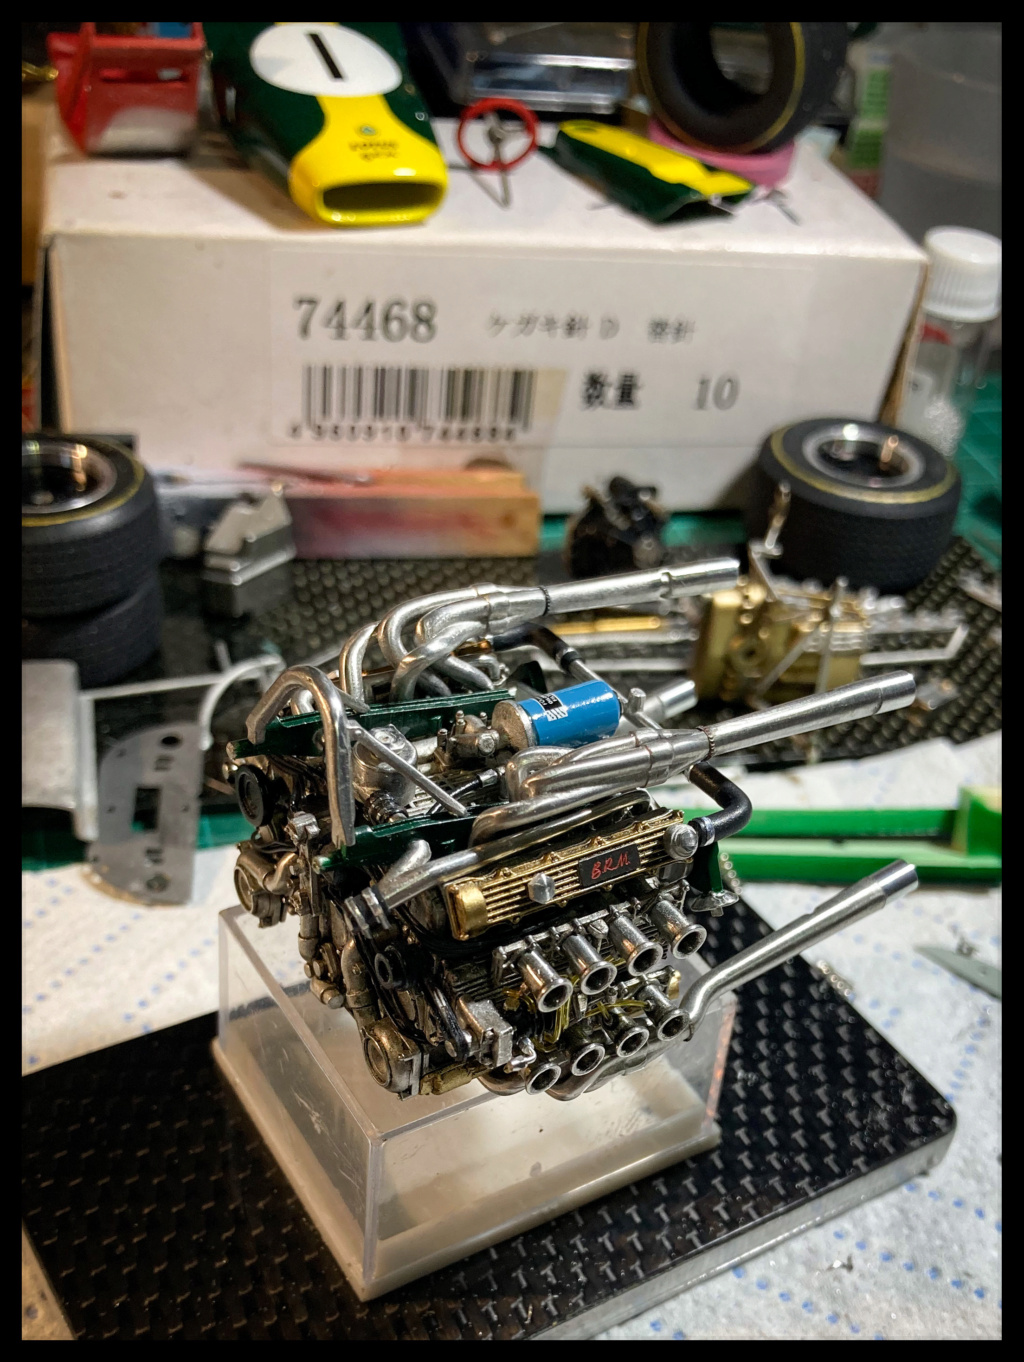   A little blank test to validate certain assemblies, but above all to have fun and happy that it is starting to take shape.   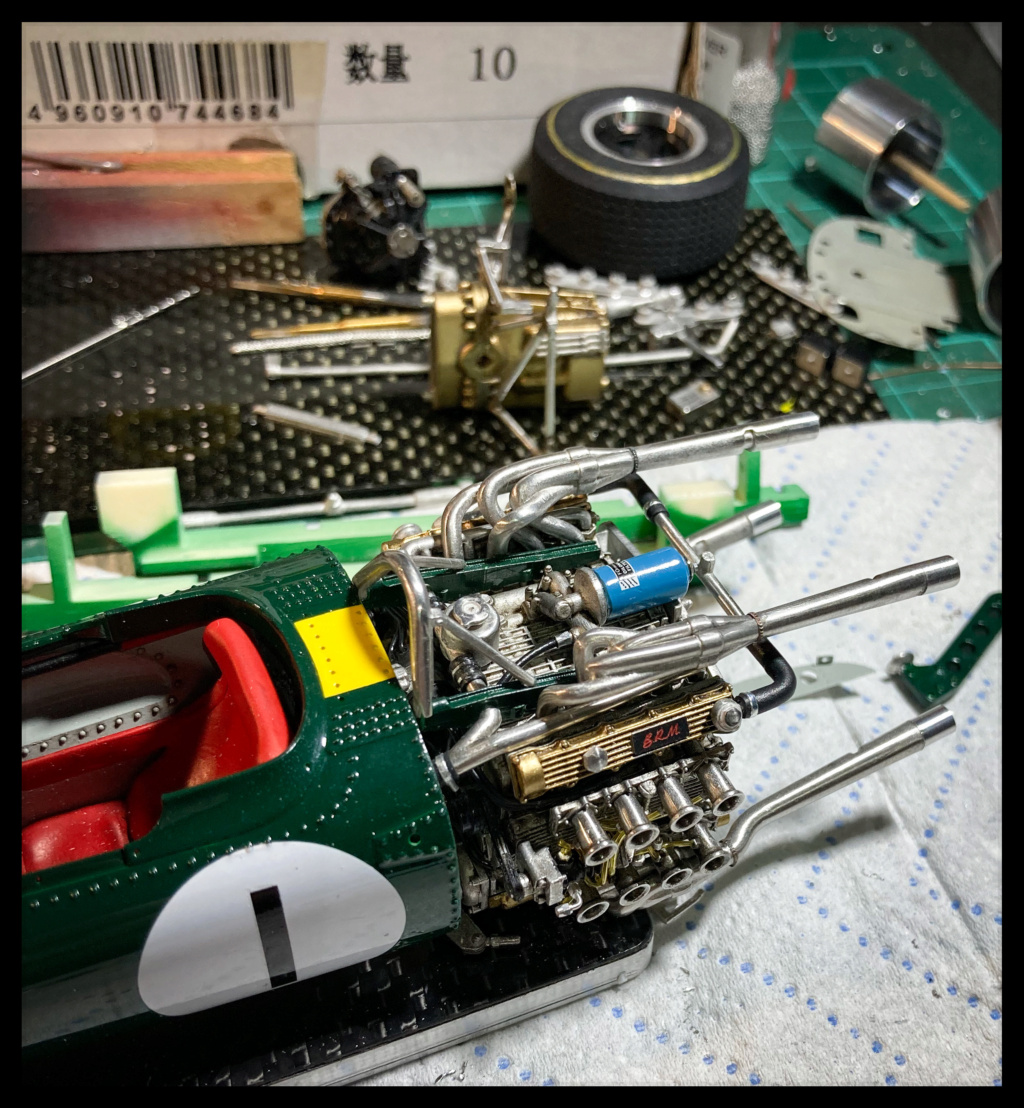 Voili voilou. Pascal |
|
|
|
Post by arcticwolf on Jan 3, 2021 20:48:06 GMT -8
You should open your own museum.
|
|
|
|
Post by Joel_W on Jan 5, 2021 14:39:51 GMT -8
Pascal,
As usual your update didn't disappoint. Every time I see your build of that BRM H16 engine, I'm simply amazed both at the kits complexity, and your ability to build and paint it so that it looks as it does. Truly a replica in every sense of the word.
Joel
|
|
|
|
Post by pg265 on Jan 24, 2021 12:15:22 GMT -8
Good evening, Thank you!! I am happy that you like this beautiful car! Little time for models, but the Lotus is still progressing . Quite a few small things on which preparation, painting and / or blank assembly work is necessary: it will go faster during the subsequent assembly phases of these subassemblies. The exhaust has been prepped and painted, I have also started to make it more "operational" with a first oil pass of 3 tones. Same fight for the radiator and the shock absorber springs. The shade of these is a mix of BRG and white to conform to my doc. The remaining rivets (central strip) are primed and painted. They will be varnished with other elements also awaiting varnish.    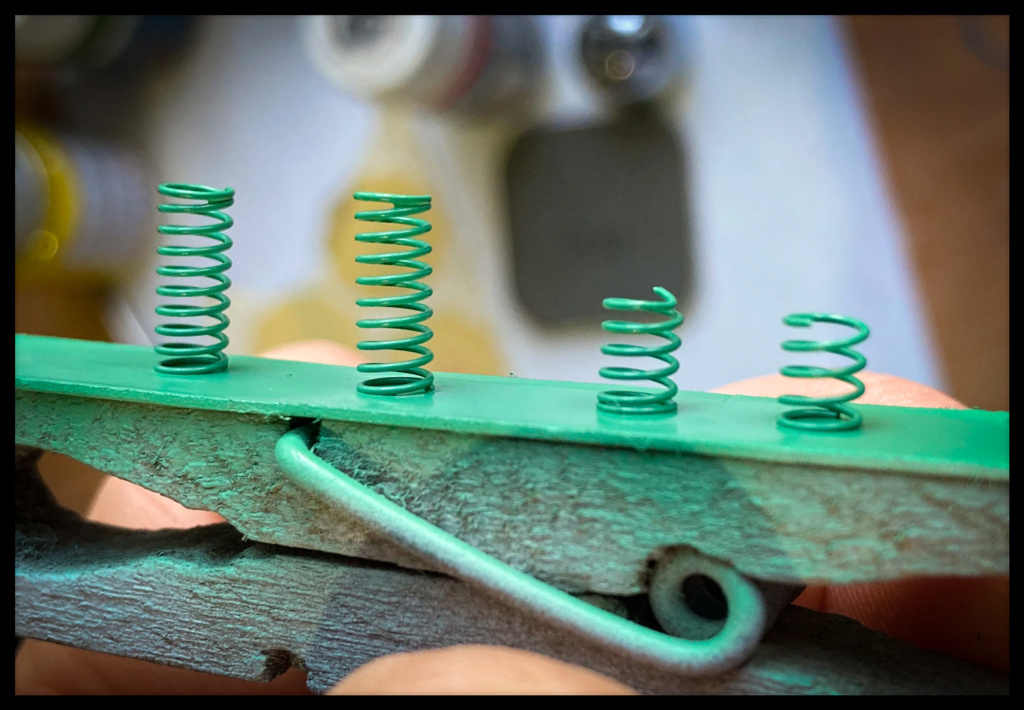  Blank mounting of the front bulkhead with the shock absorbers installed on the upper arms: this test almost allows him to finalize the front of the Lotus and its radiator. The crankset is installed for good.    The front and rear bulkheads are now in place, as are the front sills and lower wishbones. The radiator and powertrain are blank mounted to ensure the correct positioning of the pipes and adjust the alignment of the elements. The same goes for the exhausts on which I still have to pass a blow of airbrush to blacken the outlets, oils and pastels to bring a little life ... 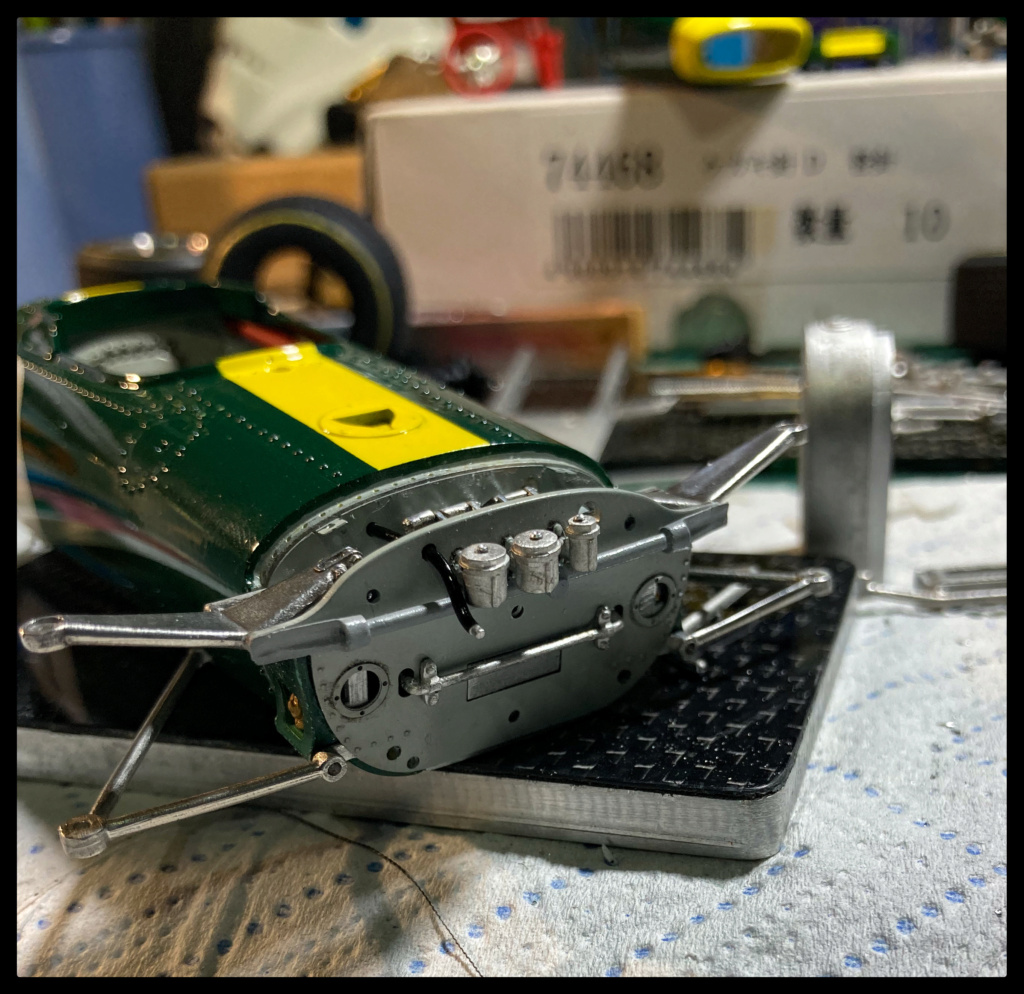     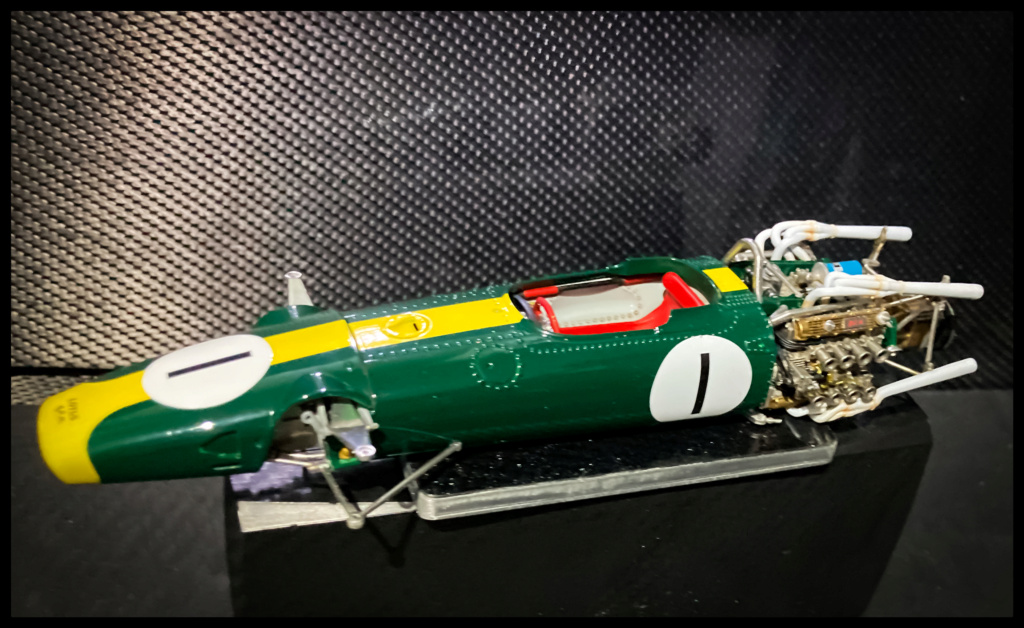 And then ... La CATA !! A false movement by putting down the engine, the hull caught up in extremis: I breathe !! But, a little "clicking" alerts me ... I'm looking everywhere and all of a sudden: no more gear lever !!! He fell into the shell, inaccessible !! After some thought, I grabbed a small diameter cutting disc and ... cut off the tub to retrieve it. Lever (Very!!) well stuck, bathtub cleaned, an Alu "part" is prepared, then painted and the seat reinstalled: like new! Big waste of time then, but... The front end is almost finished, everything hooked up, the brake and clutch master cylinders wired. The discs are "run in" and the calipers are being prepared. The left front assembly is installed, the caliper wired and fitted with a banjo fitting. The nose has undergone a drastic slimming cure.           More soon! Pascal |
|
|
|
Post by Joel_W on Jan 24, 2021 14:30:40 GMT -8
Pascal,
Great update. The amount of completed work is beyond my scope for sure. Just notice on the radiator assembly how you duplicated all the wield seams. The copper brake lines really add quite a lot to the nose assembly, as does it's use for the calibers.
To my way of thinking you're flying through this build like it was nothing more then a Tamiya kit on Steroids, but even I know better.
Joel
|
|
|
|
Post by Chris K. Hale on Jan 25, 2021 6:13:22 GMT -8
Pascal, I don't know how I had missed your WIP before this morning but, I was frozen to the Computer, reading and looking at every picture in amazement. I haven't built a MFH kit and will someday but your refinements, paint skills and assembly methods just blew me away. When I read the shift lever had fallen into the nether zone, my stomach dropped....and your methods of fixing that took some huge Huevos! if you know what I mean... I await your remaining assembly photos and final pics too. This is already a outstanding build. Thank You for sharing and giving us a detailed look at your work. Keep it coming !!! Chris
|
|


