|
|
Post by tartan54 on Jan 8, 2021 8:18:42 GMT -8
I've wanted to do this car for so long, back in the day it was my dream car (or maybe a Cologne Capri V6). It's the old Bandai/Doyusha kit of the 1975 IMSA US spec racer and as the kits are so expensive when available on eBay I bought a built model which was complete but a bit of a glue bomb, not a problem as I intended to strip it and convert it. I managed to separate a lot of the parts as they were not put together very well (although there was copious adhesive it seemed to be superglue) so once everything was apart it was given a good dunking in oven cleaner to get rid of the paint and chrome. The main visual differences between the IMSA and GROUP 5 cars are the front air dam, rear wing and the vents over the rear wheels, they only built 4 Group 5 cars and these were converted from the IMSA spec cars and some of these were then converted back to the IMSA spec by US owners in later years so restoration pictures can be a bit misleading. This is what I'm aiming for: 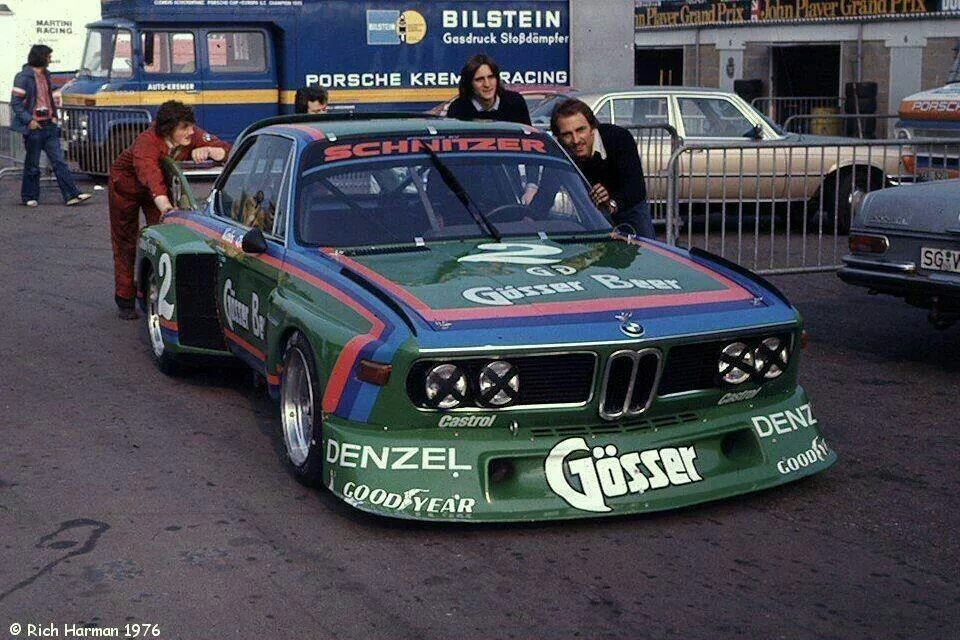 Anyway a few pictures to show what I'm doing: Front air dam from plasticard with the kit brake vents grafted in. 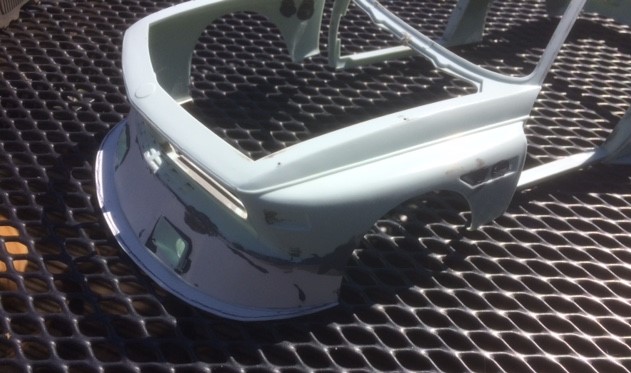 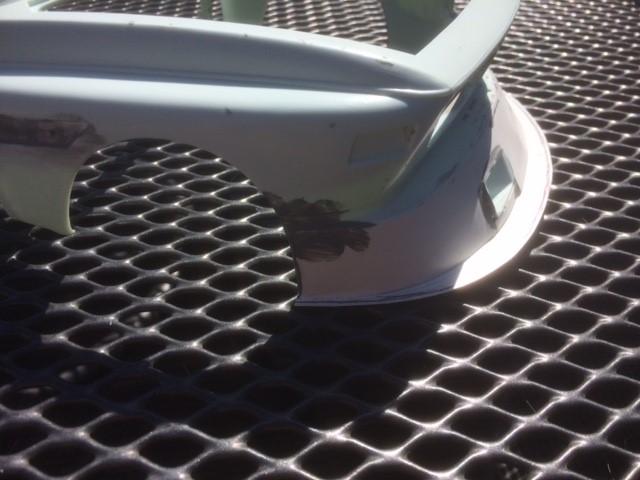 The louvred vents over the rear wheels caused me some head scratching but some Plastruct laddering proved to be about the right size so some was procured and grafted into a hole cut in the arch extension. 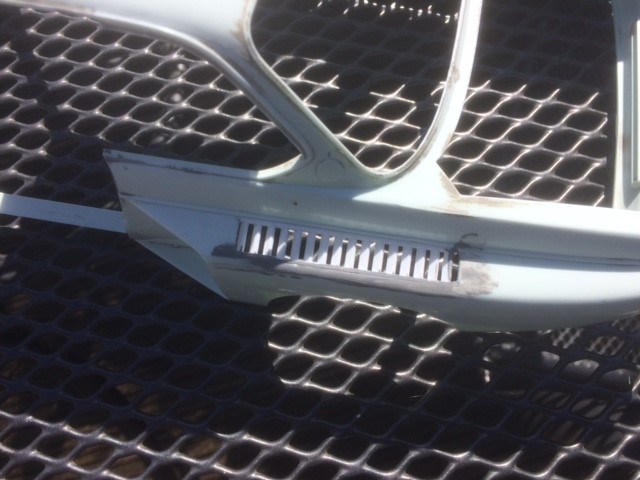 The rear wing supports will be made of laminations of plastic card and I'll blend those into the boot lid. The way the kit is put together means the chassis can be built as a completely separate module so this has been started with the rebuild of the rear suspension. 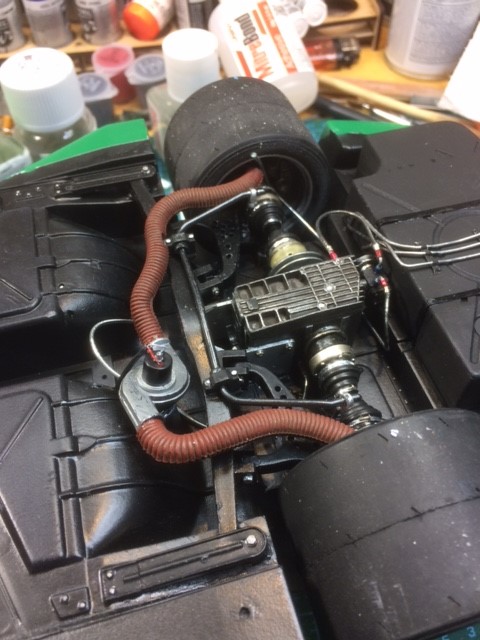 Drive shafts have been detailed and oil lines added along with replacement hardware for most of the mounting points.  The front suspension has been detailed, the front roll bar replaced and the steering rack made a little more realistic. 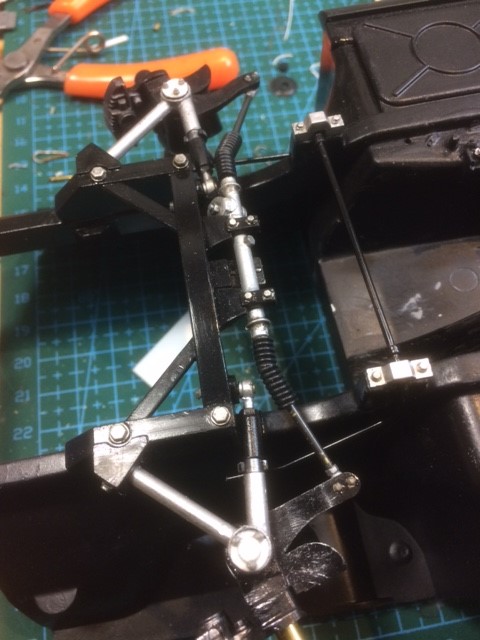 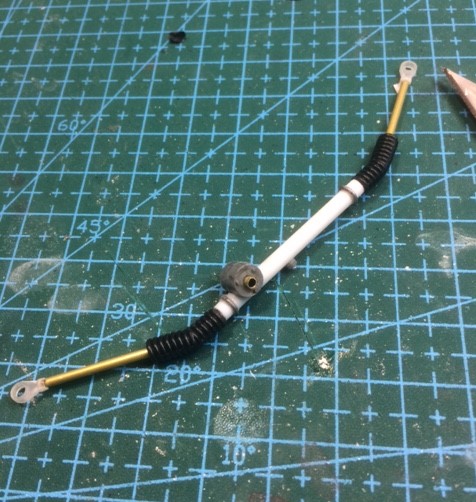 The ride height has been reduced considerably so she should look low and mean once everything comes together. Hope you like how she's coming along. Dave |
|
|
|
Post by pnance26 on Jan 8, 2021 11:04:53 GMT -8
Where did you get the rubber boots for the axles? I need some for my build!
|
|
|
|
Post by tartan54 on Jan 8, 2021 13:41:16 GMT -8
Where did you get the rubber boots for the axles? I need some for my build! Sorry, they were part of the original "rack", the only kit part I re used on the new rack. Have you tried to find very small flexible electrical conduit? I've seen similar in avionics fit on aircraft, I would look at work for you but with Covid I'm working from home. Dave |
|
|
|
Post by tartan54 on Jan 8, 2021 13:44:20 GMT -8
Where did you get the rubber boots for the axles? I need some for my build! Ah sorry, just realised you meant the drive shaft boots! Duhhhh! Again, kit parts dressed with new clips etc. Dave |
|
|
|
Post by arcticwolf on Jan 8, 2021 14:41:49 GMT -8
I always liked that car back in the day, never knew a 1/12th model was available - looking forward to this.
And like you, a Cosworth Capri would be the Holy Grail - model would be nice, 1:1 would be even better!
Paul
|
|
|
|
Post by pnance26 on Jan 8, 2021 16:39:55 GMT -8
Where did you get the rubber boots for the axles? I need some for my build! Sorry, they were part of the original "rack", the only kit part I re used on the new rack. Have you tried to find very small flexible electrical conduit? I've seen similar in avionics fit on aircraft, I would look at work for you but with Covid I'm working from home. Dave Thanks, I'll have a look. |
|
|
|
Post by tartan54 on Jan 10, 2021 4:23:11 GMT -8
I'm a bit further ahead with the build than the first pictures indicate so here are some of the engine and it's mods. One other major area of difference between the IMSA and Group 5 cars is the engine orientation, the IMSA cars were inclined and the Group 5 cars were upright, the M49/2 engine? IMSA car, it's also got the stock front hinged bonnet, Gp5 cars had lightweight pop off bonnets and boot lids. 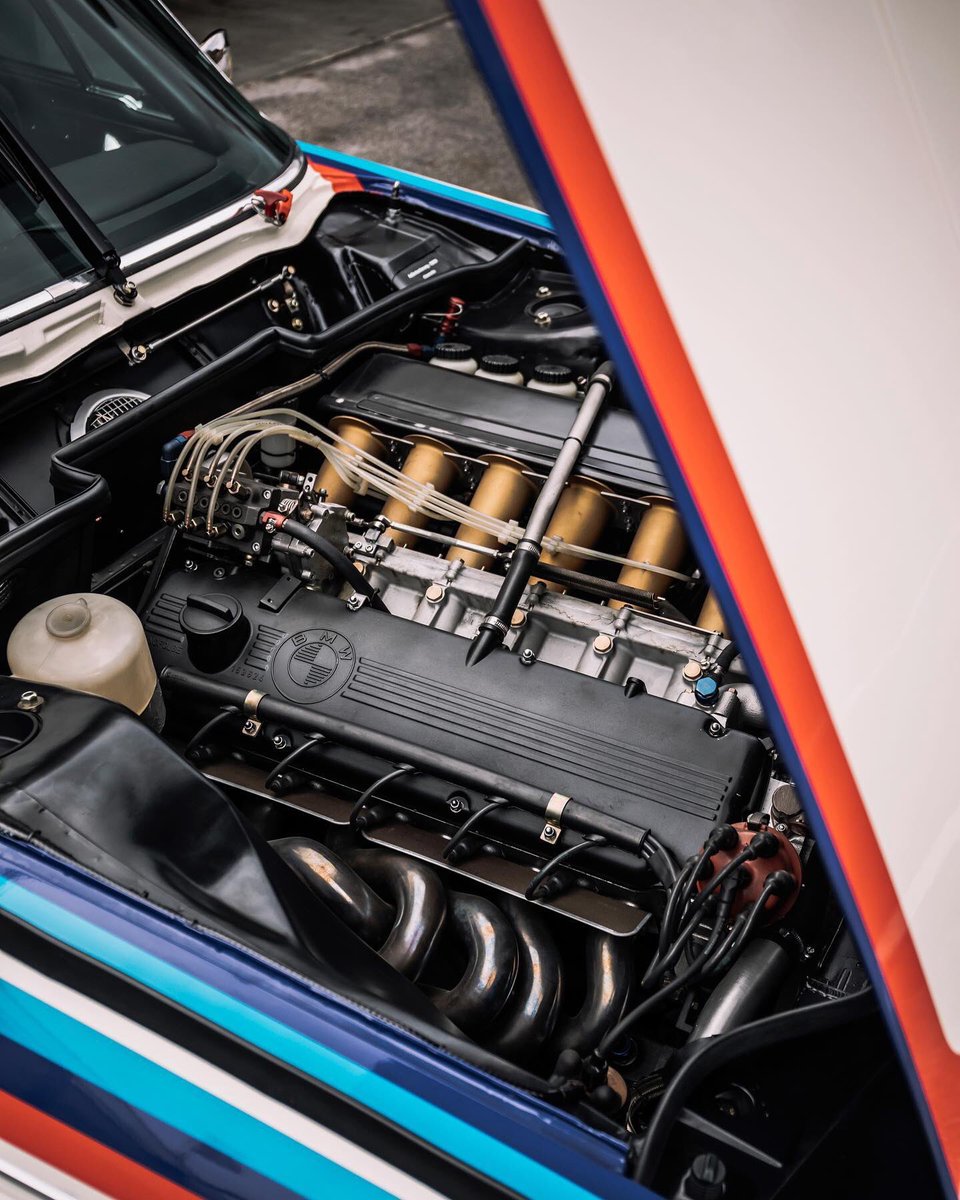 Group 5 car 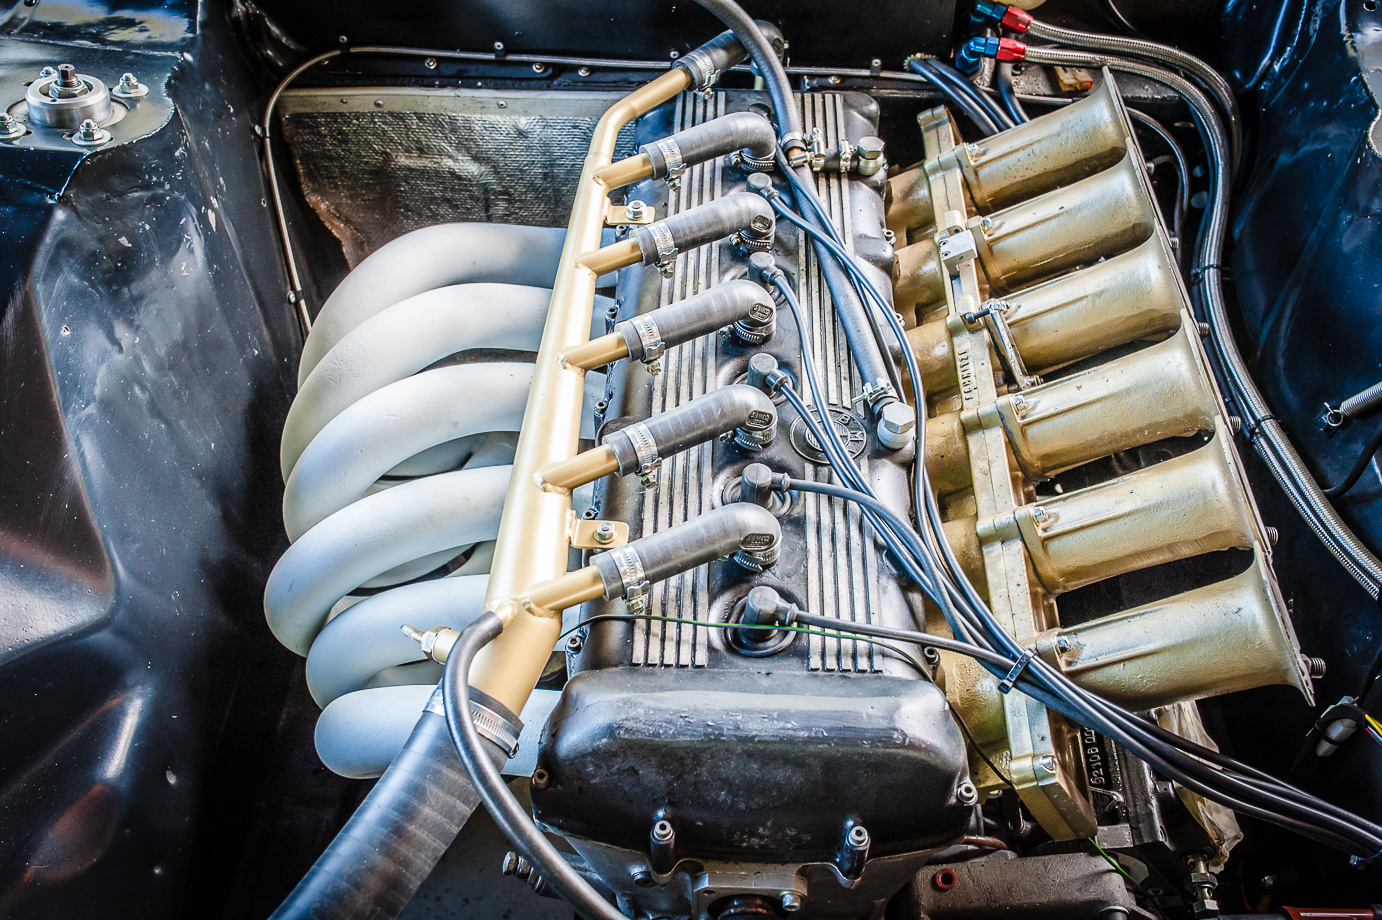 So this is the engine as supplied in the kit and built by the original owner. 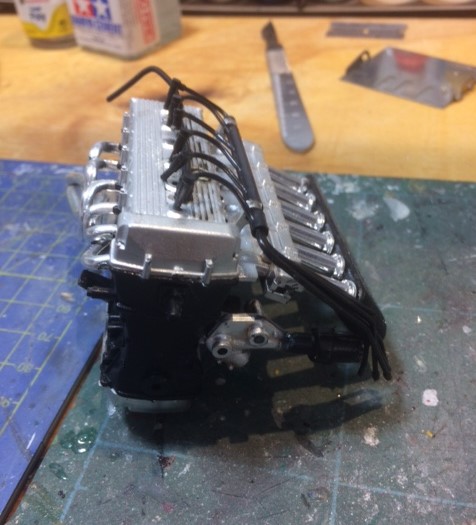 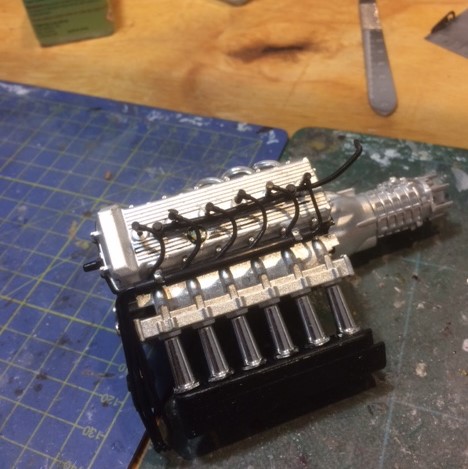 Looks a bit anaemic and over chromed. Changing the engine to upright meant new mounting legs needed to be fabricated, the angle of the inlet manifold changing and the engine generally lacked detail in particular the front pulley system, the water manifold to feed the revised head and the total absence of the Kugelfischer injection pump and its drive belts. So the spares and scrap box was raided for odds and sods. 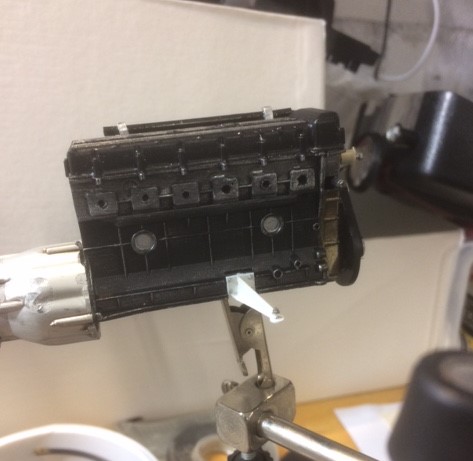 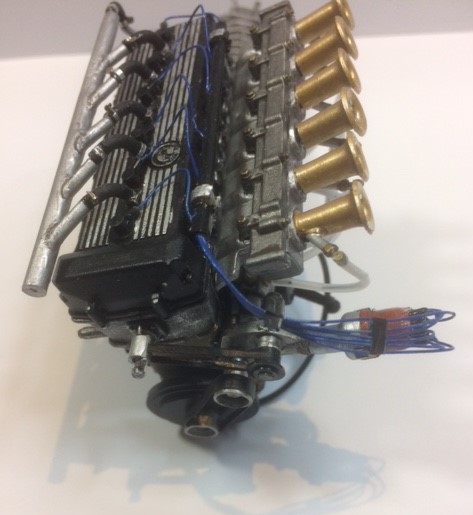 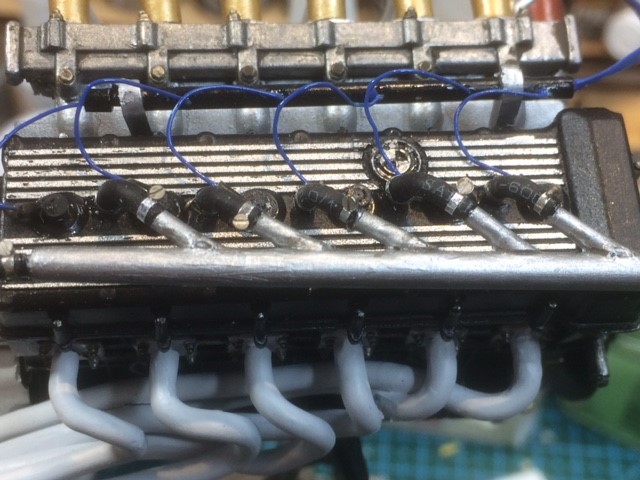 Lots of plumbing to add once the engine is in the bay but it's coming along. All comments good and bad appreciated, it's how we improve. Dave |
|
|
|
Post by chrissmith on Jan 10, 2021 13:26:12 GMT -8
Your doing a amazing job on this. Love the subject, always liked the wide body look like DTM cars.
|
|
|
|
Post by Joel_W on Jan 11, 2021 7:48:43 GMT -8
Dave,
What a fantastic project. As usual, I'm already amazed at the amount of details your have added including those vents from plastic sheet ladders, the front and rear suspensions, and of course the engine. Another build that I'll be following and paying close attention to.
Joel
|
|
|
|
Post by garydavis on Jan 11, 2021 19:55:02 GMT -8
Man....you're doing some mighty fine detail work here. Looking forward to your next update for sure...
|
|
|
|
Post by shunter on Jan 13, 2021 0:40:18 GMT -8
Stu. I g work so far, what a cool car this one was.
|
|
|
|
Post by tartan54 on Jan 13, 2021 9:16:18 GMT -8
Thanks to everyone that has commented, I really appreciate the nice things you have said. But don't be shy if you see any foobars! Onwards we go with the dashboard assembly which also forms the top of the firewall in the engine bay and on the Gp5 car is again different to the earlier IMSA car which the kit represents, see the photo in the section above for how the kit sort of looks and this is what the Gp5 car looks like;  Photo courtesy of Sabrejet on the Britmodeller forum. This is the restored car which has some minor differences to its 1976 layout but notice the compartments on the top of the firewall and the fluid bottles etc. This is also undoubtedly cleaner and tidier than the race car in period! So out came the plastic card and another dive into the spares box - 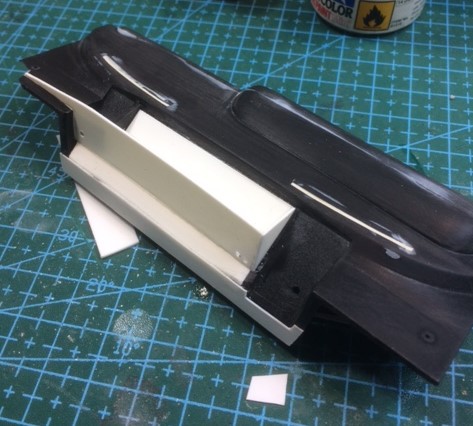 I filled the ventilation slots on the dash as the restored car doesn't have them - then recently found a period picture that shows them! They're not coming back.... So some paint - 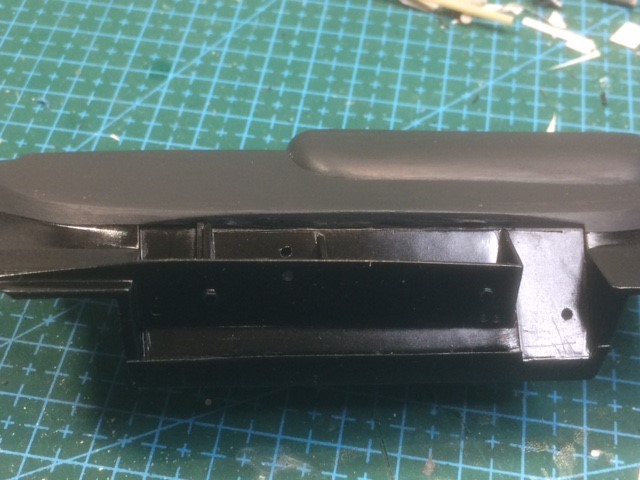 Then the fluid bottles were added -  On the other side this is what we're looking to try and copy (this is an IMSA spec car but the dash's are very much the same) - 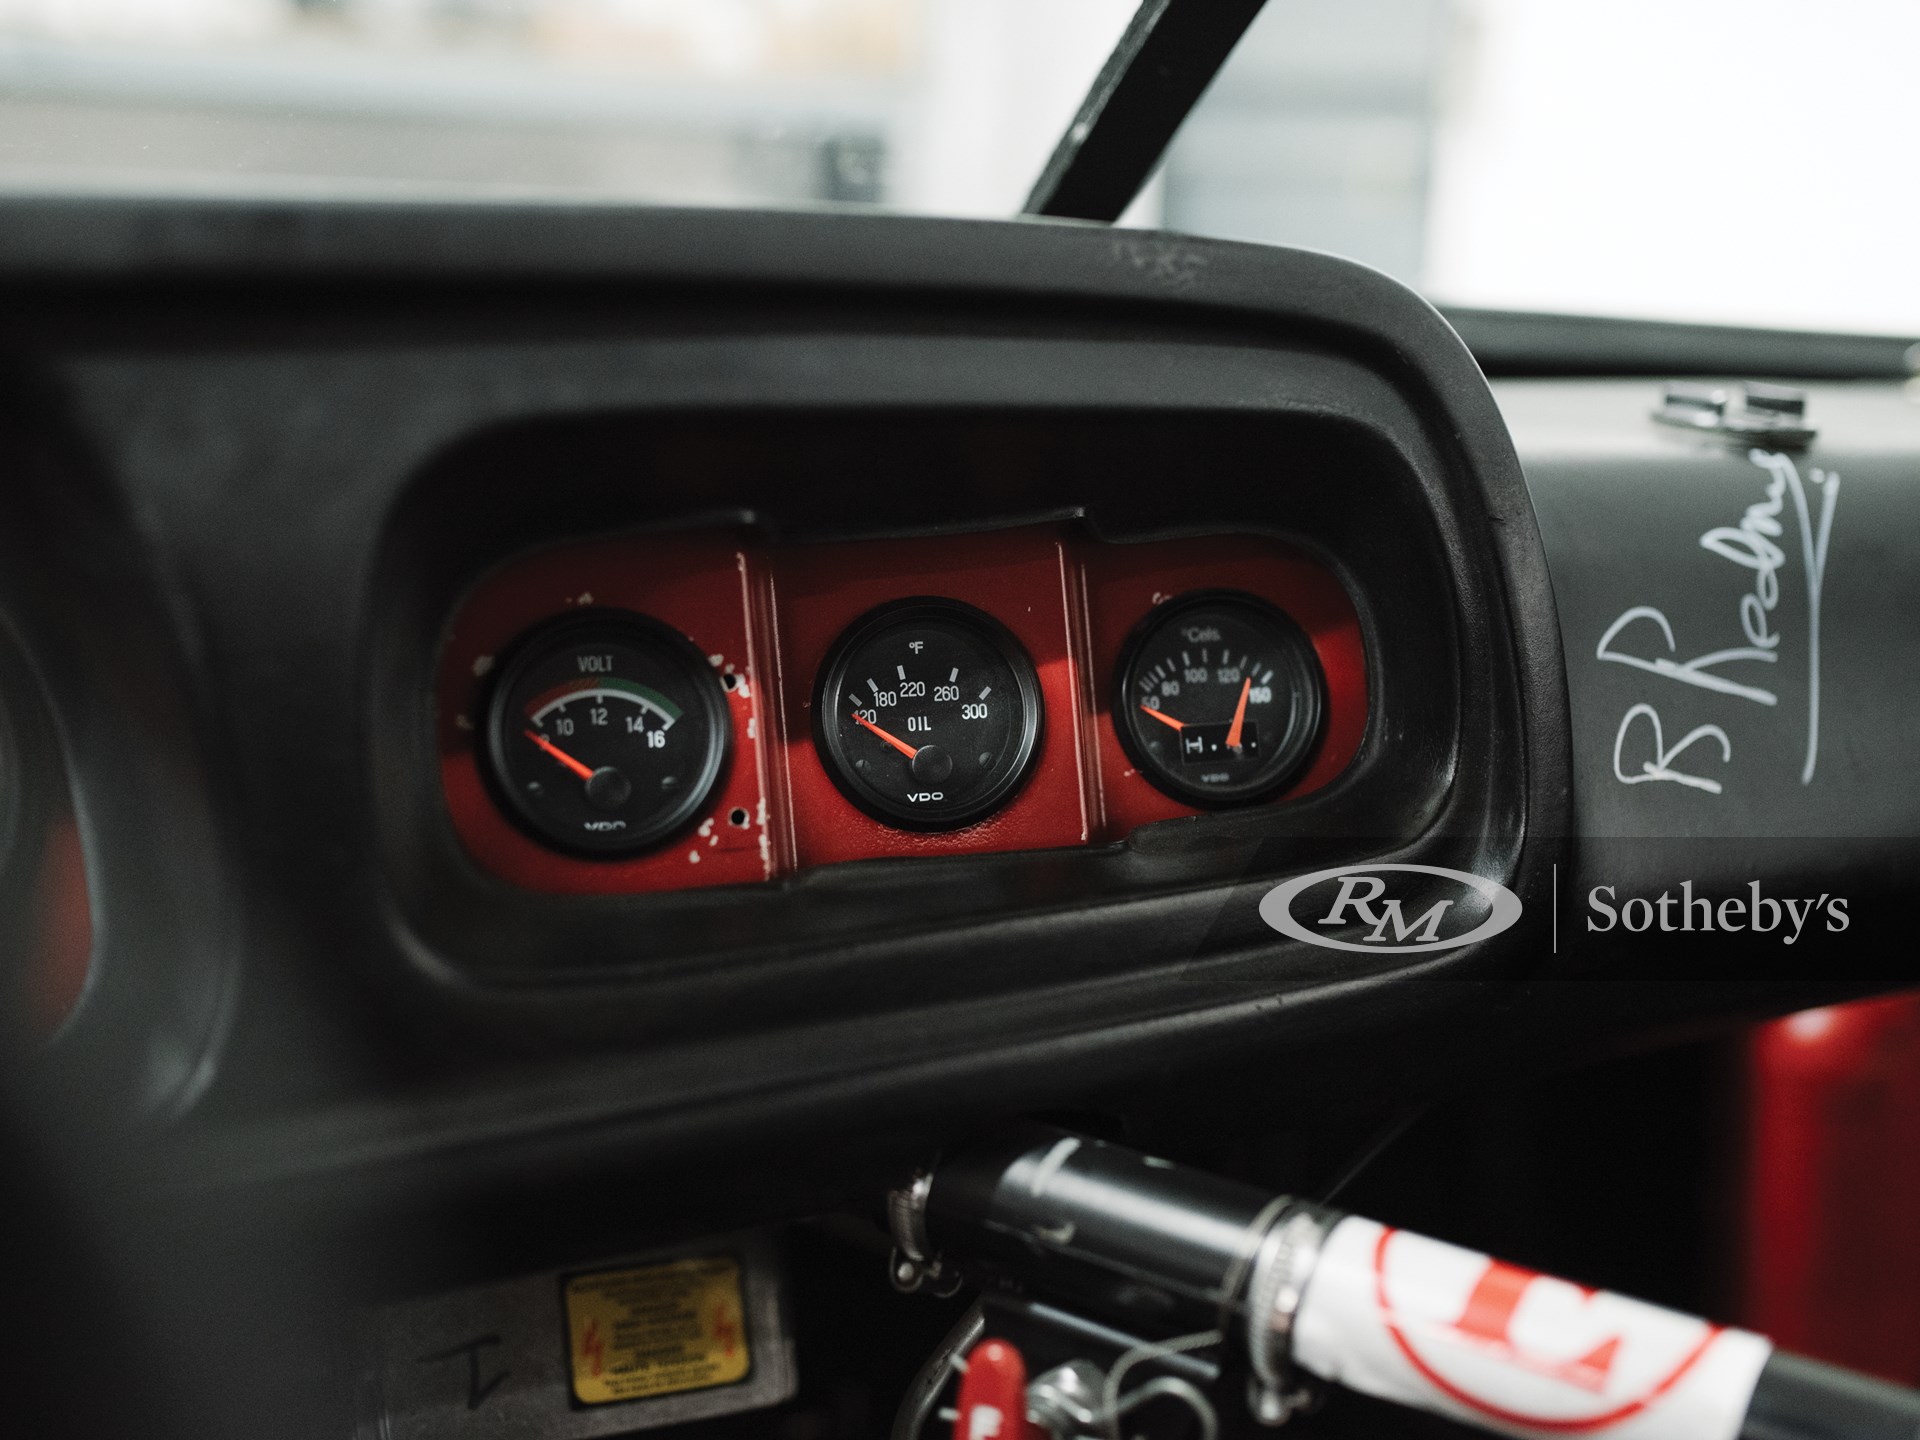 So instrument decals were added to the dials then glazed with a clear artists medium - 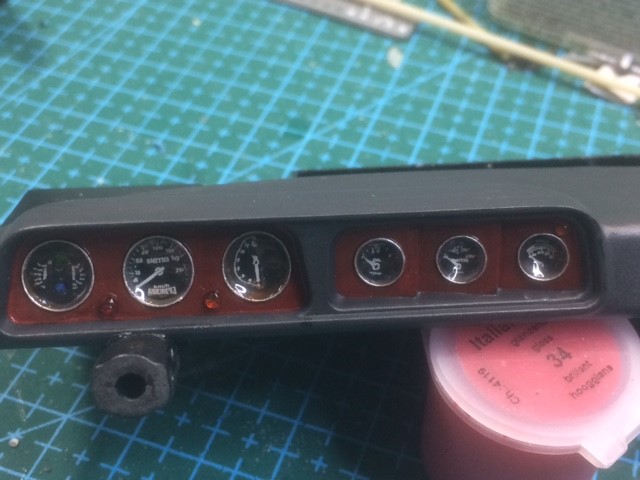 Attention getters are Decalcas clear light domes tinted with Tamiya and Mr Paint clear tints. The red dash finish is very 1970's don't you think? The whole thing was then added to the floor pan - 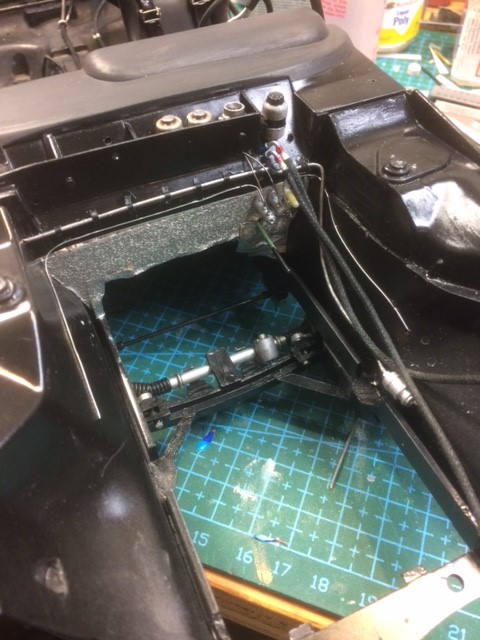 This picture also shows the added fuel pipe along the firewall above the heat shield made from the top of an easy spread butter, the oil lines that will feed the engine, brake cylinders (ex Tamiya kit) from the spares box and a fuel pressure valve on the inner wing. I've got to make up a steering coupling from the rack to the firewall before the engine goes in. I'll show the dash side in the next update which will show the cabin and roll cage. See you next time. Dave |
|
|
|
Post by Joel_W on Jan 13, 2021 14:36:57 GMT -8
Dave,
The dash looks outstanding as does the other side of it with the shelf and the liquid bottles. And the engine compartment is really starting to look like the real deal. If it wasn't for the modeling mat, I'd would of had a tough time figuring it out if it was another real car pic or your build.
Joel
|
|
gorf
Full Time Ride

Posts: 136
|
Post by gorf on Jan 15, 2021 7:49:06 GMT -8
|
|
darylh
Full Time Ride
Posts: 126
|
Post by darylh on Jan 15, 2021 10:14:40 GMT -8
Looks like you'll need to find a 1/12 scale Brian Redman autograph to complete your excellent dash work.
|
|


