|
|
Post by Joel_W on Feb 20, 2021 11:51:18 GMT -8
Ismael,
Thanks for the info. I'm going to try their 500 series.
joel
|
|
|
|
Post by tatocorvette on Feb 20, 2021 12:27:55 GMT -8
One more thing, I do thin it with their reducer. Anywhere from 80-20 clear to reducer % to almost 50-50.
Thanks,
Ismael
|
|
|
|
Post by Joel_W on Feb 21, 2021 7:07:42 GMT -8
Ismael,
I'm kind of surprised that you thin out their already thinned out Gloss that much, but I'm going to try my final coats further thinned about 25% as I do now and see if that really self levels it.\
Joel
|
|
|
|
Post by Joel_W on Mar 6, 2021 7:23:08 GMT -8
Since I've taken the two part body shell as far as I want to for now. All the rest of the bits & pcs including the glass and lights will have to wait till I'm just about at the end of the build. So my attention now has turned to the engine/transaxle/rear suspension sub assemblies. Tamiya has done an excellent job of creating in scale the Porsche flat 6 twin turbo charged engine as well as the full suspension. Even the complex mounting of the assembly to the rear driver's compartment bulkhead seems to be done at a level that even I should be able to get it basically right (but just don't bet on it). For all the various Metallic colors I used various shades of Alcad2 over Tamiya Gloss Black. What needed regular gray primer is just my mix of Tamiya Gray & White lacquer primers cut 50/50 with Mr. Color's Levelers Thinner 400. I lost count of the number of times I changed shades of Alcad2 during those painting sessions along with a quick back flushing of my AB. The turbo charger air intake over the top of the engine is two just two parts, and is only dry fitted, which is why it's crooked. The top part in Dark Graphic Gray was glossed with what was my go to clear gloss: Mr. Color C046 lacquer based Gloss. I keep a min of six 10ml bottles on hand during the pandemic as once an item is out of stock, it's pretty hard to find anywhere. Well, this time I had 8 unopened bottles all from Sprue Brothers, and they all came in two 6 packs. But every bottle I opened was only half full!! Seams that it's all Gloss media and no thinner the best I can make of it. I added my thinner to it, then cut it 50/50 again to air brush it, but it just wasn't the same. Not sure why, but I'm annoyed to the point that I'm switching over to Scalefinishes 500 Super Gloss pre-thinned. I really should get in touch with Sprue Brothers about this issue. At this point the engine/transaxle/suspension is about 75% complete, so I thought I'd share my progress with all of you. For this set of pictures I used my Nikon D7500, 18-70mm lens, and a 10mm extension tube so that I don't have to crop the pictures to death. Unfortunately, with this magnification, the Alcad pigments show up as a rougher surface then in real life. I just might take a few more pictures and see if there's a difference with just cropping those as I usually do. In real life the metallic surfaces look a lot smoother. Here's a few pictures of where I'm presently at. joel 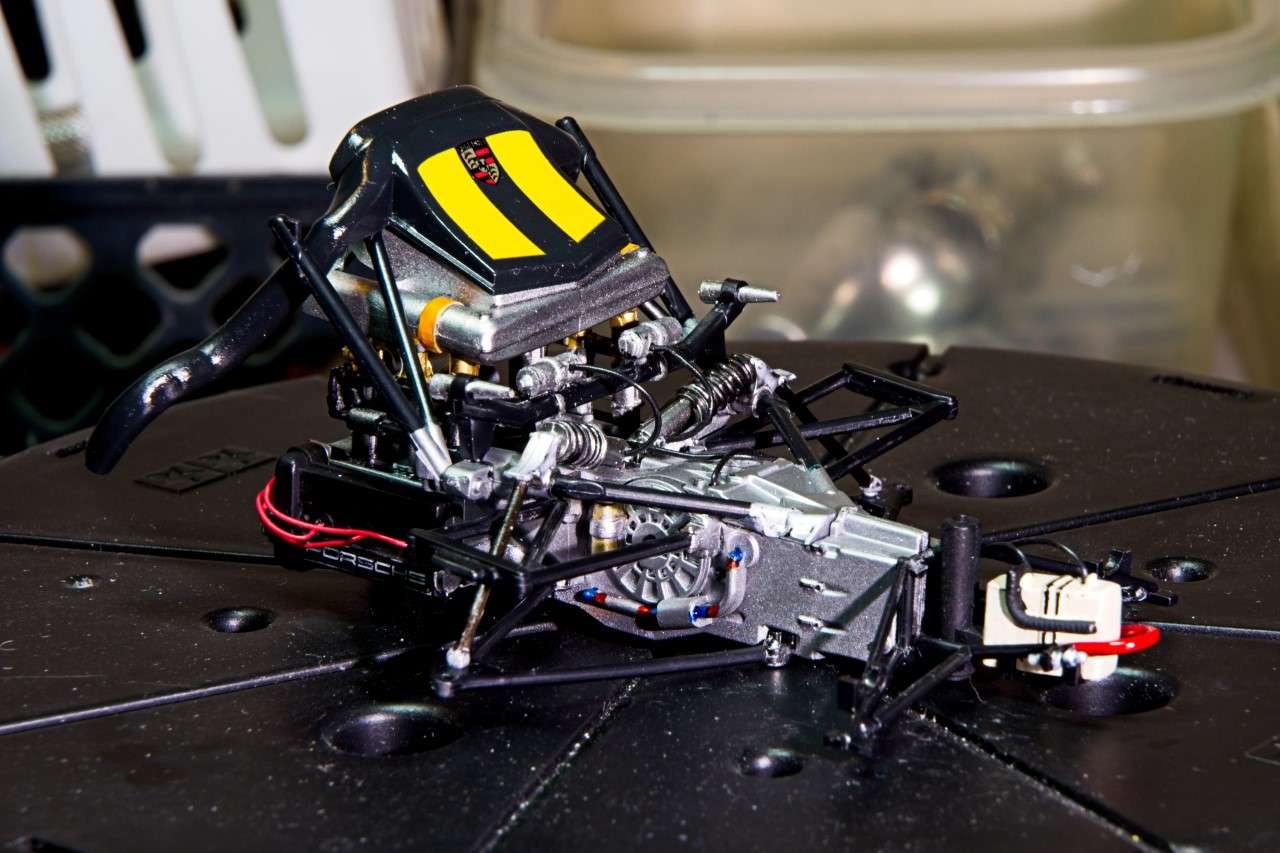 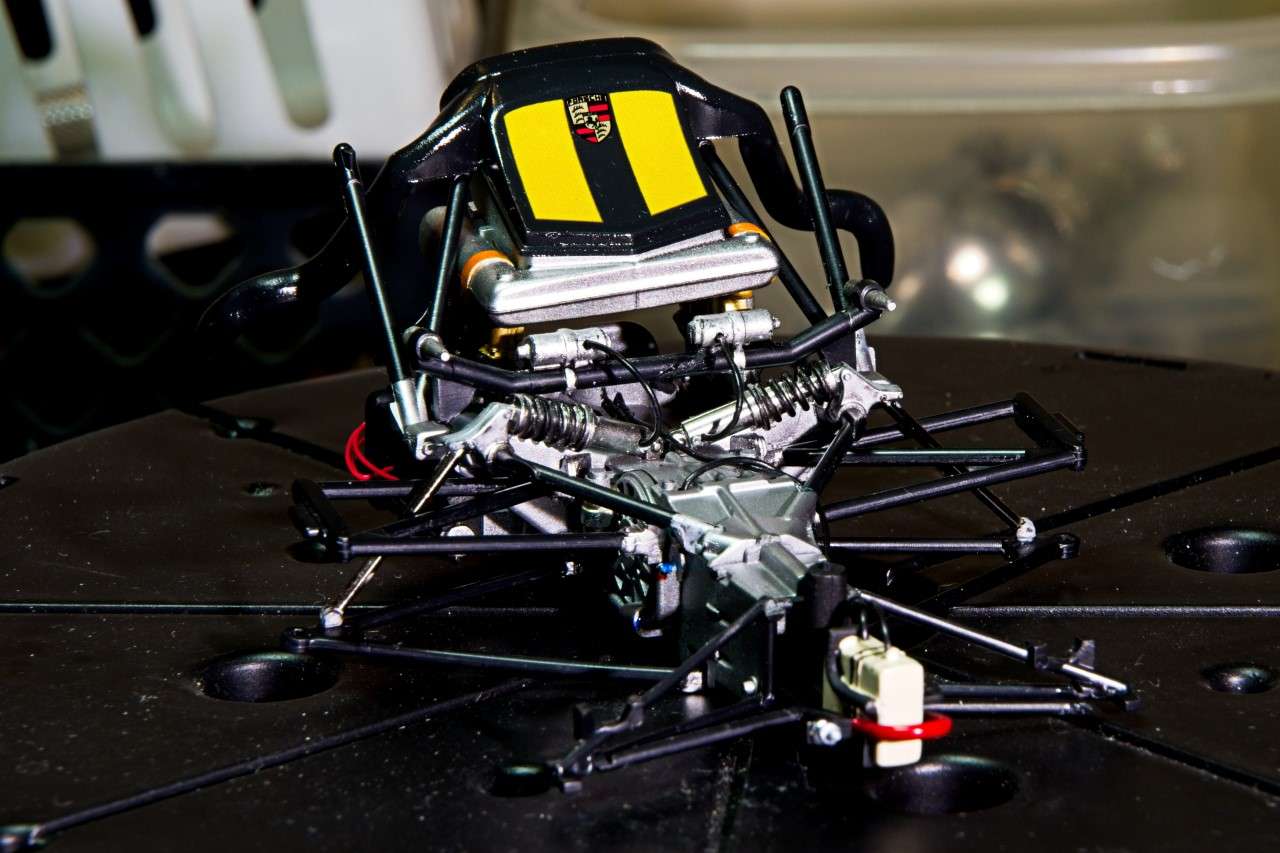  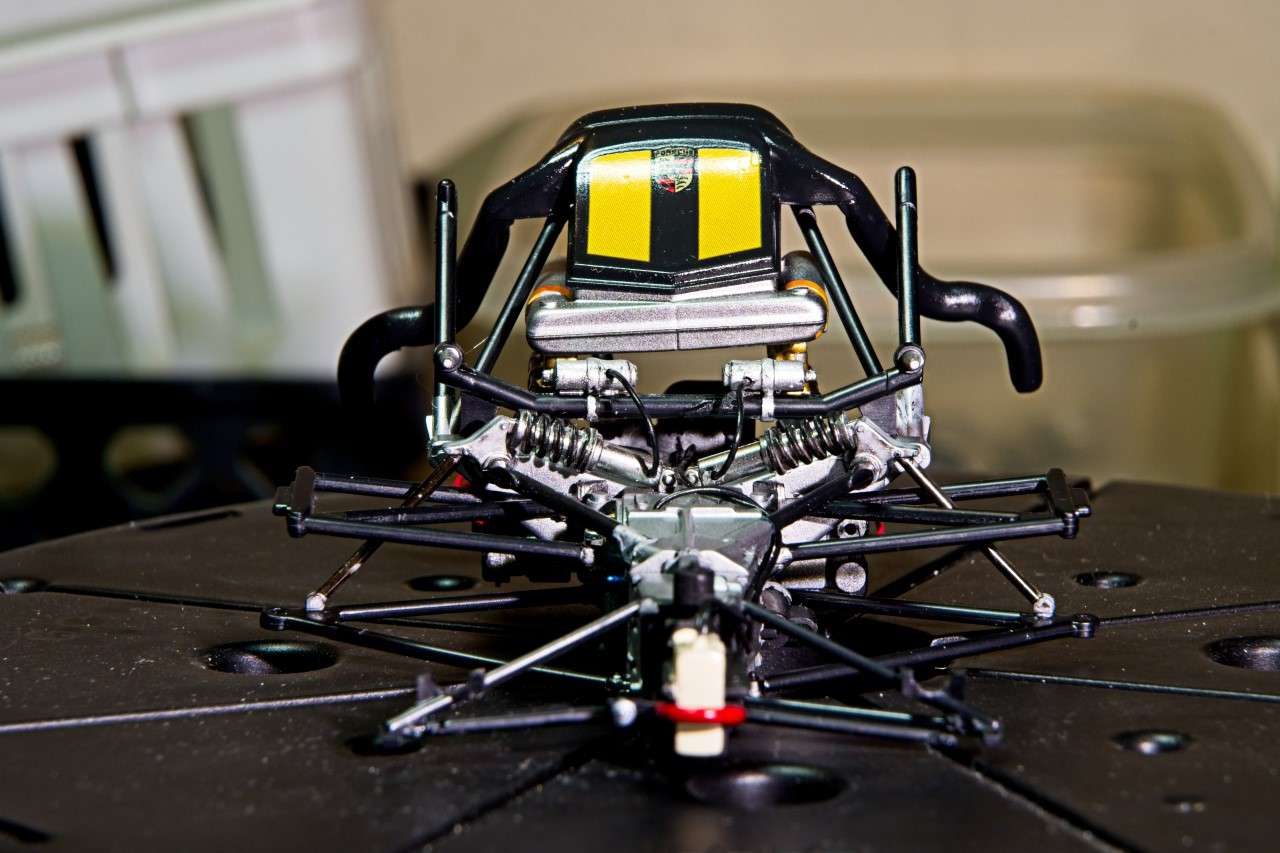 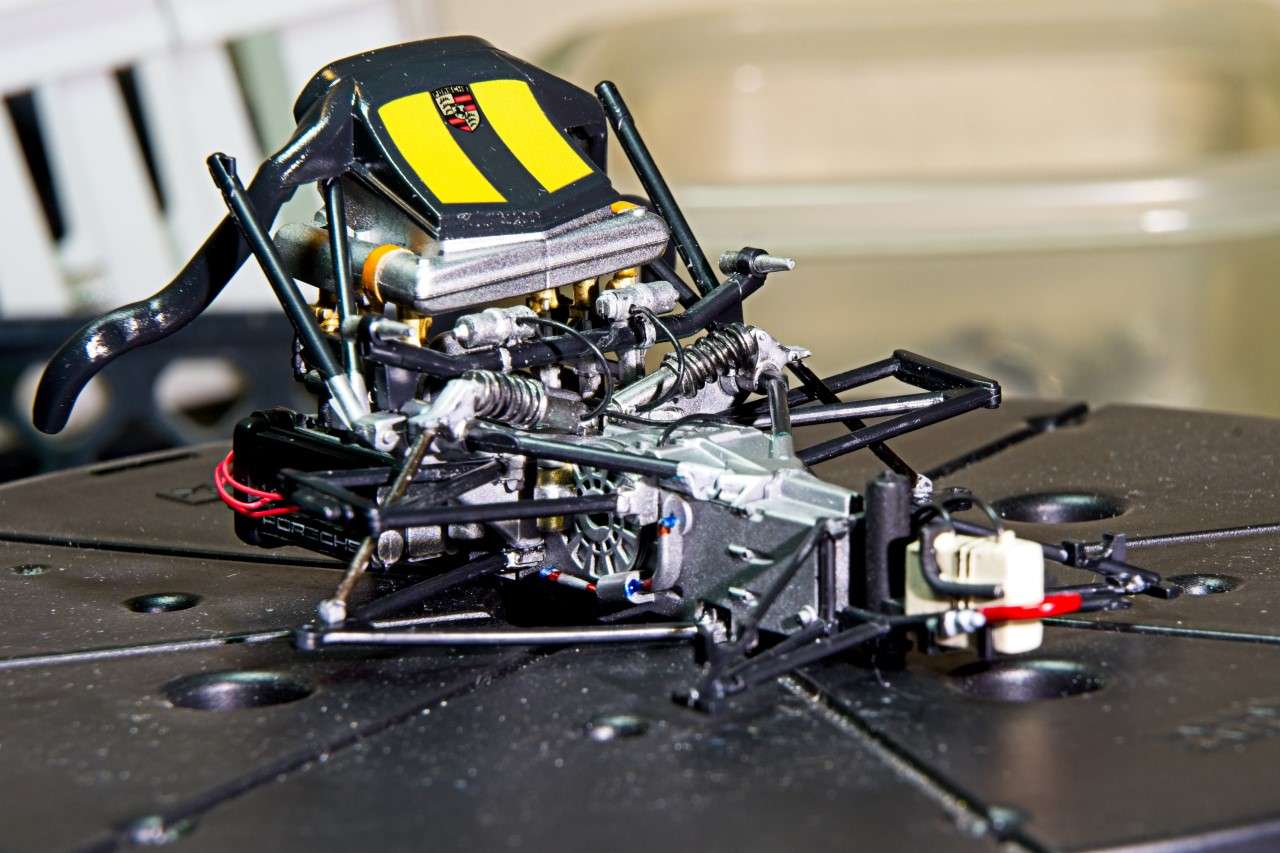 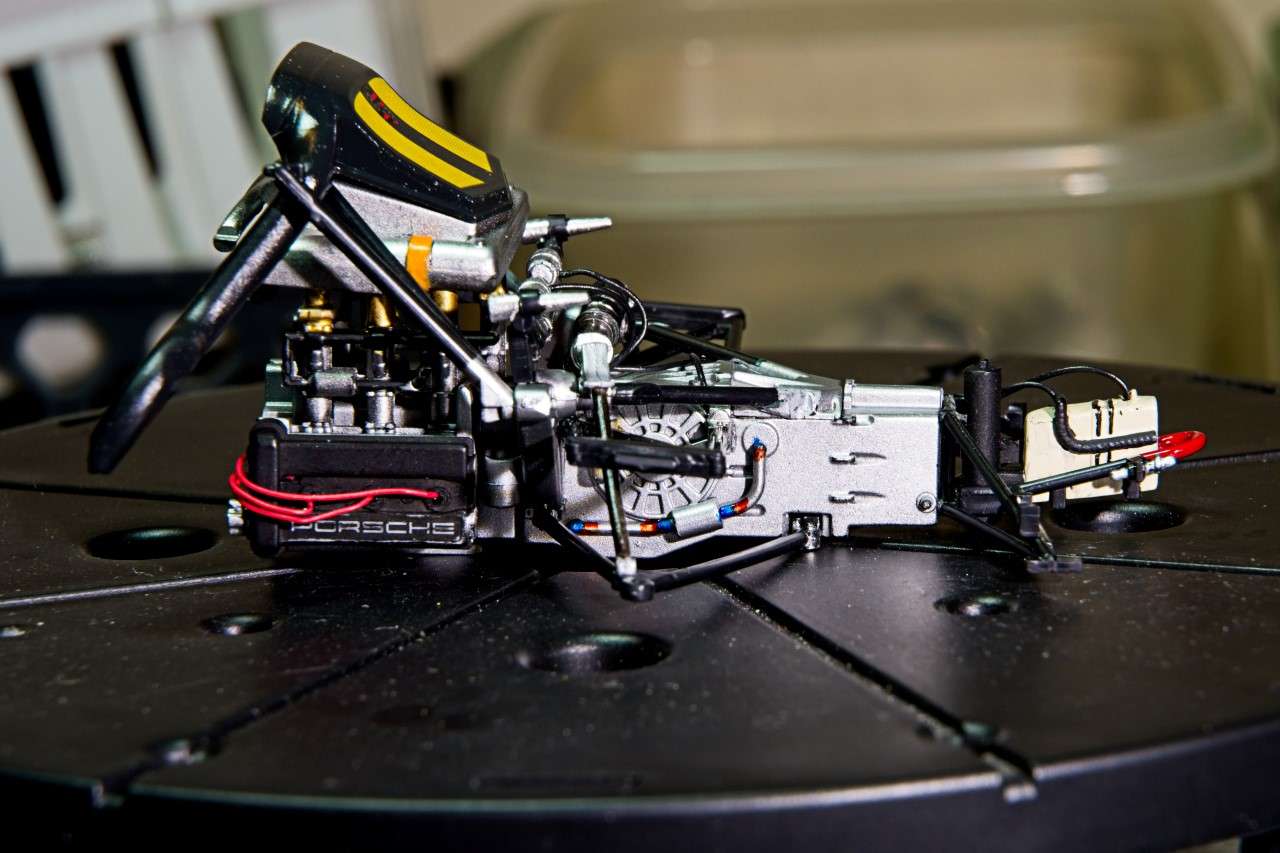  |
|
|
|
Post by tatocorvette on Mar 6, 2021 11:26:15 GMT -8
Joel,
That is looking great and super complex!
As for cropping, you have 20MP to play with. Crop the heck out of it! Anyways, the resolution for web display is usually 1000 pixels or less. All my pics for this forum are done with a 6MP camera, and still cropped a bit. Extension tubes will also decrease your depth of field. We can discuss further in more details if you want.
Thanks,
Ismael
|
|
|
|
Post by Joel_W on Mar 7, 2021 6:11:22 GMT -8
Ismael,
DOP wasn't much of a concern as I used f20 @ 1/6 sec on my trusty tripod. My concern was that in using a 10mm extension tube, the details especially the metalizer paint pigments just jump right out at you. Not using any extension tube (I sold my Nikkor macro lens 2 years ago) would keep me further back from the engine where pigment detail wouldn't be that much of an issue after cropping. Well, that's my theory which I need to test out.
joel
|
|
|
|
Post by Joel_W on Mar 18, 2021 8:31:14 GMT -8
Been hard at work trying to finish the Engine/Transaxle/Rear Suspension so that I can move on to the chassis, bulkheads, and front suspension. At this point the assembly is 95% complete. Just when I think it’s done, I see way to many painting issues in the enlarged close up pics, but they really don’t show up when I view it on my workbench. Will still try to correct what I can, and then just live with those other macro issues. Since the last update i’ve painted, weathered, and installed the twin Turbo chargers including the intake ducting from the big air intake unit. All the various secondary rods to mount the engine to the rear bulk head have been installed, as well as some secondary plumbing. I finished up the rear suspension, added the disc brake & calibur units, and just the main air brake ducting. the Tamiya designed ducting just plain doesn’t fit, and just doesn’t match any of the pictures I have. Honestly, in just about every picture those air duct lines are different and even in a few don’t even exist. So I decided to just add the main duct to the brake and leave off the rest of the ducting. There’s so much going on down in those areas that you really wouldn’t see much of them if I did actually manage to install them. I also decided to deviate from my usual painting of the brake calipers of jus a solid color and a wash that never looked as I wanted it to. So this time I hand painted the gloss Red so that the black primer showed through to represent wear and tear. Better, but still not what I really want. Here’s a few pictures of the the engine/transaxle/rear suspension. joel 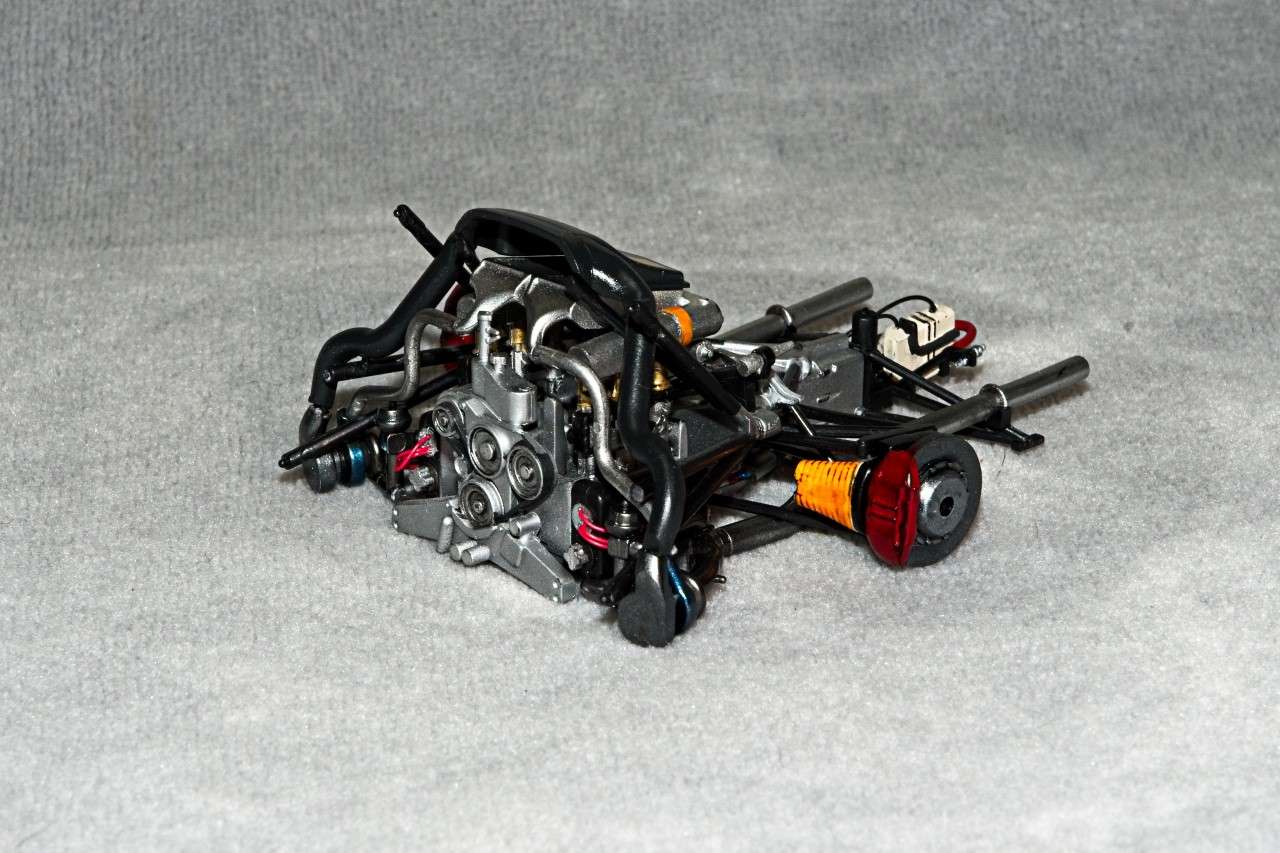    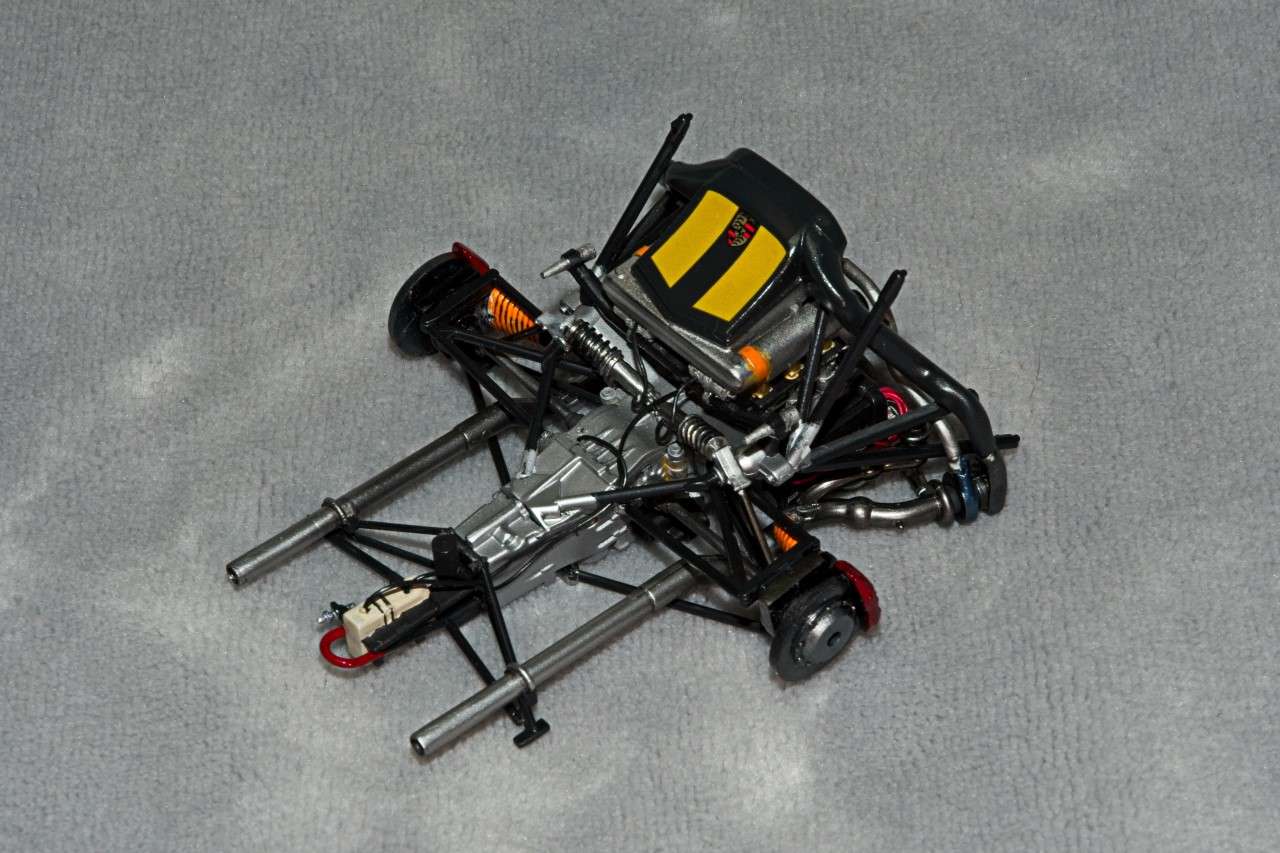 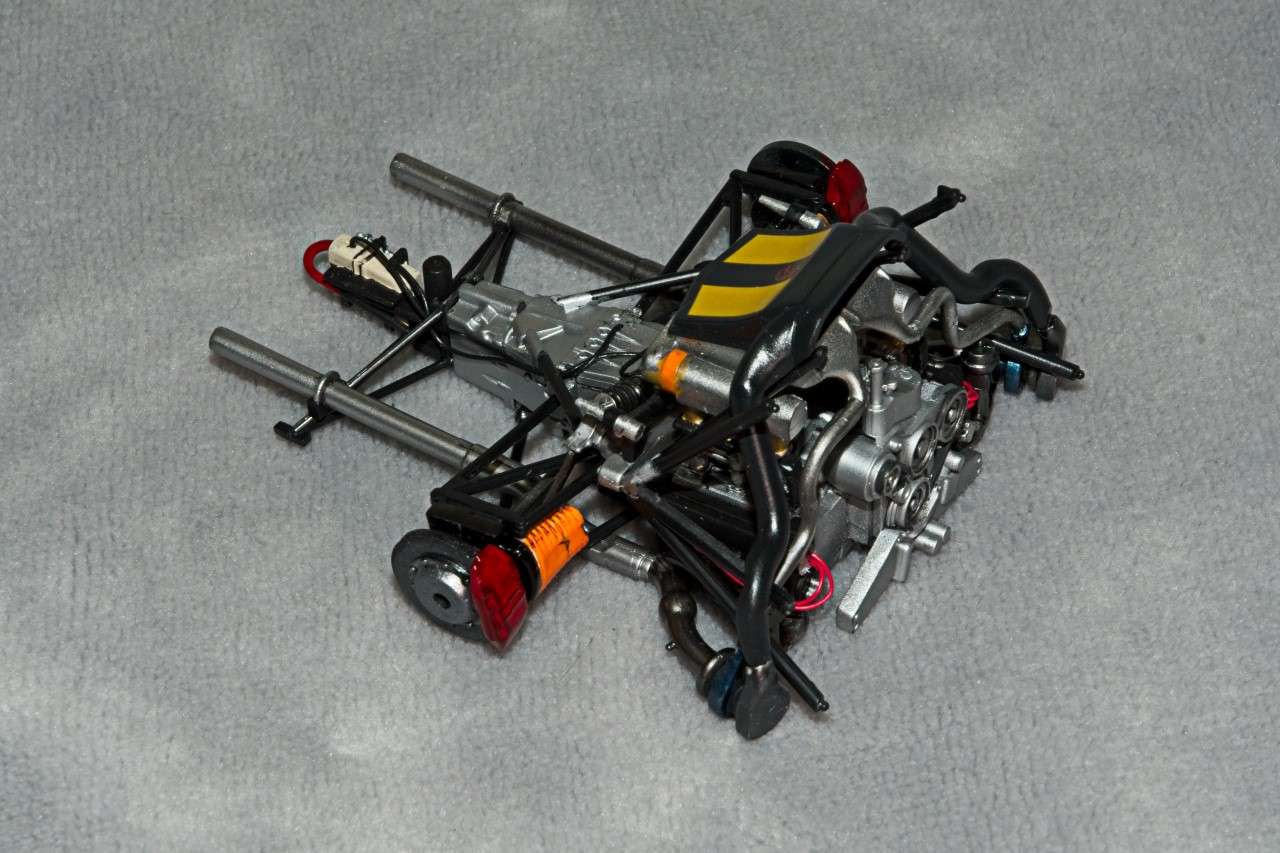 |
|
|
|
Post by afx on Mar 18, 2021 9:35:32 GMT -8
Nice looking "lump"
|
|
|
|
Post by Joel_W on Mar 18, 2021 9:45:00 GMT -8
JC,
Thanks for stopping by and checking out my "lump". Glad that you like what you see.
BTW, just finished working with Iso on a toothpick and a pointed Qtip, 5X Optivisor and new Bi-focals to clean up the catch tank strapping. Did make some progress on that front. Also gave the Calipers two more coats of Gloss Red paint, looks way better now, and much closer to what looking for.
joel
|
|
|
|
Post by tatocorvette on Mar 18, 2021 10:33:36 GMT -8
I would display that as a model in itself!  |
|
|
|
Post by Joel_W on Mar 18, 2021 15:01:40 GMT -8
Ismael,
Never thought of that. Only you would have that thought come to mind.
joel
|
|
|
|
Post by pnance26 on Mar 19, 2021 5:00:49 GMT -8
Nothing wrong there, Joel, concerning that build! Looks great!
|
|
|
|
Post by Joel_W on Mar 19, 2021 5:20:33 GMT -8
Patrick,
Thanks so much for stopping by and checking out my build. It's always greatly appreciated.
joel
|
|
|
|
Post by pnance26 on Mar 19, 2021 7:59:16 GMT -8
Patrick, Thanks so much for stopping by and checking out my build. It's always greatly appreciated. joel I have time at work to do a lot of this stuff! And that kit is always fun! I mean the Porsche 956! |
|
|
|
Post by Joel_W on Mar 23, 2021 11:03:37 GMT -8
Just a quick update on my progress to date. I decided that I’ve added as much detail to the engine/transaxle/rear suspension as I feel is needed for my enhanced type of builds. So now comes the “fun” part of getting all those engine attachment rods to correctly align with the rear cockpit bulkhead. And just to make it a little more interesting, the boys from Stuttgart decided that the bulkhead needs to be angled rearwards to help support the driver’s seat(?). Well, that’s the only theory I can come up with. Tamiya decided to mold the chassis tubing as part of the back of the bulkhead. Of course for some unknown reason the factory cars had the back of the bulkhead painted White, while the front was kind of a semi gloss Black as the drivers cockpit was literally a two tone affair. The real challenge is that the tubing is a semi gloss black. The only way I could even contemplate painting the tubing was to 1st prime the bulkhead my own very light gray mixture of Tamiya primers. Then I air brushed on Mr. Color Flat White. Once dry I needed to mask the tubing from the bulkhead so that I could air brush the tubing Mr. Color Semi Gloss Black. Well, this turned out to me another masking job from Hell. Took more then a solid hour to get it to this:  Looks darn good, but I did get paint leakage in several spots. I was going to try and touch up as needed, but a good 75% of the back of the bulkhead can’t be seen, and the rest is in shadows. Painting took all of 10 min, and removing the tape took less then 5 min. Sure wish that applying it fit into that time range. A few hours later I carefully aligned the bulkhead to the upper mounting rods and to my surprise all the others auto aligned. Never thought that would happen. I let the glue set overnight, then dry fitted the cockpit floor channel structure, then the engine assembly. Took a few wiggles but it fits just fine. Wonders will never cease to amaze me.  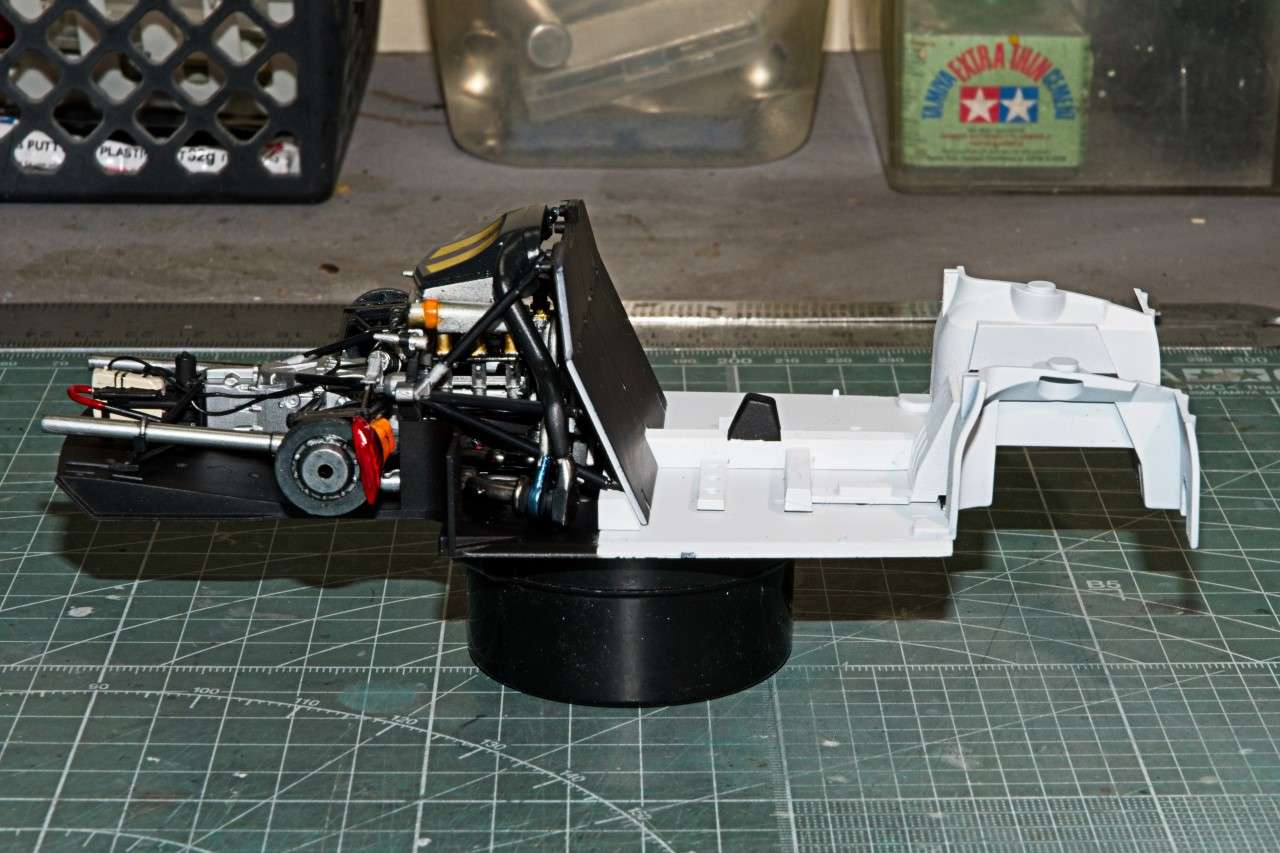 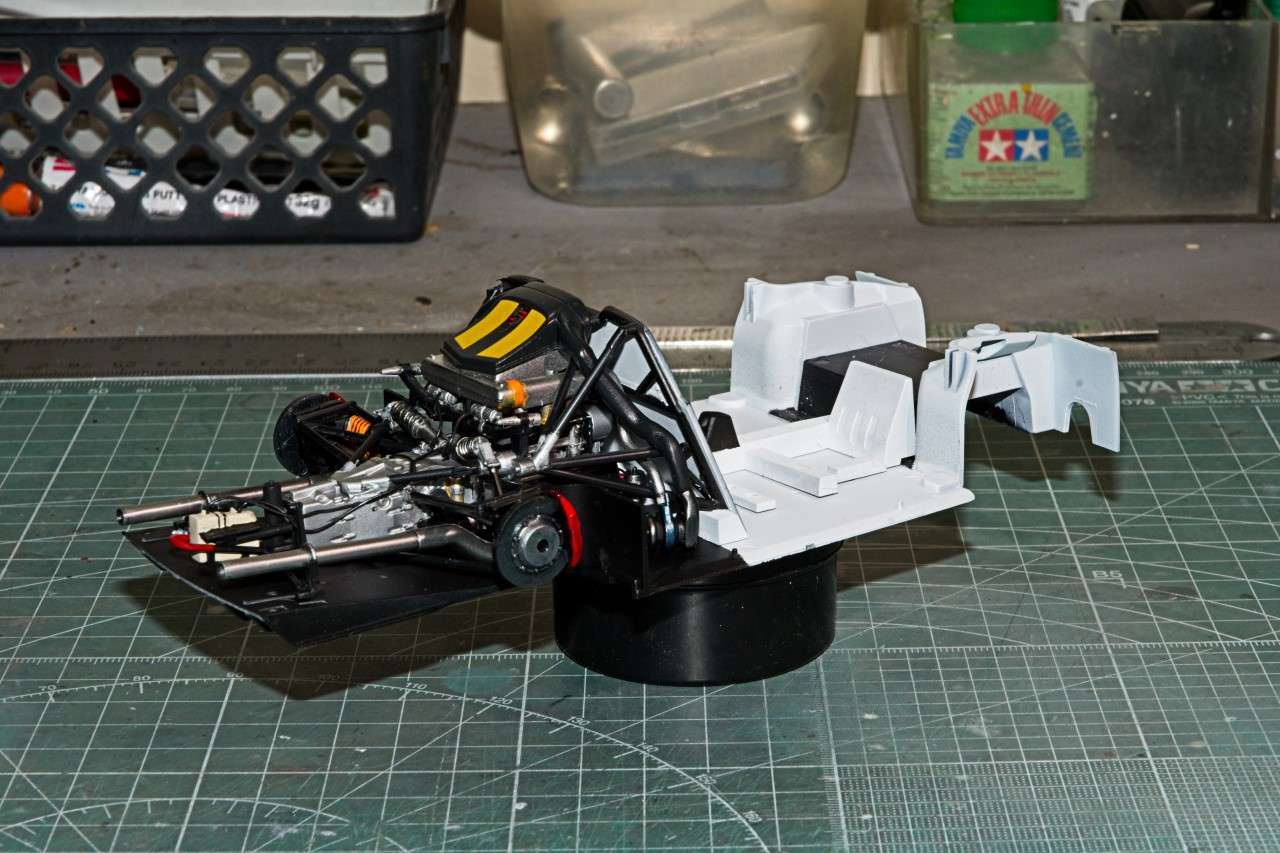 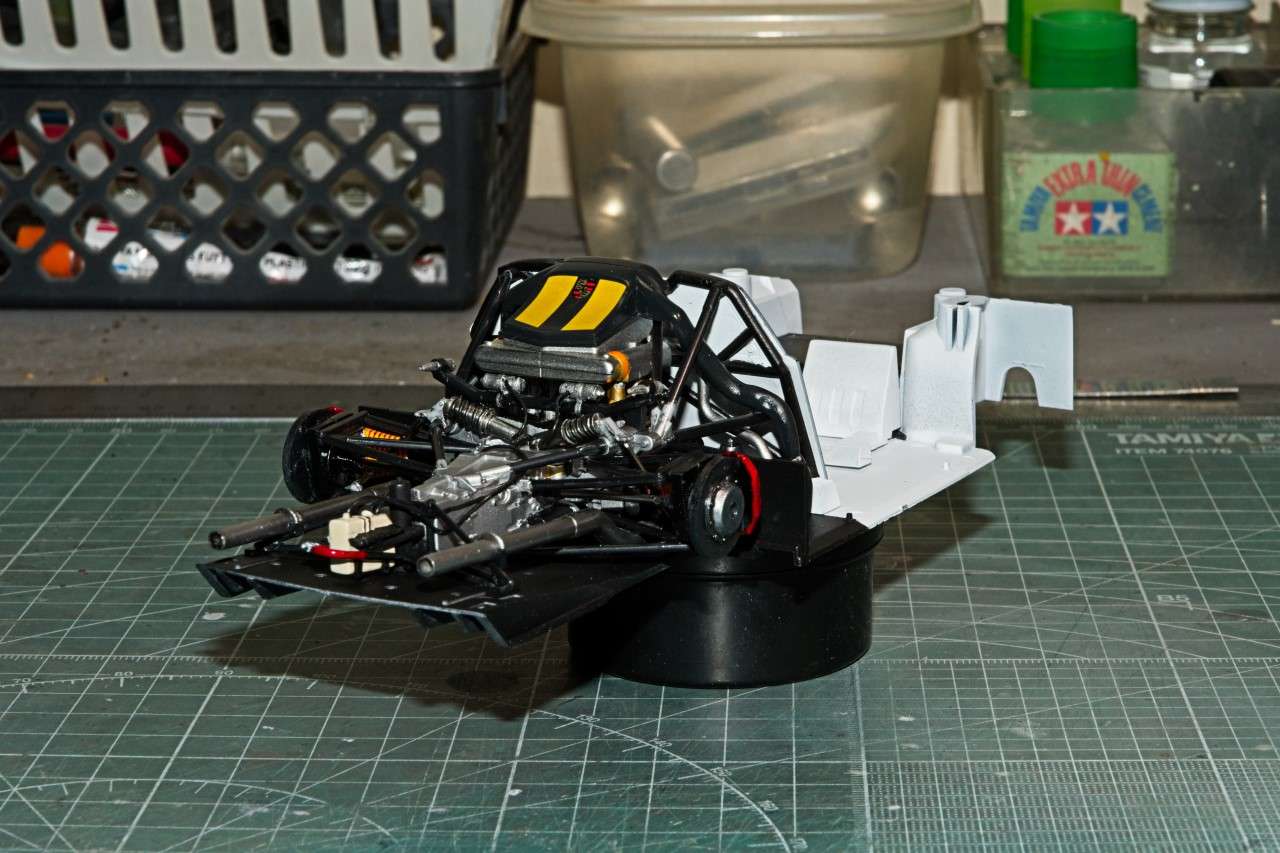 joel |
|