|
|
Post by 2whl on Apr 13, 2023 6:19:08 GMT -8
|
|
|
|
Post by chrissmith on Apr 13, 2023 6:38:09 GMT -8
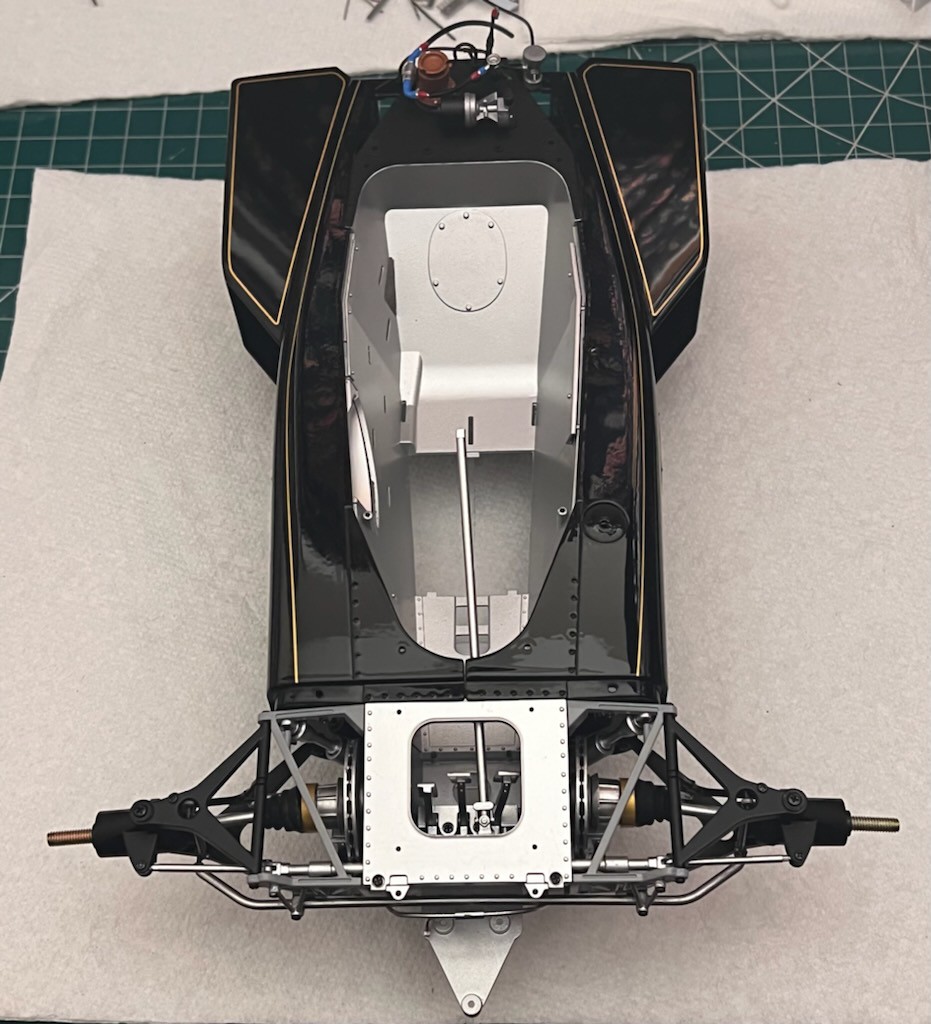
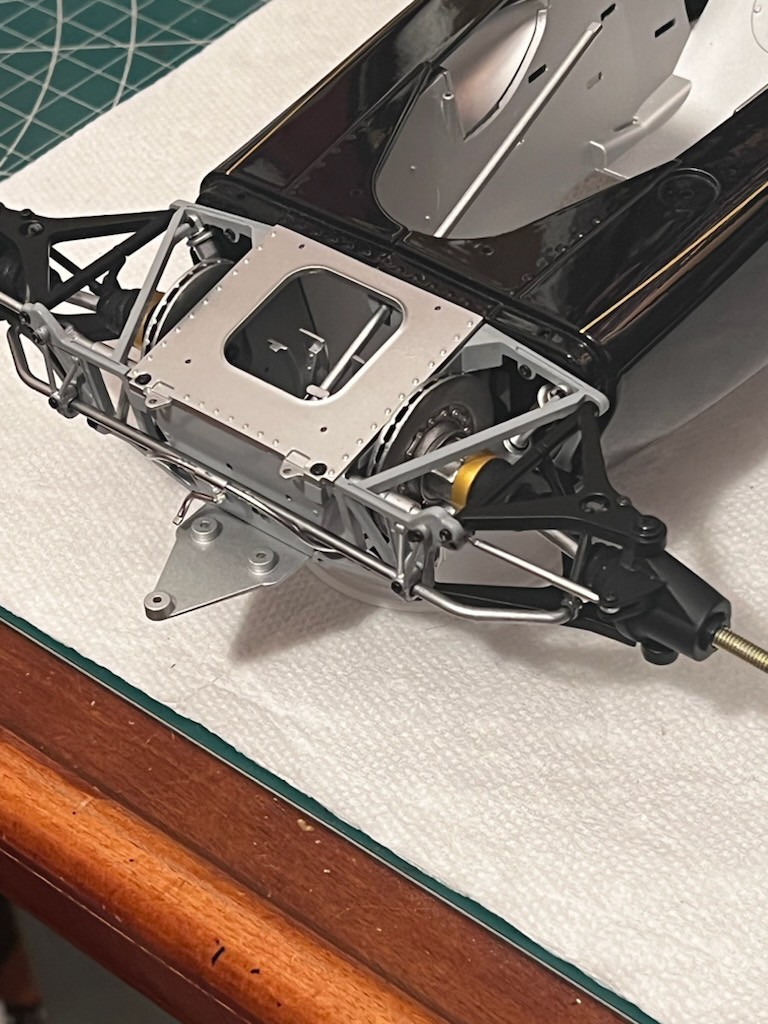
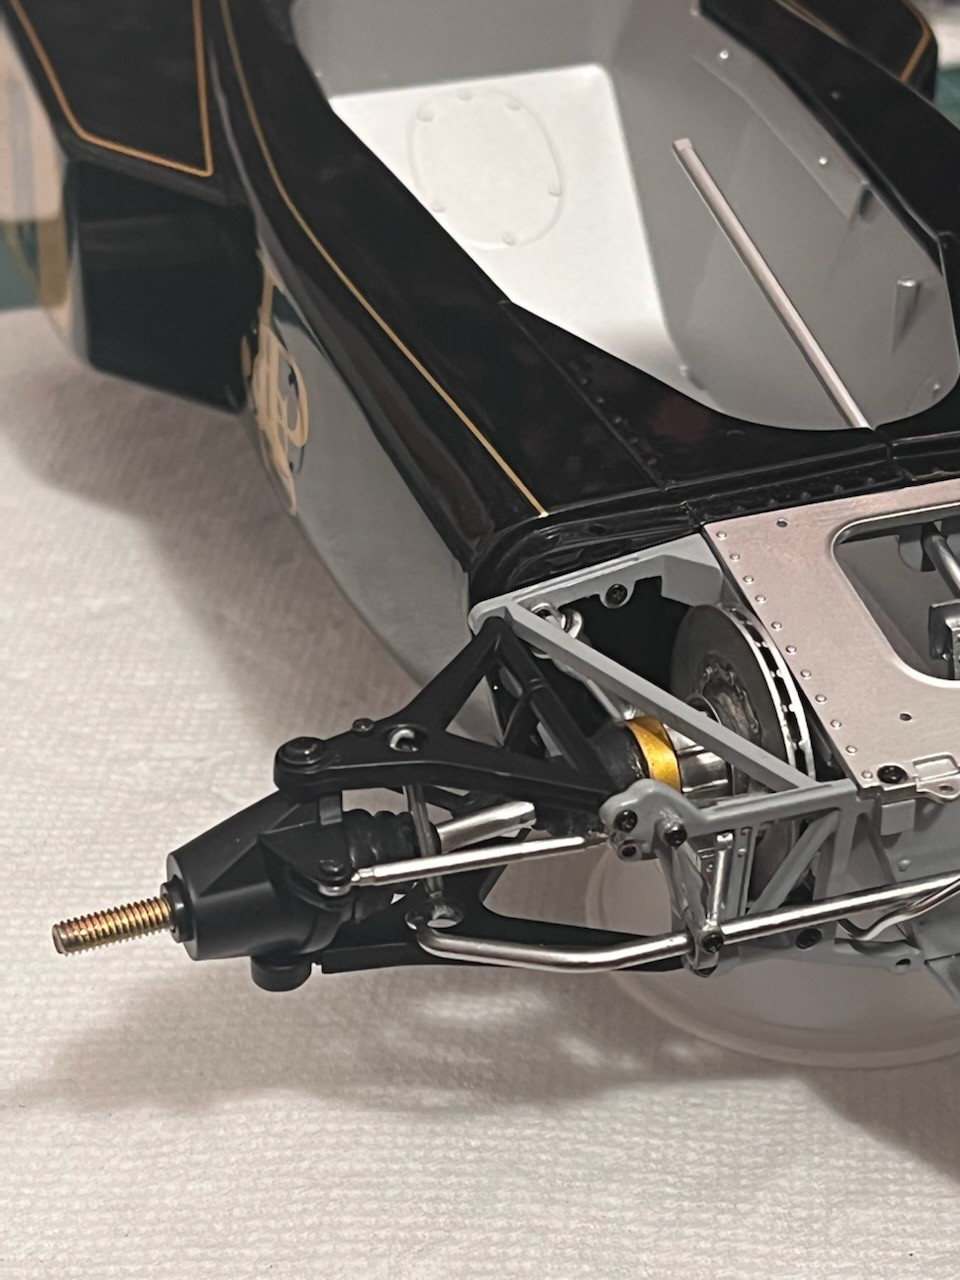
Well, as you can see I have the front end wrapped up. There is a lot of issues putting this together, the rack and pinion was a struggle to install, the directions say to do it after you install the steering shaft and after the brake rotors drop into place.
The plastic brace’s for the sway bar are brittle and the lower screws are too short, I used them as a pin and glued them into place also the sway bar end links where also fussy to install.
The universal joints where also fussy, the rubber cv boots where a pain to install, they kept slipping off while trying to glue them on, then their was glue all over the boot.
I am glad I got through this, now on to the next step!
|
|
|
|
Post by pnance26 on Apr 14, 2023 5:15:23 GMT -8
Paint really looks fantastic. I can just imagine how a little extra TLC will double the shine for sure. Is all the sponsors decals or paint? Sure does look paint from the pictures. joel They are painted on Joel, it’s a nice touch. Not that I am an expert but it is most likely that the "painting" or "decals" are what is called "tampo printed" which is a process of printing that was used on almost 100% of the diecast cars being made no matter the country. Tampo is short for tampography or pad printing... en.wikipedia.org/wiki/Pad_printingAs Paul Harvey used to say... "And now, you know... (long pause) the rest of the story." |
|
|
|
Post by pnance26 on Apr 14, 2023 5:21:42 GMT -8
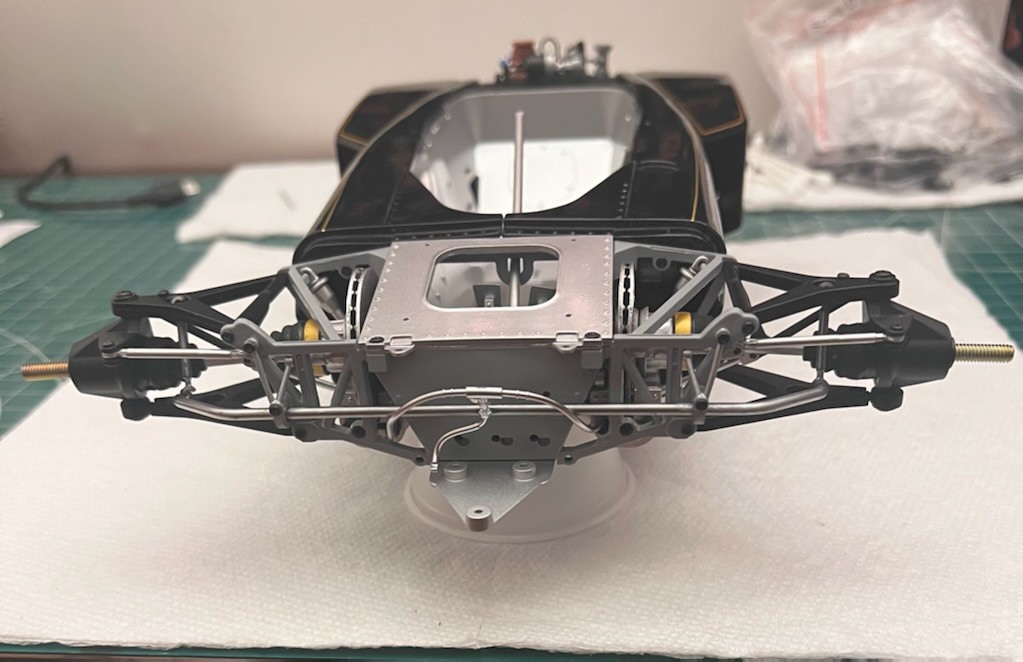
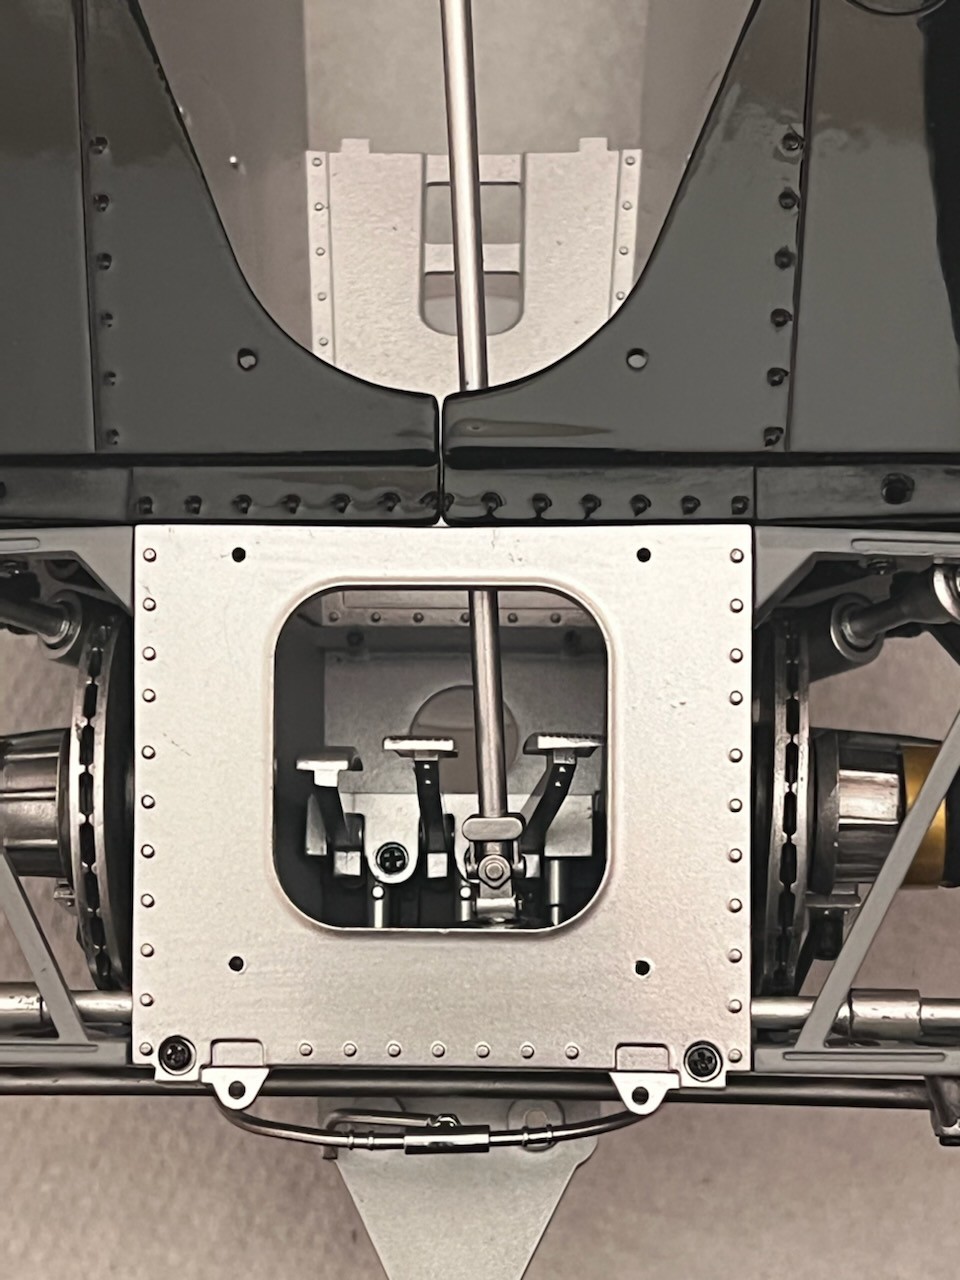
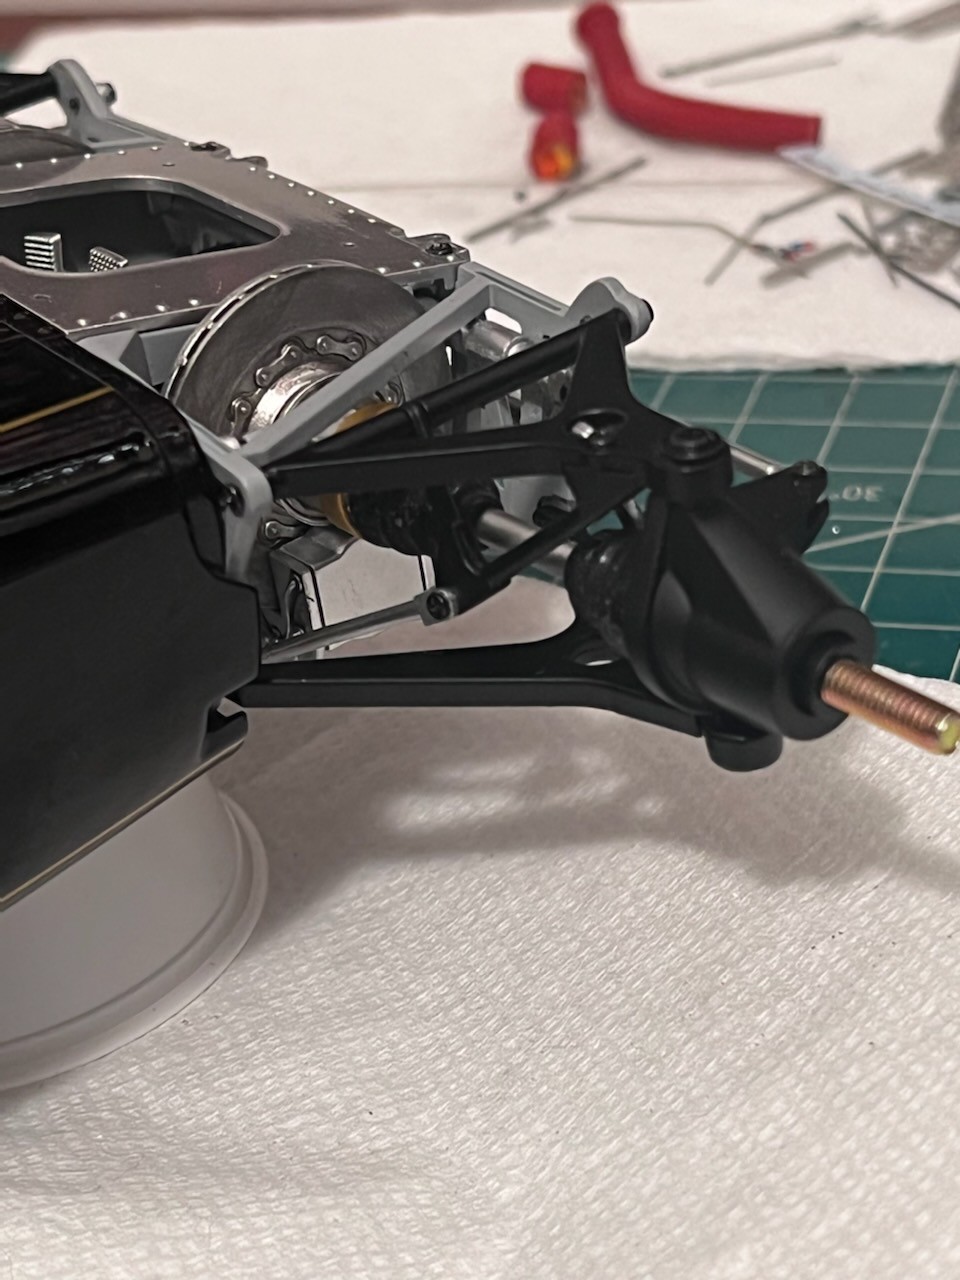
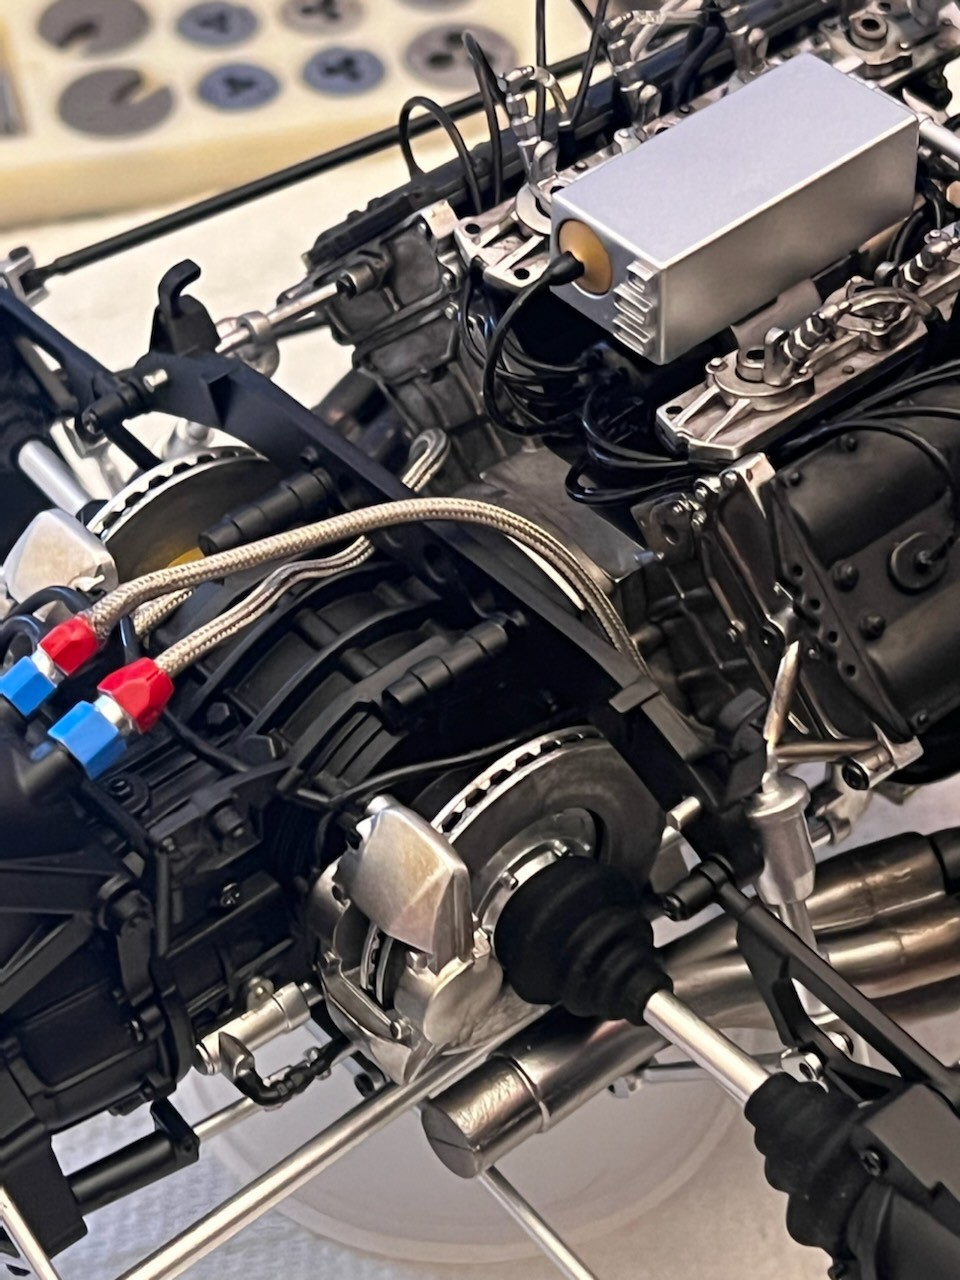
WOW! CV joints on the front end with the brake rotor inboard and not out on the wheel itself! And, Chris, is the hard line on the front end supposed to be the brake line? If so, this is the first time I have ever seen someone do brake lines correctly with hard lines. Most show them to be rubber which would not last long with hot brake fluid!
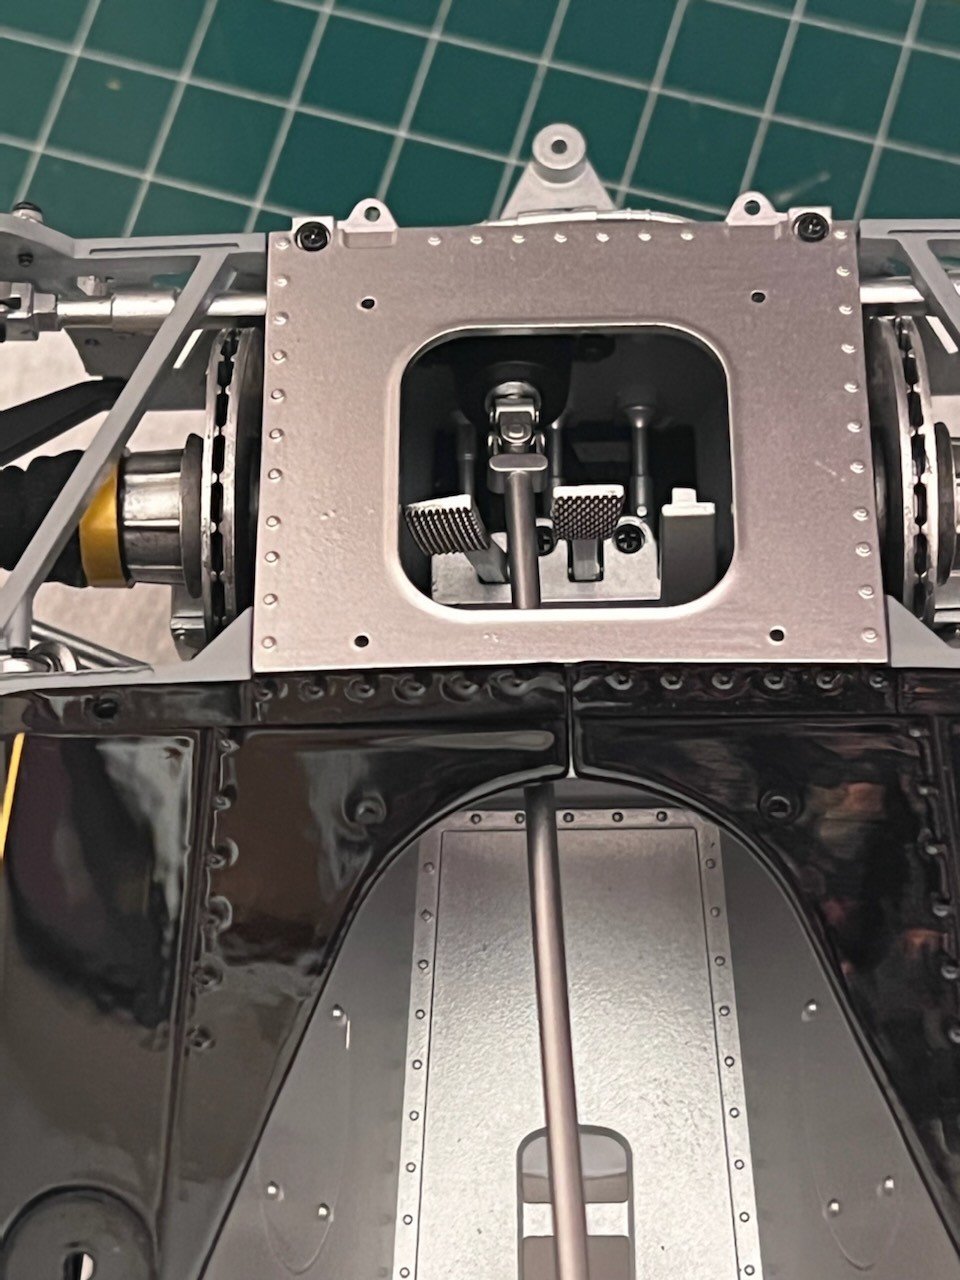
Too bad most kits neglected the connections to the foot pads in the cockpit. These are complex assemblies to work the accelerator, clutch, and brakes and are frequently ignored as "you'll never see them any how..." things. I think it would be cool if someone actually cared about one of the most important assemblies in the car!
|
|
|
|
Post by Joel_W on Apr 14, 2023 6:48:58 GMT -8
Chris,
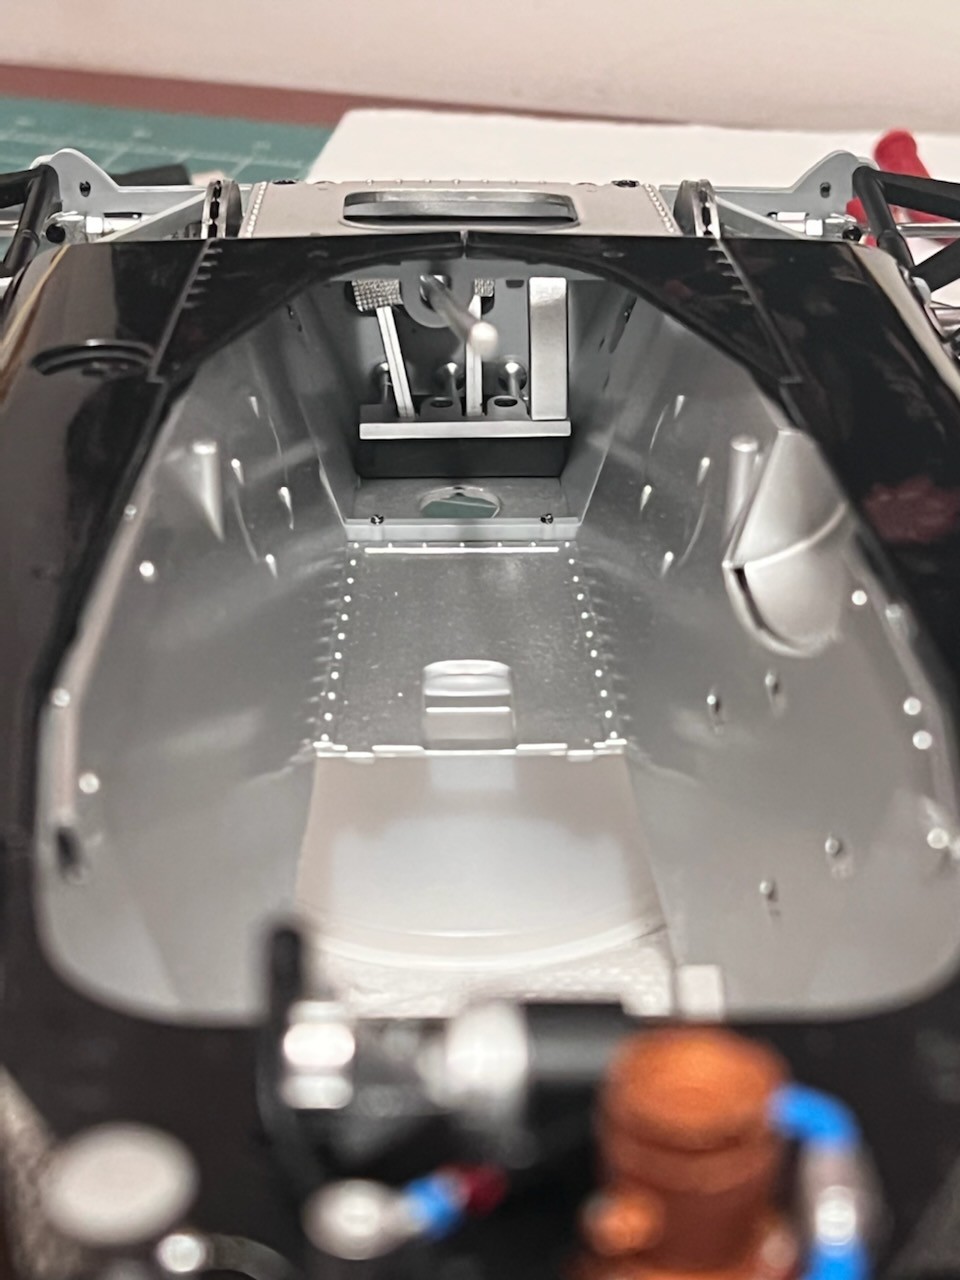
One would never guess that you had to solve all those issues from your posted pictures. You did one heck of a job for sure. Love the end result of the foot peddle/steering shaft box, as in this scale the pedal faces really show quite a lot of "in scale" texture.
As for Patrick's question about the brake lines, at some point the hard lines have to be converted to flexible hoses as the up and down motion of the suspension would surely snap the hard lines at the fittings.
joel
|
|
|
|
Post by 2whl on Apr 28, 2023 16:59:35 GMT -8
|
|
|
|
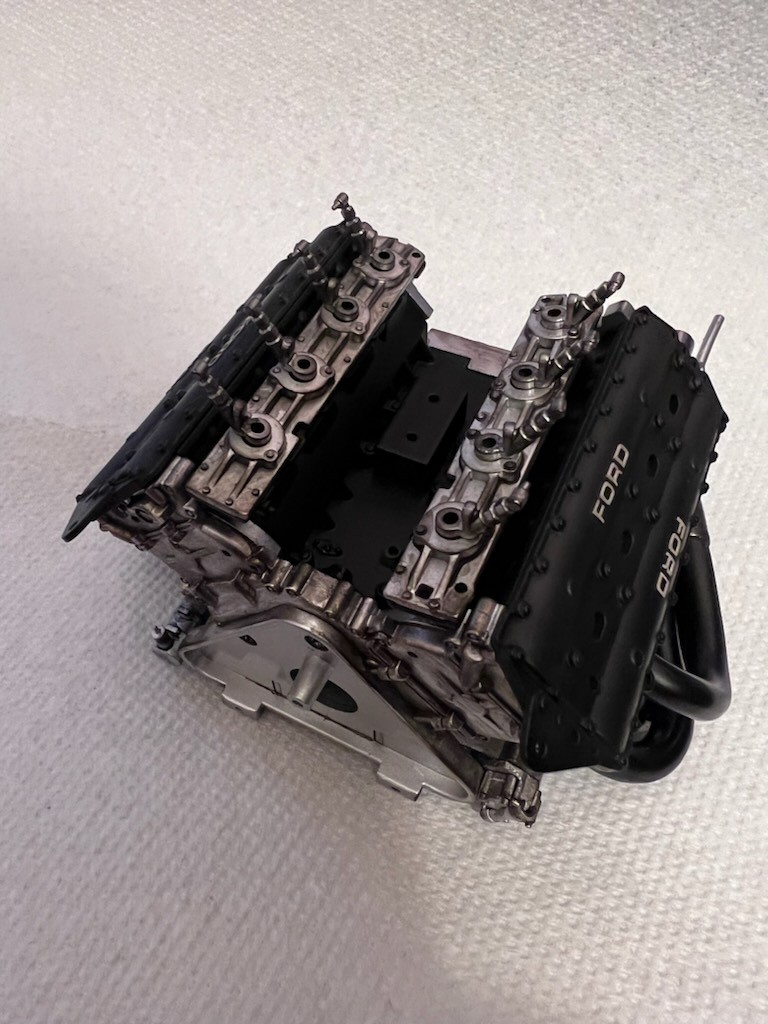
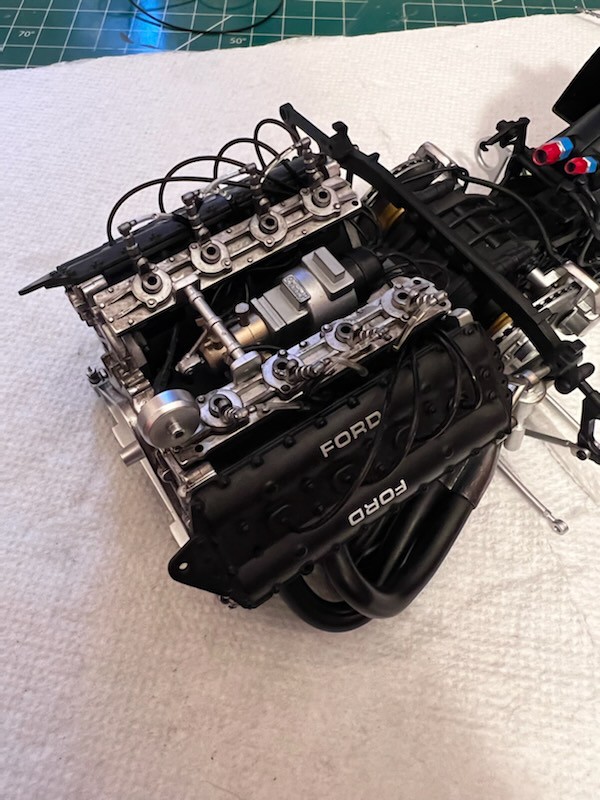
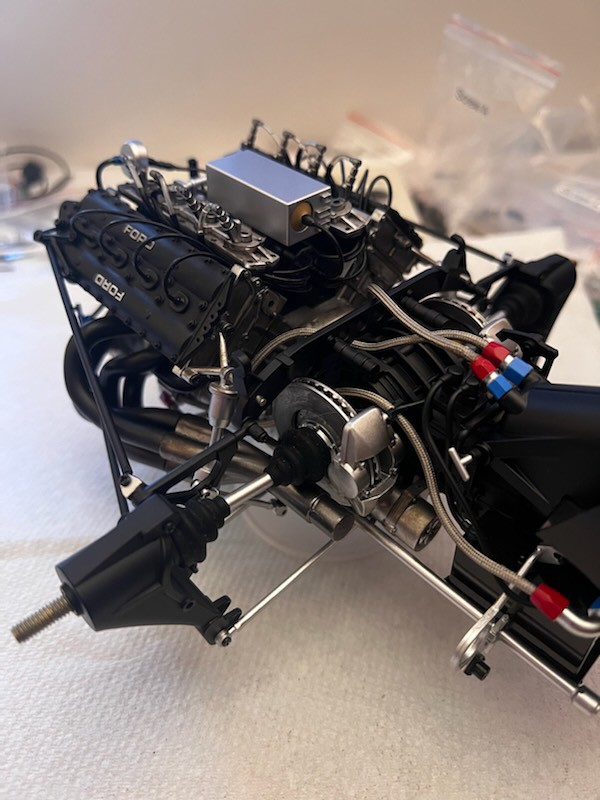
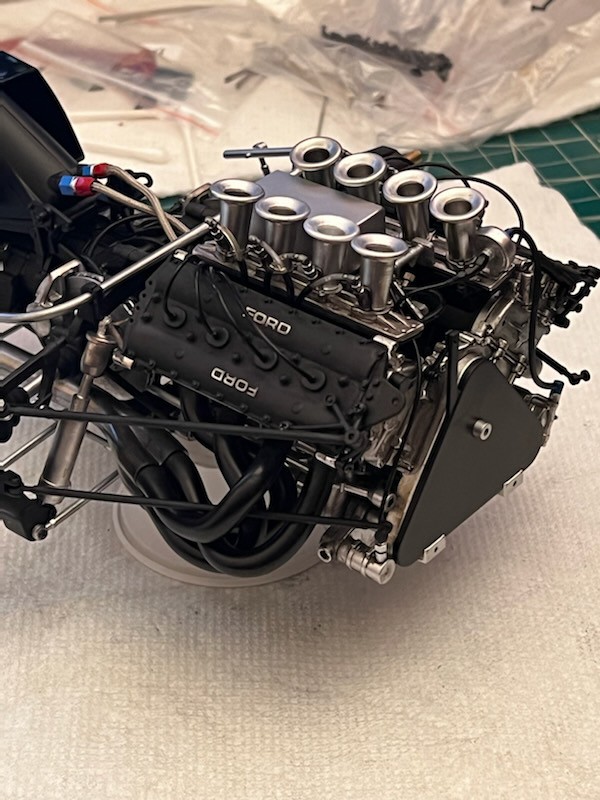
Post by chrissmith on Apr 28, 2023 18:55:29 GMT -8
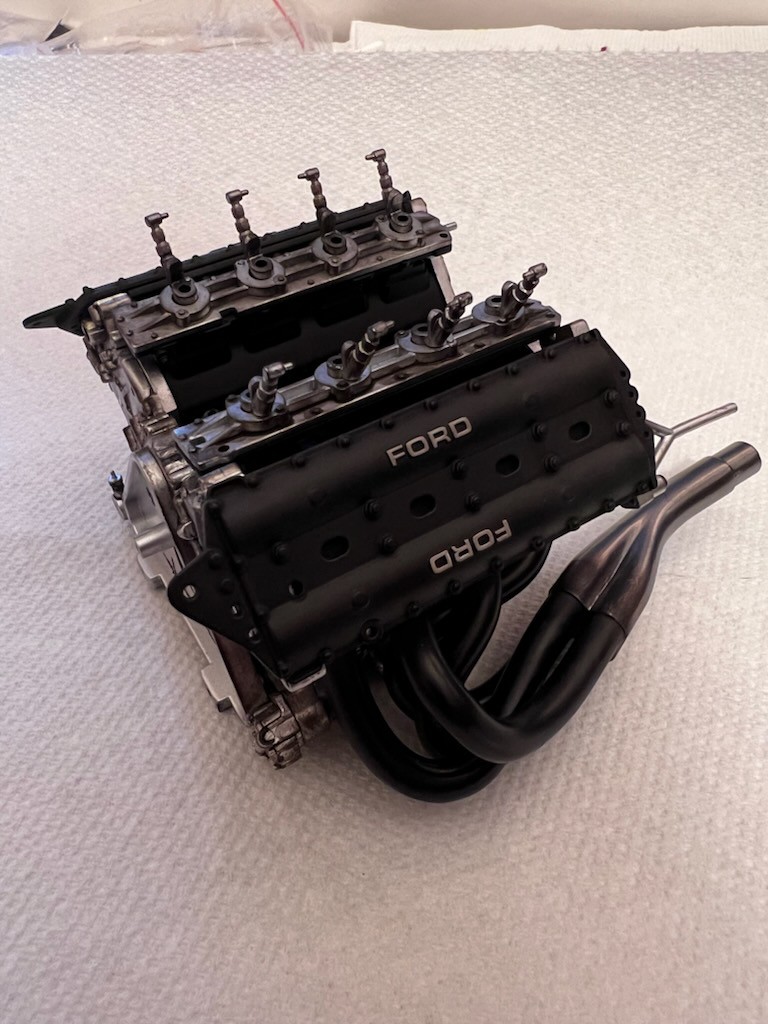
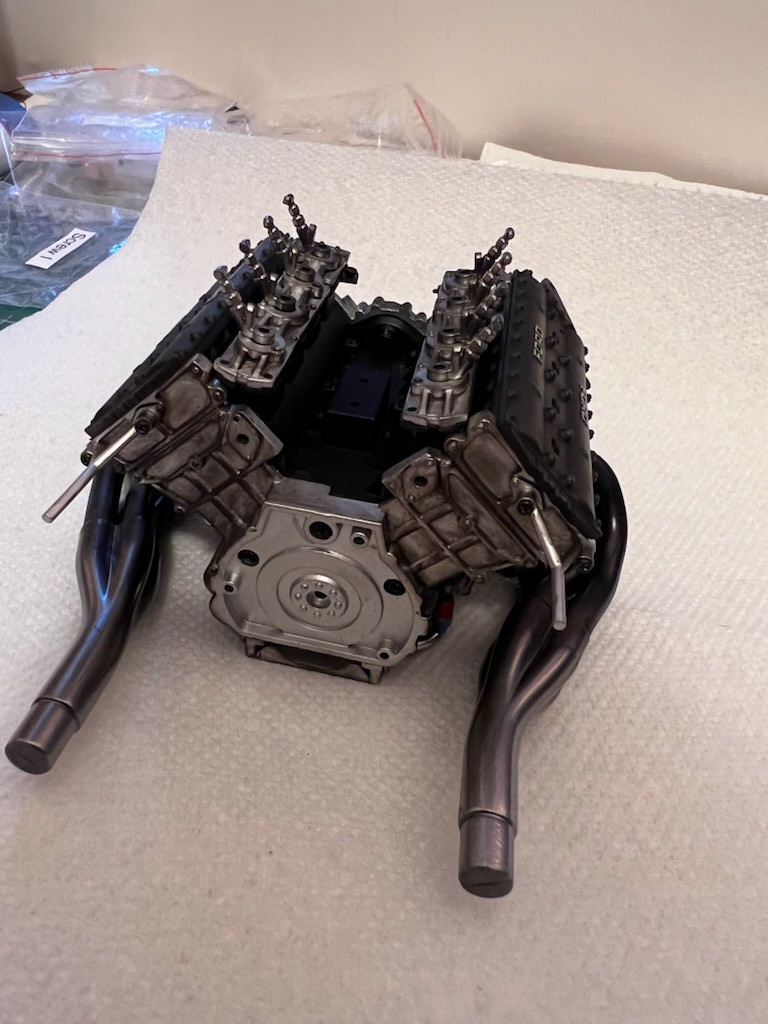
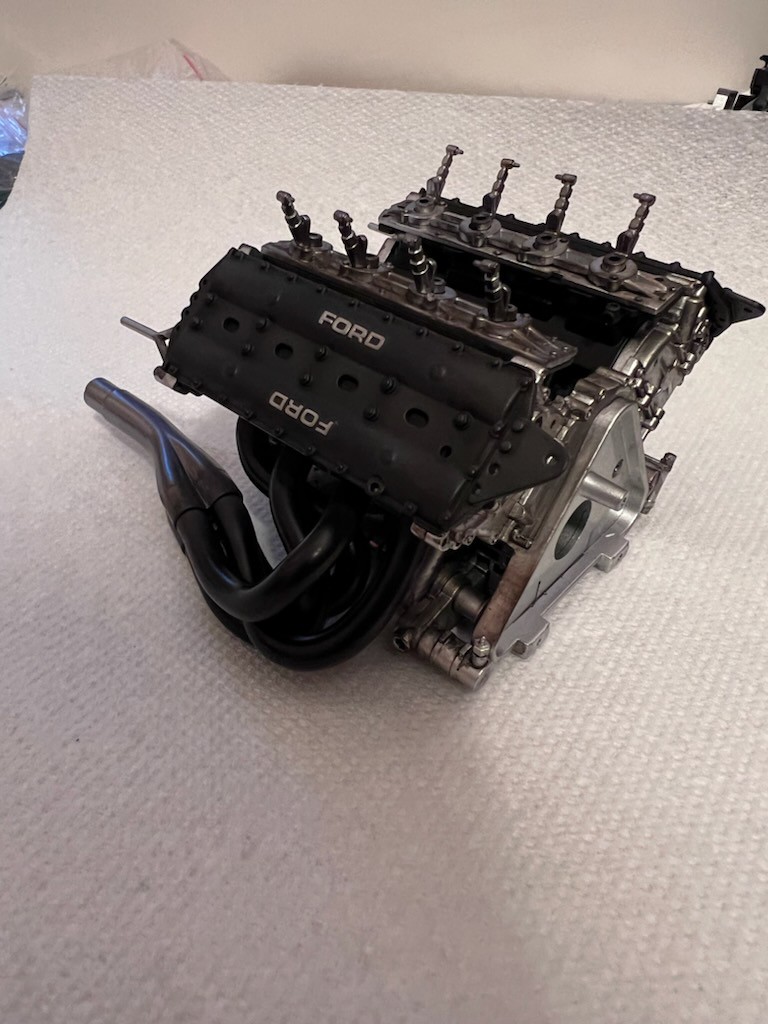
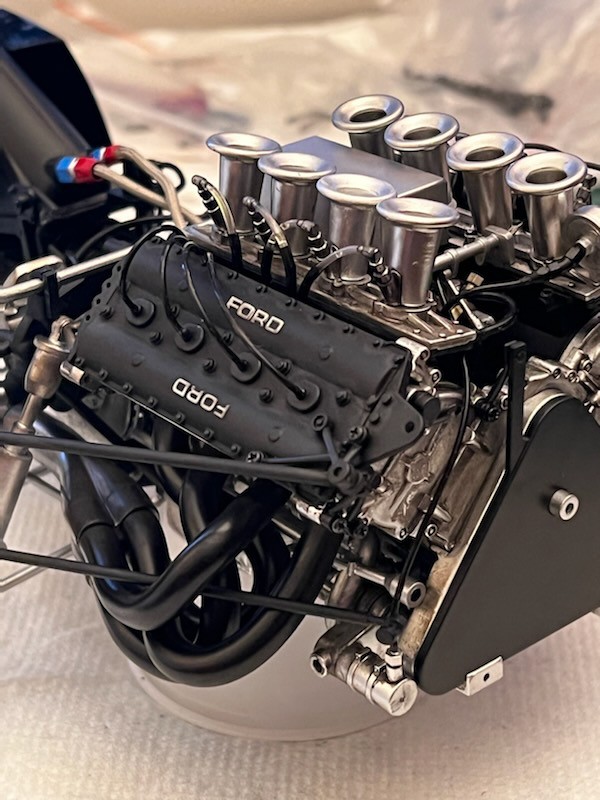
You probably can’t tell by the photos, I did dirty up the engine and exhaust a bit. The exhaust collector was 2 pieces sandwich together with a screw holding it together, it took a bit of time to get it sorted out and getting a decent color on it so it wouldn’t look like a toy. Now on to correcting the fuel lines 😉
|
|
|
|
Post by Chris K. Hale on Apr 29, 2023 9:45:52 GMT -8
what I like to do on the brake lines is run Rubber or Black wire to simulate rubber hoses, use brass an fittings on each end, one end on the Brake Master Cylinder and the to a small L bracket at the edge of the chassis from the L bracket/brass fitting I use Braided Hose of the appropriate size to the cliper ending with a brass fitting there. I also when I can, use P/E Zip Ties to attach the Braided hose to the best upper or lower A Arms. I picked this up from F-1 Magazines and now use it a lot. The Nissan R390 photo attached shows that assembly ..but couldnt get the zip ties on the A Arms on this one.. 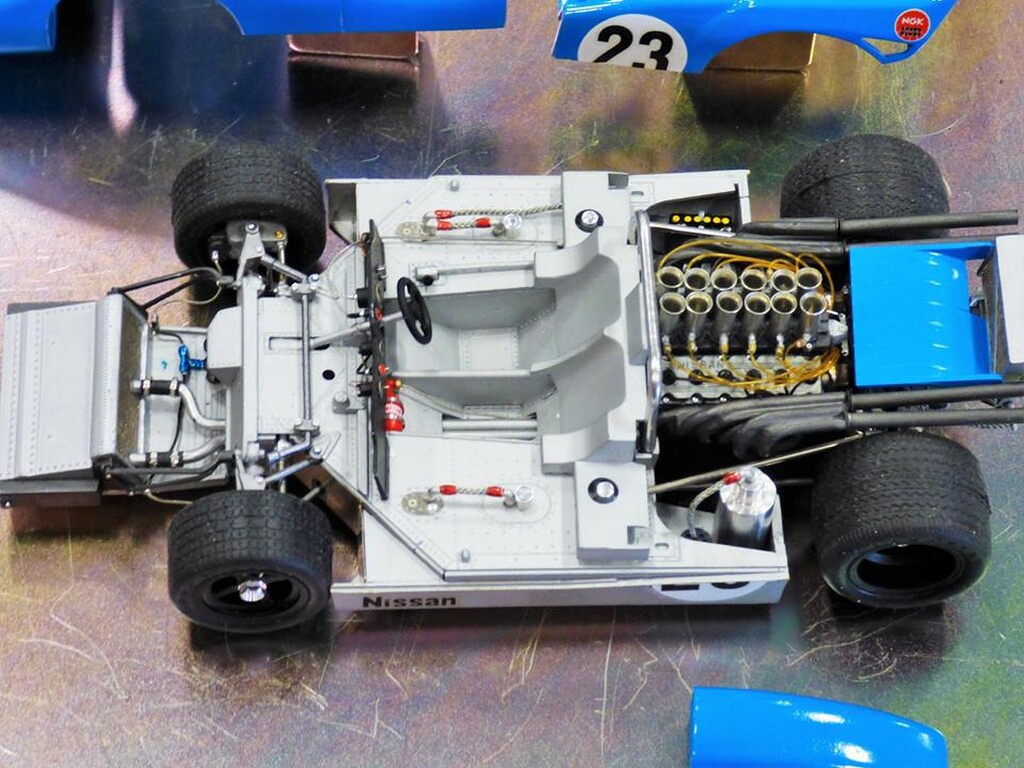 Loving Your build Chris |
|
|
|
Post by 2whl on Apr 29, 2023 16:52:32 GMT -8
|
|
|
|
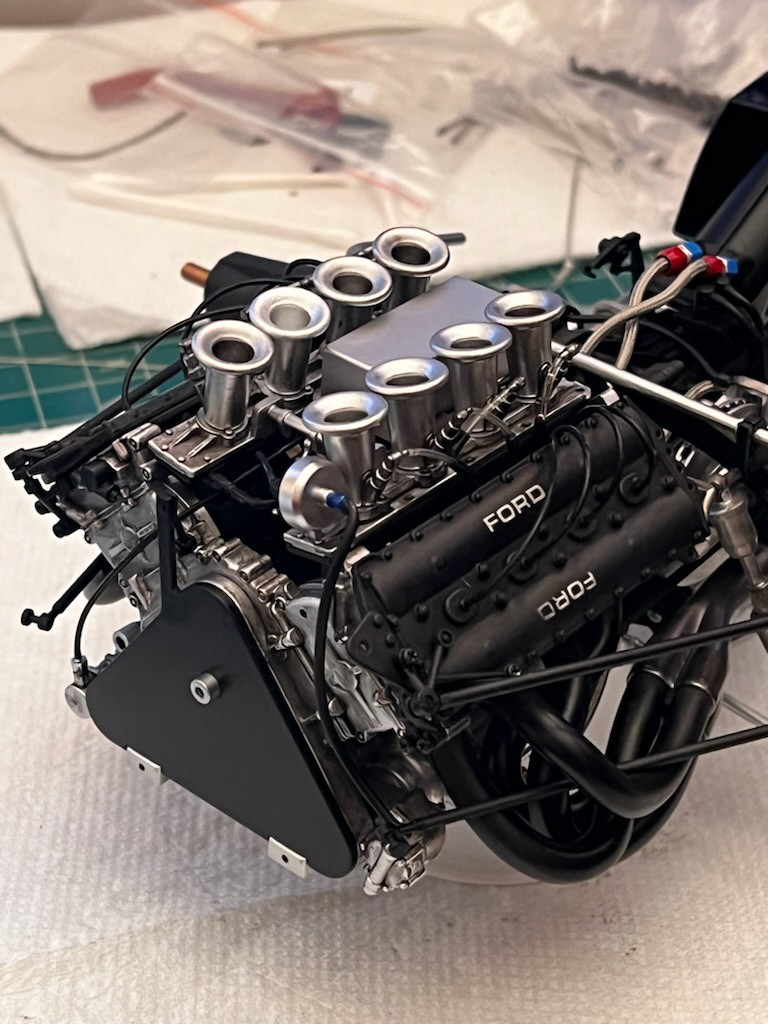
Post by Joel_W on Apr 29, 2023 17:09:24 GMT -8
Chris,
the engine really looks outstanding. The black oily wash really made quite a difference.
joel
|
|
|
|
Post by chrissmith on Apr 29, 2023 18:25:43 GMT -8
Chris, the engine really looks outstanding. The black oily wash really made quite a difference. joel Thanks Joel! I’m thinking of doing some to the cockpit and front end 😁 |
|
|
|
Post by chrissmith on Apr 29, 2023 18:32:44 GMT -8
For everyone’s info,the kit only supplied 2 different hoses for the plumbing and wiring. After looking at a bunch of reference photo’s and every other DFV I have seen the fuel lines are a yellowish color surrounded by a black sleeve, I attempted to accomplish this.
Well onto other details and hopefully rear suspension 😁😉
|
|
|
|
Post by Chris K. Hale on Apr 30, 2023 6:20:17 GMT -8
To achieve the appearance of fuel in the clear F.I. tubing I have actually sucked , by mouth, Yellow food coloring up through it. it will give a look similar to actual fuel. I have also used it to give windshields a slight Yellow tint. Chris
|
|
|
|
Post by 2whl on Apr 30, 2023 16:50:17 GMT -8
|
|
|
|
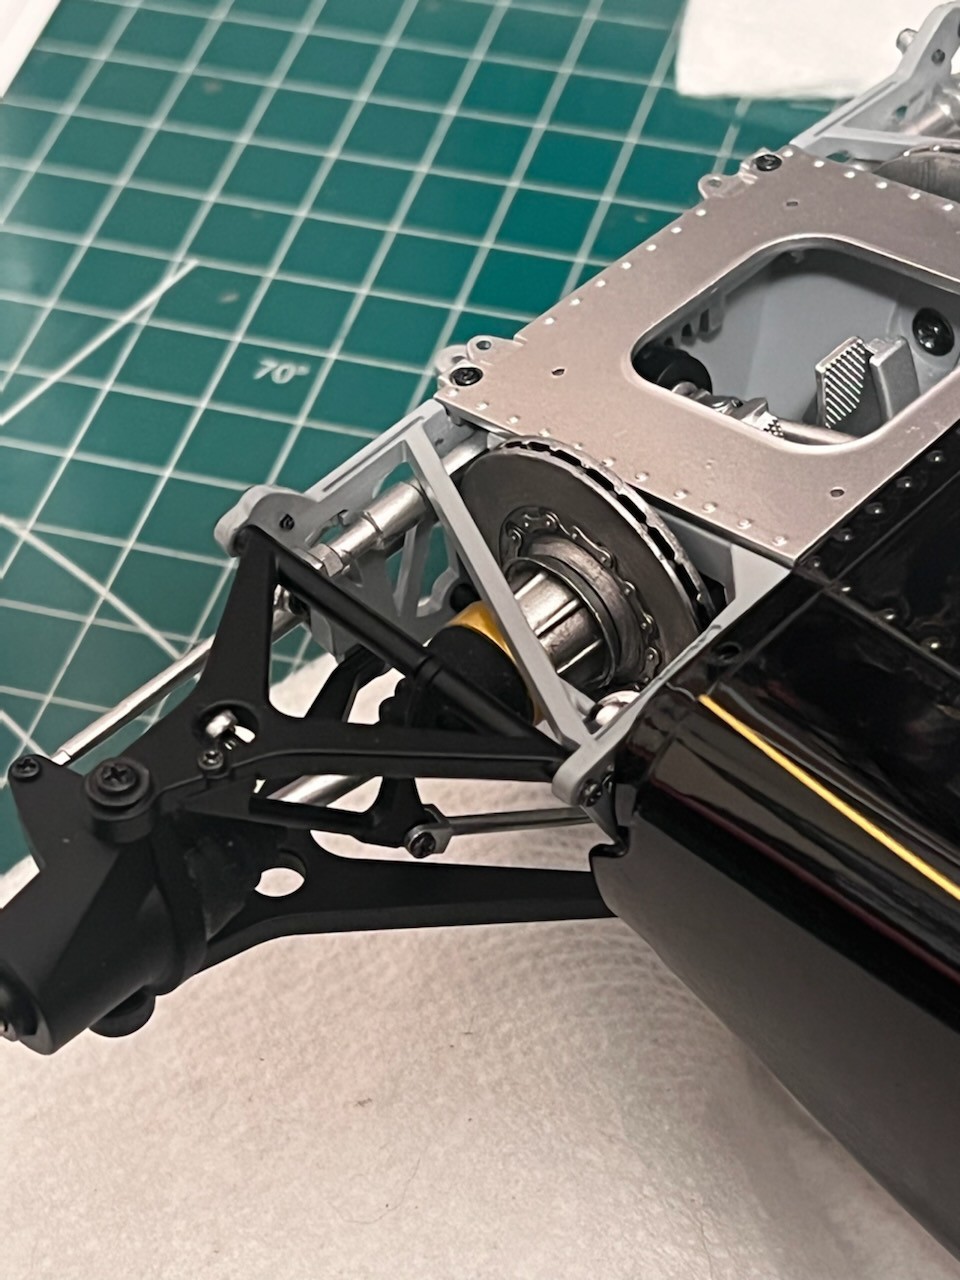
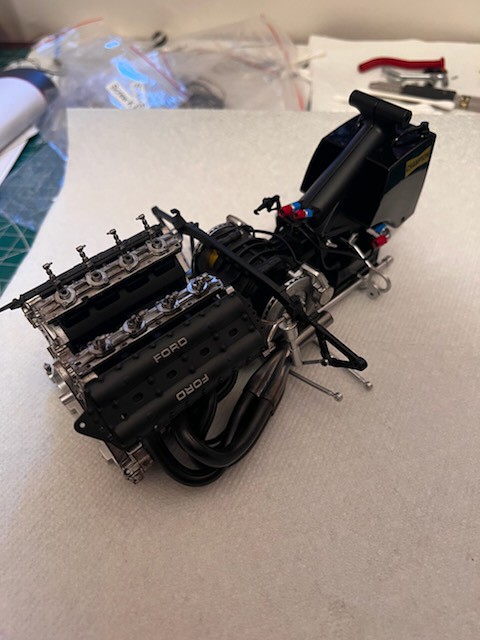
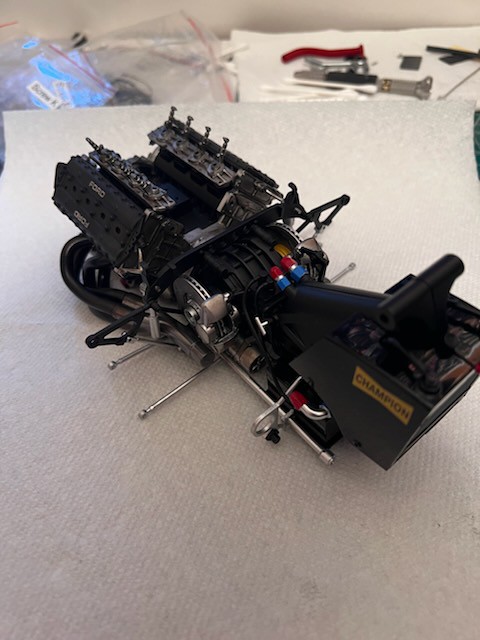
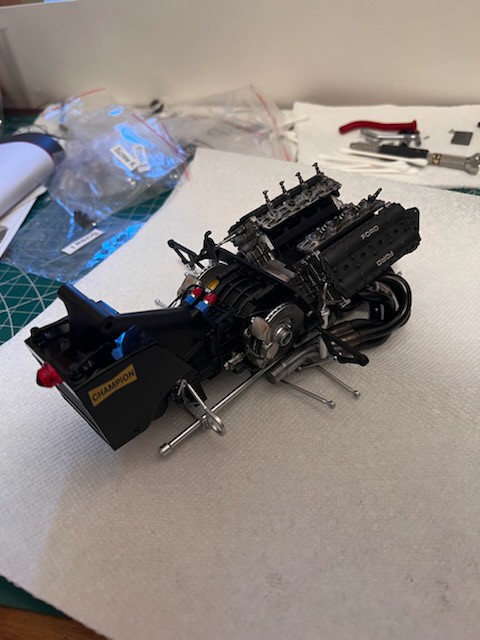
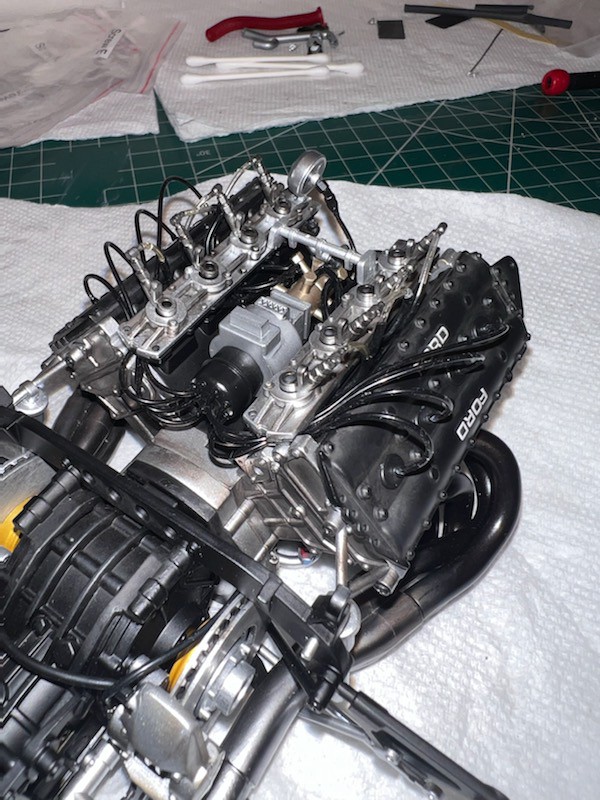
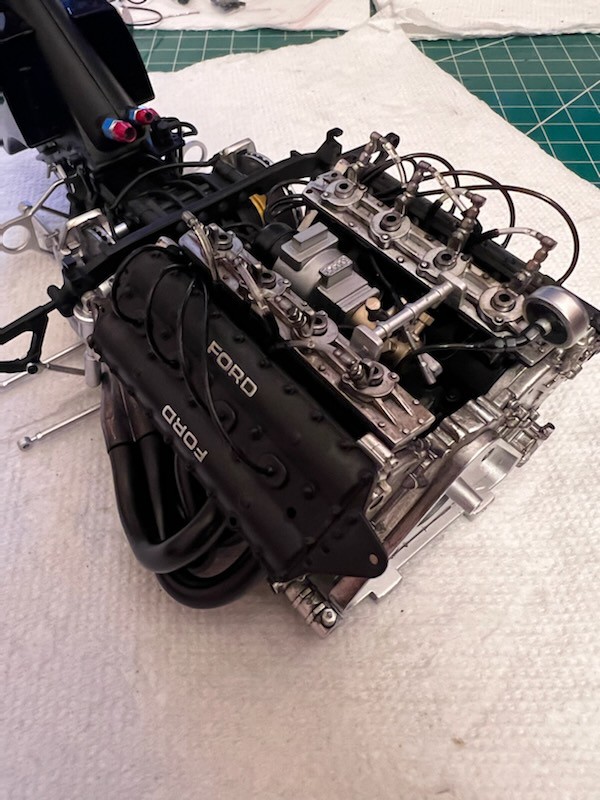
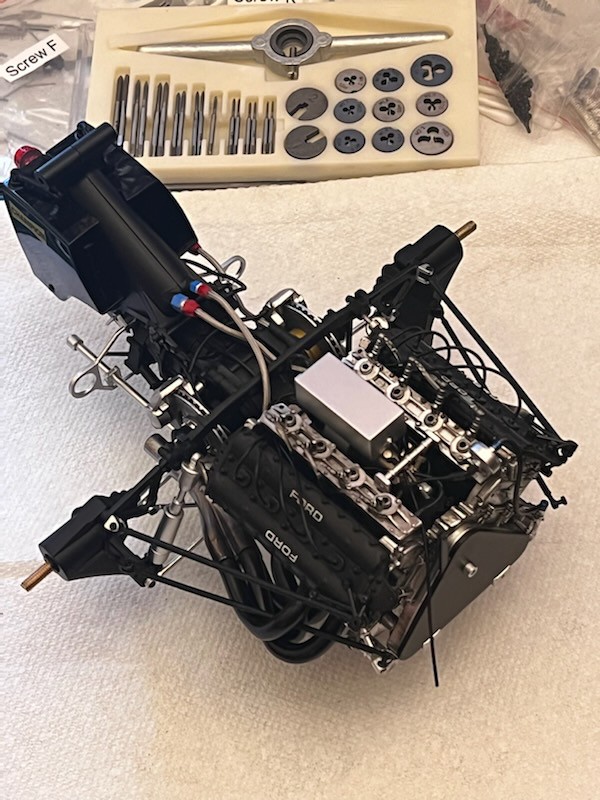
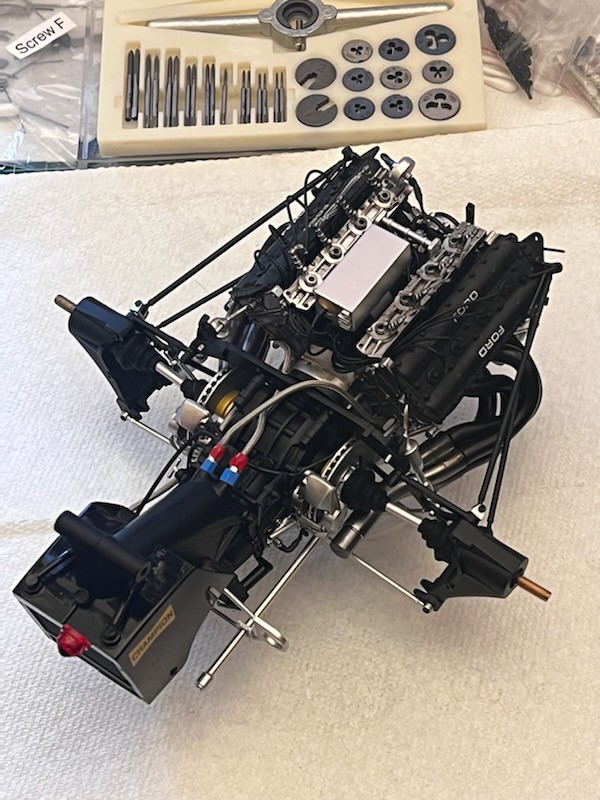
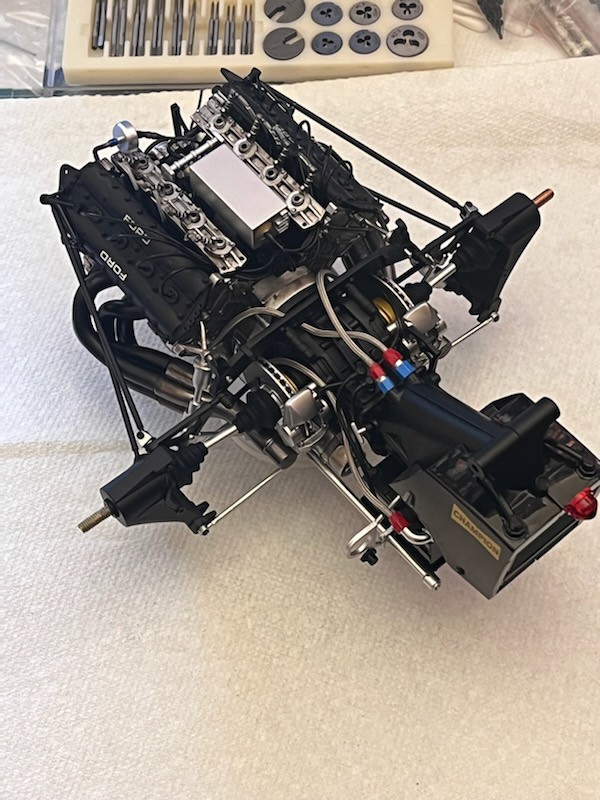
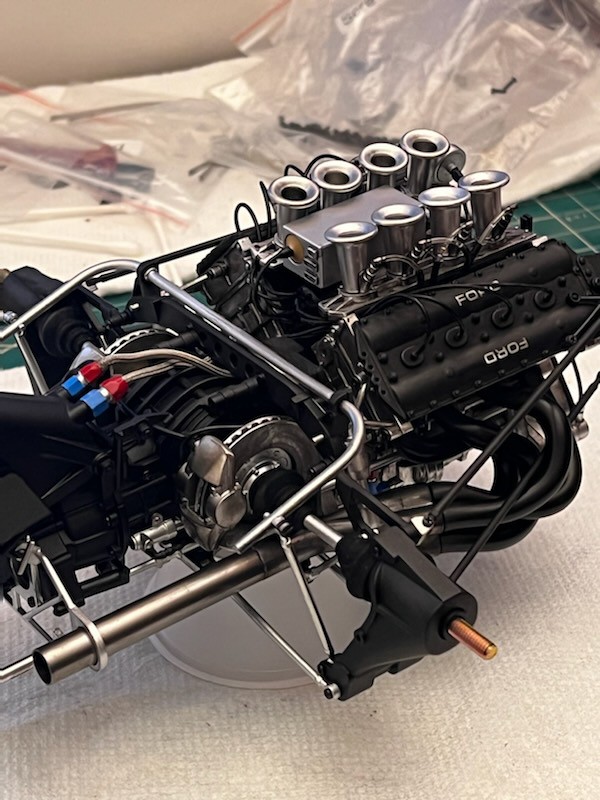
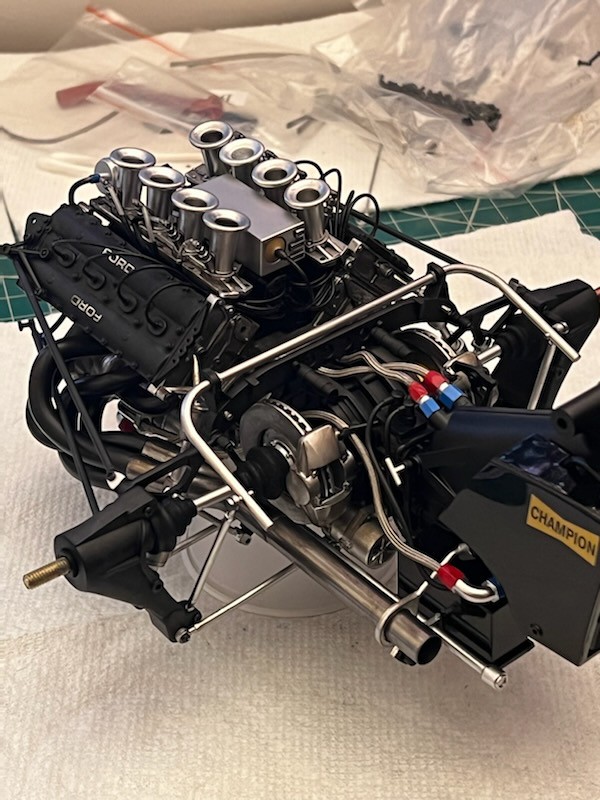
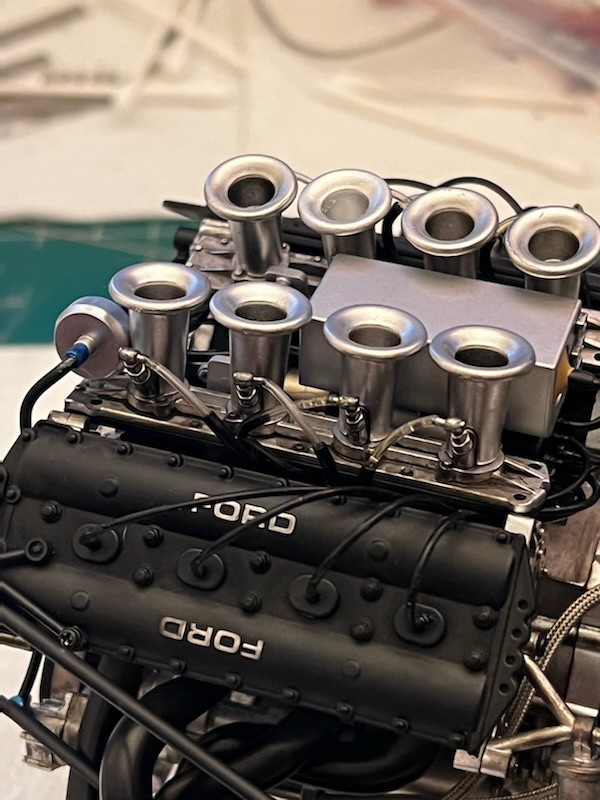
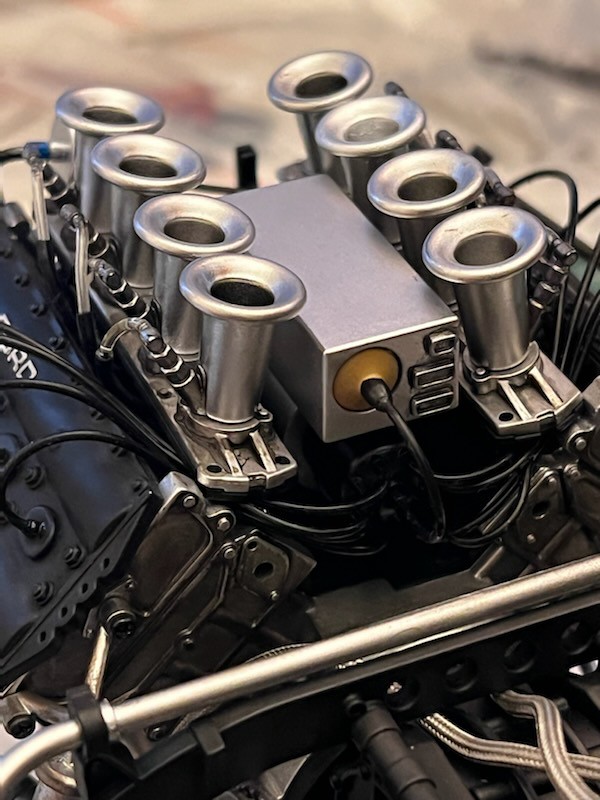
Post by chrissmith on Apr 30, 2023 18:04:09 GMT -8
First off, I’m not going to apologize for too many pictures 🤭
I have had a very productive weekend. For some reason I wanted to get the engine finished and the rear suspension done. Mission accomplished! So I was not happy with the kit braided lines and looked through my aftermarket parts box, lucky for me I hade some pro tech braided lines. The sway bar and links needed some paint work as well, they came in black, so I decided to give it some bling and painted them stainless steel(Alclad)
The trumpets needed some work as well, they where silver sitting on a sprue. I did contact a friend of mine who is a wonderful machinist and really great guy. I wanted him to make me a set out of aluminum, he was set to take care of it. Then he contacted me and told me he was scheduled for surgery on his hands and he had no idea when he was going to get back at it, so he sent back the plastic ones. So after being bummed, I got on to the task of painting them . Came out pretty nice considering.
Now I figure I’m about 3/4 done on this but I still have some more things to do. So……thanks for checking in
Chris
|
|