|
|
Post by Oldtimer on Jun 6, 2018 10:17:58 GMT -8
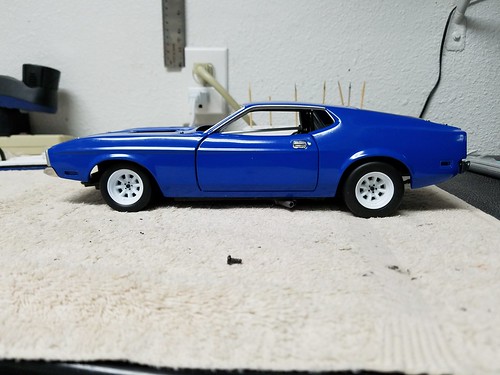
I look at the threads on here by you guys who are masters at working in 1/24-1/25 scale plastic, and am amazed at the variety of sources of parts you have access to. Working in 1/18 scale and diecast, sometimes I feel like I am alone on an island, having to cobble together what I can to achieve anything that even begins to get close to what you produce. Anyway, here's my latest brain fart.
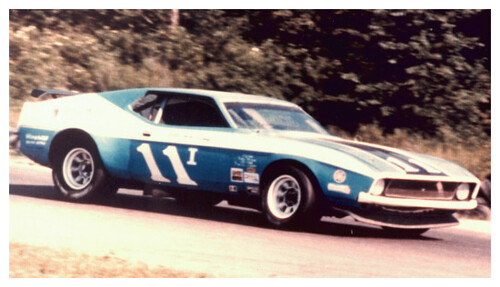
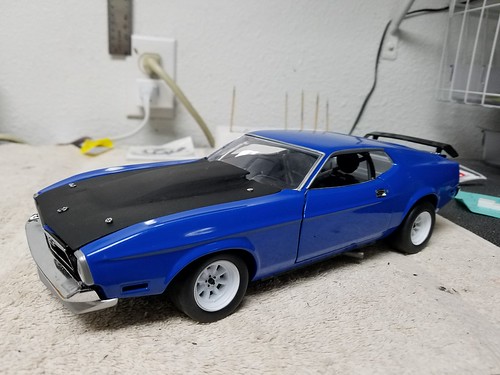
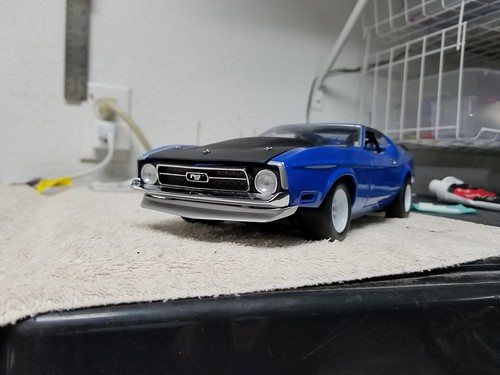
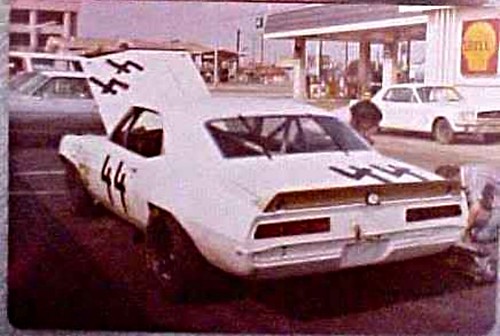
I guess I've become obsessed with the 1/18 scale Welly-based Ford Mustang Trans Am Boss 302, that has been reissued by both GMP and now ACME (errors notwithstanding). So, I was looking through some old photos, and found a picture of 1971 Mustang Trans Am and IMSA racers, and thought I'd try my hand.
My version is going to be a cross between the one raced in Trans Am and the one raced in IMSA, neither of which were very successful.
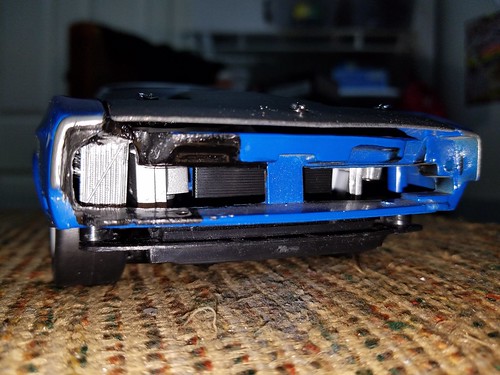
Here are early shots of the chassis/body blending. The chassis donor is a much-maligned (by me) Welly Trans Am Boss 302 Mustang (in this case, the wrong color yellow #15) and a SunStar drag racing version 1971 Mustang (I bought the body through an eBay auction). Blending the two was not just a simple drop the body on the chassis, suffice it to say, quite a few Dremel wheels were sacrificed to simply take these two pictures.
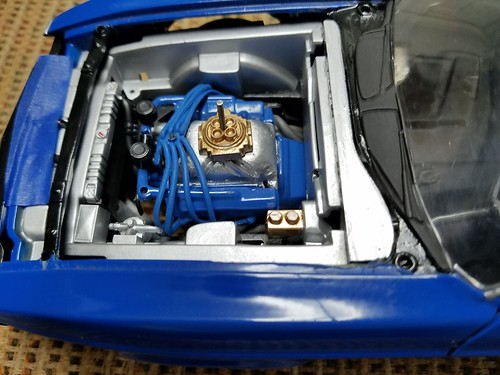
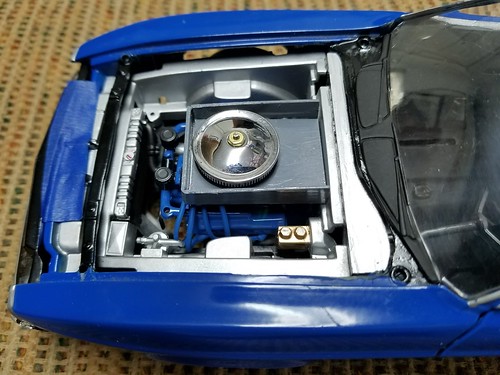
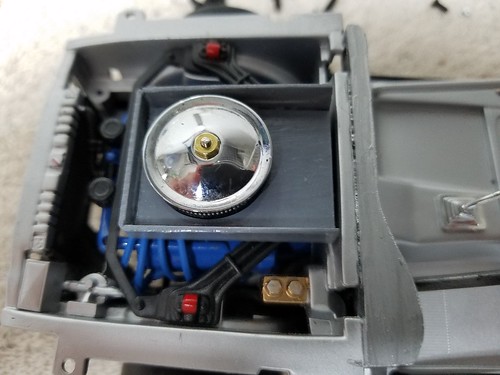
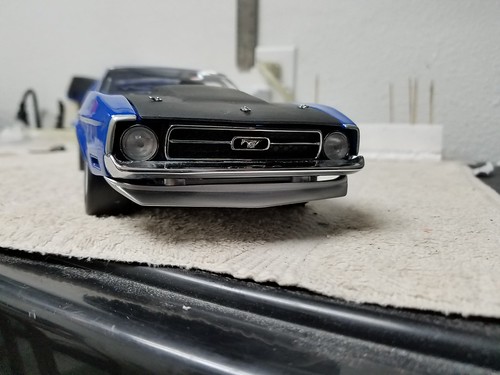
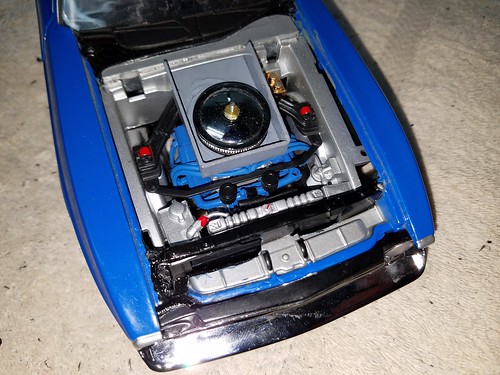
I thought as a variation to my prior induction correction process, that I might try to see if this one could accommodate a high rise intake manifold. Here is the rough results to date, adding in a fabricated cold air box. I intend to sand down the intake manifold, and hopefully carve in some runners to make it look a little more authentic.
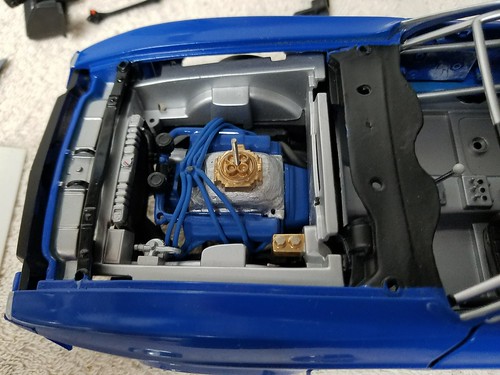  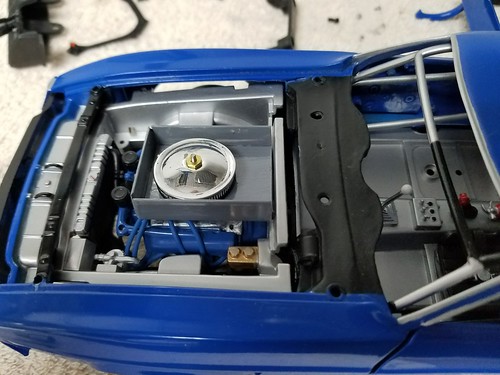
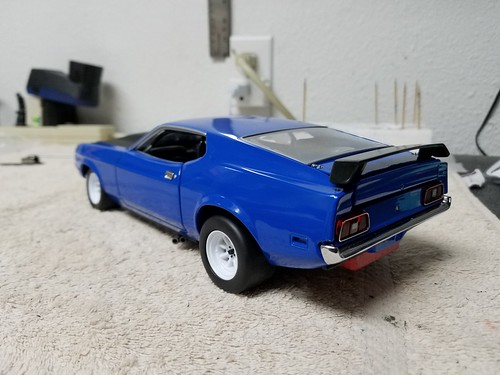
And it fits nicely under a custom hood created by blending a Z28-style scoop from a GMP '69 Trans Am Camaro into the Mustang hood (which came with a hole in it for some reason). Sorry about not having progress photos, but again, numerous Dremel cutting wheels died to make this hood a reality. To produce this near-final, the two pieces (a "U" shaped piece from the SunStar hood and the middle section of GMP hood scoop) were joined together with copious amounts of JB Weld. The final version will be sanded and the holes filled with glazing putty.
Plenty more detailing left to do, such as blending in firewalls between the two donors, raising the A-pillar cross bar on the cage, and fabricating a front spoiler, just to name a few. |
|
|
|
Post by slim on Jun 6, 2018 10:20:59 GMT -8
nice work!
|
|
|
|
Post by afx on Jun 6, 2018 14:00:36 GMT -8
There are pluses and minuses to working in this scale and medium but you seem to manage it well.
|
|
|
|
Post by Oldtimer on Jun 9, 2018 7:47:02 GMT -8
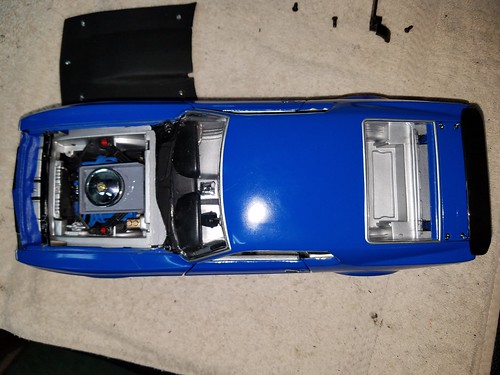
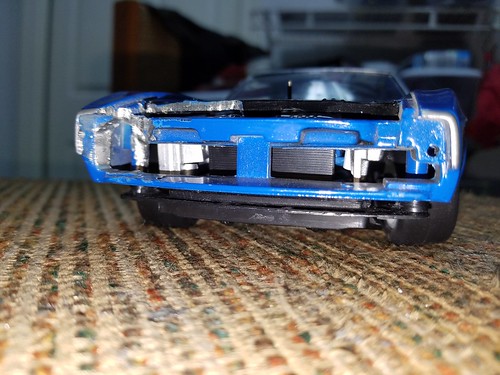
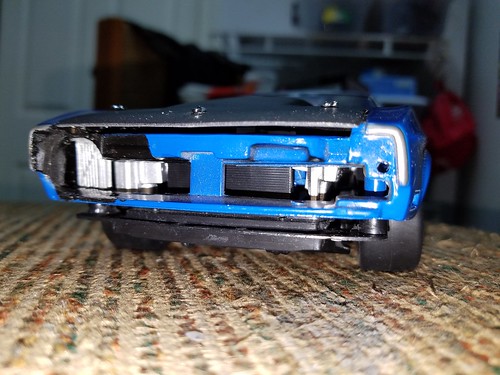
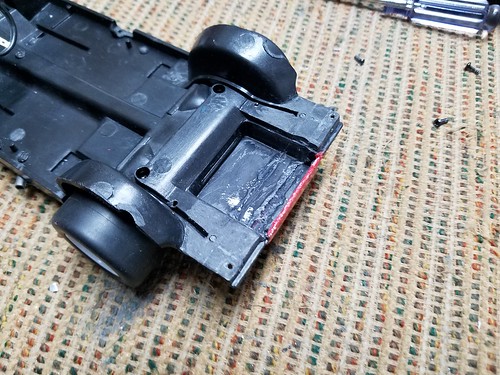
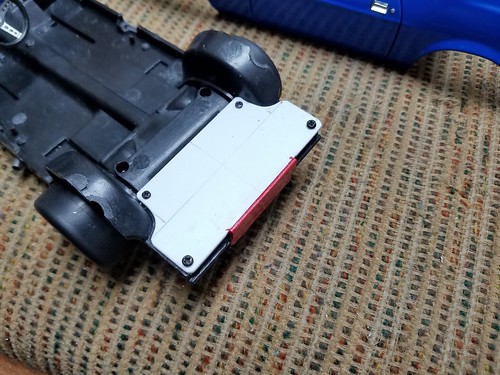
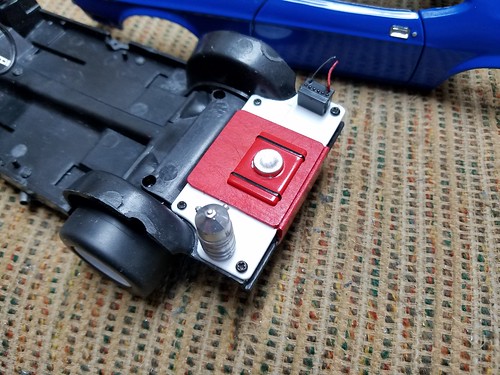
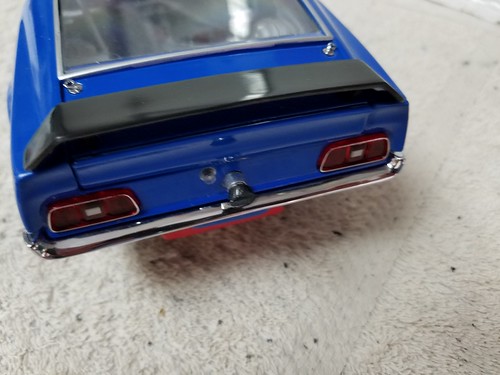
I'll continue with updates on this build. So, when blending major pieces, such as a body and a chassis in this case, we all hope for uniformity, but as most of us who have tried to build custom models know, that is rarely the case. Here's a photo of the bottom of the model, chassis fit up snugly into body. 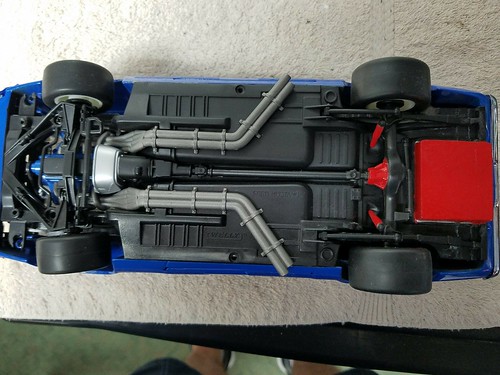 The object, for me initially on this build, was to have at least two mounting locations line up, so that I could secure the model together. Here's a picture of the bottom of the SunStar body (admittedly with the Welly interior installed), notice the two screw mounts. 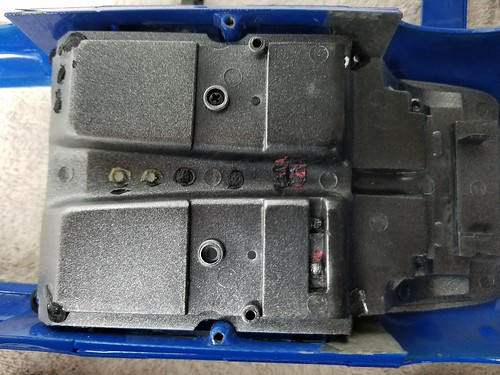 The notches in the interior are the giveaway. In my efforts to have the mounting locations to line up, I had to move the chassis back, causing me to have to remove some of the rear of the chassis (as seen by the multiple saw cuts that I have tried to cover with filler and paint) in order to reduce the interference with the molded in rear of the SunStar body.  Here is how much misalignment there is between the two manufacturers. 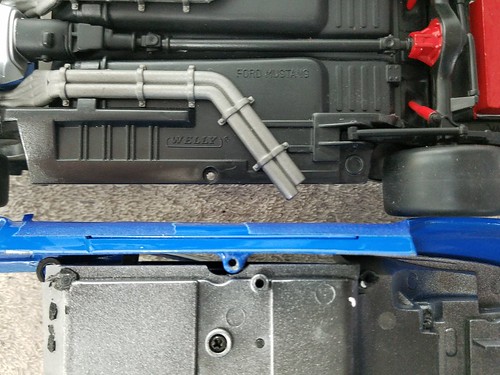 In reality, the solution was to create a relief in the chassis so that the wheelbases aligned. 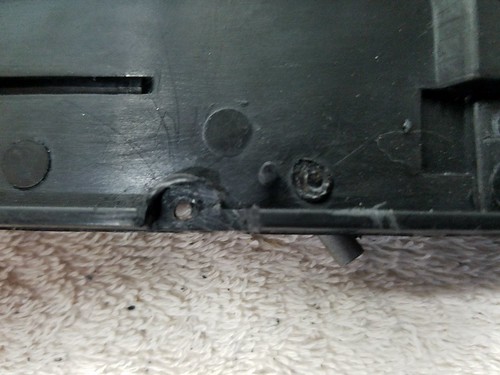 And once I made this reliefs, I got to glue the back of the chassis back together. Again, we are still in the prototyping stage, and things will be cleaned up for the final, but just wanted to give an update, and show what it takes to pull one of these off. |
|
|
|
Post by Oldtimer on Jun 9, 2018 7:51:55 GMT -8
Here are a few more pictures.
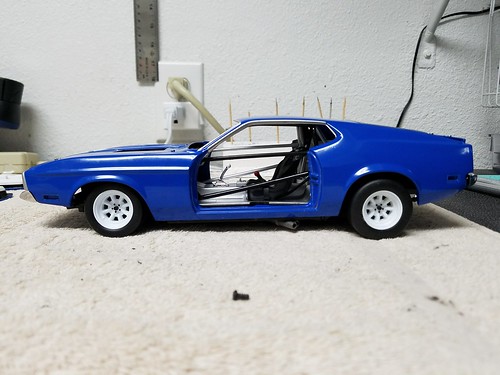
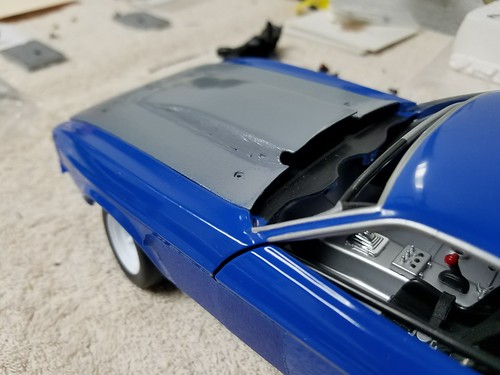
So, as the Brits post in the Tube stations, "Mind the Gap". Well, I had a similar problem between the Welly engine compartment firewall and the base of the SunStar windscreen. Fabricated up a piece of Styrene angle, carved it to fit a curvature in the SunStar firewall where the molded-in brake master cylinder unit was, and here you go. Going to paint the new piece silver to match the Welly color.
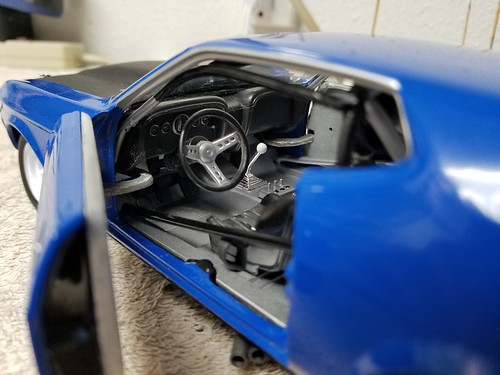
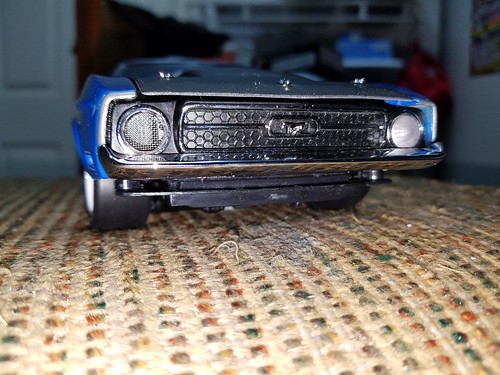
Notice, also, between the two pictures, the front windshield is in place, as is the dashboard from the Welly. To make a lot of this work I had to take a Dremel to the dogleg door hinges, and skinny them up by about half for clearance. Will have to remind my driver to not slam the door when he enters (although us real men climb in through the window).

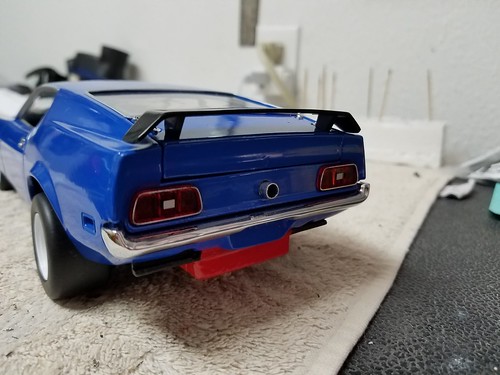
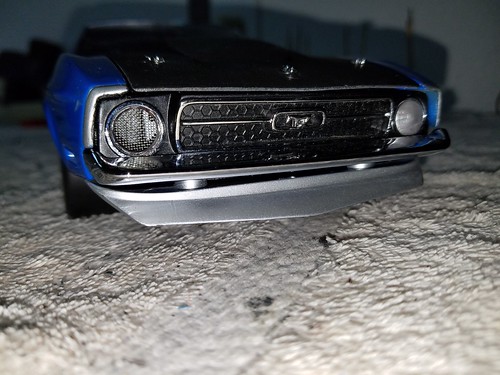
Also added the Welly front spoiler under the nose of the SunStar, however this front shot shows me that my cold air box may be just a little too tall.
|
|
|
|
Post by Oldtimer on Jun 9, 2018 7:57:56 GMT -8
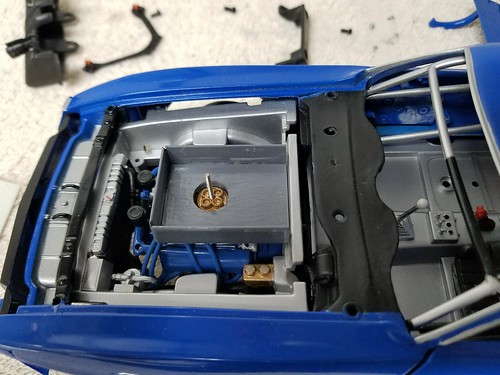
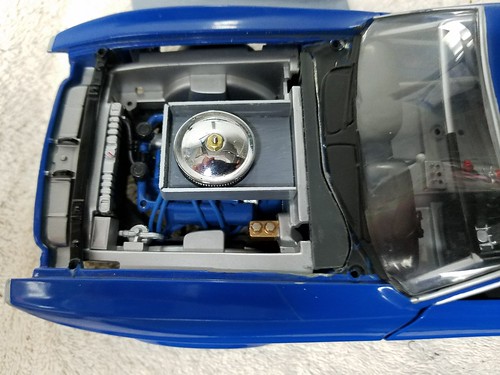
And here are a couple of updated pictures of the engine compartment. I think I made an improvement to the intake manifold appearance.
Got a donor chassis in last night, and fitted up an engine compartment export brace. Some of the Welly's came with them, some didn't. My donor chassis for this model was a mid-term (when they put the cold air box on to fake a conversion to proper carburetion), and when they did the "fix", they deleted the export brace because it interfered. As you can see from the pictures above, there are no mounting holes drilled in the shock tower, so I had to drill them to make the brace fit.
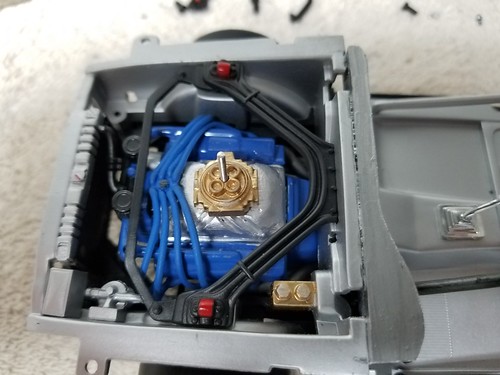 
As I have attempted to blend body and chassis between two different diecast manufacturers, challenges continue to appear with regard to a final fit. What works with putting the Welly body onto the Welly chassis doesn't quite translate when installing the SunStar. Hopefully I will be able to post some updated pictures this weekend.
Stay Tuned! |
|
|
|
Post by Oldtimer on Jun 11, 2018 6:36:34 GMT -8
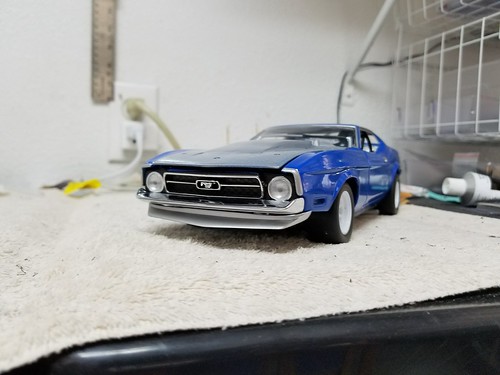
Dry fit of most components completed over the weekend. Still some detailing to do, but pretty pleased with where it is right now.
|
|
|
|
Post by Oldtimer on Jun 13, 2018 7:04:47 GMT -8
|
|
|
|
Post by mustangrex on Jul 6, 2018 6:39:40 GMT -8
I am very biased about 71-73 Mustangs as they are my favorite. Hats off to you for doing a difficult conversion. There are so few racing 71-73 Mustangs in any series and it is cool to see any model of them. Keep up the great work.
|
|
|
|
Post by Oldtimer on Jul 6, 2018 6:48:05 GMT -8
Thanks for the compliment!
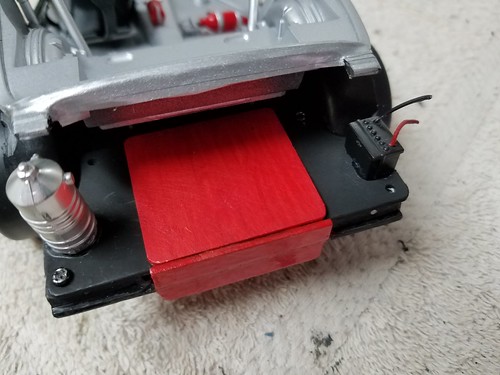
Been working on it lately, putting in fuel cell top and fuel filler, rear-mounted battery, and oil cooler in the front, behind the passenger side headlight. No pics right now, as it's back apart, but some progress shots soon. |
|
|
|
Post by Oldtimer on Jul 8, 2018 9:05:14 GMT -8
Working on this over the past week or so. Adding an oil cooler to the front. As you can see from the photos, required quite a bit of Dremel effort (actually more than what the photos show).
Also adding a little more detail to the trunk. The Welly chassis donor has a sealed deck lid, where the SunStar body donor has an opening one.
Going to paint the new floor Flat Black, and then thinking about plumbing. There will definitely be a fuel filler tube running from the back of the car into the fuel cell, but not sure how much further I will go with the other detailing.
|
|
|
|
Post by Oldtimer on Jul 8, 2018 15:52:43 GMT -8
With no Nascar race this afternoon, and baseball finishing early due to the All-Star selection, had some time on my hands, and made what I consider to be quite a bit of progress. Since this is a from-scratch build, I don't have a lot of precedent to rely on, so creating some techniques along the way.
Hopefully the pictures speak for themselves.
The trunk configuration of battery on the right rear and dry sump tank on the left rear duplicates the set up we used on the '86 Trans Am-spec Camaro my partner and I built.

Before dry break, we simply put the hose from the dump can over the stock fuel filler. Here I tried to create a fuel cap to finish the look. Not fully satisfied, but as I noted, this is a work in progress. Still needs a fuel vent line, and working on a couple of ideas for that.
Stay tuned, there's still a lot to be done, such as a rear view mirror and window net, to mention a couple of details.
|
|
|
|
Post by dustymojave on Jul 11, 2018 21:57:42 GMT -8
Gas cap should be a regular 1/4 turn smooth semi-domed chrome or zinc plated with the little tab across it for a handle. That's what was used at the time. Filler neck should just stick out 1mm (.040") or so.
|
|
|
|
Post by Oldtimer on Jul 12, 2018 3:30:26 GMT -8
Gas cap should be a regular 1/4 turn smooth semi-domed chrome or zinc plated with the little tab across it for a handle. That's what was used at the time. Filler neck should just stick out 1mm (.040") or so.
Yeah, on our 69 Camaro it was just a stock neck and cap, with a hood pin lanyard riveted to the leverage wing of the cap.
Where it was mounted, the rear spoiler had a cut out for clearance.
Still have that original rear spoiler. After I bought the car, the original rear spoiler had some damage from where the car had drifted into an earth bank with the right rear. There was a scabbed in piece of sheet metal riveted into the end of the spoiler.
I wanted the car to be perfect when I raced it (yeah, that happens), so bought a new one, and kept the "historic/vintage" one. It hangs in my garage, above my diecast workbench.
One of my pet peeves is to critique die cast manufacturers in their errors, and it is very clear that GMP made a big one on their 67-69 era Trans Am Camaros.
Here's a set of comparison pictures of their version, and how I corrected it prior to making the custom version of my actual racer.
GMP
Corrected
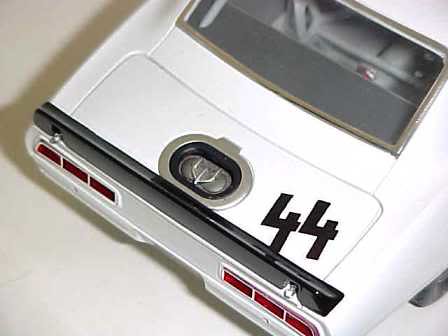
The hood pins holding the trunk closed are supposed to be inside the cut-outs. GMP had the spoiler right, but put the hood pins up into the trunk lid, where there is no structure underneath them to hold them.
|
|
|
|
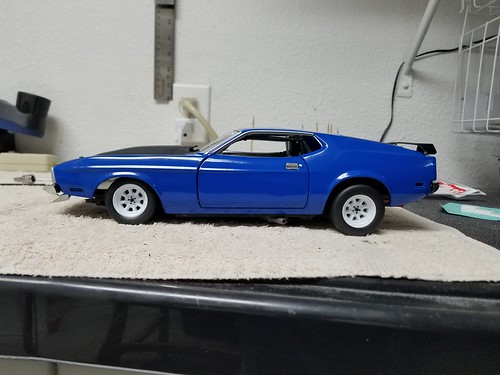
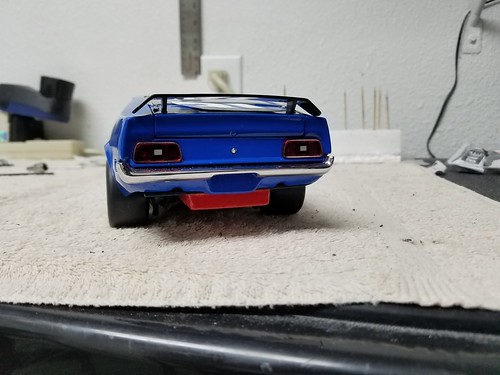
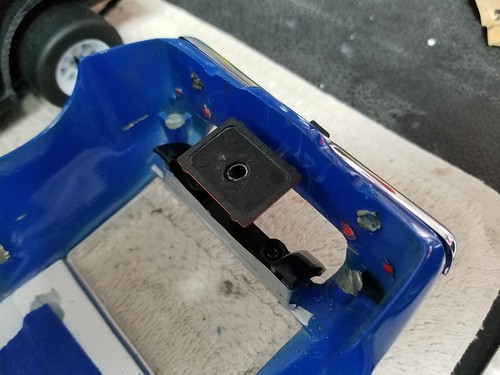
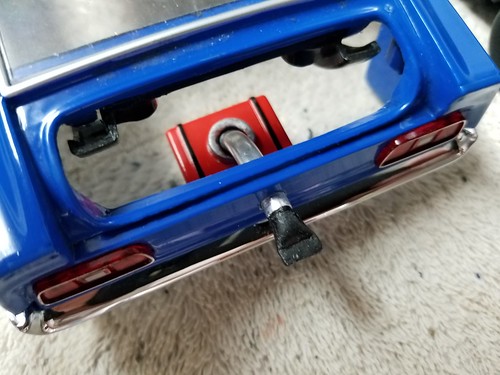
Post by Oldtimer on Jul 15, 2018 13:27:32 GMT -8
Buttoned it up for a quick look at some additional details, and took a couple of near-final shots.
Took another swing at a gas cap.
Still not pleased with the vent hose, and still thinking about some other plumbing, such as fuel and oil lines, and maybe positive and negative battery cables.
|
|