|
|
Post by Oldtimer on Oct 2, 2018 6:18:37 GMT -8
 Clearly this was going to be a problem. So, while waiting for the new bodywork to show up, I have moved the engine back about .25" (in reality, which would equate to about 4.5 inches in the real world). Re-established the front mounting point for the engine, and very glad I had not glued the custom driveshaft together yet. Had to cut some firewall and transmission hump for clearance, which will require some cosmetic fabrication, but did manage to improve front/rear weight distribution. 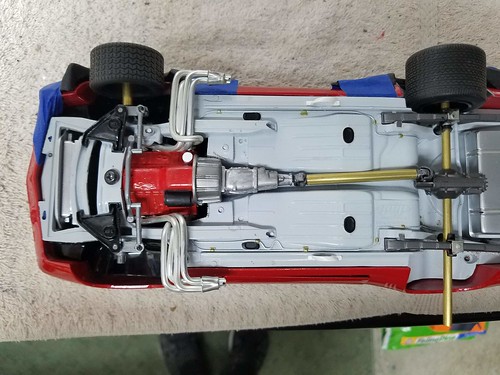
Played around a little more with the fuel filler, more pictures tomorrow. |
|
|
|
Post by Oldtimer on Oct 4, 2018 7:07:37 GMT -8
Not sure how clear these pictures will be, but I found another fuel filler cap (in a lot better condition, and made of chrome-plated diecast in lieu of plastic). This picture, more or less, tells the story. 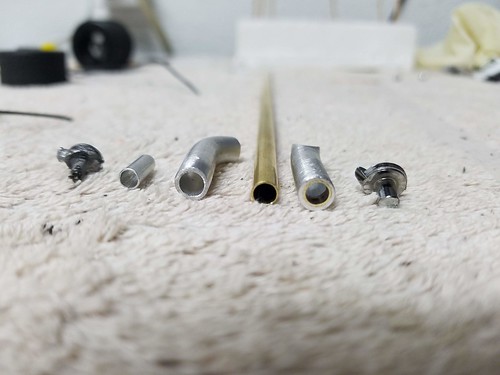 From left to right, original cap, original adapter, original ID of fueling tube, sourced brass tubing, revised ID of fueling tube (with brass insert), and new cap. The new cap fits perfectly into the brass tubing, and with a heavy duty pin vice, I "drilled" out the fueling tube to accommodate a brass insert. Here's the two, more or less, side by side (old on the left, new on the right). 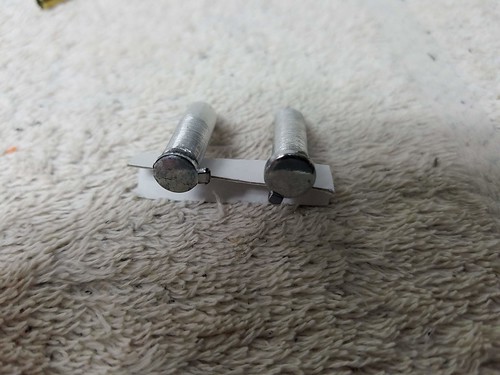 I think it makes for a better looking detail. 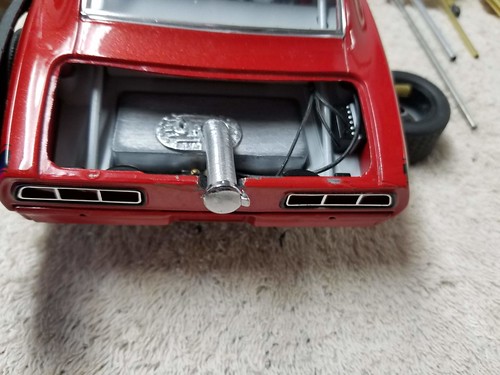 Still waiting on the new flares, so started working on repairing the firewall after I moved the engine back. Might have some pictures tomorrow. |
|
|
|
Post by garydavis on Oct 4, 2018 11:26:39 GMT -8
This is looking GREAT OT. The fab work you're doing is very cool to watch.
|
|
|
|
Post by Oldtimer on Oct 4, 2018 11:30:24 GMT -8
This is looking GREAT OT. The fab work you're doing is very cool to watch. Thanks! Corrected the post to have the correct picture(s). |
|
|
|
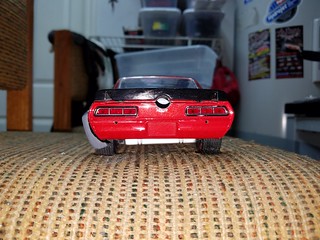
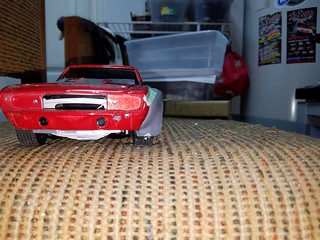
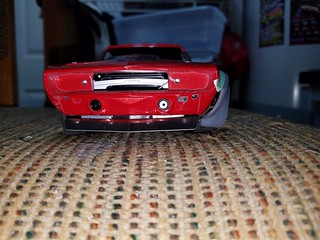
Post by Oldtimer on Oct 6, 2018 6:34:02 GMT -8
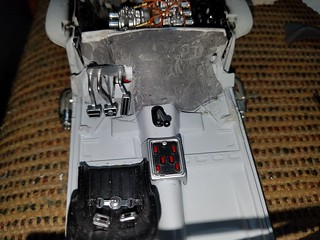
Now,the firewall. This is what a stock GMP Trans Am Camaro firewall looks like. 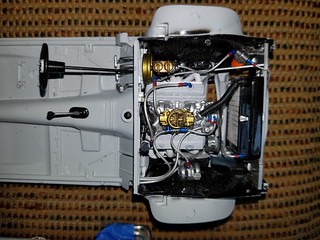 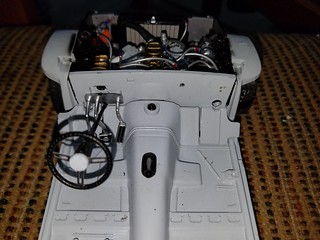 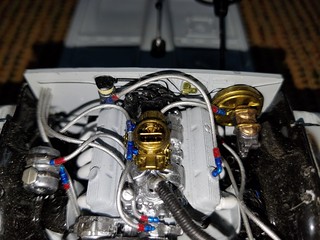
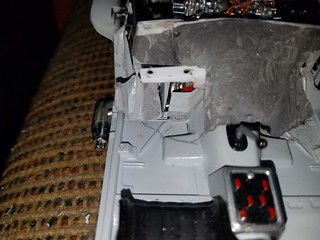
This what it looks like when you put a Big Block in the engine compartment and then move it back a scale 4.5 inches. 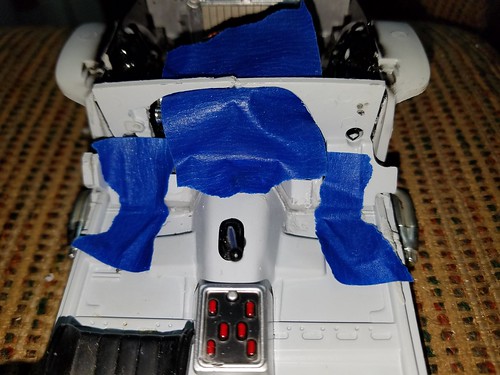
I had to cut it in the middle to allow a more simple means of grinding away the plastic. I knew that the middle was going to get really thin, and wanted a controlled cut, versus a jagged break. The problem, then, is how do you reconnect the two sides, and then also, how do you seal the hole. I decided I would use a technique that I developed when building my custom race trailer, so I got some 1/8 inch square styrene shape, and formed a channel using a Dremel plastic cutting blade.    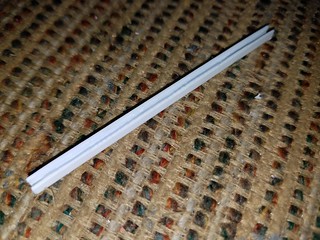
I then Superglued that piece across the top of the firewall.  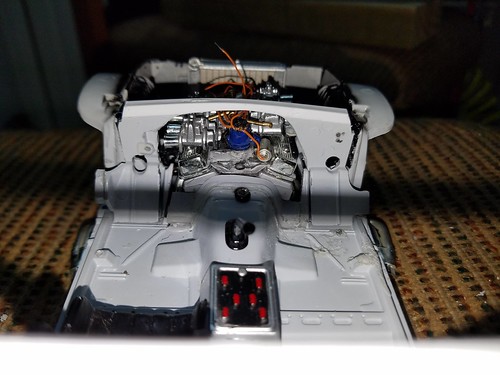 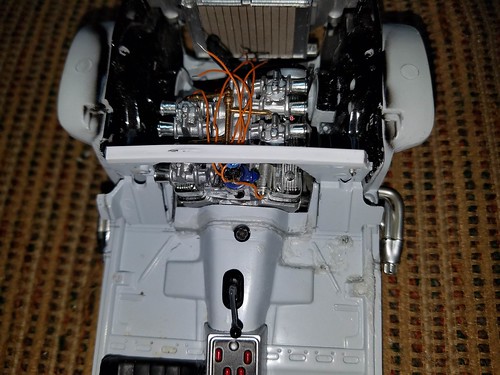
And now the fun part. How do you fill in that hole, but also making sure that you don't impose into the passenger compartment and interfere with little things like the driver. I decided that I would try to create the new infill by laying in JB Weld, knowing that it will adhere to the plastic of the original firewall (but also knowing that it will take quite a bit of grinding to smooth it up). 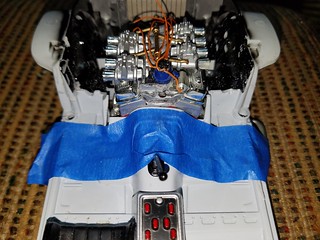 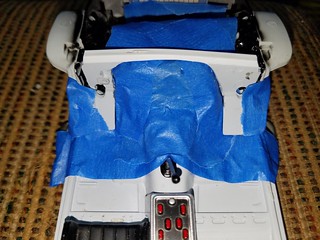 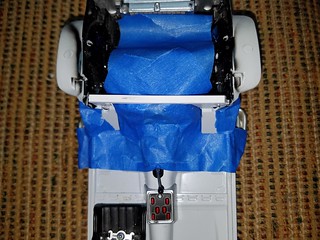
Test fit of the body to make sure it will all work. 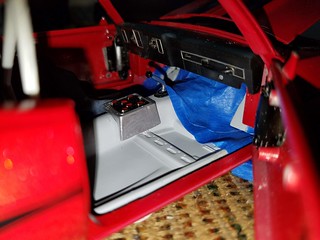 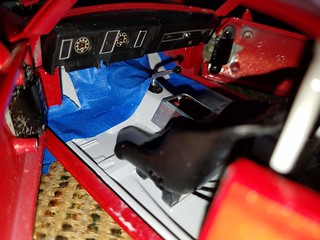 And ready for the JB Weld. 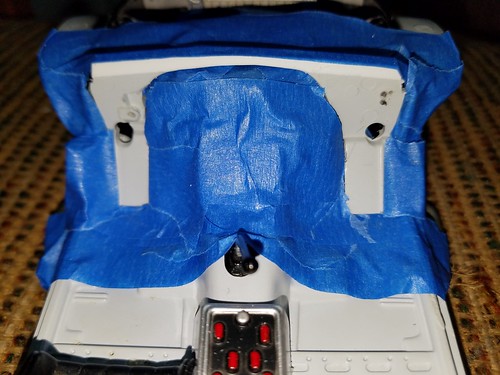 |
|
|
|
Post by Oldtimer on Oct 7, 2018 10:18:31 GMT -8
The BLOB! 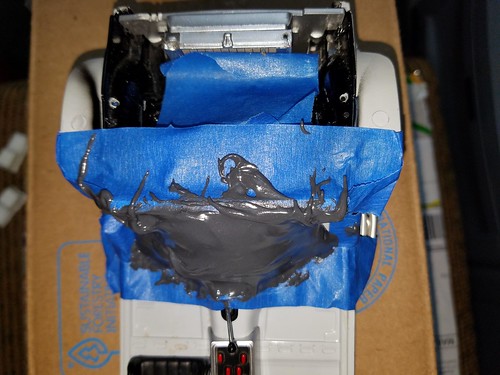 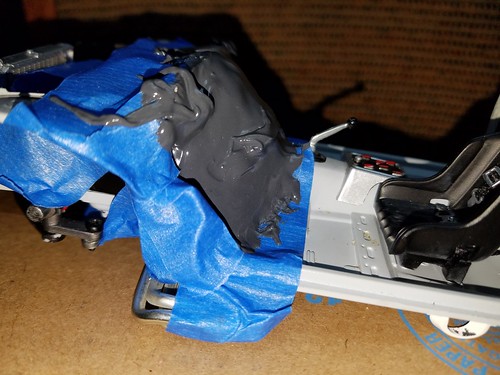 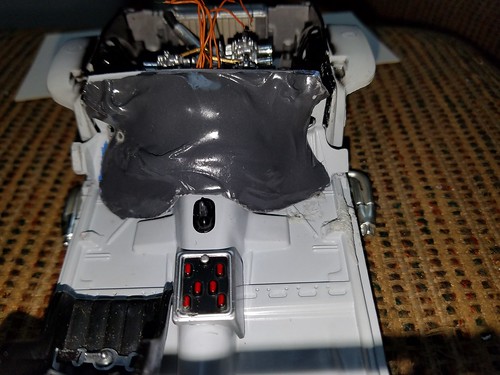
And now the grinding starts. |
|
|
|
Post by garydavis on Oct 8, 2018 10:52:34 GMT -8
Man...A lot of fabbi'n going on here.
|
|
|
|
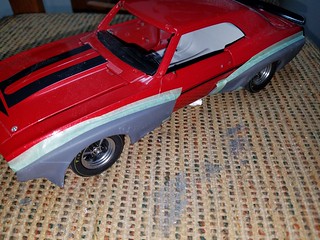
Post by Oldtimer on Oct 10, 2018 8:19:54 GMT -8
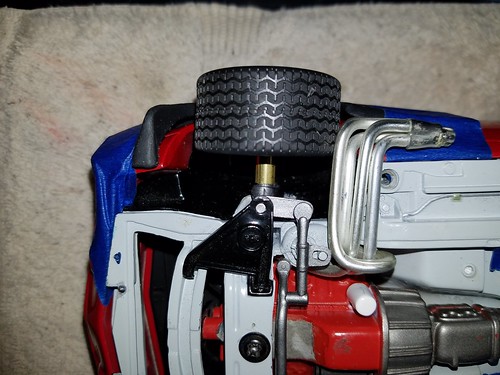
Okay, so back in the day, when I was working on real racers, one of the things we had to focus on was getting water to and from the engine and radiator. On my first racer, a converted '69 Z28 Camaro, running a stock radiator and engine, it was easy. You just had to go down to the local car parts store, buy upper and lower hoses and you were done. As we got into semi-tube frame, and tube frame, things got a little more difficult. Our second racer was a C3 Corvette, on a semi-tube frame (front clip was stock, rear clip was fabricated to hold a Franklin Quickchange center section with a coil-over suspension). When we got it, it was set up for a Small Block Chevy engine, with the radiator in the stock location. Well, in order to improve cooling and air flow, we decided that we would lean the top of the radiator forward, in lieu of how the stock configuration was, therefore setting up the challenge. Once we got the aftermarket radiator located, we then set about trying to figure out the best routing for the hoses. Clearly, stock hoses weren't going to work, so what we did was eyeball the route, and sketch up a solution. I had a buddy who's Dad ran a couple of car parts places, so once we had a design in our head, I'd go over and stand in front of a wall of hoses, and do "research". The conclusion to that process is the inspiration to a solution for this model. First, I knew that the hoses from the Carousel 1 Big Block weren't going to be a direct match to the GMP Camaro radiator, but then moving the engine back a scaled 4.5 inches added a degree of difficulty. Here's how they sit. 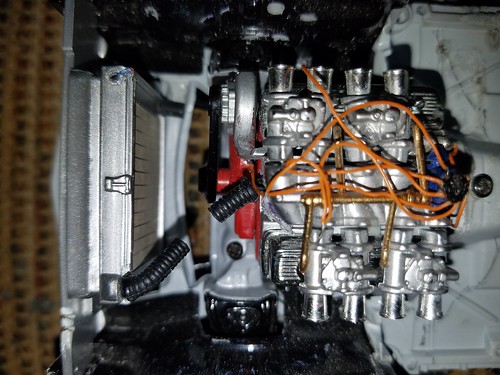 And here's the solution, again, straight from my racing days. On the racing Corvette, we decided that we would fabricate two aluminum tubes, and connect them to the radiator and engine with very short pieces of hose. In that case (as opposed to what I have fabricated for this model), we welded a bead around each end of the aluminum tube to give the hose clamps something to capture. As you can see here, I have captured the hose inside the piece of aluminum, but I am using a fabricator's license to say that's okay for this model. 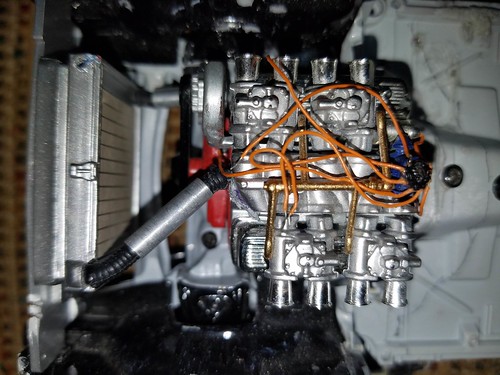 Hard to see the lower hose, but it's there, and connected. These are just on there loose for now, as there is still a lot of detailing to be completed before final assembly. While I was in the shop last night, I also shortened the drive shaft brass tube, so that it is now the correct length. 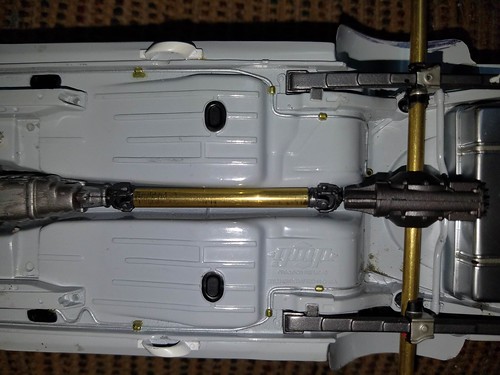 Worked some on the Blob, and still not satisfied with that solution, and the new bodywork came in, but not enough time to fab it up onto the Camaro body and take pictures (plus, I had to break away frequently to watch the Red Sox/Yankees game). |
|
|
|
Post by Joel_W on Oct 10, 2018 9:32:20 GMT -8
Old Timer,
Your Camaro conversion and fabrication is just mind boggling to someone like me whose basically a OOB builder these days.
the more I see in my 1st few days here, the more I'm impressed at the level of builds here.
Joel
|
|
|
|
Post by slim on Oct 10, 2018 9:47:40 GMT -8
Excellent!
|
|
|
|
Post by Oldtimer on Oct 11, 2018 6:18:16 GMT -8
|
|
|
|
Post by Oldtimer on Oct 12, 2018 8:12:19 GMT -8
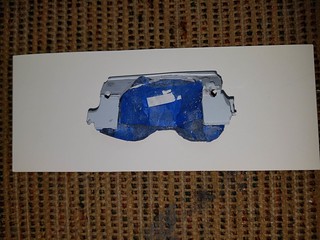
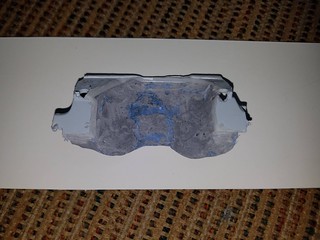
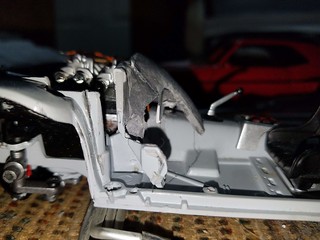
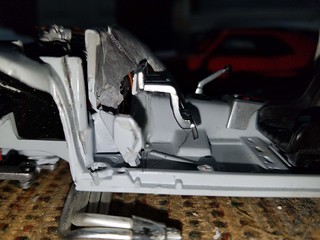
To misquote an oft-used line from the Old West: Meanwhile, back at the firewall. Clearly, the Blob was not going to be a workable solution. While it was fun, it did not prove to be functional, So, back the the drawing board, or in this case, the cardboard. I took a piece of cardstock and started cutting away everything that didn't look like a firewall. After a few starts and stops, here's where we ended up.  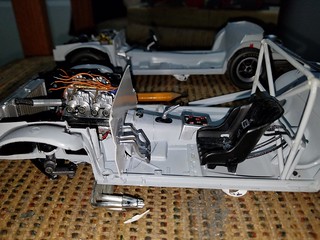  This is what a stock, unadultered firewall looks like. 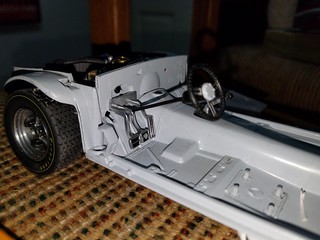 This is two GMP Camaro chassis, side by side, just to show how far back the new one has to be to clear the relocated Big Block engine (the piece of styrene is just there as a point of reference). 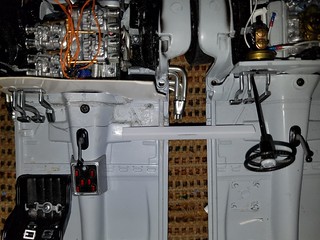 I will use this pattern to produce a new firewall out of styrene sheet, which will be this weekend's fun and games. |
|
|
|
Post by garydavis on Oct 12, 2018 8:59:36 GMT -8
That's looking REAL good OT! Good fix on the firewall.
|
|
|
|
Post by Oldtimer on Oct 13, 2018 10:52:43 GMT -8
|
|
|
|
Post by garydavis on Oct 13, 2018 12:22:15 GMT -8
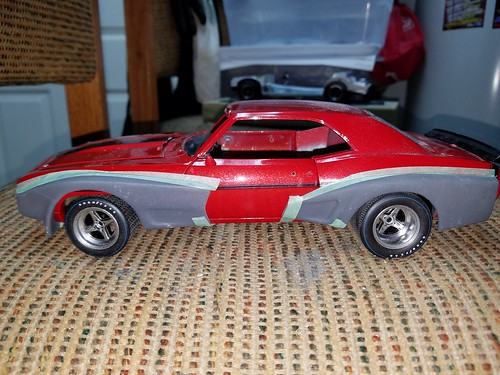
This is looking cool OT. I don't think blending the fenders in to the body will be a problem for you at all...
|
|