|
|
Post by tatocorvette on Jun 14, 2020 7:33:24 GMT -8
Cool! That picture is the same winning car I'm doing (chassis C6CT-003) but in ALMS trim. Do you know if he was part of the team by 2007? I met the whole team in Atlanta in 2006 and 2007 as a "sponsor" (long story). By now I have a good idea on how the interior of the car looked for Le Mans in 2011, but interior shots of the car in race trim have been pretty much impossible to find. A 2003 Le Mans C5R is in my list of possible next projects, but probably after the 2001 Daytona overall winner C5R. Say hello to him from another Corvette Racing brother!  And invite him to the forum. Thanks, |
|
|
|
Post by Chris K. Hale on Jun 14, 2020 8:45:36 GMT -8
yes, Rick was on the 2006-2007 Factory Team and you may have met him. I think he started with the team way back in 1999. I will tell him You say Hello and invite him to join us, He keeps busy with corvette Racing and as a Championship HO slot car racer. But he will most likely join us. Chris
|
|
|
|
Post by tatocorvette on Jun 15, 2020 5:36:13 GMT -8
Hello, I am finding that updating the interior is more involved than originally thought. And I couldn't just let it be box stock inaccurate. The C6R kit is based on the early show car which is close to the original GT1 car. But as these cars evolved over the years, things changed, especially from the GT1 to GT2 transition in mid 2009. For 2011 they introduced paddle shifters, replacing the sequential shift lever in the center console. The steering wheel changed from a rather simpler round steering wheel with a button or two to a complex command center. Center console got simpler as many buttons were relocated to the steering wheel. The dash now featured the production vent grille on top, missing on the GT1 car. The tablet-like rear view camera screen was now located behind the steering wheel and the dash instruments were replaced by a data display right in front of the driver. This data display had a visor like shade to protect from glare. The driver's side net is also different among many other changes. Here is a look at the interior from a helmet cam during a practice session. 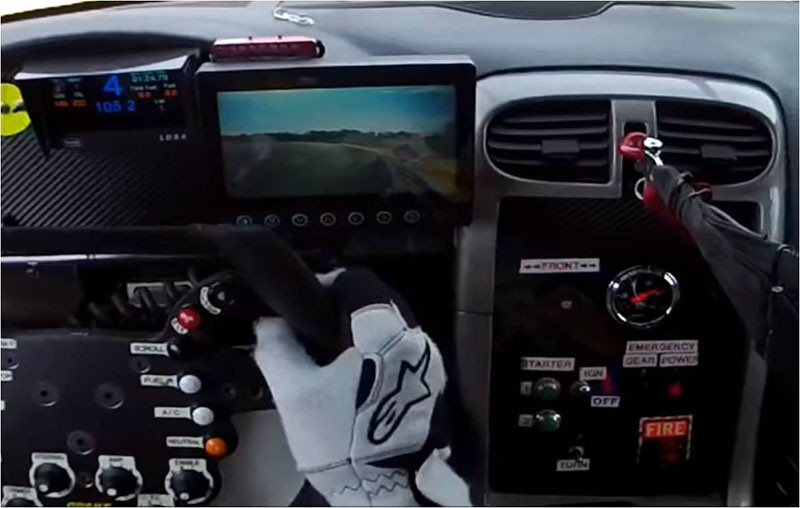 For some of these changes, I am relying on photo reduction techniques. I printed the display screens, center console, top grille and steering wheel center. 3D details will be added like switches and buttons. I scratchbuilt the little visor that goes over the display. Also modified the steering wheel and added the paddle shifters as per reference. 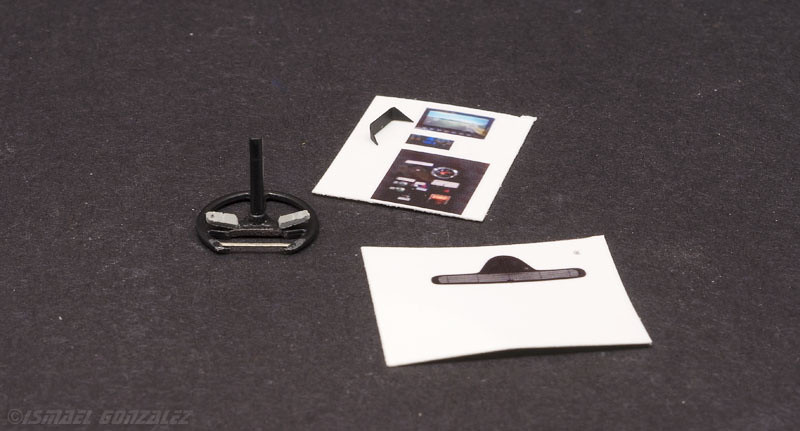 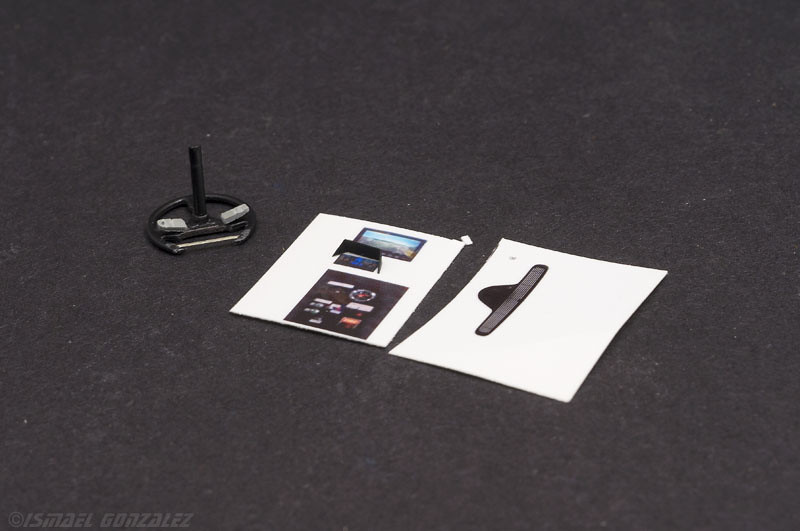 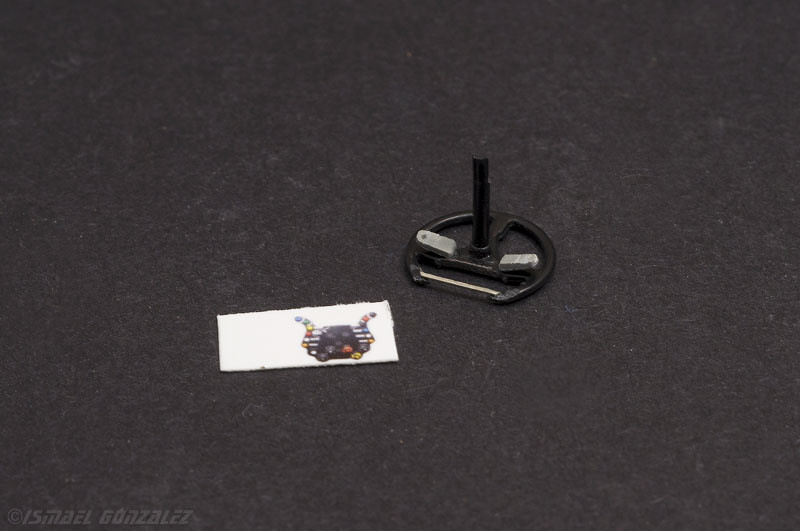 Thanks, Ismael |
|
|
|
Post by Joel_W on Jun 15, 2020 10:15:53 GMT -8
Ismael,
Nice conversion on the steering wheel. Just think at how much work work would have been needed if it was a F1 style butterfly wheel. In any event I have the utmost confidence in your abilities to make the transformation at the highest level.
Joel
|
|
|
|
Post by tatocorvette on Jun 16, 2020 7:33:20 GMT -8
Hello, I always say I treat each sub-assembly as a model in itself. In that line of thought, I finished... the dash Converting the kit's GT1 generic dash into a proper 2011 specific GT2 as raced in LeMans was a bit more involved that I originally anticipated. But it's done. Hard to see in these pics but there is data displayed in the screen in front of the driver. The rearview camera I think is showing the straight of Laguna Seca but I'll say it is entering Tertre Rouge in LeMans The instrument backdrop is a carbon fiber decal still in its backing (for strenght) mounted from behind. The grille and the dash decal are thicker than I would have liked, but those will be hard to see anyways, especially from this angle. Buttons are little drops of white glue and switches are little pieces of wire. Redid the paddle shifters. 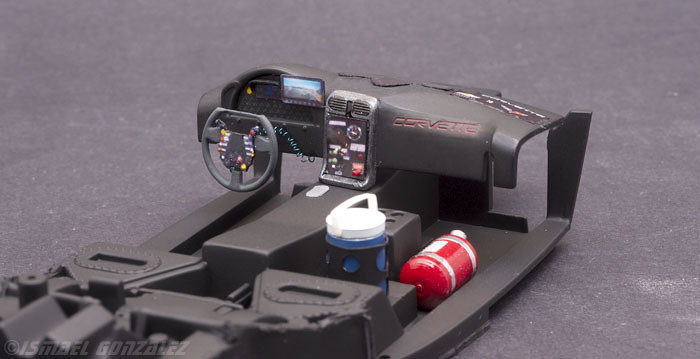 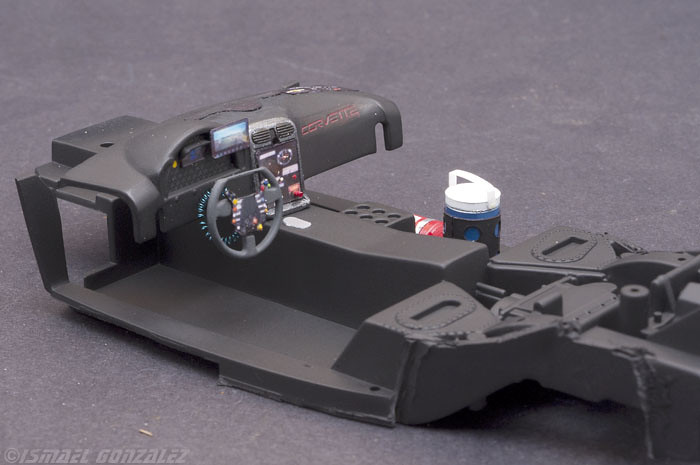 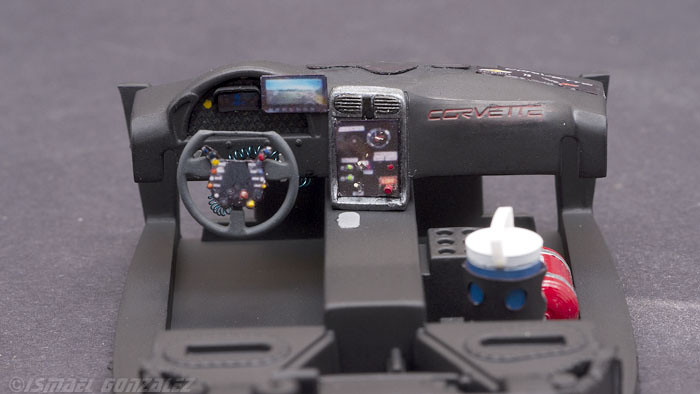 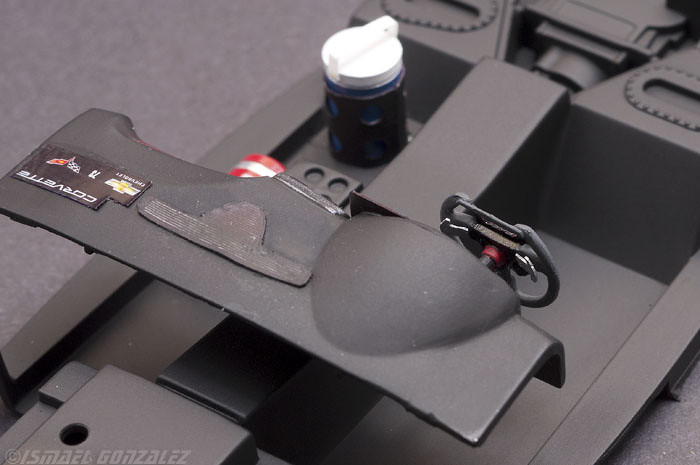 Thanks, Ismael |
|
|
|
Post by Joel_W on Jun 17, 2020 5:19:56 GMT -8
Ismael,
The interior is really looking quite good.
Joel
|
|
|
|
Post by tatocorvette on Jun 22, 2020 3:48:49 GMT -8
Hello, So I spent like 3 days scratchbuilding my own racing harness. Pictures don't do it justice. All you see here is tape, wire, styrene from a disposable plate, white glue and I printed the logos. 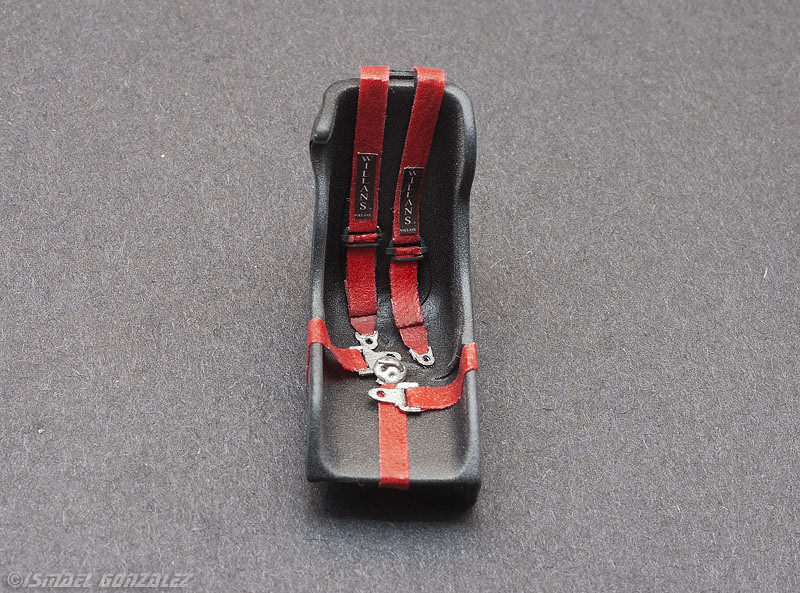 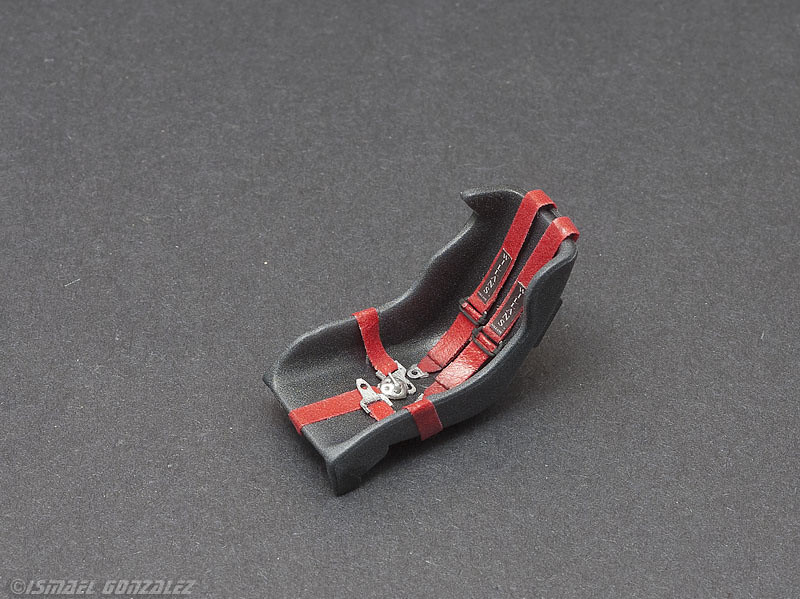 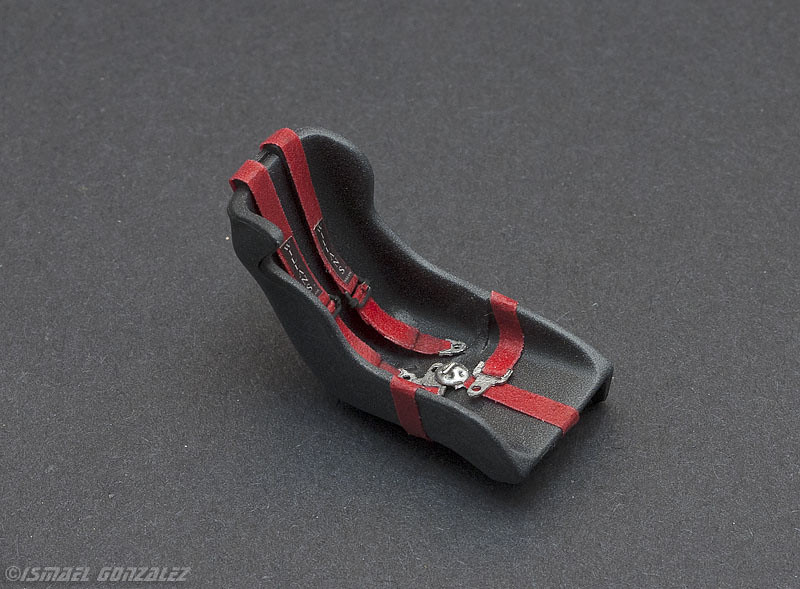 This is one of those things that will barely be seen but I really like how they turned out. Thanks, Ismael |
|
|
|
Post by Ben_B on Jun 22, 2020 6:28:54 GMT -8
Your homemade seatbelt hardware looks better than my store bought hardware! Looking great!
Ben
|
|
|
|
Post by Joel_W on Jun 22, 2020 9:07:06 GMT -8
Ismael,
I'm just super impressed at the quality of your scratchbuild racing harness. I just may hire you for my harnesses.
Joel
|
|
|
|
Post by tatocorvette on Jun 25, 2020 16:52:13 GMT -8
Hello, Sorry for been away for a while. Very busy with all sorts of stuff including competing hobbies Interior almost done. Still pending the roll cage. Disregard the white line on the dash. It is fresh white glue to seal a gap and will be painted once dry. So these cars have safety nets on both sides of the driver. Here is the kit's center net. 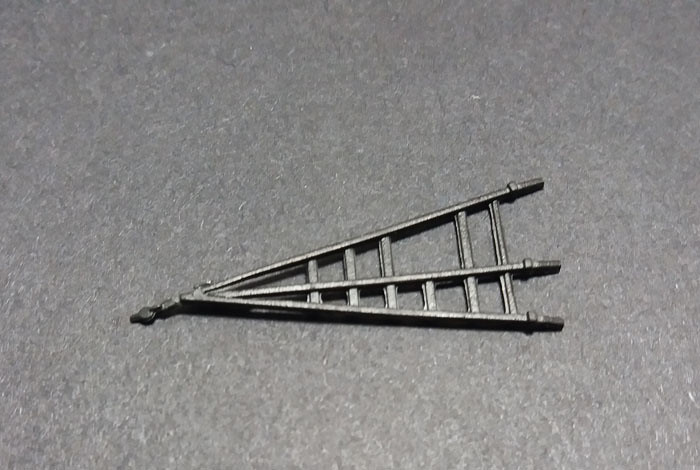 That will not cut it. It looks more like prison bars So I modified it as per the 1:1, plus scratchbuilt the left side (window) net. This will barely be seen. Making it functional is a waste as it will never be reached... Please play the video.  The white hose is the drinking water line that connects to the helmet. 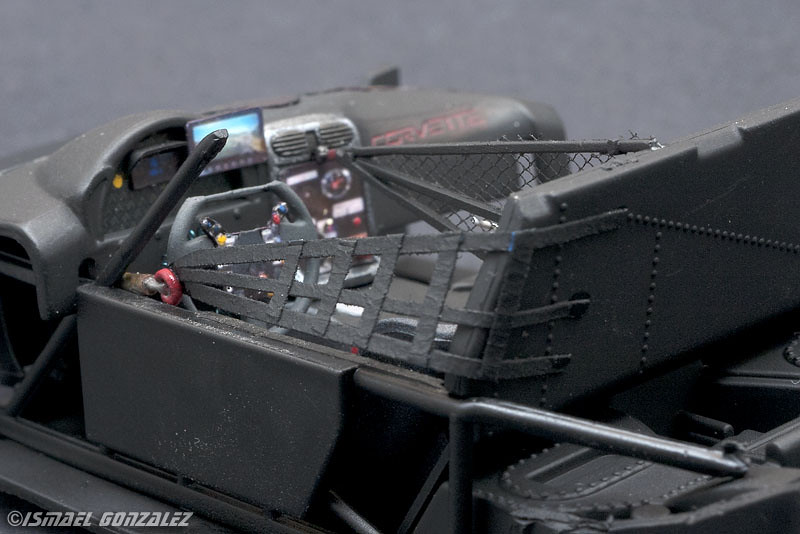 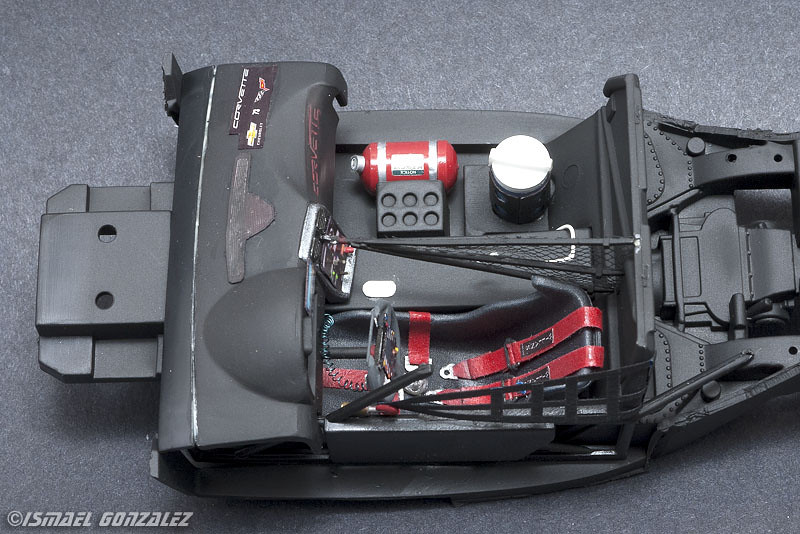 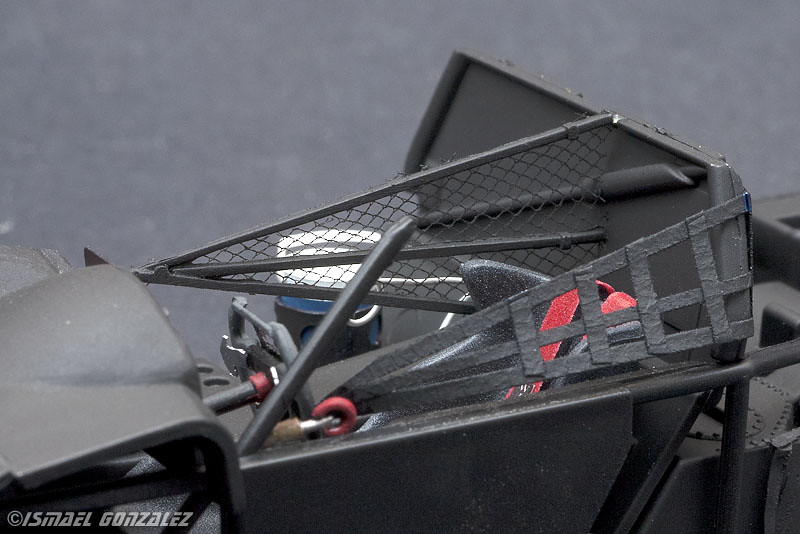 Thanks, Ismael |
|
|
|
Post by Joel_W on Jun 26, 2020 5:10:18 GMT -8
Ismael,
Now that safety netting really looks fantastic especially considering that the pictures are greater then 1:1
Joel
|
|
|
|
Post by mustang1989 on Jun 26, 2020 5:42:44 GMT -8
Wow!!! And I do mean me some WOW!!!  |
|
|
|
Post by tatocorvette on Jun 29, 2020 18:27:15 GMT -8
Hello,
Basic interior / roll cage is done. Very little of this will be seen.
Those 2 bars sticking out of the dash actually go to the windshield frame. But since that is part of the body I made them to rest on the roll cage. After all most of them will not be seen anyways.
Thanks,
Ismael
|
|
|
|
Post by Joel_W on Jun 30, 2020 5:30:06 GMT -8
Ismael,
Great interior for sure. Love your short build vids as that little bit extra.
joel
|
|
|
|
Post by arcticwolf on Jun 30, 2020 7:14:52 GMT -8
I'm lovin' it.
|
|


