|
|
Post by Joel_W on Feb 23, 2019 14:29:46 GMT -8
Well, I've taken off more then a full week since I finished the Tamiya 1/24 scale Porsche 956 build. Usually, I start a new build within a day or so, but the 956 just literally wore me out. What started out with the goal of just enhancing the engine bay and cockpit, turned into a full blown correction of the cockpit, which was just pure fantasy on Tamiya's part. The engine/transmission bay was just the opposite, and for a kit designed in the early 1980s, it was far ahead of the times, so I thought I'd just enhance it somewhat. Well, as it turned out, it too received to the best of my limited ability, the full Monty treatment. both areas honestly tested my skill level to the fullest, but somehow I survived, and eventually crossed the finish line. So this time around I'm looking for a simpler build, one that at best will just have some basic engine and maybe cockpit wiring, as the focus will be what I call an Enhanced Out of the Box build of an iconic open wheel race car. And that car is the Brabham BT18 F2 car. This is the car that Sir Jack Brabham and his teammate Dennis Hulme drove their team cars to 11 victories out of a 12 race f2 1966 season, and Brabham won the championship with 10 victories. These simple single seat open wheel cars were fitted with a Honda RA302E engine that produced all of 150 hp at 11,000rpm. But it did the job. Race cars in the rear engine era just don't get much simpler then they were in 1966: 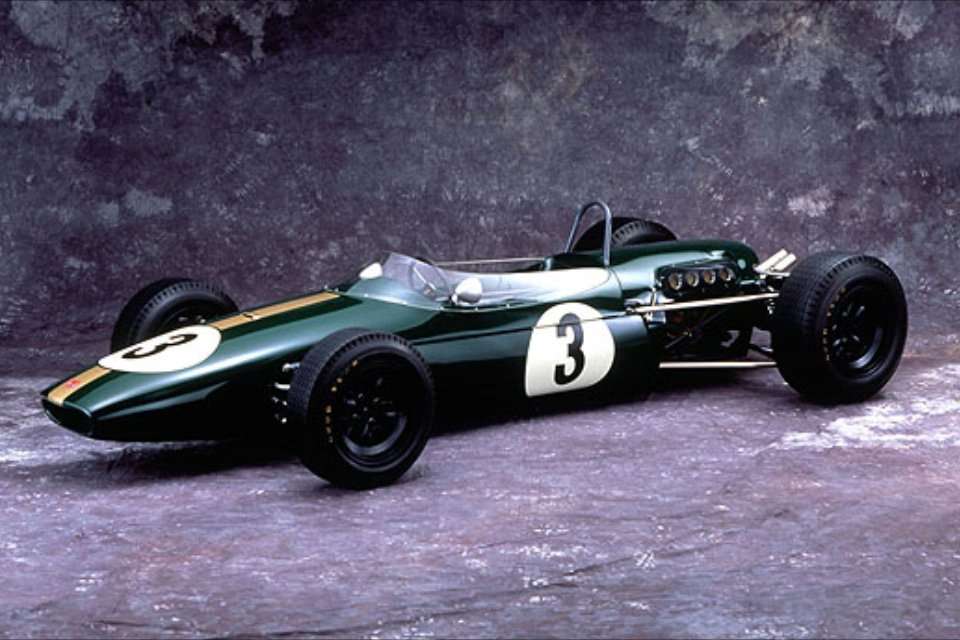 and was powered by the HondaRA320E engine 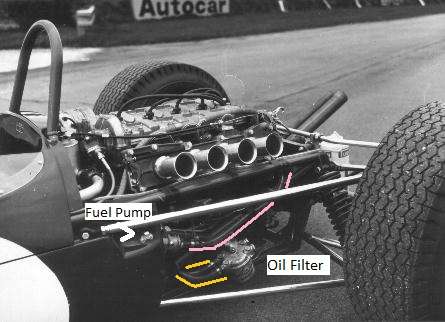 It's not a very common occurance that a model company specializing in cars would produce a non-F1 car in any scale, but Ebbro announced back in 2016 that they were indeed going to release the BT18 as a kit. And so my 2 year wait started. I'd about given up any real hope of seeing the kit released, when my good friend Richard on Aeroscale let me know that Free Time hobbies had it listed as in stock. So I wasted little time and bought one. to this day I haven't seen any other online retailer here in the USA list one. 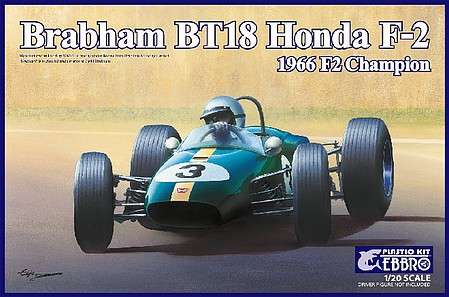 Hopefully within a week's time I'll have finished the assemby of the tube frame and side gas tanks for my 1st update. Joel |
|
|
|
Post by Joel_W on Feb 27, 2019 14:03:16 GMT -8
Over the last week, I've been able to put in a fair amount of time at the bench, since it's done nothing but rain, light snow, high winds, and cold temps. Not my type of weather to be outside for sure. So I started with step one which is the basic chassis. The Chassis was constructed back in the 1960's of plain old rolled steel tubing. Cut, clamped and wielded right there in the shop. The designs while varying slightly from one car to the next, were basically all he same where everything was bolted directly to the independent frame. I glued up the basics parts and I had a frame. 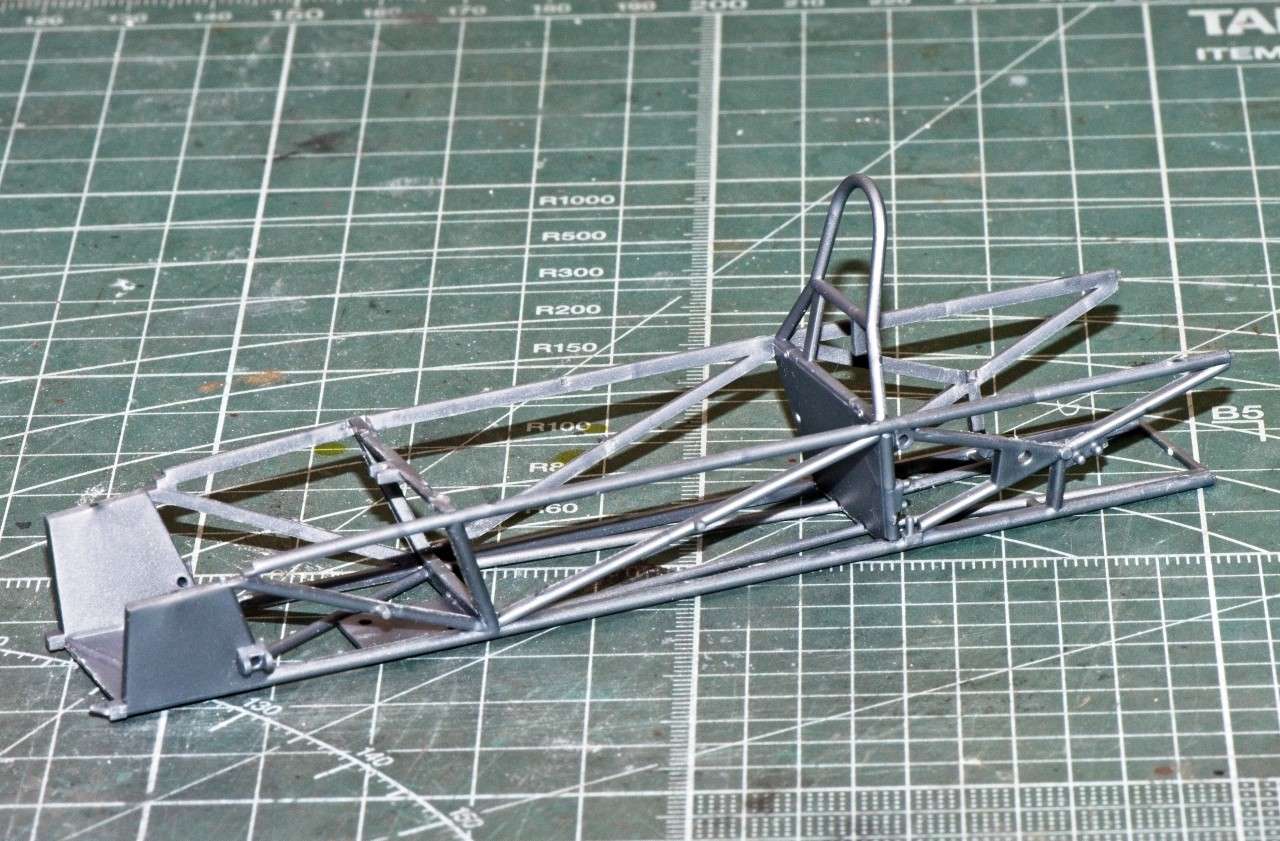 You'll notice that the molded color is aluminum, and that's incorrect, as we're looking more of a basic steel type tubing. Also, the inside of the cockpit tubing is flat on the side facing inward. The tubing should be completely round, so this puzzled me to the nth degree, as you can see the tubing in this picture is certainly round 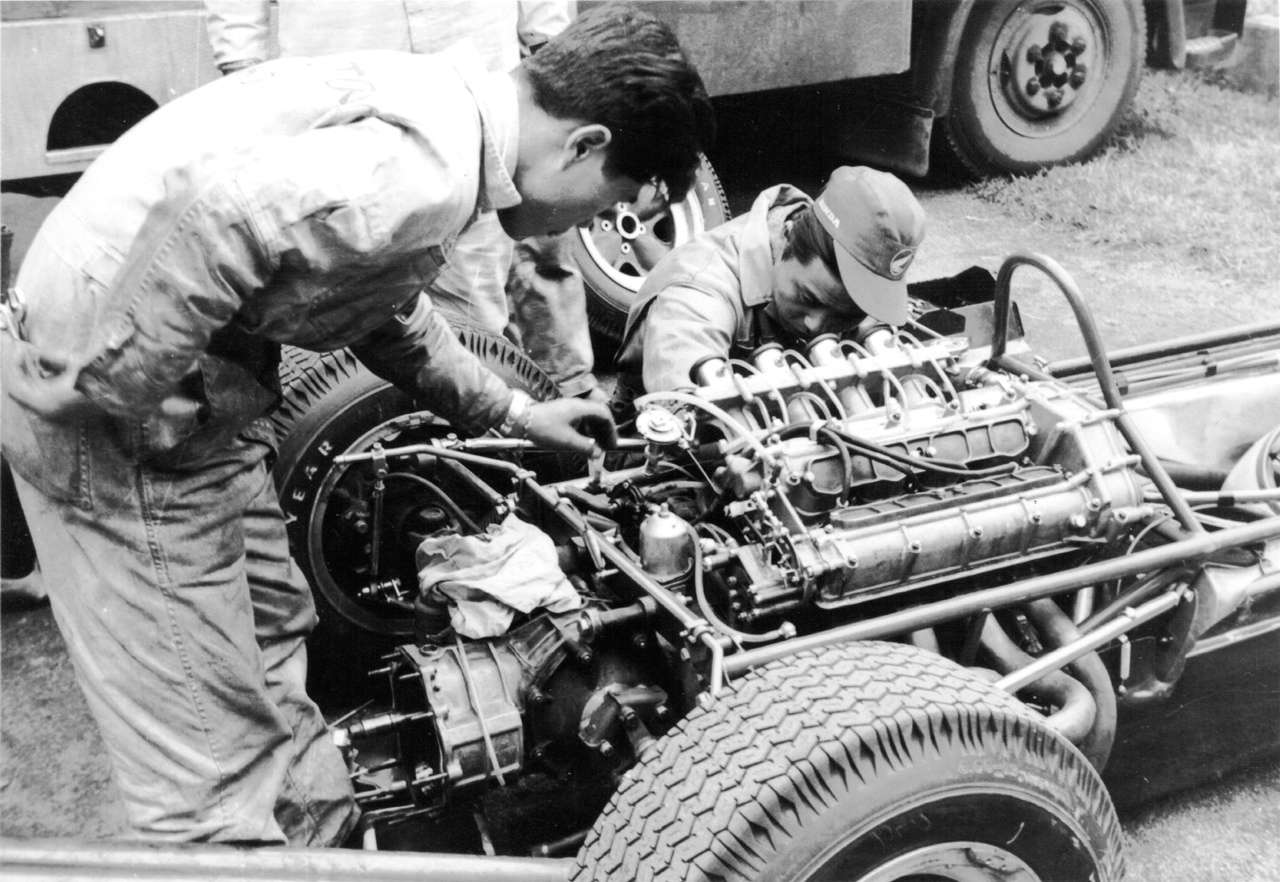 Took a little while to figure that out. With all the other over laying pieces of tubing between the chassis and the seat, having fully round tubing just might have created a space issue. So the halved tubing solved the problem. I was going to try and make half tubing, but as soon as I saw that it would effect all the other tubing in the cockpit, I nixed that idea. So I painted the chassis and associated pcs of tubing Tamiya XF-53 Neutral Gray, then when dry I glossed them with Model Master Glosscoat. 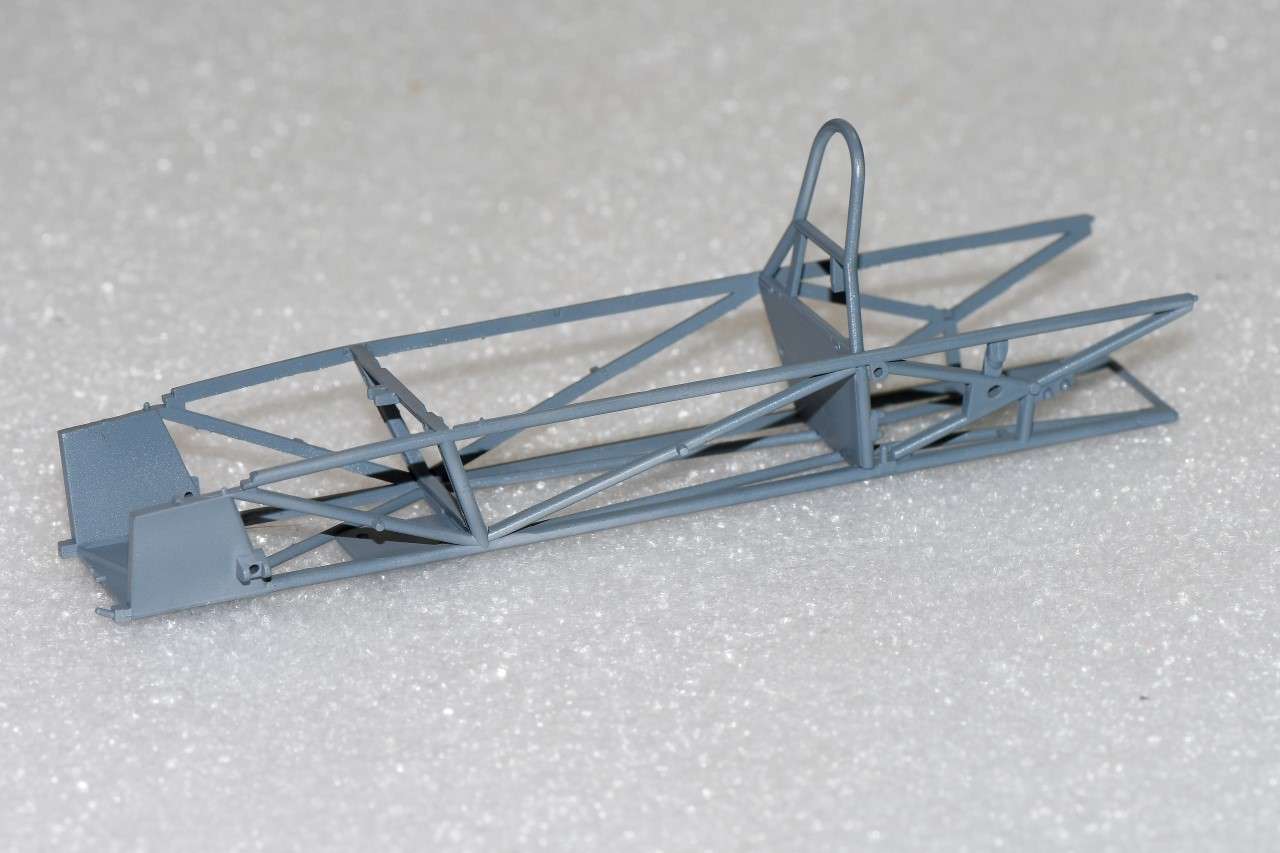 Next up was the two side gas tanks. Yep, back in those days the main tanks were actually directly on either side of the driver, and they neither had a bladder nor were self sealing. Plenty of drivers died in car crashes from gas fires when the tanks just erupted. Here's a picture of Jack Brabham working on his BT-18 right next to one of the tanks. 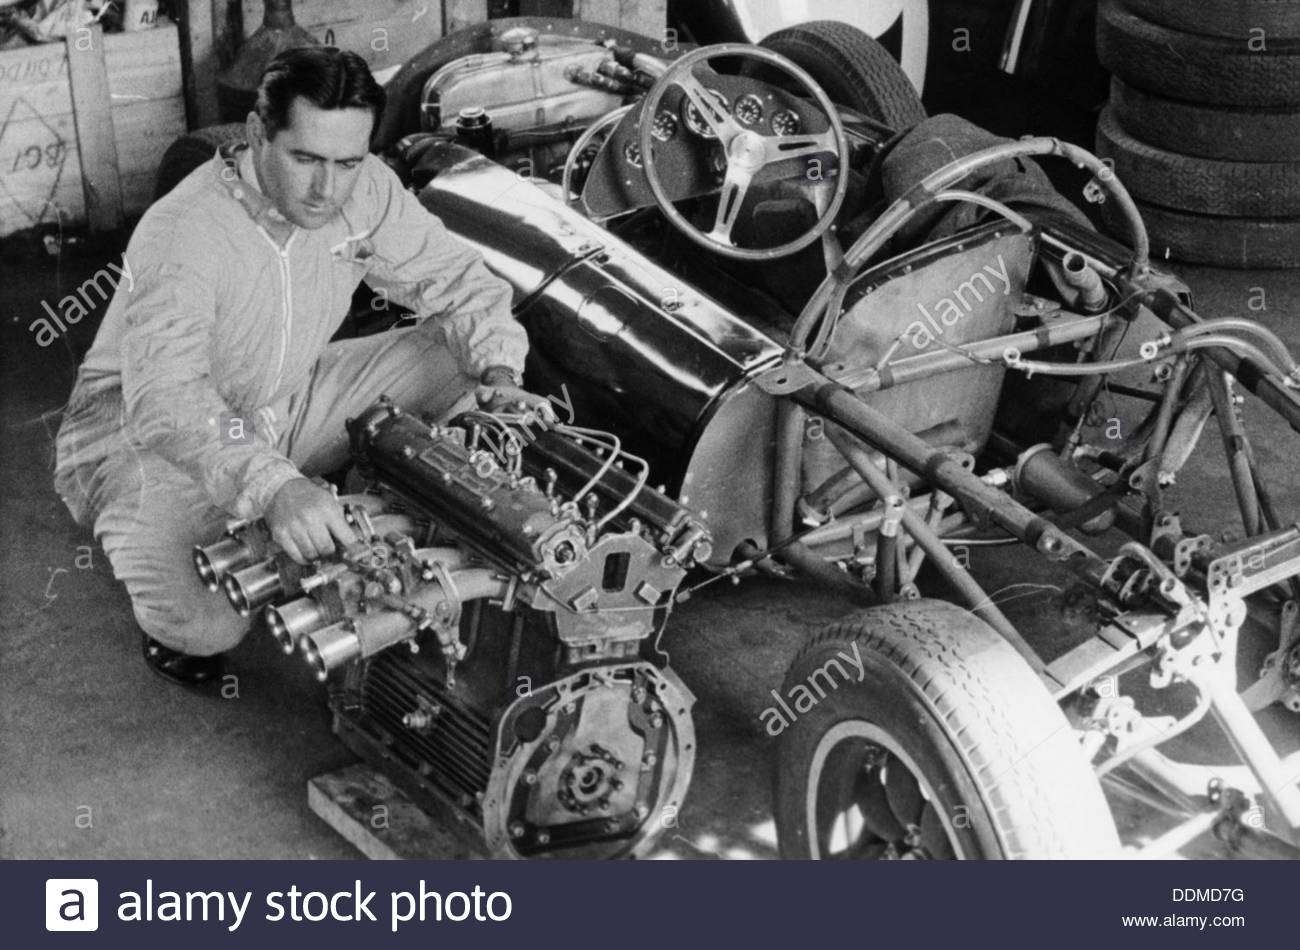 the kit comes with two, 2 piece tanks that fit like a glove when installed. I painted both tanks with a primer coat of Tamiya X-1 Gloss Black, thinned with Mr. Color Leveling thinner #400. Smooth as silk when it dried. I then air brushed on a coat of Alcad Steel. Here's a picture a little ahead of the build sequence showing the tanks installed. 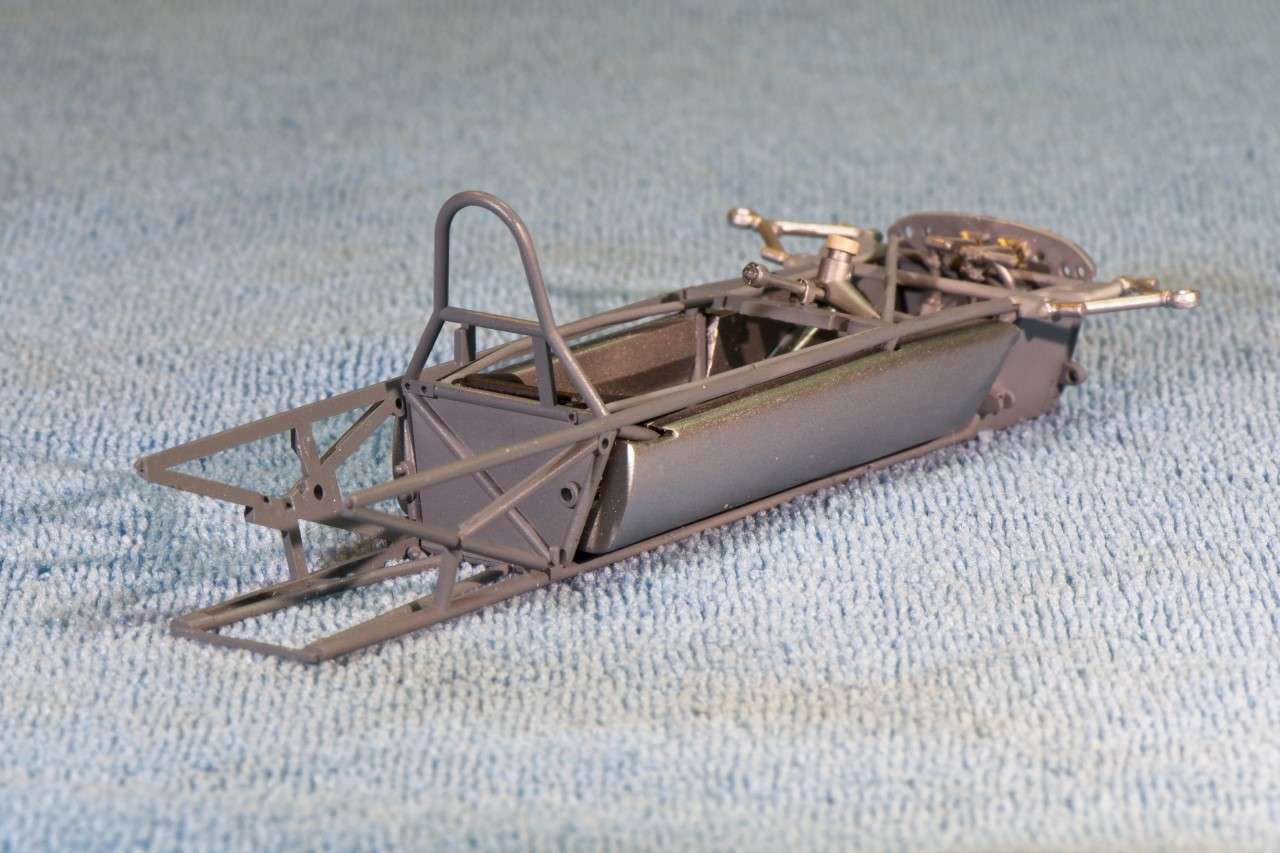 Cross members were then added as well as the stainless steel shift rod and lever. Ebbro called out for it to be gloss Gray, but that is incorrect. Next up was the front bulkhead. I painted the top plate Aluminum, and the rest Neutral Gray, then glossed it. There are 3 master cylinders: Front brakes, Rear Brakes, & clutch. They're made from Brass, so I painted them Brass, then a little streaking just to show some wear and tear. The top cap is a plastic screw cap, that I painted with a home made brew. 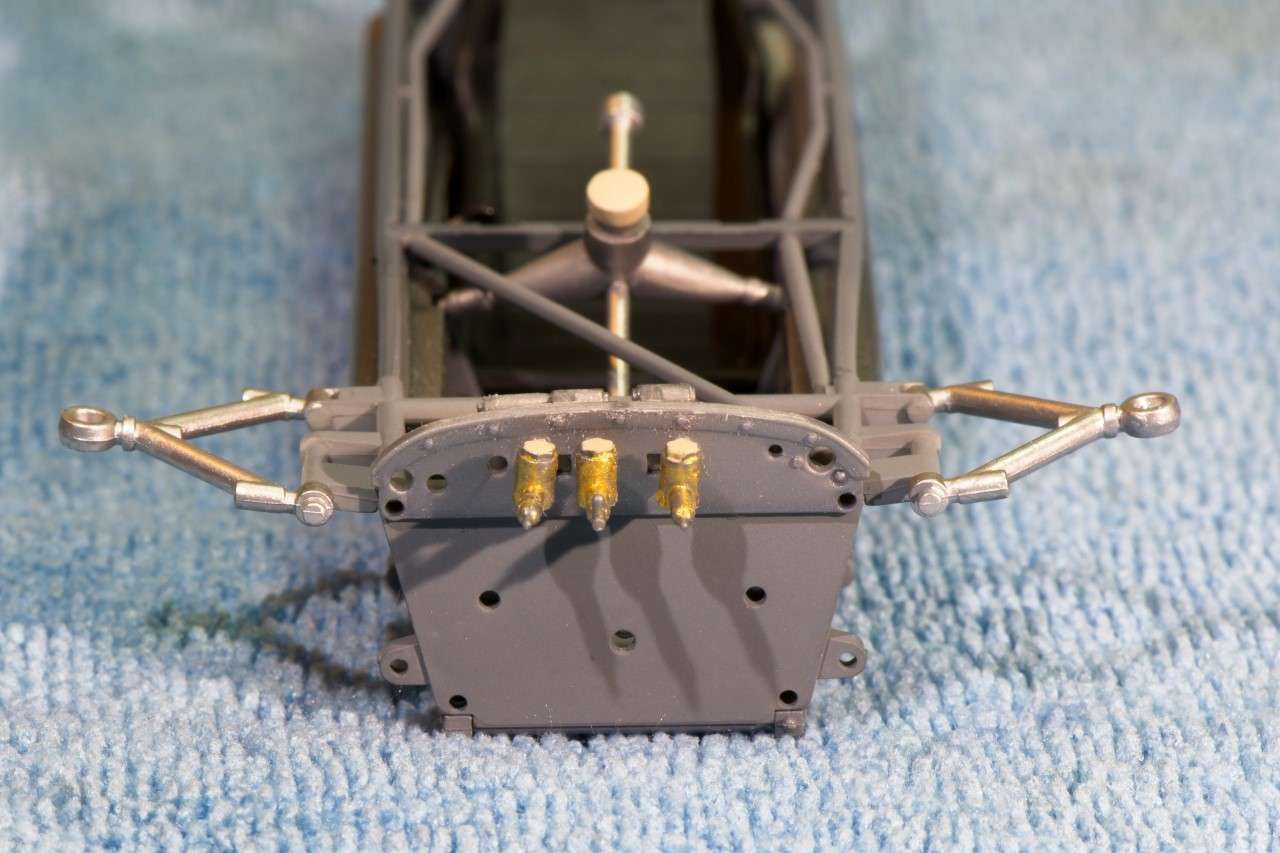 I haven't run any brake lines as at this point I literally have no idea of what or where they should go. the other side of the bulkhead has some of the finest detailed gas, brake, clutch, and foot rest peddles I've ever seen.  Next up was painting the steering shaft with Alcad chrome, then the tank that rests on it Aluminum with another plastic type cap. 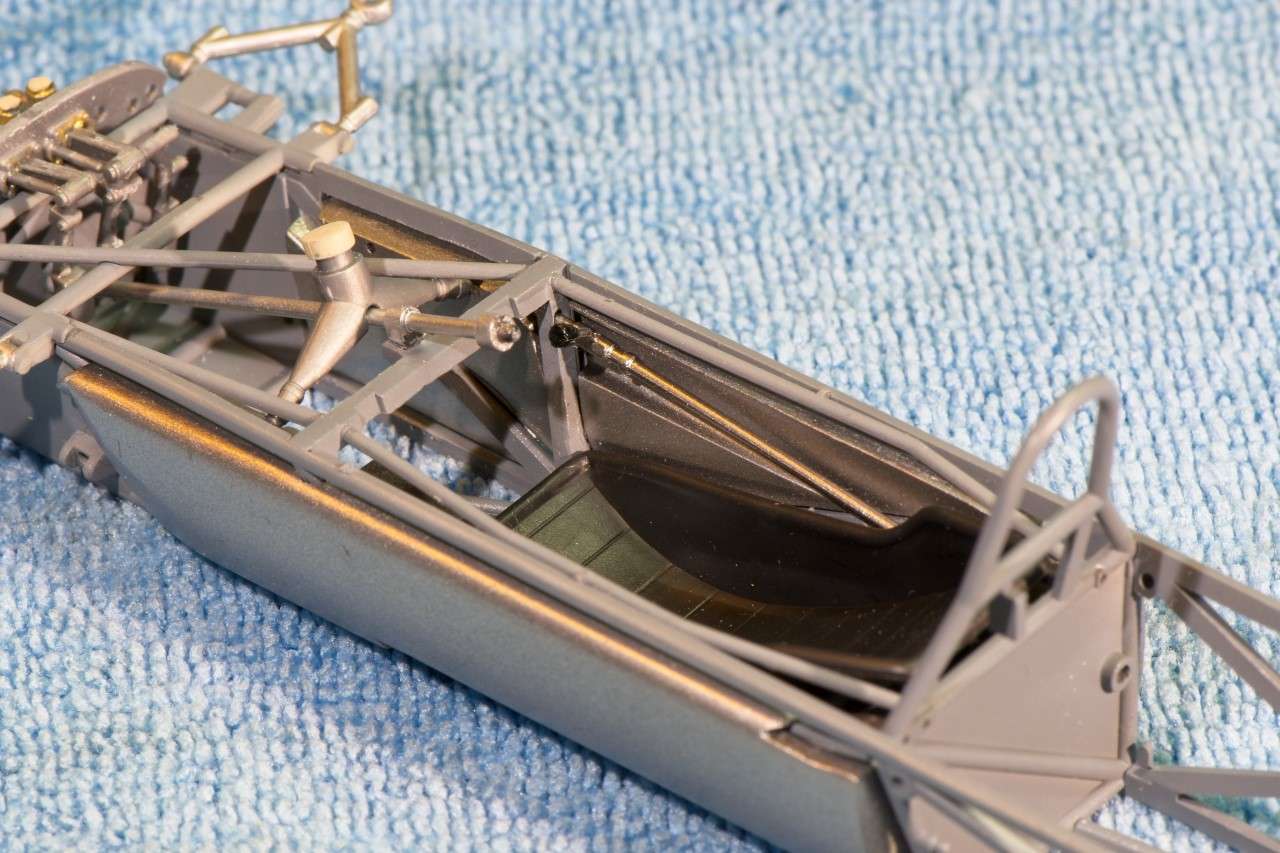 Here's a few pictures of the chassis to date as it now stands: 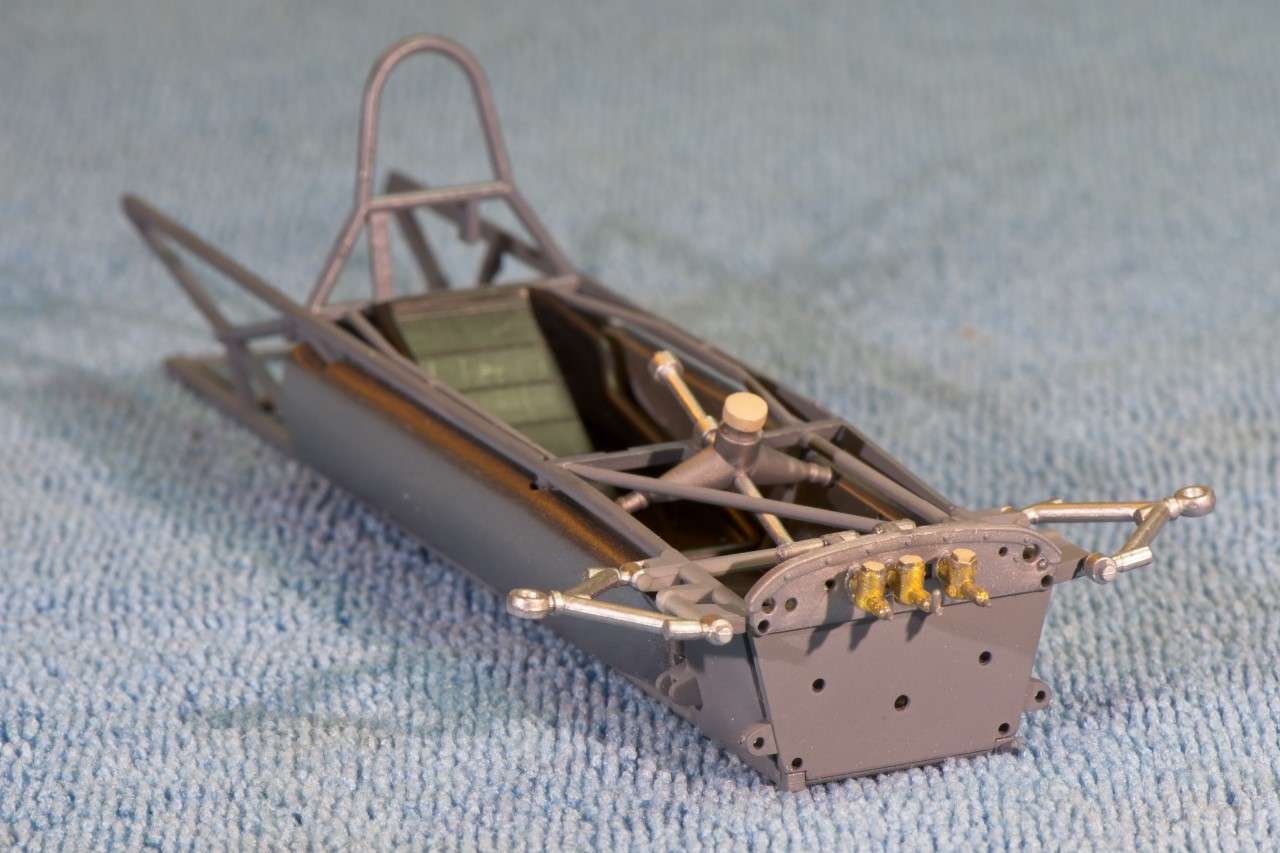 I decided to test fit the bottom of the shell, and to my surprise it fit ok, but will need a little helping hand. 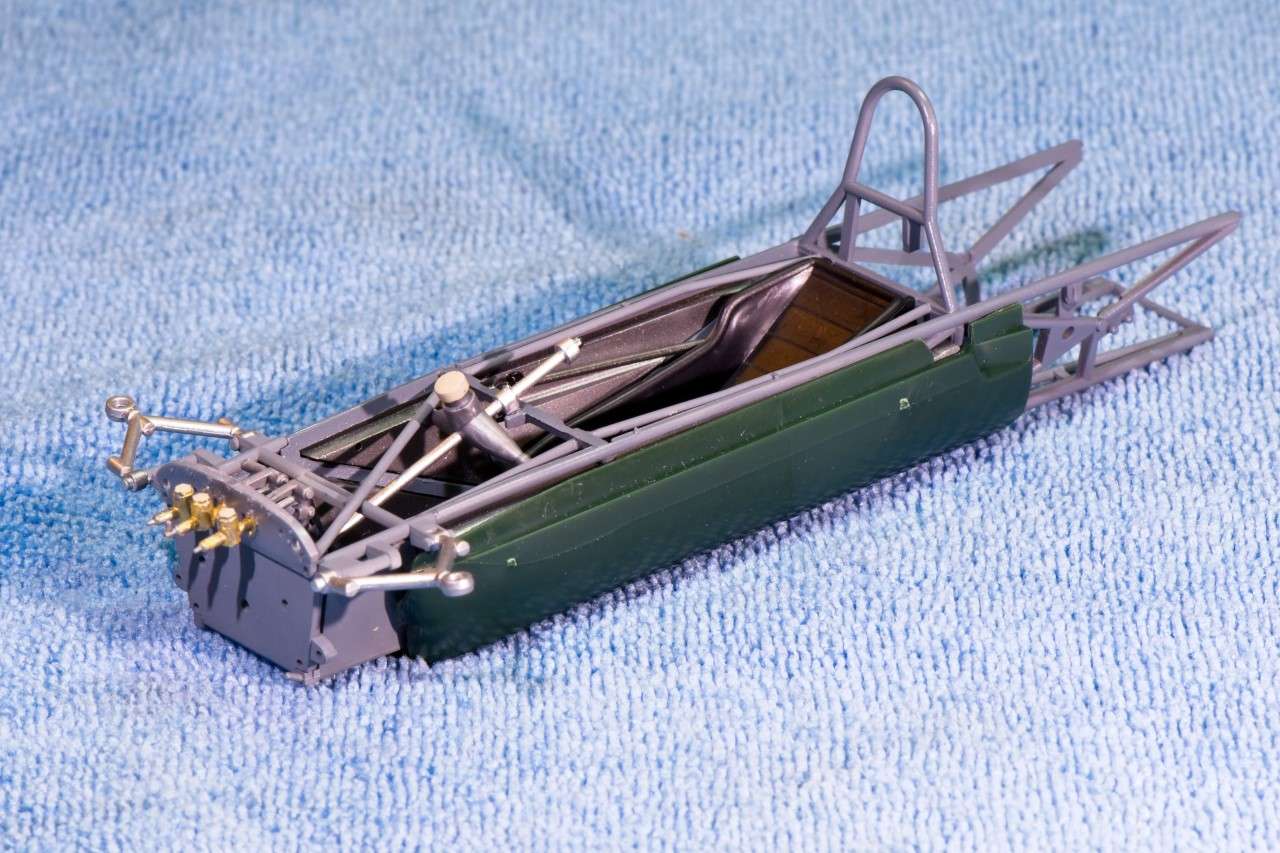 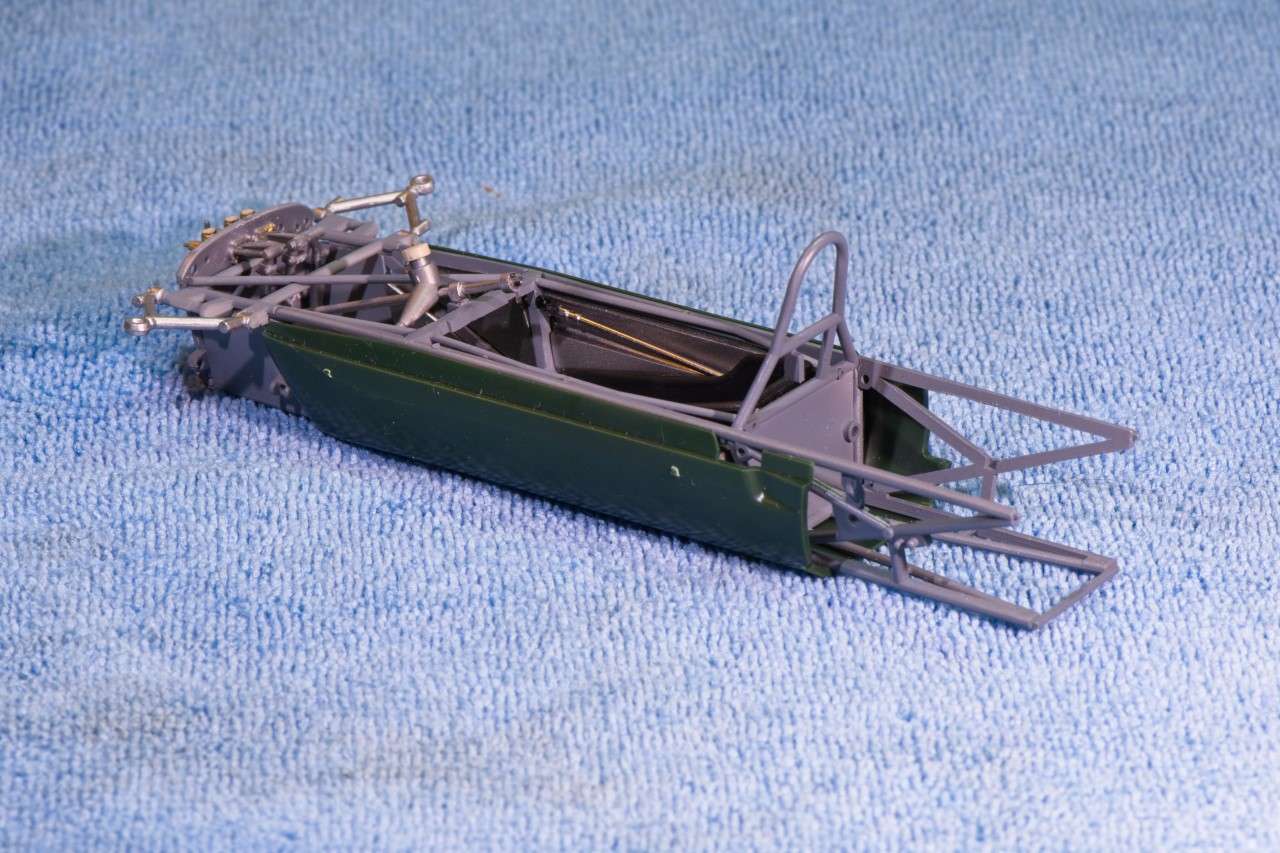 What the heck, I test fitted the top main section as well. 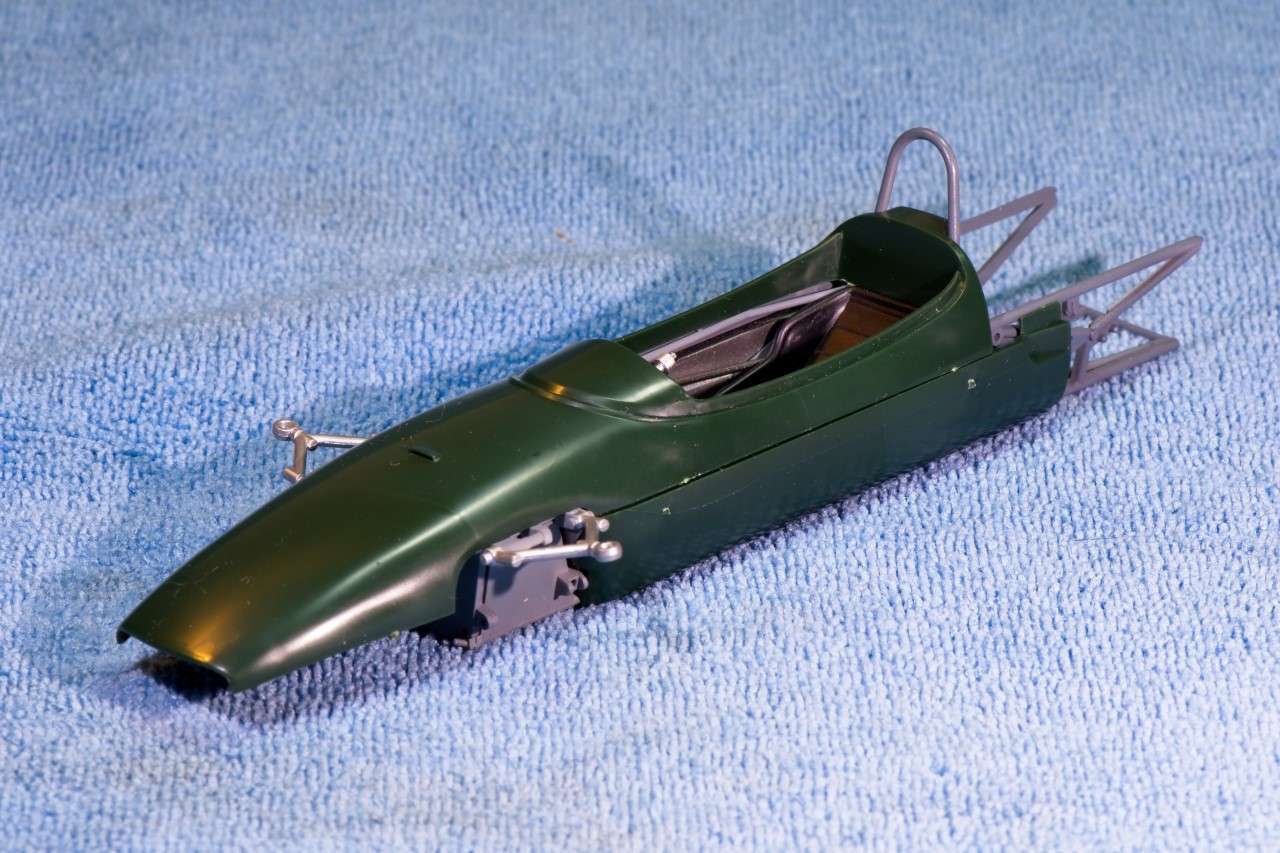 Thanks for checking out my BT-18 to date. it's always much appreciated. Joel |
|
|
|
Post by 4wheels on Feb 27, 2019 14:11:41 GMT -8
The half-round tubing is a result of the limitations of the mold used. The inside part of the mold has to be able to slide out of the frame or the frame needs to slide off the mold. One way or the other, unless the mold is made up of many more (read: expensive) moving parts, this is the compromise we are left with. Look at a Monogram Sprint Car frame, same thing, the inside of the frame and also the cage are flat. Looks like a great kit, I should pick one up before the price goes up! Nice work on it so far, I like anything "unusual", and this fits the bill for sure!
Brian
|
|
|
|
Post by Joel_W on Feb 27, 2019 14:35:36 GMT -8
The half-round tubing is a result of the limitations of the mold used. The inside part of the mold has to be able to slide out of the frame or the frame needs to slide off the mold. One way or the other, unless the mold is made up of many more (read: expensive) moving parts, this is the compromise we are left with. Look at a Monogram Sprint Car frame, same thing, the inside of the frame and also the cage are flat. Looks like a great kit, I should pick one up before the price goes up! Nice work on it so far, I like anything "unusual", and this fits the bill for sure! Brian Brian, Thanks for the molds lesion. So I was completely wrong in my assumptions. So the only way to do it correctly was to have the chassis in more parts. But once I build up the chassis, it's busy enough that you don't even notice it. As for unusual, like I said, not many F2 cars from the 60s ever made it to the molding stage. And as Sir Jack Brabham is a personal favorite, the build is all that much more special to me. Joel |
|
|
|
Post by 4wheels on Feb 27, 2019 17:19:41 GMT -8
Another option would be to use half-round Evergreen strips to fill out the visible portions of the tubing (cockpit, engine bay), if there is room. I have always wished that Monogram had done their Sprint frames in more pieces to avoid the flat-sided tubing. I have all of those sprint car kits in my collection, multiples of many, and haven't finished one yet, mainly due to that problem. Just not happy with them.
Sir Jack was one of the greats, for sure. World Champion at 40!
|
|
|
|
Post by afx on Feb 28, 2019 3:00:46 GMT -8
It does look like a great kit.
|
|
|
|
Post by robhart on Feb 28, 2019 4:47:58 GMT -8
The chassis detail is impressive and the pedal assemblies appear particularly well done.
|
|
|
|
Post by Joel_W on Feb 28, 2019 7:41:39 GMT -8
Another option would be to use half-round Evergreen strips to fill out the visible portions of the tubing (cockpit, engine bay), if there is room. I have always wished that Monogram had done their Sprint frames in more pieces to avoid the flat-sided tubing. I have all of those sprint car kits in my collection, multiples of many, and haven't finished one yet, mainly due to that problem. Just not happy with them. Sir Jack was one of the greats, for sure. World Champion at 40! I did think of filing down Evergreen tubing, but as my original assumption as to no real room exists for the full tubing, it would really be a very tight squeeze. plus at the stage I'm at, it's just to late to try that correction. I've never built one of the Monogram sprint cars, but sooner then later I'll find one, and then build it. I do love watching them on TV when I can find a race. Joel |
|
|
|
Post by Joel_W on Feb 28, 2019 7:48:58 GMT -8
It does look like a great kit. JC, So far I'm absolutely amazed at the detail, as well as the fit of the parts. 1st class all the way. Joel |
|
|
|
Post by Joel_W on Feb 28, 2019 7:50:31 GMT -8
The chassis detail is impressive and the pedal assemblies appear particularly well done. Rob, I completely agree with your assessment. Like I said, I've never seen such detailed pedal assemblies in a 1/20 scale kit before. I'm hoping that the other end of the car is just as perfectly engineered. Joel |
|
|
|
Post by 4wheels on Feb 28, 2019 14:18:09 GMT -8
Another option would be to use half-round Evergreen strips to fill out the visible portions of the tubing (cockpit, engine bay), if there is room. I have always wished that Monogram had done their Sprint frames in more pieces to avoid the flat-sided tubing. I have all of those sprint car kits in my collection, multiples of many, and haven't finished one yet, mainly due to that problem. Just not happy with them. Sir Jack was one of the greats, for sure. World Champion at 40! I did think of filing down Evergreen tubing, Joel Joel, Evergreen sells half round rod, no filing required! |
|
|
|
Post by Joel_W on Feb 28, 2019 14:37:12 GMT -8
I did think of filing down Evergreen tubing, Joel Joel, Evergreen sells half round rod, no filing required! 4 Wheels, Thanks for that info. I really have to start looking at what they sell these days. Joel |
|
|
|
Post by afx on Feb 28, 2019 16:59:41 GMT -8
Evergreen as well as Plastruct offer many shapes and sizes.  |
|
|
|
Post by Joel_W on Mar 1, 2019 7:07:36 GMT -8
JC,
Thanks for the info. My biggest issue is that with no LHS that carries a good selection, I have to order online, and it's just that much harder to visualize the shapes and sizes.
Joel
|
|
|
|
Post by Joel_W on Mar 13, 2019 7:30:46 GMT -8
This last week has been more about not modeling, then modeling, due to the horrendous splitting and cracking issues on my finger tips. Of course that only is a concerning issue on my left hand as I'm left handed. Wearing Nitrile glove(s) while handling solvents and even sanding has really helped. So I've been able to finally finish up the front clip. My last update had just the top half of the front suspension in place, as well as the 3 master cylinders. But I still haven't figured out just how the brake and clutch lines actually ran, so nothing done on that front as yet. Ebbro has designed the shocks as three part assembly, top half, seperate spring, and bottom half. the plastic springs are just amazing. Every other shock I've ever seen in the 1/25-1/20 injected molded category are one piece molding that look ok, but not that great.  These once painted look simply outstanding. To me this is taking molded in kit detailing to the next step. 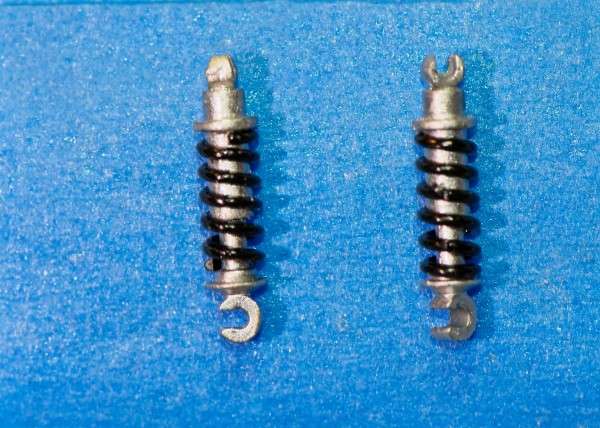 All the steel A Arms, control rods, and steering linkages were primed with Tamiya X-1 Gloss Black, and then air brushed Mig Ammo Polished Steel as I didn't want the look of chrome, which they're certainly not in real life.The Brake discs assemblies were also painted with steel for the rotors, then the caliburs were painted a darker metal cast color that's actually Mr. Color Creos Chrome Silver, which doesn't look anything like Chrome Silver that I'm used to. All the various parts did fit exactly as shown in the instructions, but the smaller adjustment rods for the sway bar were extremely fiddly to attach. As for the shocks, well, I decided not to glue the top and bottom parts together, but rather let the shock float once attached so the verical alignment doesn't get screw up. The end result looks quite convincing. 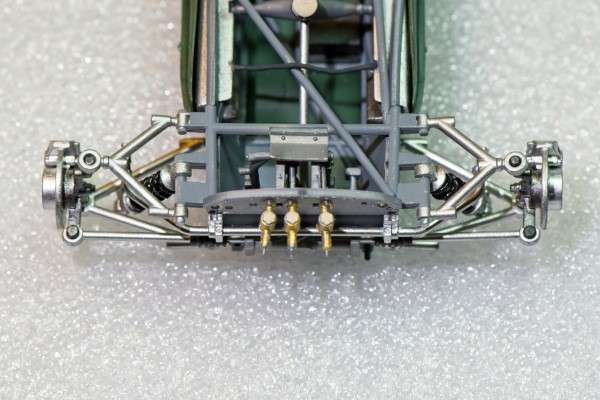  Back then the radiators were both still up front and completely vertical. Made with a Brass frame, and a core. The kit radiator is just that. I mixed my own shade of Brass from Mig paints, then air brushed it on in several light coats. The grill was just left as the molded mat black that I dry brushed lightly with Tamiya XF-53 Gray. Now comes the fun part, the tank directly behind the radiator that actually attaches to it. The tank is the holding oil tank for the dry sump system with the appropriate lines to the oil cooler located in the bottom of the radiator. The fun part is that Ebbro has molded all the water hoses and fittings as well as the oil hoses and fittings plus the two lower mounting brackets. Talk about fiddly parts. I'm sure that in 1:1 scale, and a few mechanics mounting the tank was pretty easy. But not so in scale. Took quite a while and I did it in stages. The really neat thing is that the hoses that go back to the engine do go right through the bulkhead, so the cockpit pipes should be a most convincing fit. 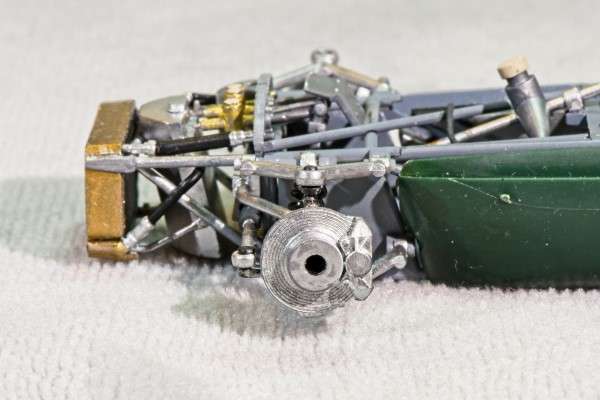 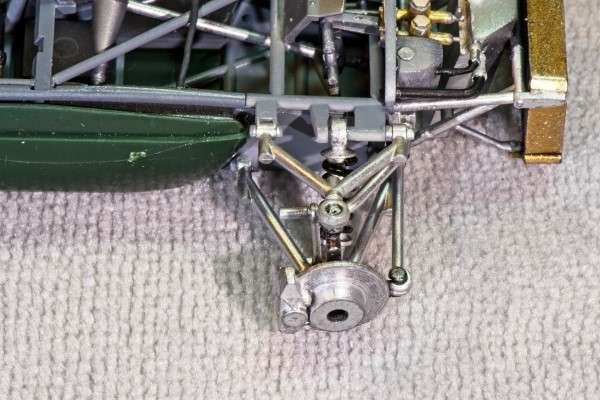 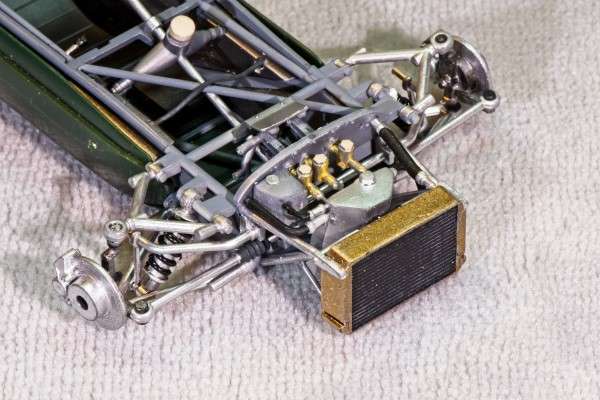 And witht the completion of the cooling and oiling system, it's time to head to the other end of the car. Or I just might decide to paint and decal the body shell parts as a break. Anyway, here's a few pictures of the overall car as it now stands. 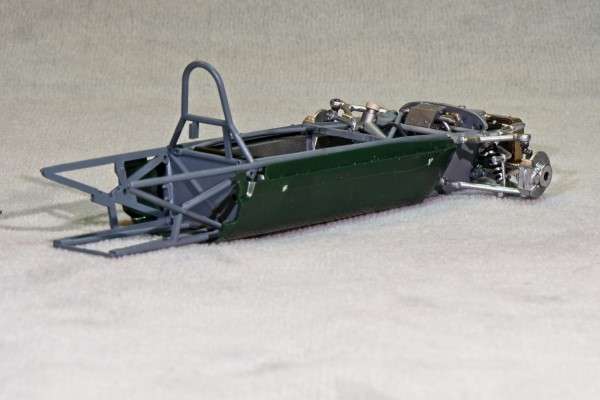 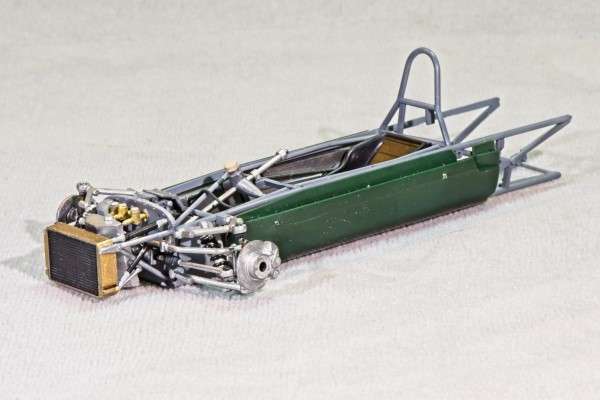 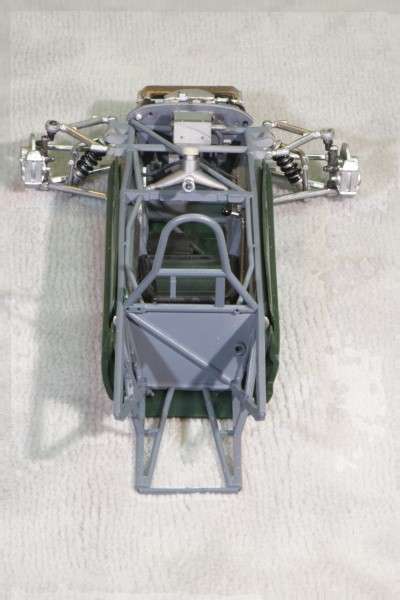 And thanks for stopping by and making it to the end of this rather long winded update. Joel |
|


