|
|
Post by sam on Mar 25, 2019 15:59:36 GMT -8
Beautiful work Joel! I love the detail in these kits right out of the box.
|
|
|
|
Post by 2whl on Mar 26, 2019 14:29:58 GMT -8
Fantastic work on this, Joel. After seeing what you've done on the Brabham, I have no doubt you would be able to tackle a MFH kit.
|
|
|
|
Post by Joel_W on Mar 27, 2019 6:06:18 GMT -8
Beautiful work Joel! I love the detail in these kits right out of the box. Sam, Thanks for the thumbs up, it's always greatly appreciated. The Ebbro/Tamiya kits just keep on getting better and better. I have their 1st release; the Lotus 49A and while it's very well detailed, the build is no where this well thought out and precise. So they take each kit and move the bar just a little further. Joel |
|
|
|
Post by Joel_W on Mar 27, 2019 6:09:22 GMT -8
Fantastic work on this, Joel. After seeing what you've done on the Brabham, I have no doubt you would be able to tackle a MFH kit. 2whl, Thanks for checking out my build. 90% of the build is Ebbro's excellence, I just painted and glued the parts together. Plastic is one media I'm truly comfortable with as I've been building kits on and off since the 60s. But a Multi Media kit is a whole new ballgame. The goal is be able to build the simpler 1/20 scale kits of race cars not in injected plastic. Maybe one per year, and figure on a min of 6-9 month build time. Joel |
|
|
|
Post by Joel_W on Apr 6, 2019 16:12:34 GMT -8
I finally finished up the exhaust system, & the rear suspension including the drive train, So I've completed enough work for another update. I started with the exhaust headers which are all separate parts, and the two exhaust pipes, plus the bracket that kind of holds those pipes in place, which attaches to the top and bottom of the transmission at an angle just to make it a little more interesting. While the headers were molded in Black, it wasn't the shade I was looking for, so I mixed Mig Ammo Mat Black with a few drops of their Mig Ammo Gray primer to both lighten and Dull the color. The problem that I encountered is that with each exhaust header being a separate piece; #1 & 4 get mated together that attaches to the inner exhaust pipe, and #2 & 3 mated together for the outer pipe. Sounds simple enough, but not only did I have to align all 4 headers, but the exhaust pipes rest on that bracket with the two piece molded springs. In other words, once again I needed 3 hands, and very small fingers. I made sure that each header mounted flush to the block, but they still needed some tender loving care. I've seen pictures where the pipes are perfectly aligned, and just as many where they angle in towards the back of the gearbox, and that's how mine came out. Pretty close, but no cigar. 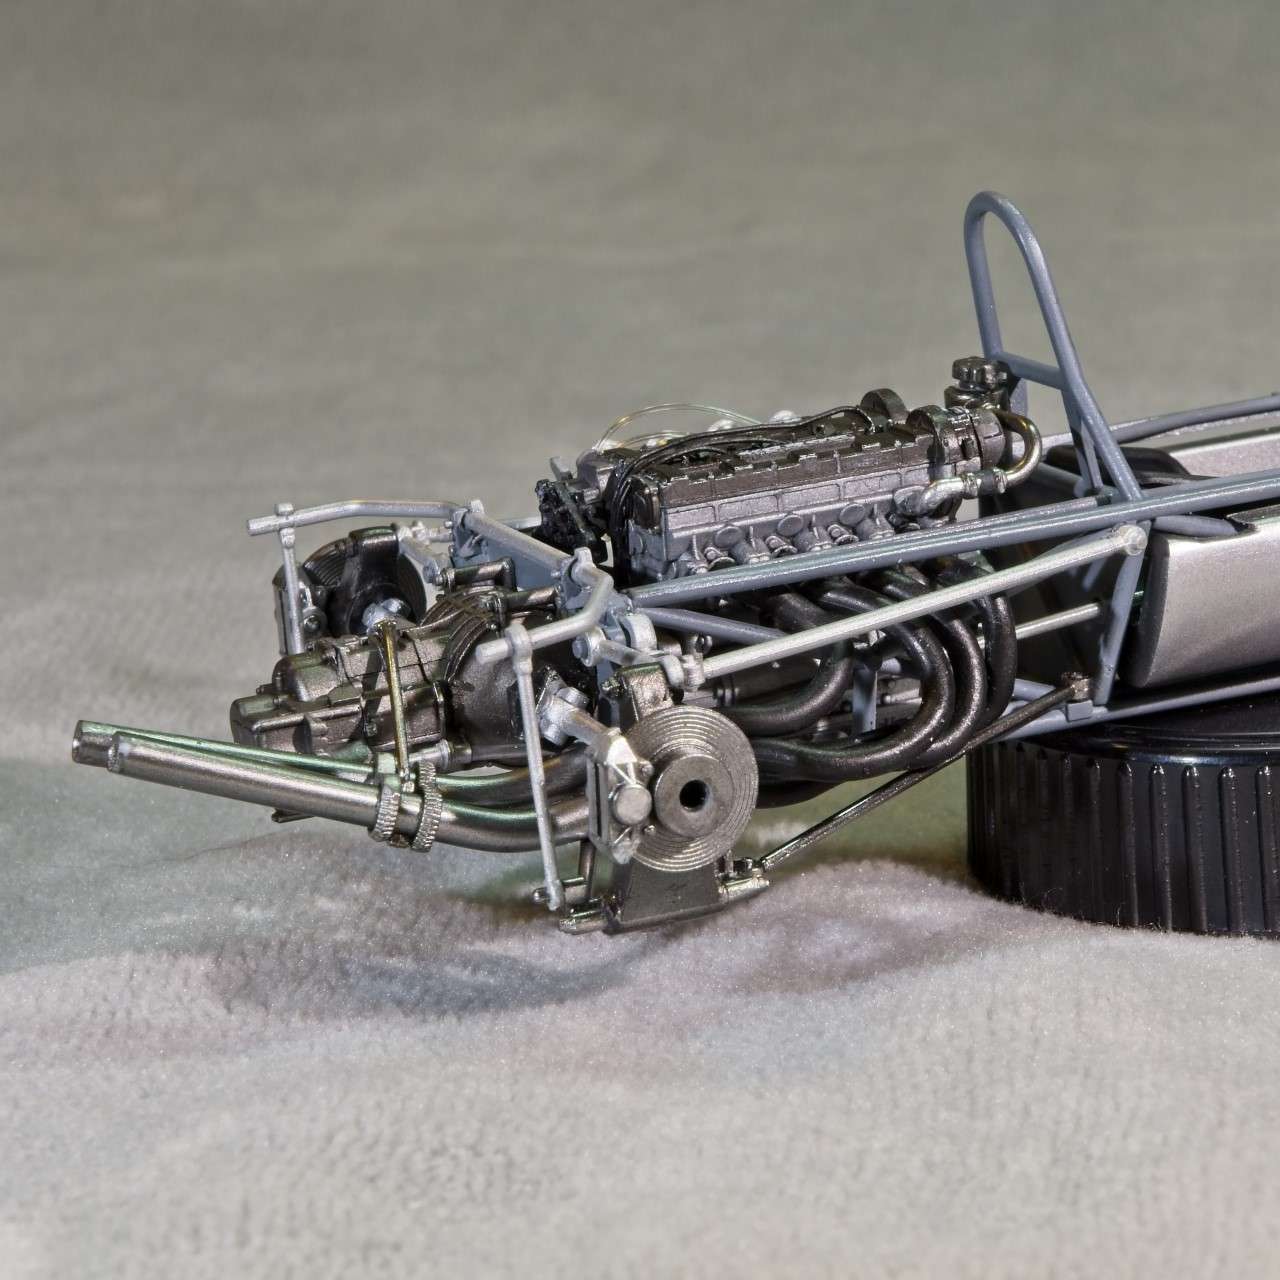 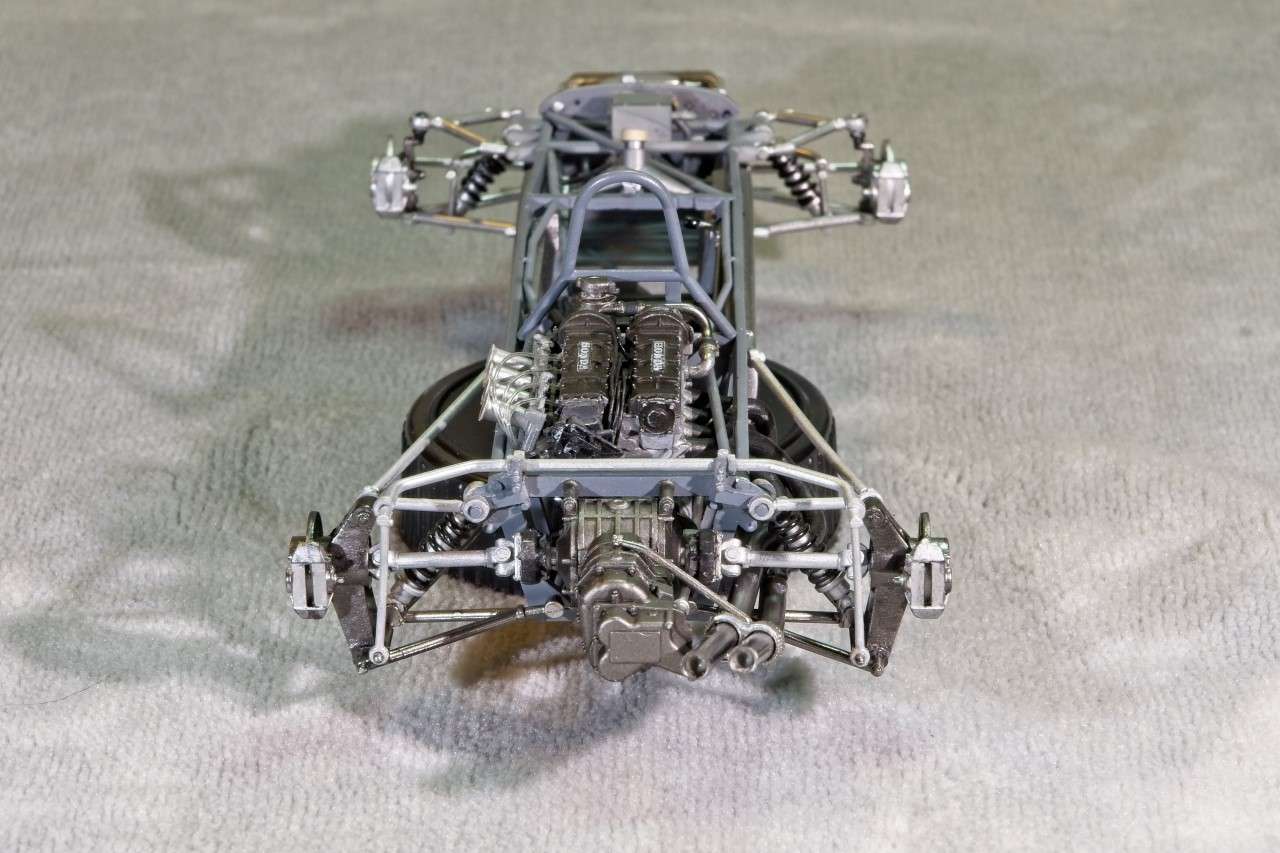 Now that was just a warmup for the dozens of parts that comprise both the rear suspension, and the drive train. All the parts were primed with Mr. Hobby 1500 Gray primer, not their Black primer, nor did I opt for a coat of Gloss Black to give the Alcad Metalizers a deep shine. Most of the parts are stainless steel. Polished when new, but they just didn't stay that way very long. Grease, grime, and plain old dirt from Jack's hands and work rags took care of that in short order. My compromise was as I said, the Gray undercoat only. I started with the suspension lower arms that the disc brakes are attached to. Those were painted straight Alcad Stainless Steel. The Discs were a combination of Stainless steel and Steel, while the Hub Carriers (? as I just can't remember the correct name), were painted Alcad Magnesium which looks close enough to a dark cast metal color. The rest of the suspension was painted Alcad2 Chrome, but over Gray primer doesn't have that super shine. 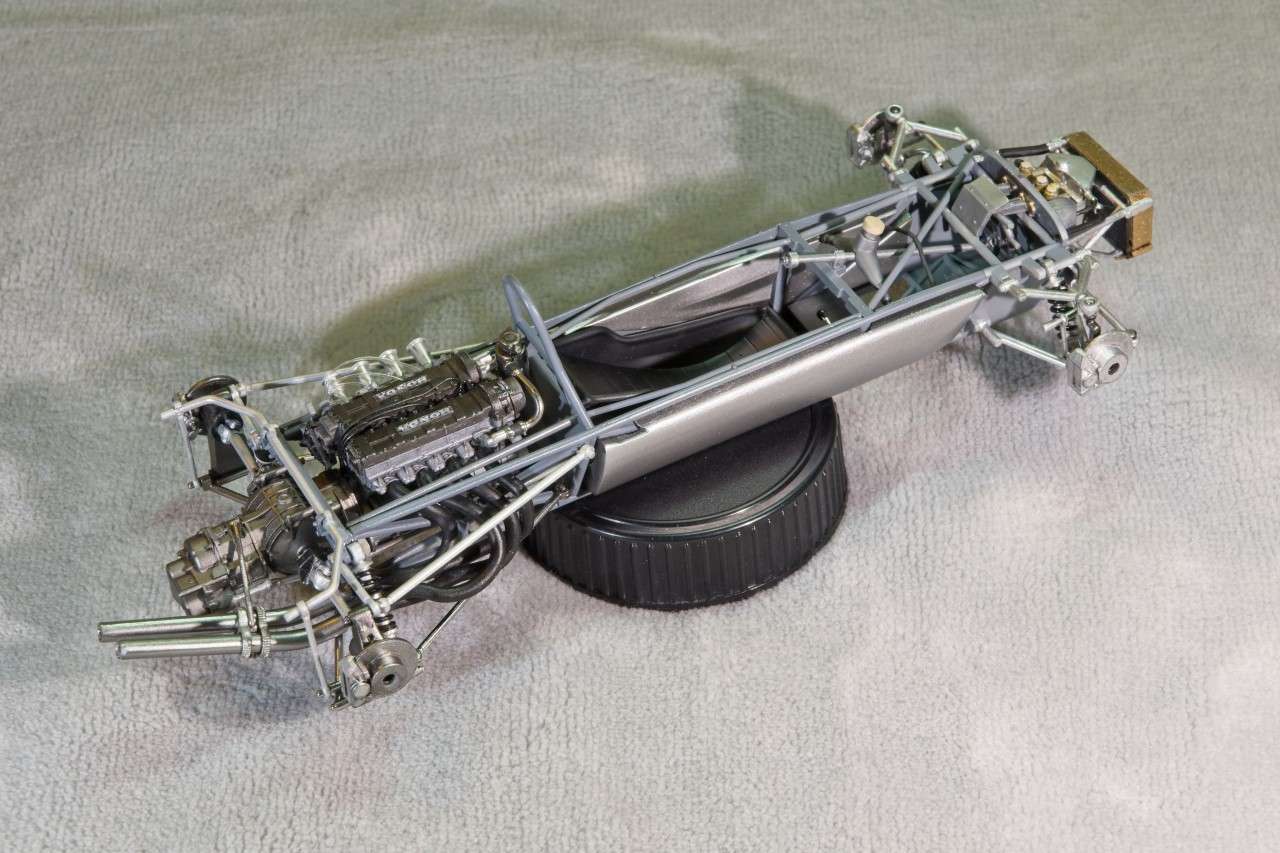 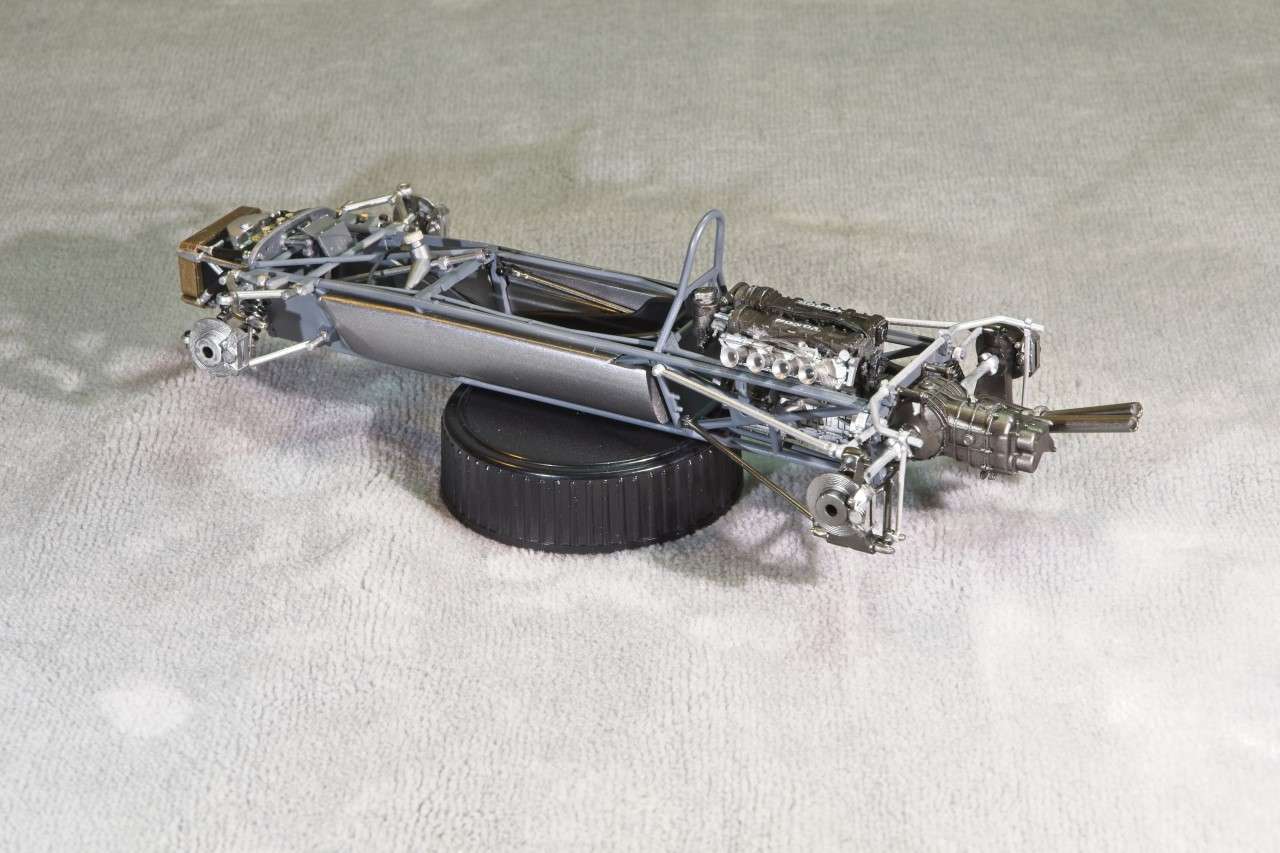 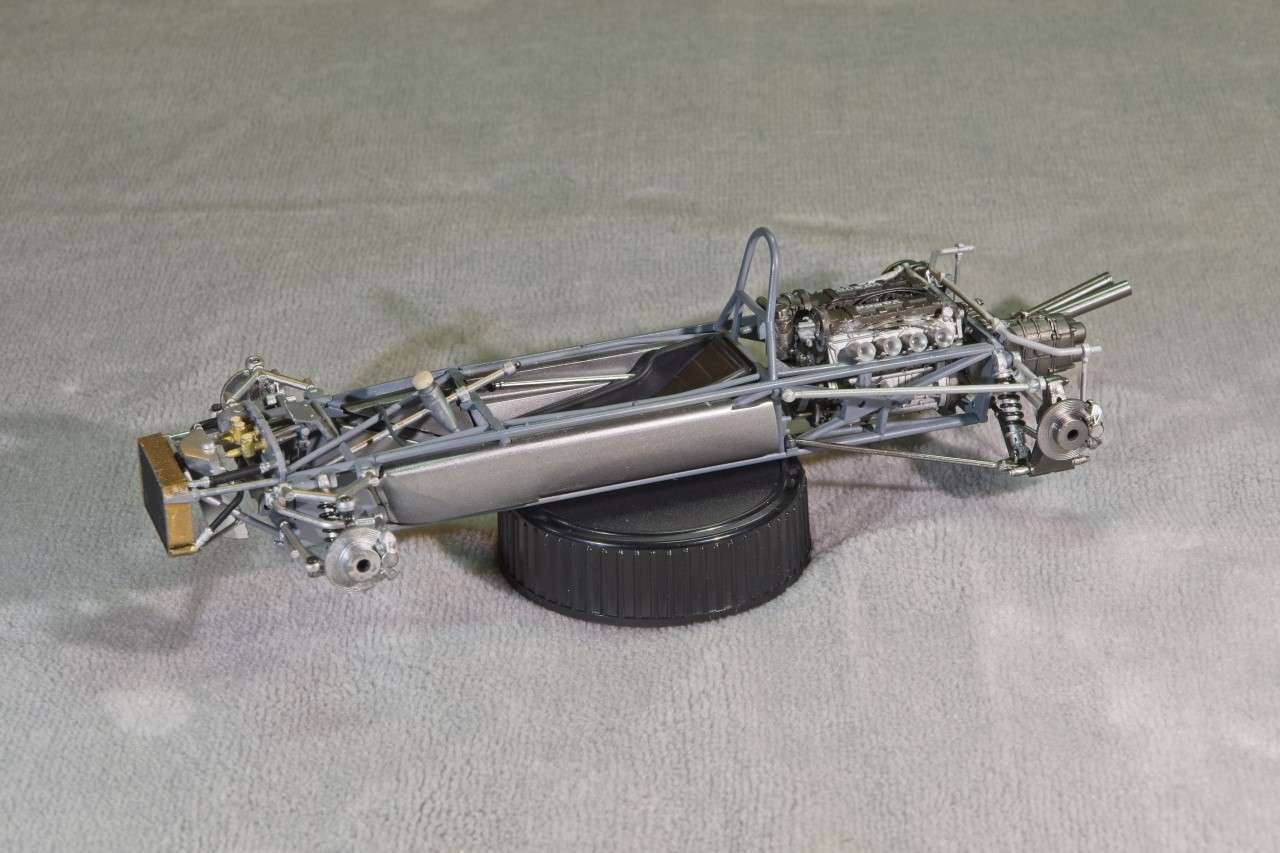 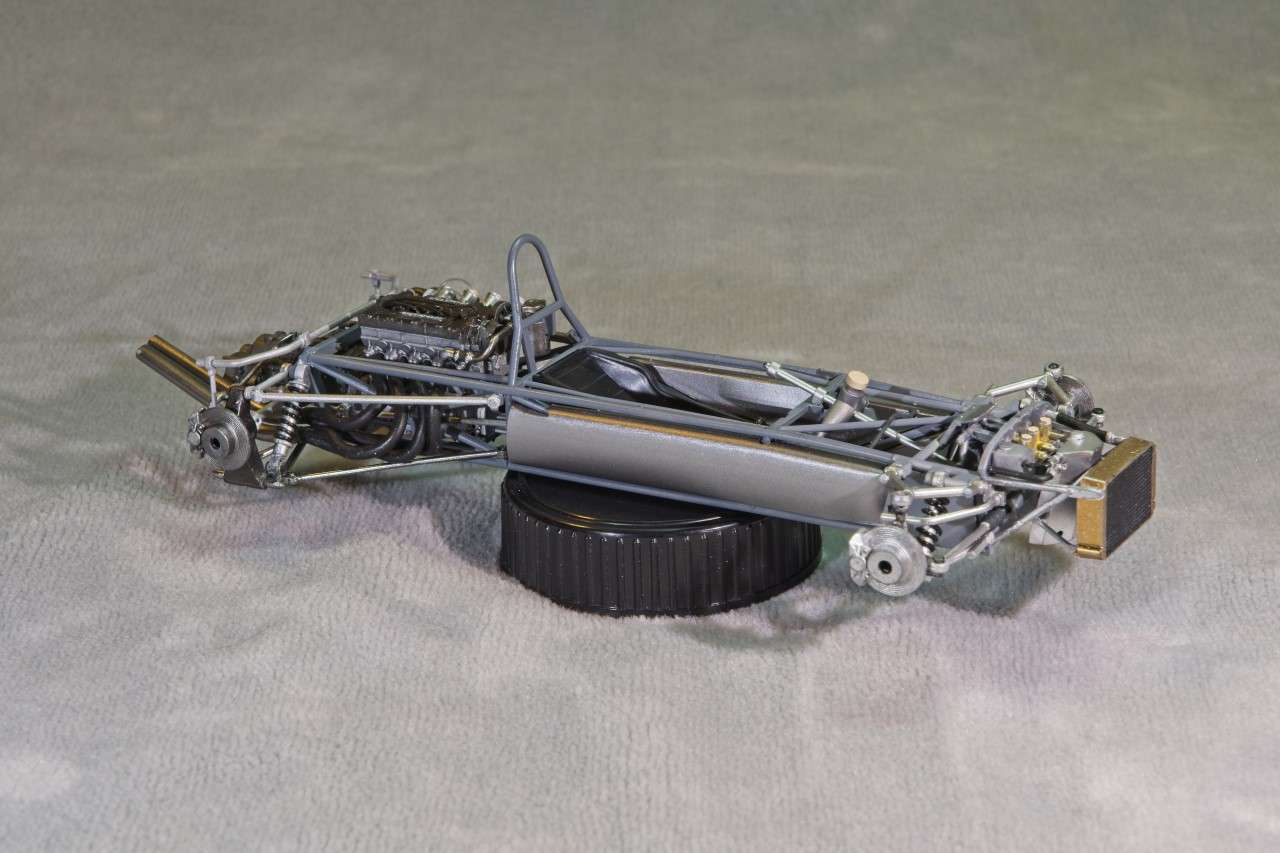 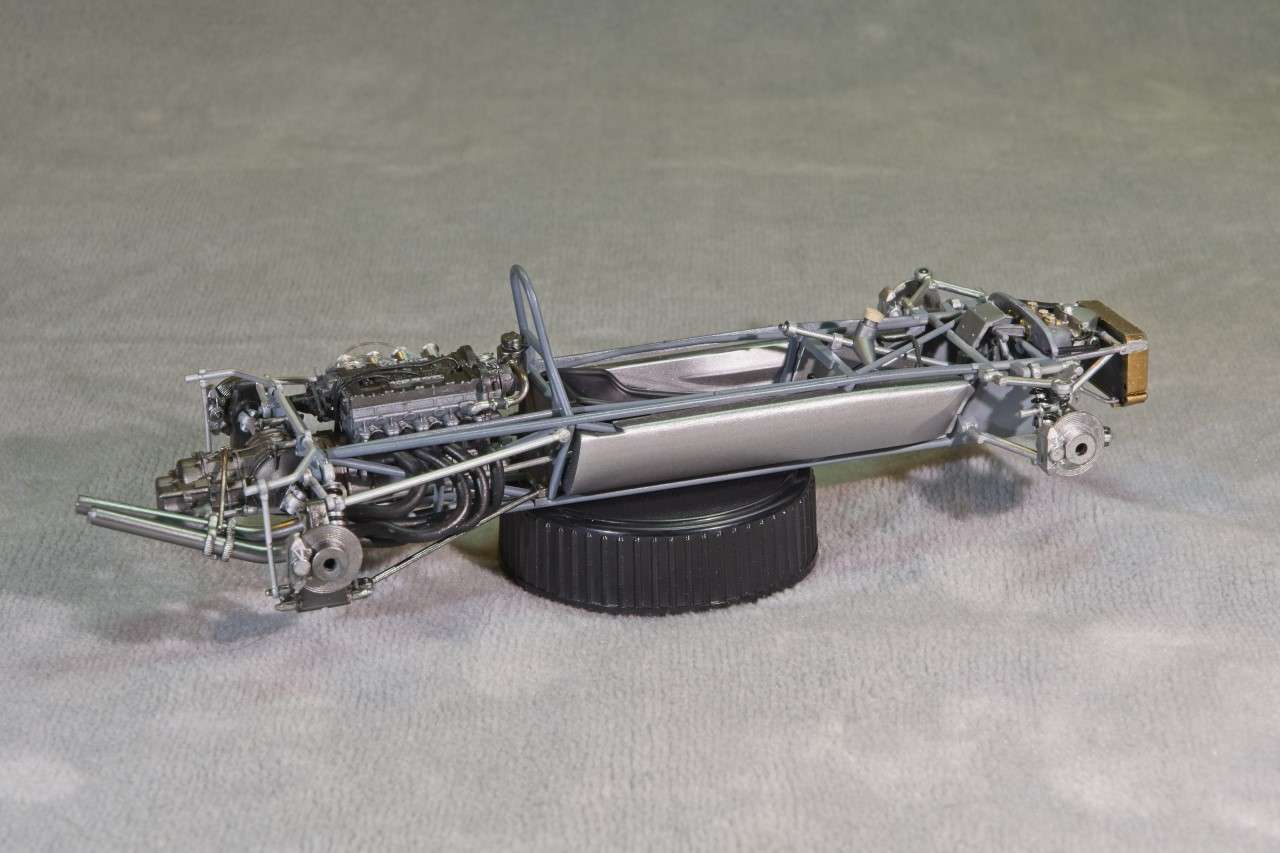 One thing I did notice was that whomever decided on colors, has no idea that Black can be Matt, Semi Gloss, or Gloss. Every single call out is for Semi gloss. :-? Thanks for stopping by and checking out my BT build to date. It's greatly appreciated. Joel |
|
|
|
Post by tatocorvette on Apr 6, 2019 17:49:13 GMT -8
Wow! I really love you metal shading work. Really convincing. Looking great.
|
|
|
|
Post by afx on Apr 7, 2019 3:02:06 GMT -8
It will be a shame to cover up that chassis with body panels, looks great Joel.
|
|
|
|
Post by Joel_W on Apr 7, 2019 6:22:21 GMT -8
Wow! I really love you metal shading work. Really convincing. Looking great. Ismael, Thanks my friend for stopping by, it's always greatly appreciated. Coming from you, whose standards are at the top of the list, I'm really glad that I took the time to work with various metallic shades as one would have seen back in those days. Joel |
|
|
|
Post by Joel_W on Apr 7, 2019 6:24:12 GMT -8
It will be a shame to cover up that chassis with body panels, looks great Joel. JC, Thanks for your thumbs up. I really appreciate it. As for covering up that chassis, engine, etc. I'm trying to work out a system of using craft pins cut down so I can pin as many panels as possible. That way I can remove them as needed and or wanted. Joel |
|
|
|
Post by 2whl on Apr 7, 2019 11:41:56 GMT -8
The chassis on this is beautiful. If you had it on workstands, you could convince people it is real.
|
|
|
|
Post by Joel_W on Apr 11, 2019 9:34:37 GMT -8
Just a quick update with no pictures.
I just finished installing the bottom three radiator pipes, and the top two radiator pipes to the engine. What a bear they were to install. A quick test fit of the bottom and top shells, and lets just say it's rather tight, ok, real tight.
I glued up the lower front body shell to the top shell, and while the fit was pretty good, it does need a little body work as I believe the real deal is a single piece.
Looking forward to starting the painting process.
Joel
|
|
|
|
Post by Joel_W on Apr 15, 2019 11:34:16 GMT -8
I've never had this issue before, and have absolutely no idea how to deal with it.
Two of the three body sections have imperfections in the plastic. They look like lines that go right through the plastic shells. I use to think that they were caused by impurities in the liquid plastic as it was injected into the molds. I've had them appear from time to time, but lacquer primer has always covered them. That is until today.
I've reached to stage of painting the BT18. So I cleaned all the parts with Iso Alcohol, and air dried them.
I primed the body shells with Mr. Hobby 's Mr. Finishing Surface Primer1500 Gray, and thinned it 50/50 with Mr. Color Leveling Thinner #400. I applied the primer with my Grex Genesis air brush with a .3mm setup @ a flow rate of 16 psi. Two light coats, and then two heavier coats. I let this dry for 24 hrs. I then very lightly wet sanded with a piece of Tamiya 3,000 sponge. Those lines were still there but less noticeable, so I figured that they disappear with the color coats.
My next paint session was applying the color coats. I always air brush my color coats with my other Grex AB that has a .5mm setup, at a flow rate of 16 psi. As usual the paint used was Gravity pre-thinned lacquer, and it was a new bottle. Two tack coats, then two heavier color coats, with the last coat being a wet coat.
The lines are all still visible. So now I need to strip all three body assemblies and start over, which I've never had to do before. What's the best method for stripping the lacquer paint? And how do I deal with those lines in the plastic?
Joel
|
|
|
|
Post by tatocorvette on Apr 15, 2019 11:57:27 GMT -8
Just replied to the other thread. Do you have pictures of those lines?
|
|
|
|
Post by Joel_W on Apr 15, 2019 12:05:23 GMT -8
Just replied to the other thread. Do you have pictures of those lines? Ismael, No I don't. I can open up a few other Ebbro kits and see if they have them as well. Come to think of it, the Lotus 72E had them, but the Black paint took care of that issue. I posted in both places so that I stood a better chance of getting some help. Joel |
|
|
|
Post by Joel_W on Apr 19, 2019 13:47:04 GMT -8
Finally another update. Well the adventure of those imperfection lines in the plastic as I posted have been taken care of. I didn't remember taking any pictures, but I guess I just forgot. Here's the basic imperfection in the top of the shell. 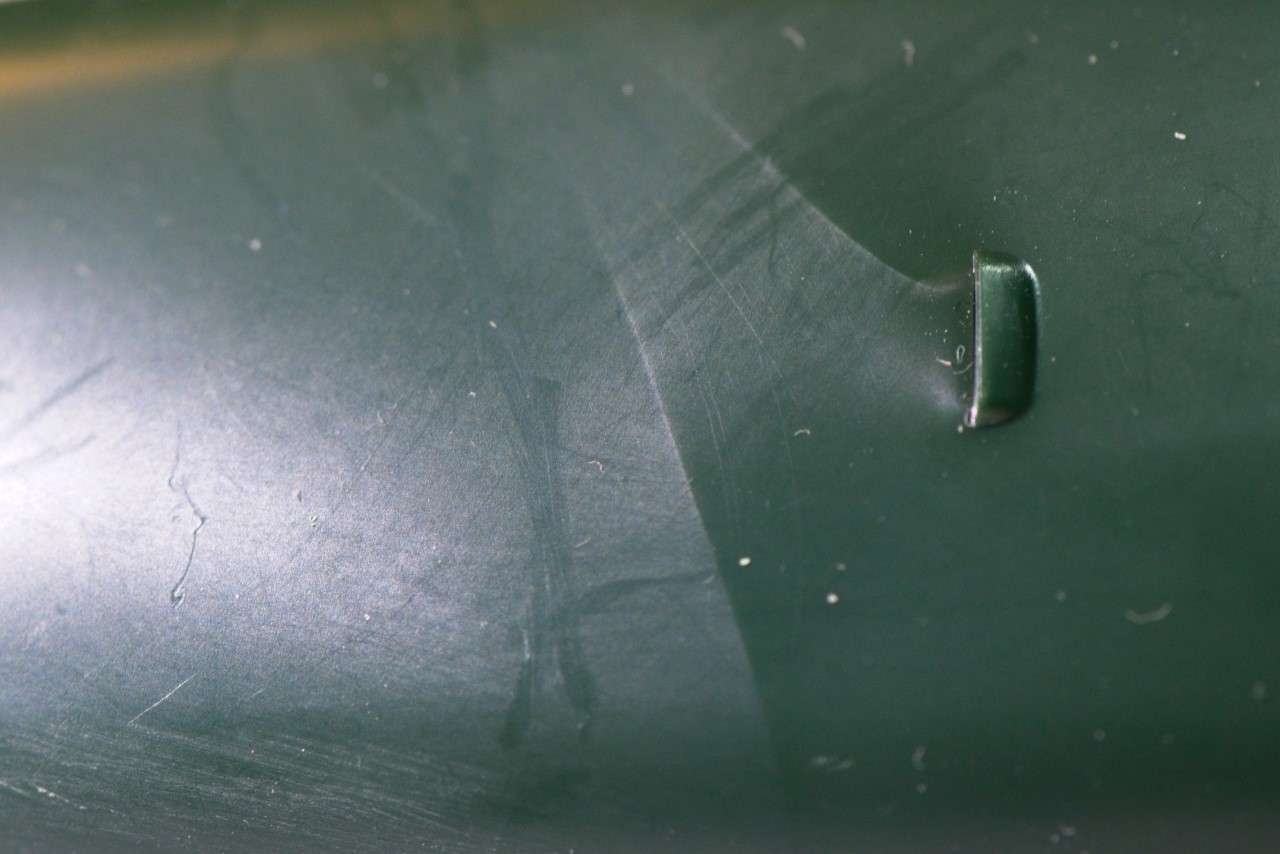 and here's a post sanding but not polished as yet picture without those pesky swirls. 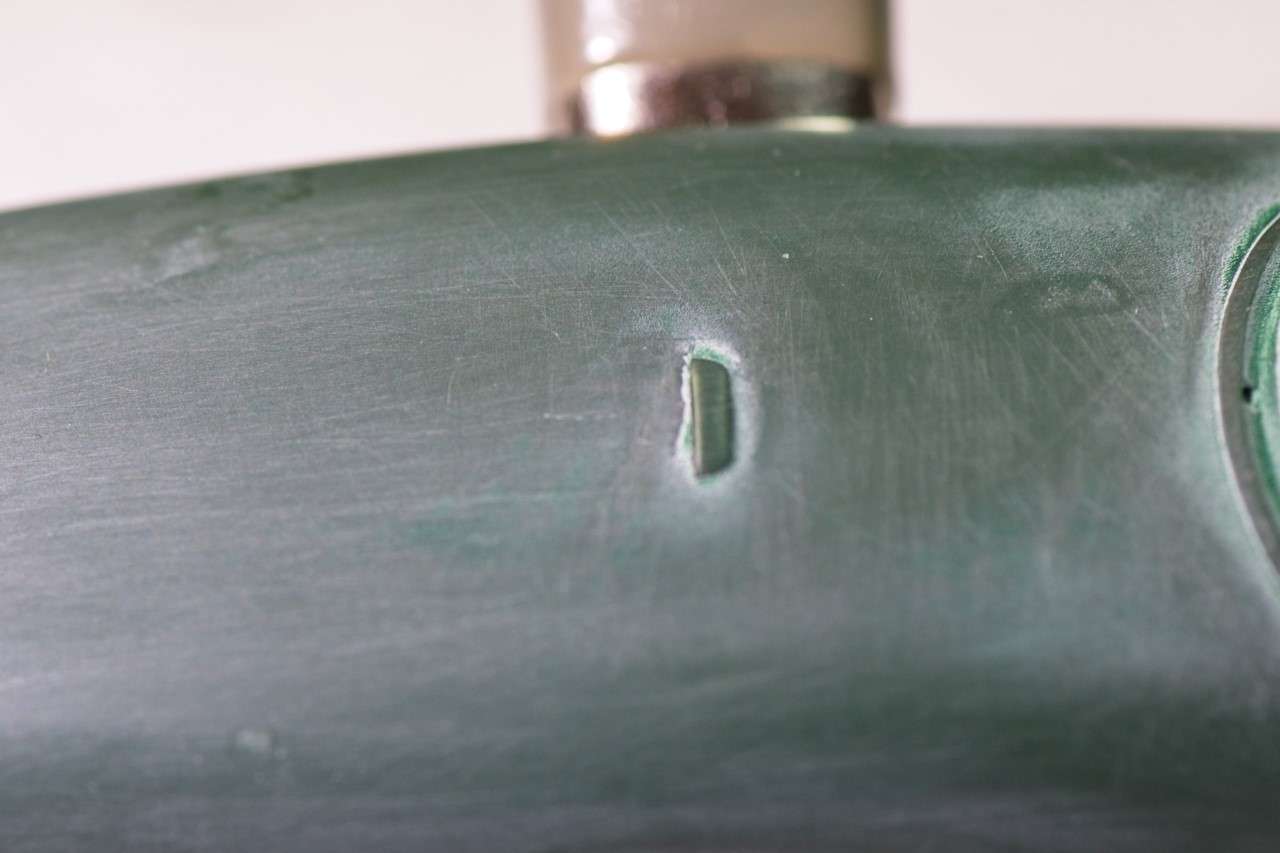 After those swirl marks showed up, I did a few Google searches on reviews of the kit, and found a link to a Eastern European modeling site that was actually in both languages. Now that's a really nice touch. Anyway, they had posted pictures of the sprue trees, so I checked out the one with the shells, and guess what? They also had those same swirl marks in the same places. 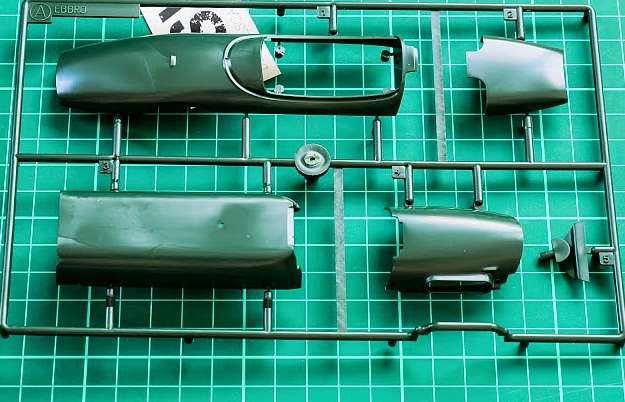 Now that threw all of theories we came up with, as there is no way that my kit and theirs are from the same pour. So it has to be something with the melted plastic. Then a few day later I was watching a video on You Tube by Paul of the International ScaleModeler building a Tamiya 1/24 scale Mercedes kit. And when he had a close up of the body there were those swirl marks again. Now Tamiya and Ebbro are basically the same company, so the kits are most likely molded from the same plastic in the same machines. At this point I really have no idea of what the issue is, but light sanding/polishing prior to priming takes care of the problem. so that's my new building procedure. Ok, enough of the swirls, and back to the BT18. I once again primed with Mr. Hobby 1,500 primer thinned 1:1 with Mr. Hobby leveling Thinner. 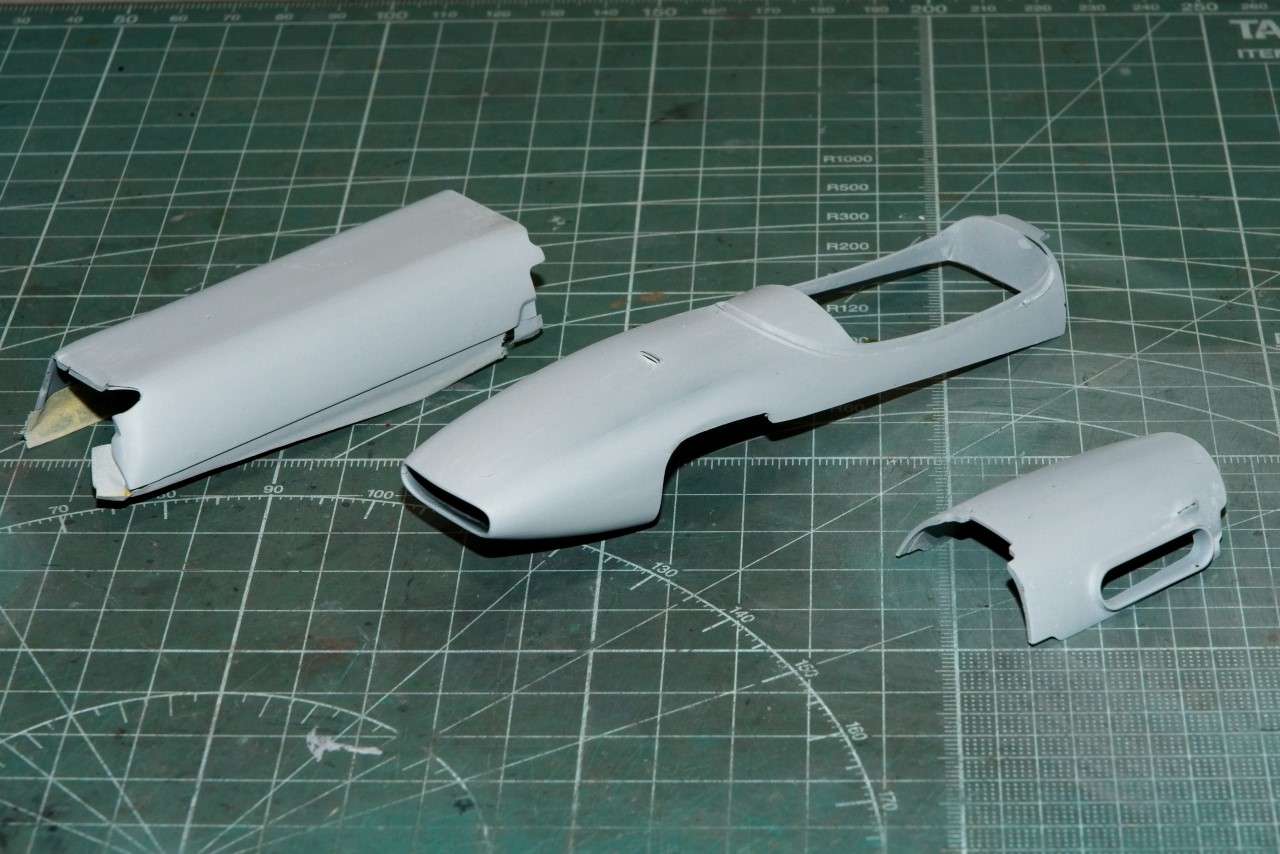 And the swirls were gone for good. I let the body parts dry overnight, then they were all lightly wet sanded with #3,000 Tamiya Sponge. Now it's time once again to repaint the 3 body shell parts with Gravity's GC 113 BRG. Two tack coats, followed by 2 wet coats. Looks darn good by my standards m:-) I gave the shells a full 24 hours to cure, then I lightly wet sanded them with Tamiya #3,000 sponge. I only wish that they made grits to 12,000. I've yet to find a resource that sells sheets of Emery cloth separately, not in those little expensive packs of 5 sheets each. I gave the shells a wipe with my tack cloth, then proceeded to apply the kit decals. Now I haven't used kit decals in quite a while, as I prefer AM decals whenever possible. I used my modified Paul Budzik's procedure of Microscale set, sol, and then Walthers Solvaset. The decals after 15 seconds in warm water came right off the backing paper. But they sure didn't want to stick to the polished plastic without letting each solution setup for a good min or so. Once down, they looked pretty good. 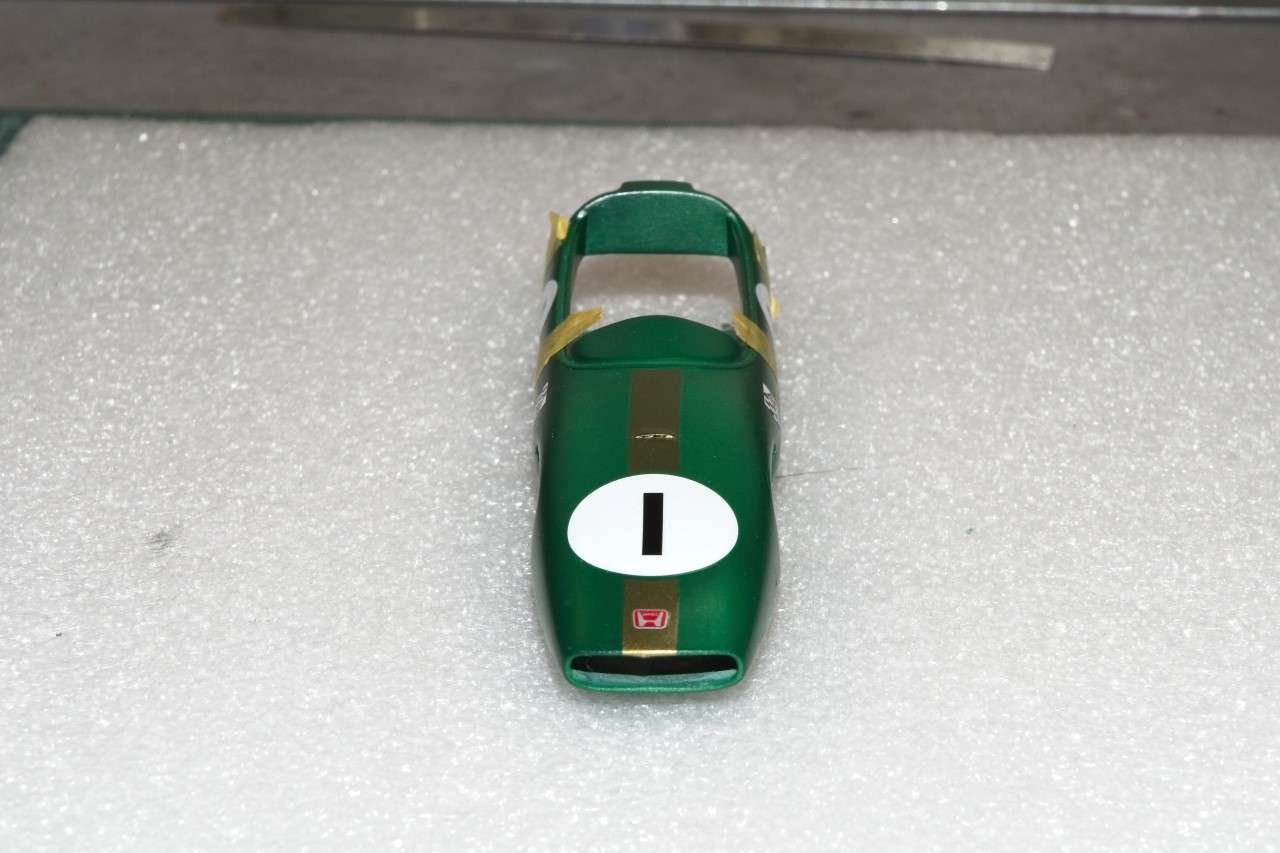 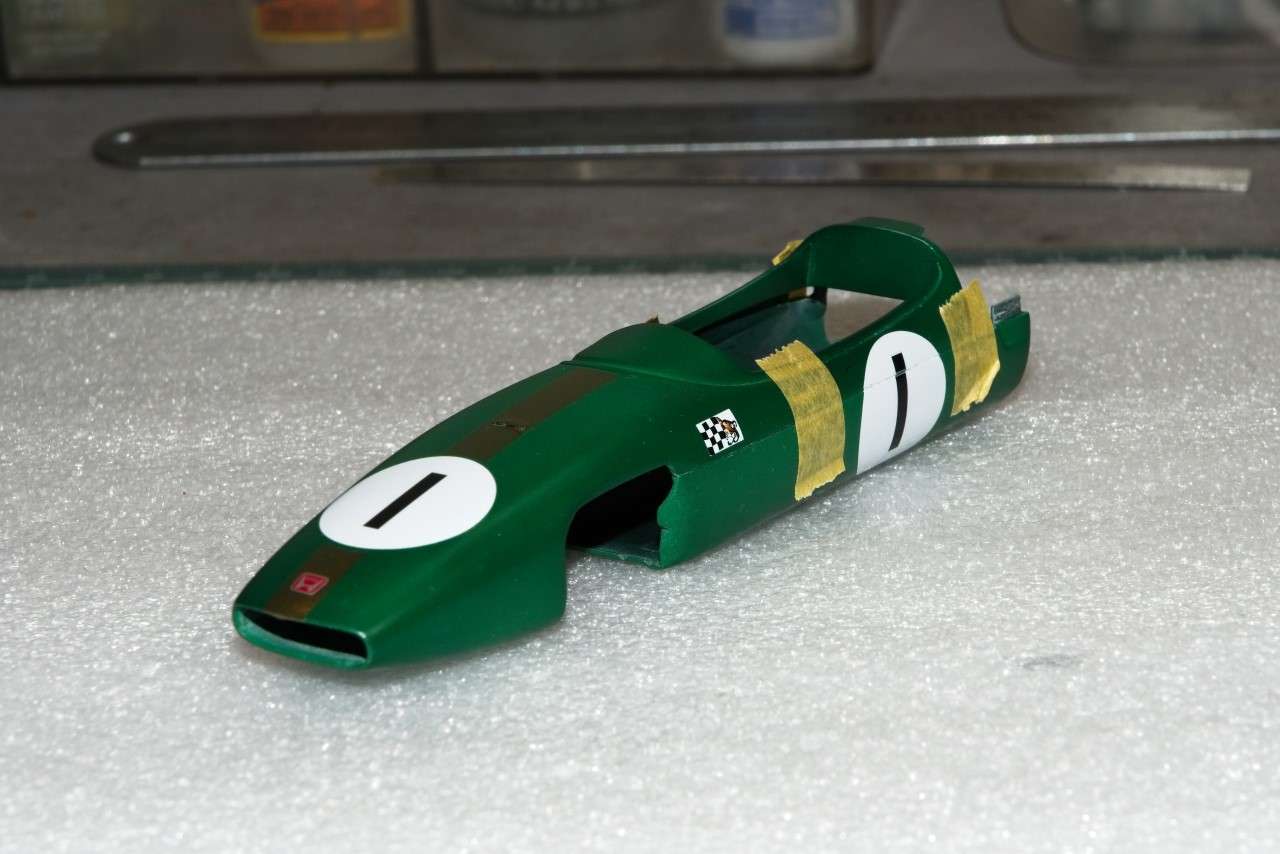 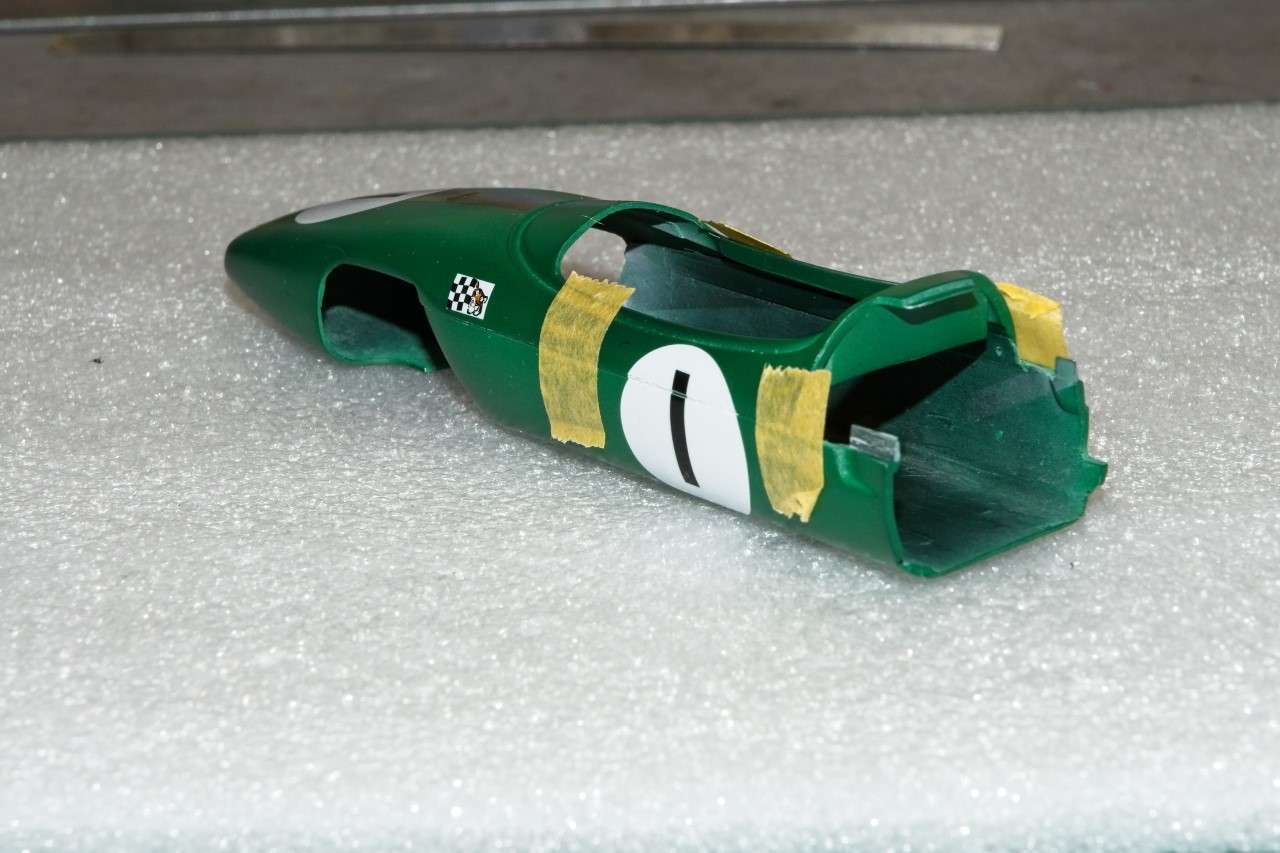 there are no panel lines, so I don't know how well they would settle down into them. But from all the issues I had with getting the stripe to conform to the small top intake, I have my doubts. It took several applications of Solvaset to win that battle. One issue I had is that the side number circles and numbers are each separate so they have to be layered. I let the circles dry off for a full 24 hours before applying the numbers. Also they opted to make both the numbers and the circles in upper and lower pieces. While that makes not having to deal with those rather large gaps, once dry, you see a black separation line between. So I hand painted the white as it would have looked folded over, but not the black. I have a few places to touch up, but it solved the problem, as you can see from looking at the body panel pictures. 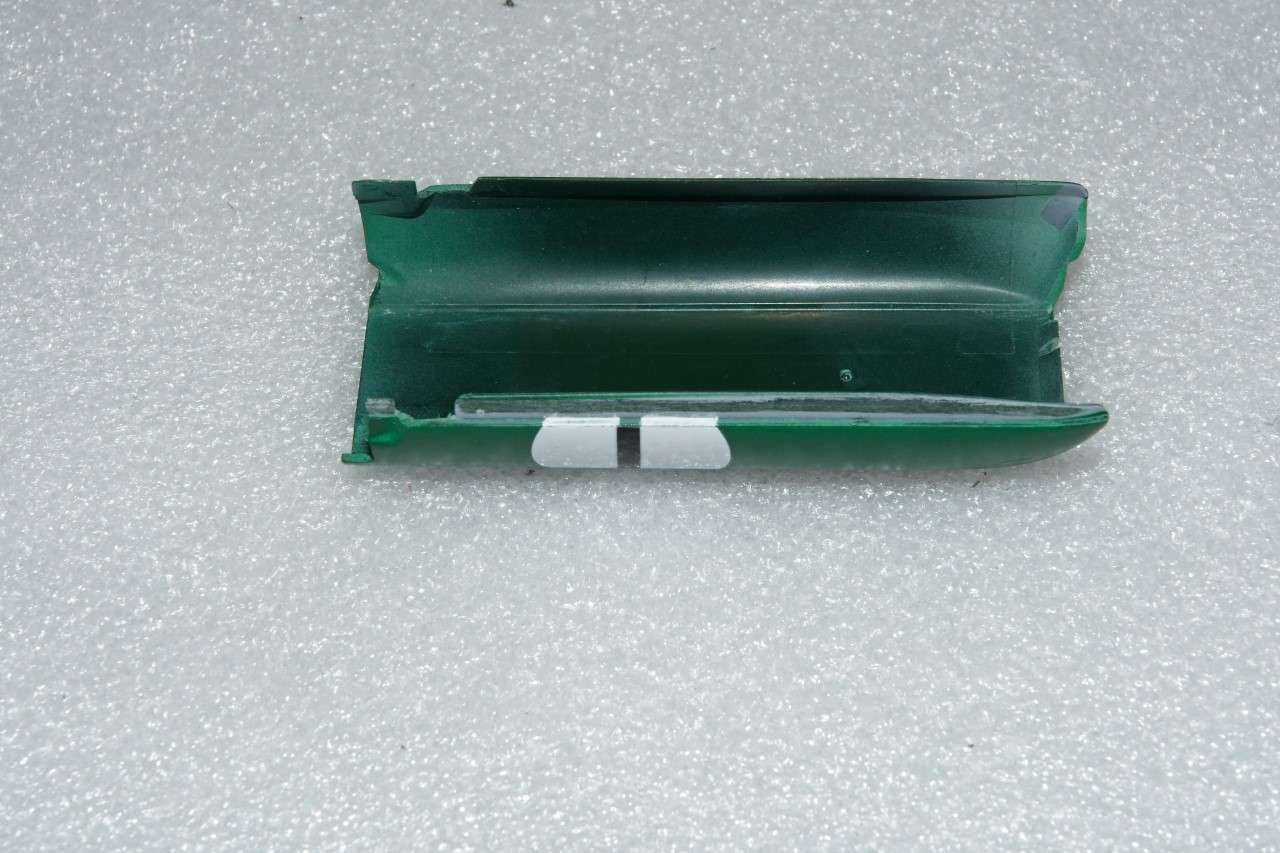 Thanks for stopping by and checking out my BT18 to date. As usual, it's always appreciated. Joel |
|


