|
|
Post by Joel_W on Jun 28, 2019 4:27:38 GMT -8
Plus the thing you have Joel is the Resin Body......no fears. Just sharing an observation on how nicely the BEEMAX assemble 😎 Bill, The Resin body will be my focus on that build for sure. I'm looking forward to it, yet at the same time, I'm kind of leery of it. Go figure that one out. Joel |
|
|
|
Post by Joel_W on Jul 2, 2019 8:56:55 GMT -8
Not much bench time of late due to family issues with my Mother-n-law, but I did squeeze in enough time to prime the shell and rear wing with Mr. Finishing Surfacer 1500 thinned 3 parts Surfacer to 2 parts Mr. Leveling #400 Thinner. Just air brushed on light/even coats @ 16 psi, and the results were nearly perfect. 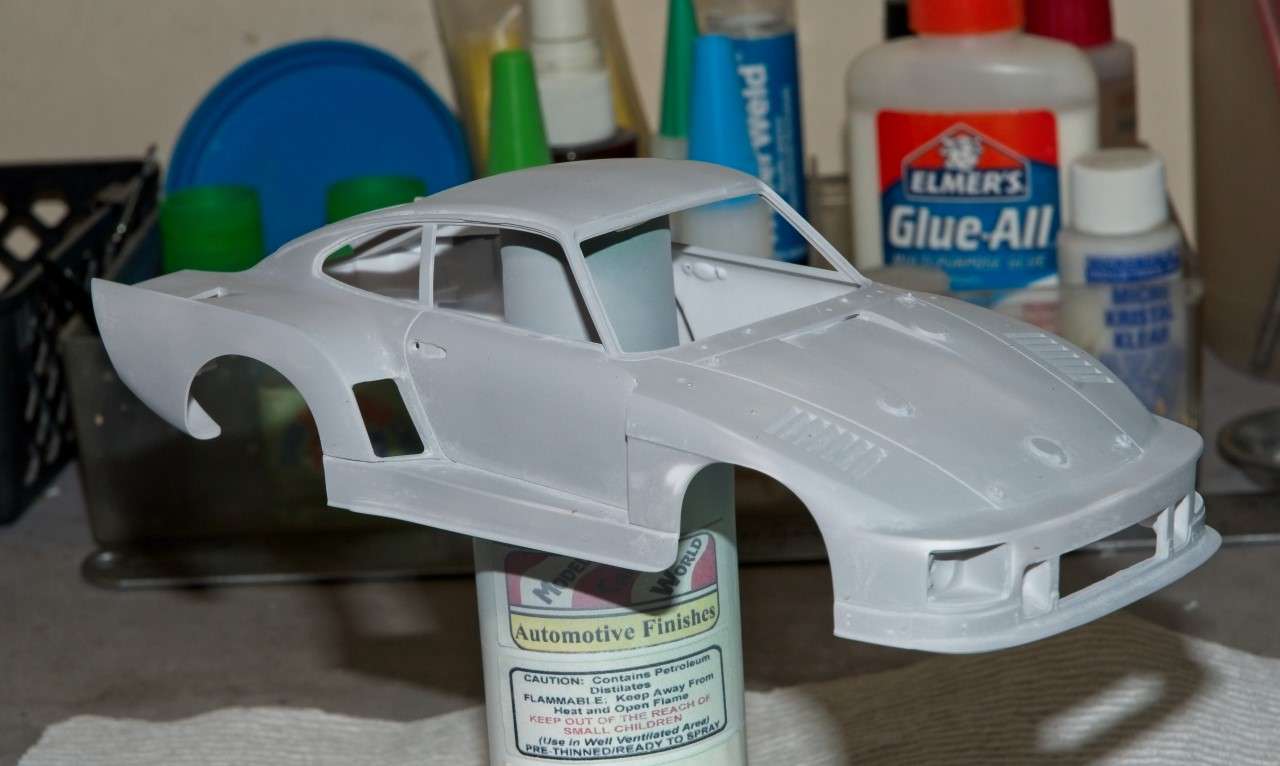  Gave the primer overnight to fully cure, then a light sanding with water & Tamiya #3,000 sponge. Then a quick wipe with a tack cloth. Air brushed the shell & rear wing with Gravity's #GC-138 Porsche Carrara White @ 16 psi. 4 light/even coats and it was back into the drying bin. 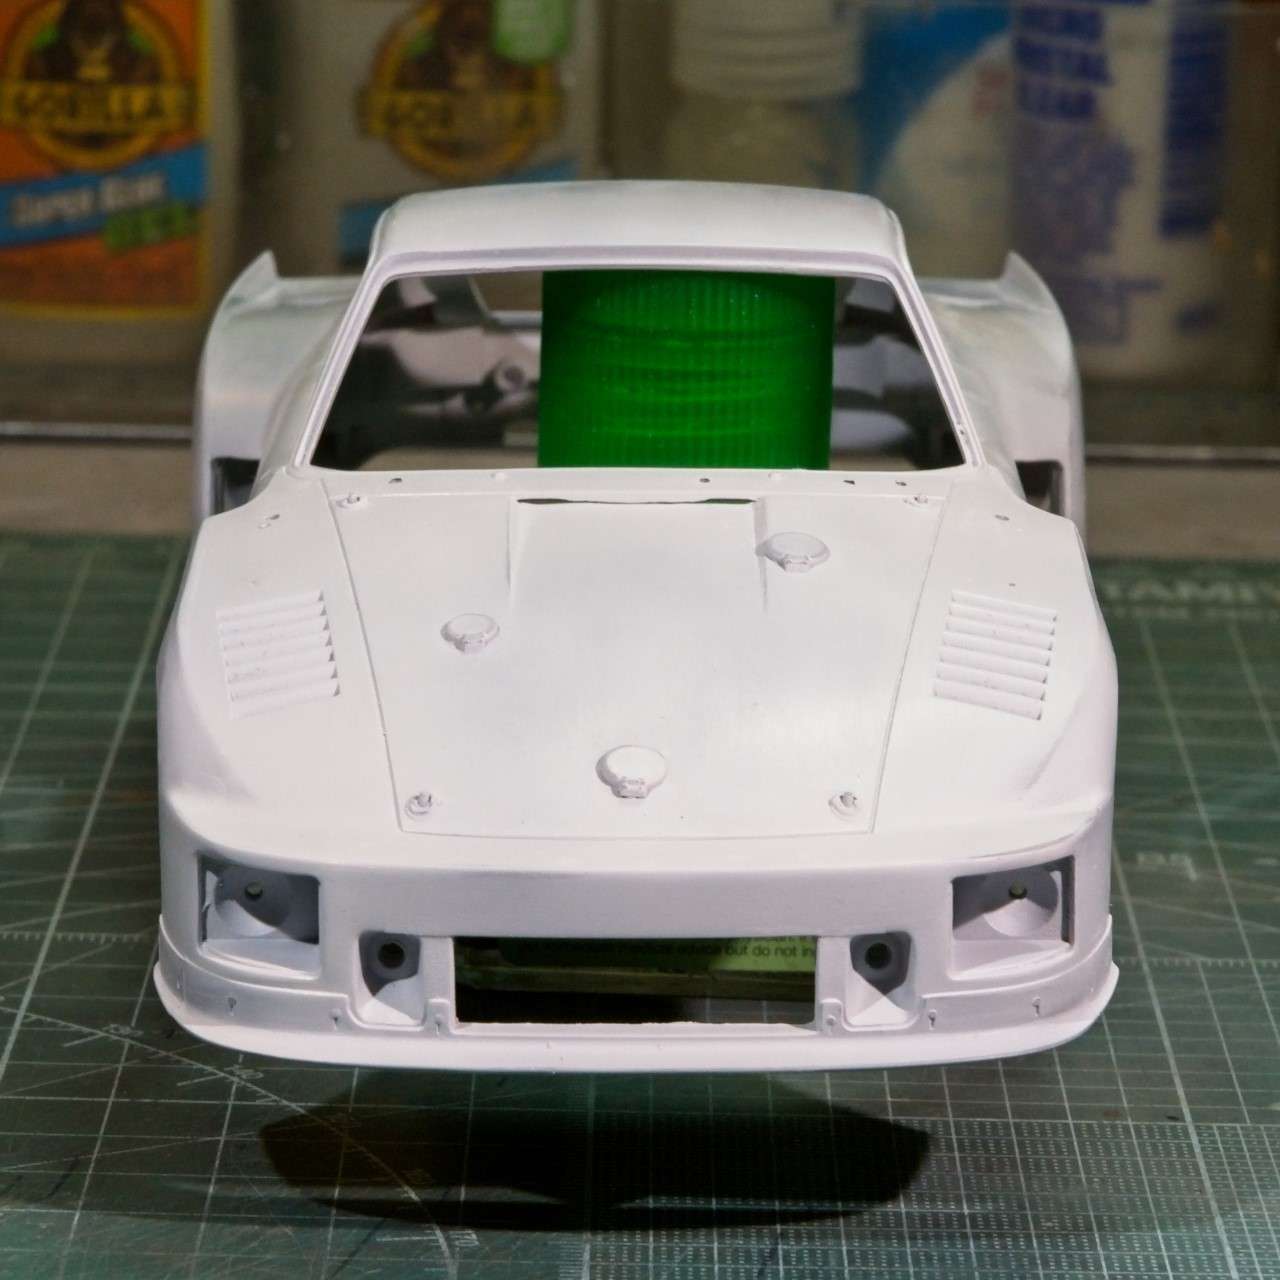  Another light wet rub with Tamiya #3,000 sponge and I can start the complex decal scheme. This one isn't for the faint of heart. Joel |
|
Deleted
Deleted Member
Posts: 0
|
Post by Deleted on Jul 2, 2019 9:29:33 GMT -8
Looking very nice Joel
|
|
|
|
Post by Joel_W on Jul 2, 2019 10:22:34 GMT -8
Thanks Bill. Had some down time today, so I started decaling. With every decal the Porsche just seems to take one step closer to reality. BTW, I don't use a gloss coat as a base as it's not necessary. Joel |
|
|
|
Post by afx on Jul 3, 2019 3:08:33 GMT -8
Details are very crisp on the body as well as all the other parts. Beemax is a serious modeling manufacturer!
|
|
cc
Full Time Ride

Posts: 141
|
Post by cc on Jul 3, 2019 4:14:14 GMT -8
Joel, paints looking good. I happy you posted the airbrush info as Im just starting to explore using one. Keep up the good building and good luck with decals. Waiting at the finish line to see it come across. 🏁
CC😎
|
|
|
|
Post by Joel_W on Jul 3, 2019 8:51:50 GMT -8
Details are very crisp on the body as well as all the other parts. Beemax is a serious modeling manufacturer! JC, So far I've really been thrilled with the level of detail, as well as the crispness of molding that Beemax is at. From what I understand they are somehow more then a part of Aoshima, and Nunu somehow fits into that as well. I've heard a rumor or two that they're all just one company producing kits under 3 different names. Joel |
|
|
|
Post by Joel_W on Jul 3, 2019 9:01:15 GMT -8
Joel, paints looking good. I happy you posted the airbrush info as Im just starting to explore using one. Keep up the good building and good luck with decals. Waiting at the finish line to see it come across. 🏁 CC😎 CC, If my painting technique is any help, then I've really accomplished something way more then just another build blog. Air brushing isn't hard once you develop a method that you can duplicate over and over again. It's the duplication that's taken me years to figure out. It's like in golf, 13 clubs one swing. for a long time I had 13 swings with 13 clubs, and was usually all over the place with zero consistency. Joel |
|
|
|
Post by Joel_W on Jul 5, 2019 9:35:52 GMT -8
last update took forever to get ready and post, as it dealt with the priming and painting of the body. This update deals with the extensive decaling. Somehow I thought that Beemax designed the decals and then had Cartograf print them. Well, I was really surprised when I closely examined the two pages of decals that no where did is say printed by Catograf, just Beemax Models Porsche 935 K2. So now I'm going to be dealing with Asian decals which have a reputation as being on the thick side, and not the easiest to get to conform to compound curves. Ok, I'm ready for the challenge as I had purchased Mr. Mark Setter & Sol just for Asian decals. They would be my backup plan if my usual decal procedures didn't work. I still use a 3 part decaling process: Microset, Microsol, & Sovaset, giving each solution ample to to work their magic, and repeating with numerous applications of Solvaset as needed. To prepare the painted shell and rear wing, I gently rubbed out the paint with warm water & Tamiya's #3,000 sponge. The goal was just to get the paint smooth when I ran my finger across the surface. Contrary to most modelers I no longer bother applying a heavy clear gloss coat for a few reasons. 1st it will just mimic the texture of the paint, so you still have to rub it out, and it starts to fill in all the recessed panel lines, so that any panel line washes become all that much harder to do correctly. Decals don't need a glossy surface, they need a smooth surface without any nooks & crankies. It's that texture that will cause the decals to Silver as they dry because there is air trapped under the decal in those nooks & Crannies. Rubbing out the paint solves that issue. For the record, I paint with Gravity lacquer paints. Lacquer responds quite well to rubbing and polishing. Of course I always manage to rub a few spots to hard or to much, and burn right through the paint and sometimes the primer as well. Luckily with an All White paint scheme, touch up work was easy and took no time. I decal the same way I paint: hood, left side, rear deck, right side, & finally the roof. I also don't apply one decal right next to the previous one so it gets soaked in the solutions all over again. I'll give it a good half hour to dry, then go back and apply the missing decals. The trim decals from the top of the front fender to just past the rear side window are two pieces, making placement and adjustment easy. I didn't bother trying to cut the openings in the upper brake venting till the decals completely dried over night. Then I cut them along the back of each vent slot, and used a small brush with Solvaset to get them to lay and tuck down. The end result is nearly purfect. I do have a little touch up work to do where the decal had a mind of it's own. Below are a set of pictures as the body looks after the decals have dried. There is no Clear Gloss coat on top of the decals at this stage. Just decals directly on top of Matt lacquer paint. Joel 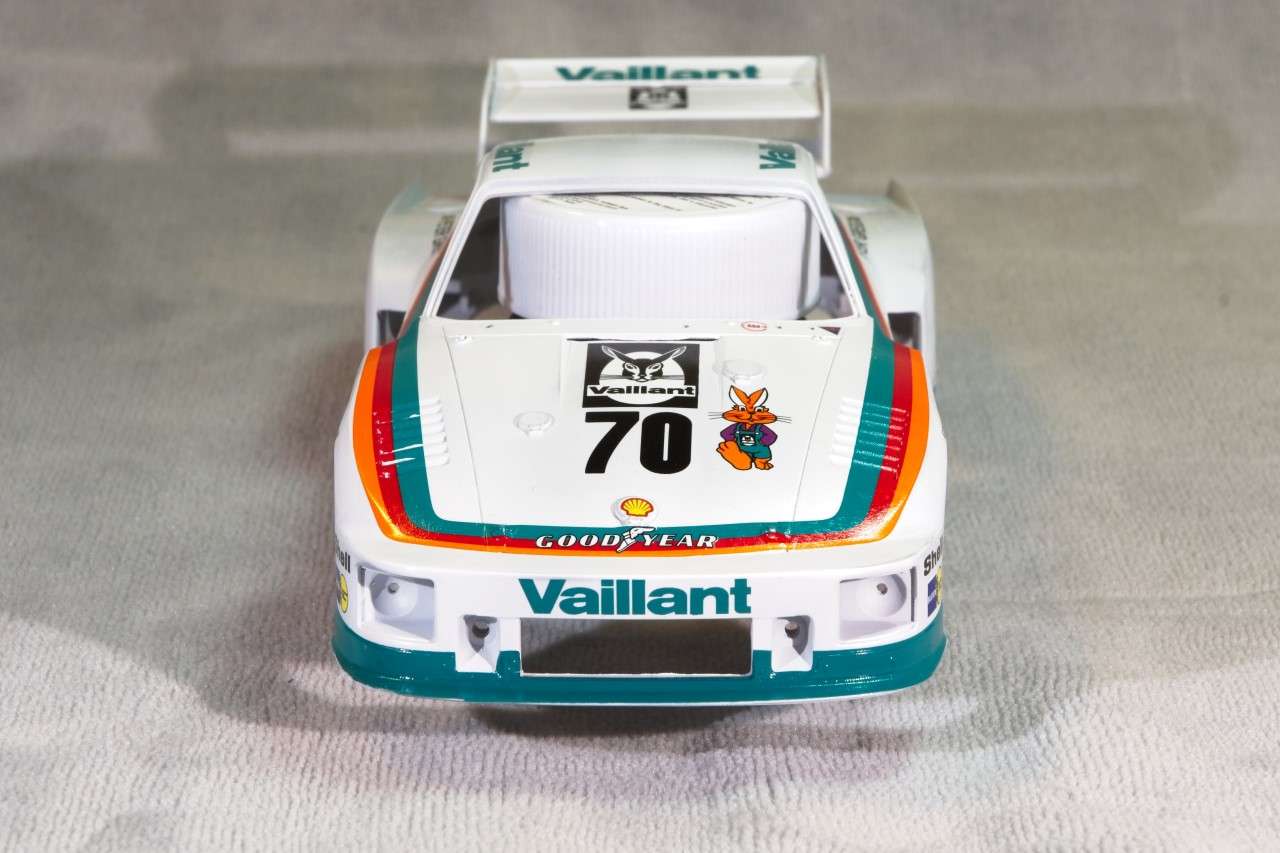 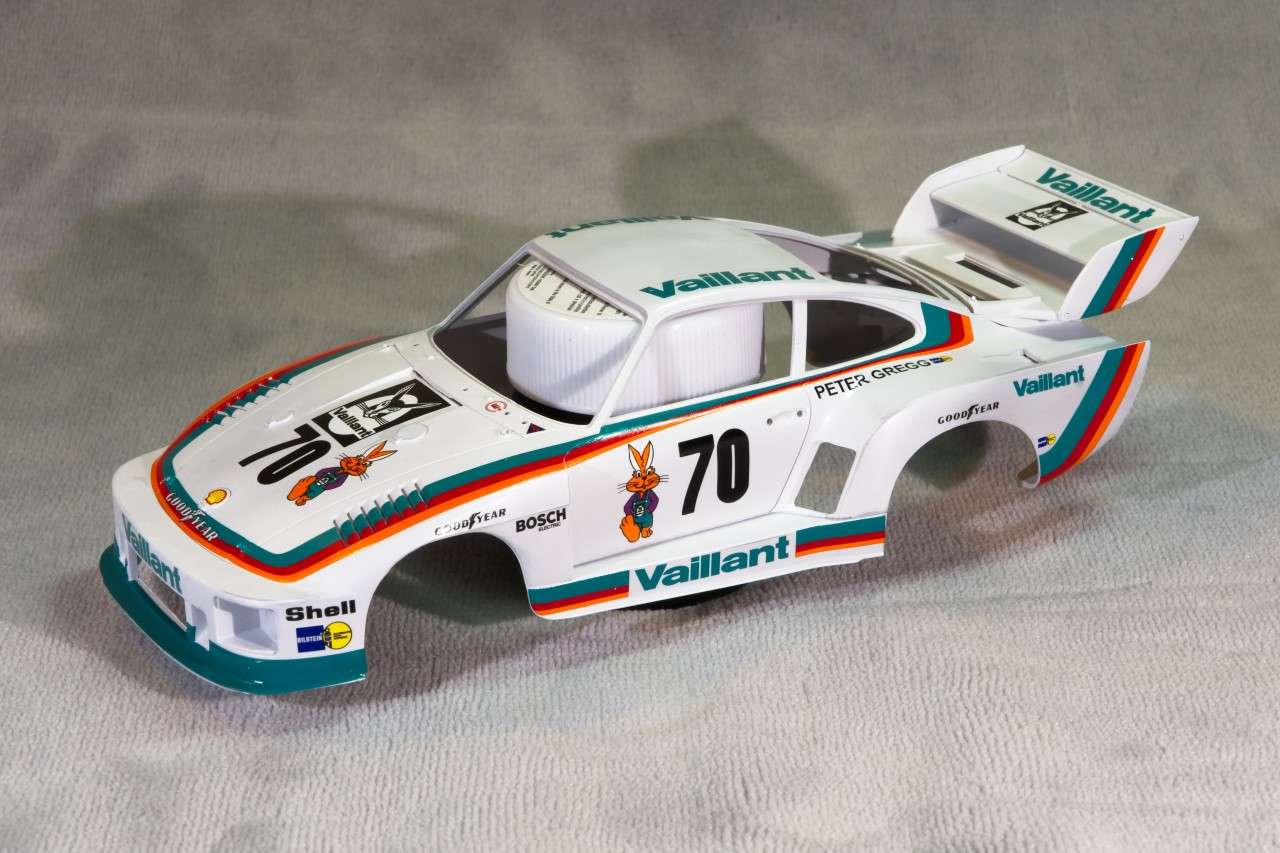 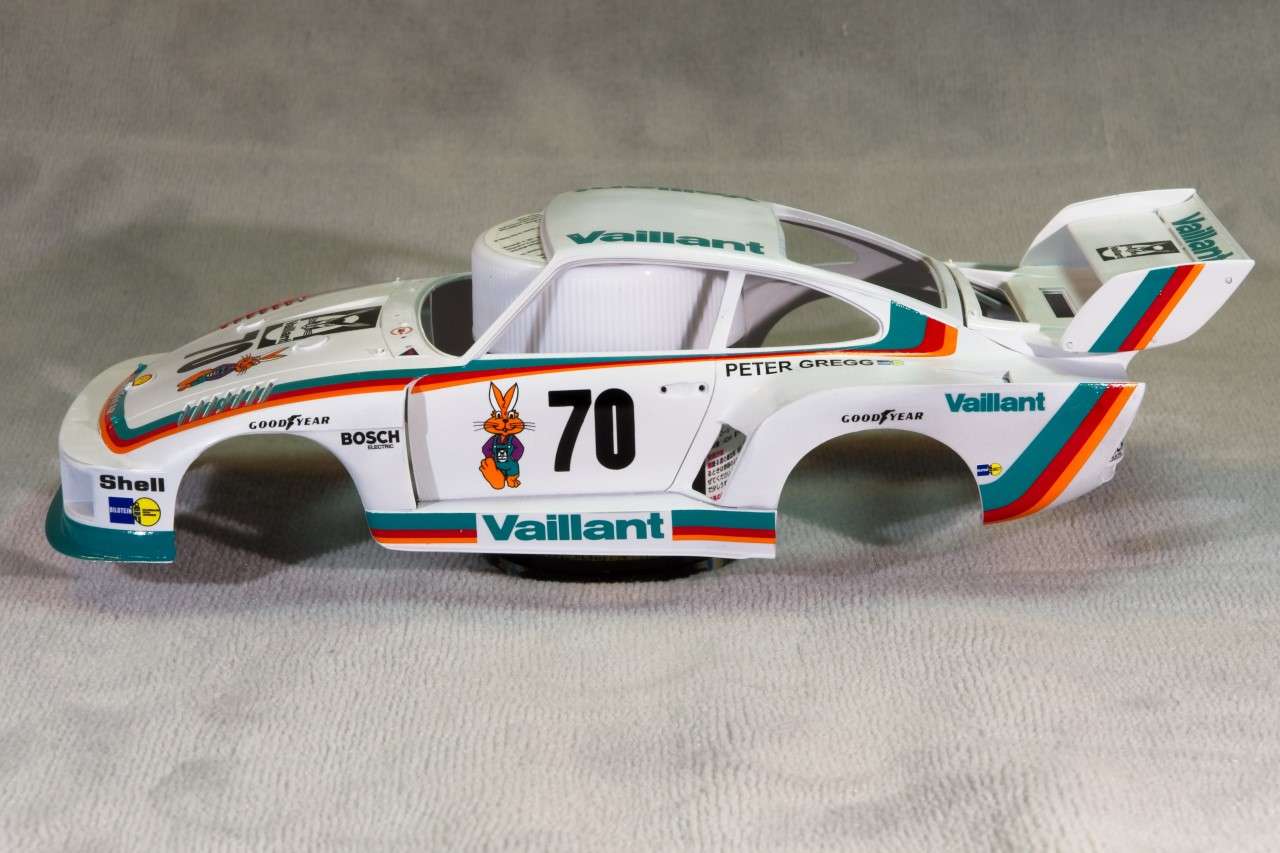 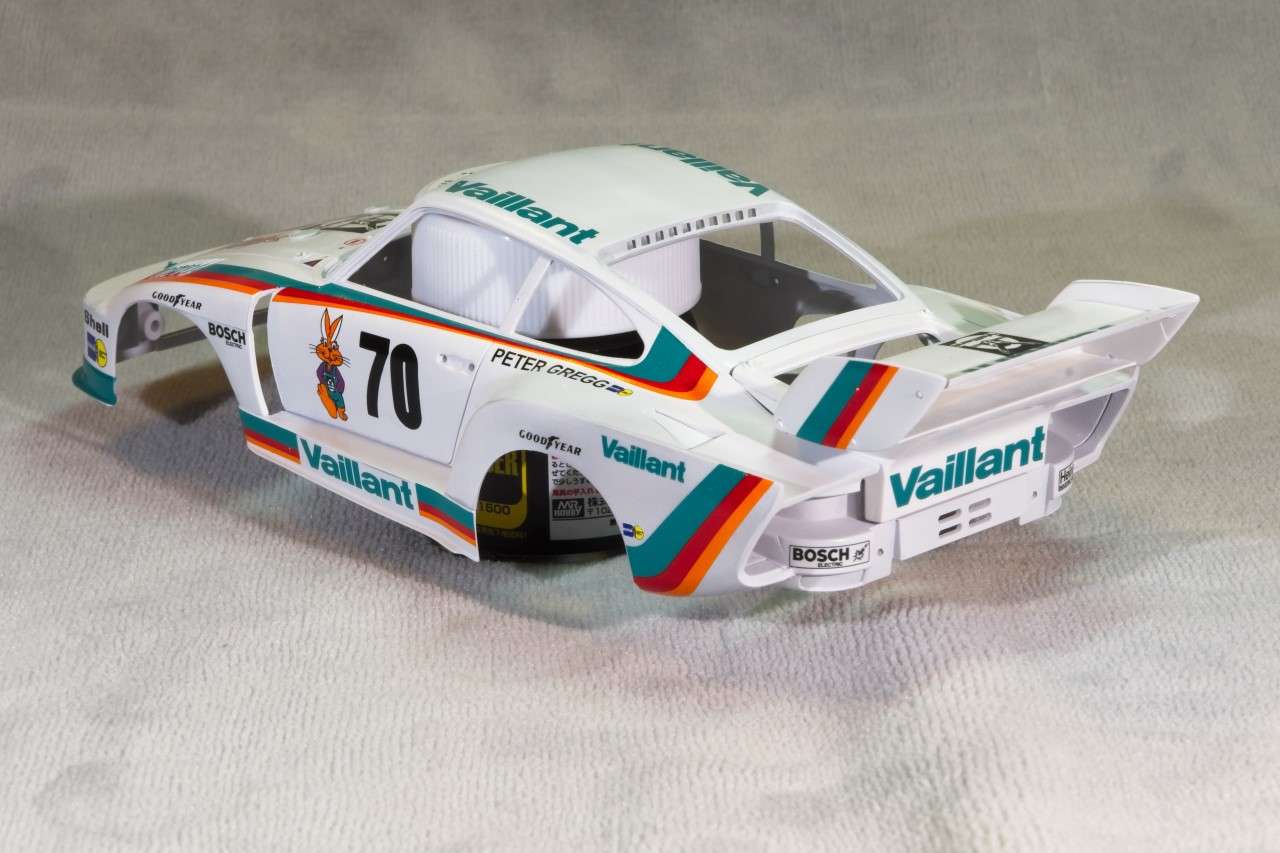 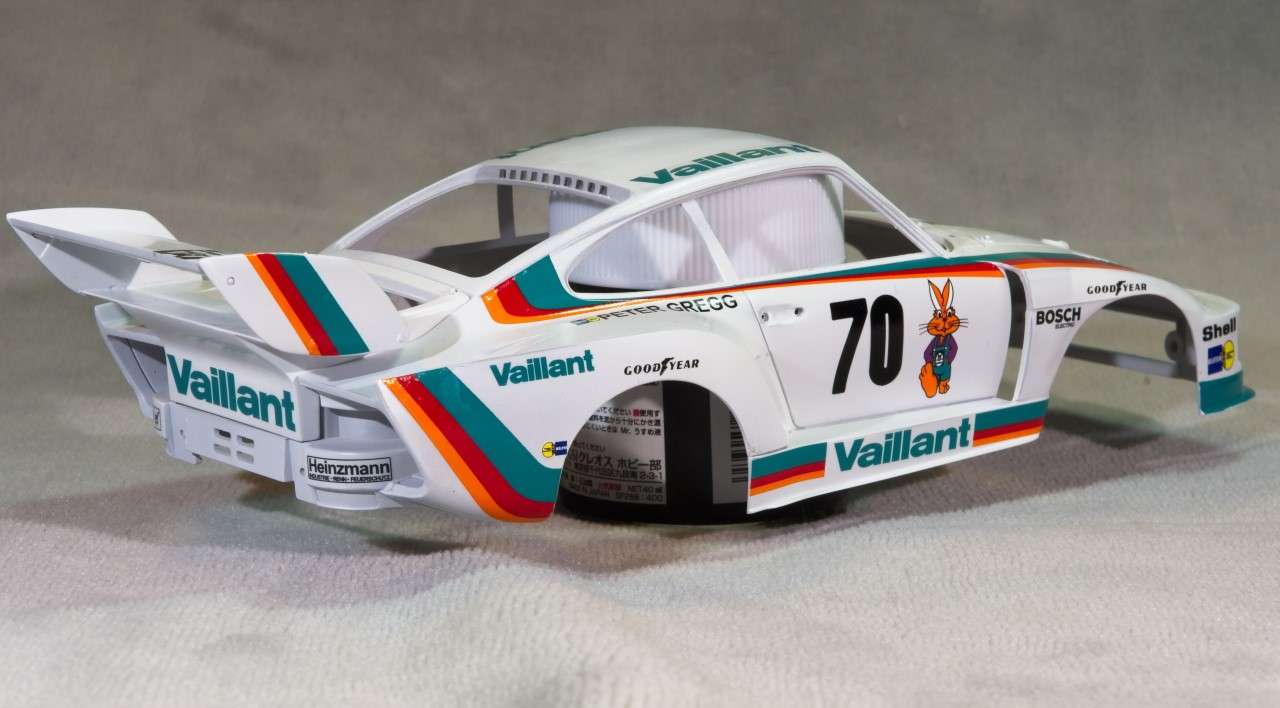 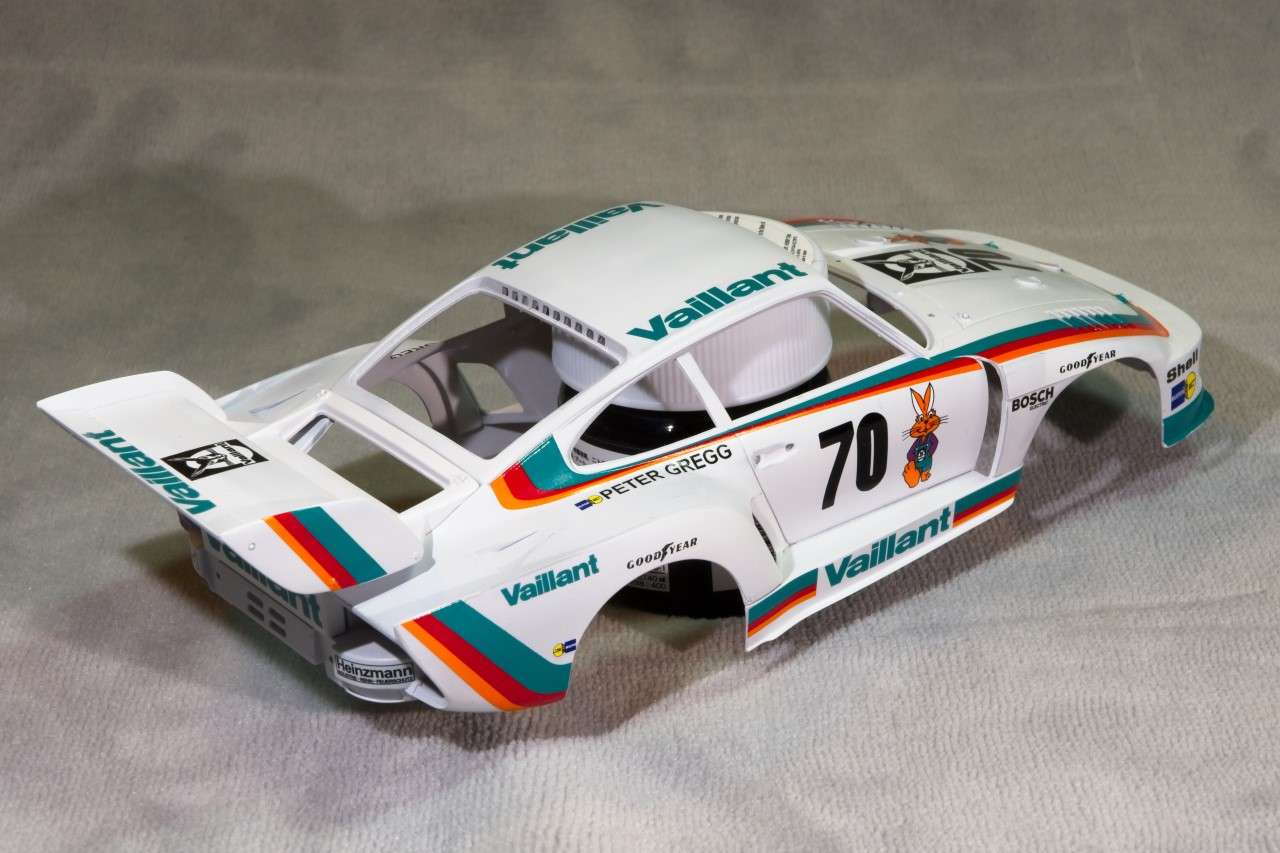  |
|
|
|
Post by afx on Jul 5, 2019 10:30:19 GMT -8
A striking livery Joel - very nice.
|
|
|
|
Post by Joel_W on Jul 5, 2019 12:55:31 GMT -8
A striking livery Joel - very nice. JC, Thanks for stopping by and checking out the decaling. I'll have to hand it to the Kremmer Brothers, they sure had some striking looking cars Joel |
|
Deleted
Deleted Member
Posts: 0
|
Post by Deleted on Jul 5, 2019 13:34:43 GMT -8
Very very nice Joel, the best part of the build as far as I'm concerned the DECAL placement, now they come alive! I might ad a lot of life here 😎
|
|
Deleted
Deleted Member
Posts: 0
|
Post by Deleted on Jul 5, 2019 14:21:00 GMT -8
I'm like you as far as clear coat. It's either an exceptional paint job or one needing help. If it needs help,it gets polished 2400 maybe 3600 wet sand to begin working my way up to 12000, by then it should be glass smooth. I then do my decals and finish off with a coat of final detail carnuba wax EXCEPT Final Detail is no where near the original. But no I have NEVER clear coated a paint jo. At all until. .......NOW.
|
|
|
|
Post by Joel_W on Jul 6, 2019 4:58:04 GMT -8
I'm like you as far as clear coat. It's either an exceptional paint job or one needing help. If it needs help,it gets polished 2400 maybe 3600 wet sand to begin working my way up to 12000, by then it should be glass smooth. I then do my decals and finish off with a coat of final detail carnuba wax EXCEPT Final Detail is no where near the original. But no I have NEVER clear coated a paint jo. At all until. .......NOW. Bill, I do go the full Monty with rubbing out and polishing the clearcoat. I usually start with 6,000 and then like you work up to 12,000. From there I use the Gravity 3 part polishing system, followed by their Carnuba wax. Their system is rather expensive so when I finish the set, I'm switching over to Maguires products, as I've seen a lot of modelers use. Joel |
|
|
|
Post by Ben_B on Jul 6, 2019 7:41:55 GMT -8
NICE!!!
Ben
|
|


