|
|
Post by afx on Feb 4, 2020 15:43:11 GMT -8
Nice score Joe.
|
|
|
|
Post by pnance26 on Feb 10, 2020 13:01:05 GMT -8
So three kits to make one and the aluminum wheels... how much do you figure you have got in it so far? I always start with "This is going to be STRICTLY OOB!" and then end up buying this or that! I'm not complaining... it's just kind of a habit!
|
|
Deleted
Deleted Member
Posts: 0
|
Post by Deleted on Feb 10, 2020 13:15:46 GMT -8
I've been haggling over the tires for the last couple of days and after conversing with Ted Bowe from Ted's Modeling Marketplace back and forth through emails, going through photo shots and doing ALOT of measuring and head scratching I've come up with a new set of slicks that I'm going to use for this thing. Additionally I was concerned with how the front ride height was going to be but once I test fitted everything into place...…….it pretty much fell into place. I might go just a tad lower in the front but I'm pretty happy that I don't have to do much here as this has been quite the gaggle in the way of mods on this car. This is the way this car is going to look now and it seems like it's a lot closer to the reference photos that I have of this car. Now I've just gotta score a Goodyear decal sheet to put the scripts onto the tires. Back to the reference shot: 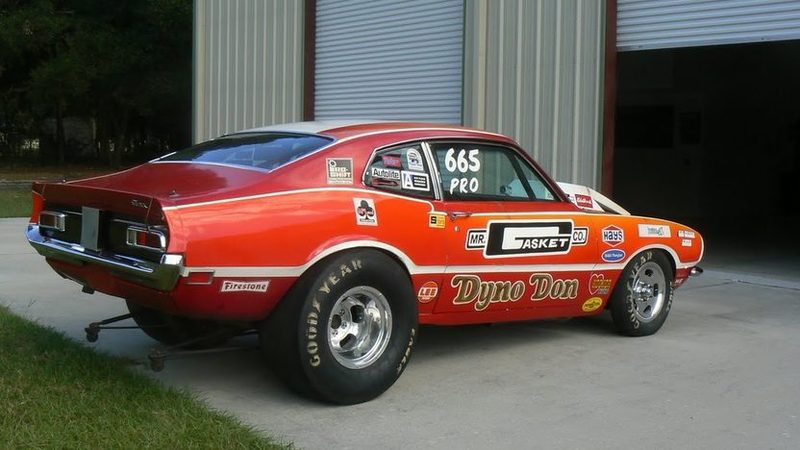 Updated tires and stance: 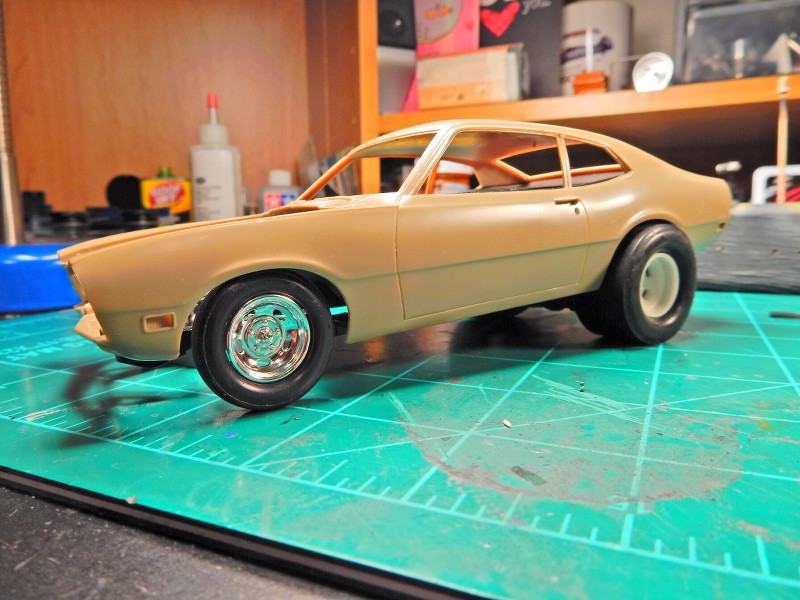 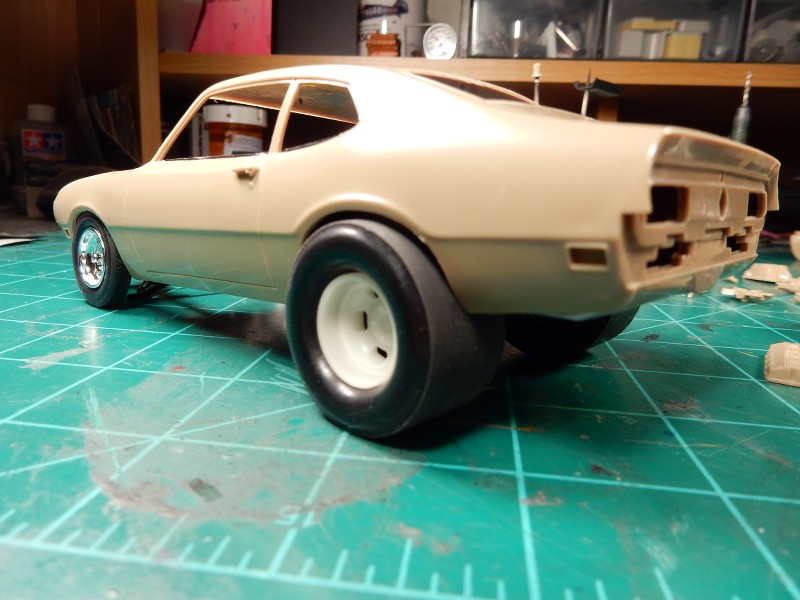 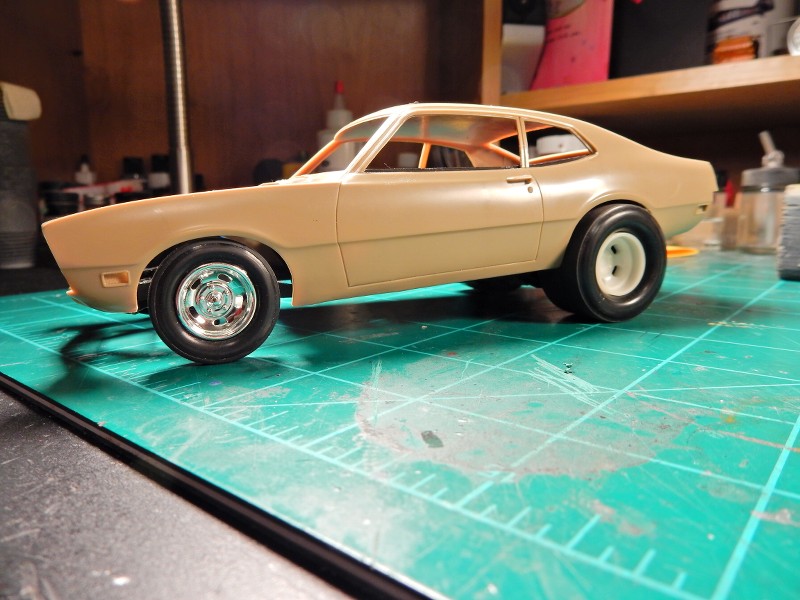 BTW.....did I mention that I found a set of aluminum slots for it?? Yeah.....those are on the way to me from Canada:  This is a cool project, so I'm going to follow it, especially because you sourced those beautiful Al' Rims from the Great White North!  See we can contribute to the cause in small ways here or there. I always enjoy seeing a custom build using several kit parts and or scratch built parts because that's the way I love to do things and it's exciting. If I may be so bold as to make a suggestion - if you really want to pop realism into this build don't use Goodyear Decals on the tires, air-brush them on with a stencil - it's a million times more realistic, and takes a build to another level of realism IMO. Love the fact that you went to the Aluminum Rims rather than plastic - big thumbs up from me on that! (Following) Adrian |
|
Deleted
Deleted Member
Posts: 0
|
Post by Deleted on Feb 10, 2020 13:20:04 GMT -8
I've been haggling over the tires for the last couple of days and after conversing with Ted Bowe from Ted's Modeling Marketplace back and forth through emails, going through photo shots and doing ALOT of measuring and head scratching I've come up with a new set of slicks that I'm going to use for this thing. Additionally I was concerned with how the front ride height was going to be but once I test fitted everything into place...…….it pretty much fell into place. I might go just a tad lower in the front but I'm pretty happy that I don't have to do much here as this has been quite the gaggle in the way of mods on this car. This is the way this car is going to look now and it seems like it's a lot closer to the reference photos that I have of this car. Now I've just gotta score a Goodyear decal sheet to put the scripts onto the tires. Back to the reference shot: Updated tires and stance: BTW.....did I mention that I found a set of aluminum slots for it?? Yeah.....those are on the way to me from Canada: |
|
Deleted
Deleted Member
Posts: 0
|
Post by Deleted on Feb 10, 2020 13:27:20 GMT -8
I haven't done a race car in I don't know how long but I've had this Jo-Han Maverick in my stash for a couple of years and wanted to build it but didn't know what theme I was going with until I saw Don Nicholson's ride. I knew right away that I HAD to build it....and so.....along with my re-intro here I'll give this my best shot. The kit (I bought this kit a couple of years back for $50......you don't want to know what it goes for these days....WOW!!) 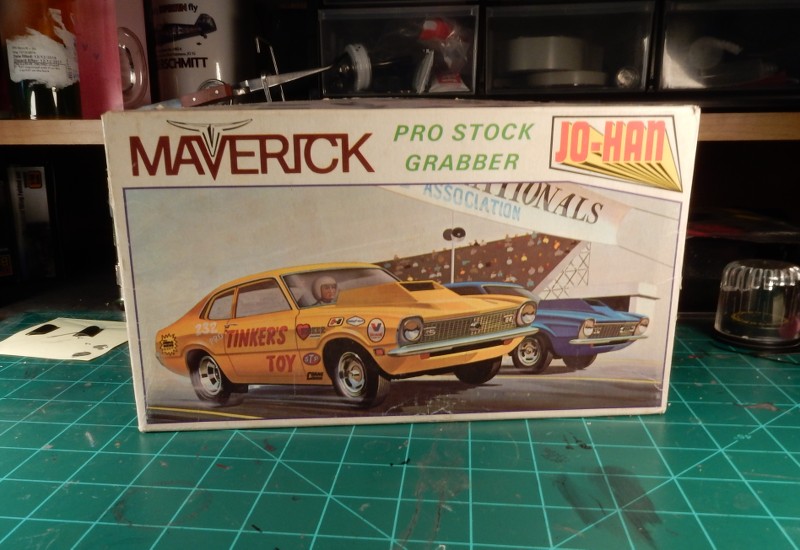 Dyno Don's Maverick 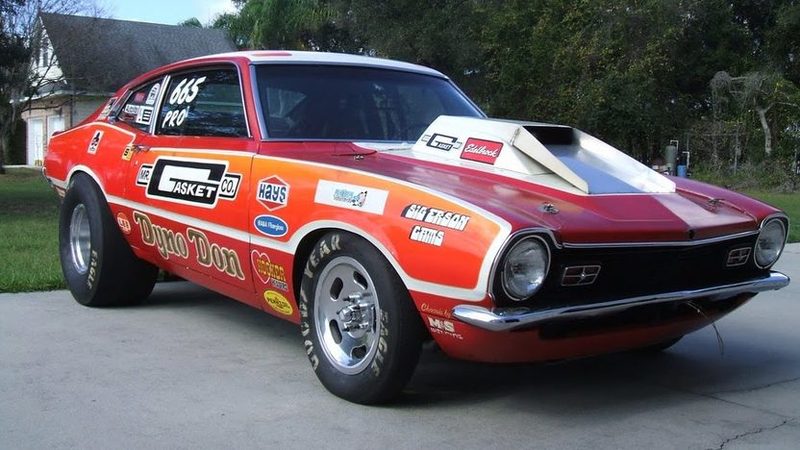  |
|
|
|
Post by mustang1989 on Feb 20, 2020 17:22:16 GMT -8
I'll be posting some more on this one later on tonight / early tomorrow morning fellas. Sorry for the absence and thank you all so much for the comments.
|
|
|
|
Post by mustang1989 on Feb 20, 2020 18:06:20 GMT -8
So three kits to make one and the aluminum wheels... how much do you figure you have got in it so far? I always start with "This is going to be STRICTLY OOB!" and then end up buying this or that! I'm not complaining... it's just kind of a habit! For mildly modified builds I'll usually stick to just the one kit but when it comes to more heavily modified builds I tend to get two or more kits involved. Most times I don't even think about OOB or not. I just know what I've got envisioned and use whatever it takes to obtain what I see. I will say that lately I've been a little more money conscious so I've learned to parts shop a little more than buy entire kits for parts. lol |
|
|
|
Post by mustang1989 on Feb 20, 2020 18:10:56 GMT -8
I've been haggling over the tires for the last couple of days and after conversing with Ted Bowe from Ted's Modeling Marketplace back and forth through emails, going through photo shots and doing ALOT of measuring and head scratching I've come up with a new set of slicks that I'm going to use for this thing. Additionally I was concerned with how the front ride height was going to be but once I test fitted everything into place...…….it pretty much fell into place. I might go just a tad lower in the front but I'm pretty happy that I don't have to do much here as this has been quite the gaggle in the way of mods on this car. This is the way this car is going to look now and it seems like it's a lot closer to the reference photos that I have of this car. Now I've just gotta score a Goodyear decal sheet to put the scripts onto the tires. This is a cool project, so I'm going to follow it, especially because you sourced those beautiful Al' Rims from the Great White North! See we can contribute to the cause in small ways here or there. I always enjoy seeing a custom build using several kit parts and or scratch built parts because that's the way I love to do things and it's exciting. If I may be so bold as to make a suggestion - if you really want to pop realism into this build don't use Goodyear Decals on the tires, air-brush them on with a stencil - it's a million times more realistic, and takes a build to another level of realism IMO. Love the fact that you went to the Aluminum Rims rather than plastic - big thumbs up from me on that! (Following) Adrian Thanks for dropping in Adrian. Well...….the aluminum wheels were a tad bit too small. I'll still be able to use them on my other Maverick build but it looks like I'll be going ahead with the plastic ones above. Sorry to disappoint but this was a trial for me as well. I was bummed out about the wheels but know that I'll have a use for them in the future so they were not a waste of time and money for me to acquire. I do thank you for the suggestion in regards to the stencils as well. I'll have to keep that one in mind for future builds. |
|
|
|
Post by mustang1989 on Feb 20, 2020 18:19:35 GMT -8
Ok gang....I managed to get the wheels coated in Molotow and the tires all decaled and completed. I use a multi step process with the decals on the tires. First step is obvious, apply the decals and let dry out, for the second step I take Model Master Acrylic Flat Clear cut with Isopropyl Alcohol(which seems to make flat even more flat) and applied a super light coat over the sidewalls of the tires to blend the cals in to the tires which makes all decal film disappear. Lastly I grind up some black pastel and dry brush black pastel over the sidewalls and lettering. This does two things, 1.) it helps to further hide all decal film making the letters look as part of the tire and 2.) it creates a "worn" effect that dirties the lettering up a little therefore making the tires look a little more realistic. I didn't use the front wheels with the Molotow on them in the following pictures because this stuff has a minimum cure out of 48 hours. The rears I could handle somewhat because of the dish in the wheels but here's where we're at right now with the wheels/ tires. I still have to move the rear tires inward just a tad more to look like the reference shots but that shouldn't be that hard to do. 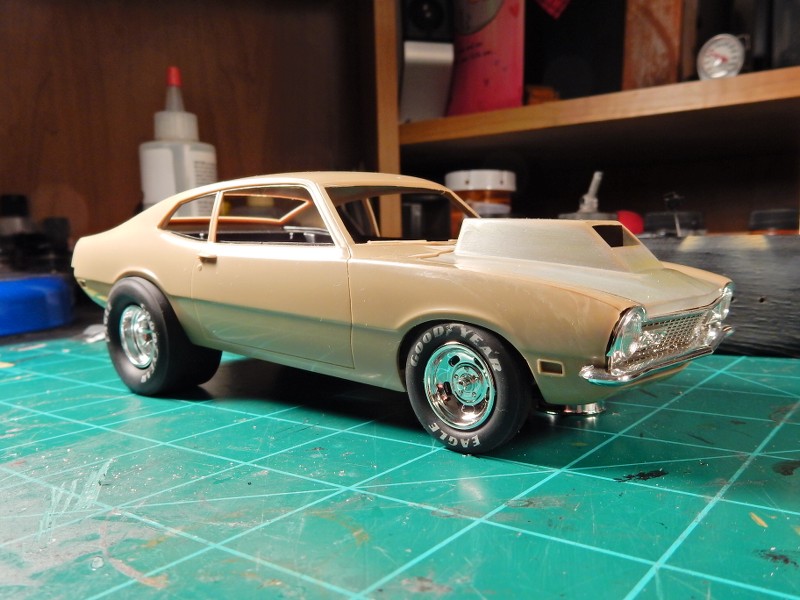 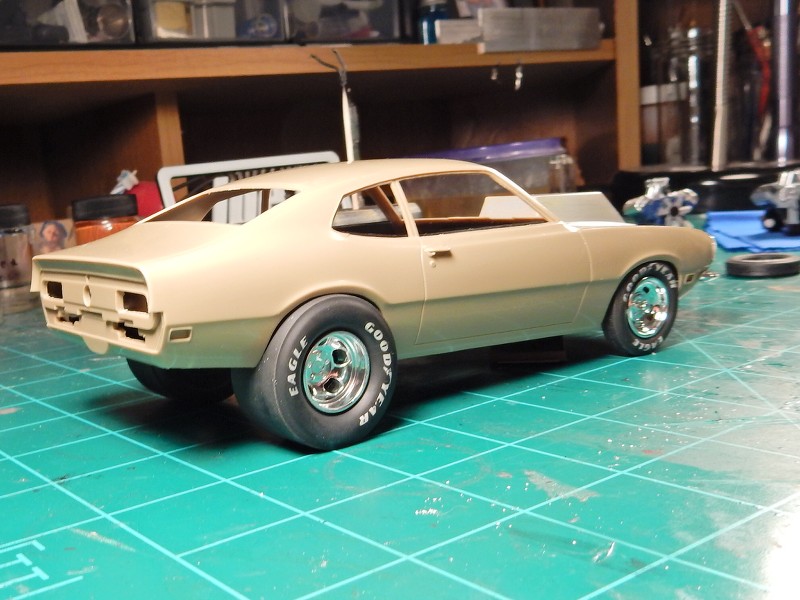 |
|
|
|
Post by tatocorvette on Feb 20, 2020 19:01:50 GMT -8
Those tires look great!
|
|
|
|
Post by mustang1989 on Feb 20, 2020 19:05:06 GMT -8
Thanks Ismael. I may need to dry brush a little more black on those rear tires to get just the final effect/ look that I'm after. |
|
|
|
Post by Joel_W on Feb 21, 2020 8:01:35 GMT -8
mustang1989
The tires and wheels look fantastic. Are you saying that the chrome is Molotow that you coated on? How did you do that? Air Brush I'm assuming? One other stupid question. The rear slicks have a pretty tight fit in the wheel wells. What in real life would prevent them from getting cut by the body under acceleration?
Joel
|
|
|
|
Post by mustang1989 on Feb 21, 2020 10:26:10 GMT -8
mustang1989 The tires and wheels look fantastic. Are you saying that the chrome is Molotow that you coated on? How did you do that? Air Brush I'm assuming? One other stupid question. The rear slicks have a pretty tight fit in the wheel wells. What in real life would prevent them from getting cut by the body under acceleration? Joel Thanks Joel. Yeah that's Molotow shot through the airbrush uncut. If you look closely in the reference photos those rear tires do have some cuts in them. Just a beastly look though. Nice n' aggressive. |
|
|
|
Post by mickgee on Feb 21, 2020 13:09:21 GMT -8
Dyno Don's Maverick |
|
|
|
Post by mustang1989 on Feb 21, 2020 14:05:39 GMT -8
Thanks Mick!
|
|


 See we can contribute to the cause in small ways here or there. I always enjoy seeing a custom build using several kit parts and or scratch built parts because that's the way I love to do things and it's exciting.

