|
|
Post by tatocorvette on Apr 4, 2020 19:06:45 GMT -8
Thanks! I usually do a dark wash for depth, followed by a light dry brush for the worn look. My latest wash was too soon and the paint was not fully dry making a little mess. Since I'm using craft acrylics I need to wait longer. Grabbed the fuselage thinking it was ready for decals. After almost 2 weeks it is still a bit tacky and I left some fingerprints on it.  Thanks, Ismael |
|
|
|
Post by mustang1989 on Apr 4, 2020 19:12:53 GMT -8
Thanks! I usually do a dark wash for depth, followed by a light dry brush for the worn look. My latest wash was too soon and the paint was not fully dry making a little mess. Since I'm using craft acrylics I need to wait longer. Grabbed the fuselage thinking it was ready for decals. After almost 2 weeks it is still a bit tacky and I left some fingerprints on it. Thanks, Ismael AAAAAH don't sweat it Ismael. You'll pull through it all just fine buddy. Been there and done that pal. It's not about the mistake....it's all in the recovery. |
|
|
|
Post by tatocorvette on Apr 4, 2020 20:11:18 GMT -8
Hello again, A helicopter without a collective pitch /throttle control is like a race car without an accelerator pedal. That's a NO-NO I had to fix that omission in the kit. Most helicopters have redundant controls for both pilots. 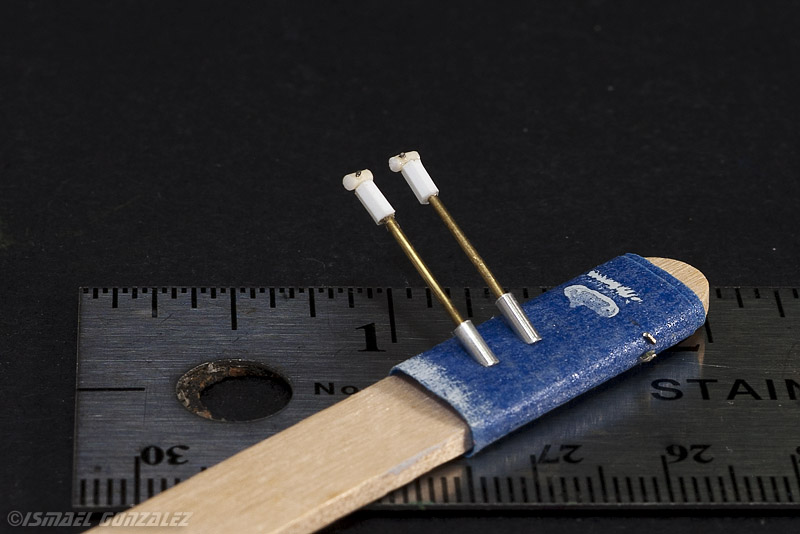 Thanks, Ismael |
|
|
|
Post by Joel_W on Apr 5, 2020 9:28:10 GMT -8
Ismael,
You've now brought the world of Masking tape to a whole new level.
Just saw your duel pitch/throttle controls. Impressive to say the least.
Joel
|
|
|
|
Post by tatocorvette on Apr 5, 2020 11:50:48 GMT -8
Thanks Joel! Here is round 1 of many of decals: There are 17 decals and several hours here.  The decal sheet is nice but I'm finding many of them are not the correct size. The box art and instructions are very misleading. I'm using actual pictures of the event on Sept 21st, 1961. My pet peeve with models is that decals are always the wrong size. Be it cars, aircraft of armor, I've yet to find a perfect set of properly sized decals. Pardon the crappy cell phone pic. Thanks, Ismael |
|
|
|
Post by tatocorvette on Apr 5, 2020 11:57:49 GMT -8
By the way, this is my main reference pic 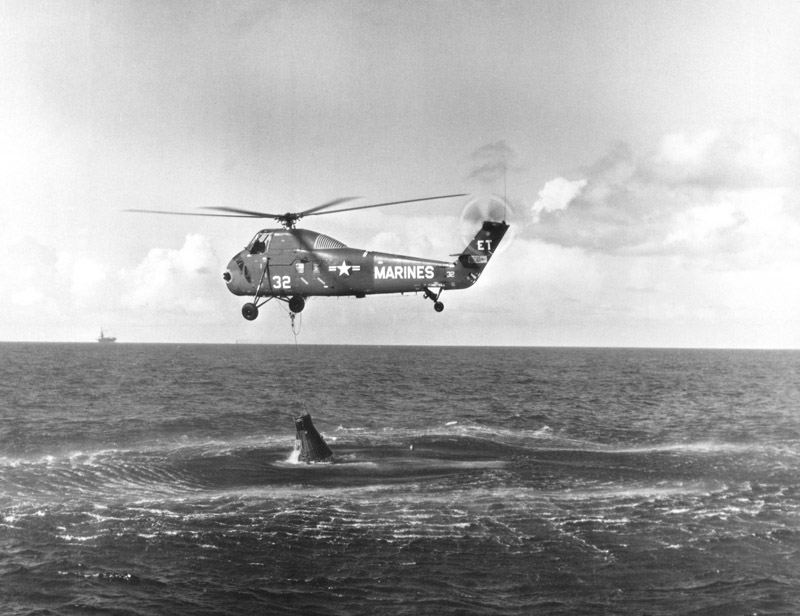 That dot to the right of the capsule is Gus Grissom himself fighting for his life while Jim Lewis at the control of the helicopter fights the flooded capsule, trying to get it away from Gus so the other helicopter could pick him up. Some people don't realize the helicopter was only a few seconds from engine failure. Having it kept fighting the flooded capsule, it would have become a major rescue mess with a spacecraft and a helicopter lost and an astronaut, a pilot and a recovery crew chief fighting for their lives. Jim Lewis did the right thing. Thanks, Ismael |
|
|
|
Post by 2whl on Apr 5, 2020 12:18:20 GMT -8
|
|
|
|
Post by jchrisf on Apr 5, 2020 12:49:03 GMT -8
This is looking great. I didn't think it would be much from the out of the box pics but you have turned it into a piece of art. It is amazing what a master builder can do with a kit.
|
|
|
|
Post by tatocorvette on Apr 5, 2020 13:00:16 GMT -8
Thanks guys!
I have done research on the subject over the years and everything points he did not. He did remove the cap and safety pin of the activation plunger as per the checklist, but before the capsule was secured to the helicopter. It is possible that the internal pin of the plunger may have slid internally without external force. That's according to Robert Thompson, the head of recovery operations for Mercury and the first person to speak with Gus Grissom after the incident. Checklists items were not very clear on timing back in those days. He was cleared of any wrongdoing by NASA and continued to be a valuable astronaut until his unfortunate death in 1967 on Apollo 1.
Thanks,
|
|
|
|
Post by Joel_W on Apr 5, 2020 16:02:23 GMT -8
Ismael,
Your decaling looks perfect, and that's high praise for someone who keeps on telling us how much he hates decaling. I know that I have poor eyesight these days, but I really don't see any major issue with the size of the decals. As a side note, I stopped using one companies decals when I was into aircraft even when they were the only game in town, because they always managed to have a critical decal or two just to large and I couldn't fudge it.
Overall, the helicopter is really coming together now.
Joel
|
|
|
|
Post by tatocorvette on Apr 6, 2020 15:03:14 GMT -8
Hello, OK, I have to admit I was impressed with the resolution of these decals, especially the small ones. These are real closeups much bigger than actual size. 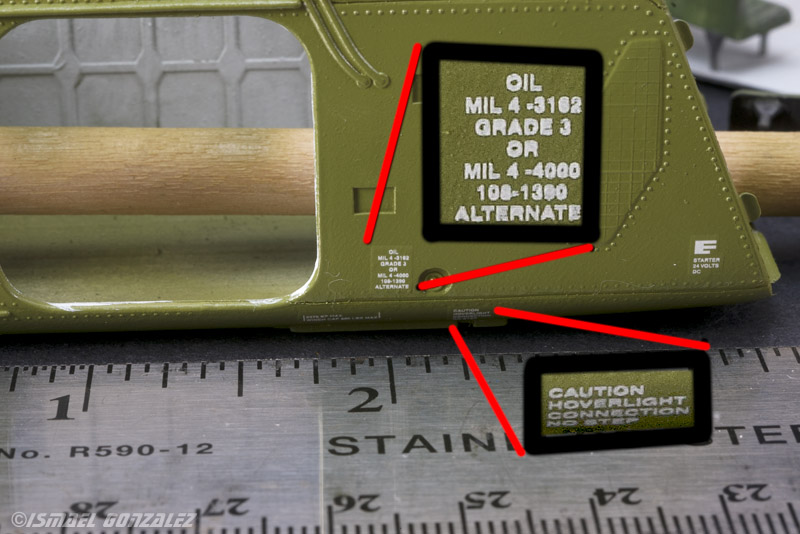 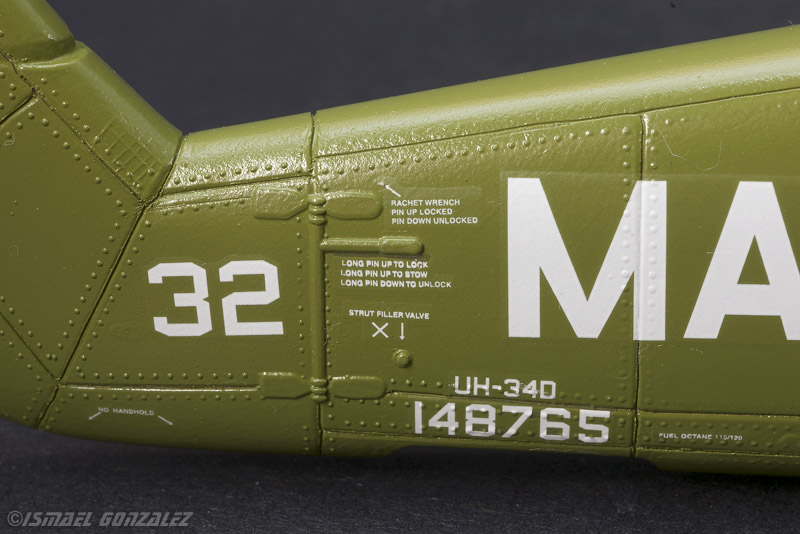 Thanks, Ismael |
|
|
|
Post by tatocorvette on Apr 6, 2020 15:08:38 GMT -8
Hello again, This was a fun one. After assembly, the tail rotor was painted black. Then I masked the tips and painted white. Then, after dry, I masked the white stripe and painted the red. All with rattle cans. I then added some weathering on the leading edge on the blades. As these spin into the air it was very common to loose some of the leading edge paint exposing some metal underneath. It is subtle and hard to see in the picture, but it is there in all 4 leading edges. 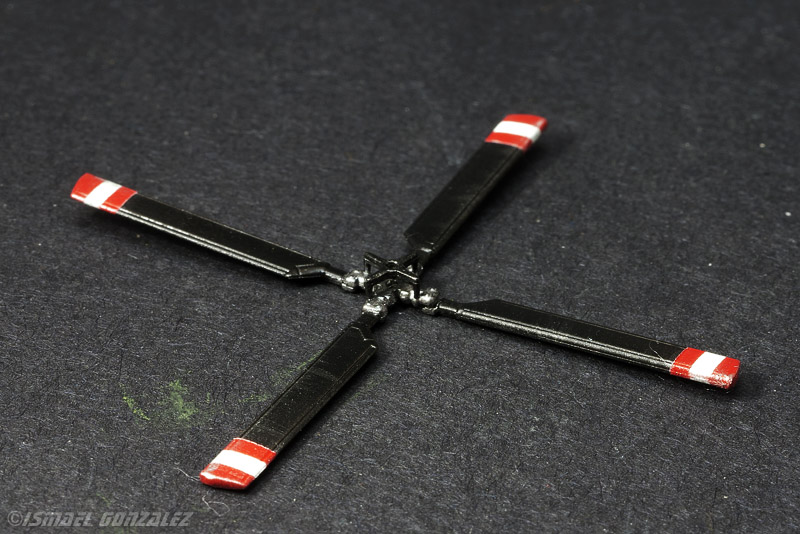 Thanks, Ismael |
|
|
|
Post by Ben_B on Apr 7, 2020 2:48:06 GMT -8
Looking good, Ismael! I'm one of those weirdos who likes applying tons of tiny stencil decals to my airplane models.
Ben
|
|
|
|
Post by jchrisf on Apr 7, 2020 4:36:37 GMT -8
Looking good and you are progressing fast!
|
|
|
|
Post by Joel_W on Apr 7, 2020 7:36:50 GMT -8
Ismael,
Those stencil decals are really outstanding. Sharp as a tack. Love your rotor blades. Neat, clean paint work. Just hard to see the weathering with the glare of the camera light.
Joel
|
|


