|
|
Post by 2whl on May 1, 2020 17:28:50 GMT -8
Paul, You are almost at the point where you can try something for me, if you would... Can you place the main body piece (the one that forms the cockpit fairing) in place and take a photo of where the tail hits that black crosspiece in front of the rear brake ducts? Mine will not fit and leaves an huge gap as I showed over on my build. I am curious if it is a standard issue issue or if I did something else incorrectly? Unless I am missing something, there is a problem. Chris Smith and I discussed it and he said it is a well known issue. In the photos of the actual car, that entire black piece in the first photo is covered by the body panel. But I just don't see how as it leaves the huge gaps shown in the bottom photo. Any ideas? Anyone else? Patrick, I assembled enough to check the fit of the pieces you described. The top cowl on mine does not hit the suspension cross piece. I'm not sure what you did different. The only gaps I have are side gaps between the pieces that cover the fuel cells and the top cowling. Let me know if you want more pics or of different angles. 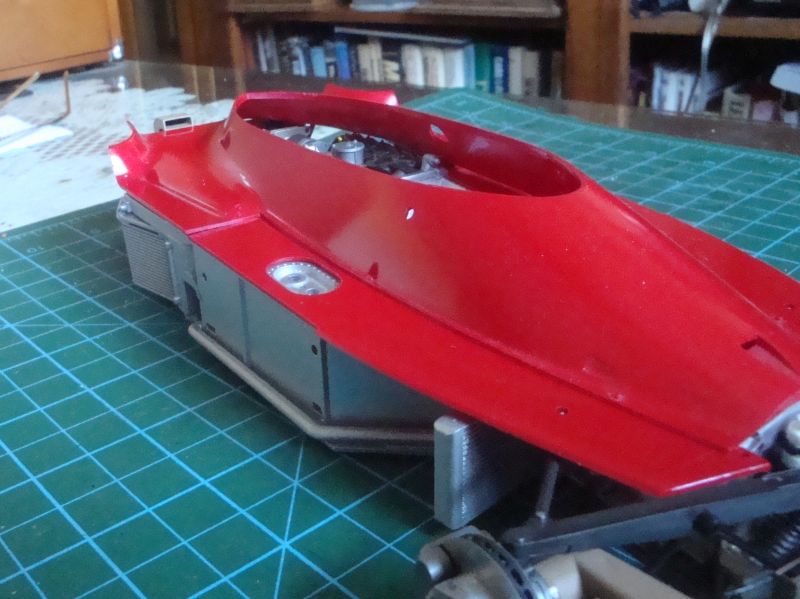 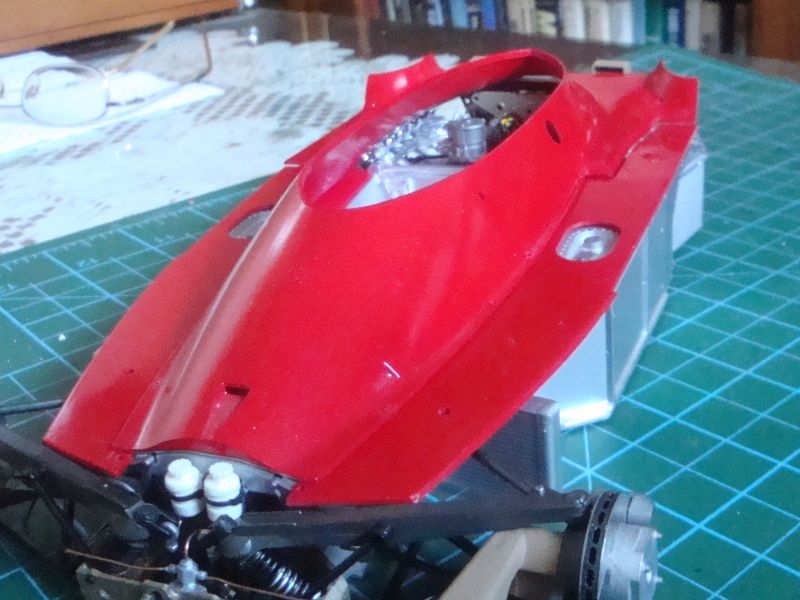  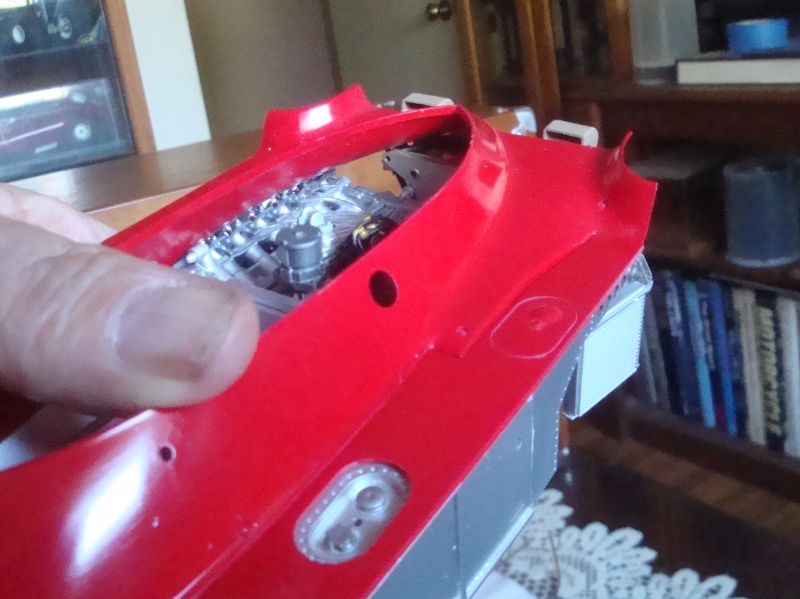 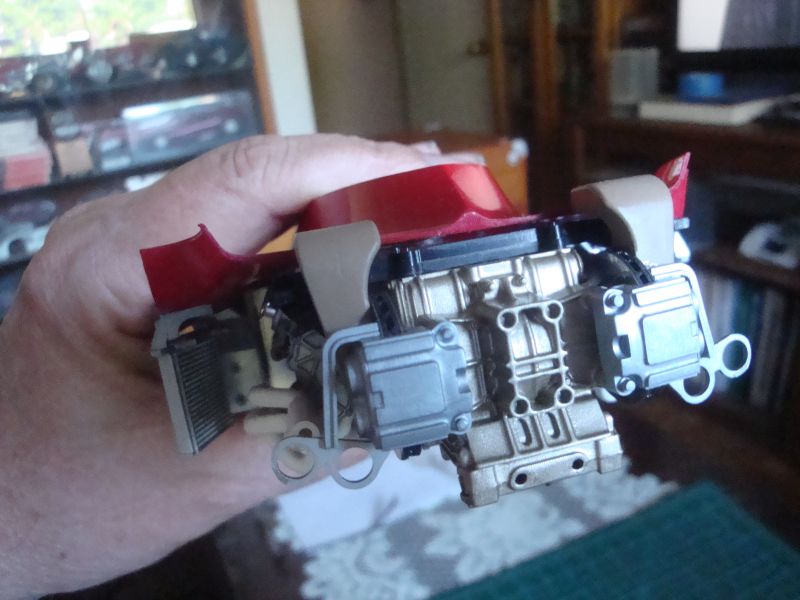 597 |
|
|
|
Post by pnance26 on May 2, 2020 6:51:33 GMT -8
I think I found the problem... here is the rear from your car...  And here is mine...  Somehow I managed to not seat the part (D30) under the cross member properly (It should have been lower. You would not see the back edge of it) which now leaves a gap... So I have to figure out how to eliminate that gap... Why, oh why, do I do this to myself? |
|
|
|
Post by tatocorvette on May 2, 2020 7:20:40 GMT -8
Could the part be upside down?
|
|
|
|
Post by pnance26 on May 2, 2020 8:17:09 GMT -8
Could the part be upside down? Nope, Israel... D30 is the part underneath the cross member and I didn't seat it far enough down in the transaxle box... this leaves it and the mounting holes sticking up instead of being flush. I am going to see if I cannot find some kind of "string saw" (like a bow saw you would use on a tree limb) that would fit in there and let me remove the pins. It is going to be tricky... wonder if a hot wire would work? I've got one of those... |
|
|
|
Post by tatocorvette on May 2, 2020 8:25:30 GMT -8
You've got this. Just don't rush it.
|
|
|
|
Post by 2whl on May 2, 2020 8:31:18 GMT -8
D30 is the part underneath the cross member and I didn't seat it far enough down in the transaxle box... this leaves it and the mounting holes sticking up instead of being flush. It's good that you found the problem. I almost didn't get the crossmember snapped onto D50 enough when I installed it. So are you thinking of shaving off the pegs to get it to drop down? How about a razor saw? |
|
|
|
Post by pnance26 on May 2, 2020 8:52:27 GMT -8
D30 is the part underneath the cross member and I didn't seat it far enough down in the transaxle box... this leaves it and the mounting holes sticking up instead of being flush. It's good that you found the problem. I almost didn't get the crossmember snapped onto D50 enough when I installed it. So are you thinking of shaving off the pegs to get it to drop down? How about a razor saw? I have a very thin saw but I also am thinking of using a hot wire, the kind used to cut foam. I will try it out on a donor kit first to see if it will even cut through. Your photographs have been an invaluable help in identifying the issue. It would require a complete disassembly of the rear end to fix correctly. That is doable as everything to that point snaps in place until we get to the cross member itself. It attaches at those four points and then two points on the engine block. There are also the two uprights that are diagonal braces... so I think trying to shave the pegs might be best. This is when modeling gets to be fun... seriously. It takes some ingenuity. I thought about shaving the tail and then cutting slots for the crossmember supports that go forward. It may not be "spec" but the body panels would fit. Chris is taking a third approach. Because of all his amazing detail work, he is leaving the body cowl and high air intake off for display purposes. That alleviates that problem for him. He has said that many folks have seen the problem that you are encountering which is not nearly as radical as my problem. If I had just the 1/8" gap it appears you have, I would try a couple of things... but that is how I roll. I probably won't be able to get to the issue until next week. The wife has surgery on Tuesday and so I am taking a couple of days to take care of her! Will let you all know! |
|
|
|
Post by pnance26 on May 2, 2020 9:30:46 GMT -8
You've got this. Just don't rush it. Thanks for the encouragement! I have nothing but time... after the lawn gets mowed (1.3 acres so...), the wife gets settled after surgery Tuesday, and the chores get done. I have an idea or four... |
|
|
|
Post by pnance26 on May 2, 2020 10:07:15 GMT -8
Sorry about hijacking your thread, Paul.
I will be moving my sorrows and woes back over to my little corner of this forum! But you have been a great help!
|
|
Deleted
Deleted Member
Posts: 0
|
Post by Deleted on May 2, 2020 15:55:01 GMT -8
You've got this. Just don't rush it. Thanks for the encouragement! I have nothing but time... after the lawn gets mowed (1.3 acres so...), the wife gets settled after surgery Tuesday, and the chores get done. I have an idea or four...
I like to say that if you go a day without having at least one minor or major issue to fix on your build, then you are not truly modelling.
You can fix it - just don't rush as your friend mentioned - that's the only thing in your way  |
|
|
|
Post by pnance26 on May 2, 2020 16:10:49 GMT -8
Thanks for the encouragement! I have nothing but time... after the lawn gets mowed (1.3 acres so...), the wife gets settled after surgery Tuesday, and the chores get done. I have an idea or four...
I like to say that if you go a day without having at least one minor or major issue to fix on your build, then you are not truly modelling.
You can fix it - just don't rush as your friend mentioned - that's the only thing in your way Adrian, If there is one thing I have learned, it is to think it through... and anything I try will be tested on a throwaway kit first! I can't throw away the work I've done! Thanks for all the encouragement here folks! It means "Go slow... people are watching!" |
|
|
|
Post by 2whl on May 6, 2020 9:59:05 GMT -8
Thanks for all the encouragement here folks! It means "Go slow... people are watching!"  |
|
|
|
Post by 2whl on May 12, 2020 9:19:47 GMT -8
I managed to stop riding long enough to get the rear suspension assembled.  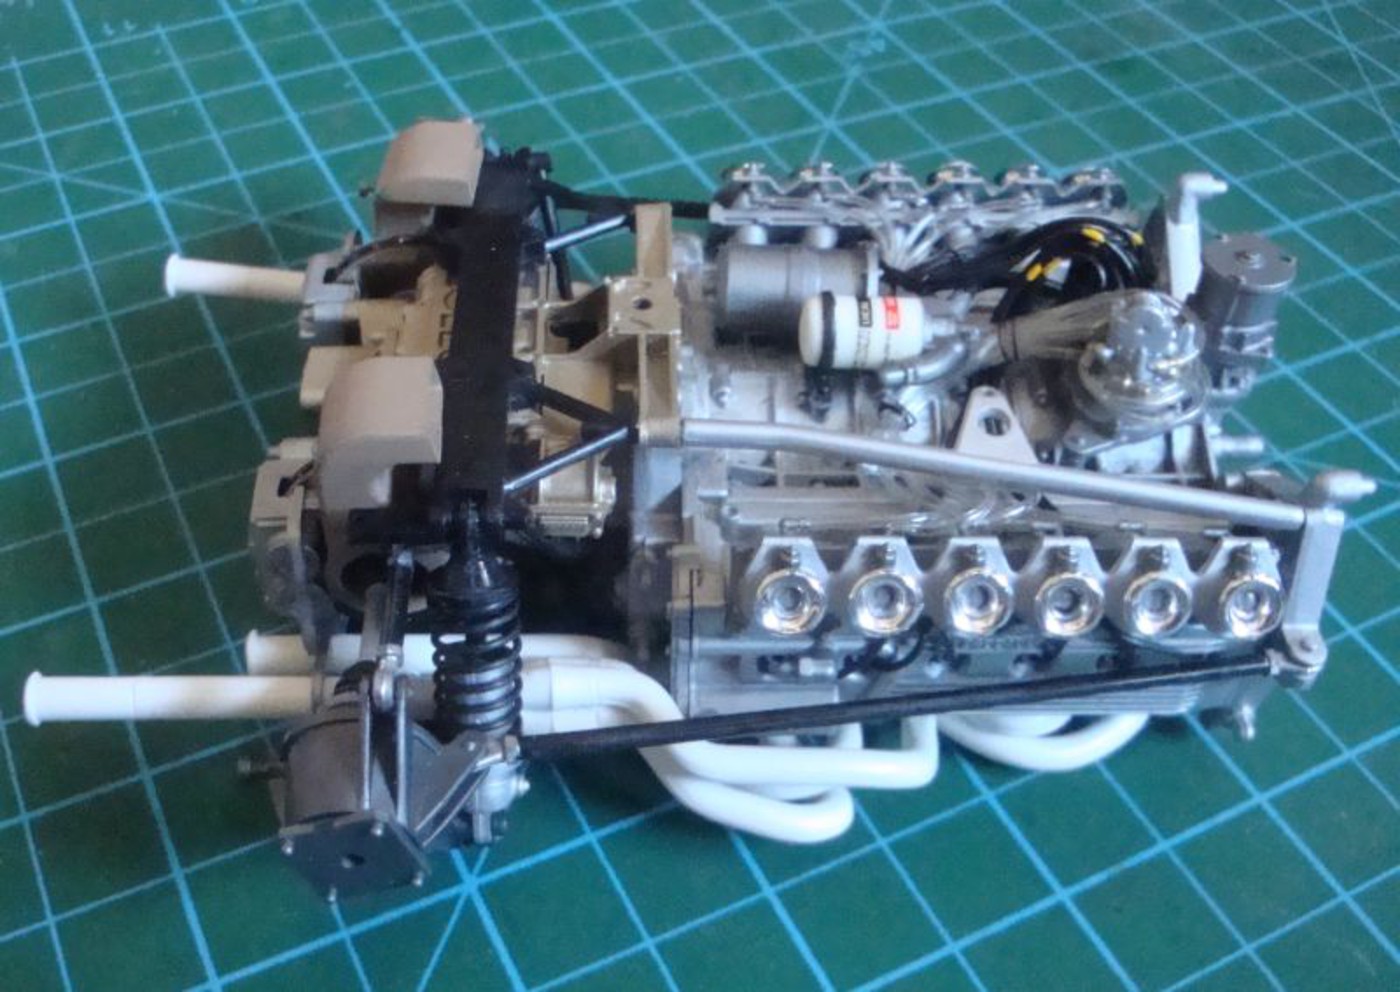 780 |
|
|
|
Post by Joel_W on May 12, 2020 9:25:37 GMT -8
2whl,
That rear assembly sure does look sweet.
Joel
|
|
|
|
Post by 2whl on May 12, 2020 9:33:49 GMT -8
Thanks Joel
|
|


