|
|
Post by chrissmith on May 18, 2020 20:39:43 GMT -8
The tire looks great, car looking good as well... You have had some better luck than I have had on this. The last couple of weeks have been frustrating on my build, nothing going to plan... Keep it up 👍 Thanks Chris. Keep your head up on your build. I'm sure it's nothing you can't fix. If you need any spare parts, let me know. Just frustrating, painted wings with Molotow about two weeks ago and they still smudge when handled, so now I have to redo them, also tried MFH cable ties. The plastic ones. Super brittle..so I am redoing the wings and waiting for metal cable ties from spot model |
|
|
|
Post by mustang1989 on May 19, 2020 9:55:30 GMT -8
Looks really good so far Paul. Lotsa good detail here man.
|
|
|
|
Post by 2whl on May 19, 2020 10:09:08 GMT -8
Thanks Joe
|
|
|
|
Post by pnance26 on May 19, 2020 10:37:29 GMT -8
Am going the Molotow route after seeing Chris' result. I will make sure to prep properly. He says no black base is needed jut a nice smooth surface.
So the wings will get attached last. I need to finish the rear wing mount construction and the nose needs polished.
Paul, how's it going? Got any new progress. When you get ready to decal, Chris and I will have made all the mistakes so you will benefit! I didn't know there was a solid wrap on the side pod of white. I'll bet that's a surprise to you as well! I'll show what I mean when I get it done! Most likely the next week!
Hope all is well!
|
|
|
|
Post by Art on May 19, 2020 15:52:21 GMT -8
It's coming along nicely, Paul! Good to see you keep up your momentum on this one.
|
|
|
|
Post by pnance26 on May 20, 2020 14:03:30 GMT -8
The tire looks great, car looking good as well... You have had some better luck than I have had on this. The last couple of weeks have been frustrating on my build, nothing going to plan... Keep it up 👍 I hadn't read this! What's up? You need something? Is it the wings? Is the Molotow still smudging? I haven't started mine yet so let me know. I'll figure something out... |
|
|
|
Post by 2whl on May 23, 2020 14:58:28 GMT -8
There are a few! But no regazzoni! Yes there is. I plan on doing this car. 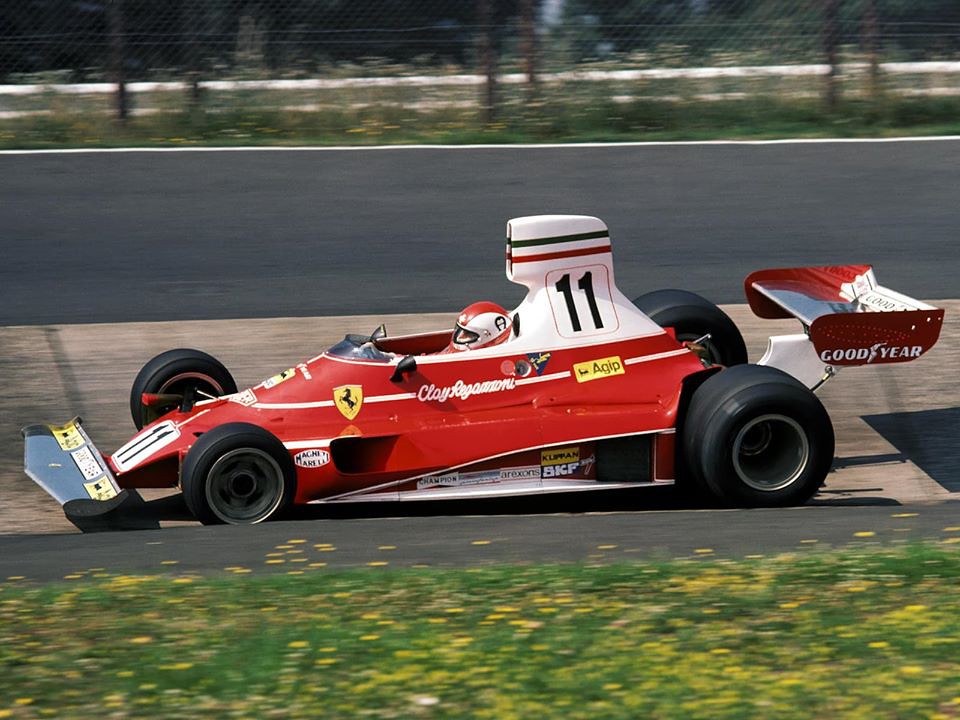 |
|
|
|
Post by pnance26 on May 24, 2020 7:57:49 GMT -8
There are a few! But no regazzoni! Yes there is. I plan on doing this car. Excellent! Variety is the spice of life! |
|
|
|
Post by Joel_W on May 25, 2020 6:29:22 GMT -8
Paul,
The engine and body really looks outstanding. the gloss Red just pops and has that mile deep finish. Love the various metal tones you used on the engine. As for hand painting the Goodyear on the tire, it really looks quite good. If you want to kick it up another notch, try running a toothpick right along the edge of the letters, that will chip off any excess paint and really sharpen up the paint lines, as paint doesn't stick all that well to rubber.
Joel
|
|
|
|
Post by 2whl on May 25, 2020 11:03:39 GMT -8
Paul, The engine and body really looks outstanding. the gloss Red just pops and has that mile deep finish. Love the various metal tones you used on the engine. As for hand painting the Goodyear on the tire, it really looks quite good. If you want to kick it up another notch, try running a toothpick right along the edge of the letters, that will chip off any excess paint and really sharpen up the paint lines, as paint doesn't stick all that well to rubber. Joel Thanks Joel. I decided to forgo the white letters. In going thru the period pictures, it seems they weren't painted that often. The decaling has begun. To get used to the Indycals, I started with the bigger ones. Then I used an impromptu jig to keep the endplates square. 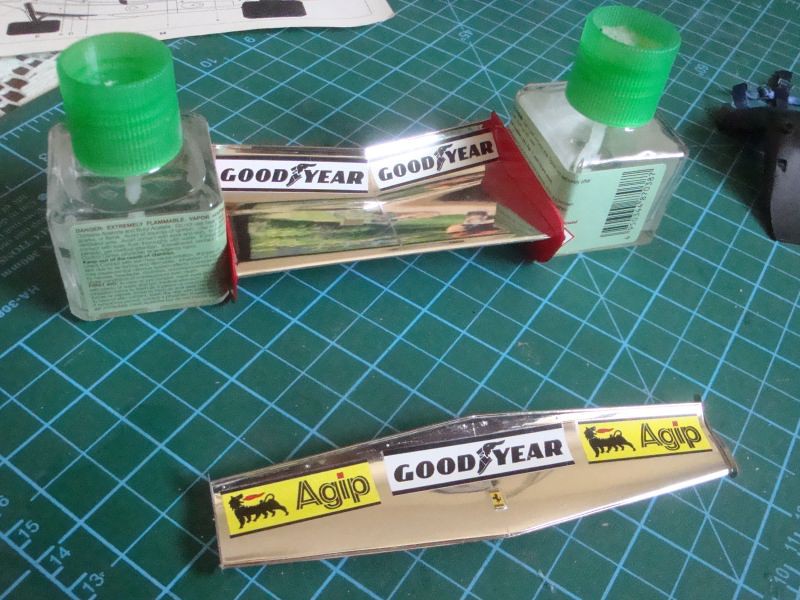 The rear wing mount is done. 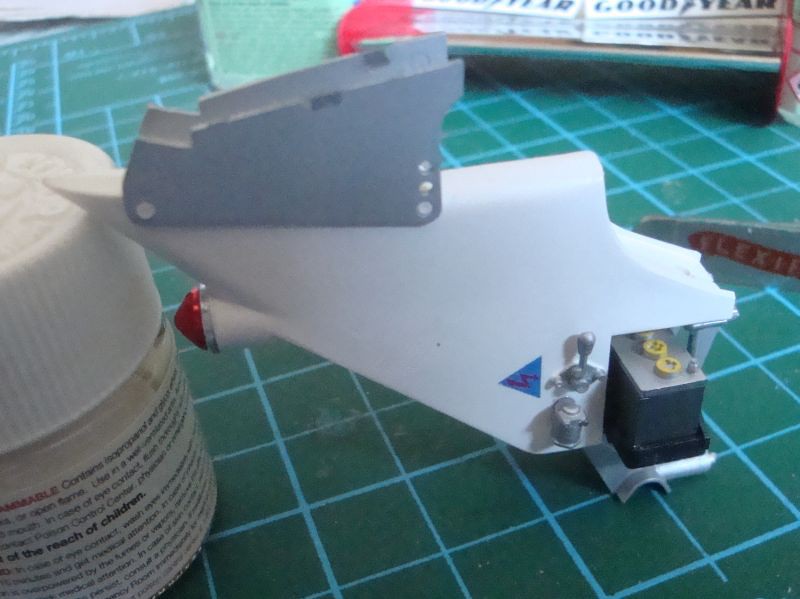 1060 |
|
|
|
Post by Joel_W on May 25, 2020 12:46:59 GMT -8
Paul,
Nice jig. I also use bottles of Extra thin for a jig and braces at times.
Decaling looks great. You'll love the Indy Cal decals other then the extra trimming needed. But you'll get use to them in no time.
Joel
|
|
|
|
Post by chrissmith on May 25, 2020 13:01:50 GMT -8
Looking good Paul!! I almost think you where right to just decal over the kit chrome, it doesn’t look half bad..
|
|
|
|
Post by pnance26 on May 25, 2020 18:40:22 GMT -8
I may be going Bare Metal Silver paint... I'm just not sure.
Looks good Paul! Good idea to start with the ones you know will line up!
|
|
|
|
Post by pnance26 on May 25, 2020 20:06:22 GMT -8
Paul, Nice jig. I also use bottles of Extra thin for a jig and braces at times. Decaling looks great. You'll love the Indy Cal decals other then the extra trimming needed. But you'll get use to them in no time. Joel I agree with Joel! You will want to trim very closely as Michael prints on full carrier sheets! It almost got me on the script Niki Lauda twice today (one dotted “I” folded under and the serif on the “a” in Lauda did as well but I used the tip of my hobby knife to straighten them. I bought a box of 100 blades so I don’t mind changing them frequently. It really makes a difference! I don’t know why I started with the hardest part of the decaling! I need to show you how the white surrounds the inside of the side pod as the Tamiya drawing is not even what you can call vague! I’m not sure where Chris Smith is in the process. He got an MFH kit for a present and is quite taken by that! Keep mushing! Oh one more thing... know how I thought I was so smart making the side pod tops permanent to the main body work? Guess what! I forgot to account for those two big ass pipes coming back from the radiators! I may have to remove one of them. |
|
|
|
Post by Joel_W on May 26, 2020 6:42:25 GMT -8
As far as using Indy Cal decals, I've got two completely different prep methods:
1- I have a small pair of very sharp scissors that makes cutting curves very easy as well as following an exact pattern. Most of the time I use this method and just cut as closely around the decal as I can using mostly the tip to make my cuts. The resulting cut is sharp, leaving no tearing of the decal film that I can see.
2- The old standard method of using a brand new #10 curved blade, not a #11 blade which makes tight corners a real choir, and just score through the decal film, not the paper. Then I cut our the decal with either the knife or a pair of scissors, wet the decal, then let it continue to release the glue on a piece of glass I use for this. when the decal has released, I use a needle in a vice and gently slide the excess clear film away from the decal. Then decal as usual.
joel
|
|


 Pro Tech | MAD | Scale Motorsport