|
|
Post by jchrisf on Apr 14, 2020 11:55:26 GMT -8
Got the wheels and tires ready today. Those tiny decals on the wheels gave me a fight. Usually I would give up but somehow I rescued the first one that goes around the hub after it curled into a ball. Had to break out the high magnifying glasses. I never knew how tough these decals can be. I cut the next three in half and it was easier to get in place. Would it be a good idea to brush some Tamiya flat acrylic clear over the tire decals or use the testors dullcote? Most people won't even be able to see these decals. I was disappointed in the Tamiya decanted spray paint. I thought it would lay down flatter like the primer did but it has orange peal. Can Tamiya sprays lay down flat? Do I need to sand it down flat before I clear it?  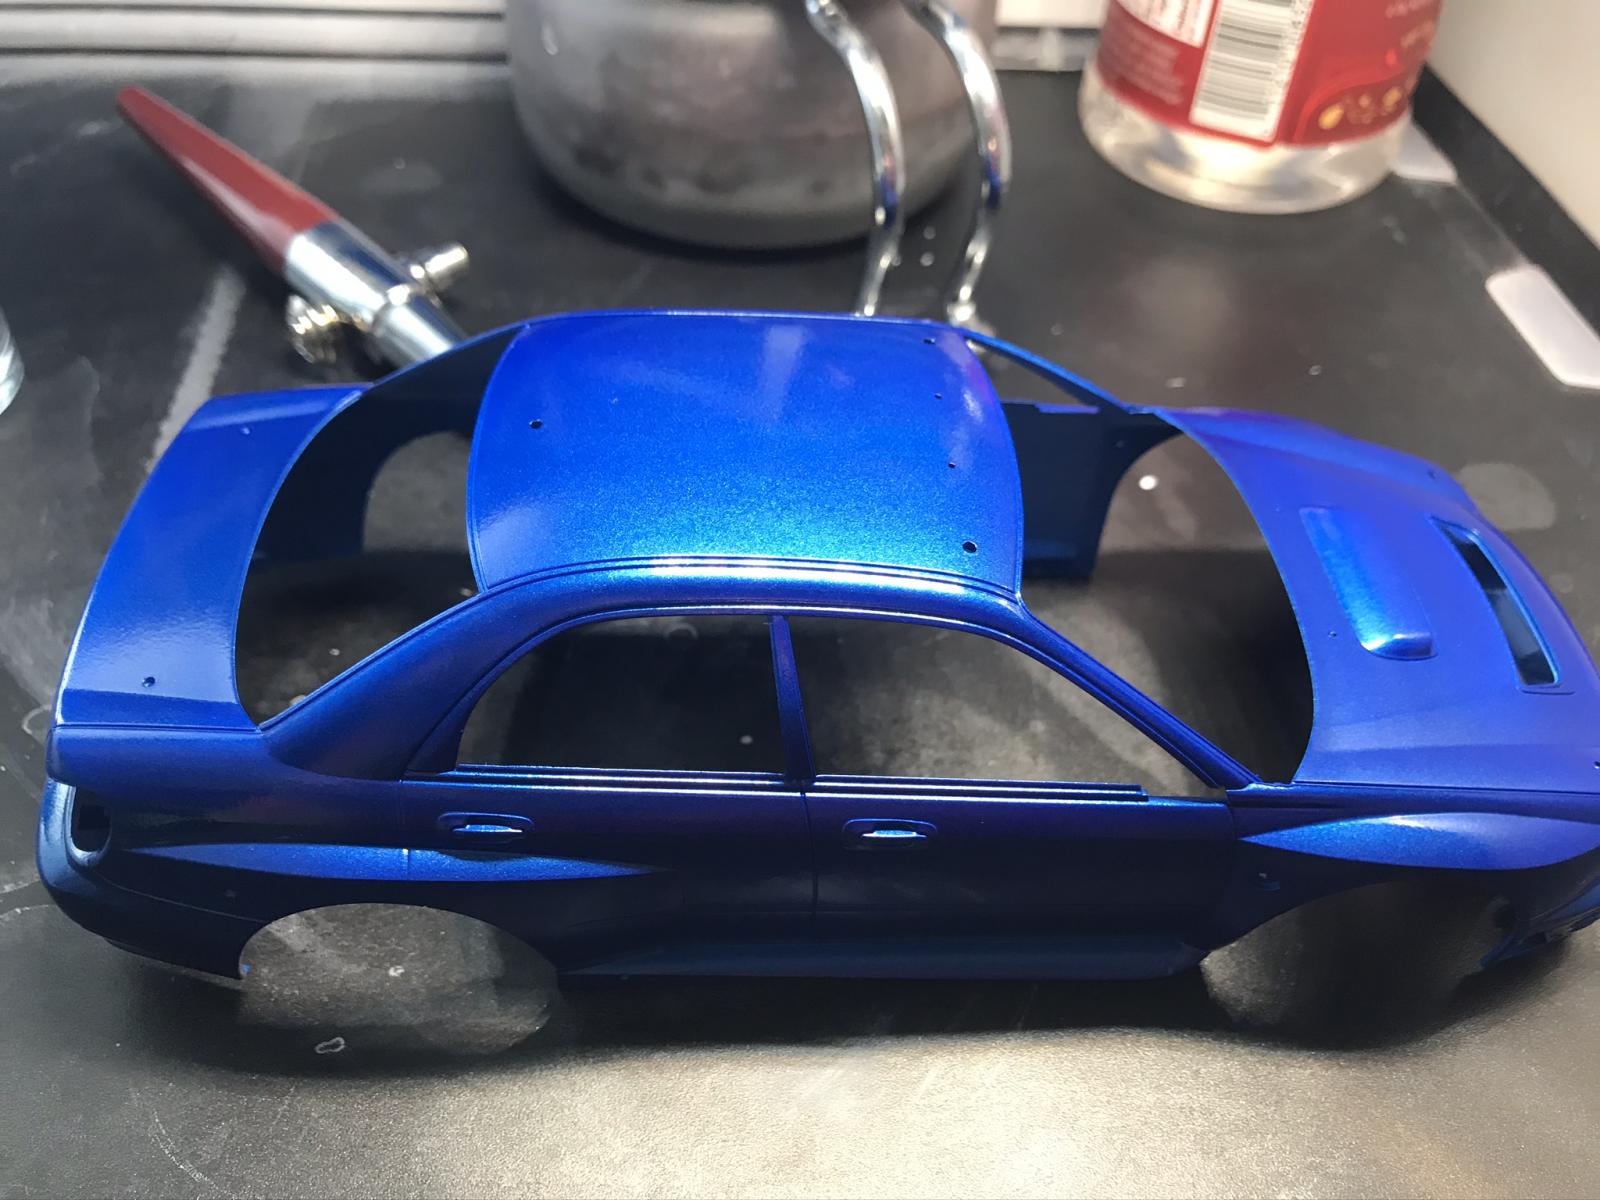 |
|
|
|
Post by Joel_W on Apr 14, 2020 12:51:32 GMT -8
Just found your 1st build blog. Sorry that I'm late to the party. You picked an excellent Tamiya kit that I hear is a dream to build. You'll find several on You Tube, if for nothing else then to give you some additional inspiration.
It's hard to see the decals you're referring to that you applied to the wheels, but sealing them will help to blend the edges in. as well as protecting them. I've hand brushed Tamiya acrylic gloss that I thinned with Iso Alcohol 1:1 without any issues for small jobs, but always airbrush my clear coats on for larger applications. As for the Testors Dullcoat, it's lacquer based, so hand brushing it can damage those decals. Thinned with Tamiya Yellow cap Lacquer thinner, at a 1:1 ratio, it air brushes beautifully.
As for the orange peel from the Tamiya paint, that's usually caused by air brushing on to much paint to quickly, which causes the paint to ripple in a wave pattern, hence Orange Peel. Since the paint was decanted, it's already thin enough for air brushing, just apply it in consistent lite even coats moving across the body without stopping.
Since you're using a Paasche H air brush, I'm assuming that you're using their #3 needle and cone. I haven't used one in many years, but the cone sizes are weird as it's not the same as a standard #3mm needle and cone, it's way bigger, so keep the AB a little further back from the body. I do recall seeing a few videos years ago by "The Lone Wolfe" who used a Paasche H AB, and turns out contest quality finishes.
Joel
|
|
|
|
Post by jchrisf on Apr 14, 2020 13:36:07 GMT -8
Just found your 1st build blog. Sorry that I'm late to the party. You picked an excellent Tamiya kit that I hear is a dream to build. You'll find several on You Tube, if for nothing else then to give you some additional inspiration. It's hard to see the decals you're referring to that you applied to the wheels, but sealing them will help to blend the edges in. as well as protecting them. I've hand brushed Tamiya acrylic gloss that I thinned with Iso Alcohol 1:1 without any issues for small jobs, but always airbrush my clear coats on for larger applications. As for the Testors Dullcoat, it's lacquer based, so hand brushing it can damage those decals. Thinned with Tamiya Yellow cap Lacquer thinner, at a 1:1 ratio, it air brushes beautifully. As for the orange peel from the Tamiya paint, that's usually caused by air brushing on to much paint to quickly, which causes the paint to ripple in a wave pattern, hence Orange Peel. Since the paint was decanted, it's already thin enough for air brushing, just apply it in consistent lite even coats moving across the body without stopping. Since you're using a Paasche H air brush, I'm assuming that you're using their #3 needle and cone. I haven't used one in many years, but the cone sizes are weird as it's not the same as a standard #3mm needle and cone, it's way bigger, so keep the AB a little further back from the body. I do recall seeing a few videos years ago by "The Lone Wolfe" who used a Paasche H AB, and turns out contest quality finishes. Joel Thanks Joel.. I think one, I just need more practice with the airbrush and two, I think I am not opening the needle far enough to get a good paint flow so I can put down, nice, light coats. Does Tamiya need a wet coat at the end or all just light coats? What airbrush do you use? I couldn't find The Lone Wolfe on YT. It was this video below that got me back into the hobby recently. He is a new YTer and I knew I had this car.. He was using all hobby paints and making it look fun and simple so I got motivated to try again. I've also been through Paul's (International Scale Modeler) series on building the 1999 WRC. Learned a lot from him. As soon as this virus issue is over I'm going to order a couple more of these kits from PlazaJapan and build it better when I have more experience and build the Marlboro livery the next time (pic below). I love Marlboro liveries the best. Should I wet sand this orange peel or wait until after clear? I'm going to decant some TS-13. I'll get better shots of the wheels and tires tomorrow after everything is dry. I love this paint livery   or  |
|
|
|
Post by Joel_W on Apr 14, 2020 15:11:35 GMT -8
JCF,
The best way to learn how to use your air brush is to practice on plastic not cardboard or craft paper as they absorb the paint, plastic doesn't. I have two Grex Genesis air brushes, a 3mm and 5mm setups, coupled with a Iwata compressor that has two fittings with regulators so that both air brushes are always ready to go. Each one has a 6 ft hose as my paint booth is across the room by the window.
I've known Paul from International Scale Modeler for several years. He's basics are IPMS quality which is what everyone modeler should make as their primary goal. I've modified my painting procedure to basically follow his, and the result has been amazing to say the least. Nearly all my paint jobs are with Gravity, Zero, or MCW lacquer paints, which are pre-thinned. Primer is Mr. Finisher #1500 thinned with their #400 leveler thinner 2:3 which is almost as thin as those paints. 16-18 psi flow rate for just about everything these days.
I've always gone by the principle that you deal with each layer of paint or clear before moving on to the next one. Orange peel under a perfect clear 2K gloss finish won't have that mile deep finish, but it will be super shiny. To make your life easier follow Paul's method for rubbing out and polishing. Mine system is somewhat more complicated, but it works for me.
I'll be posting the start of my new build blog tomorrow: the Tamiya 1/20 scale Camel Lotus Honda. Senna's Monaco ride. The update will cover body prep, priming, and color coat that I applied today. If you want, I'll go through it a little more fully if it will help you. I'm not the best builder, nor painter here by far, others put me to shame, but I try my best, and I'm satisfied with my results as each one seems to be better then the last one. As with all my builds, it's basics before details, which I'm not very strong at.
Joel
|
|
|
|
Post by tatocorvette on Apr 14, 2020 17:33:07 GMT -8
What airbrush do you use? In 1993, I used an airbrush for the first time. It was a Badger 150 from a friend. Fell in love. It was expensive for a college student, so I bought a Korean made knockoff called the Central Pneumatics 1500 until I could afford a Badger 150. I think it was around $20. Fast forward to 2020 (that's 27 years for the math lazy): That Central Pneumatics is STILL my first and only airbrush I've ever owned. Thanks, Ismael |
|
|
|
Post by jchrisf on Apr 15, 2020 3:52:36 GMT -8
JCF, The best way to learn how to use your air brush is to practice on plastic not cardboard or craft paper as they absorb the paint, plastic doesn't. I have two Grex Genesis air brushes, a 3mm and 5mm setups, coupled with a Iwata compressor that has two fittings with regulators so that both air brushes are always ready to go. Each one has a 6 ft hose as my paint booth is across the room by the window. I've known Paul from International Scale Modeler for several years. He's basics are IPMS quality which is what everyone modeler should make as their primary goal. I've modified my painting procedure to basically follow his, and the result has been amazing to say the least. Nearly all my paint jobs are with Gravity, Zero, or MCW lacquer paints, which are pre-thinned. Primer is Mr. Finisher #1500 thinned with their #400 leveler thinner 2:3 which is almost as thin as those paints. 16-18 psi flow rate for just about everything these days. I've always gone by the principle that you deal with each layer of paint or clear before moving on to the next one. Orange peel under a perfect clear 2K gloss finish won't have that mile deep finish, but it will be super shiny. To make your life easier follow Paul's method for rubbing out and polishing. Mine system is somewhat more complicated, but it works for me. I'll be posting the start of my new build blog tomorrow: the Tamiya 1/20 scale Camel Lotus Honda. Senna's Monaco ride. The update will cover body prep, priming, and color coat that I applied today. If you want, I'll go through it a little more fully if it will help you. I'm not the best builder, nor painter here by far, others put me to shame, but I try my best, and I'm satisfied with my results as each one seems to be better then the last one. As with all my builds, it's basics before details, which I'm not very strong at. Joel Joel, yeah if you don't mind, please do go through your build a little more thoroughly. I'm looking forward to it. I love the F1 builds and especially like the Camel liveries. I even had a can of Tamiya Camel Yellow just waiting on finding a car that can use it. That's also cool that you know Paul.. Great guy who is always posting so much information that has really benefited me. I wish it was convenient and economical to buy from his company over here in the US. I just got so Mr Finisher and Mr Leveler 400 myself but haven't tried it. Got the idea from Ziggy's Desk and Plasmo (IMO the greatest modeler out there and many of his vids are from his high school days). I have a couple of spare bodies to practice on and some spare paint so I'm going to give it a try. I did a lot of research last night and the Paasche H might also have something to do with the orange peel since it is external mix. I'll be trying my Paasche VL next time. I've also got a Neo by Iwata that gave me orange peel on my test build last week but I think the paint was too thick (Mr. Hobby lacquer mixed 1:1 Mr. Leveler). When I finally do lay down a perfect paint job I am going to be happy! One other thing I thought of was I decanted the paint 15 minutes before spraying it.. maybe it was too cold? |
|
|
|
Post by jchrisf on Apr 15, 2020 3:55:24 GMT -8
What airbrush do you use? In 1993, I used an airbrush for the first time. It was a Badger 150 from a friend. Fell in love. It was expensive for a college student, so I bought a Korean made knockoff called the Central Pneumatics 1500 until I could afford a Badger 150. I think it was around $20. Fast forward to 2020 (that's 27 years for the math lazy): That Central Pneumatics is STILL my first and only airbrush I've ever owned. Thanks, Ismael It blows me away to find out that many of the greatest builders are using what are called "beginner" airbrushes. I figured they were using expensive Harder and Steenbecks. |
|
|
|
Post by Ben_B on Apr 15, 2020 7:00:55 GMT -8
I guess “stick with what you know,” right?
Love the Subaru Blue!
Ben
|
|
|
|
Post by tatocorvette on Apr 15, 2020 7:41:53 GMT -8
I had to lookup what a Harder and Steenbeck is. It sounded like a piano maker to me  |
|
|
|
Post by Joel_W on Apr 15, 2020 9:59:24 GMT -8
I guess I'm the exception to the rule. I used a Paasche H for 25 years or so, but when I got back into modeling about 10 years ago, my trusty H just was on it's last legs. Finally it just died. I wanted another single action gun but not a bottom feeder. Iwata had just come out with those little single action M series ABs, so I bought the .3mm one, and loved it. I eventually got the M2 which is the same AB but with a .5mm setup and a much bigger bowl. Slowly both of those ABs just started to wear out and controlling the flow and amount of paint became a real issue. So I broke down and bought the two Grex ABs and never looked back. I'm more then confident that both will out last me.
Joel
|
|
|
|
Post by jchrisf on Apr 17, 2020 5:16:10 GMT -8
I'm really loving the Tamiya Acrylics. Still not sure about the decanted TS spray. I color sanded the car but unfortunately there was a lot of raised detail on the hood and I burned through it so I'll be putting a couple more coats on today. The pic below is before color sanding. I'm going to warm my decanted paint up before spraying it this time. Having to repaint is slowing me down but hopefully it will come out nicer. I hope the decanted TS-13 clear doesn't destroy my decals. The Dullcote on my tires cracked when I put them on the wheels so I had to re-clear them. Maybe I didn't let them dry long enough because I've never had that happen before. I sprayed them the second time on the wheels. The bottom of the chassis is painted in Tamiya X-13 metallic blue and doesn't match the body but I wanted to see what it looked like. I like it. 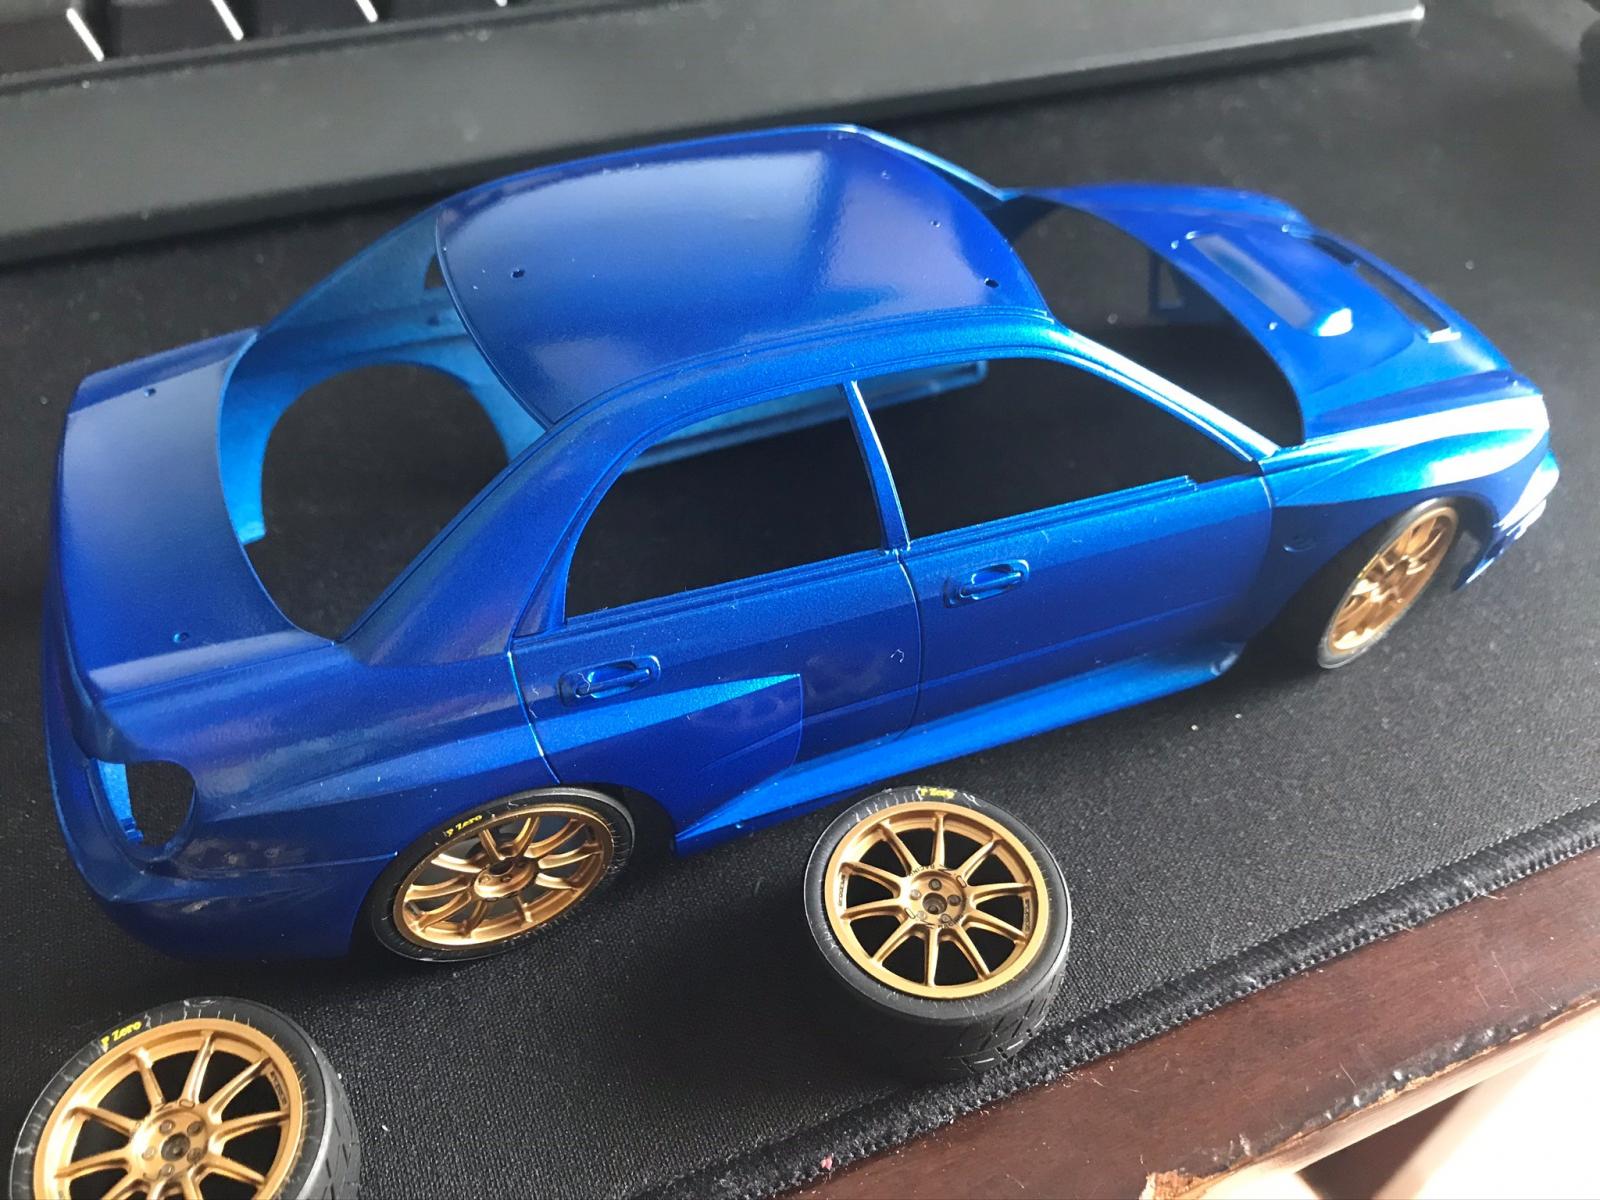  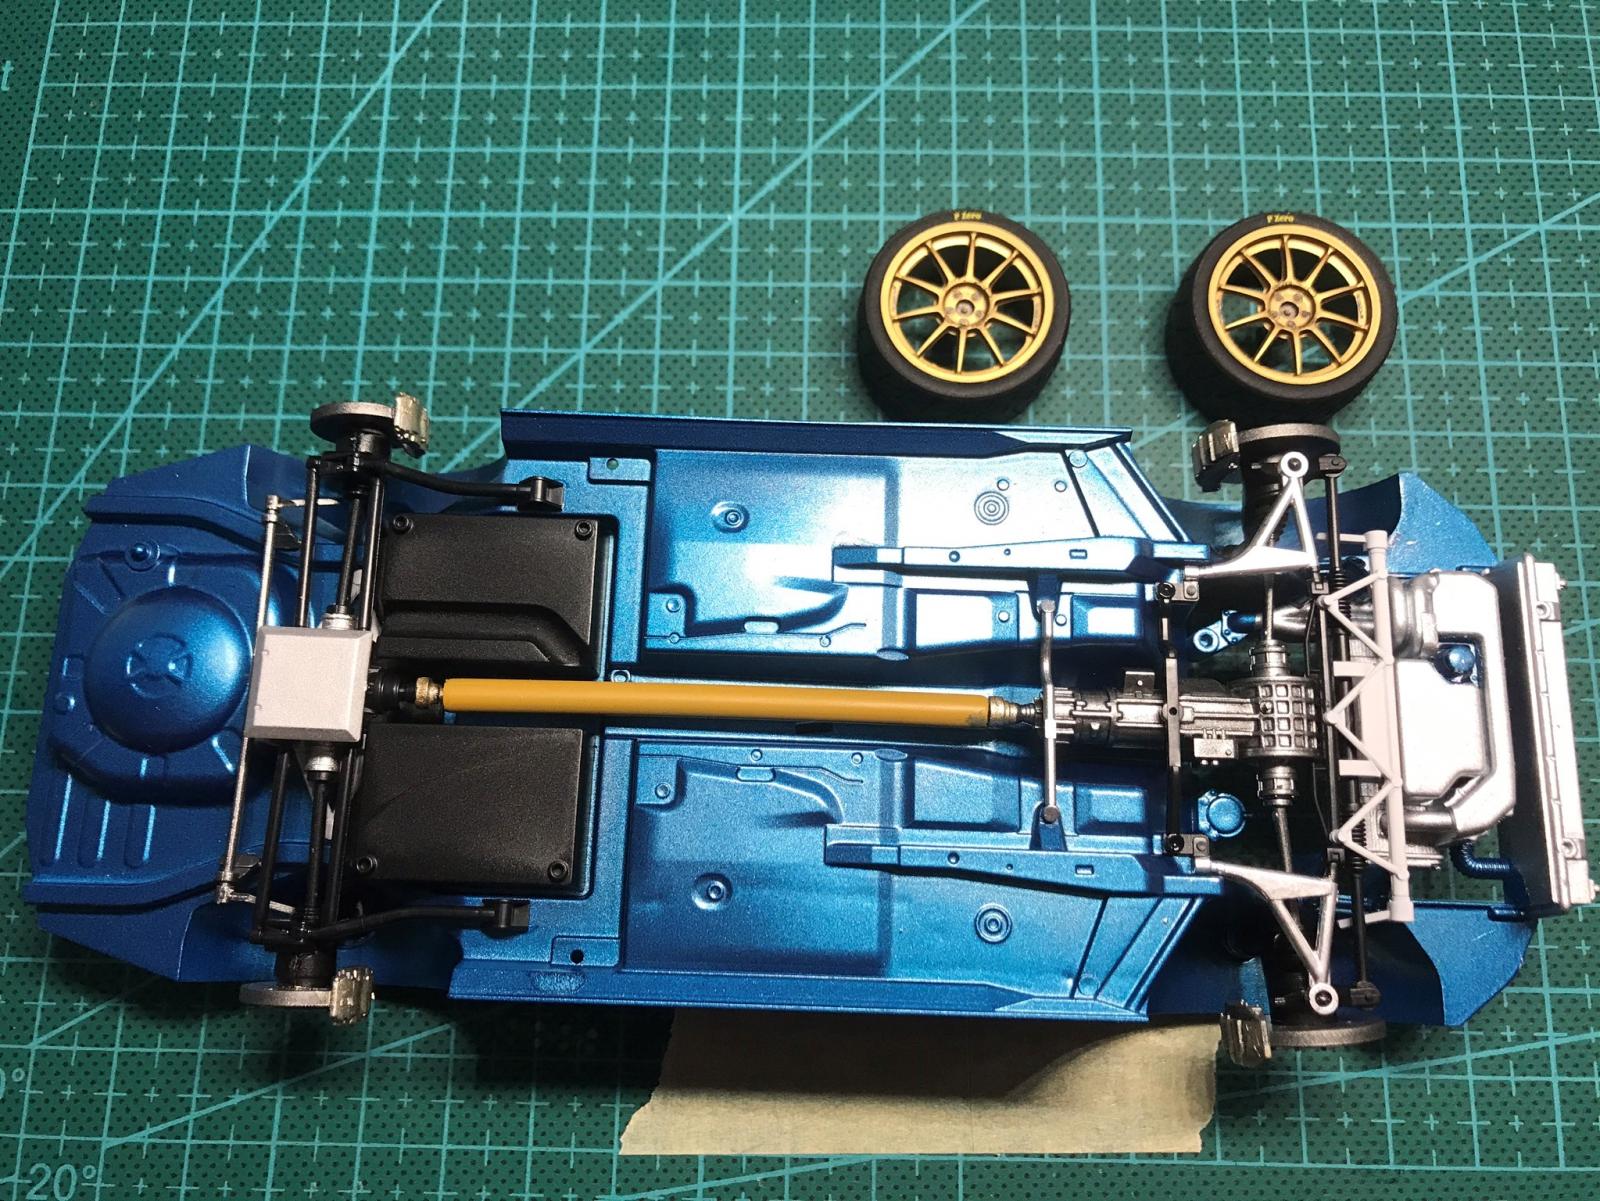 |
|
Deleted
Deleted Member
Posts: 0
|
Post by Deleted on Apr 17, 2020 8:35:46 GMT -8
Chris, what many modelers here will know by now is that I'm super critical of my builds - I always have been and I think it's what keeps me improving as a modeller.
So here is my 2 cents on all of the discussion in this post re brushes and painting techniques etc. Very nice start on this build by the way Chris.
As with most things in life I think what all of this comes down to is what you find works best for you through trial and error. You can take all the advice you can find from fellow modellers - which is always a very good idea - and I recommend that highly, but ultimately you are in your own home with your own set up doing your own thing.
I taught myself how to airbrush when I picked up a Badger 200 many years back - I loved the entry level brush and after trying many many others I only purchased a new brush this past month - it is an Iwata Revolution, and I purchased it because it was as close as I thought I could get to the Badger 200. I absolutely love the brush and it is just a much better version of the Badger. It has changed the way I apply coats ... it has changed the way I paint basically. I just applied the final coat of clear to my 1/43rd Rusty Wallace ride and it is the best overall Clear Coat I have ever achieved. I will post pics once I complete the model likely later this week.
On the topic of Clear Coating - I switched from Tamiya Acrylic Clear (Bottle) to the Lacquer Clear (Bottle) .. something I had always wanted to try. The result is the best clear coat I have ever achieved. BUT - that's using my brush, at 32 PSI, using my wet sanding method. What's my point?? Everyone is different and everyone has their own methods.
My advice to you Chris would be to keep experimenting on plastic pieces on your own and find out which product, psi setting, brush, and technique work for you.
I feel once you have established your own technique you can switch mediums/subjects and build all kinds of different types of models - and you don't necessarily have to be a pro in that medium to achieve success - case in point is that the first airplane model I painted, took first place in it's category at a show - and it was only the second model I had build using an airbrush. STUDY and be CREATIVE and push yourself and you will improve as a modeller ... 100 %.
Listen to the advice here in the Forum and experiment with it - and as a result you will create YOUR method 
P.S. - Always let your decanted paint sit in a bottle with a small hole to allow it to off gas for at least 8 hours before you spray with it
|
|
Deleted
Deleted Member
Posts: 0
|
Post by Deleted on Apr 17, 2020 8:43:46 GMT -8
P.S. - In my experience and in my opinion, Orange Peel comes down to 3 things: Paint Thinning Percentage, Room Temperature, and thickness of Coat. The only way to deal with Orange Peel without stripping the whole thing down is by extensive Wet Sanding right through at least 3 grades.
I personally have never used an External Mix brush Chris and I rarely if ever experience Orange Peel.
|
|
Deleted
Deleted Member
Posts: 0
|
Post by Deleted on Apr 17, 2020 8:49:46 GMT -8
I'm really loving the Tamiya Acrylics. Still not sure about the decanted TS spray. I color sanded the car but unfortunately there was a lot of raised detail on the hood and I burned through it so I'll be putting a couple more coats on today. The pic below is before color sanding. I'm going to warm my decanted paint up before spraying it this time. Having to repaint is slowing me down but hopefully it will come out nicer. I hope the decanted TS-13 clear doesn't destroy my decals. The Dullcote on my tires cracked when I put them on the wheels so I had to re-clear them. Maybe I didn't let them dry long enough because I've never had that happen before. I sprayed them the second time on the wheels. The bottom of the chassis is painted in Tamiya X-13 metallic blue and doesn't match the body but I wanted to see what it looked like. I like it.
Are you using Tamiya Flat Clear on the tires? I ask because I only use Tamiya and Flat Clear can be very finicky at times. The likely reason that you experienced cracking on the tires is because you didn't leave it long enough - I alway let my flat on tires, if I ever use it for that purpose, dry for at least 2 days before doing any mounting - the mounting process expands the tire which expands the flat clear. I recommend trying Tamiya Rubber Black instead of the flat clear on the tires - lightly applied the Rubber Blk will do a better job of not only getting rid of the glossy finish but also add a more realistic look to the tire - very lightly though! |
|
|
|
Post by jchrisf on Apr 17, 2020 8:55:29 GMT -8
Thanks Adrian.. one of these days I'm going to figure it out and it will be a combination of everything everyone has taught me I am sure I've got a nice 1991 Pontiac Nascar body to practice on. When it comes out good it is going to be the Yellow Pennziol car. Thanks also for taking the time to read my thread and offer advice. I appreciate it! |
|


