|
|
Post by chrissmith on May 3, 2020 14:21:09 GMT -8
Love the progress!! You could always take a second mortgage and get one those driving simulators with the hydraulic seat 😉
|
|
|
|
Post by Joel_W on May 4, 2020 5:59:22 GMT -8
Chris,
Took forever to pay off the 1st mortgage. Thanks for the idea but my wife would surely kill me.
Joel
|
|
|
|
Post by Joel_W on May 9, 2020 10:57:38 GMT -8
Work slowly continues on my Lotus 99t build as I concentrated on finishing the basic painting and then the decaling on the Carbon Fiber inner shell. The two electrical boxes molded on top of the inner radiator ducting had their straps painted Aluminum using AMMO Mig Acrylic paints. Then I added the Camel and the few logos needed using the Tamiya decals. They're certainly thicker then the Indy Cal decals, and required more effort to get them to lay down correctly. BTW, the ELF decal with the Black trim around it on the nose, is how it's supposed to be in real life. Not sure why they designed it that way. Next came the very tedious task of decaling the dozens of rivets that hold the tub together. You can see in real life that they were quite large and certainly very noticeable.  My 1st attempt was to try and hand paint the rivets on, but that was just wishful thinking as no two looked the same. So after 3 or 4 attempts I just removed the paint with Iso alcohol on a Q tip since I was using Acrylic paint for the test. The only viable option was to use the Tamiya decals. I wasn't to confident in getting them to all lay down over the raised rivets, especially since the decals were in small groups. Every decal did eventually settle down into the nooks and crannies with a liberal use of Solvaset. Of course I should have sanded down the rivets to almost nothing, but honestly it just didn't occur to me to take that route. Once down and dried, the decals didn't have any flash or silvering issues, but the glossy Tamiya decal film looked horrendous, and the rivets were just to bright. So I very lightly dry brushed all the rivets with Tamiya German Dark Gray, then air brushed on my all time favorite Matt clearcoat: Testors Dullcoat diluted 1:1 with #400 leveling Thinner. the results are exactly what I was hoping for. 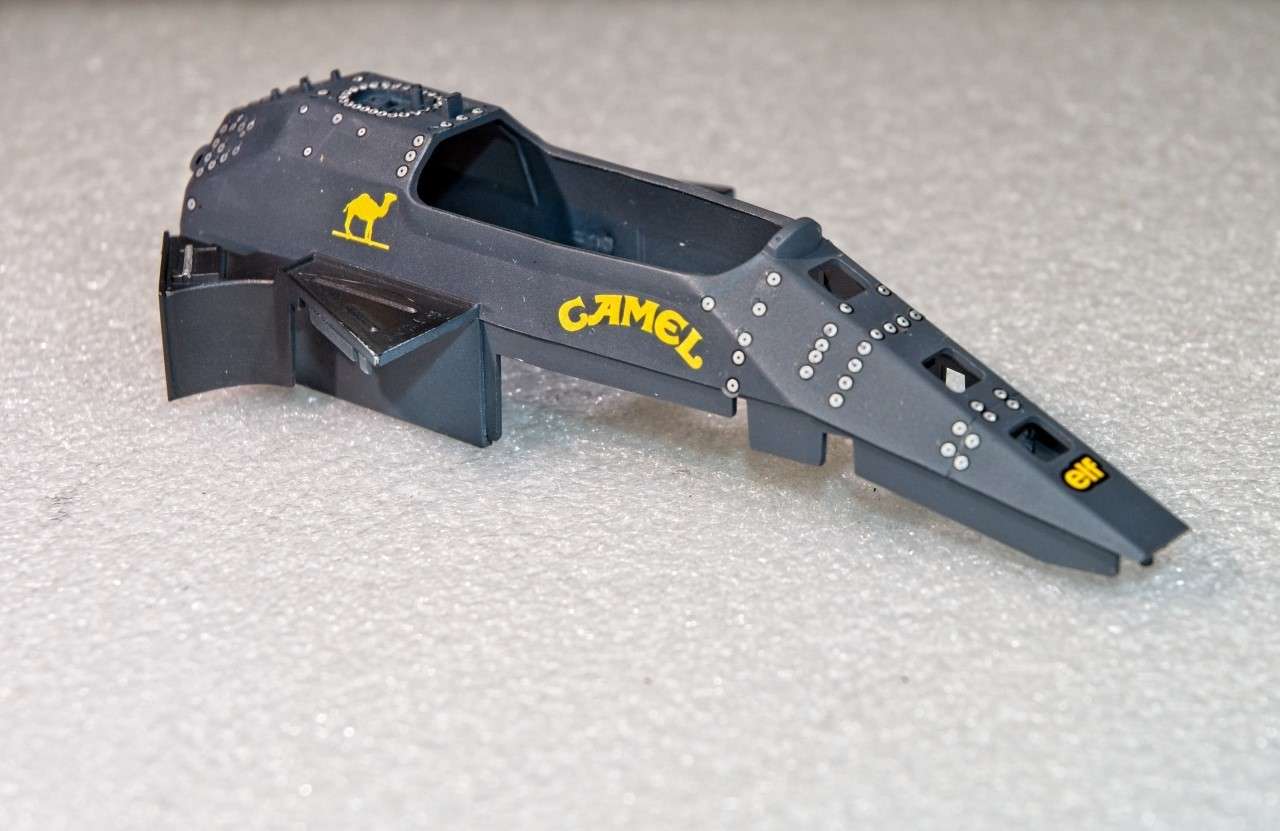 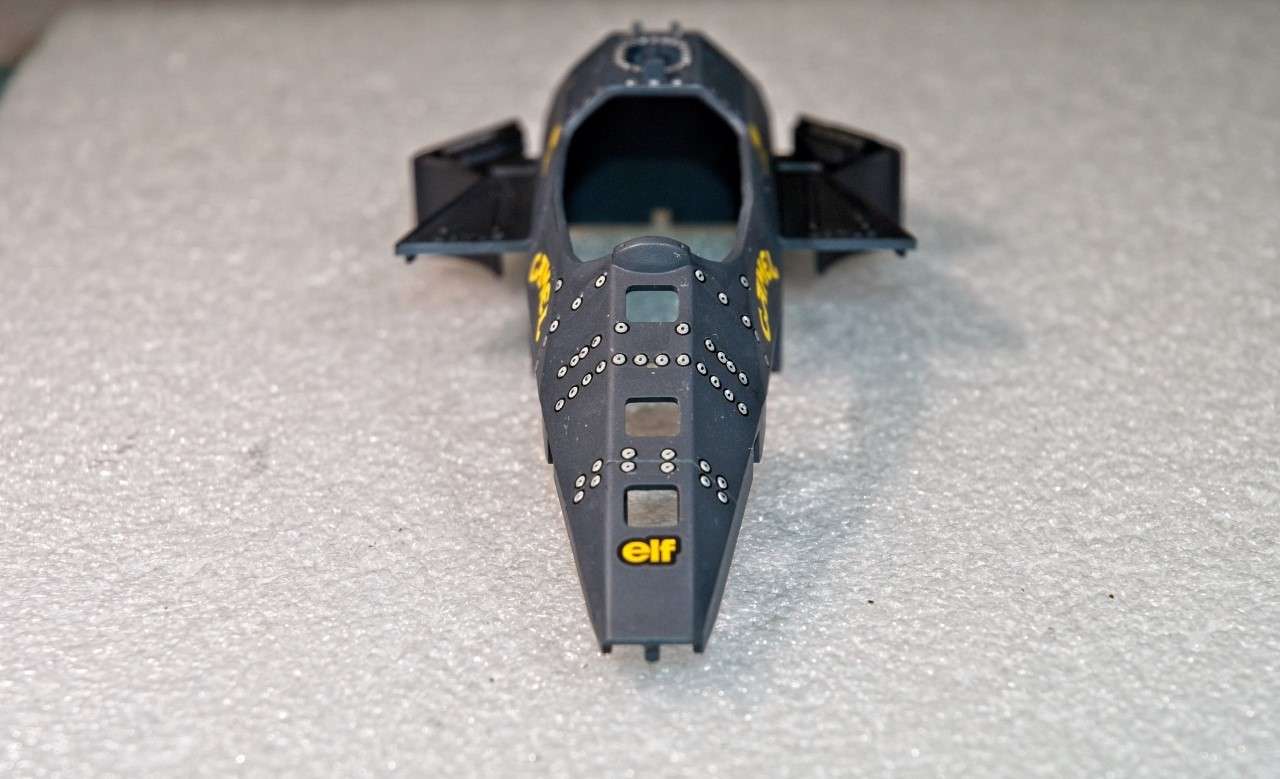 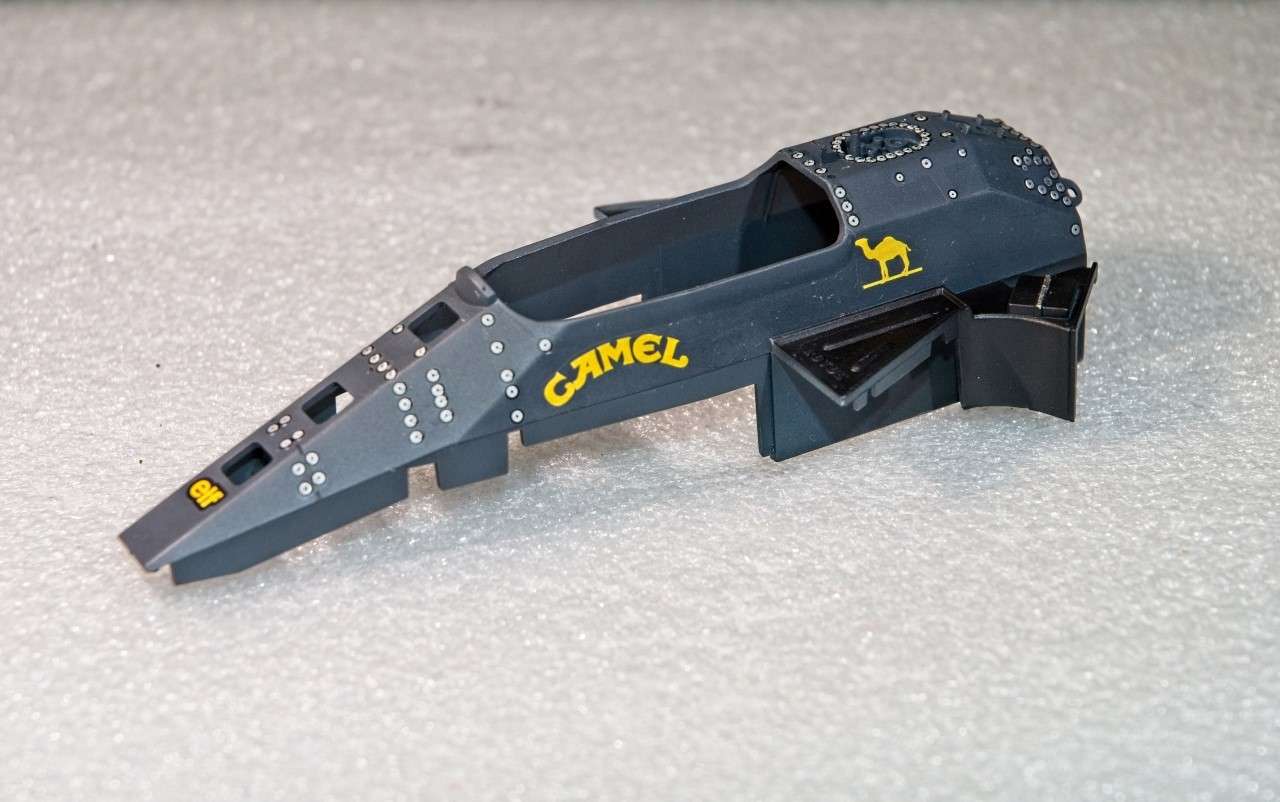 I also managed to finish the basic rear suspension subassembly minus the disc brakes.  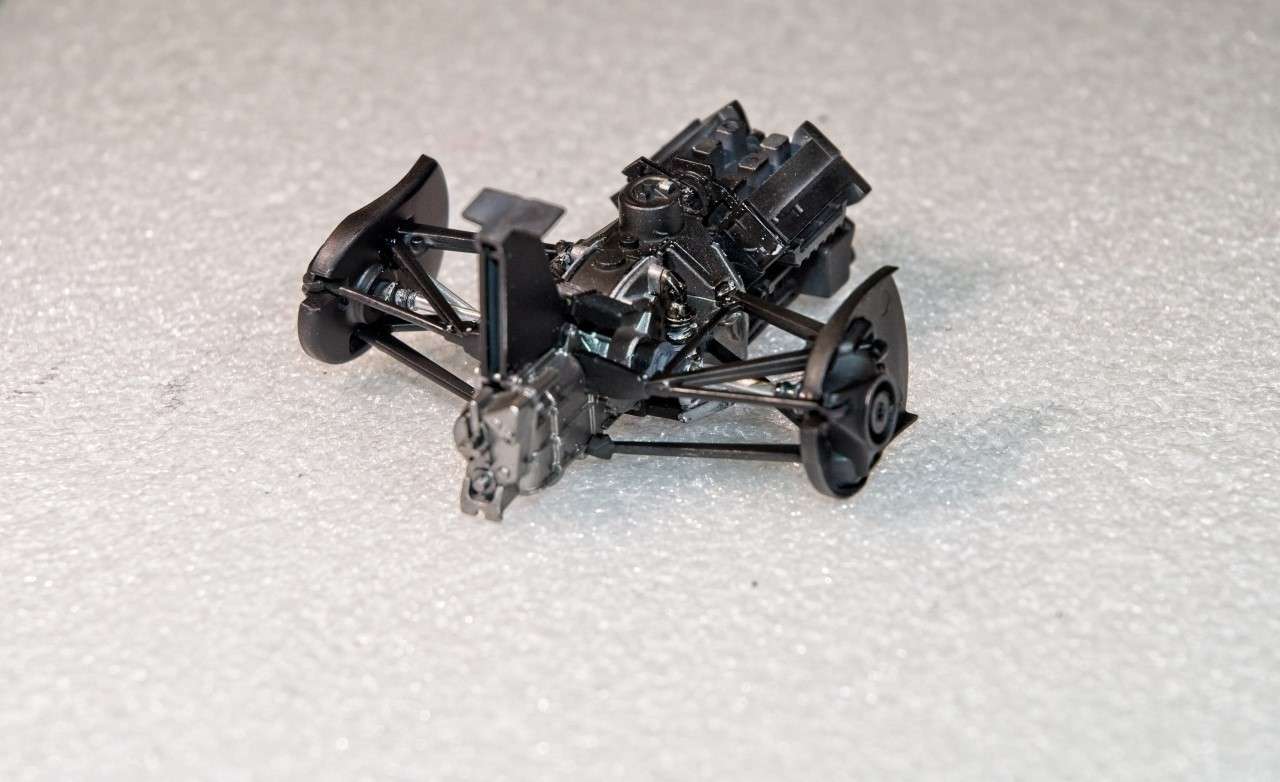 I still haven't gotten around to rubbing out all the body panels and the main shell as yet as I keep on getting involved in other projects with this build. Here's a few pictures of how the shell, engine/transaxle, chassis plate come together. 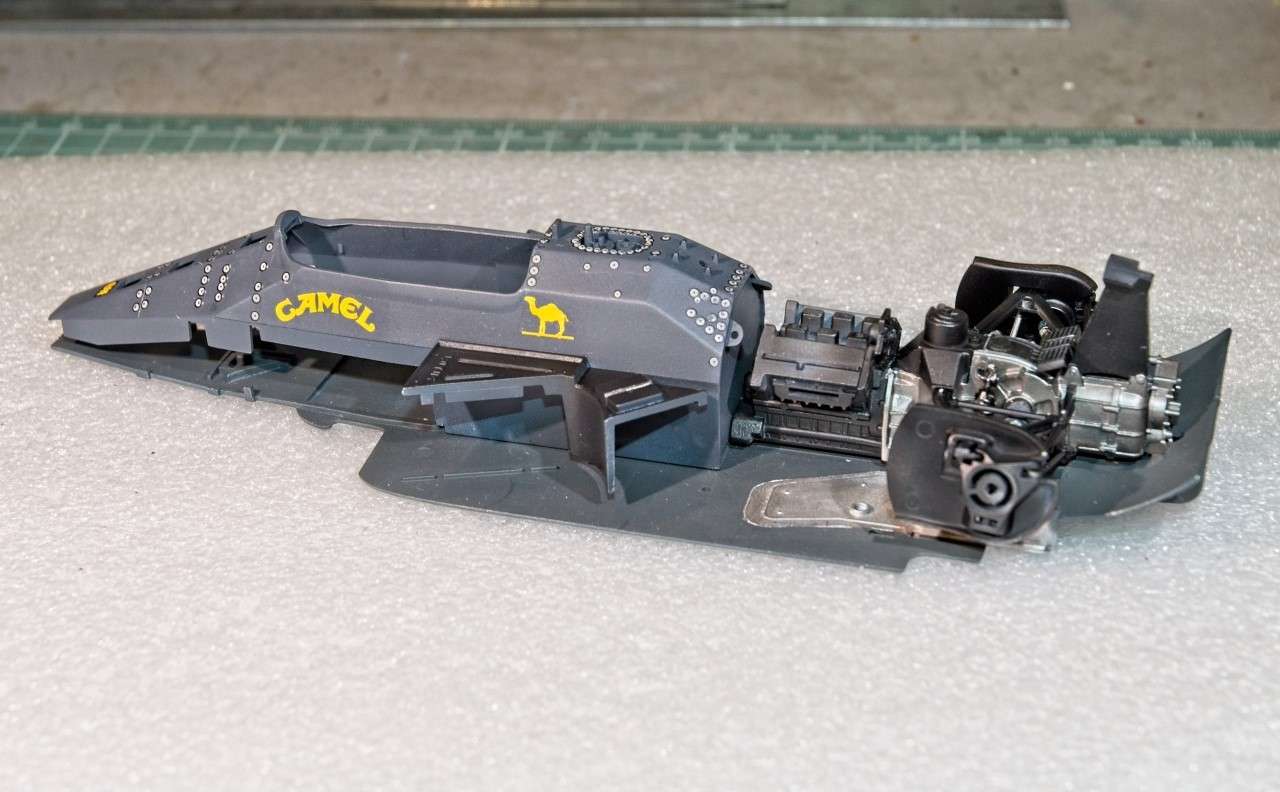 and one last picture with a outer side panel dry fitted. 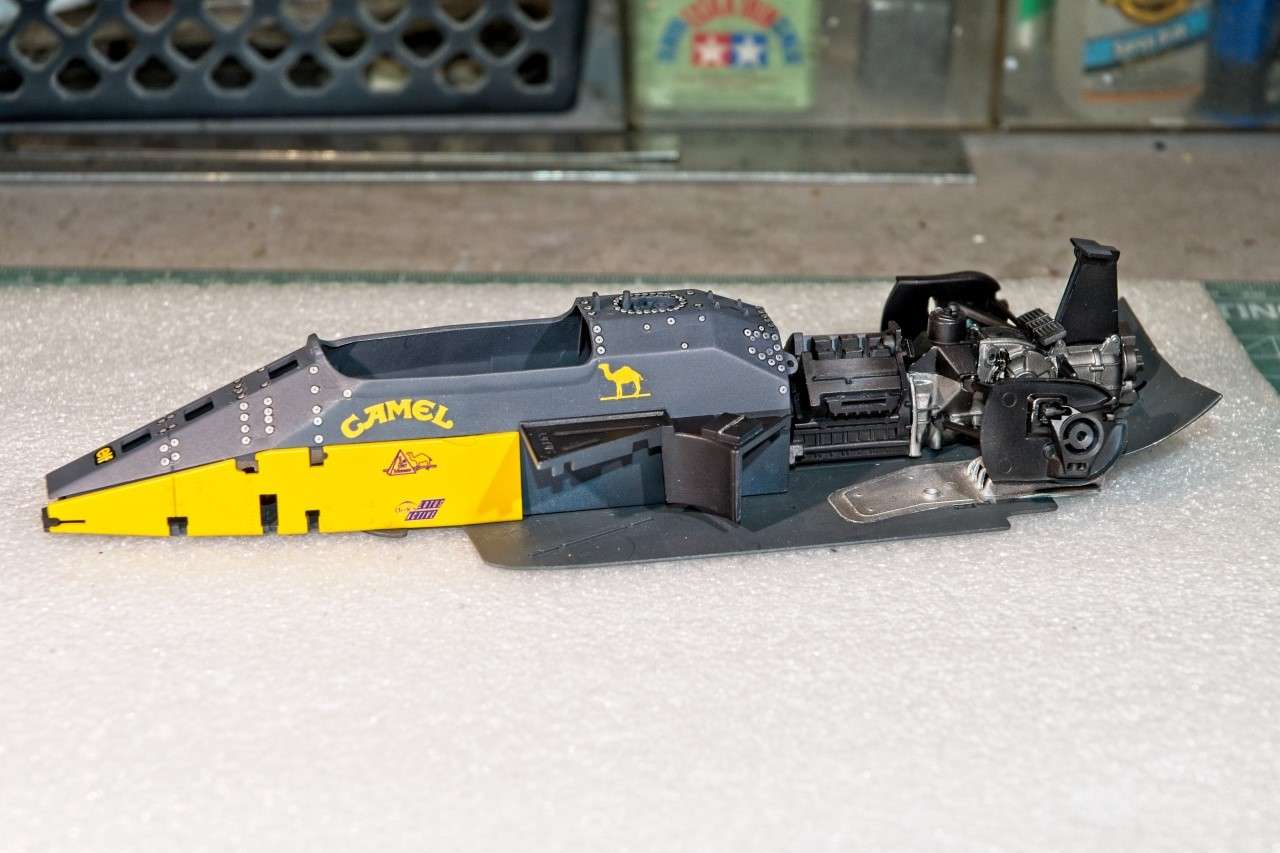 Thanks to all for checking out my build to date. As always, it's greatly appreciated. Joel |
|
|
|
Post by 2whl on May 9, 2020 11:01:28 GMT -8
That is looking stellar
|
|
|
|
Post by tatocorvette on May 9, 2020 11:09:52 GMT -8
Wow Joel! That is coming along beautifully! Those rivets are really interesting and look like the real deal.
|
|
|
|
Post by Joel_W on May 9, 2020 12:49:47 GMT -8
Ismael & 2whl,
Thanks guys for checking out my progress to date. I'm thrilled that you like what I've accomplished to date.
BTW, I didn't realize till I looked again at Senna's car picture and my carbon fiber tub just how close I actually got to the color. I was so fixated on the fact that you don't really see any CF pattern compared to today's weave patterns.
Joel
|
|
|
|
Post by chrissmith on May 9, 2020 14:40:23 GMT -8
You are doing such a stellar job on this, I’m a little jealous ☺️
Keep up the good work sir!!
|
|
|
|
Post by Joel_W on May 9, 2020 16:16:24 GMT -8
Chris,
Thanks for your thumbs up, it's greatly appreciated. Nothing to be jealous about as it's mostly just concentrating on the basics to achieve those results.
Joel
|
|
Deleted
Deleted Member
Posts: 0
|
Post by Deleted on May 10, 2020 8:01:17 GMT -8
Joel, after a crazy night finishing up the Eagle until 3 am, I finally got a chance to catch up on this build. This is why I can't understand why you down play your abilities - this is looking fantastic!
As I always tell you - your work is so concise and so clean - and to me those are the 2 Big ones when judging other peoples work - is it clean? and is it concise? and most of all does it look realistic - and my friend you nailed all 3 so far on this build - the rivets look amazing! - just like the actual car - and I never would have known that you used decals - the process worked perfectly and then adding the German Grey you nailed the colour and the weathering look perfectly! You should be very proud of this - that's not easy stuff Joel. And personally i wouldn't regret not sanding down the rivets at all because they are not flat in reality - and now you have the raised effect and the look - well done.
I love the look of this so far and I can't wait to see the final product - keep up the great work!
|
|
|
|
Post by pnance26 on May 10, 2020 8:02:39 GMT -8
Great work on the rivets, Joel!
What did you use?
|
|
|
|
Post by Joel_W on May 10, 2020 10:55:04 GMT -8
Patrick,
Thanks for your thumbs up. It's greatly appreciated.
What I really didn't use soon enough was that gray matter between my ears. Just studying the pictures of the real car shows that for the most part the rivets and I guess for a lack of a better term washers, are basically flush to the surface. I'm not sure why Tamiya raised them other then as an option for painting, which I tried and kind of failed at that course. Like I said, I should have just sanded them all down, and then just decaled as I always do.
In this case I just didn't think that do that (Old age and the start of mental failures I guess). The Tamiya decals are somewhat thick, and don't just lay down with Micro Sol and set. Set really didn't seem to have much of an effect on them and the decal moved around with the slightest touch even after a few applications, but the Sol did work on setting them into position, and I had to be very careful about moving them out of position. One decal is off, but there's nothing I can do about that when I saw it. usually two applications of Solvaset got the decals to settle down and around the groups of rivets. Some were much harder to achieve based on the grouping of the rivets.
As I said, the decals are very glossy, and the CF paint is dull Matt, so they looked terrible at this stage. After a full day to dry off, I used a thinned out wash to dry brush the same color I had used for the CF over the decals. That did have the effect to help blend in the clear decal film of which there is a lot of. Then I air brushed on Testors Dullcoat cut 1:1 and basically the visible clear film had vanished.
Joel
|
|
|
|
Post by illeagle10 on May 10, 2020 12:59:18 GMT -8
Looking great Joel, nice touch on the rivets!
Jim
|
|
|
|
Post by Joel_W on May 10, 2020 15:29:49 GMT -8
Thanks Jim,
It's much appreciated.
Joel
|
|
|
|
Post by Joel_W on May 17, 2020 14:50:52 GMT -8
Finally, I've got enough done once again for a small update on the Lotus 99t. With most of the rear suspension, engine, transaxle, minus brakes done and installed, I next focused my efforts on the 4 radiators, and twin turbo intakes. The main radiators are right behind the driver's compartment, and have two rather large aluminum tubes and filter assembly. Attached to them are the twin turbo air intakes. And right in front of them are another pair of radiators. All the parts were given a base coat of Tamiya X-1 Gloss Black. I opted for Alcad 2 Duraluminum As the shinier finish is what I was looking for. The intakes were previiously primed and painted with the Gravity Lotus Camel Yellow on the upper half, and Tamiya Semi Gloss Black on the lower half. 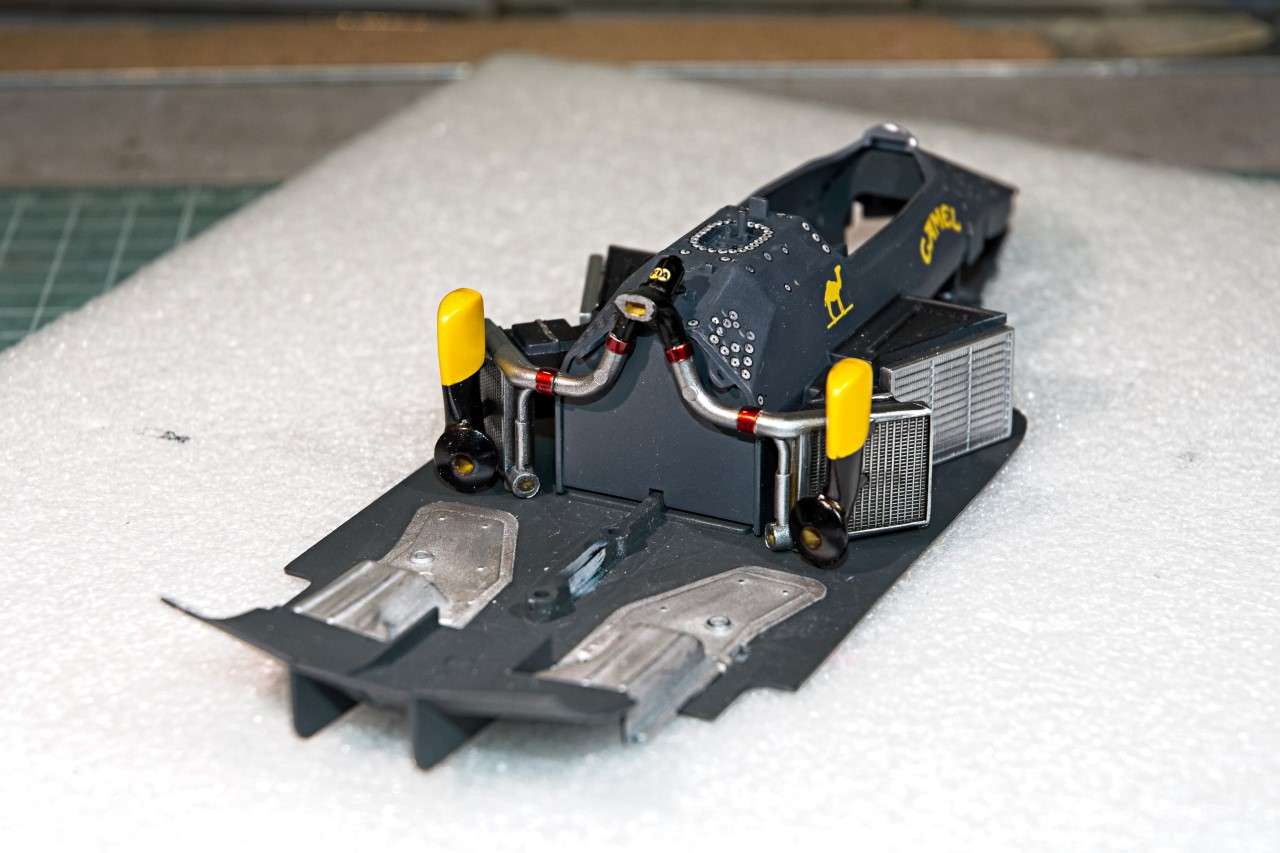  the 2nd pair of radiators haven't received their Tamiya black panel wash as yet, so they look way to bright and new. Also the top of one of the intakes has a little black over spray that needs to be removed. there is a main opening in the front of the radiator pods that Tamiya just left open, and completely void of details. 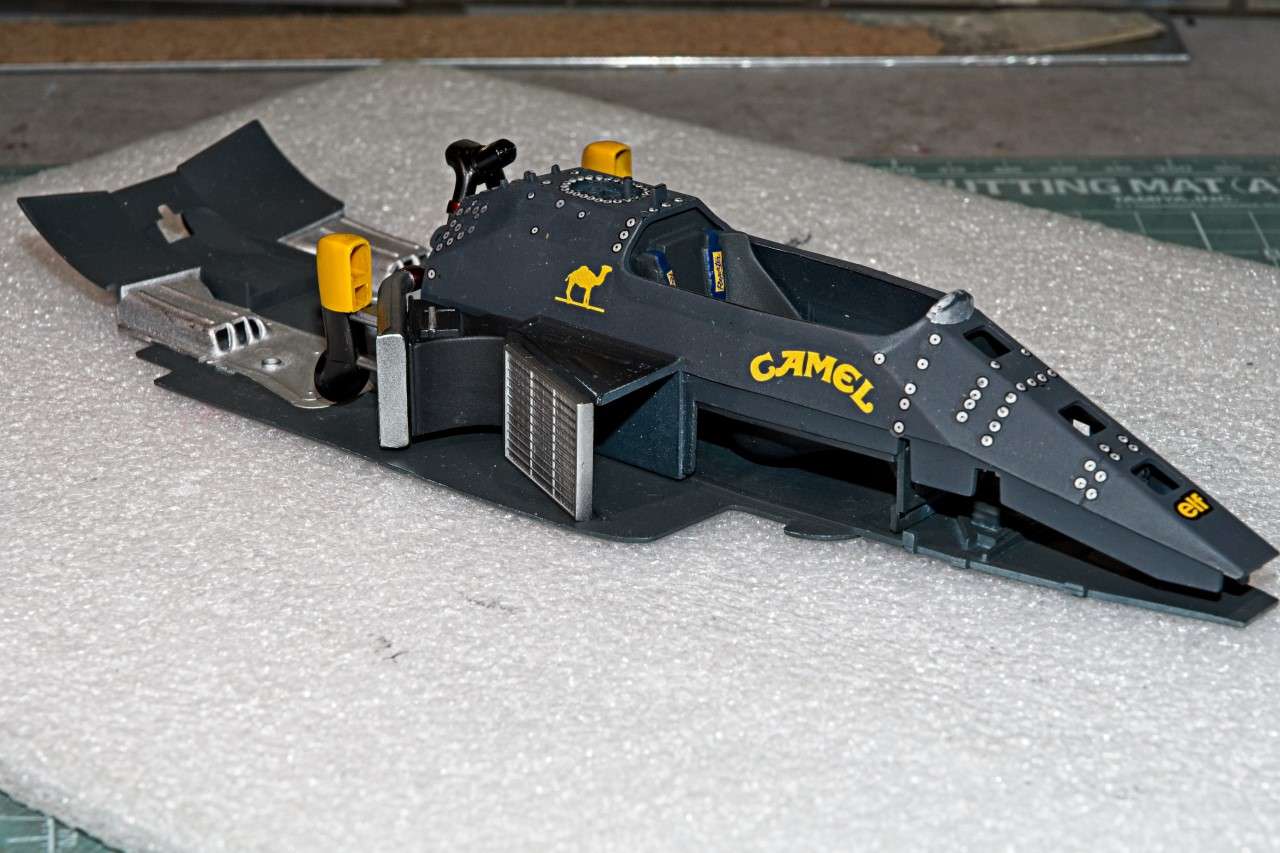 Research shows that there is a protective screen in both sides of the intakes. 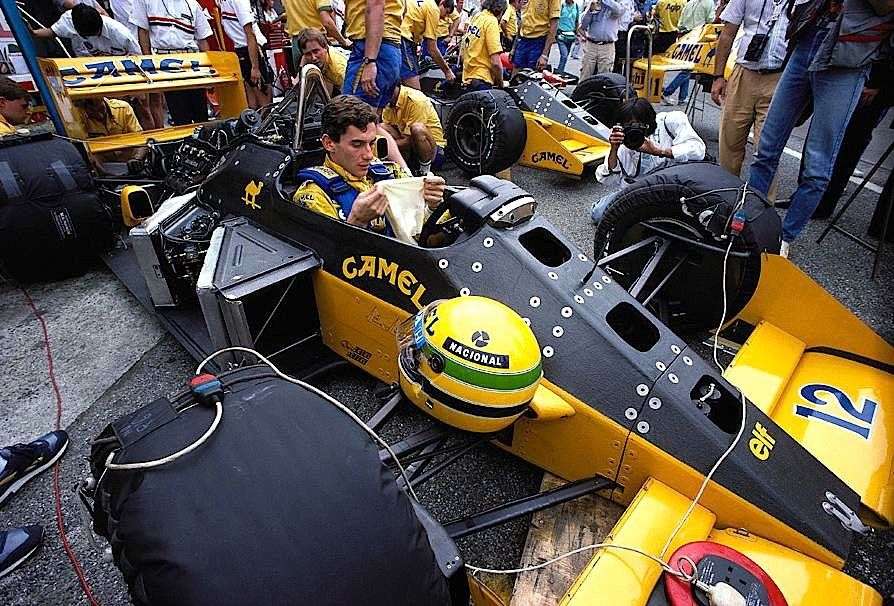 In the above picture you can see quite a large Aluminum frame around the screen. Yet in the picture below the screen is completely incased within the mouth of the opening. 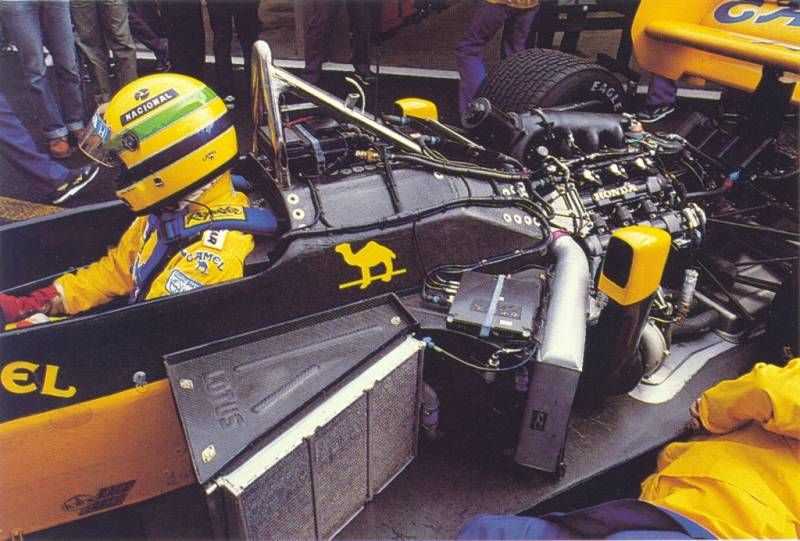 so I scratched out two screens based on a few other pictures of the incased version from sheet plastic and a piece of screening from a coffee filter that Chris had sent me for another early build. Right now the screening is just dry fitted along with all the radiators, as a final edging of paint is still needed to fully cover the white sheet plastic edge. 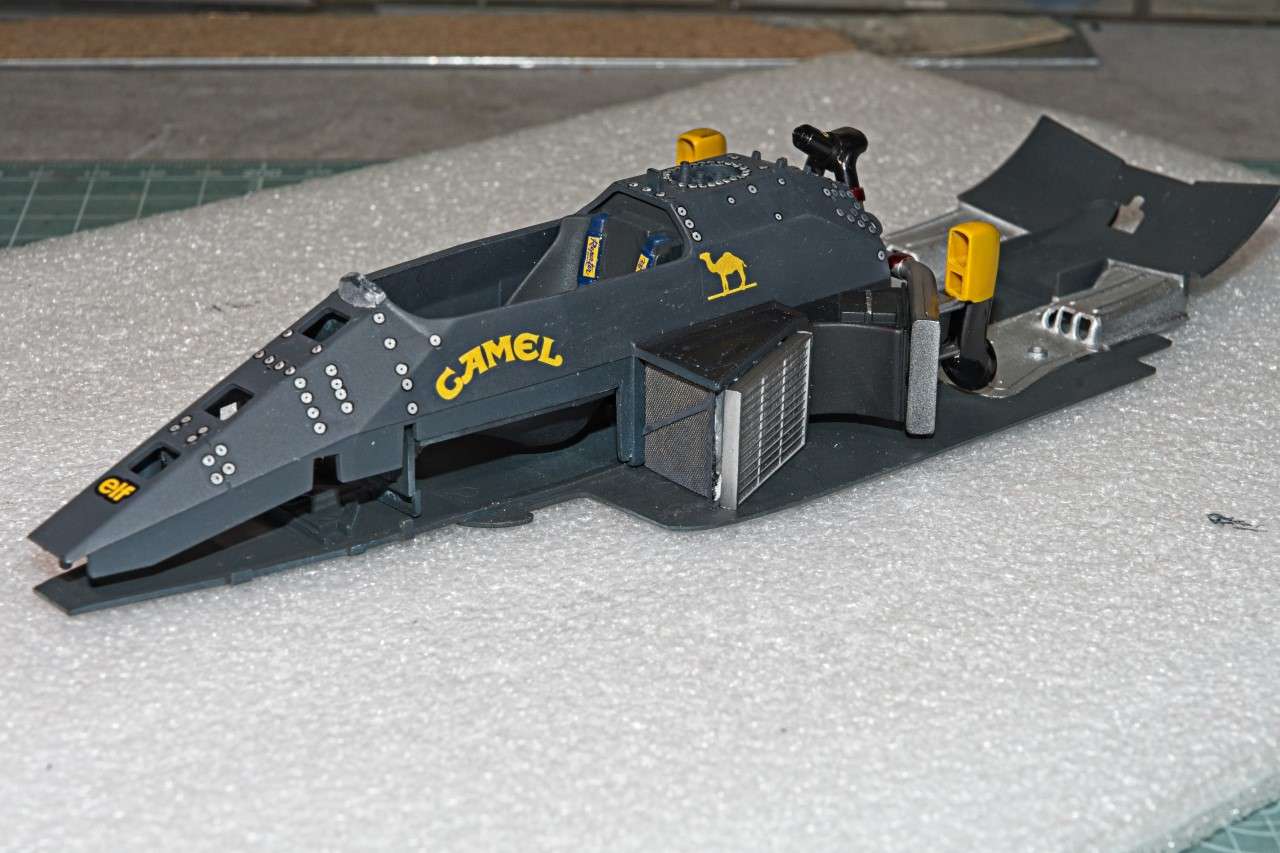 The drivers compartment is just about completed, but it's about as bare bones as one can get, so I haven't included a picture of it with this update. And here's a few pictures of how the chassis is very slowly shaping with the engine block, transaxle. and rear suspension also dry fitted. 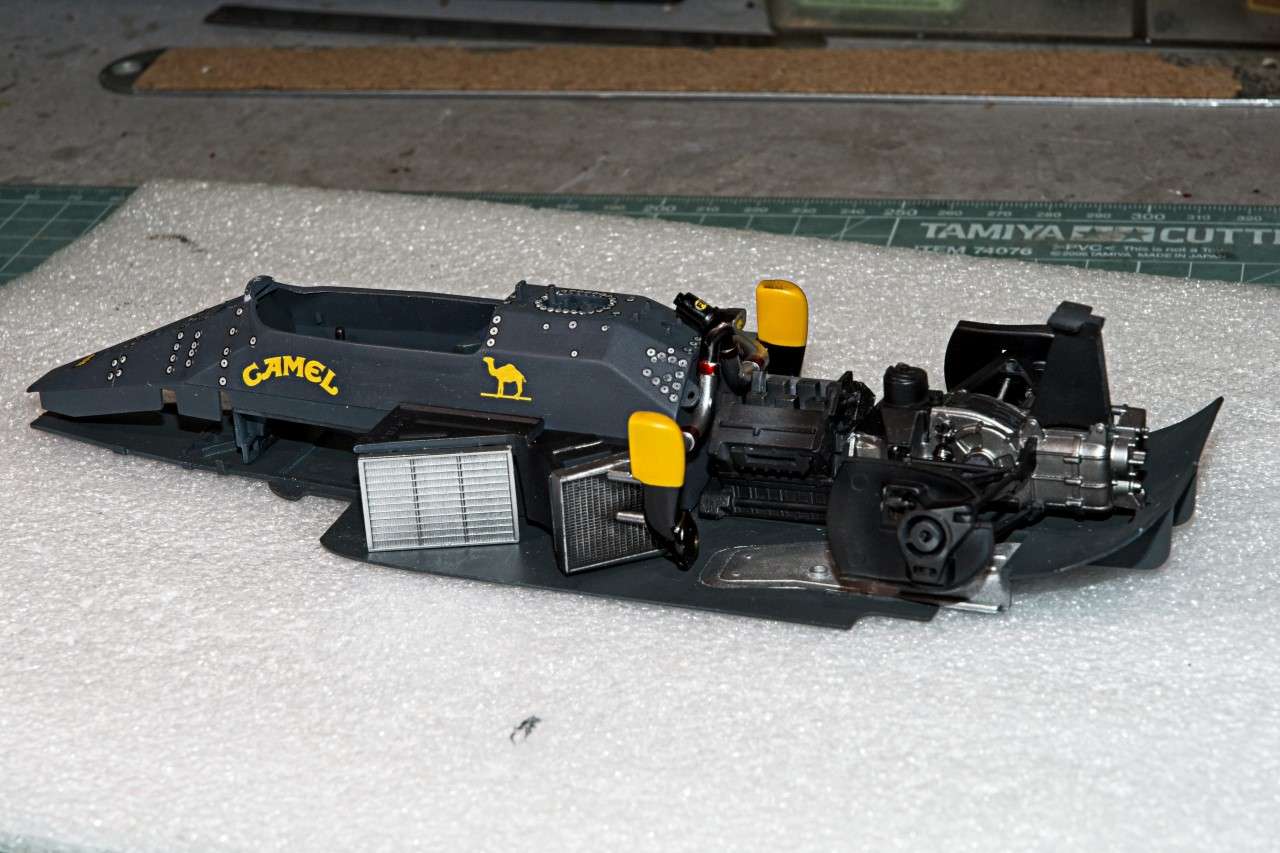 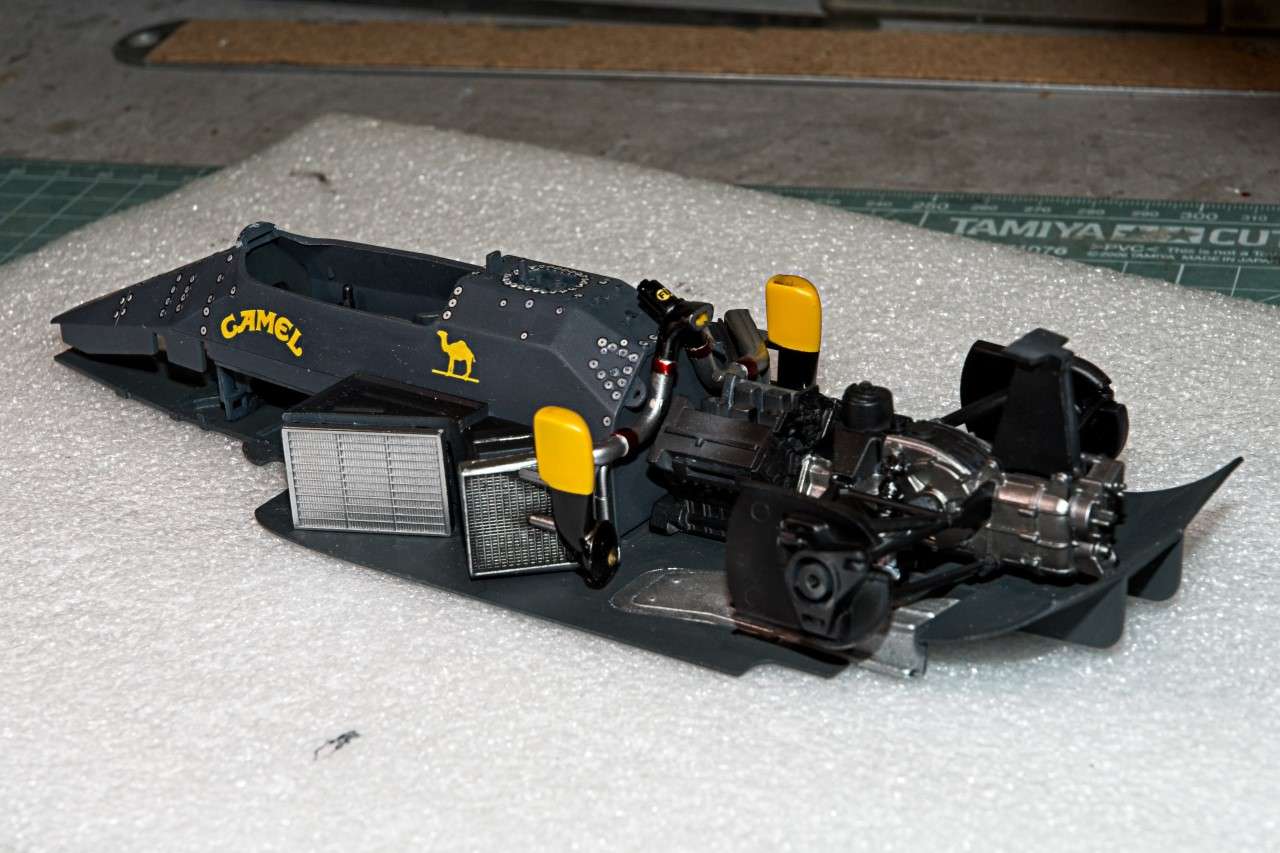 Thanks for stopping by and checking out my progress to date. As always, it's greatly appreciated. Joel |
|
|
|
Post by chrissmith on May 17, 2020 19:22:28 GMT -8
Your nailing this one, I am sure looking forward for more...
Great explanation of what you have done and where you are going!!
Keep it up!!!
Chris
|
|


