|
|
Post by Joel_W on Jun 25, 2020 13:14:51 GMT -8
OK...Thanks for sharing your ideas. I also have been decaling since the 60's and enjoy that kind of work. I've never used the three together though. Plus...I never touch the decal after applying the solvset. I've seen a decal lift right off the project by touching it to soon. Gary, That's what I use to do too. But I kind of borrowed Paul Budzik's decaling method, and it works perfectly. Joel |
|
|
|
Post by Joel_W on Jun 26, 2020 9:38:55 GMT -8
This week I've concentrated on the chassis, and what is modeled of the front & rear suspensions. Basically, both ends of the suspension are basic at best as the only way to see them is by looking at the bottom of the pan. I air brushed the pan a darkish Gray to simulate Carbon Fiber. And since it's never going to be seen once it's in its display bin, it's more then good enough for the intended purpose. For me the focus is on the 4 disc brakes as you will clearly see them through the wheels. The discs are steel, the hubs Aluminum, and the Calibers Titanium Aluminum followed by the makers logo. I gave each disc a wash with Tamiya Black panel line wash just to help pop out the view details. I also painted the transaxle aluminum but once the interior is added, you'll never see it. 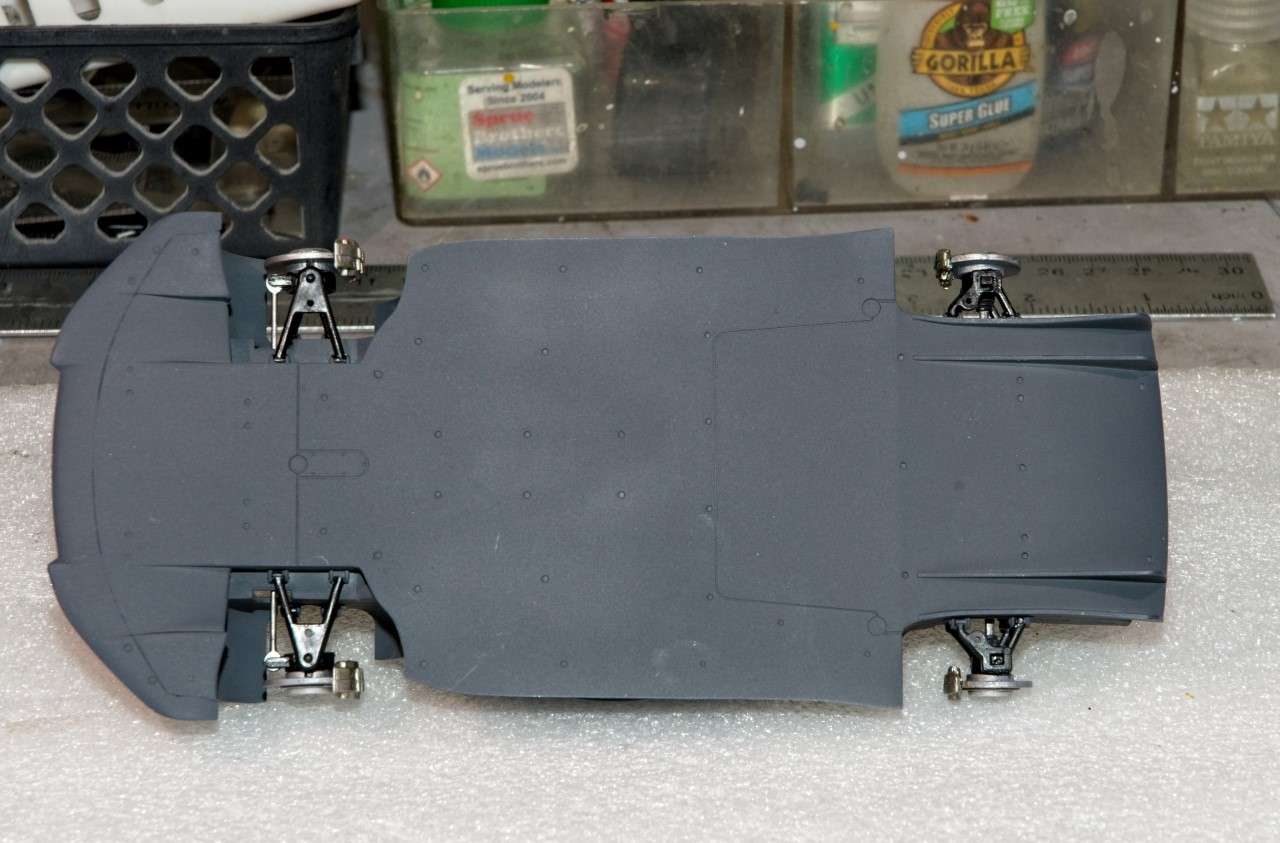 the Front brakes: 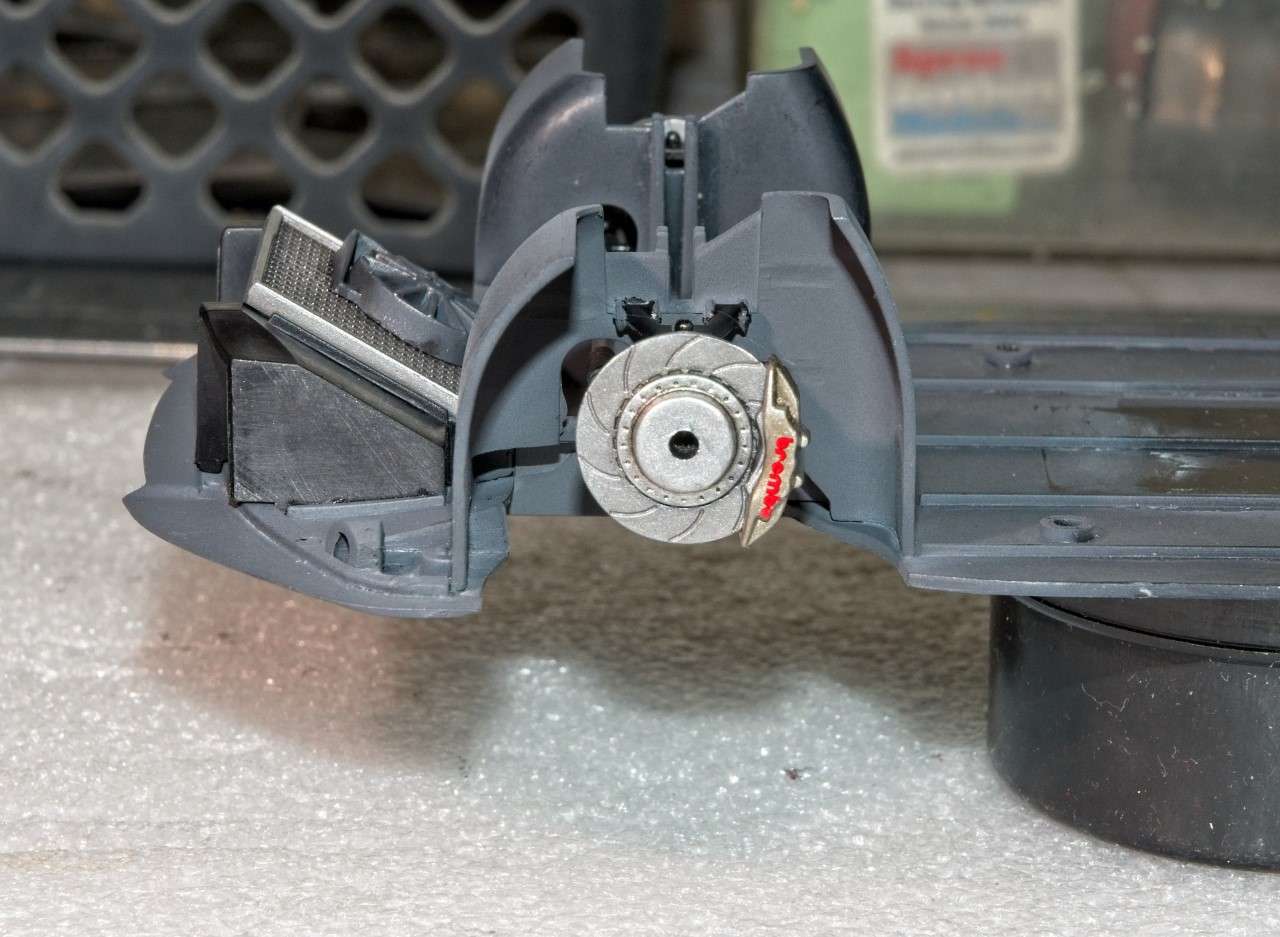 The Rear brakes:  the radiator and fan housing will be visible when looking down through the radiator exhaust opening in the hood, so it was air brushed with Dark Gray to simulate CF, then dry brushed with a light Sky Gray. The radiator assembly was air brushed polished Aluminum, and once dry the radiator core was given a few washes of Tamiya Black panel line wash. 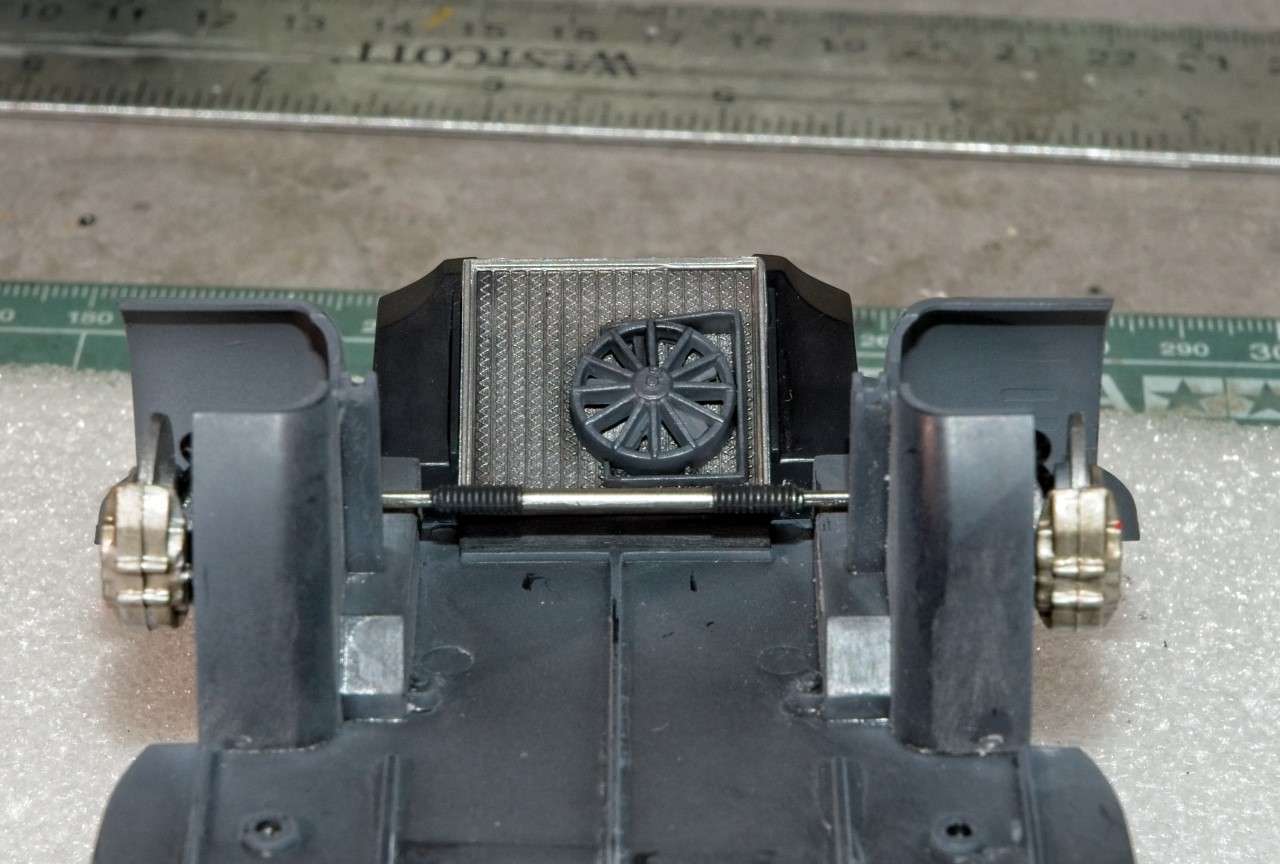 As always, thanks for stopping by, and checking out my progress to date. Joel |
|
Deleted
Deleted Member
Posts: 0
|
Post by Deleted on Jun 26, 2020 10:25:41 GMT -8
Captain My Captain!
I am just catching up on this now ... have had my head in 2 Indy Builds as you know.
This is looking sharp so far my friend - especially that body - it's so interesting to see you move from F1 to this Series and carry the same precision
work from one to the next.
I have never build NuNu - how would say the quality compares to Tamiya?
Can't wait to see this at the finish line ... I will be following!
|
|
|
|
Post by Joel_W on Jun 26, 2020 12:10:58 GMT -8
Adrian,
I know that you're in my corner all the way like I am with your builds.
F1 is by far a harder build for me, especially as the tin tops I've been building are basically curbside kits on Steroids. My focus has been on upping my game each build with perfect basics. I'm getting closer but have a long, long way to go.
Nunu, Platz, Beemax were basically producing kits as one company sharing just about every resource. But I heard that Beemax just decided to go out on their own. As for their quality & accuracy they're a half step at most behind Tamiya. But in the in house decal department, these guys are really good.
Joel
|
|
|
|
Post by garydavis on Jun 29, 2020 17:14:10 GMT -8
Joel...that radiator looks really good. The dry brushing technique you did sure makes it pop. Is that rack and pinion a kit part or did you fab it? It looks real...
|
|
|
|
Post by tatocorvette on Jun 29, 2020 18:26:16 GMT -8
Looking good Joel! This kit looks similarly engineered to the BMW M6 I started as a GTLM.
|
|
|
|
Post by Joel_W on Jun 30, 2020 5:27:53 GMT -8
Gary,
The rack & pinion is a kit part. It's how they keep both front wheels in sync as their turnable. As for the radiator dry brushing, it looks way better in person as the larger then 1:1 scale and the bright photo lights eliminates a lot of the darker shades in the nooks & crannies.
Ismeal,
I would think so that it's similarly designed as the BMW M6 series, as the kits are from the same company group. Of course you could always finish it after your current CR6 build.
Joel
|
|
|
|
Post by mustang1989 on Jul 1, 2020 2:38:33 GMT -8
Nicely done on the brakes and radiator areas. This is gonna look killer.
|
|
|
|
Post by Joel_W on Jul 10, 2020 12:00:04 GMT -8
Finally time for another small update on the Audi R8 LMS GT3. I started working on the driver's compartment which is comprised of various sub assemblies. The 1st one is the floor pan. Various electronic components were painted Flat Black then glued into position. I added three rubber clad electronic cables that I painted in Semi Gloss Black so that they just didn't disappear over the tops of the various Black boxes. Unfortunately, the lights just reflected way to much light back towards the camera. After seeing these pictures, maybe I should consider toning them down a tad. finally the fire extinguisher was painted bright gloss Red, and the holding straps were made from BMF. For me that's way easier said then done, but eventually I got both strips into place. 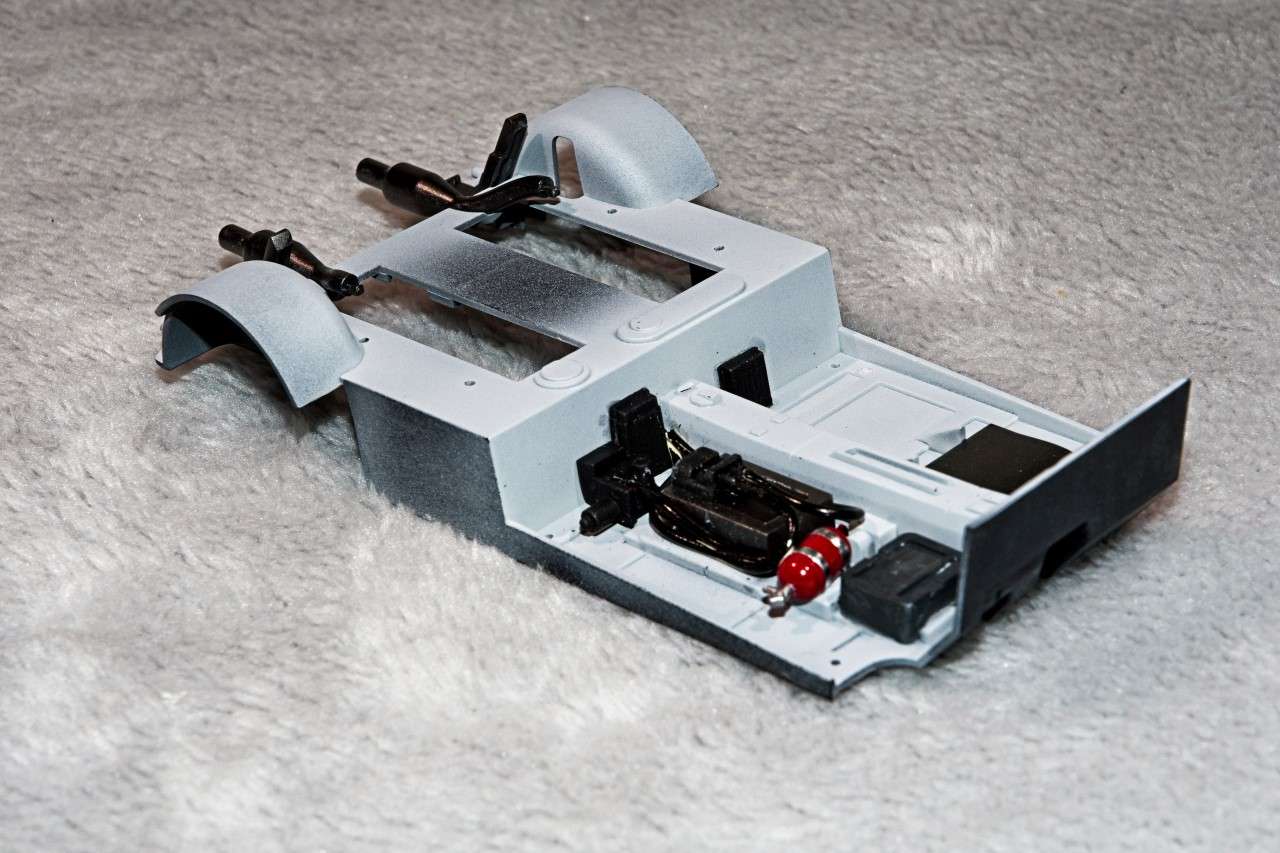 The exhausts are each just two halves that needed a little Tamiya putty to blend in the seams. I primed them Gloss Black then Alcad 2 Stainless Steel was air brushed on. The two engine compartment supports were also painted with Gloss Black followed by Alcad 2 Steel for a slightly different look. 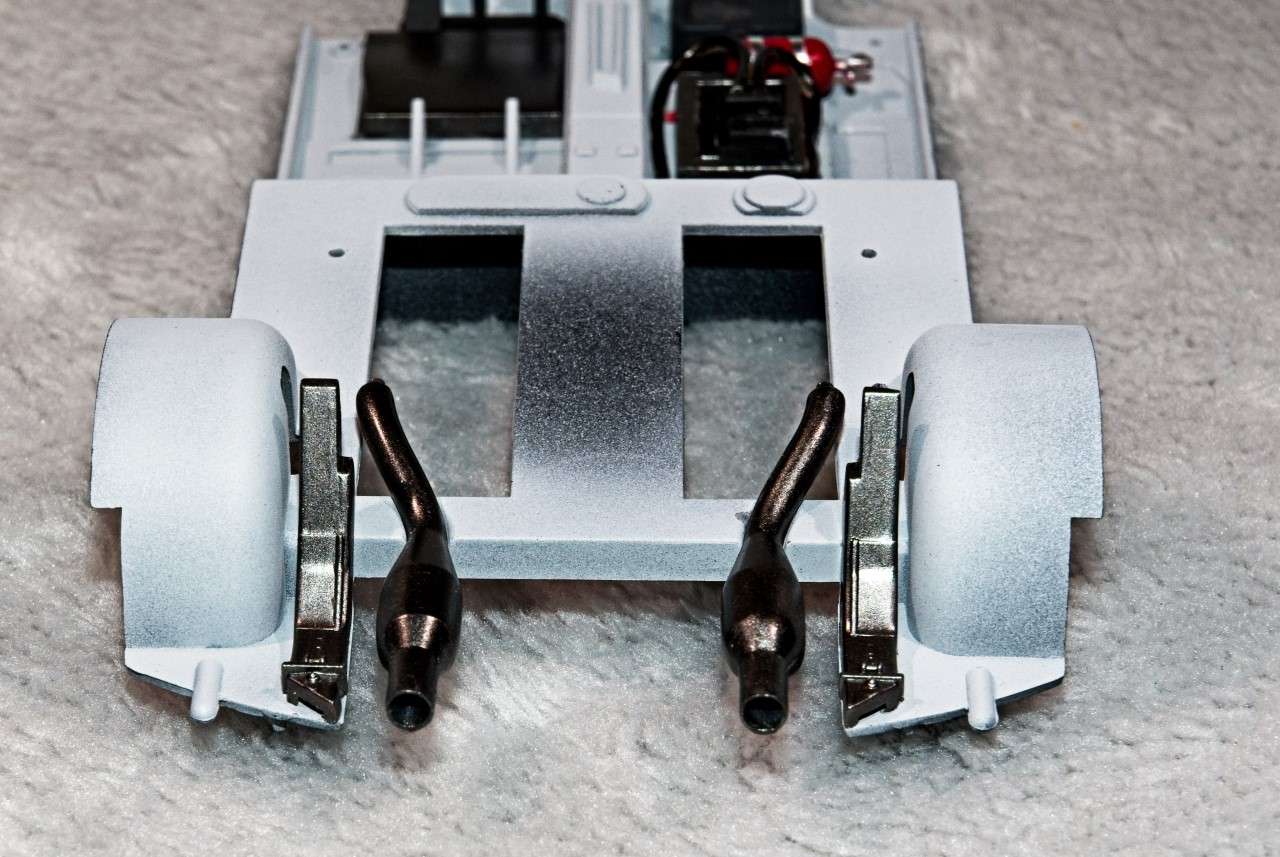 I then built up the interior roll cage that fits like a glove. Primed then painted a Neutral Gray followed by a coat of Mr. Color clear Gloss. When dry, I hand painted all the rubber pads flat Black.  Up next is the engine compartment sub assembly. The engine and exhaust are molded into the compartment. This created the need for quite a lot of masking as the compartment is neutral Gray, the back panel is Flat Black, the exhausts are Metallic Metal, and the engine is a dull Red. So I decided to paint the engine and exhausts by hand. The engine fuel injection covers were air brushed Mr. Color Metallic 2 Silver which looks more like polished Aluminum, which is the metallic color I was looking for. When dry, the Audi decals were applied. The two intake lines were painted with Aluminum, and Nato Tamiya Rubber for the boots. The engine compartment support rails were painted exactly the same as the roll cage. 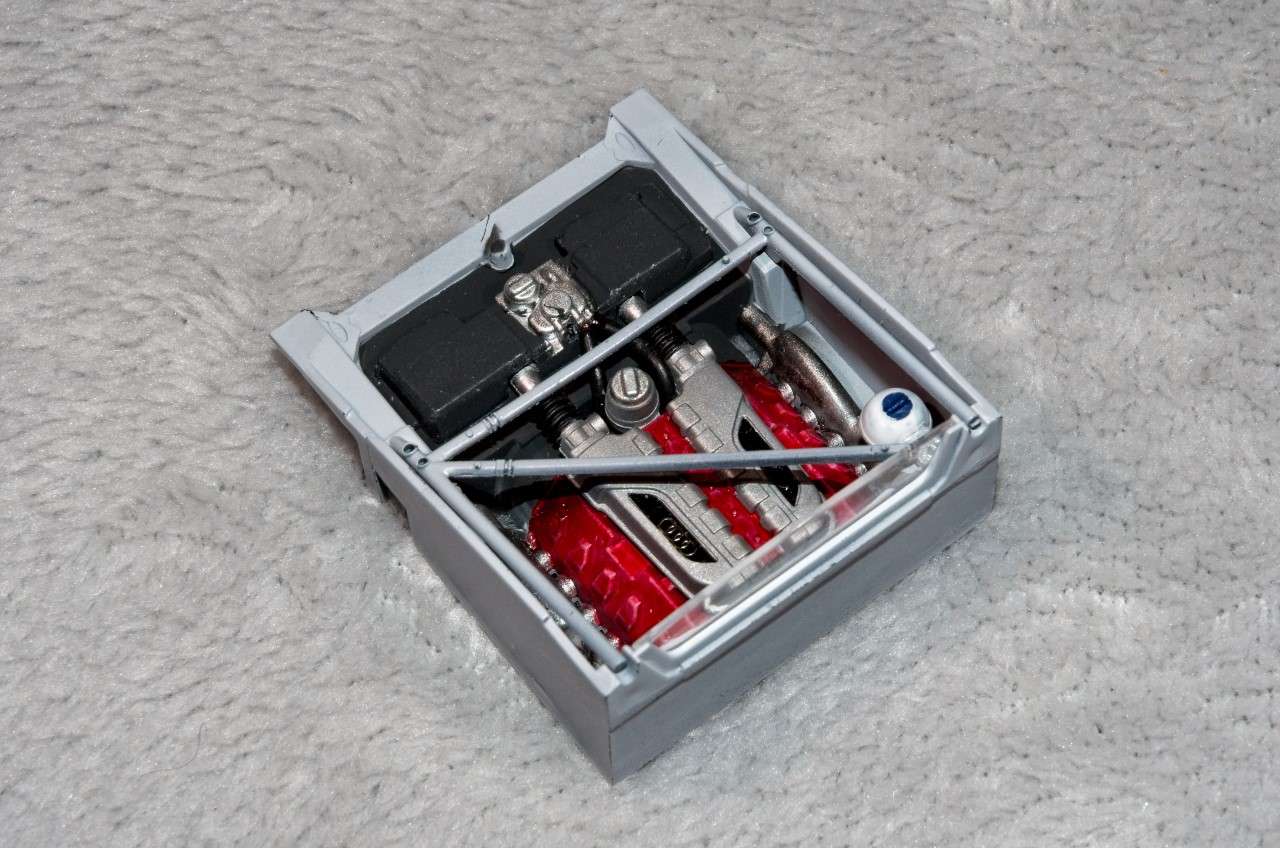 Now for the fun part. I dry fitted all the assemblies. The fit is nearly perfect, but some tweaking of the roll cage where it meets the engine compartment railing is necessary. Still it's starting to come together nicely. 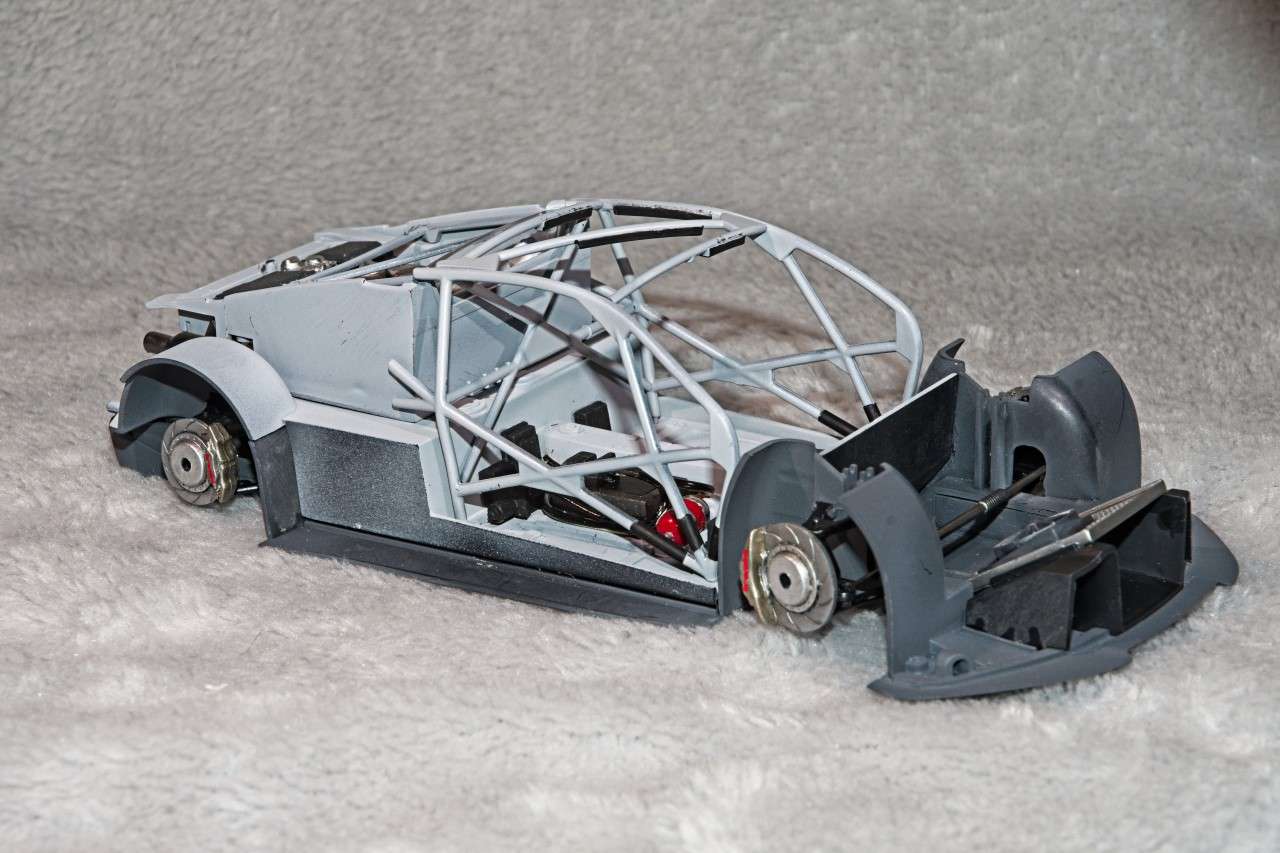 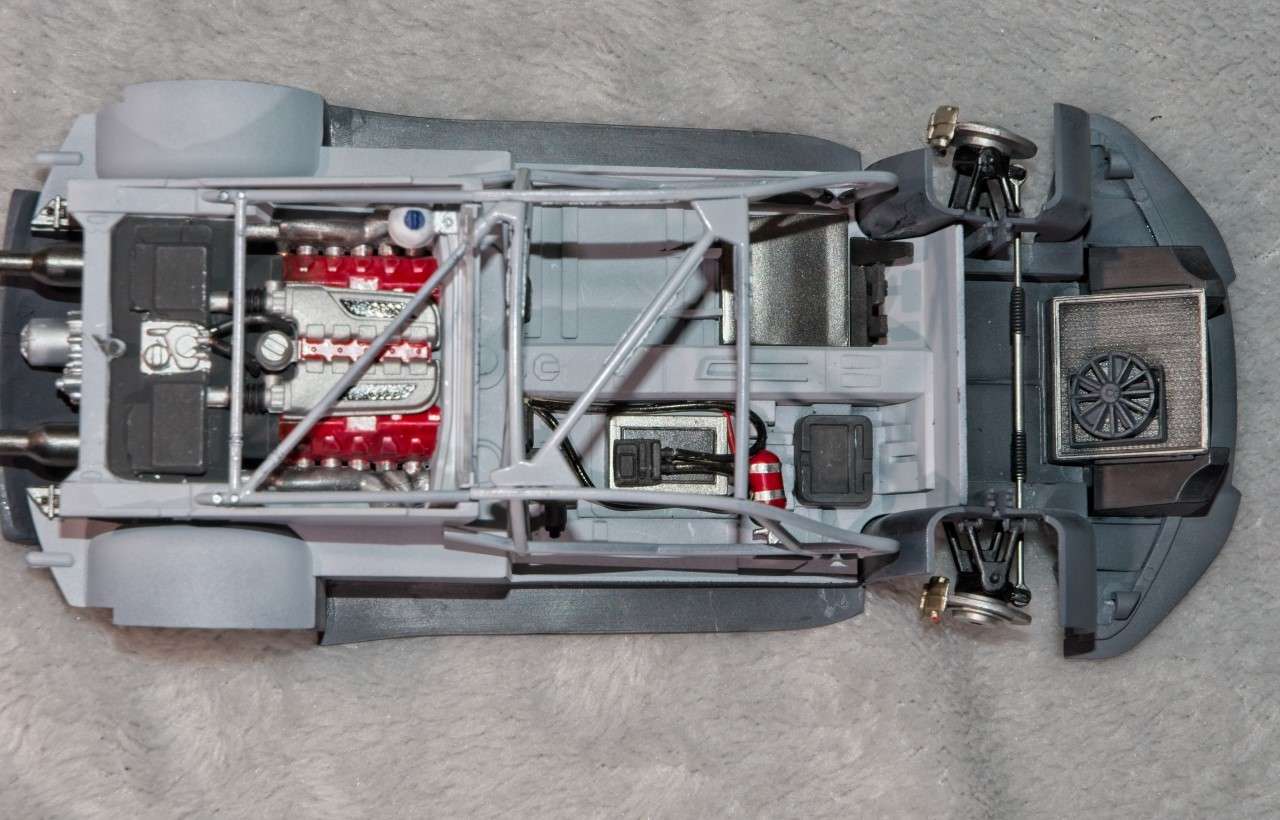 And thanks for stopping by and checking out my build to date. As always, it's greatly appreciated. Joel |
|
|
|
Post by tatocorvette on Jul 10, 2020 12:46:54 GMT -8
Looking good! You are almost there!
|
|
|
|
Post by Joel_W on Jul 10, 2020 13:05:02 GMT -8
Ismael,
Slowly but surely getting there. Not to bad for a one eye old coot.
Joel
|
|
|
|
Post by Joel_W on Jul 18, 2020 8:49:27 GMT -8
I started off the week painting the 4 wheels a Metallic Steel Gray, then the center hub stainless Steel, and finally a pin line wash of Tamiya Black panel line wash to help with the separation of wheel and hub. The tires are nicely molded, but haf this extremely rough texture that I really couldn't completely get rid of. I opted to hand brush on two coats of Pledge to help seal the tires as well as the gloss base for the Pirelli Pzeno decals. This time I did have some issues once the decals dried using my three part decaling method of Micro Sol, Micro Set, & Walther's Solvaset. So rather then air brushing on a coat of Testor's Glosscoat, I applied another hand brushed coat of Pledge. When it dried, problem solved. Gave the tires a full day to dry and cure, then I air brushed on a few coats of Testor's Dullcoat thinned 1:1 rather then my usual 2:3. 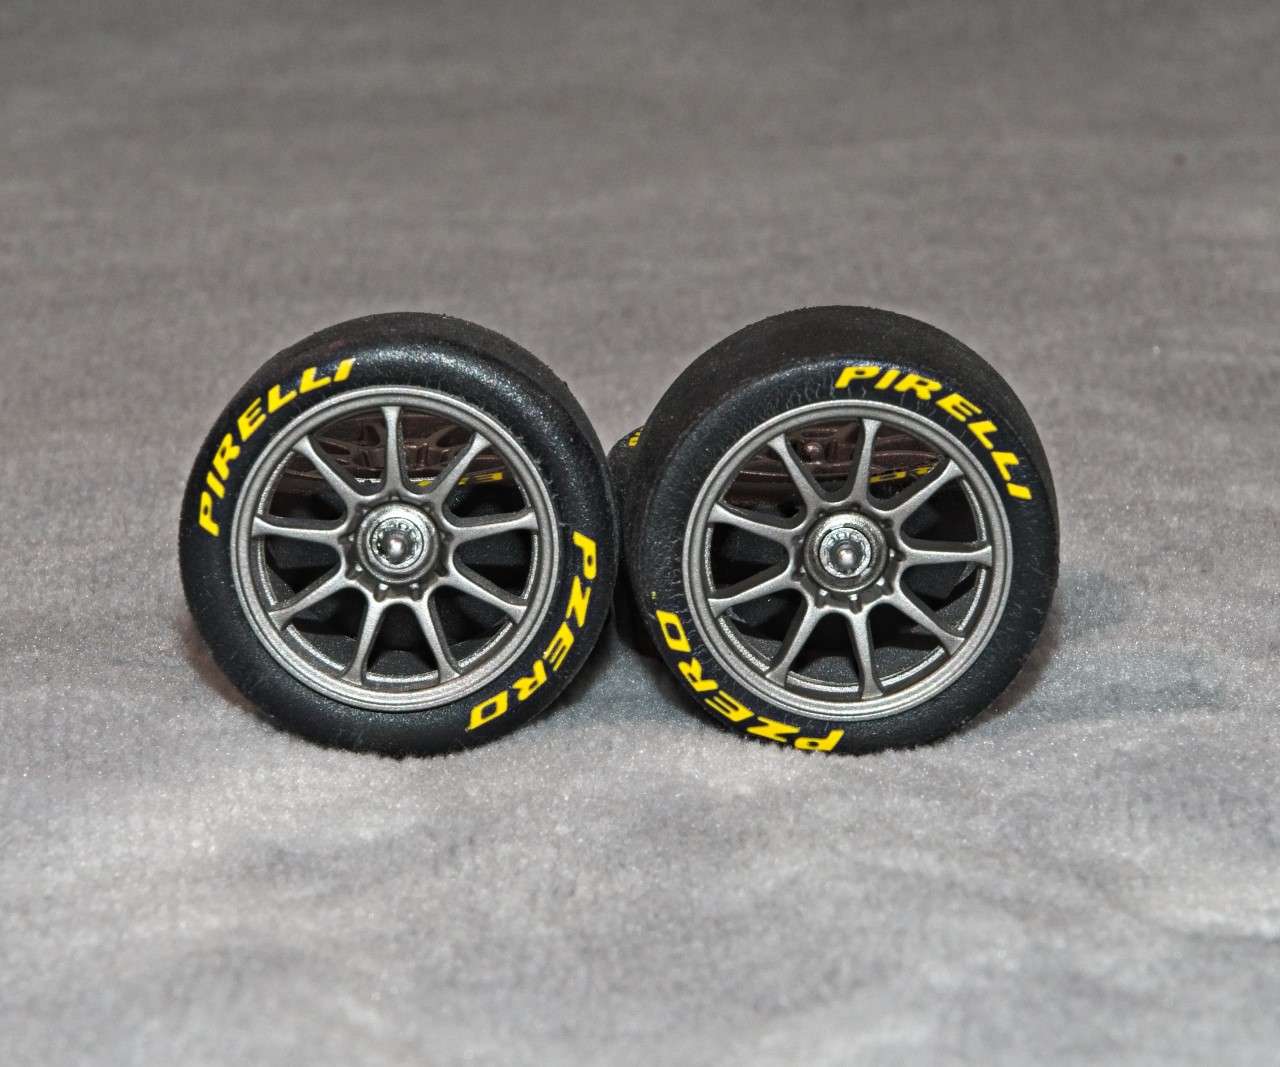 Now my attention turned to finishing up the driver's compartment. The dashboard, wheel assembly, and large button box on the right side side were all painted with Tamiya's Nato Black to kind of represent one type of Carbon fiber. Next I applied the decal to the steering wheel with all the buttons and dials, as well as the decal for the button box. Added the air vent to it, and dry brushed it with Aluminum so that the raised details kind of popped right out. The seat is extremely well molded with clearly defined demarcation between the black leather and the Carbon Fiber seat. Nunu also took the time to include the proper openings for the 6 way harness assembly which made installing it all that much easier. I painted the CF part of the seat Nato Black, and the leather material Semi gloss Black, but is wasn't shiny enough, so I air brushed it with a coat of Testor's Gloss coat. As with most of the Asian kits the harness assembly is just decals. So I made my own generic 6 way harness using the Gofer generic set. I still needed a main belt latch, so I dug through my PE spares and found one that would do nicely. My one complaint is that the design engineers at Audi really need to take us modelers into consideration when picking colors, as the Black Seat with a Black Harness assembly inside the drivers compartment basically just fades into the shadows. So I used a little modelers license and found a pair of Yellow Harness labels for the Shoulder straps, and applied the decals with a very heavy dose of Solvaset so that they would settle down into the fabric's nooks and crannies. 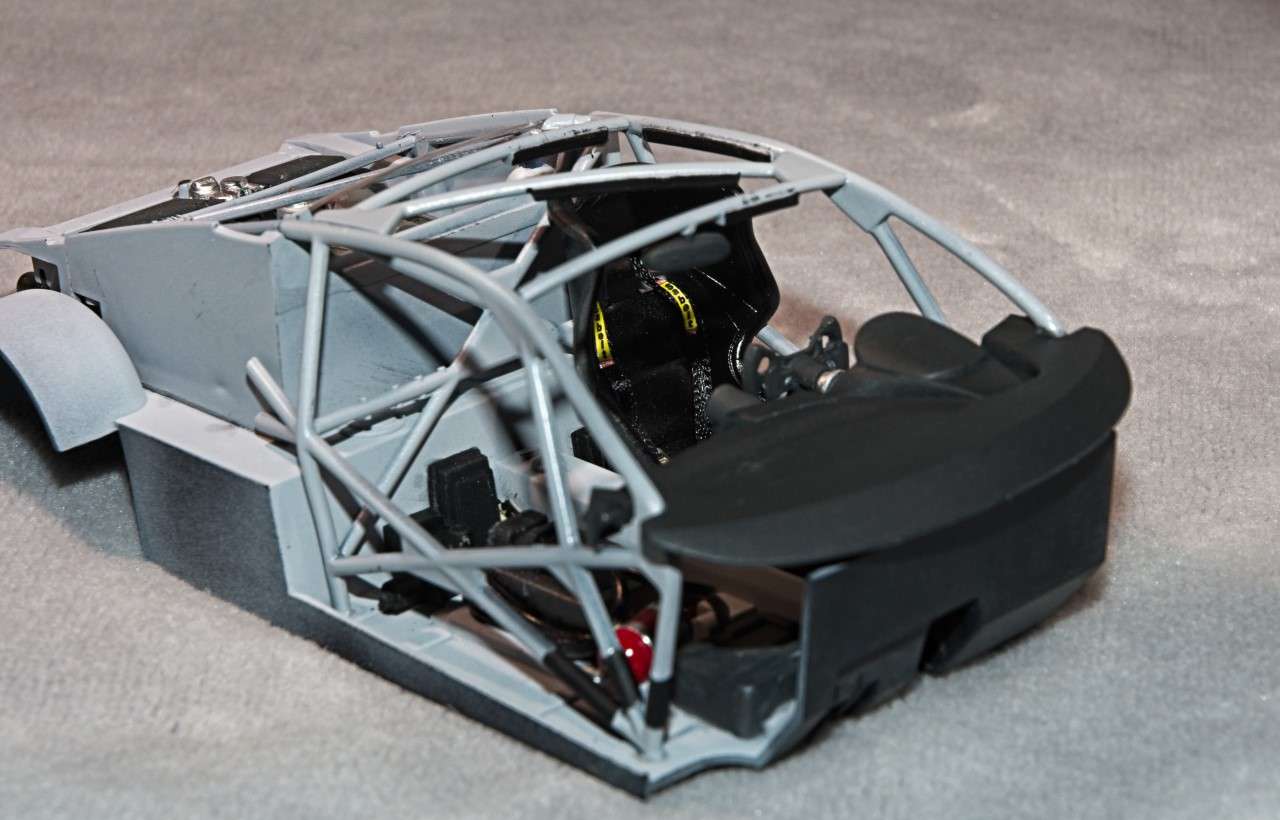 All that was left to do was assemble the various sub assemblies. The dash literally fits like a glove which just amazed me as I seem to have issues with every build. The seat was also a drop in fit. The roll cage aligned perfectly with the 4 mounting holes, and the engine compartment finished up the interior assembly with another perfect fit. 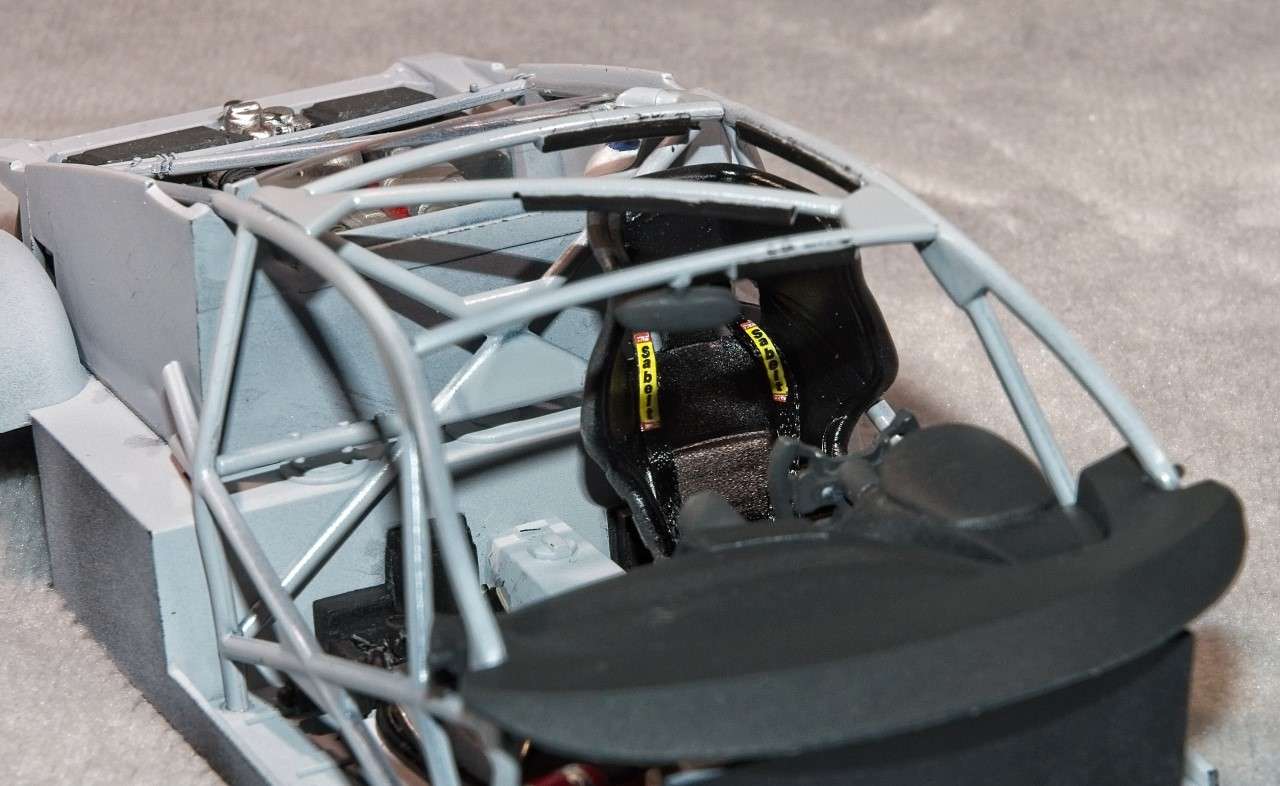 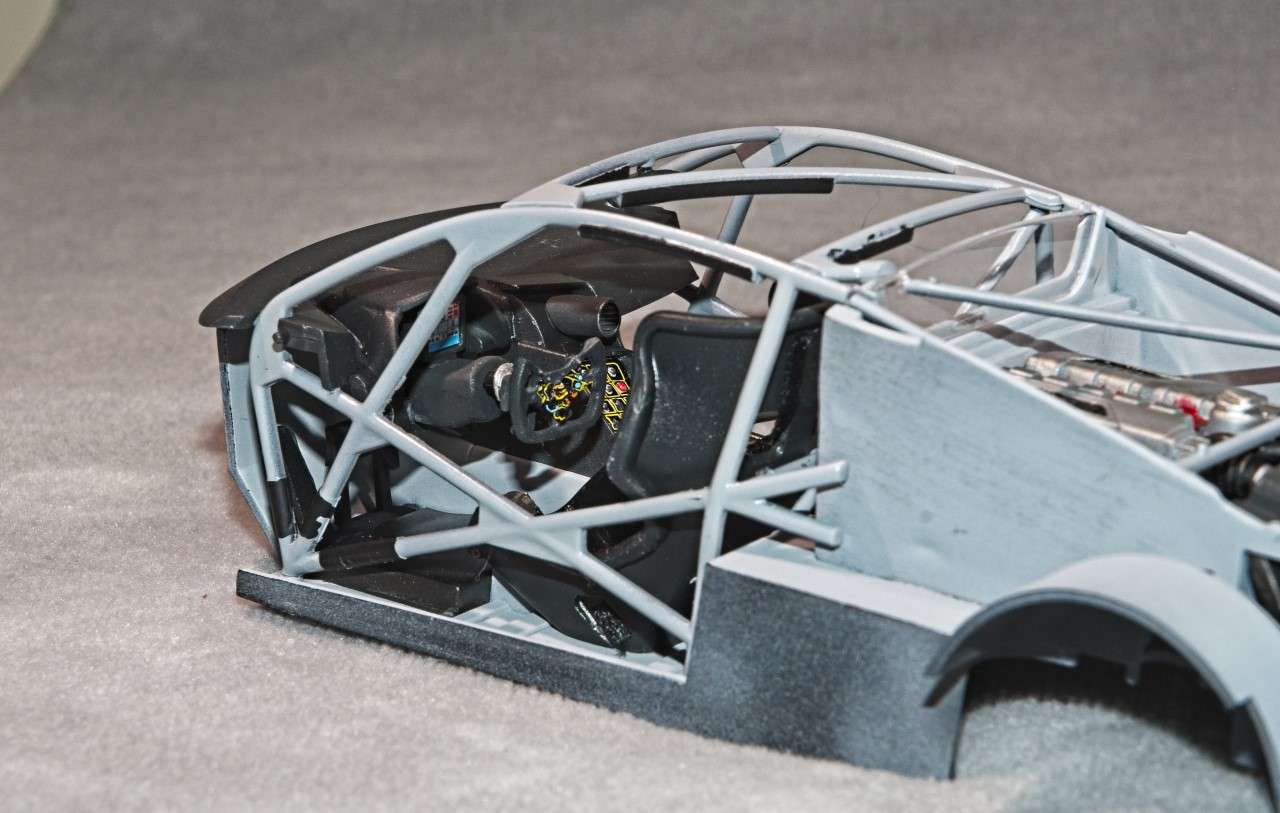 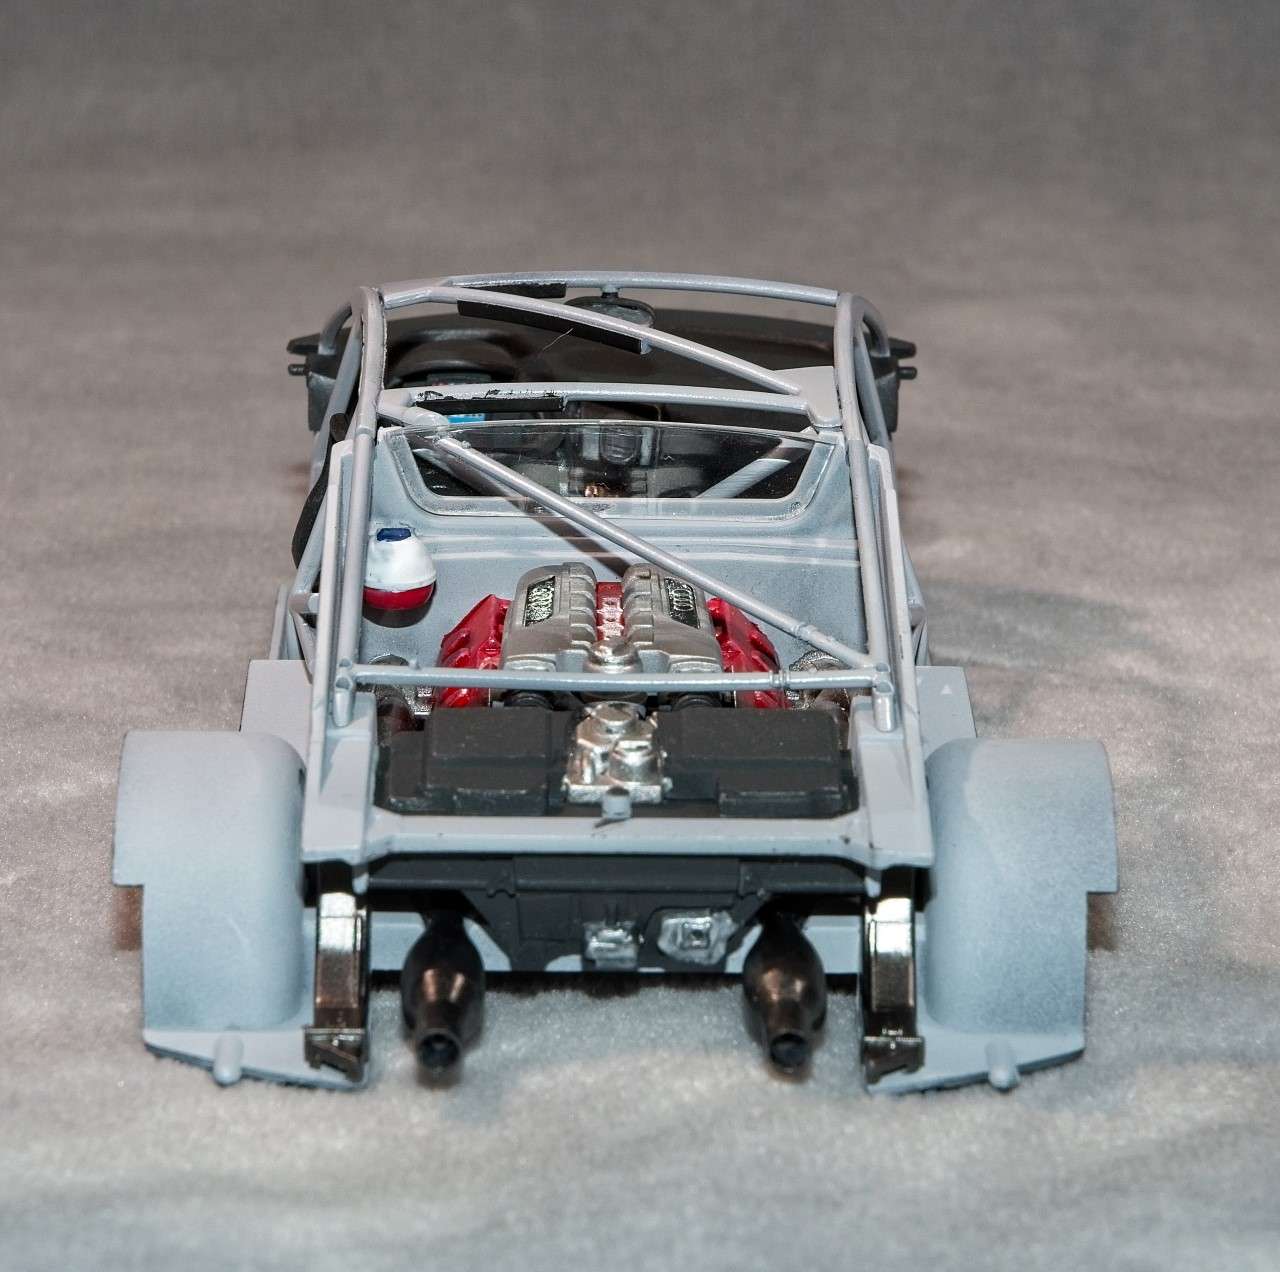 Thanks to all for stopping by and checking out my build to date. As usual, it's always greatly appreciated. Joel |
|
|
|
Post by arcticwolf on Jul 18, 2020 10:24:32 GMT -8
I missed this thread (not an Audi fan), but up to your usual standards Joel! Interesting car, certainly a different genre than I'm used to.
I get exposed to a lot of cool new stuff here.
|
|
|
|
Post by Ben_B on Jul 18, 2020 12:29:24 GMT -8
Looking great, Joel!
Ben
|
|
|
|
Post by Joel_W on Jul 18, 2020 13:01:09 GMT -8
Paul,
I'm not exactly a die hard Audi fan either, but the Audi R8 is super competitive in GT3 just about everywhere these days. And the new Nunu, Platz, & Beemax kits are just great builds. So it's a win win for me. And thanks for liking my efforts to date, it's always greatly appreciated.
Joel
|
|


