|
|
Post by ShawnS on Oct 25, 2020 1:21:26 GMT -8
Hi again guys, thanks for your interest.
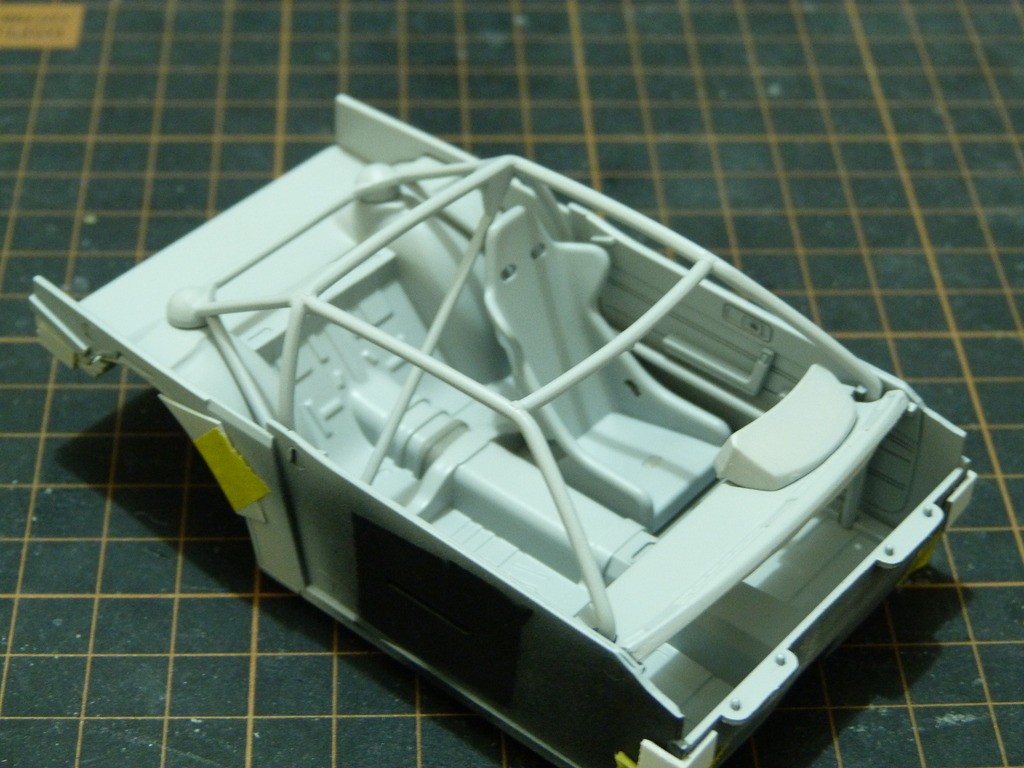
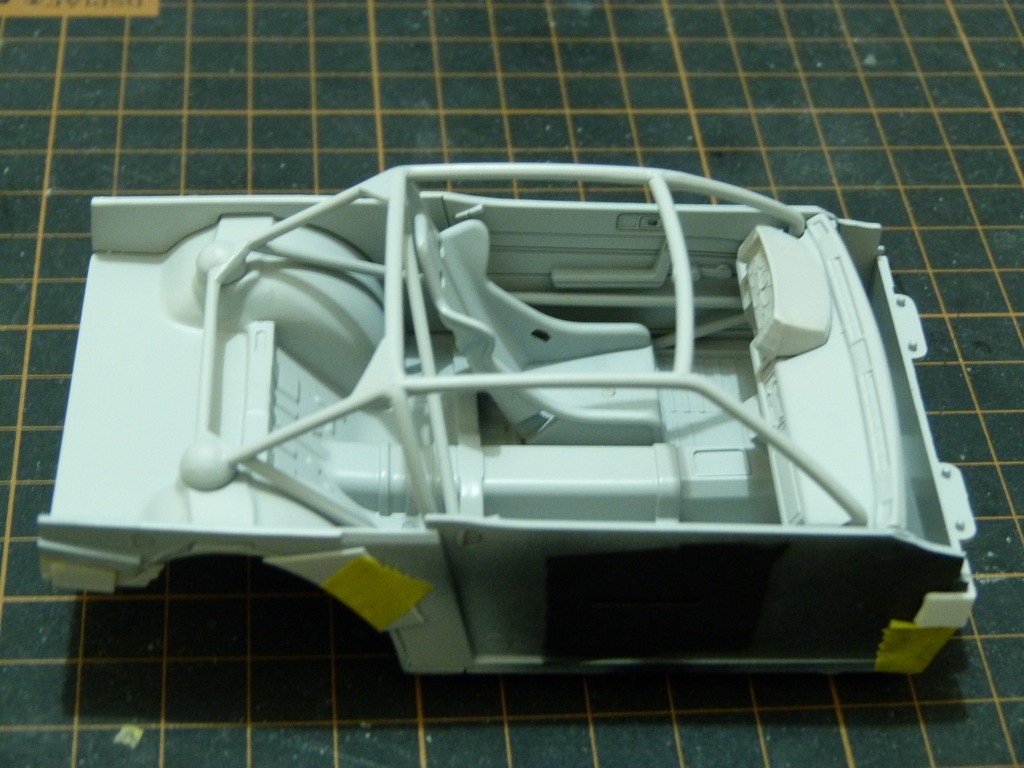
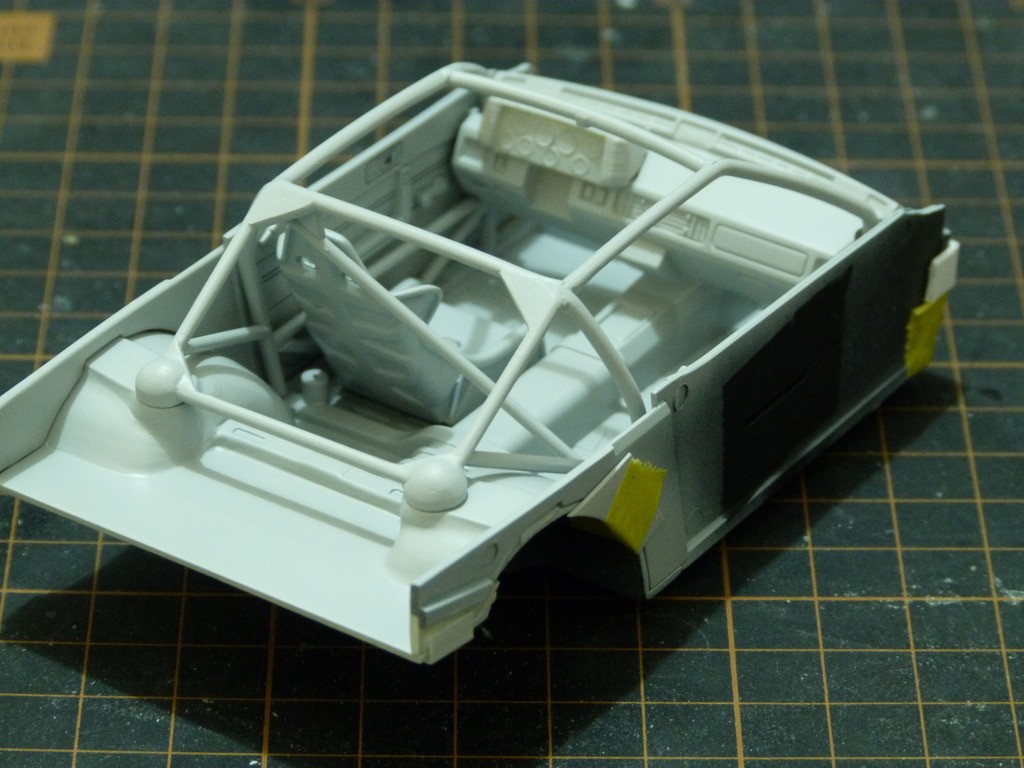
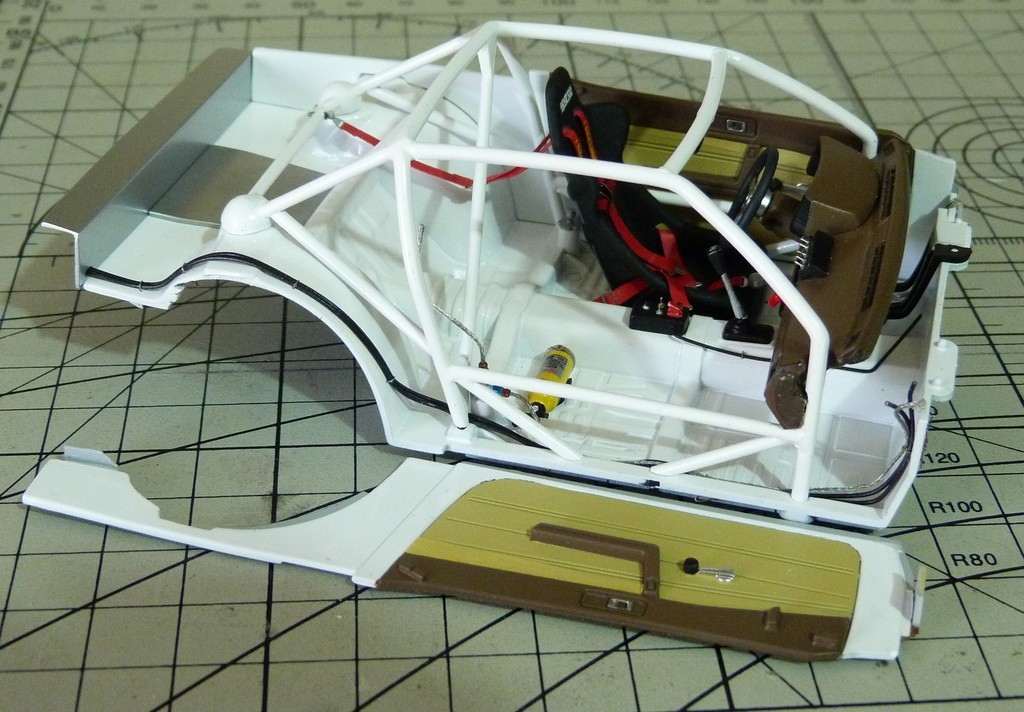
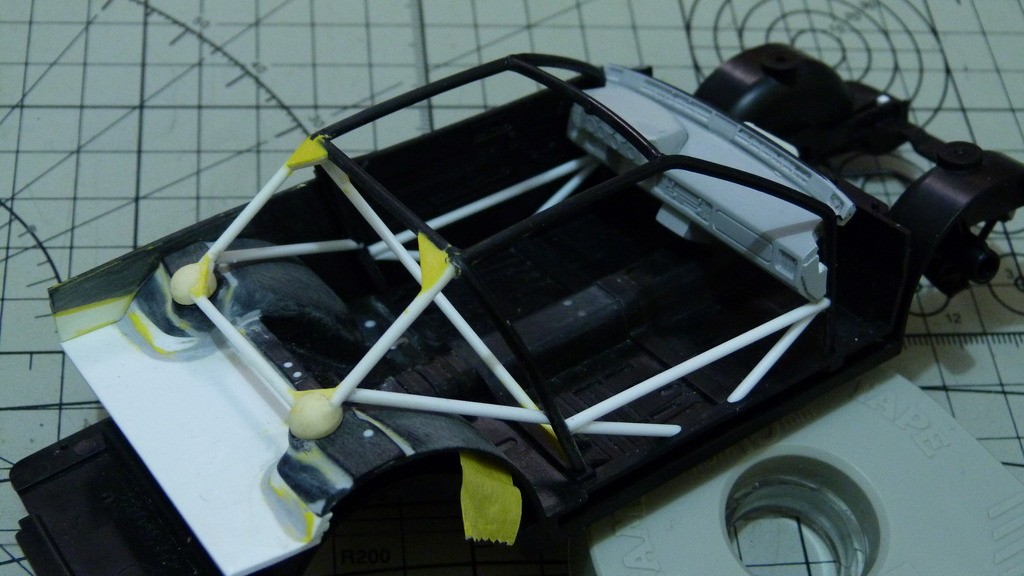
This update is a bit of a mixed bag so here goes. Work is almost complete on the rollcage just waiting on some decent weather to shoot some primer on it to fix anything that shows up.
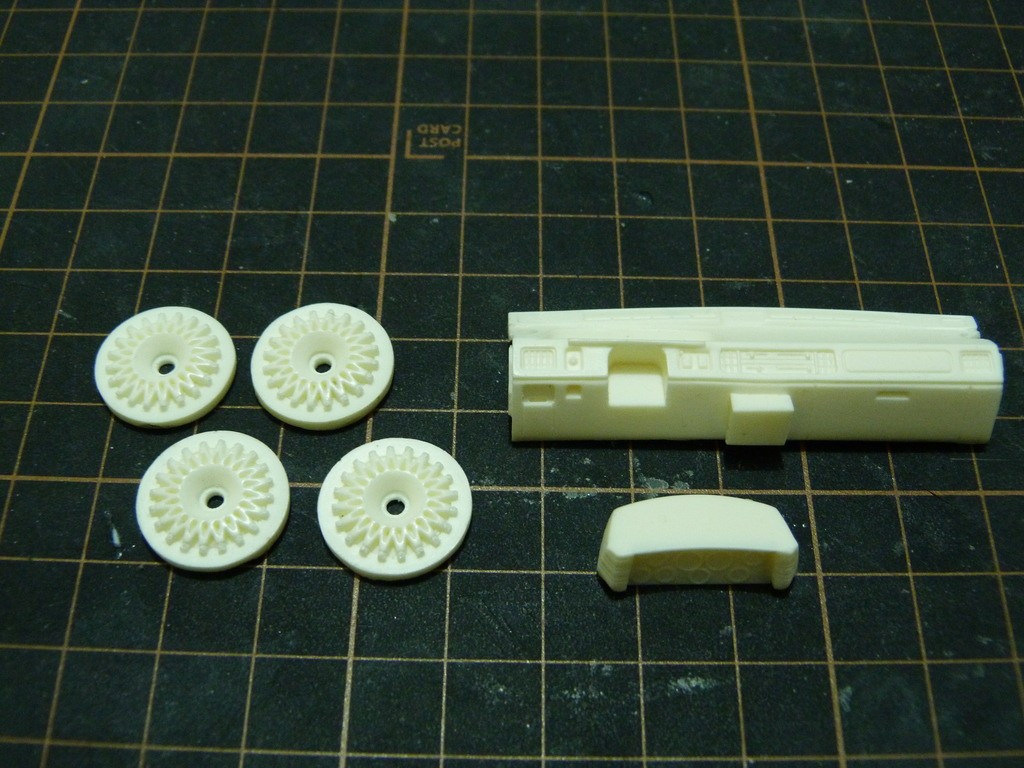
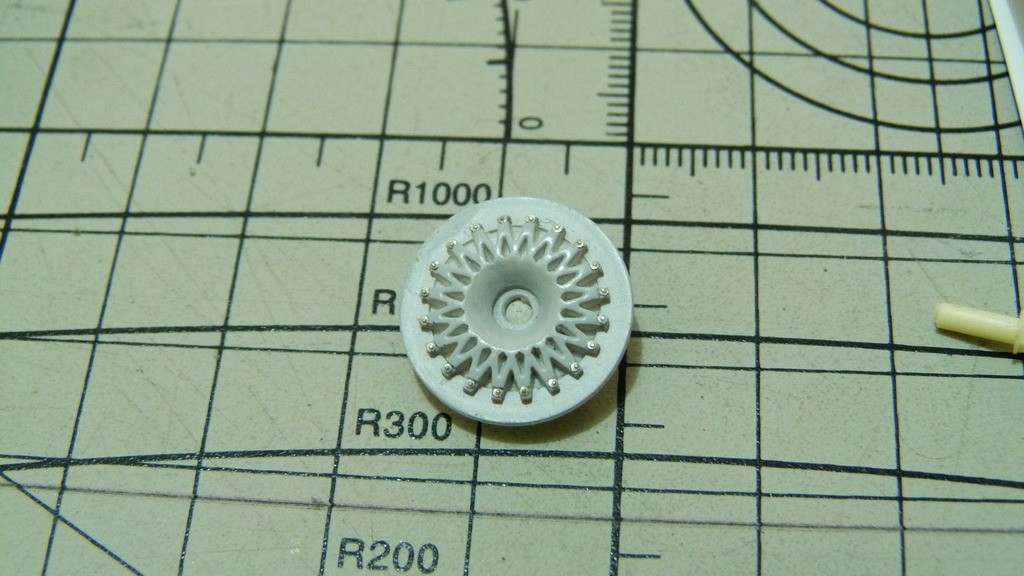
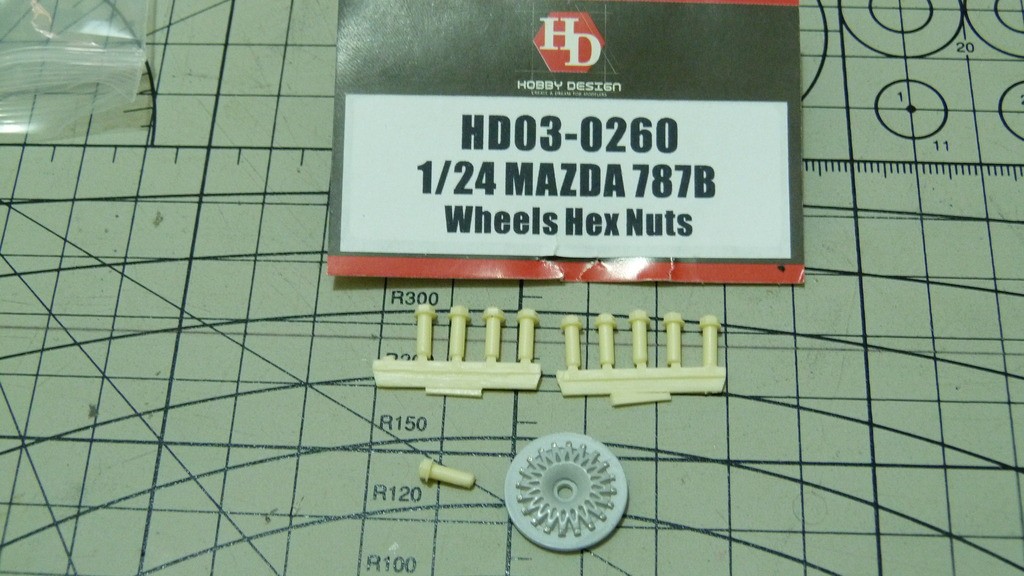
I got the wheel centres sorted and ready for casting.
A little while ago I bought some wheel nuts by Hobby Design thinking that I may need them some day and I was right. They are the perfect size for the Starion. I have also made the moulds for resin casting the wheels and dash.
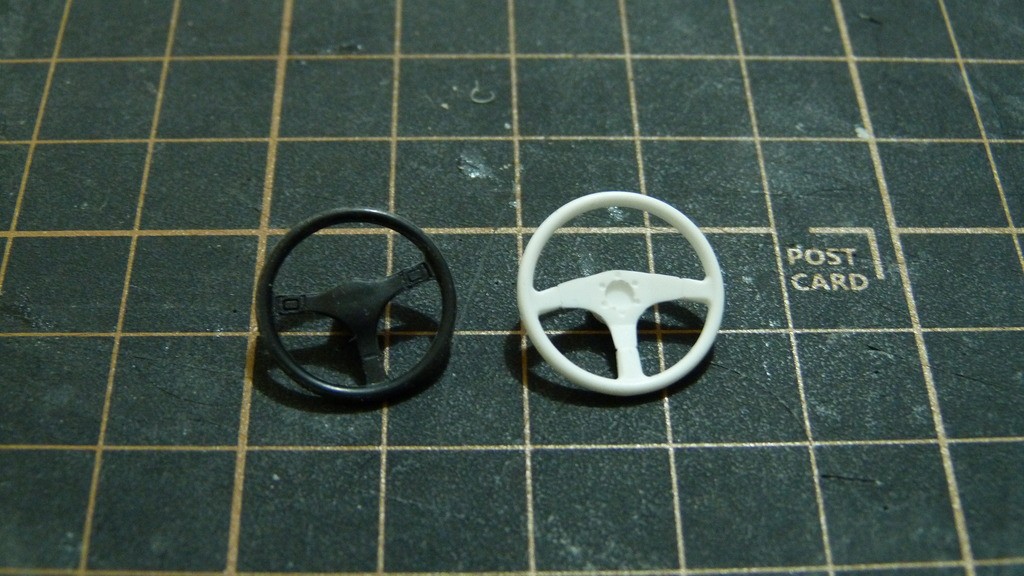
Speaking of wheels, I found a racing steering wheel in my spares to replace the almost stock one from the kit.
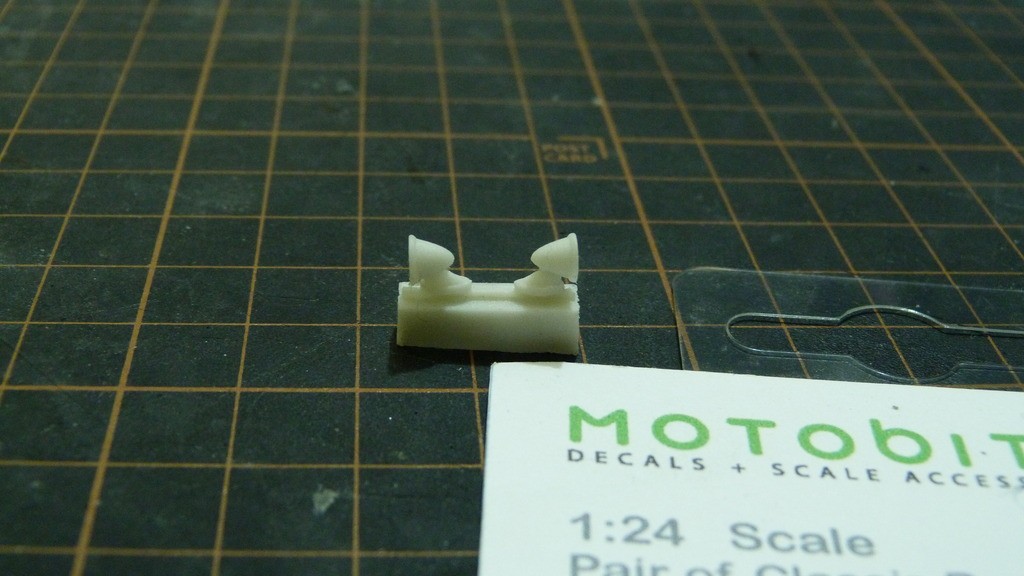
The car had bullet mirrors so I sourced some nice little items from Motobitz in the UK.
Fitment issues 2.0
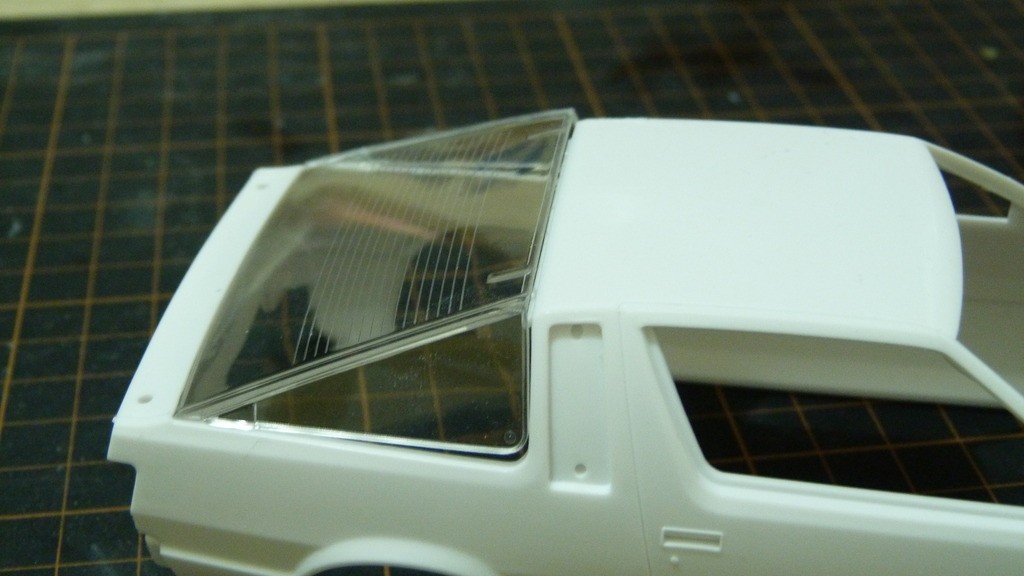
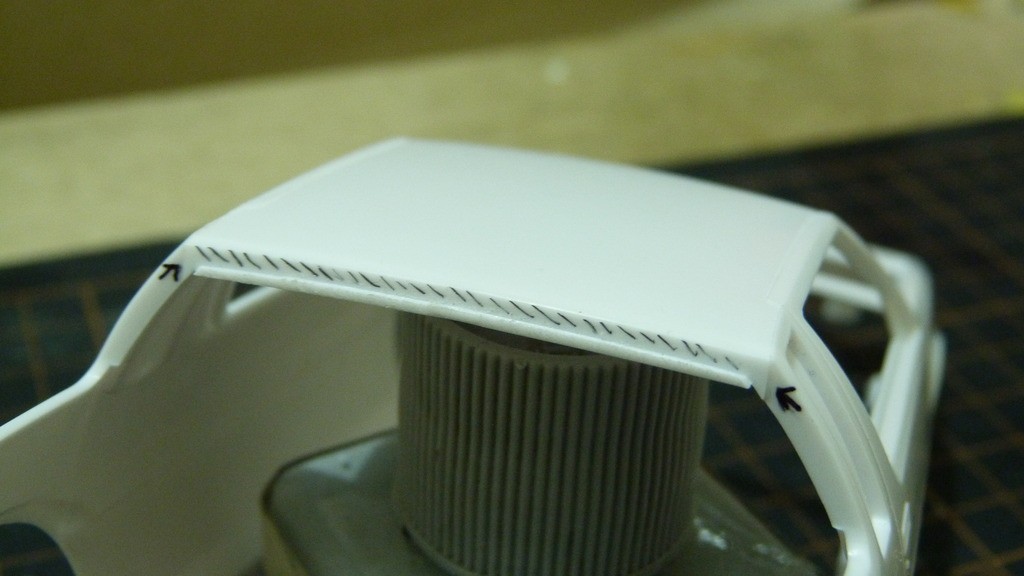
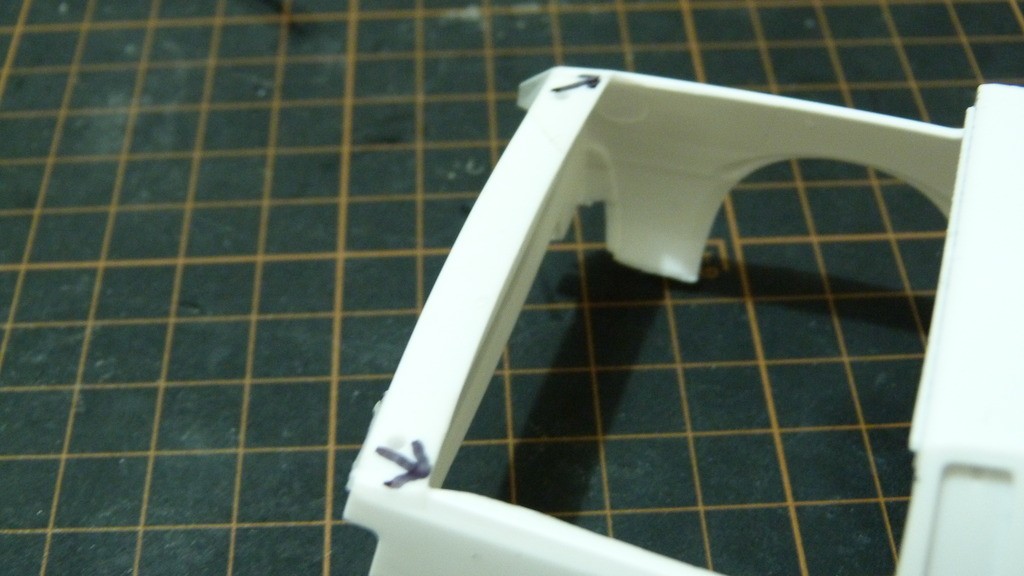
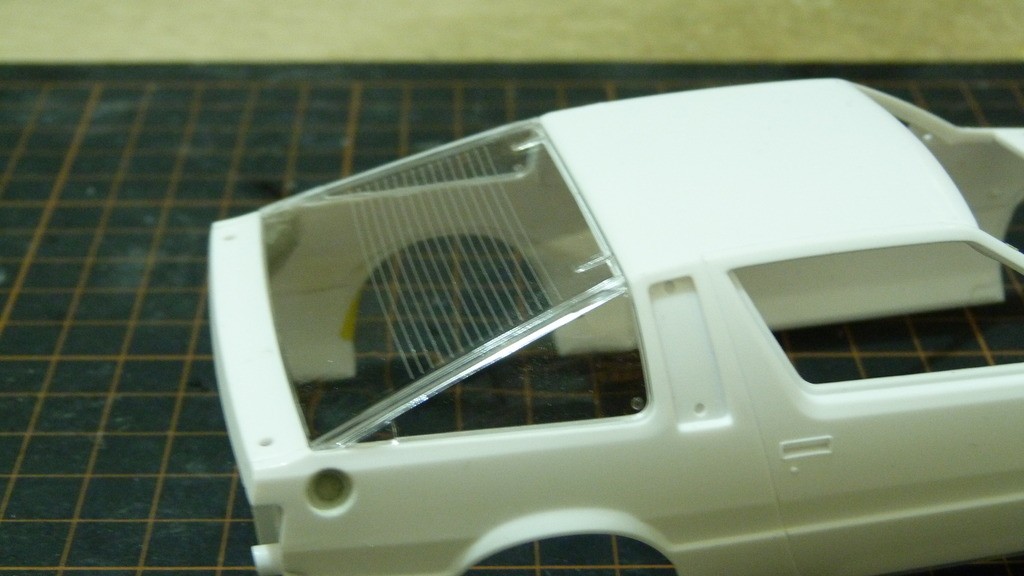
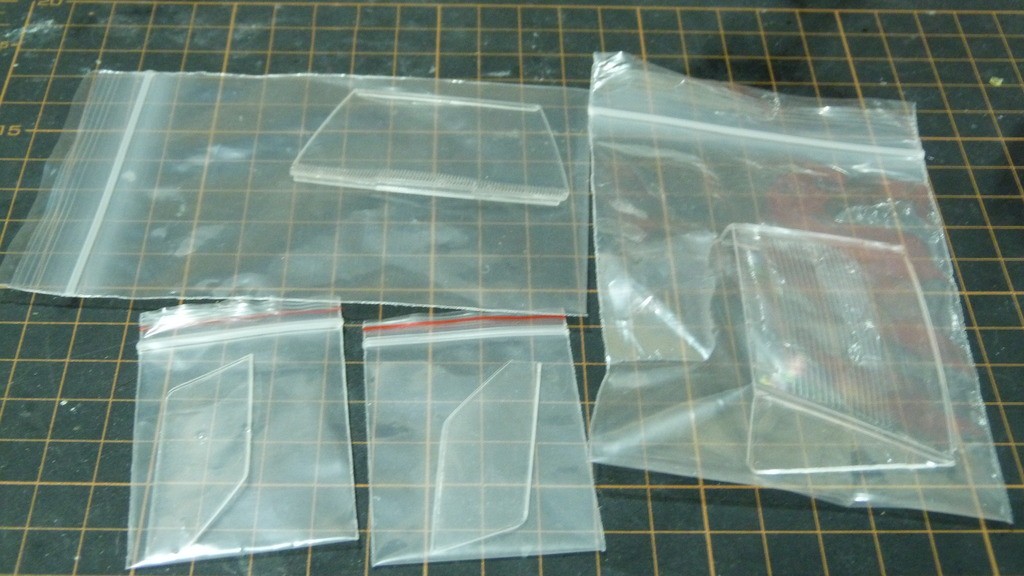
I always test fit everything before painting and I discovered the rear window/hatch would have been a massive pain in the rear if I didn't find this issue. There is a bit of a step at the top of the window recess that needed to be smoothed out. and some thick mold lines on the inside edge of the rear corners that affect fitment too. The edges of the glass also have some light flash that needed to be sanded smooth and after that was done it fit just right. The side windows and the windscreen fit great with just some sanding on the seams around the outside edges of the glass and the inside of the A pillars. After I test fit clear parts I place them in individual bags for protection.
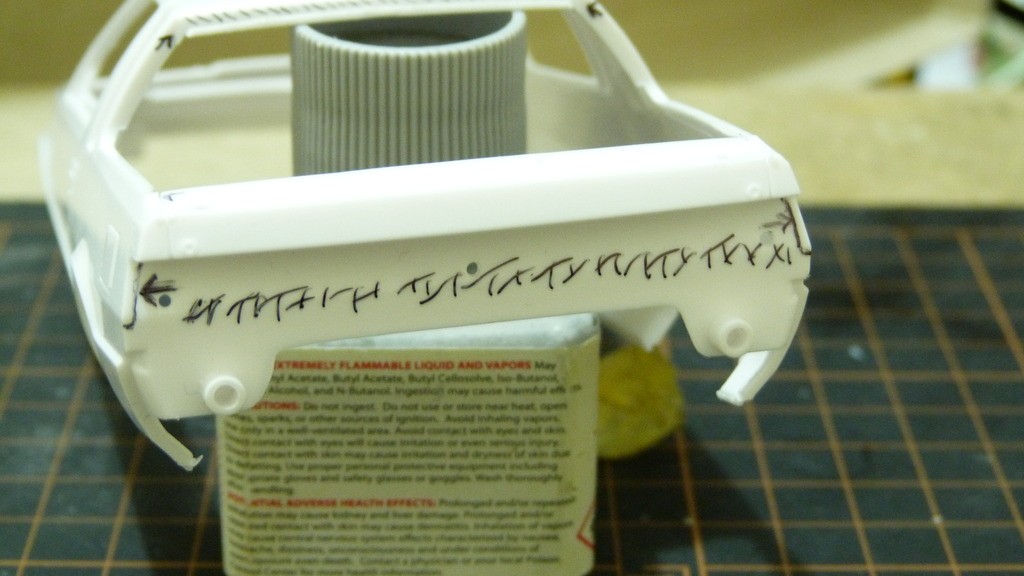
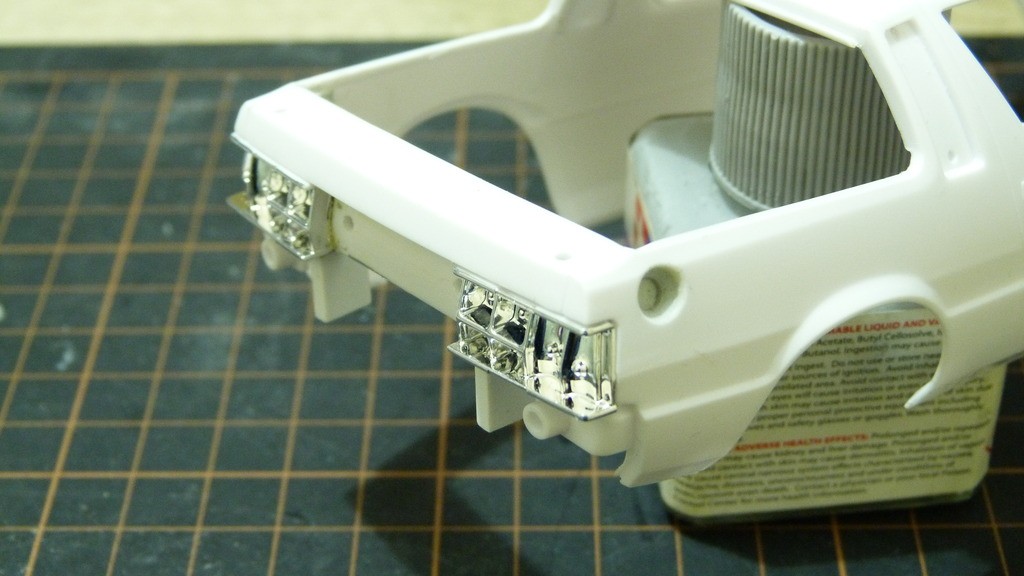
The tail lights hardly fit at all due mostly to the thick chrome that they have. I scraped the plating off of all of the surfaces that touch another part including the back. I also had a look at the body and found a step at either end if the tail light recess and sanded them flat and I scraped a blade twice along the high point that runs along the middle of the recess to knock the high point off of it. Fitment achieved.
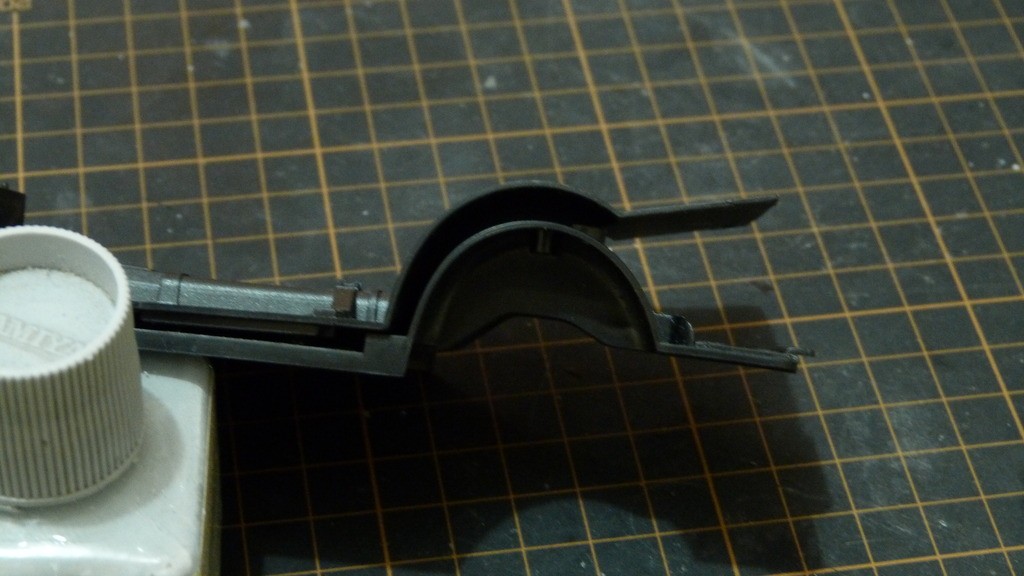
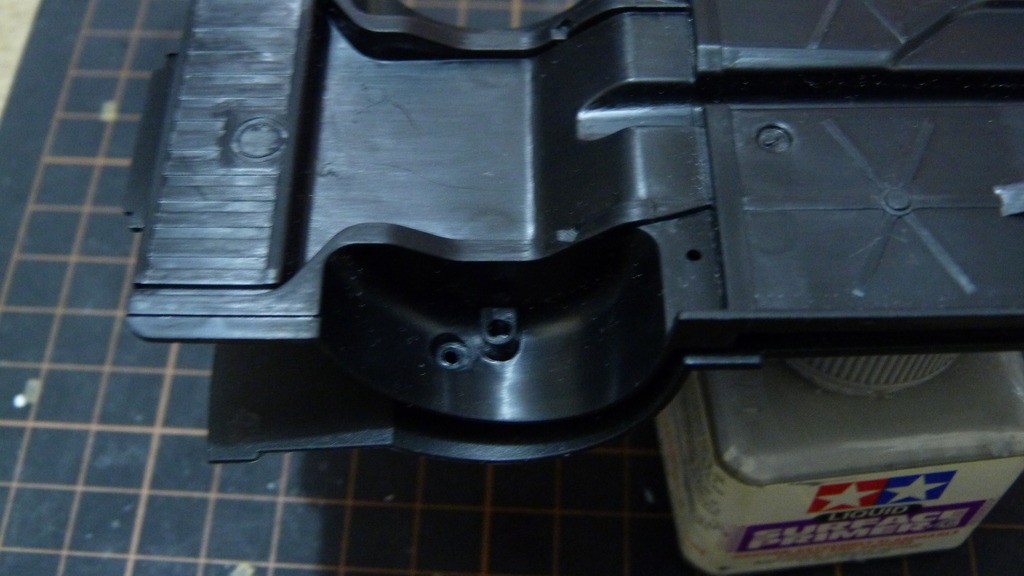
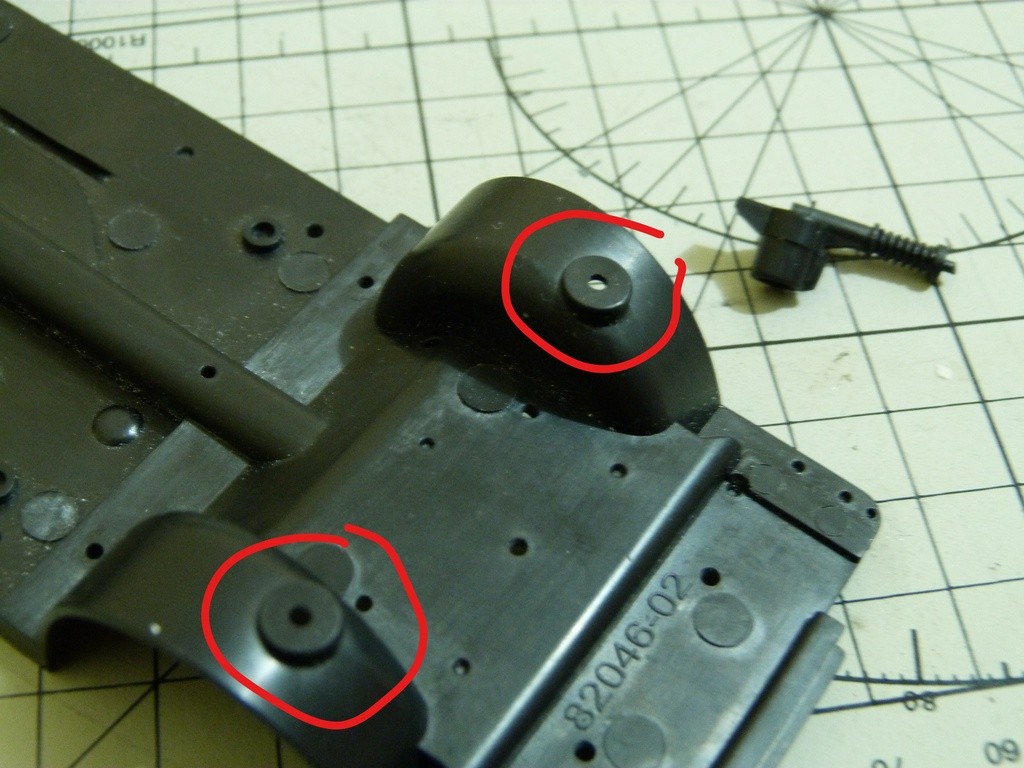
Compromises and Oddities. As I said before, the chassis is a common item that is used in the Lancer kit so the Starion interior doesn't exactly conform to every shape that the chassis has. You can see the gap between the top of the wheel well on the chassis and the wheel well on the interior piece. This issue leads to oversized wheel tubs that really spoil the interior but there isn't much that can be done about it. Also the wheel wells have mounting points for the springs on both the Lancer and the Starion. The Lancer rear suspension uses both of these mounting holes but the Starion only uses the one at the back of the tub.
And finally, one thing that is going to bug me is the recesses for the windscreen wipers. Because the kit is RHD that means the wipers are set up for RHD and now I that have converted it to LHD the locating points for the wipers are wrong but the problem is that the part is clear and that makes modifying them a tricky task. I will have to think about this one for a while.
Thanks for looking. Cheers ShawnS
|
|
|
|
Post by Joel_W on Oct 28, 2020 5:35:06 GMT -8
Shawn,
Outstanding progress for sure. The wheels look fantastic and should be real winners once casted. Great progress on making a proper roll cage. As for those chromed parts, believe me, I've been there and had to deal with those issues all the time on most kits plus that mold line seams that always seem to throw off the fit a bit. But you've certainly dealt with each one as the fit of each part looks perfect now.
Looking forward to how you deal with the wiper conversion orientation.
Joel
|
|
|
|
Post by ShawnS on Nov 5, 2020 2:29:19 GMT -8
Hi again all,
Work on the Starion continues, here's where I'm at. I resin cast the wheels and dash.
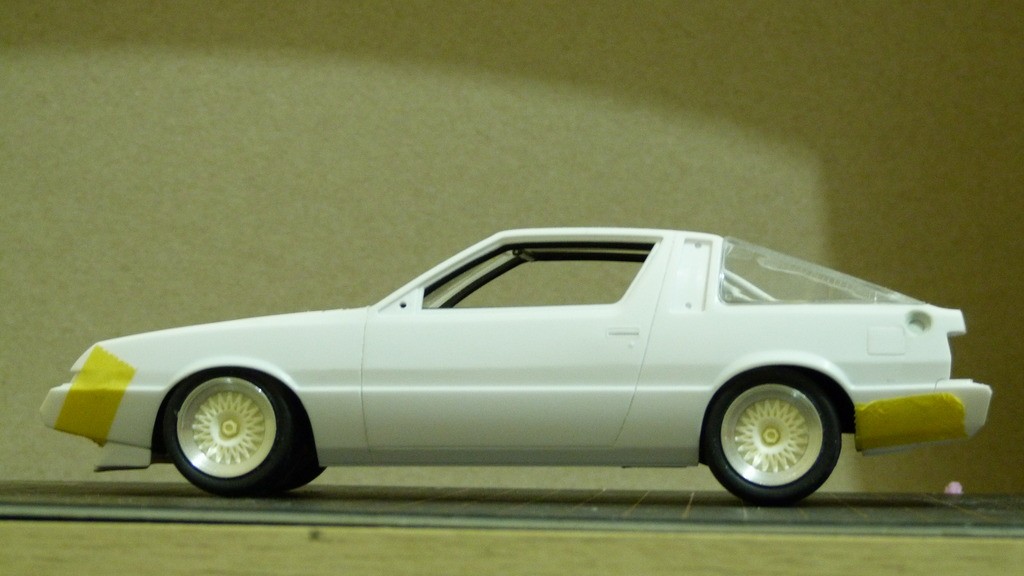
I have primered the body, bonnet, bumpers, chassis and all of the modified interior parts. Here is the interior in Tamiya primer awaiting the white base coat.
Fitment issues 3.0 Here is the mocked up ride height. You can see the rear sits too high and the wheels are forward in the wheel arches.
Both of these issues are of my own doing after having to raise the rear of the car to make sure the interior fitted properly. The wheel location was fixed by sanding down the rear chassis mounting tab and adding some spacers to the front locating pins. The rear ride height was fixed like this-
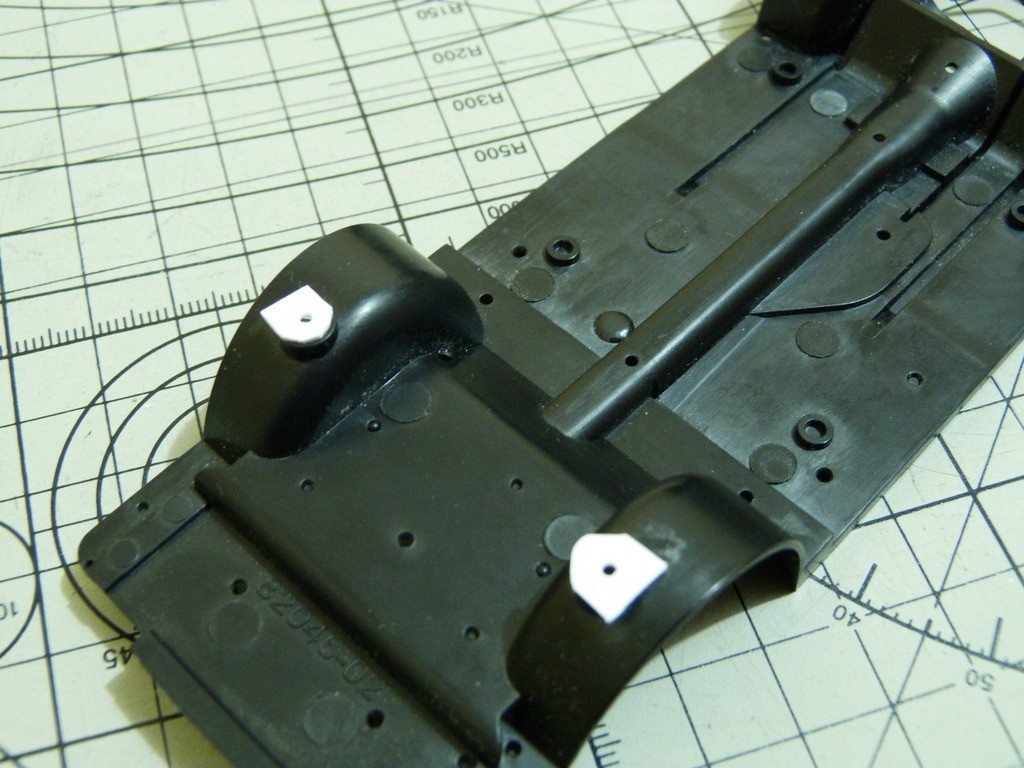
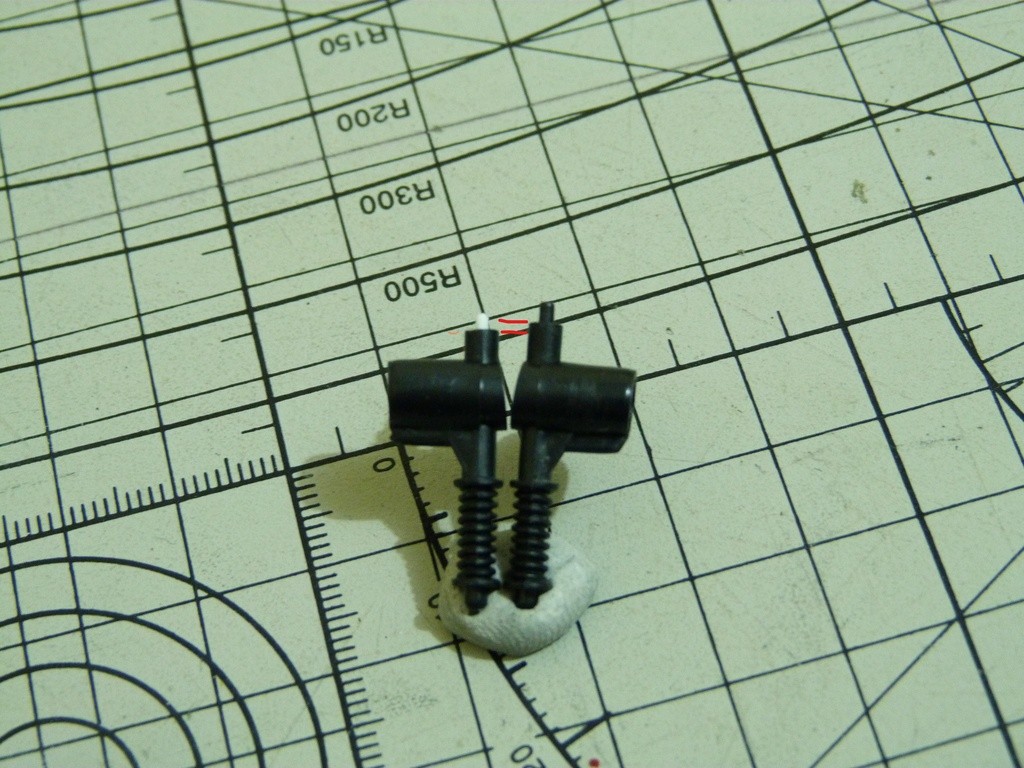
I drilled out the rear suspension upright mounting point so that the spring base would be even with the top of the wheel arch then I just capped the top with a piece of scrap styrene sheet. This lowered the ride height by about 1mm which was spot on.
Here's another fitment issue that the kit has that I had to fix.
The front suspension uprights are too tall and they interfere with the fitment of the front crossmember to the chassis rails. I cut it down just a little at a time until it fit and added a pin from Evergreen rod.
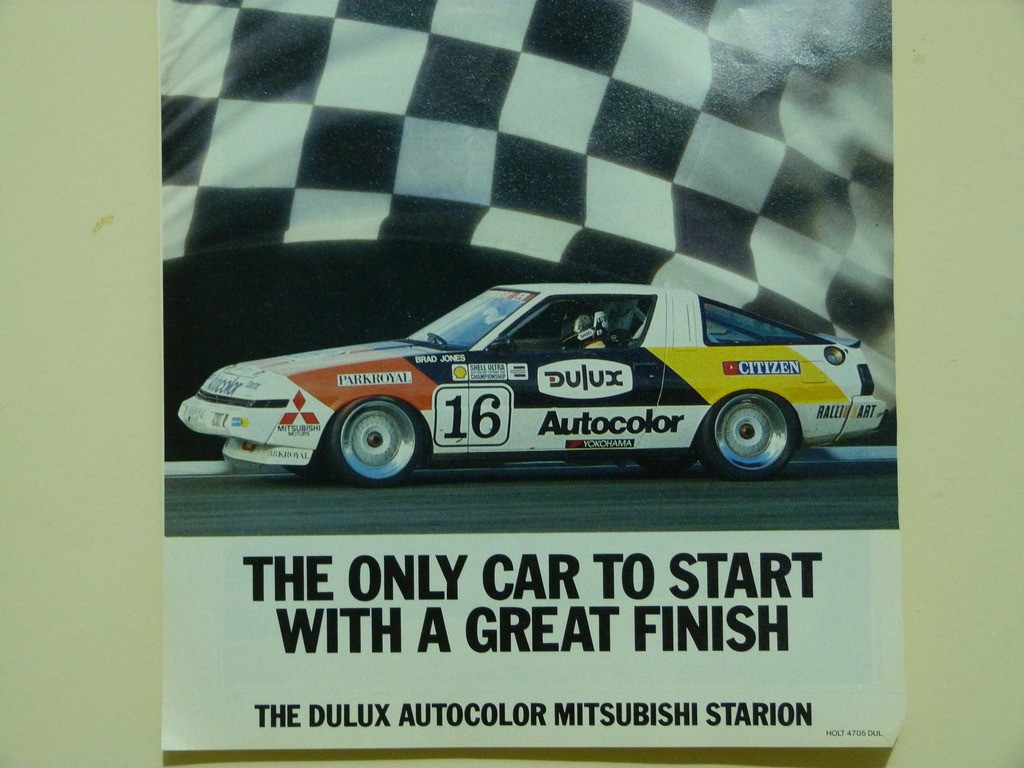
This is the livery on the actual car.
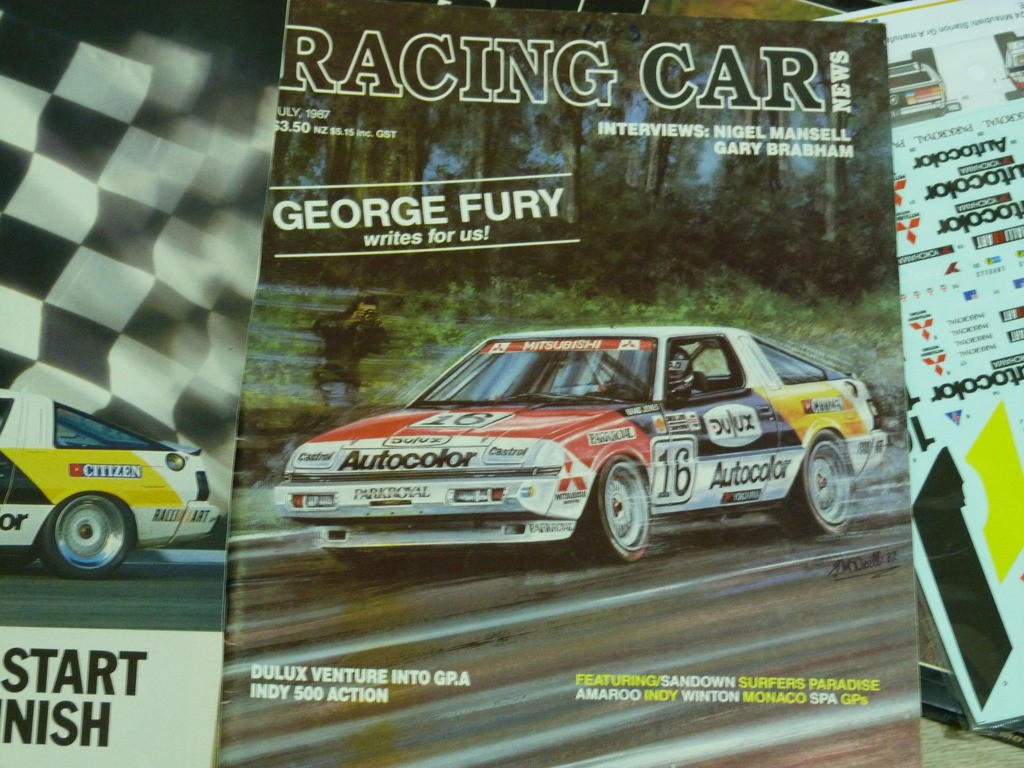
and a 1987 issue of Racing Car News magazine
I will be painting the colours instead of using the decals. I'm looking forward to getting some more paint on this thing.
Cheers ShawnS
|
|
|
|
Post by afx on Nov 5, 2020 3:51:22 GMT -8
Great work Shawn. Wish that magazine "Racing Cars News" was available in the USA.
|
|
|
|
Post by Joel_W on Nov 5, 2020 6:02:37 GMT -8
Shawn,
excellent attention to all the little details. Loved how you solved every single fit issue especially the ride height and track. Simple yet sounds modifications that even I could manage to do.
Joel
|
|
|
|
Post by sam on Nov 29, 2020 10:48:00 GMT -8
A friend of mine had a Starion Turbo. That was a fast and well handling car.
|
|
|
|
Post by ShawnS on Jan 6, 2021 1:12:00 GMT -8
Hi again guys. The Starion build isn't dead yet. Here's where it's at. Most parts have been painted their base colours and are awaiting detail painting except for the body which is painted, polished and ready to go. The paints used for the body were Tamiya TS26 white over TS101 base white with TS14 black and TS16 yellow and the red is a custom TS mix all with TS13 clear over all. 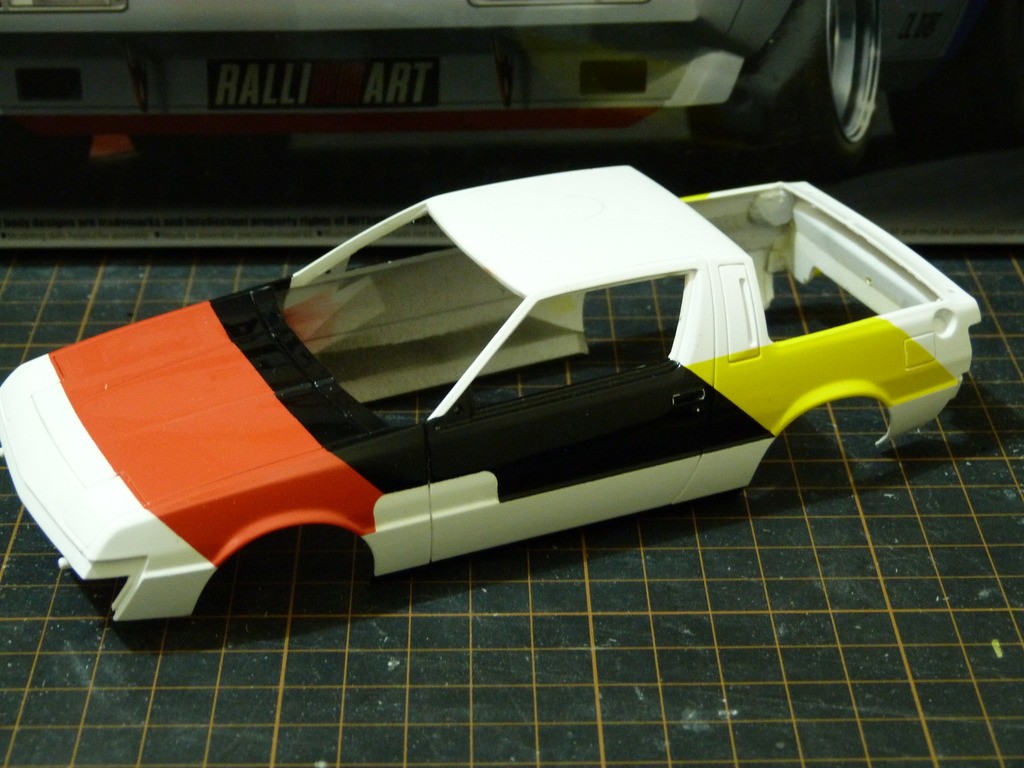 Interior is ready for detail paint and assembly. 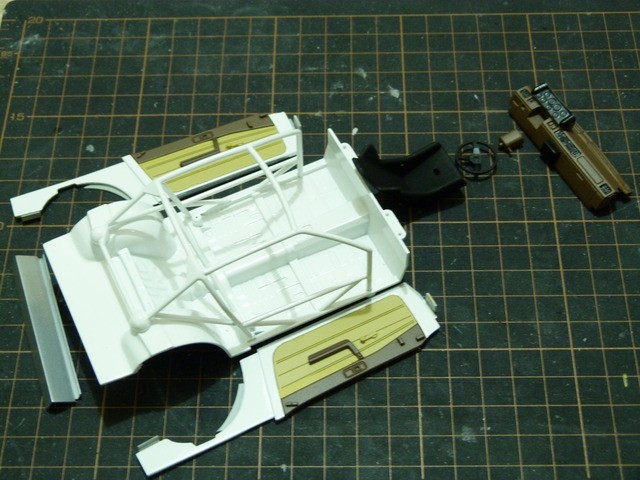 Ditto the chassis, suspension and drive train.  I have polished the wheel rims and the centres are painted and ready for black wash. 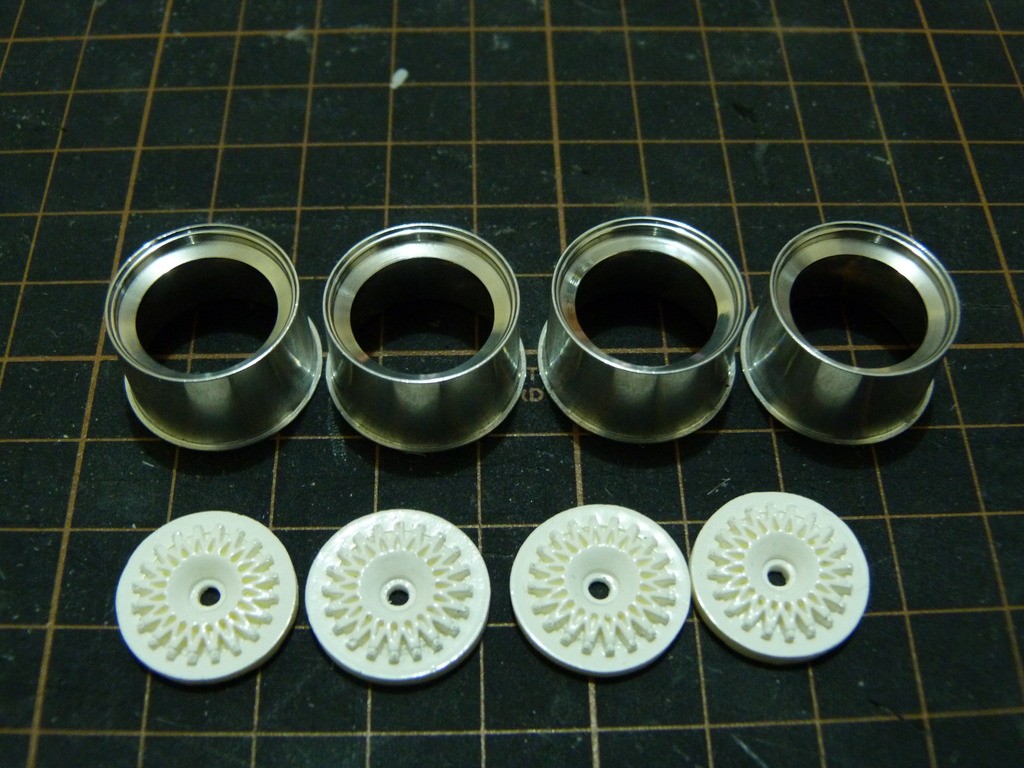 I wonder if the manufacturers were planning on doing an engine at some stage as there are signs of it being setup to take a full engine and engine bay but there's just not any parts supplied in the kit. Perhaps they were hoping for the aftermarket to pick up their slack. Anyways here is the sum total of engine in the kit. Between the sump and the bonnet there is a massive space waiting to be filled just not by me. 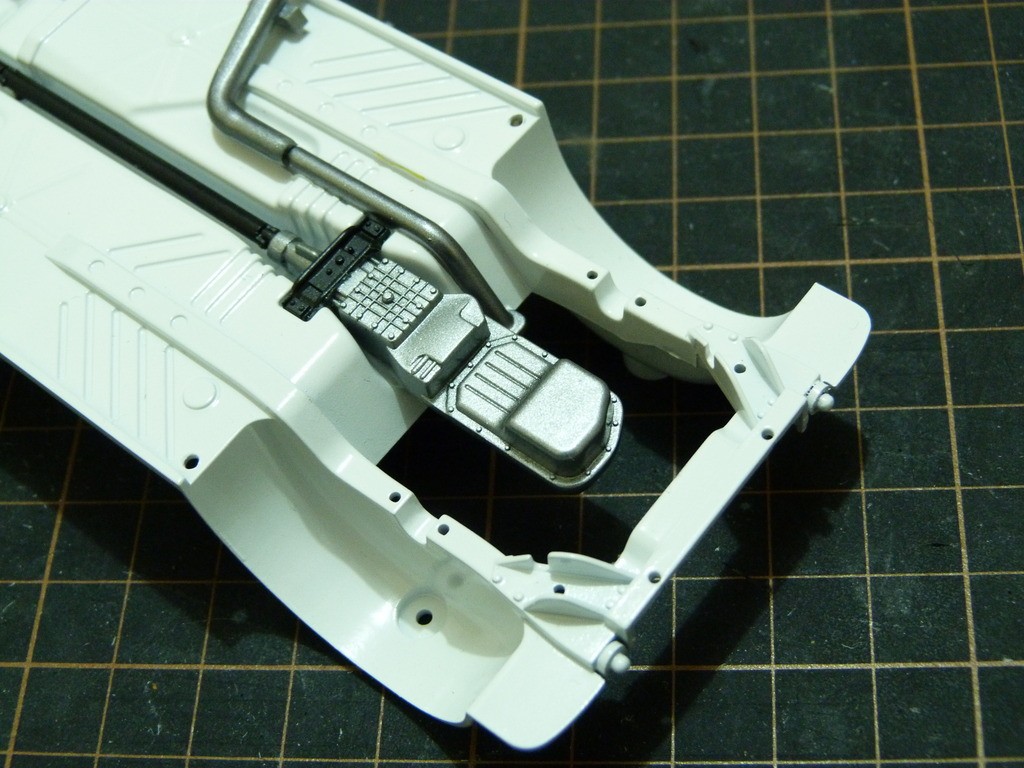 So I finally found some time to sit and think about the issue with the vent grill. My solution? build my own. Starting with 3 strips each of Evergreen strip #116 (.4mm x 3.2mm) and #107 (.25mm x 4mm) glued together with extra thin cement.  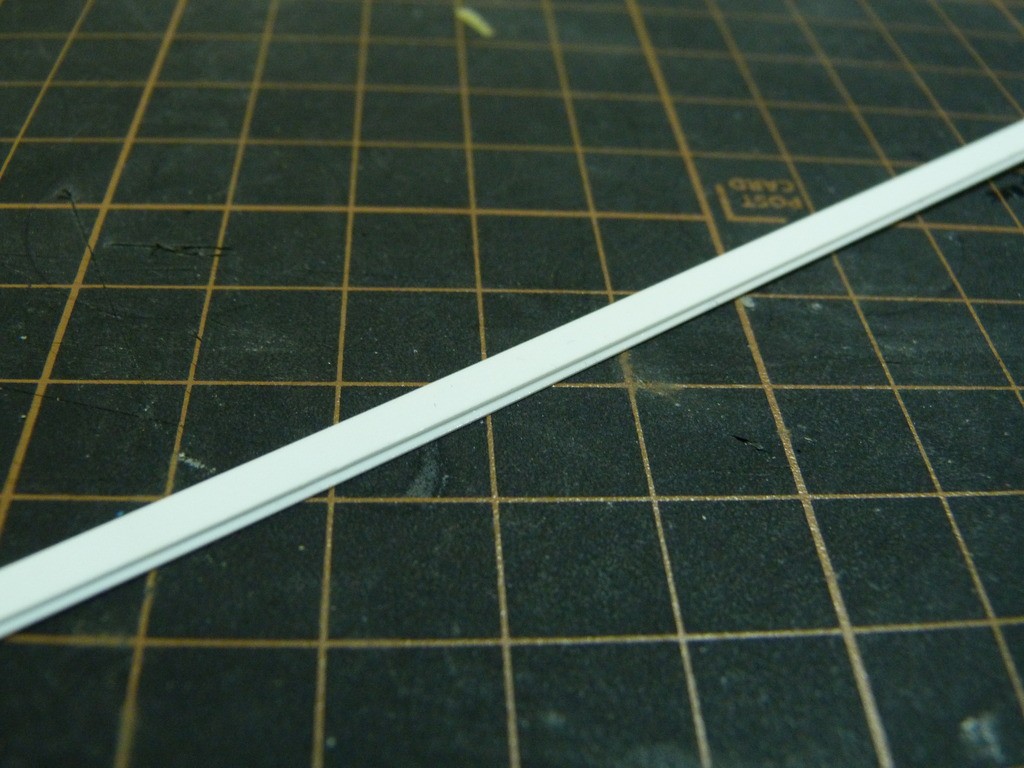 Chopped them to equal length. 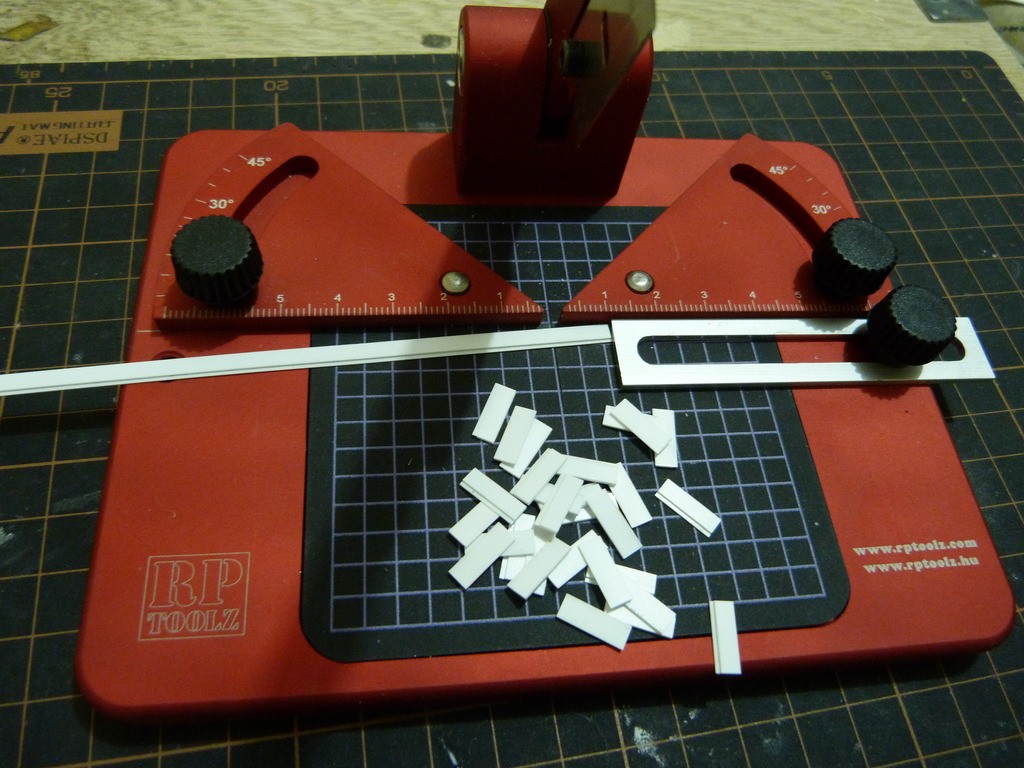 and started assembly 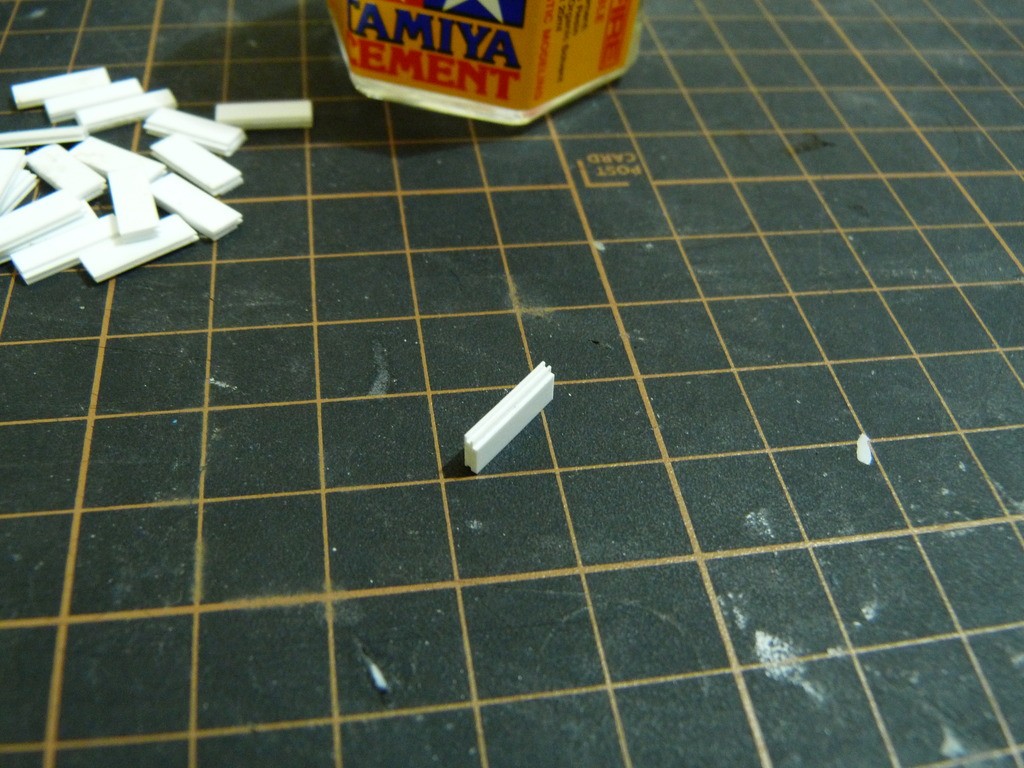 I made 3 pieces with a bit of scrap Evergreen sheet under the centre section to raise it above the two outer parts. 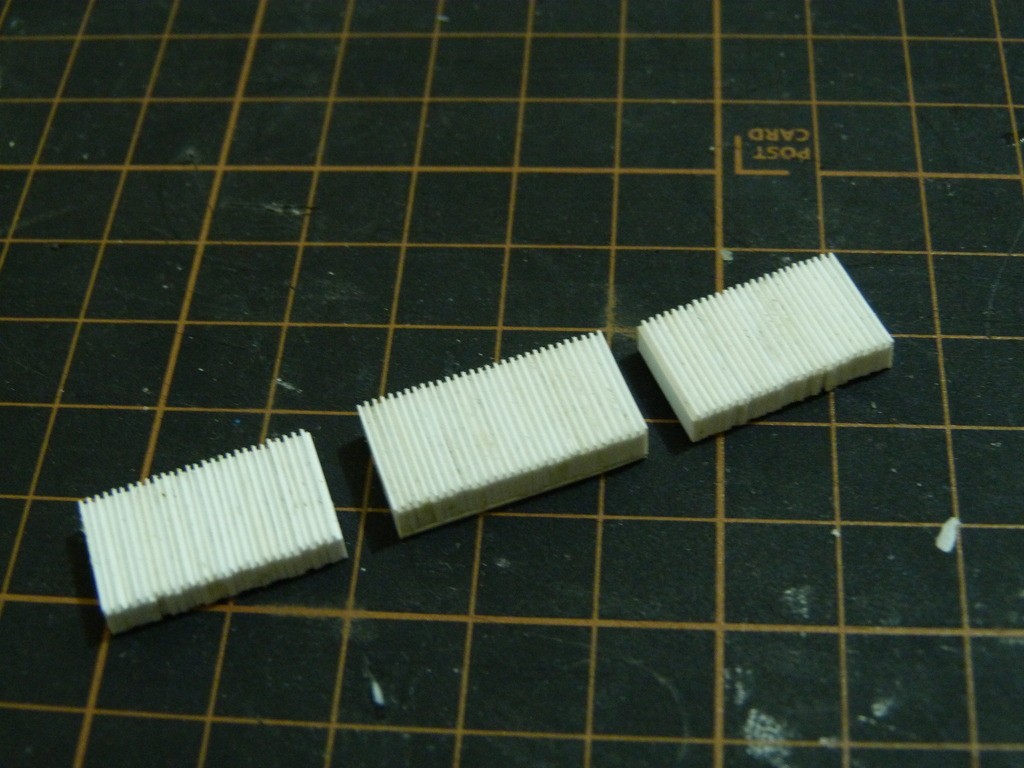 Past experience with this type of thing told me that it would be easier to make one big block and then cast that block in resin and modify the resin piece than it would have been to mess around with the plastic, so I glued those three pieces to a trusty old bit of evergreen sheet and make a mold from that. 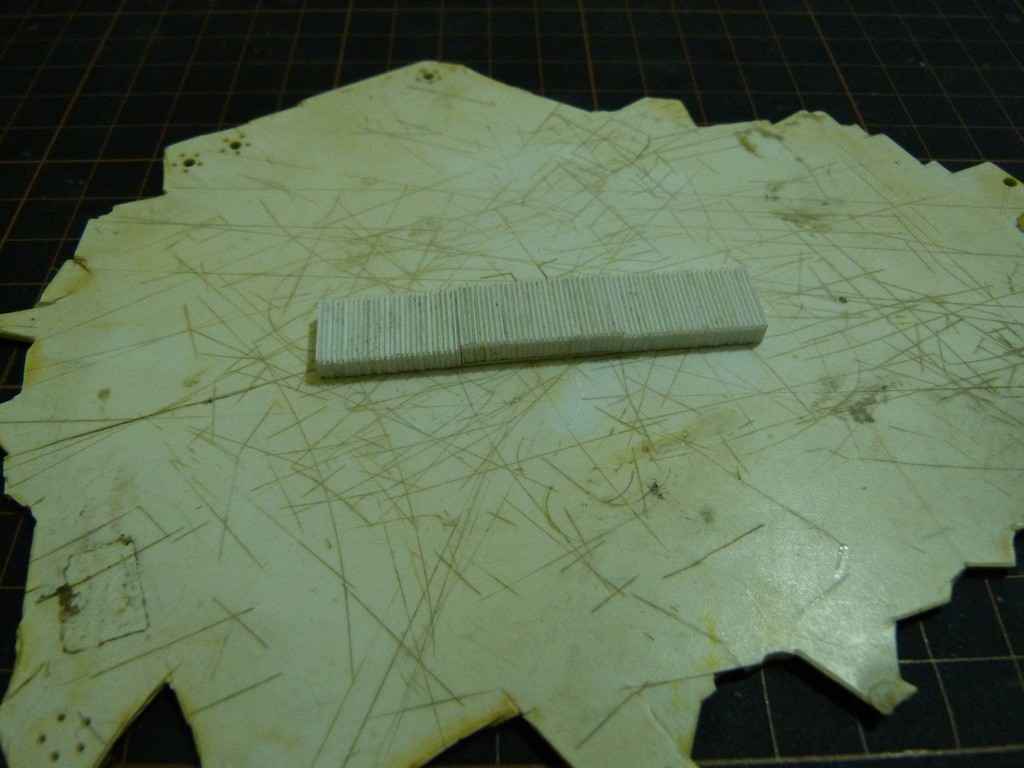 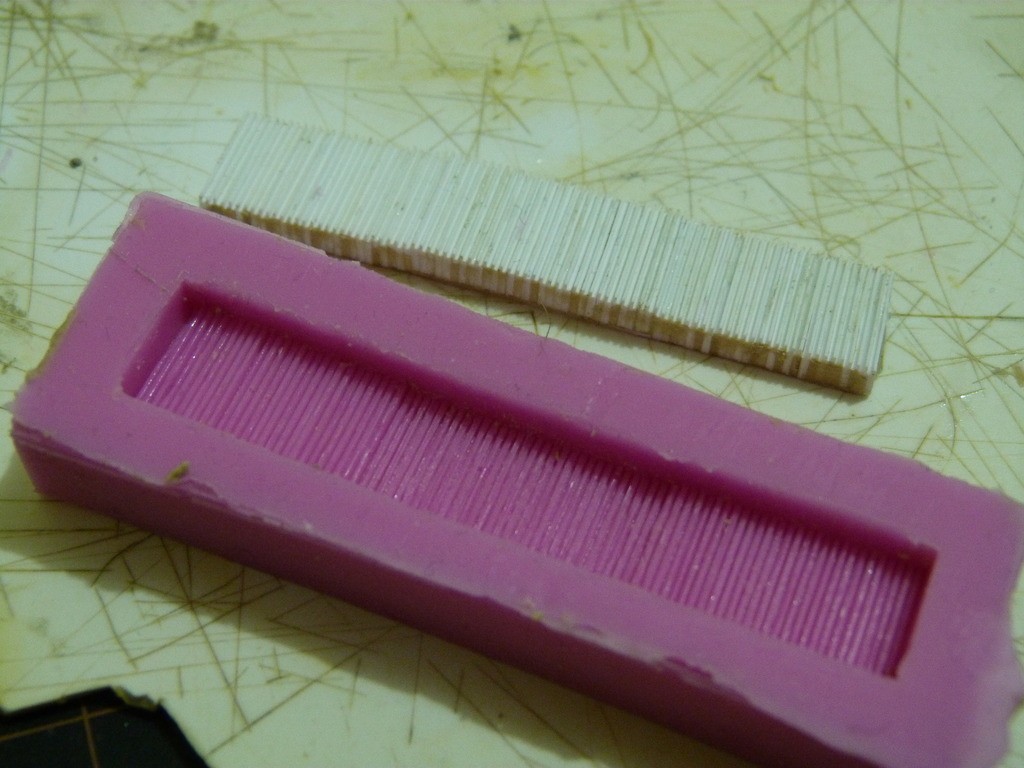 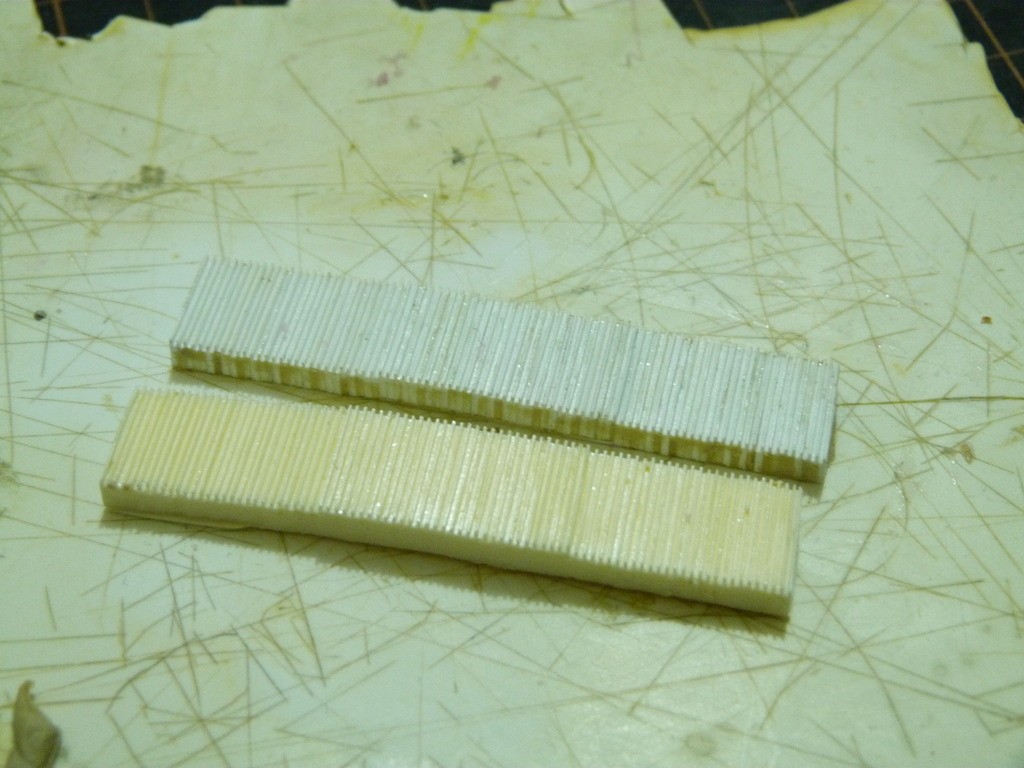 After much much cutting, grinding and sanding I got a result that I was happy with. 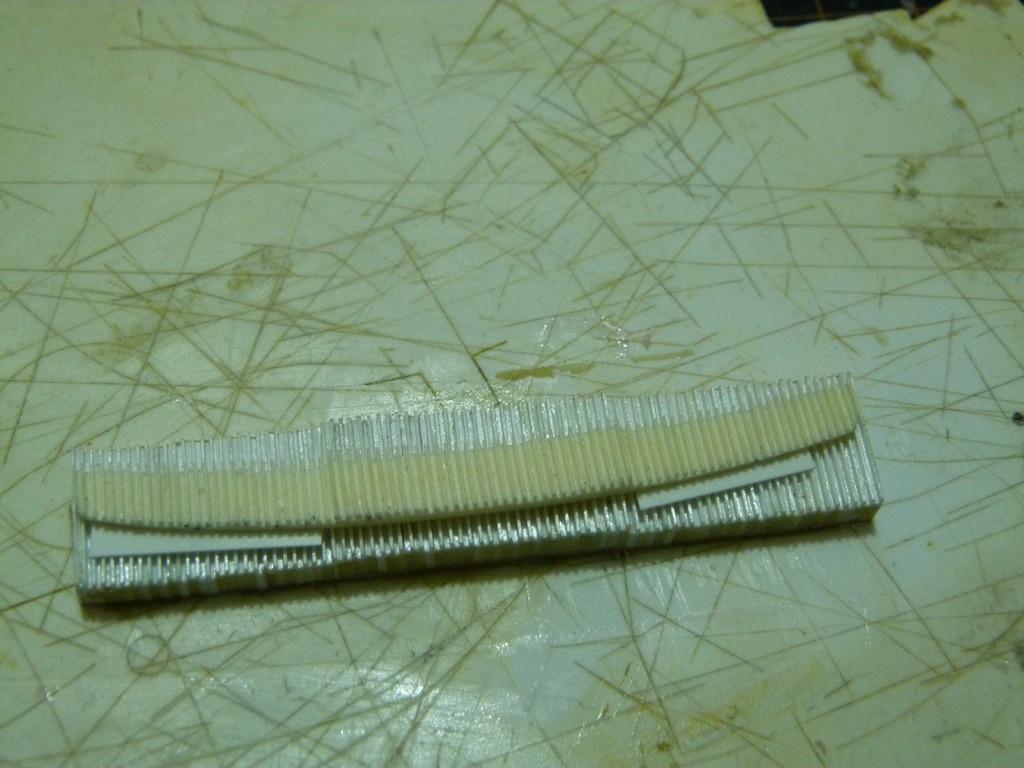 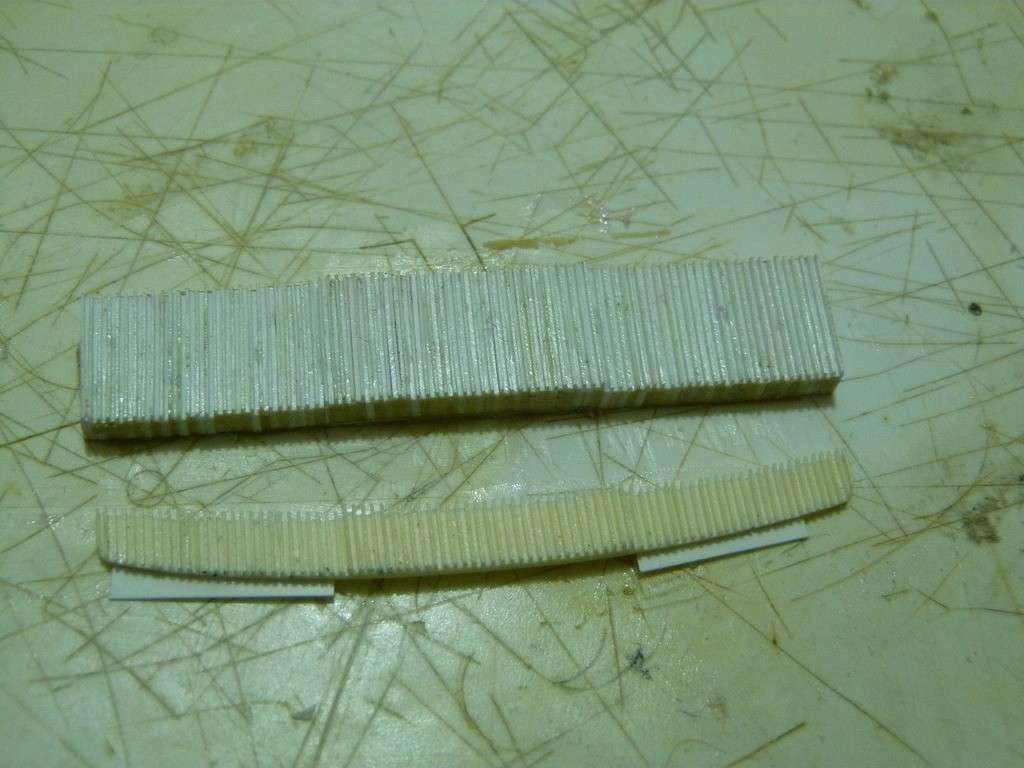 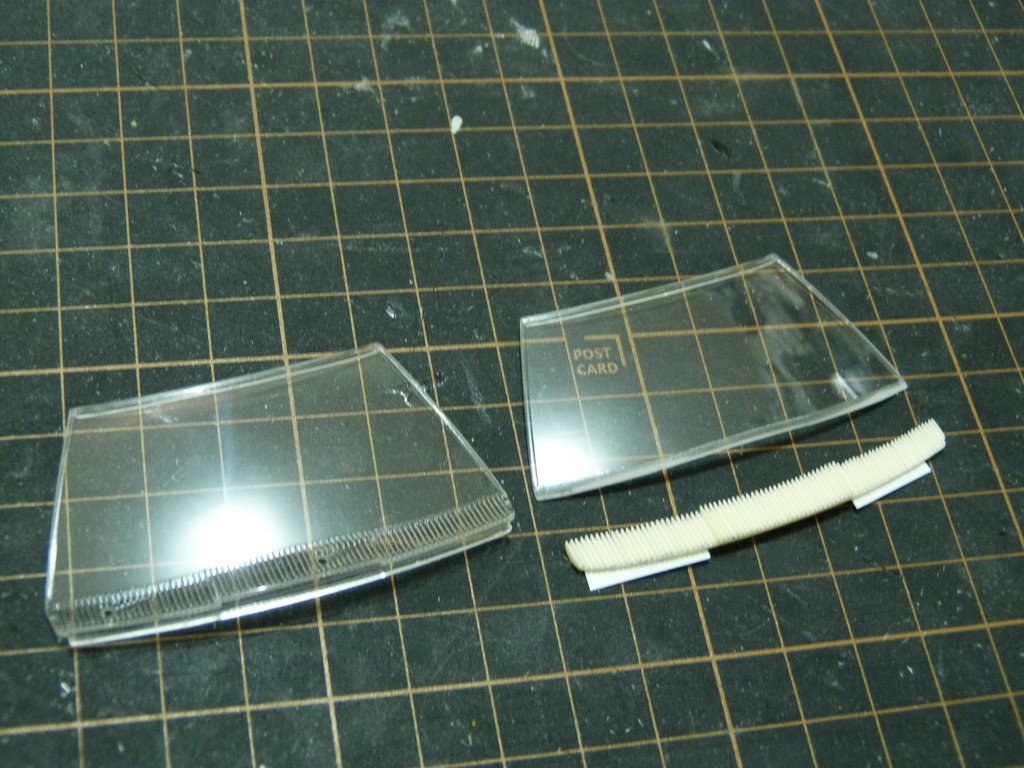 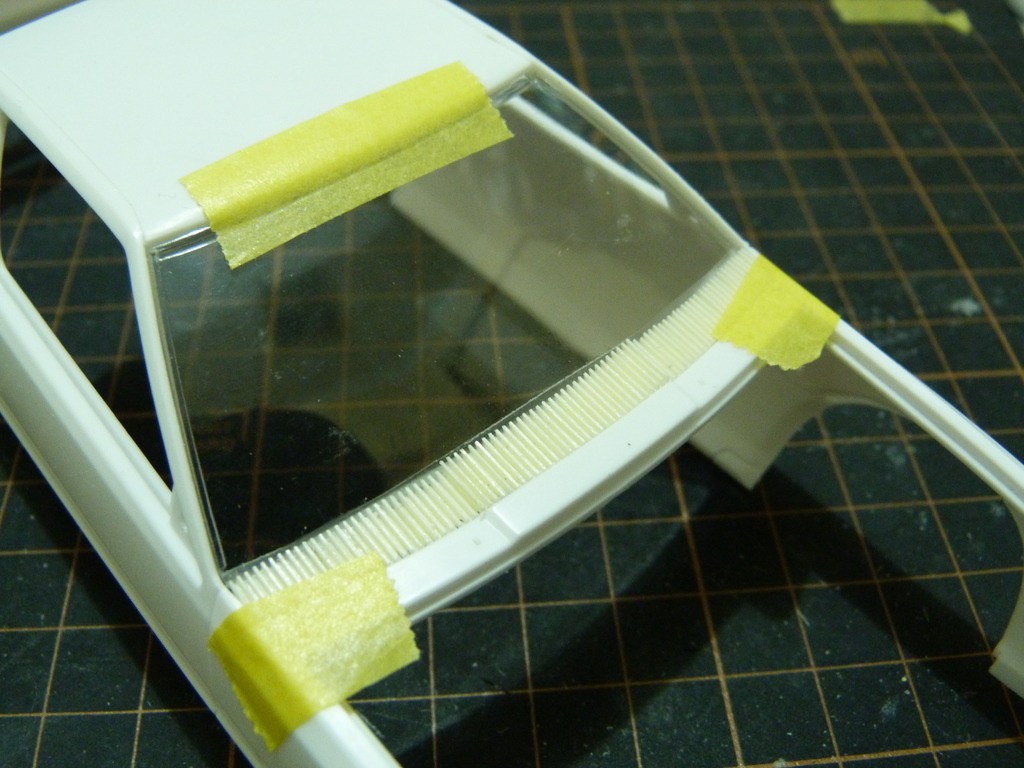 All that's left to do is cut out a recess for the wiper and it'll be done. And finally a heads up. Don't bother buying Zero Paints window masks as they are too small and are totally useless. I made a R32 Skyline last year and bought a Zero Paints window mask set for that too and it was also way undersized. I thought/hoped that it was a one off but the Starion one is the same so never again. 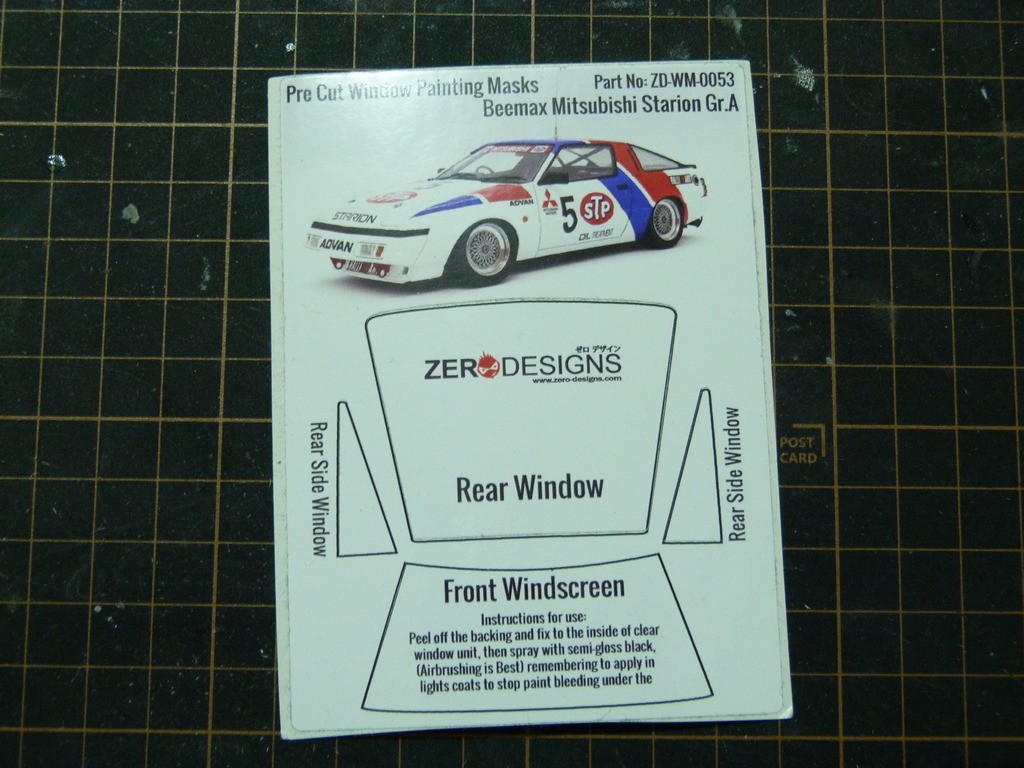 Thanks, Cheers and Happy New Year. ShawnS |
|
|
|
Post by afx on Jan 6, 2021 3:36:47 GMT -8
Paint work looks great Shawn as does the vent grill. Do you like your cutting tool jig? Looks like a nice one.
|
|
|
|
Post by Joel_W on Jan 6, 2021 13:56:46 GMT -8
Shawn,
A update well worth waiting for. The scratch built windshield vent is simply amazing. To bad about the no engine issue. The oil pan would have worked to give the impression of a full engine in the bay, but with the massive open space it just doesn't work all that well.
As for those paint masks, are they undersized if you cut along the outside of the black lines? In any event, I feel your pain as I've been burned many times with masks especially in my aircraft days.
I'm with JC on that cutter. I've got a Mr. Chopper 2 that's hardly useable as even I could make a better one, which I really need to do, or modify this one.
Joel
|
|
|
|
Post by ShawnS on Jan 6, 2021 21:43:23 GMT -8
Thanks guys,
The RP Toolz cutter is great. It's of solid metal construction so that means it's fairly sturdy and every time I use it I kick myself for not getting one sooner. Would recommend. As for the window masks, they are pre-cut peel and stick so cutting them larger isn't an option unfortunately.
Cheers ShawnS
|
|
|
|
Post by ShawnS on Mar 17, 2021 0:53:49 GMT -8
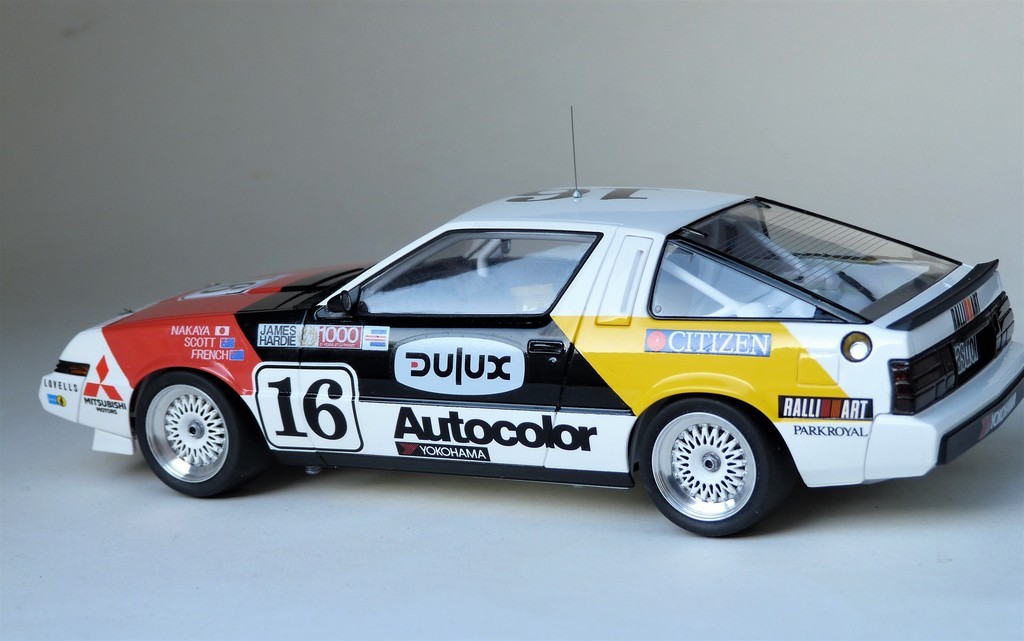
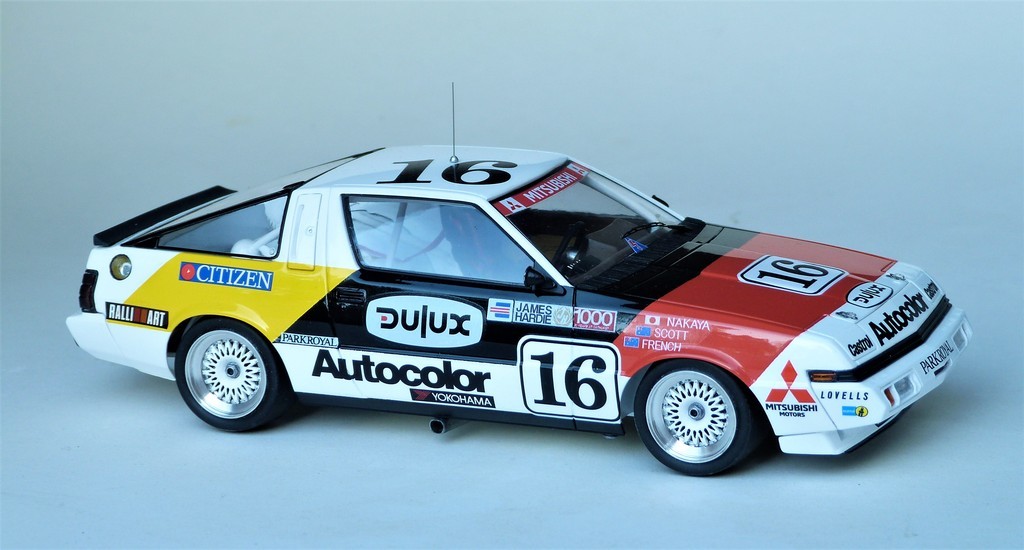
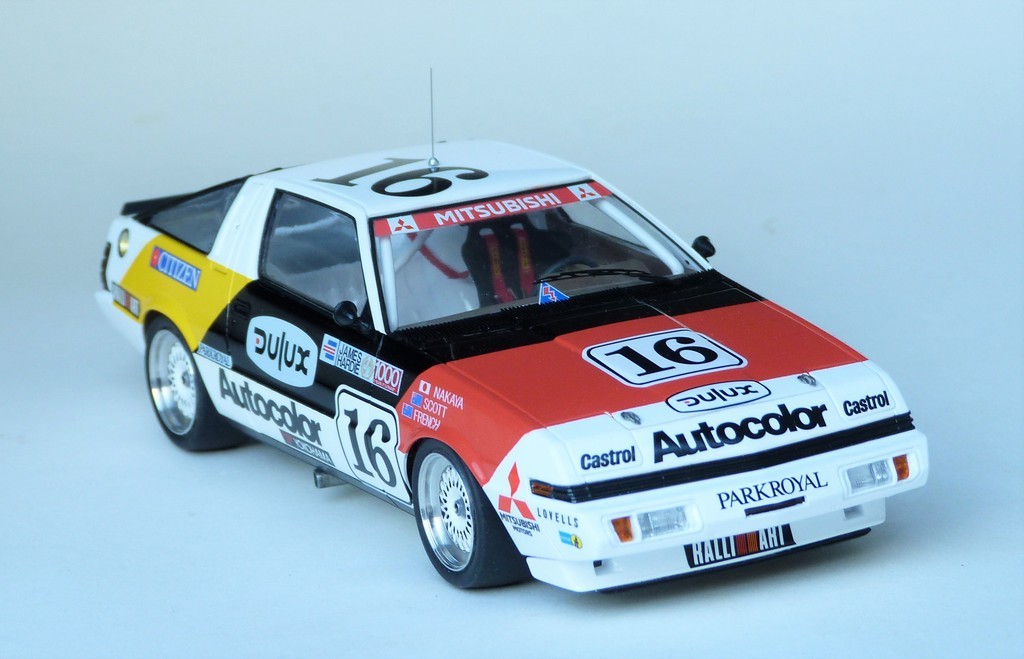
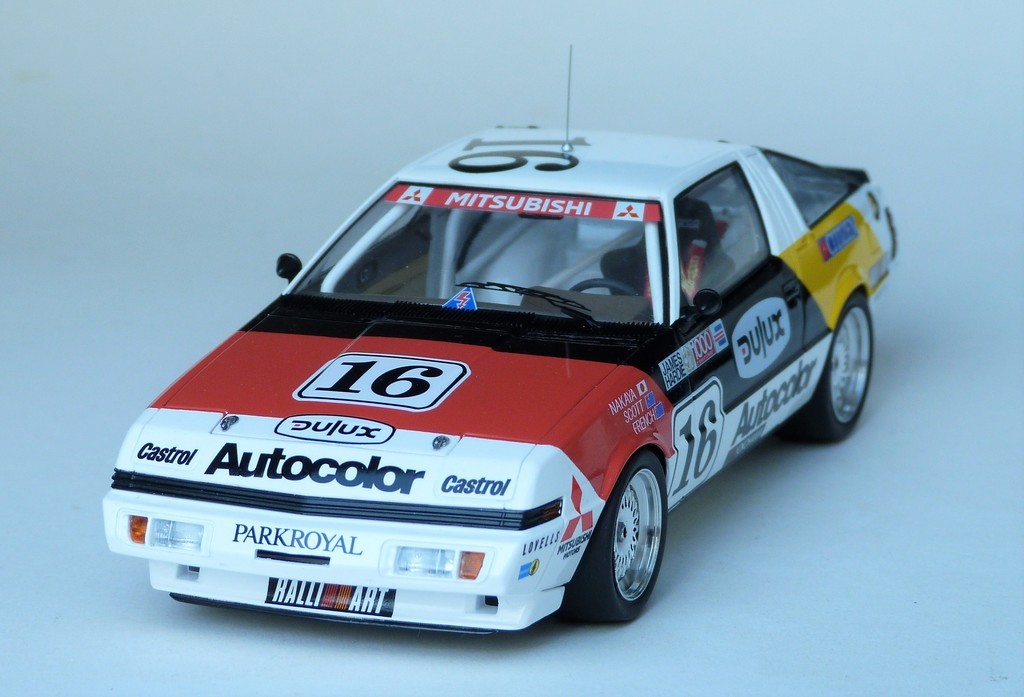
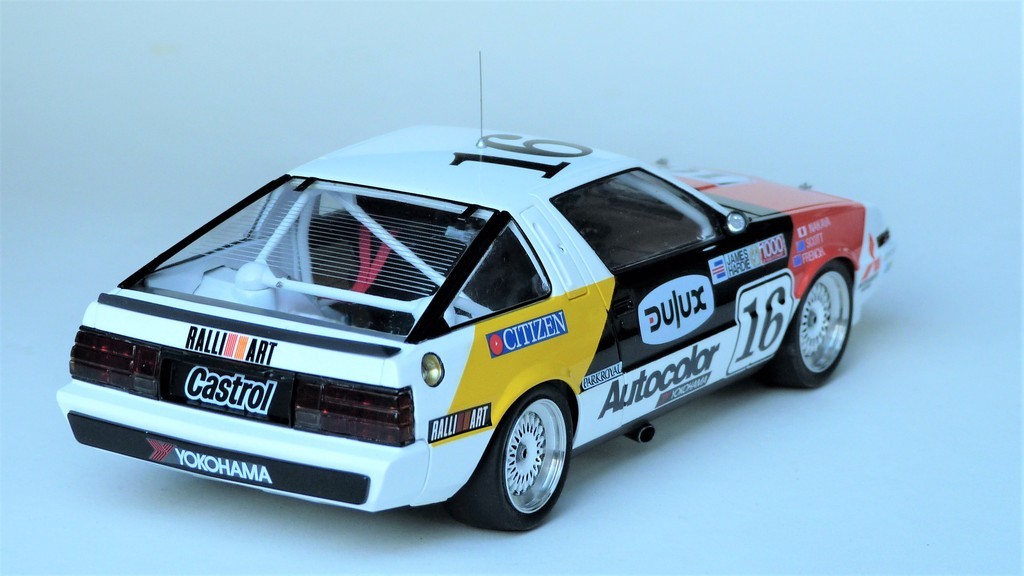
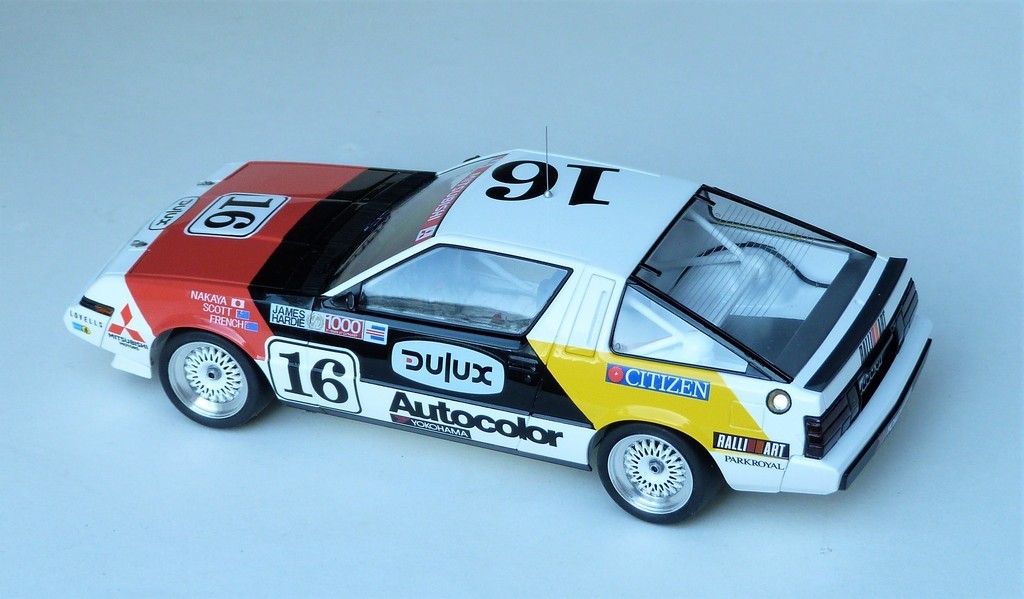
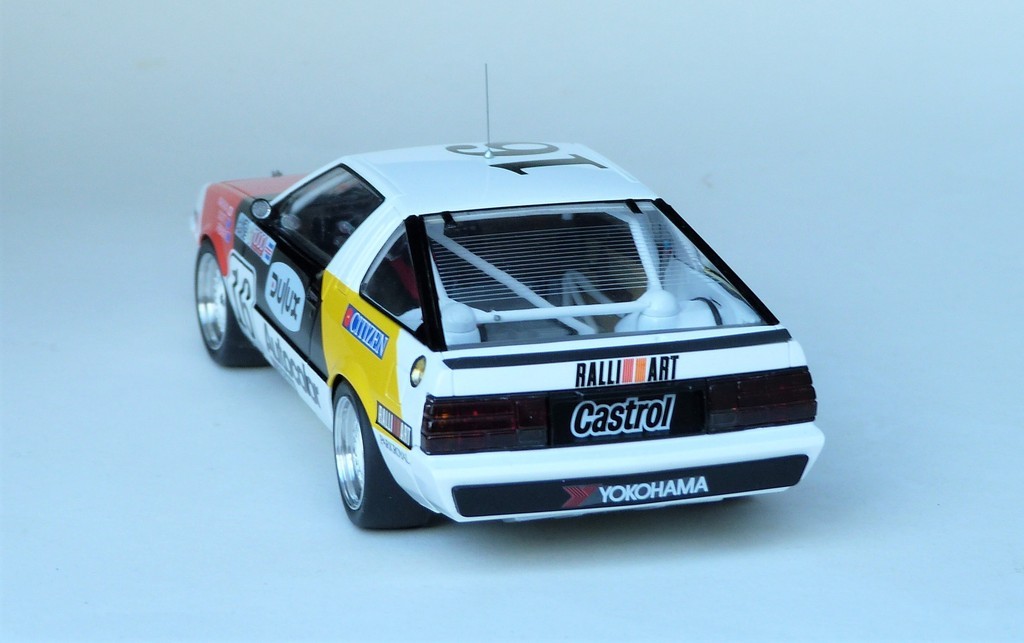
Hi everyone. Well it's finally finished.
The interiors of Group A touring cars aren't too complicated so it's easy to keep it simple. Air jack plumbing and basic wiring add easy detail as well as belts, a control box with toggles and a nice fire extinguisher to top it all off. The loose air jack hose that's pointing to the sky will connect to the inside of the B pillar.
I always keep the underside of my models basic without adding any extra items. I don't show off the bottom of my models so I don't prioritize spending too much extra time and effort for something that's not seen.
Thanks for joining me on this WIP. I have two more of these things to build in the future so now I know what I am in for.
Cheers ShawnS
|
|
|
|
Post by afx on Mar 17, 2021 2:25:34 GMT -8
Beautiful work Shawn.
|
|
|
|
Post by Ben_B on Mar 17, 2021 3:43:08 GMT -8
That turned out great! I've always liked the Starion, with the '80s angles and pop-up headlights.
Ben
|
|
|
|
Post by tatocorvette on Mar 17, 2021 4:49:48 GMT -8
What a nice job! It looks beautiful.
That vent grille is a masterful solution.
I always liked these cars back in the day.
Thanks,
Ismael
|
|
|
|
Post by Joel_W on Mar 17, 2021 6:23:36 GMT -8
Shawn,
Kudos on a great build for sure. the final set of pictures really shows off all the extra effort you put into the build.
joel
|
|


 [/URL
[/URL