|
|
Post by pg265 on Mar 8, 2021 14:36:31 GMT -8
Good evening, Thank you very much Mates! And thanks a lot for the stunning video: what a RRROOOOAAAARRING BEAUTY!!! @joel: the underside of the car is also covered by the body... Well, otherwise it is progressing. Slowly due to the parts to be prepared, painted, and masking to protect the parts treated by oxidation. The ignition is done and set up; I didn’t forget to paint the spark plugs porcelain in white.   The clutch assembled, painted and coupled to the engine   The front axle is partially assembled, but without the leaf springs for the moment. 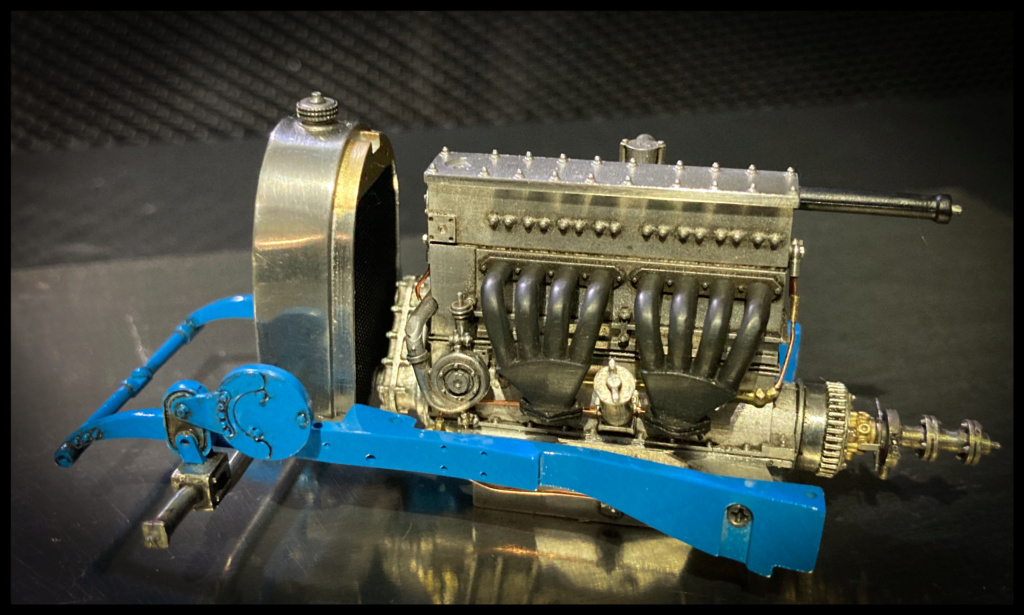 The radiator is almost finished: It's a BUGATTI! 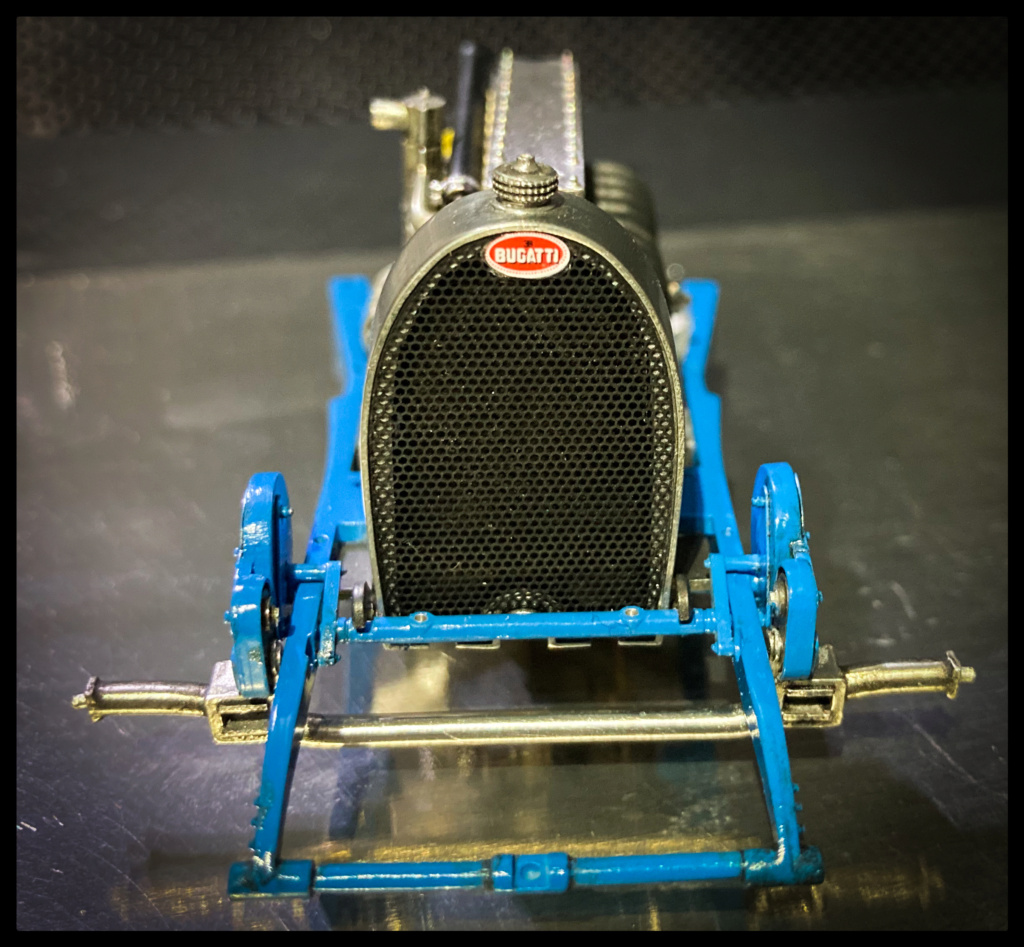 I placed a foam insert inside, painted black with gouache. The grilles are primed and spray painted in "Dashboard" black, decanted with a bomb. The stone guard is first painted white and masked to receive its layer of black, then held onto the radiator by the beautiful cap.  Finally (Phew! ...) the two chassis parts are twinned.   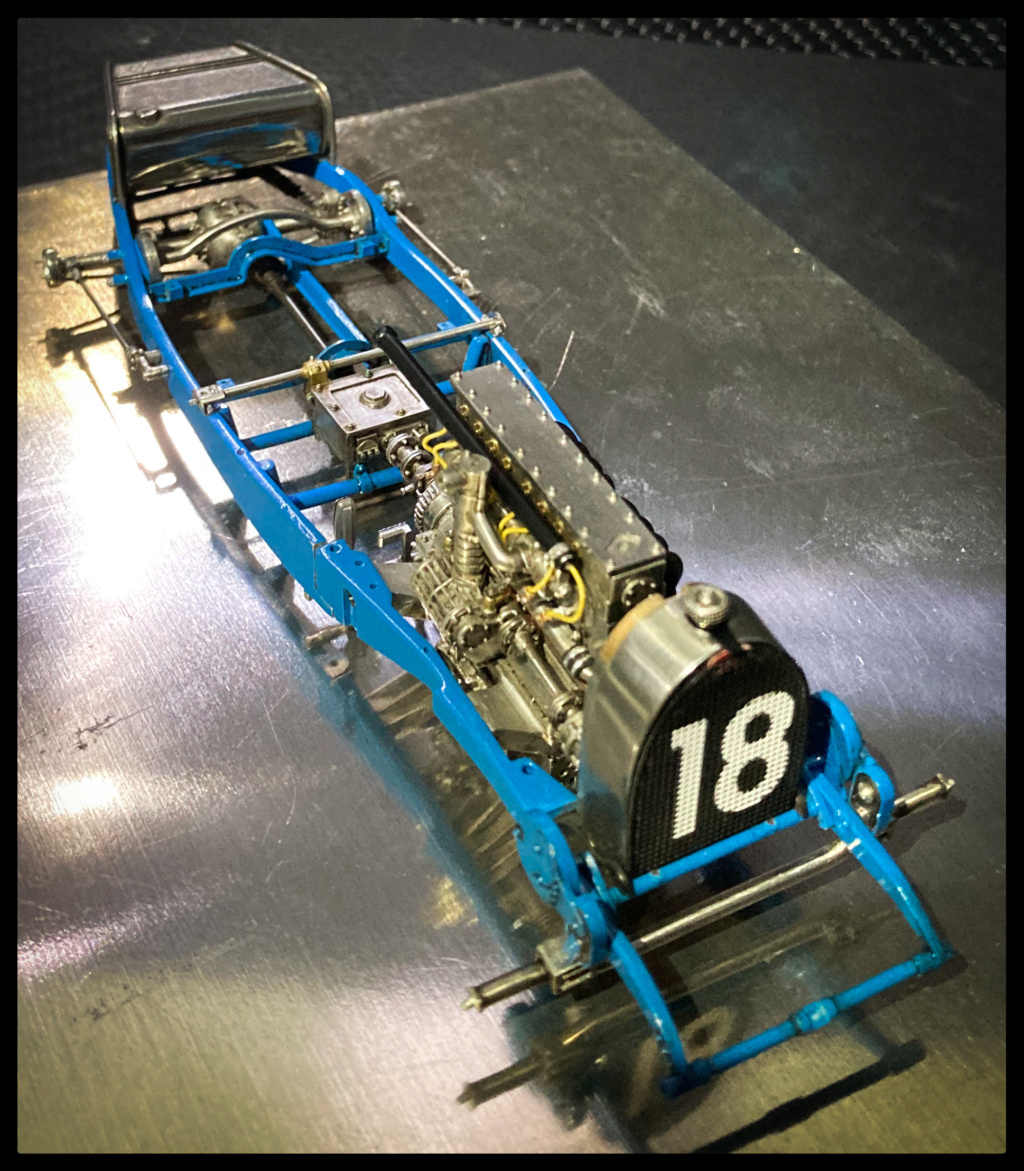  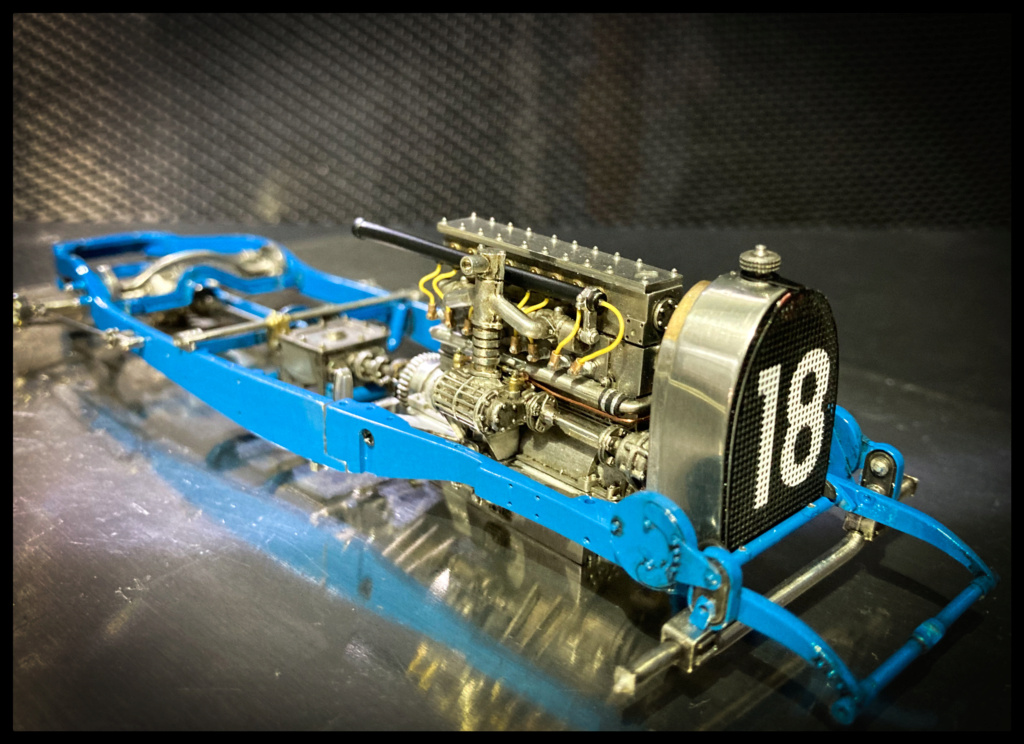 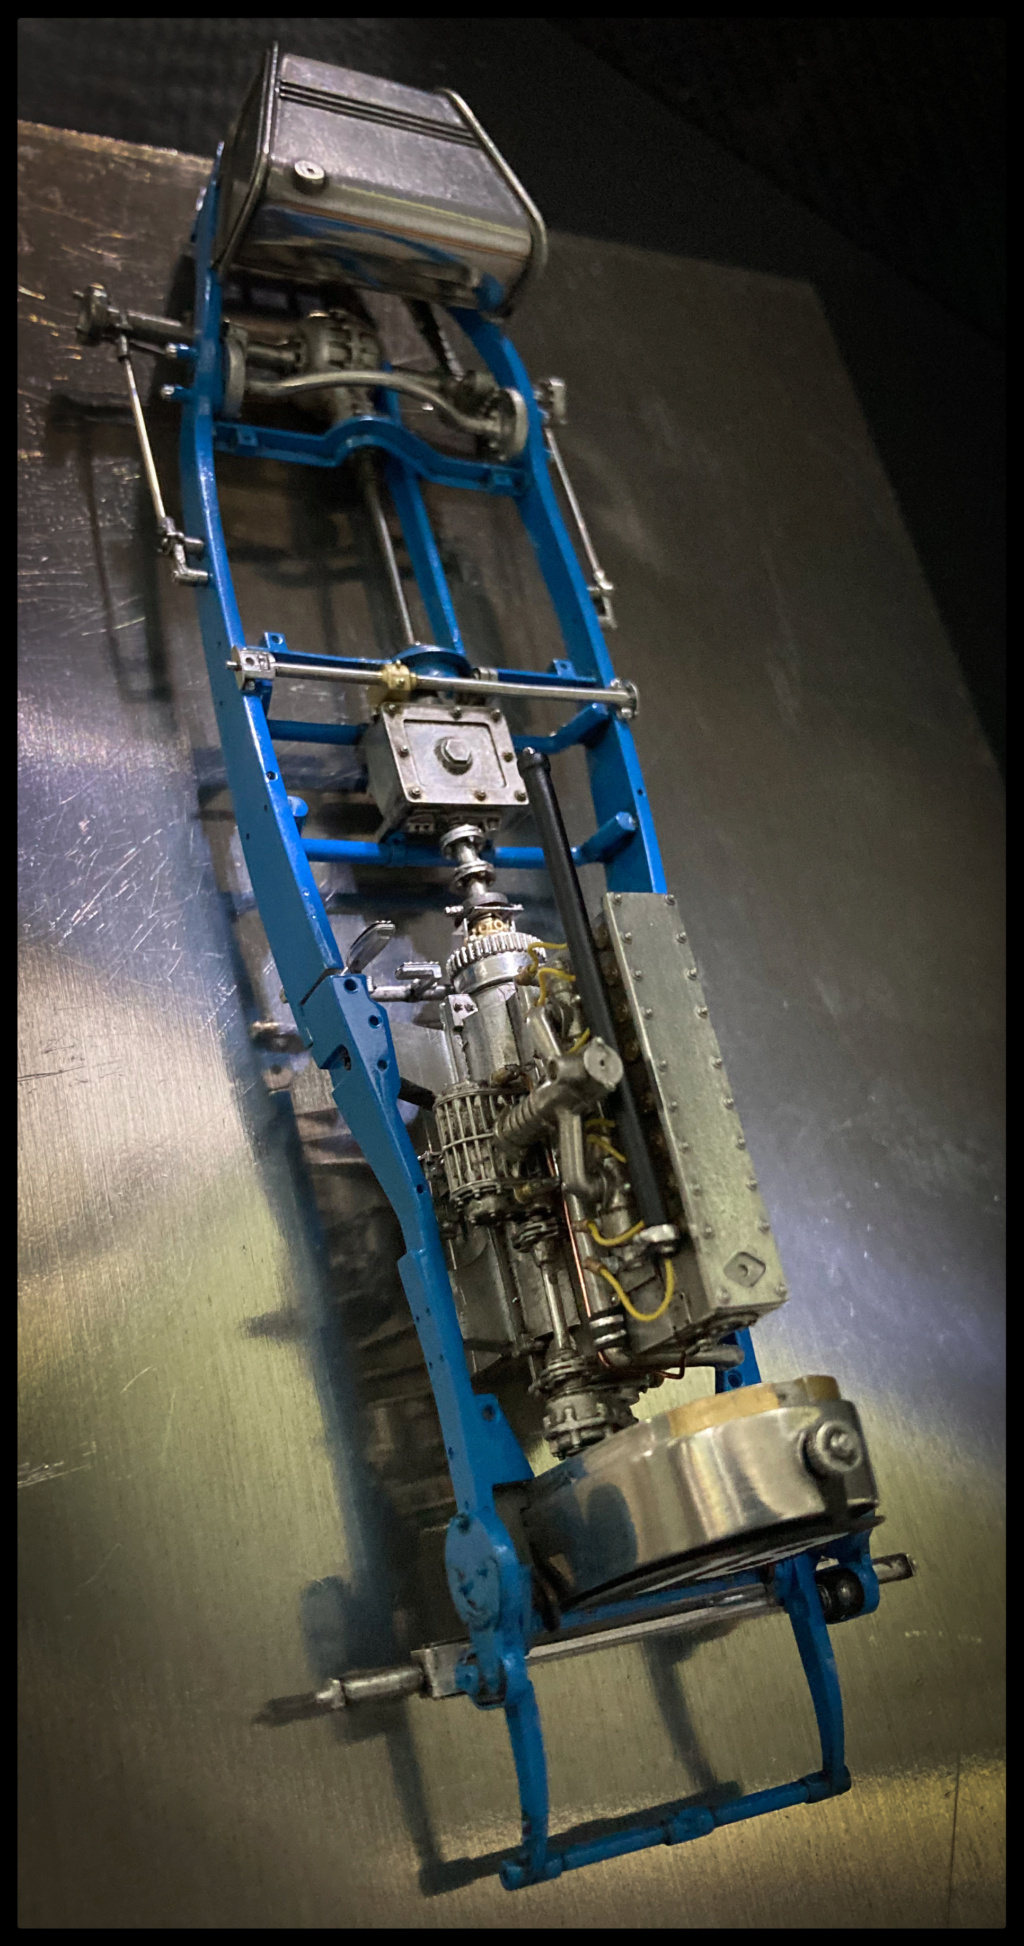 Voilà. Pascal |
|
|
|
Post by clowncar on Mar 8, 2021 15:52:16 GMT -8
"The grilles are primed and spray painted in "Dashboard" black, decanted with a bomb."
On behalf of a fellow francophone, tolerate me, please. "Decanted with a bomb" does not imply roadside IED painting techniques. It means the paint came out of a rattlecan and got re-directed. "Une bombe" is a spray-can in French-from-France French. Throw one into a campfire, and immediately understand.
Monsieur Pascal: Your work is exquisite.
|
|
|
|
Post by pg265 on Mar 8, 2021 16:06:58 GMT -8
You’re right!!
This is the automatic translator...
I should have reread!
Pascal
|
|
|
|
Post by clowncar on Mar 8, 2021 16:18:05 GMT -8
Don't worry about the translation robot. Just please keep showing us your progress with this arcane agricultural vehicle.
We have you.
|
|
|
|
Post by arcticwolf on Mar 8, 2021 20:23:30 GMT -8
You’re right!! This is the automatic translator... I should have reread! Pascal Don't worry mate, I understood you.  |
|
|
|
Post by Joel_W on Mar 9, 2021 7:00:45 GMT -8
Pascal,
Your Translated English is still better then mine most of the time.
As I've come to expect, your preparation of every part, and added details just elevates this build to even higher levels. Your detailing of the radiator assembly is just simply amazing.
joel
|
|
|
|
Post by pg265 on Mar 9, 2021 12:02:02 GMT -8
Good evening, Thank you!  The funny thing is that it was the first time I used the translator... Too lazy!  In a playful mood, (and completely under the spell of these little gems !!) I decided to use castle nuts like on the Tipo 500. The front suspension is complete and, like the rear, composed of blades to be assembled one by one and to be crimped. The assembly of the components of the front axle is extremely precise: a treat!     Woilà woilà. Pascal |
|
|
|
Post by Joel_W on Mar 10, 2021 7:06:53 GMT -8
Pascal,
I'm just speechless! Those nuts are simply amazing, especially when one considers that they're 1/20 scale.
joel
|
|
|
|
Post by pg265 on Mar 14, 2021 13:51:25 GMT -8
Good evening, Thank you very much Joel! The Bugatti has just taken an important step with the painting of the main body parts: Masking, primer, paint and varnish. The gloss of the varnish is deliberately moderate.  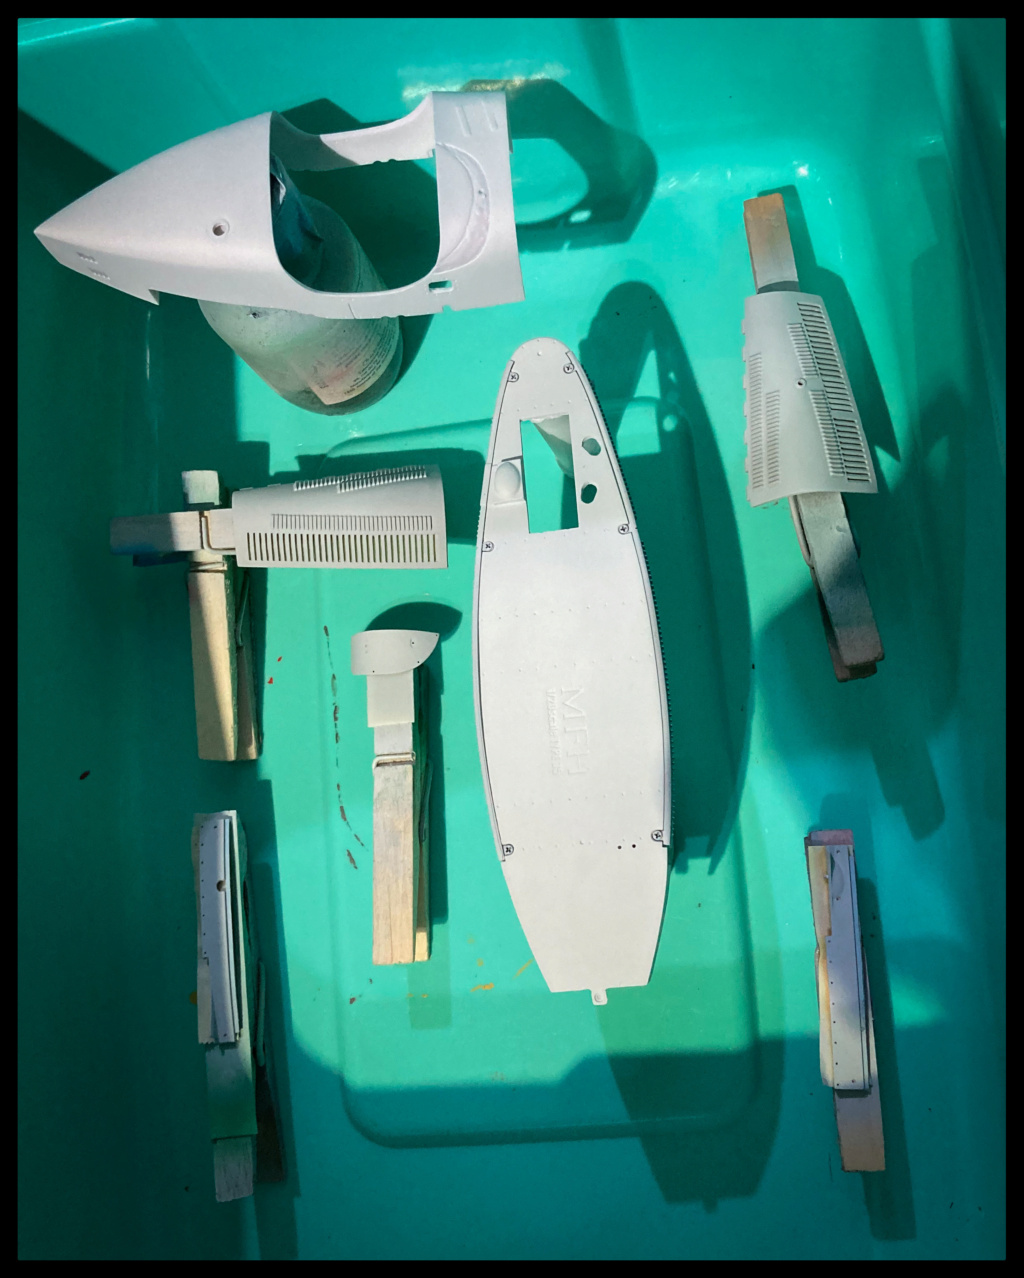   I then looked at the dashboard and the firewall, here they are almost finished. Windows have been added to the dials.    Pascal |
|
|
|
Post by Joel_W on Mar 15, 2021 4:30:08 GMT -8
Pascal,
As always your work is top quality professional standard or better.
The French Blue paint on the main body shell is absolutely flawless in application and finish as I've come to expect. Just out of curiosity, I've been going back and forth between a .3mm and .5mm needle setup on my Grex AB's for primer, color, and gloss coats on 1/20-1/24 scale builds, and still can't decide on what's the best setup for those scales. Since you've been building 1/20 scale kits, do you use one standard setup for all applications, or change the setup and/or air brush as per application?
Excellent detail work on the dash and instruments. I'm assuming that the ignition distributor is that unit in the middle of the dash? Never seen anything like that before. Do you know the reason for it being there?
joel
|
|
|
|
Post by pg265 on Mar 15, 2021 11:38:15 GMT -8
Good evening, Thank you so much once again Joel for following the build and being involved with your comments and questions. I really appreciate!  Regarding the nozzle size, I’d say both are OK. As a bad boy (yes I am!) I love airbrushes and have a few... I mainly like “trigger type” and “Flat pattern”. I both use 0.3 and 0.5 for 1/20 and bigger scales. The 0.3 is maybe more appropriate for 1/20-24... The most important with 0.5 nozzle is that you need to be very precise on the trigger pressure to avoid thick layers. The big advantage of the flat pattern is that all the paint hits the model with the same quantity. The “classic” round airbrush nozzle spray more in the middle, less on the periphery with more overspray: the flat pattern is far more efficient for finish coats and flat areas like those we have on our model car kits. 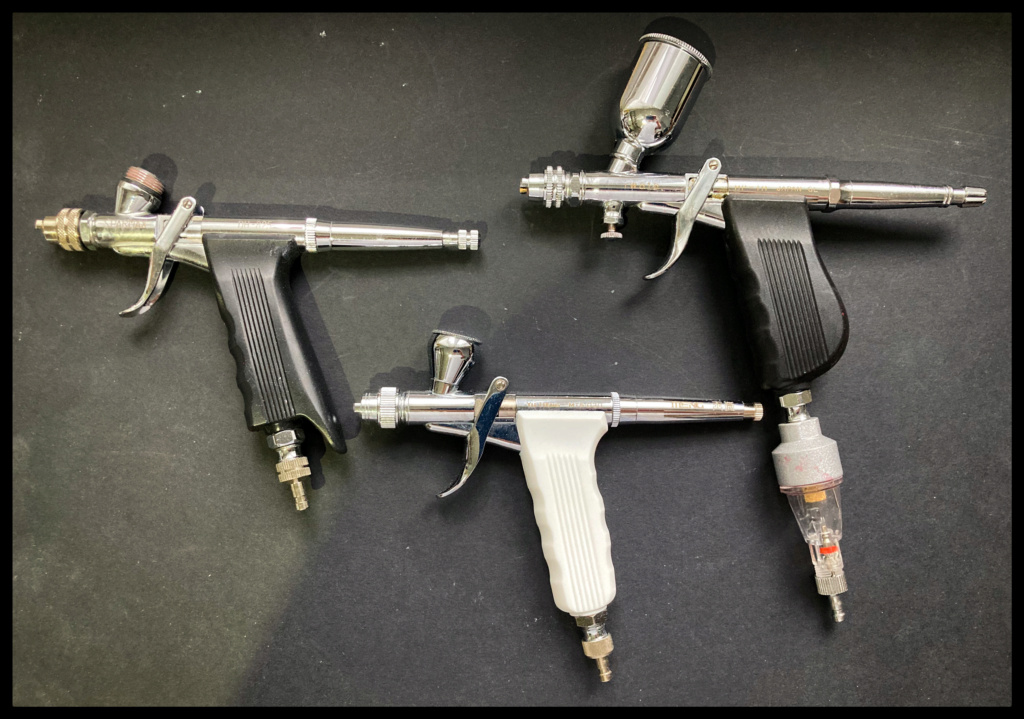 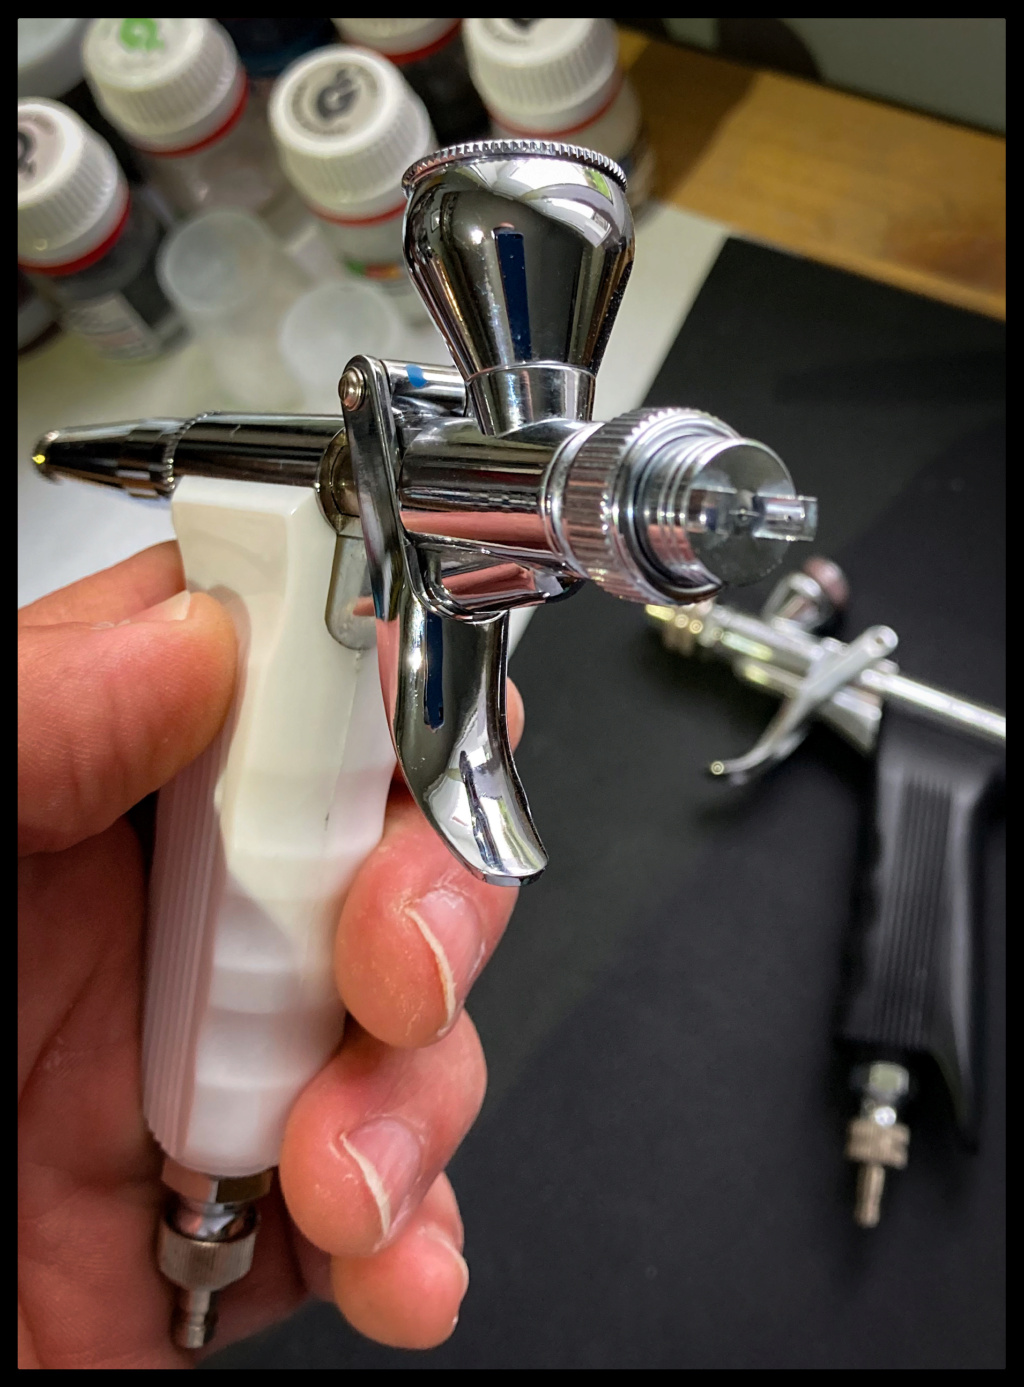  The white one (Meng) is 0.3, the 2 others (Iwata & Sparmax) 0.5. The 1/20 Lotus 43 and Eagle Weslake were primed, painted and clear coated with the Meng 0.3. The 1/20 Ferrari 312F1 67, Ferrari Tipo 500 and McLaren M7A with both the HP-TH and Sparmax. The 1/12 Monaco GP Ferrari 312F1 67 with the 3 and others... This 1/24 312P was only painted using the 0.5?Iwata HP-TH. 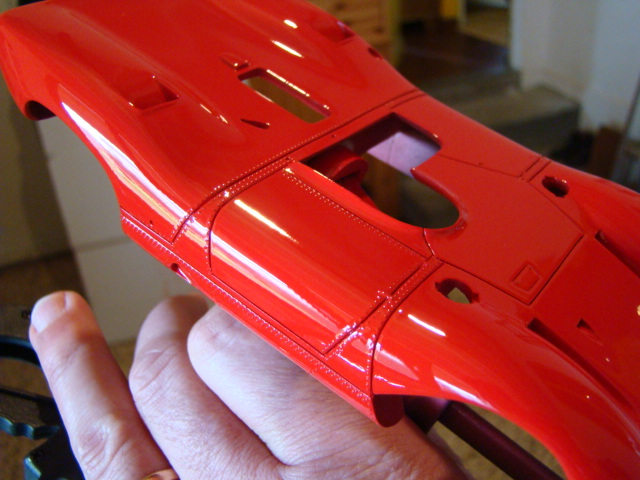 So, 0.5 or 0.3?... Both! It only depends on how you feel it at the moment! I hope my answer is ok and understandable... Regarding the big ignition device in the center of the dashboard, this is the Magneto Joel. It provides electric energy to the spark plugs using the engine movement. It’s now mainly (only) used on aircrafts, 2 per engine, and it’s one of the main items to test before take off! We have to test the left, then right to check if the ignition cuts on one of them, before to put back the selector on “Both” and enjoy the flight. I have to abort a flight few weeks ago due to a failure on one of the magneto during the preflight engine check list. The reason why it’s in the center of the dashboard is due to the fact it’s aligned with the engine and because the handle not yet installed Allie the driver to adjust the ignition advance. Sorry for being so long... More very soon! Pascal |
|
|
|
Post by tatocorvette on Mar 15, 2021 13:07:12 GMT -8
Hello,
I ran out of superlatives, but I really enjoy every update. This project is inspiring. What paint are you using for the French blue?
Thanks,
Ismael
|
|
|
|
Post by pg265 on Mar 15, 2021 14:26:30 GMT -8
Hello, I ran out of superlatives, but I really enjoy every update. This project is inspiring. What paint are you using for the French blue? Thanks, Ismael Thank you Ismael! I use primer, paint and clear coats from Gravity Colors (Spain) since the creation of the company in 2013. The blue is the Bugatti Strong Blue Pascal |
|
|
|
Post by tatocorvette on Mar 15, 2021 17:23:51 GMT -8
Love the color. I am using Mediterranean blue on this and I think it will be a nice color for a Bugatti or a Talbot T26C. 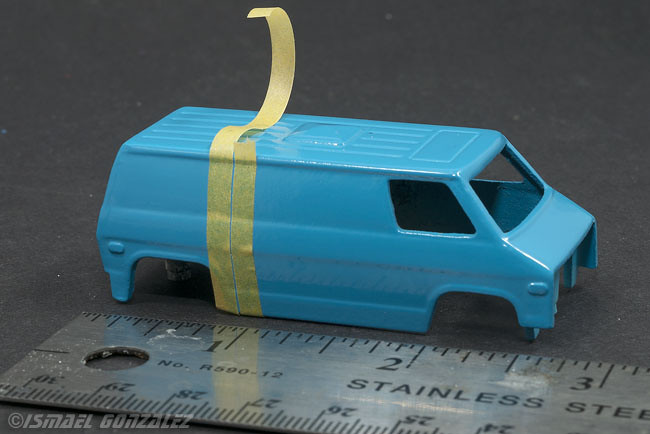 Thanks, Ismael |
|
|
|
Post by pg265 on Mar 16, 2021 13:16:48 GMT -8
Good evening, Yep Ismael, Great blue Still progressing. Added some details on the engine and its bulkhead, as well as the cockpit side with a little plumbing. The flat bottom and the lower parts of the hull are now assembled, as well as the central part. This set is already starting to weigh a bit...  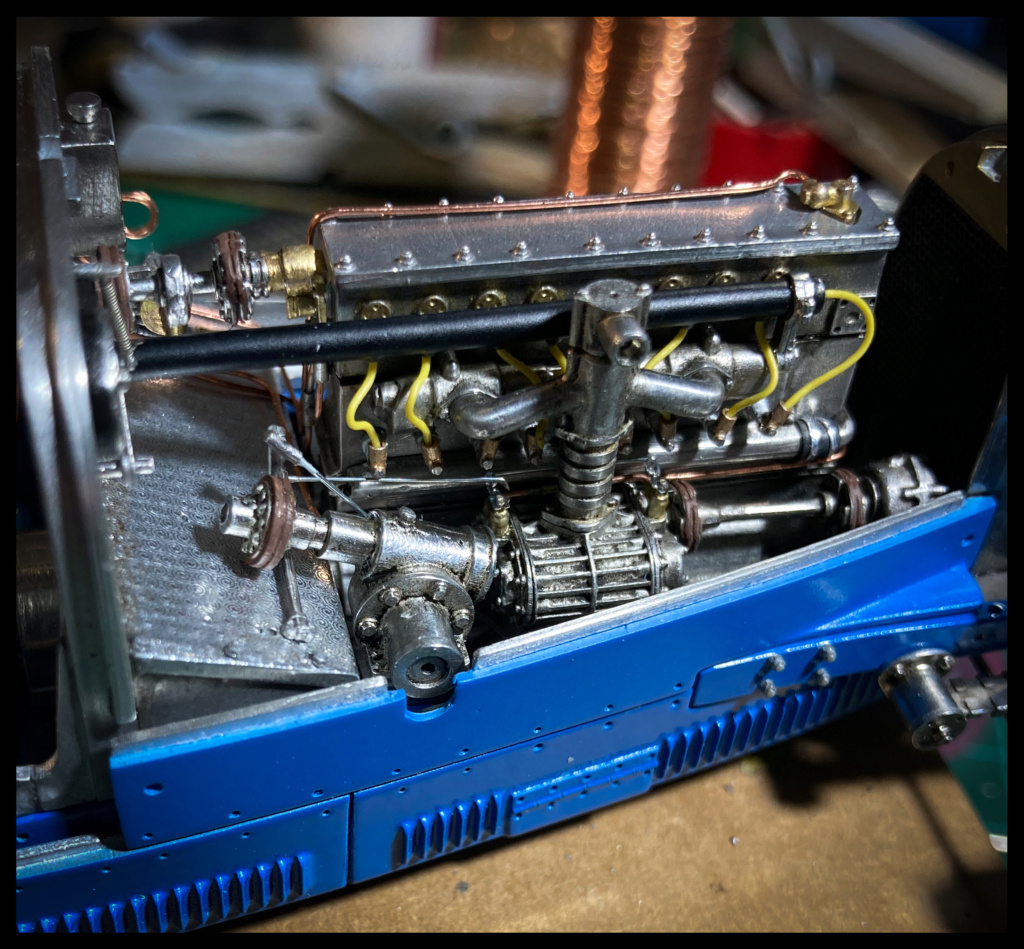    Cet ensemble commence d’ores et déjà à peser un certains poids. Gifts day.  Pascal |
|


