|
|
Post by Joel_W on May 3, 2021 12:36:43 GMT -8
sylphide
Just saw your build, and I'm super impressed. I've got the Camaro in my stash along with two more Mustangs, so I'll be following your build and detailing with great interest. Lew, I'm going be checking out your reference pics too, as one just can't have enough references these days.
I do have one Camaro Slixx decal sheet for my build, but for the life I me, I can't remember which one. Talk about old age and starting to loose one's memory.
joel
|
|
|
|
Post by sylphide on May 13, 2021 15:43:12 GMT -8
After leaving tape marks and burning through the paint wetsanding on the first try i stripped it and masked it again using plastic wrap and it worked much more nicely and saved on some tape. Got the decals on and gonna wait a few days before clearing again. I've discovered though that I really dont like Tamiya Mark fit strong. Ive tried it on 2 different brands now, one of them cartograf, and it just wrinkled the edges and never laid flat so halfway through I went back to Walthers and it did the trick. Now I'm only hoping my rear bumper mounting is gonna work.
|
|
|
|
Post by Joel_W on May 15, 2021 6:56:25 GMT -8
Sylphide,
I checked my Slixx decals, and of course I've got the same decal sheet for that build. Just have to live long enough to get it done as my stash should be shrinking, it's growing once again.
Just an outstanding decal application. I've had issues with the Tamiya decal setting solutions when I gave them a test run, and they got tossed as not up to my current standards. What I use is a time tested method of a master modeler: Paul Budzik who I 1st met back in the 1970s. His decal method only requires a smooth surface, no clear coat needed that just fills in the smaller recessed panel lines. Micro Set (blue bottle), Micro Sol (red bottle), and Solvaset. Make sure that you give each solution time to do it's thing. The method is absolutely fool proof. Paul has a full video on decal application on his Modeling site which is very well done.
joel
|
|
|
|
Post by sylphide on May 22, 2021 11:22:01 GMT -8
Got this beast for the most part done, had the rear panel setup so it would be perfectly flush however that didnt end up working as then it couldnt be put on once the rear bumper was attached so that was a slight bummer. However im really happy with the stance as I did extensive mockup to make sure it sat right because i know sometimes the front looks like a monster truck as well as making the rear bumper work out like how it is on the real car. This car was more of an exercise for me on what does and doesn't work so I'm ok with it not being perfect or every tiny detail added because I'm not that good yet lol.
|
|
|
|
Post by tatocorvette on May 22, 2021 17:15:24 GMT -8
WOW! That last picture sold it!
That's a great job!
Thanks,
Ismael
|
|
|
|
Post by afx on May 23, 2021 2:59:01 GMT -8
Very nice.
|
|
|
|
Post by Chris K. Hale on May 23, 2021 7:22:31 GMT -8
Awesome Job on that, its not an easy kit to build. The end result is very nice. Chris
|
|
|
|
Post by Joel_W on May 23, 2021 7:31:38 GMT -8
Your not that quite good yet is so far advanced from my hard earned level it's not even funny. I'd gladly settle for just your perfect paint and decal finish and the rest box stock, which is basically what I'm planning mine to be. Every time I look at my JPS Mustang with the engine clip off because it just doesn't fit well enough to display on, I'm convinced that I went to far in the wrong direction.
joel
|
|
|
|
Post by checkeredflagdetails on May 23, 2021 13:14:04 GMT -8
Very nice work, I especially like the covers over the rear wheels. For those that haven't built this kit these are omitted in the kit and needed to make it look right. Also the corrected rear window/bumper situation. Great attention to detail. I LIKE IT!! Paul would too.
|
|
|
|
Post by sylphide on May 23, 2021 13:43:38 GMT -8
Thanks for all the comments guys! Cutting out the rear panel was a painstaking process and took forever but the result was great. I can take what I learned on this and apply it to the Glidden car whenever I get started on that. Maybe I'll have more scratch material stuff to do the whole fuel system setup in the back justice next time.
|
|
|
|
Post by Chris K. Hale on May 23, 2021 17:49:18 GMT -8
I worked on my Roush Mustang for almost 18 months, detailing everything but when I got to the rear, fuel tank, pumps,filters, tanks and so much more I burned out. I made those 3 filters out of brass. That took a month to solder all three just right. Here are some reference pics sent to me that also drove me nuts on this build. It got shelved for the future even though it is 3/4 done... someday maybe.. A bit complex..to try in 1/25 scale! Close but no cigar for now.... Chris 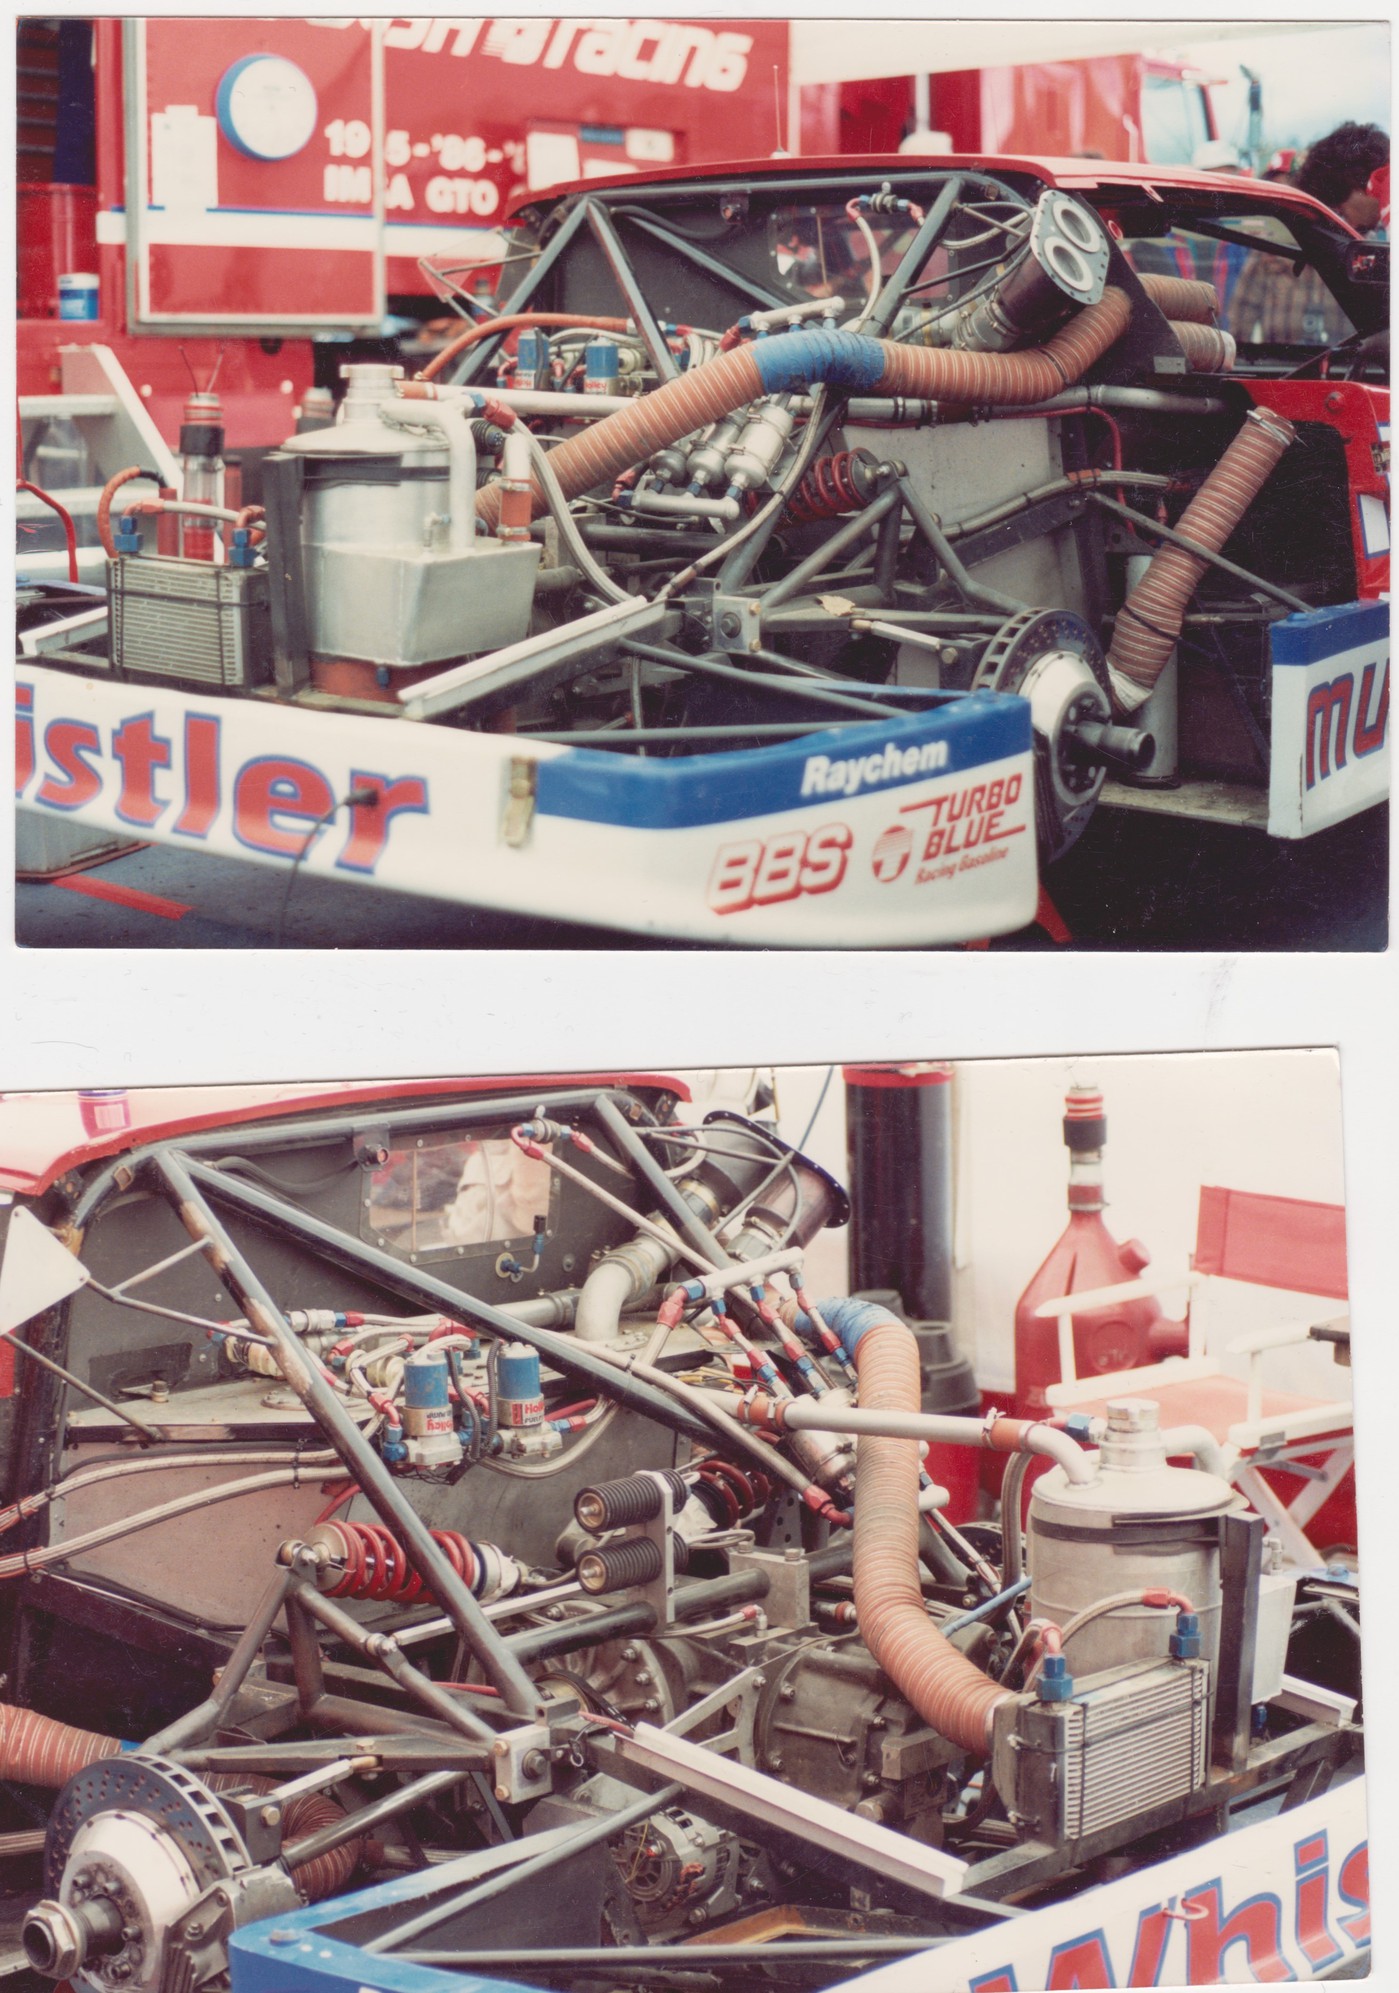 |
|
m2
Rookie

Posts: 24
|
Post by m2 on May 25, 2021 0:50:25 GMT -8
Chris, I'm sure your aware that the Mustang is an IMSA car and the Highway Master car is a Trans Am car. At that time you couldn't run irs unless you ran a Corvette or a Mercur in the Trans Am.
|
|
m2
Rookie
Posts: 24
|
Post by m2 on May 25, 2021 0:59:03 GMT -8
I forgot to add,that's a very nice job on the Camaro, one of the best I have seen. Never seen anyone add the rear inner fenders, or go to the trouble to move the oil tank.
|
|
tiptoe
Qualifier
Race/wreck/repair/repeat
Posts: 51
|
Post by tiptoe on Jul 11, 2021 19:46:36 GMT -8
I remember that car, you did great!!
|
|


