|
|
Post by Chris K. Hale on Mar 2, 2018 17:40:49 GMT -8
Recently Indycals Decals has added a lot of IMSA, Lemans and Can Am decal sets. Michael has a Excellent product and is reasonably priced. visit him at www.Indycals.net and check out his products which include 3d printed parts.. He will on occasion make custom decals depending on the what you need. Chris |
|
|
|
Post by Chris K. Hale on Mar 5, 2019 8:35:43 GMT -8
Michael is producing a Ton of Decals for Lemans, IMSA and other Sportscar models check him out at link indycals.net/ and drop him a note if there is something you think he should make.. Chris |
|
|
|
Post by Joel_W on Mar 22, 2019 5:26:01 GMT -8
Chris,
I can 2nd both Michael's ever expanding list of non-Indy Car/Open wheel car decals, and their exceptional quality. Almost every kit in my modest stash that Michael makes decals for, I've bought at least one set. His prices are more then reasonable. The only downside until you get use to it, is that the entire sheet is one big decal, so you have to carefully cut out each one. Not a big deal by any means, but it does add time to the process.
Also, Michael has a no goof replacement policy. If you screw up a decal or two, Michael will replace them free of charge. Believe I know that he does 1st hand, and he gets you those replacements fast, since you're right in the middle of decaling.
Joel
|
|
|
|
Post by Bernard Kron on Mar 22, 2019 10:37:51 GMT -8
I have a question regarding Indycals, and really, most aftermarket decals out there.
Several years ago, when I got back into car modeling, I bought some trade decal sheets from Slixx. Each decal was a separate piece that lifted off the sheet separately from any others. Initially they worked like the kit decals I was accustomed to, they held up well to handling and could be maneuvered on the surface without breaking up. Eventually, however, they dried up somewhat and I had to spray them with clear acrylic to give them strength. At this point, of course, they ceased to be individual decals. When I started making my own decals using an inkjet printer I quickly learned that I was printing "one big decal" and needed to trim close to the image when cutting them out. I also learned that it was mandatory to spray them or coat them with a clear coat to give them strength. A couple of years ago I bought some 50's style Halibrand wheels and Indianapolis tires from Indycals which came with Firestone decals. Initially I suffered brain fade and tried to use them the way they came without clear coating them. They immediately broke up and were very fragile. With his no questions asked guarantee Michael replaced them, and this time I clear coated them and they went on beautifully. Interestingly, Michael never included instructions with the decals saying to clear them and never raised the issue when I contacted him for replacements.
Recently I bought a Gofer sports car decal sheet to get some white roundels for my 904 project. The eBay vendor who supplied them included an information sheet lauding them as the best decals I would ever find in the aftermarket. So I assumed they were silk screened with a white undercoat and that each decal would slide separately off the sheet. Fortunately I cut a test decal out to see how they worked and discovered that this, too, was a "one big decal" sheet and that I had to clear coat them for strength and cut close to the image when cutting them out. They were also quite transparent and I had to double up on the white decals to achieve sufficient opacity, so I suspect thay weren't silk screened, but were of the Alps-printed to decal stock variety.
My question is the following. You guys obviously consider Indycals to be top quality and are happy with them. Do you have to clear coat them for strength as I did? Is this standard operating procedure for most aftermarket decals? I mainly either print my own to hobbyist decal stock, or have them custom printed for me by a friend who has an Alps printer when I need white or metallics, so virtually all decals I handle except kit decals are of the "one big decal" sheet type and require close trimming and clear coating for strength. |
|
|
|
Post by tatocorvette on Mar 22, 2019 11:32:58 GMT -8
Hello, I am by no means an expert, but in my limited experience with aftermarket and home made decals, I always spray a coat of lacquer clear. That also seems to help control the curling that can be very annoying. I also spray a coat of lacquer clear on old decals as extra insurance against breakage. Your mileage may vary. Some restrictions apply. See your local dealer for details. Not insured by FDIC.  |
|
|
|
Post by Ben_B on Mar 22, 2019 12:43:27 GMT -8
If the decals are silk screened, they usually come as individual decals, like you find in kit decals. You can spot them by shining a light on the sheet. The decals will reflect the light differently than the bare paper. Many aftermarket manufacturers outsource their artwork to a silkscreen printer. Those companies usually require minimum print runs of 250 or 500 sheets. Smaller, print to order companies like Indycals use laser printers, ALPS, or “Digital Silk” printing. I’ve never encountered a company like that that didn’t print on a continuous layer of decal film. These guys will often clear coat the decals before they ship them to you or they’ll say in their instructions that you need to coat them. I don’t usually clear coat decals prior to using them unless they’re old. I’ve never clear coated Indycals before applying them. I’m just extra gentle with them, even though they seem to be tougher than ALPS decals. I’m not aware of any car decal companies that use Digital Silk. I don’t know what the official name is, but Draw Decals and Vintage Flyer use the process for their airliner decals. Those decals are tough as nails and don’t respond to setting solutions. The only time I’ve had problems with decals curling was when I coated some I had printed with liquid decal film. It acted like a bimetal strip and curled right up. I hate when that happens. Of course, now that I’ve said I never clear coat my decals, the next set I use will fall apart and the pieces will curl up.  Ben |
|
|
|
Post by vintagerpm on Mar 22, 2019 13:44:20 GMT -8
I've used several sets of Indycals decals and have had no problems. I do not clear coat them before use. They do come as single sheet, though. Also, I always clearcoat over my decals after application (cleacoat the entire body) just to make sure they don't peel off in the future. (I've had it happen with models I built back in the '70s.)
Mike
|
|
|
|
Post by Joel_W on Mar 23, 2019 6:12:30 GMT -8
IndyCal decals are laser printed. Mike sold off his two Alps printers way back in April 2017 as they were going out of business. I can tell you that Mike doesn't seal his printed decals. The only time that it's necessary if they're from a Ink Jet printer as even mild decal solutions can start to dissolve the inks. I've used Silk Screen decals from Hong Kong, they were expensive, and they were clear coated. Honestly, I only used them over IndyCal decals because with Mike's new laser printers he can no longer print the correct shade of Gold that I needed, and they were on thick side which surprised me.
As for IndyCal instructions, they're on his home page on the left hand side in the table of contents half way down the column.
I always seal my decals with a lacquer based clear coat, with protects the decals including yellowing, and allows the polishing of the surface to make the decals look more like paint then decals, as well as adding to the mile deep shine I really want as a final finish.
As far as decals curling in water, yes they do. But you can greatly decrease the curl by using warm tepid water, which loosens the glue much faster then cool water, and by placing the decal face down. Decals should only be left in their water bath till the backing paper is completely soaked, then placed on a piece of glass or ceramic tile till the decal completely loosens from the backing paper, and don't try to help the water do it's job. Work on two decals at the same time but at different stages.
Decals can and will rip or tear if you pull them as their glue starts to grab the model surface. If the surface isn't smooth as silk, that also causes decal movement issues. I use a liberal amount of Micro Set (Blue Label) both under and over the decal.
One other issue that's a major reason for decal problems or even failure, is that modelers apply setting and sol solutions, then start to roll or dab the decal down way to soon. Let the solutions do their job and wait a min of 1 or more. When you see it starting to dry off, then you can start to roll it to remove any trapped air and nudge it down into the nooks and crannies.
Joel
|
|
|
|
Post by Bernard Kron on Mar 23, 2019 8:57:48 GMT -8
Thanks for all the detailed responses. It was what I was hoping to get. Many of the details mentioned are in the "things I supposedly already knew" category, but, as can happen, we eventually take for granted and perhaps forget to do. In particular Joel's rundown of the application process bears repeating. In my case I place the decal face down in water until the backing is soaked through and then place it face up on a paper towel for a minute or so until the decal slides freely. I then place the backing near the final position and slide the decal into place. The warm water tip is one I knew but often am lazy about using, but actally makes a big difference. I use MicroSet and MicroSol solutions most of the time, although with decals that have been clear coated before application you can often apply them just with water because they are so stable. As regards coating the decal sheet, I use acrylic spray clear, or, when I'm out of it, clear lacquer. As I said, I spray the decal sheet with clear because my experience has been that most decals I have used benefit from the extra strength. The downside is that the sealer coat thickens the decal. For those decals that I have used that are either ALPS micro-dry printed or laser printed, opacity is a serious problem, regardless of the color of the image, in particular over dark or "strong" colors (i.e. any shade of red for example). Some decal suppliers supply a white underlayer sheet along with the color pass. When working with my friend who does my ALPS printing I generally take a "belt and suspenders" approach by ordering a white under-layer sheet and specifying a white ink pass followed by a color pass on the colored sheet. Tghis gives me two white under-layers and helps solve the transparency issue. Any metallics are printed on a separate sheet for technical reasons having to do with the fact that the metallic inks are much thicker than the other inks and can interfere with the print head's movement across the sheet.
I found the application instructions on the Indycals page. Like many of you, he assumes you won't be clear coating the decal sheet and only discusses clearing the decals after application. His comment about not using clear enamel over his laser printed decals because it is incompatible with the white ink is an important point I didn't know about.
Again, thanks for all the substantive discussion.
B.
Edit: I just reviewed Mike's "Print for Hire Services" page on the Indycals site, and it's an excellent primer on decal design and specification issues when doing one-off custom printing work. He discusses the the transparency issue I referred to above in clear and concise manner.
|
|
|
|
Post by Joel_W on Mar 23, 2019 9:28:45 GMT -8
Bernard, One thing that I forgot to mention ( old age strikes again), is the issue of opacity. I've had it occur with Indy Cal white circles over Ferrari bright red 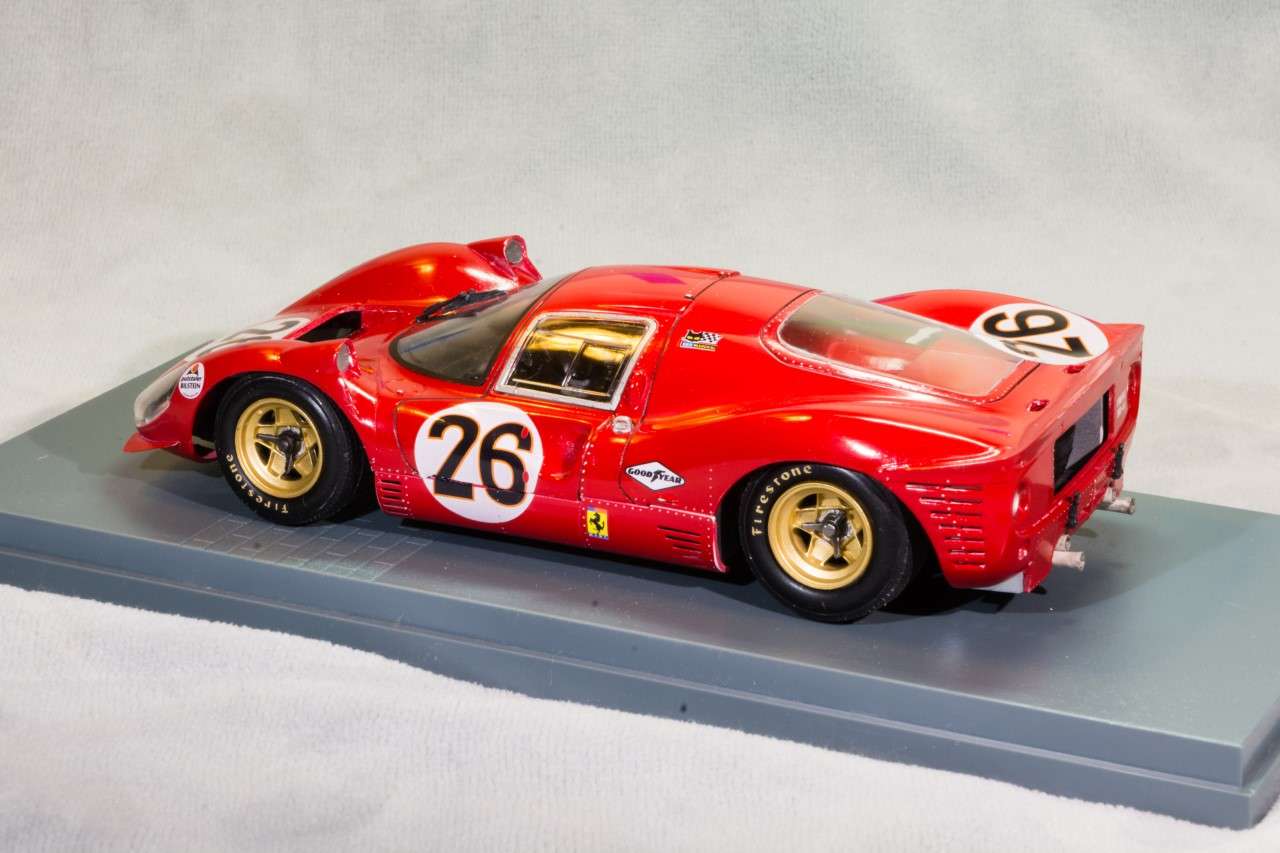 But not so much over a dark Blue. 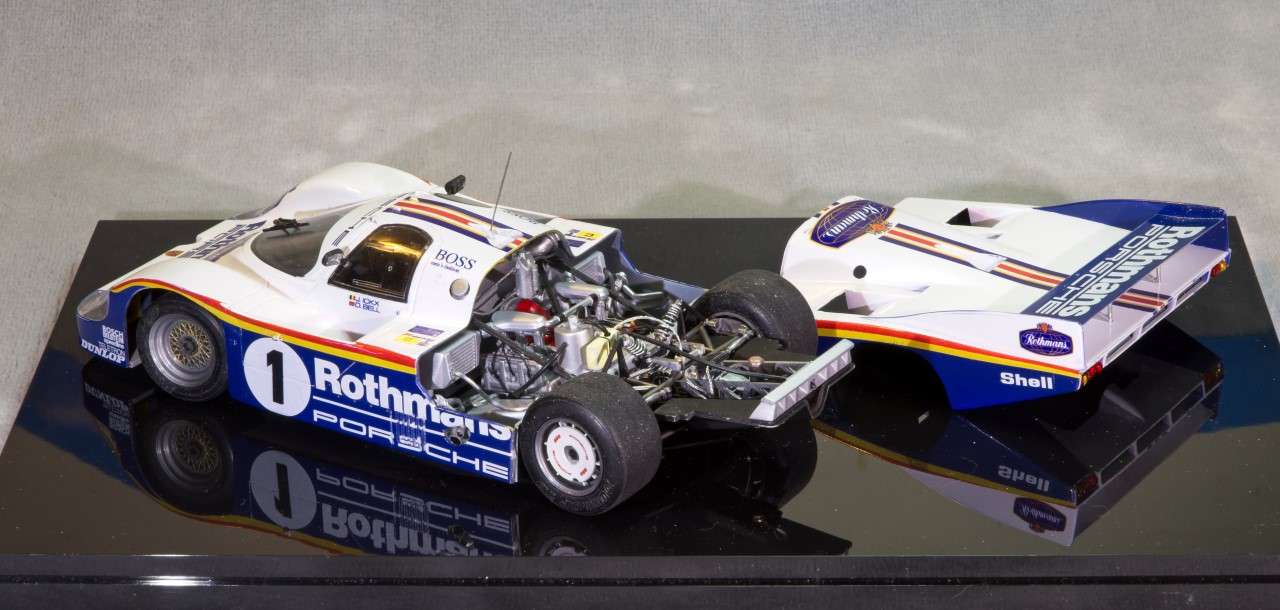 About the only way to cure the problem is as you've said about double decaling. On the Porsche 956 it would be almost like having to do the whole model. I know virtually nothing about the actual decal printing procedure via a Laser printer. I'm wondering he could increase the amount of ink to help reduce the bleed through? Joel |
|
|
|
Post by Bernard Kron on Mar 23, 2019 10:06:04 GMT -8
Bernard, One thing that I forgot to mention ( old age strikes again), is the issue of opacity. I've had it occur with Indy Cal white circles over Ferrari bright red ... But not so much over a dark Blue. About the only way to cure the problem is as you've said about double decaling. On the Porsche 956 it would be almost like having to do the whole model. I know virtually nothing about the actual decal printing procedure via a Laser printer. I'm wondering he could increase the amount of ink to help reduce the bleed through? Joel The only way to increase the amount of ink is to do an additional pass of the color in question since the CYMK color printing process (CYMK stands for Cyan, Magenta, Yellow and blacK, the ink colors from which the actual shades are assembled). This is essentially what I'm doing when I order an additional pass of white on my "color" sheet. I forgot to mention that my "color" sheet includes a white pass among the colors printed. So this individual sheet has 2 white passes. On an ALPS printer like the one my friend uses the white ink cartridge is placed in the blacK position and master art is created for the white areas. He prints a pass of white before printing the CYMK components from a file which omits the white areas from the image information. In my case I ask him to print the white areas twice. In addition I ask him to print a whole second sheet that's white only and ask for twoo passes of white. That's what I meant by "belt and suspenders". Even with all this, transparaency over dark or strong colors remains an issue. Only high quality silk screen decals, at least in my experience, avoid the problem entirely. Here's an example from a recently completed project. First the white only artwork, which is printed twice:
Then the CYMK colors omitting the white areas (I've added a blue background so that you can see the missing white areas): And the final result (with the blue background added once more, this time so the white is visible). |
|
|
|
Post by Joel_W on Mar 23, 2019 10:19:41 GMT -8
Bernard,
Very interesting. I can see this really adding up. Just from what Mike quotes as needed and costs for custom work, it can get real expensive quickly.
Joel
|
|
|
|
Post by Bernard Kron on Mar 23, 2019 10:49:53 GMT -8
Yeah, it ain't chopped liver. Unfortunately decal-driven graphics are a basic aspect of my modeling. That's why I taught myself this black art. Between the technical aspects of making the decals themselves and the graphic design challenges inherent in translating what are often no more than off-angle action photographs I'm totally impressed by suppliers like Indycals who turn out accurate replica decal sets with such seeming ease.
|
|
|
|
Post by Joel_W on Mar 24, 2019 4:39:19 GMT -8
Bernard,
That's really impressive learning the art & technical side of creating the art work. I still struggle with the basic concepts of plastic modeling.
Joel
|
|
|
|
Post by tatocorvette on Mar 24, 2019 5:23:14 GMT -8
Hello, I can attest as to how difficult and time consuming this can be. I did my own set of decals for this 1/200 scale aircraft. In this case the biggest challenge was sizing it properly as the kit's decals were not even an approximation of what they should have been. But since they were mostly black and such a small scale, I guess that made it a bit easier to print. 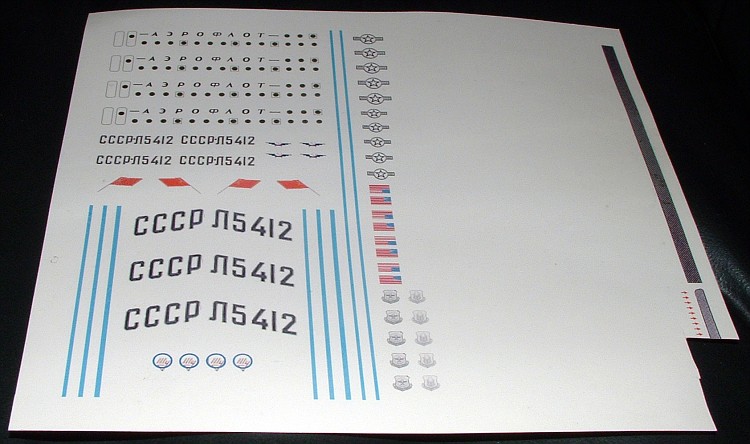 Printed in plain paper first (several times) for adjustments 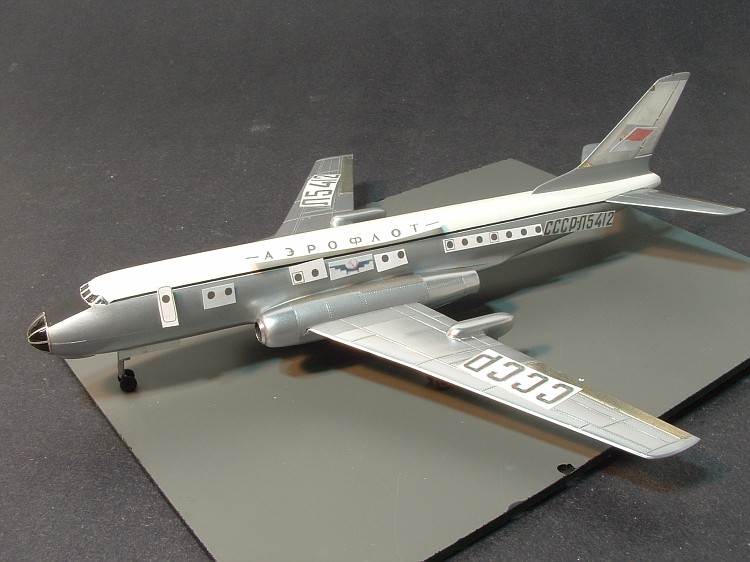 And the end result 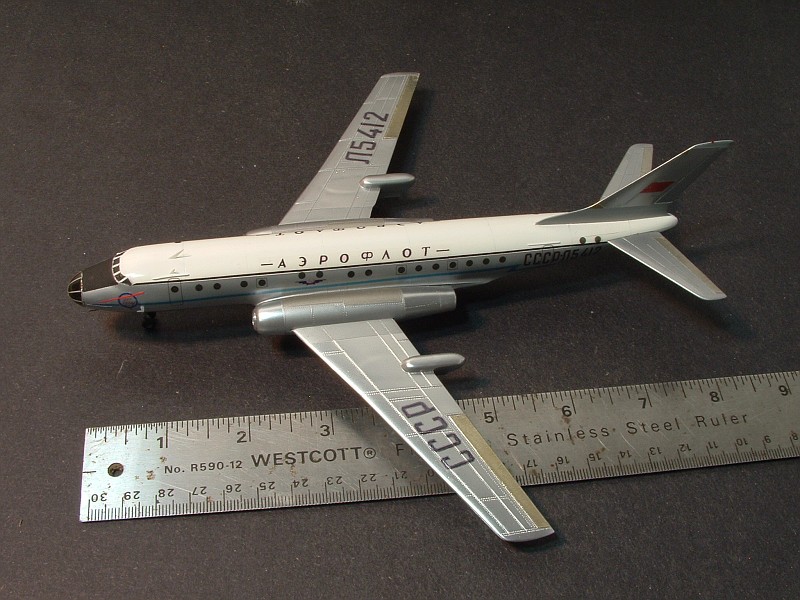 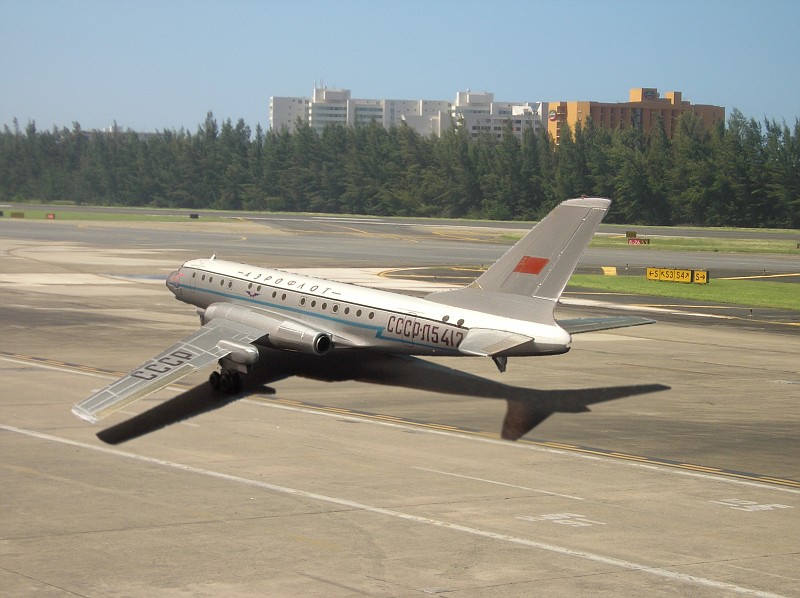 You can read the complete story of this oddball here: www.arcforums.com/forums/air/index.php?/topic/174379-1200-aeroflot-tupolev-tu-104-finished/Thanks, Ismael |
|