|
|
Post by tatocorvette on Feb 18, 2020 5:12:17 GMT -8
Hello, Destruction in the name of construction! Rusty Trusty was let loose! 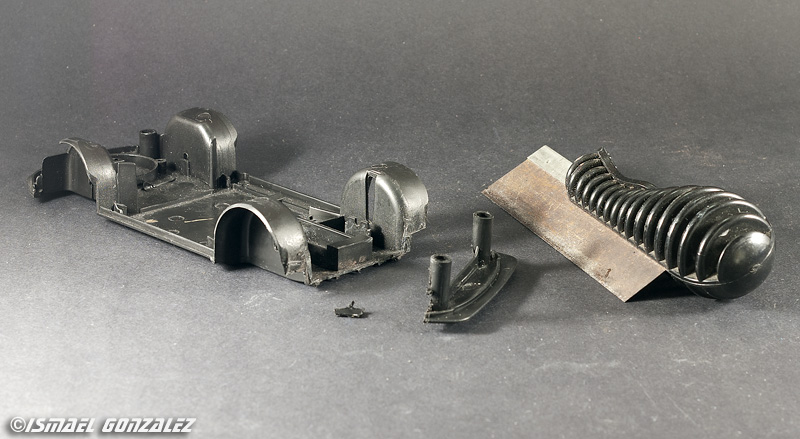 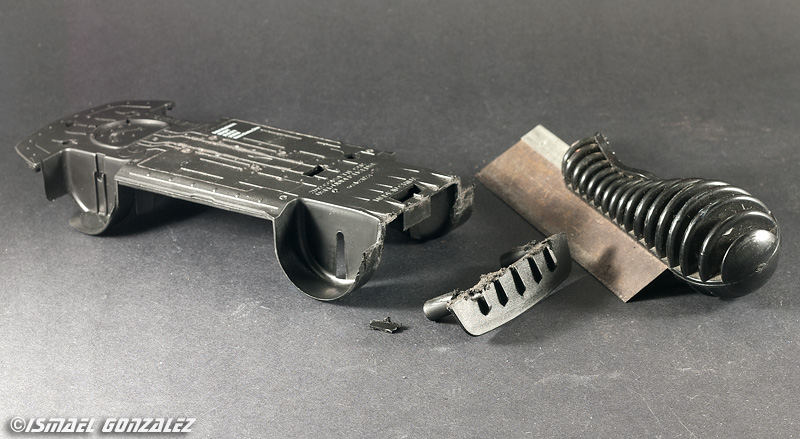 Testing... 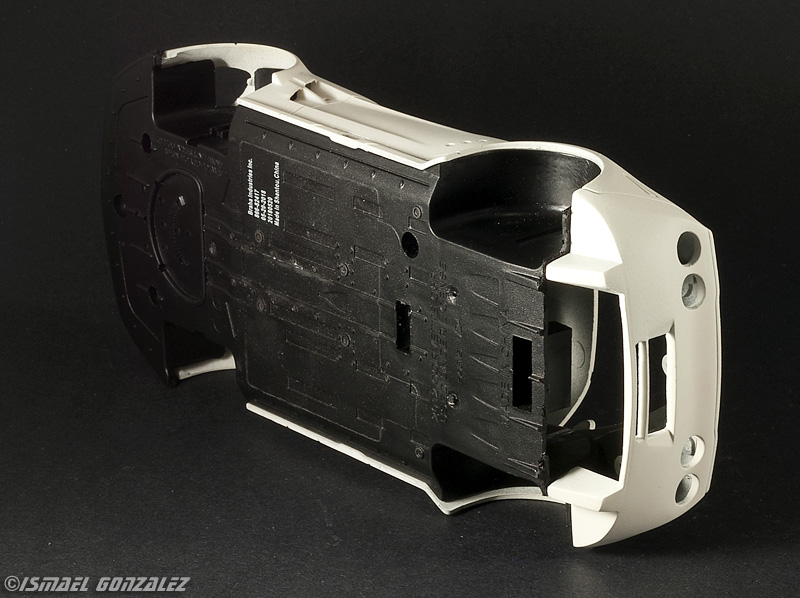 Thanks, |
|
Deleted
Deleted Member
Posts: 0
|
Post by Deleted on Feb 18, 2020 5:20:20 GMT -8
I'd say testing looks to be successful Ismael. This is an amazing transformation.
|
|
|
|
Post by Joel_W on Feb 18, 2020 6:25:31 GMT -8
Ismael,
It now fits like a glove.
Joel
|
|
|
|
Post by tatocorvette on Mar 6, 2020 15:48:28 GMT -8
Hello, After a lot of relentless butchering and destruction in the name of construction, I was able to get the Revell C6R Interior tub to play nice with the C6R GT2 chassis. The roll bar is not fixed yet. this is only a mockup. Also notice the molded window net disappeared. It was the wrong size, wrong shape, wrong thickness etc. It just did not work. The correct one is planned. 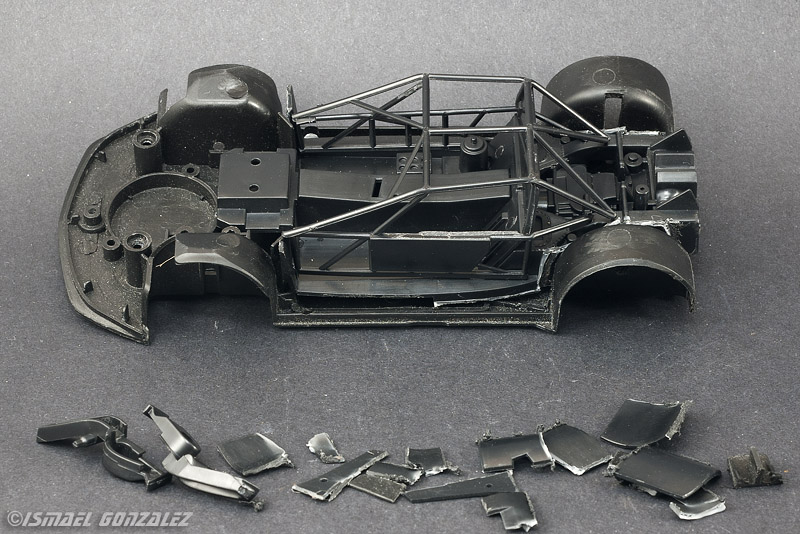 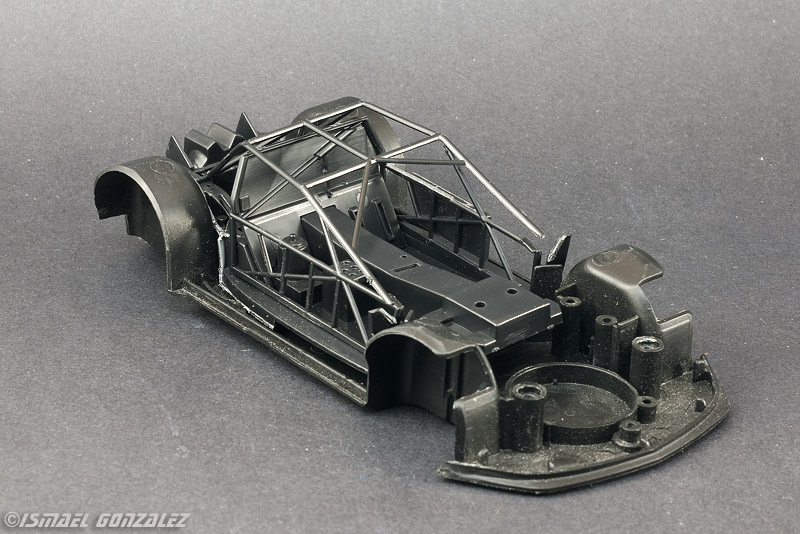 Thanks, Ismael |
|
|
|
Post by Joel_W on Mar 7, 2020 6:21:25 GMT -8
Ismael,
Just more of your outstanding engineering hard at work. Looks great.
Joel
|
|
|
|
Post by tatocorvette on Mar 14, 2020 16:25:38 GMT -8
Hello, The Revell's C6R is 1/25 and the GT2 body is 1/24. I did not like how the roll cage looked at the front. It was too far from the A pillars. So after careful examination it was modified to widen the bottom so it will be closer to the A pillar. Made strategic cuts so the tubing would "bend" where I wanted. Bracing was replaced. The dash will be modified accordingly. 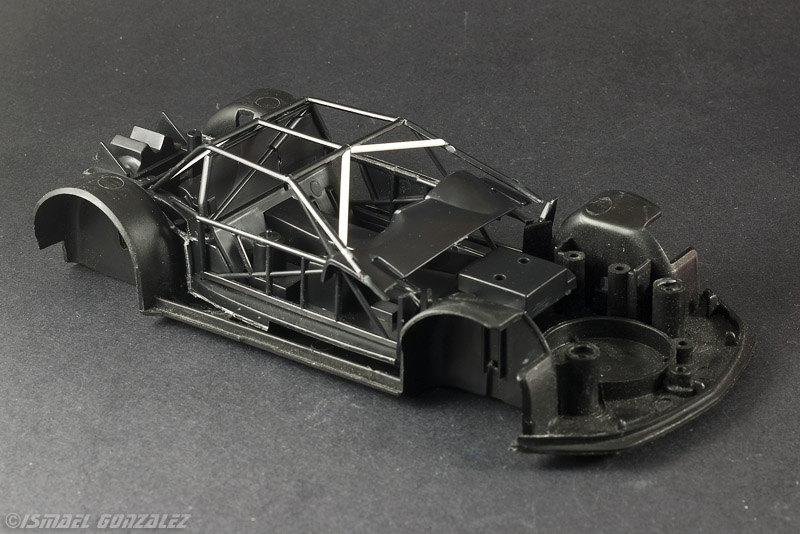 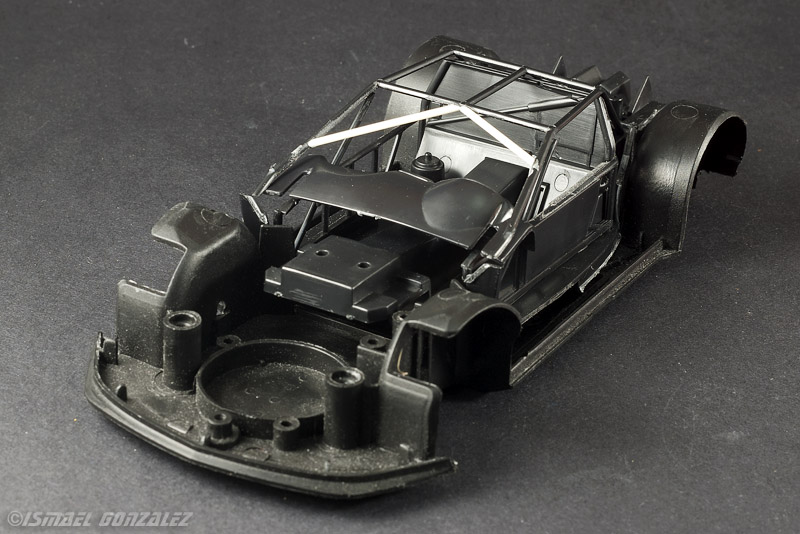 Thanks, Ismael |
|
|
|
Post by Joel_W on Mar 15, 2020 11:38:27 GMT -8
Ismael,
Now that's really impressive. Combining both scales is a whole new ballgame that I've never seen done as well as you did it.
Joel
|
|
|
|
Post by tatocorvette on Mar 31, 2020 17:52:13 GMT -8
Hello, The chassis of this project had a major issue: For the stance I want, the floor was too low and it was touching the floor. I mean, the floor was hitting the floor, I mean the car's floor was hitting the bench floor... ehhh you know what I mean!  So over the course of many weeks I sanded and sanded and sanded and then sanded some more trying to make it work but the end, surgery was needed. And here we are now after some time in surgery. Far from over, this is only the beginning. It will be trimmed so it tucks inside. Extra care was taken not to disturb the fragile chassis integrity left. No idea at this point if it will eventually need sheet styrene, putty, both or something else. 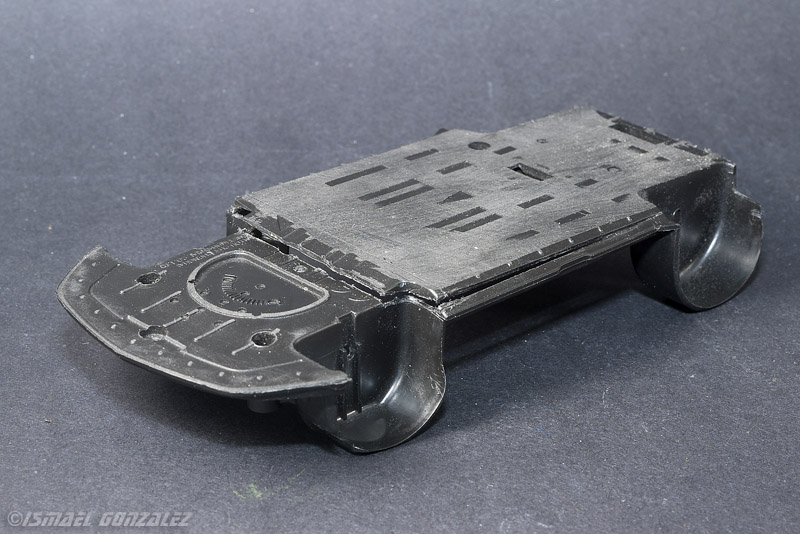 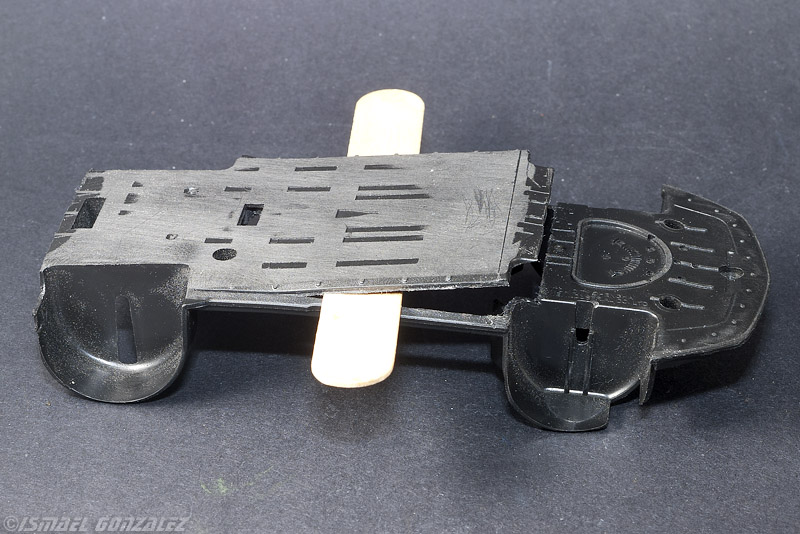 Thanks, Ismael |
|
|
|
Post by Joel_W on Apr 1, 2020 12:09:55 GMT -8
Ismael,
Now I'm confused. I understand how sanding the bottom of the floor pan will raise it up from ground zero, but why are you cutting it now? Won't the frame rail and wheel wells still be an issue?
Joel
|
|
|
|
Post by tatocorvette on Apr 1, 2020 12:44:31 GMT -8
Good observation!
What happens is that the section of the floor I cut is lower than the frame rails. There was also a "step down" to the front pan.
It is (was?) like a V shape -\___________________/-
Sanding was already getting it very thin and nowhere near where it needed to be. The cut was strategically made to address the lower than the rails area.
Thanks!
|
|
|
|
Post by Joel_W on Apr 2, 2020 6:03:20 GMT -8
Ismael,
Thanks for the explanation. Now it makes perfect sense.
Joel
|
|
|
|
Post by tatocorvette on Apr 10, 2020 9:32:36 GMT -8
Hello, The surgery continues. Still a long ways, but it looks promising. 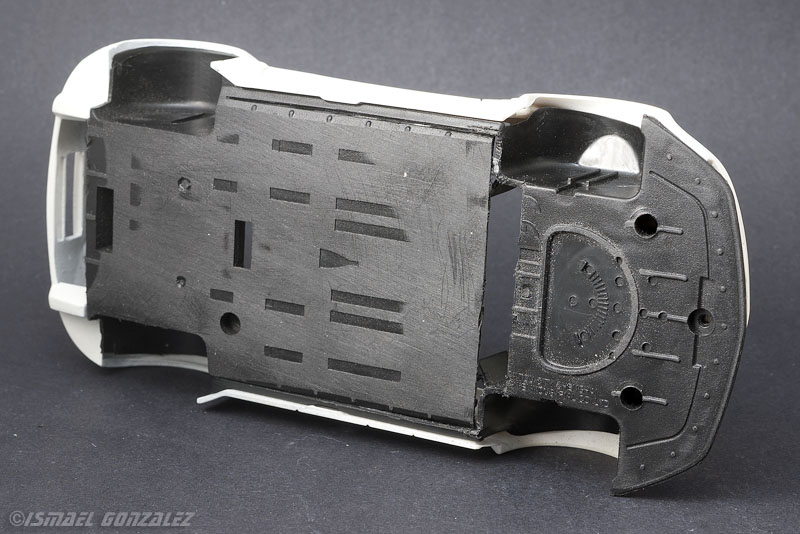 Thanks, Ismael |
|
|
|
Post by afx on Apr 10, 2020 15:39:07 GMT -8
It's not the destination but the journey. |
|
|
|
Post by ibuildscalemodels on Apr 10, 2020 19:00:04 GMT -8
This project is pure madness! I would never have thought of modifying a toy car this way. Genius work Ismael! Genius! Keep it up!
|
|
|
|
Post by Joel_W on Apr 11, 2020 5:49:21 GMT -8
Ismael,
The bottom of the chassis looks darn good. Just two questions:
1- Knowing your standards for absolute perfection, how are you going to fix sanded away sections of those recesses in the pan (actually, I'm not even sure what they are).
2- What is the molding in the front of the pan for that looks like a protractor? I've never seen anything like it before.
Joel
|
|


