|
|
Post by Ben_B on Mar 16, 2019 8:49:22 GMT -8
That looks great! I ended up painting the wires on mine with acrylic black paint and then going over the edges with a toothpick soaked in Windex to scrape any overrun off. The Windex didn't bother the Tamiya primer underneath. Looks okay if you don't get too close.
I looked all over for photos of that clear box, but only found one pic, and it didn't show much. It looked like it covered some kind of electronocs. I painted mine light grey to camouflage it.
One more question about those Slotfabrik decals. Are they silkscreened, ALPS, or something else?
Ben
|
|
|
|
Post by Joel_W on Mar 16, 2019 9:06:24 GMT -8
Ismael,
You've got the eyes of a surgeon. Me, I'm already half blind (really only one eye), so everything is twice as hard for this old timer.
Joel
|
|
|
|
Post by tatocorvette on Mar 19, 2019 17:50:12 GMT -8
Hello, This is getting busier than the 5PM freeway traffic. Added more wiring, rear air ducts, fuel filler tube to which I added a metal collar to give some depth, the part behind the seat which I have no idea what it is, pedals etc. The seat is not fixed in place. Just mocked up. I added black embossing powder padded surface. Very hard to see. See the last pic which is blown overexposed. Still pending belts before gluing in place. The oval black areas on both sides were impossible to hand paint. I ended up doing a tape template and cut 2 pieces of carbon fiber decal. 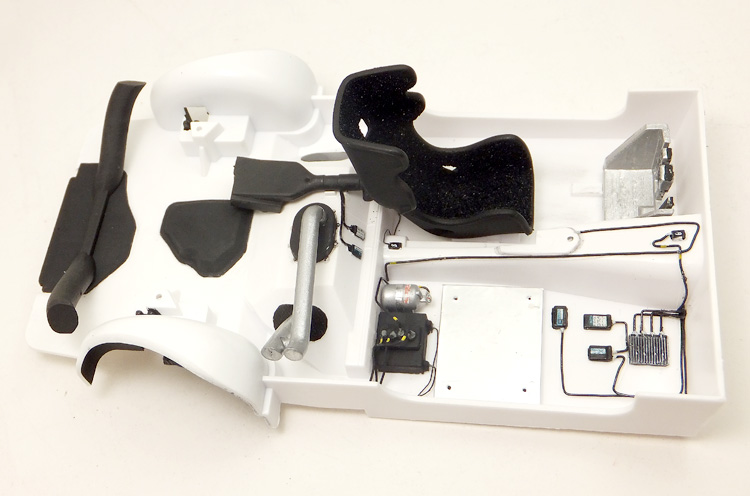  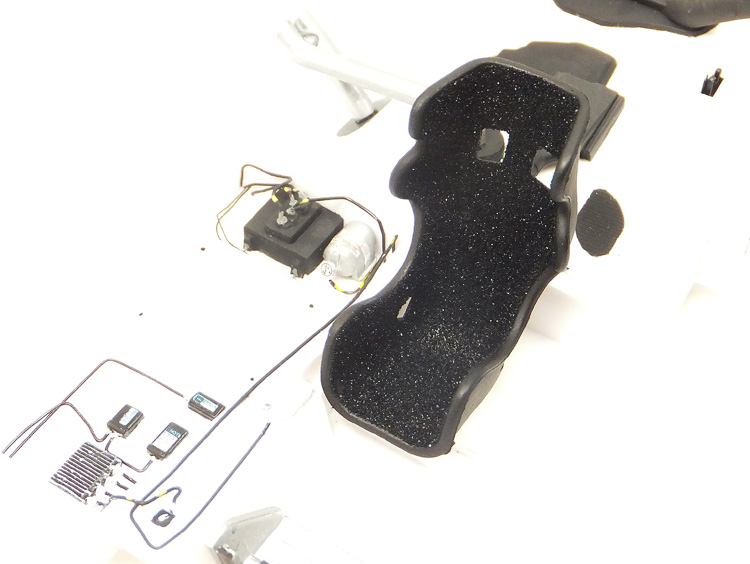 That's all for now.... Thanks, Ismael |
|
|
|
Post by Joel_W on Mar 20, 2019 5:54:03 GMT -8
Ismael,
Simply impressive detailing. You're setting the bar higher and higher for us basically out of the box type of guys.
BTW, I read through your Corvette build twice. At 1st I didn't realize that the scene was your build in a perfect Diorama. It's that good. So I sent my brother whose a large scale aircraft builder your 1st 3 pictures as he does remember this Vette from years past when he watched racing on TV as well. I just didn't bother telling him that it was a diorama. He to thought it was the real deal. Of course after his reply email, I emailed the truth.
Joel
|
|
|
|
Post by tatocorvette on Mar 20, 2019 7:24:32 GMT -8
Joel, Thanks for always checking and commenting. Really appreciate!
Ben, So sorry I missed your previous question! On the Slotfabrik, I have no idea what type of decals they are. I checked their website but there is no mention as to the type. You need to trim close to the image as the sheet is one giant decal. Other users have reported that since those are designed for slot cars to take a beating, they are stiffer than usual and decal solvent has little effect on them. They also reported they have a tendency to severely curl during application, making them challenging to use.
Thanks,
Ismael
|
|
|
|
Post by shunter on Apr 3, 2019 11:38:56 GMT -8
Great start...look forward to seeing more
|
|
|
|
Post by djflyer on Apr 3, 2019 13:44:31 GMT -8
Excellent work with the detail painting, those are always tough to get right. I bought a couple of these kits to cars from some of the races I attended - especially the livery they ran at Watkins Glen in 2017. BUT I have to find someone that can do the decals as I havent found anyone that has them already.
|
|
|
|
Post by Joel_W on Apr 14, 2019 6:21:23 GMT -8
Ismael,
Your continuation of the wiring really adds to the interior detailing especially since it's basically white.
Joel
|
|
|
|
Post by ShawnS on Apr 15, 2019 1:44:58 GMT -8
Love that interior, very nice. As modern race cars have heaps of electronics, models need the extra detail as well and that's just about right. Not too much and not too little.
|
|


