|
|
Post by tatocorvette on Mar 12, 2019 3:52:26 GMT -8
Hello, The IMSA GTLM class is very popular and have been growing in recent years. Factory teams like Corvette Racing (my favorite and the best ever), Porsche, Ferrari, etc. compete for top honors. In 2016, the RLL racing team (Rahal Letterman Lanigan) debuted the GTLM BMW M6. It ran for 2 seasons and was replaced with the current M8 for the 2018 season. The team had 4 class wins in 2017: Watkins Glenn, Mosport, Laguna Seca and the Petit LeMans in Atlanta. Petit LeMans was the last race of the season and the last race for the M6 as it was replaced with the M8 for the following season. It also marked Bill Auberlen's 400th race with BMW. Winning the race was a great way to close its 2 season career. This is the subject of this project. Platz/Nunu released the 1/24 BMW M6 GT3 model a while ago. The kit has been very popular. That will be my starting point for this project. A fellow modeler from MCM forum pointed me to a decal maker in Germany. I contacted him and long story made short, after several email exchanges, pictures and reviews, he made me the decals for this car. First of all: This is the car we are talking about. Yes, there has to be a Corvette connection somewhere in here  By the way, the Corvette clinched the championship by finishing 2nd. 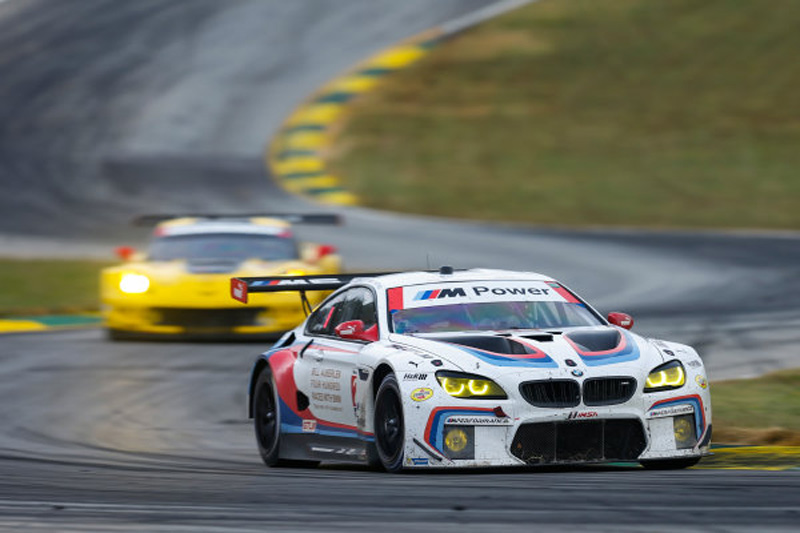 This is the kit I'll start with: The Falken version which is basically the same original kit except for the fender louvers and decals. 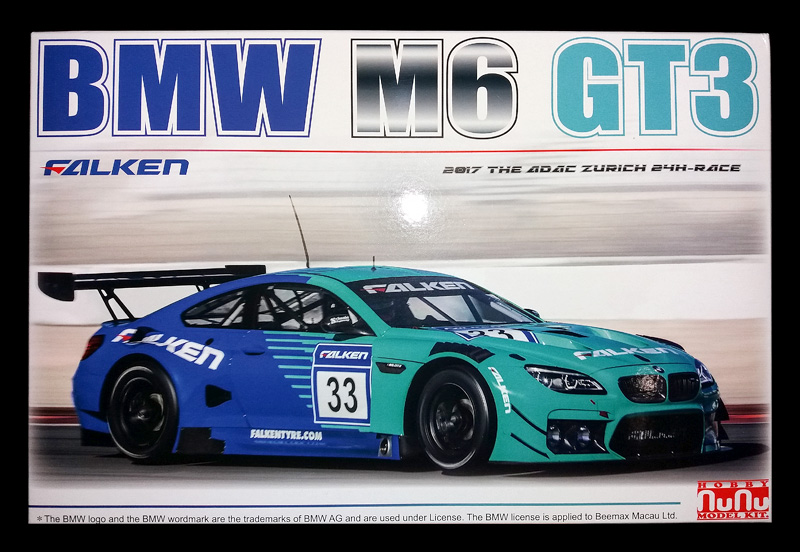 Already started with the front suspension. 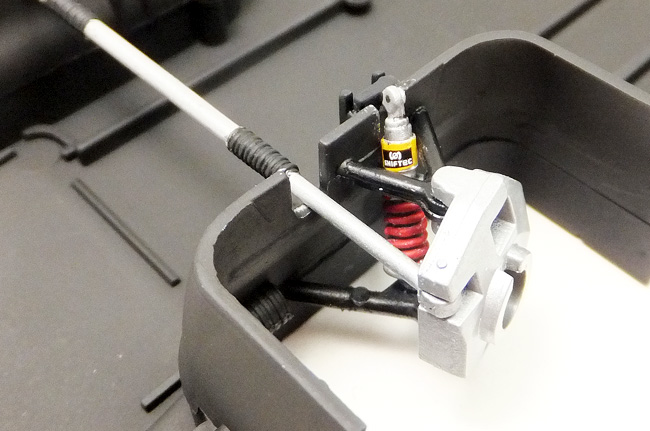 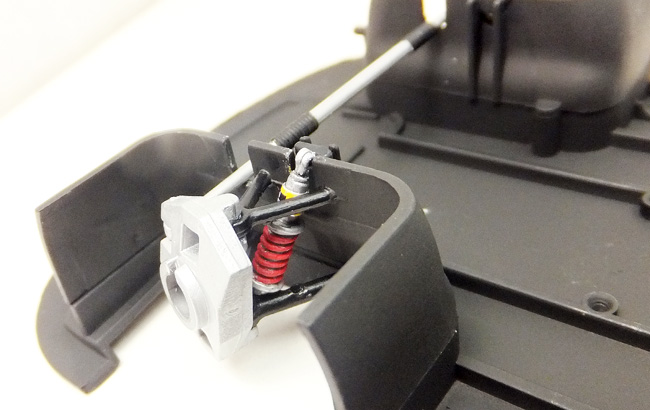  Kit's one-piece shocks are nice but plain on top so I added a metal tape valve body painted golden yellow and added some leftover decals. Thought for a moment to scratchbuild working shocks that that would be a waste of time. Progress will be slow until I finish the current project. Then this will most likely be the next main project. Thanks, Ismael |
|
|
|
Post by afx on Mar 12, 2019 3:55:16 GMT -8
What is your opinion Ismael of the kit? I have not seen any of the NuNu products.
|
|
|
|
Post by tatocorvette on Mar 12, 2019 7:41:33 GMT -8
Hello,
If we have Tamiya at the top, AMT at the bottom and Revell in the middle, I would put it between Revell and Tamiya, somewhere around Fujimi. Parts are crisply molded. Some minor flash but nothing major. I've only done the front suspension and it seems parts fit fairly good. I asked a fellow modeler that has done a bunch of them and he said some fit issues with the windows and mirrors, and body to chassis mating can be a challenge. Parts count is relatively lower since there is no engine. I'll keep posting progress as it moves along.
Thanks,
Ismael
|
|
|
|
Post by Ben_B on Mar 12, 2019 7:46:18 GMT -8
This is going to be great! Just out of curiosity, does the windshield in the Falken kit have the square leaderboard mount molded into it like the Rowe kit does? Also, what decal company are you using for the decals? JC, my build is a little farther down the page: link I enjoyed building it, but every part required some cleanup. The main fit problem I had was with the radiator assembly. It was a little too wide to fit between the front wheel wells and it also interfered with the headlight buckets, because there were no positive attachment points for them. I ended up attaching the radiator assembly to the body, first, then added the headlight buckets. I then filed the sides of the outer ducts down until they fit between the wheel wells. There were also a few (okay, a lot!  ) car newbie self-inflicted wounds, but overall, it's a good kit of a cool subject. You'll probably want to treat it more like a limited run kit. Ben |
|
|
|
Post by Ben_B on Mar 12, 2019 7:49:39 GMT -8
Hello, If we have Tamiya at the top, AMT at the bottom and Revell in the middle, I would put it between Revell and Tamiya, somewhere around Fujimi. Parts are crisply molded. Some minor flash but nothing major. I've only done the front suspension and it seems parts fit fairly good. I asked a fellow modeler that has done a bunch of them and he said some fit issues with the windows and mirrors, and body to chassis mating can be a challenge. Parts count is relatively lower since there is no engine. I'll keep posting progress as it moves along. Thanks, Ismael You type faster than I do! I agree with that assessment of the kit. The windshield wiper interferes with the body, which causes a gap at the top when you mount the windshield, so test fit with the wiper installed. The other windows fit okay, but the headlight clear parts did not. Ben |
|
|
|
Post by afx on Mar 12, 2019 10:20:17 GMT -8
These kits aren't cheap, really shouldn't have to deal with flash and fit issues at this price point.
|
|
|
|
Post by tatocorvette on Mar 12, 2019 14:33:55 GMT -8
This is going to be great! Just out of curiosity, does the windshield in the Falken kit have the square leaderboard mount molded into it like the Rowe kit does? Also, what decal company are you using for the decals? Hi Ben, I don't see any mount molded on the windshield nor the instructions. But the part is still in the clear sprue. The decals are from Slotfabrik in Germany. www.slotfabrik.comHere is the decal sheet. Intimidating to say the least.   I'm scared of it.  Note the drivers names are in a separate smaller piece. Most likely the main page was printed already when I pointed out the names were wrong. Thanks, Ismael |
|
|
|
Post by Ben_B on Mar 13, 2019 3:48:53 GMT -8
Hi Ismael,
Thanks for the info! I've been to Slotfabrik's site several times. They have some great subjects. Their Lamborghini Gallardo and Huracan GT3 bodies have me thinking about trying to adapt them for static models.
Ben
|
|
|
|
Post by tatocorvette on Mar 13, 2019 6:59:24 GMT -8
Test, testing... This is only a test. Replacing the kit's exhaust tips with aluminum tubing 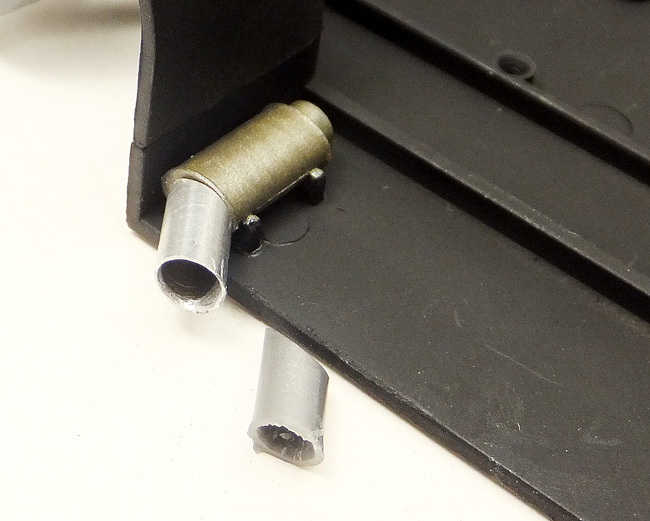 Still needs a little tweak but you get the idea. Thanks, Ismael |
|
|
|
Post by tatocorvette on Mar 14, 2019 9:29:07 GMT -8
Hello, DISCLAIMER: I'm using flat black instead of wasting a ton of money in carbon fiber decals that will not be seen. But 99% of what you see in flat black should be CF. Radiators, heat exchangers, coolers whatever you wanna call 'em... 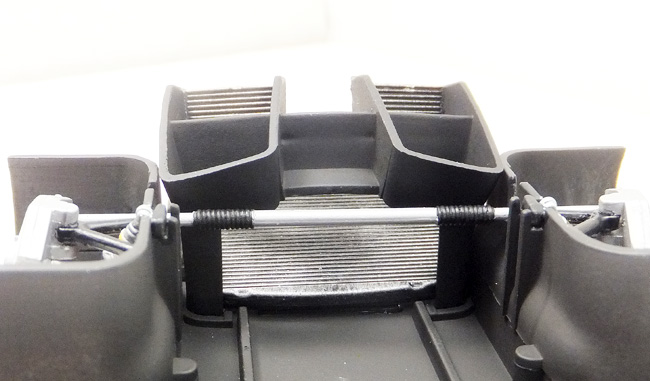 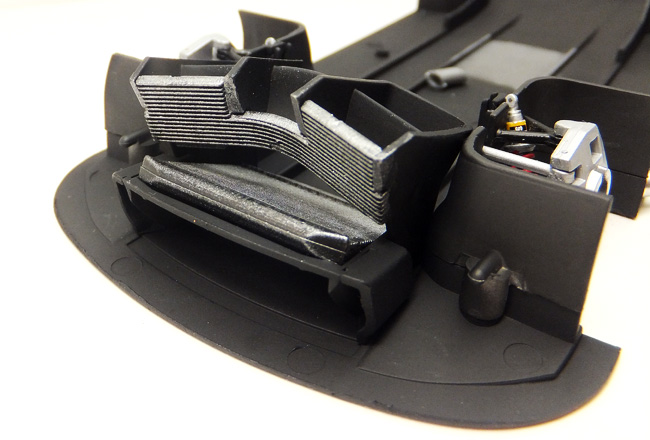 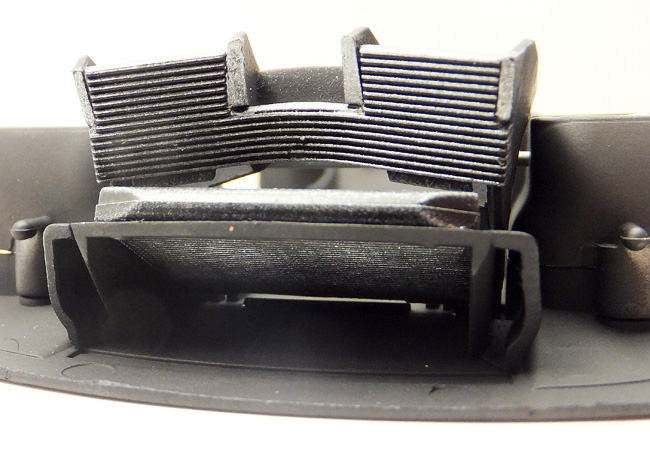 Front brakes: 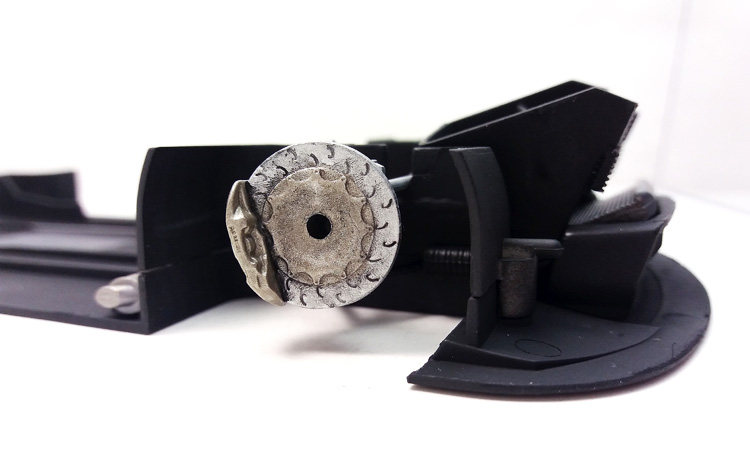 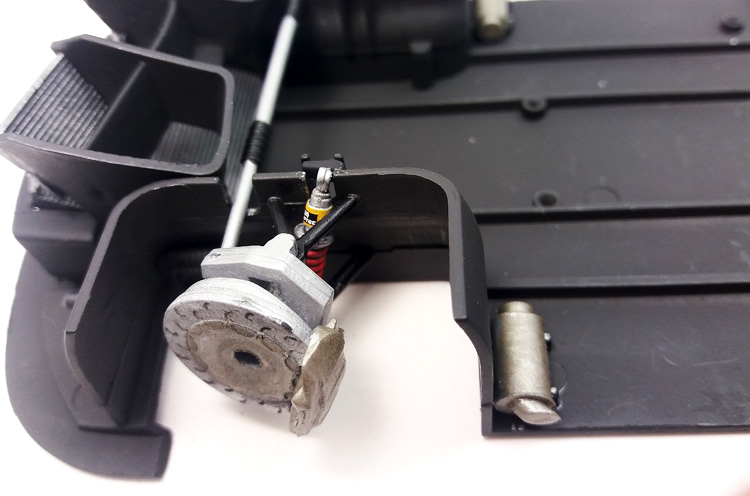 I'm really liking this kit! I'm only starting and I'm aware I will most likely run into issues but it is engineered to be a rather simple build with low parts count but looks really good and far more detailed when done. So far so good. Thanks, Ismael |
|
|
|
Post by Ben_B on Mar 14, 2019 10:04:59 GMT -8
Looking great!
Ben
|
|
|
|
Post by Joel_W on Mar 15, 2019 15:33:15 GMT -8
Ismael,
Certainly a rather interesting build from a kit manufacture I've never heard of before. Nice detailing of the front shocks, it's a huge improvement.
As for your use of flat black as a substitute for CF decals, I'm with you on that issue. Actually, I've shied away from CF decals for a few reasons, with price being #1 for me. What I'll be using when I actually need some CF is Gravity's Carban Graffiti paint #206. See you're not the only one who has a decal phobia.
And those decals look spectacular. I'm going to checkout that site ASAP.
Joel
|
|
|
|
Post by tatocorvette on Mar 15, 2019 20:16:45 GMT -8
Hello, A particularity of this model is that all electronics boxes and many other interior parts are molded in the tub. that makes a huge challenge to detail paint, especially since the car I'm doing is gloss white inside with black cables and boxes. I tried masking but did not work. Free hand painting these was a pain. Still more than halfway to go. I added black painted wires following the molded cables. I added some decals from the parts box. Except for the wires, this is all one piece. This will most likely not be seen, but again, I've never claimed to be normal. 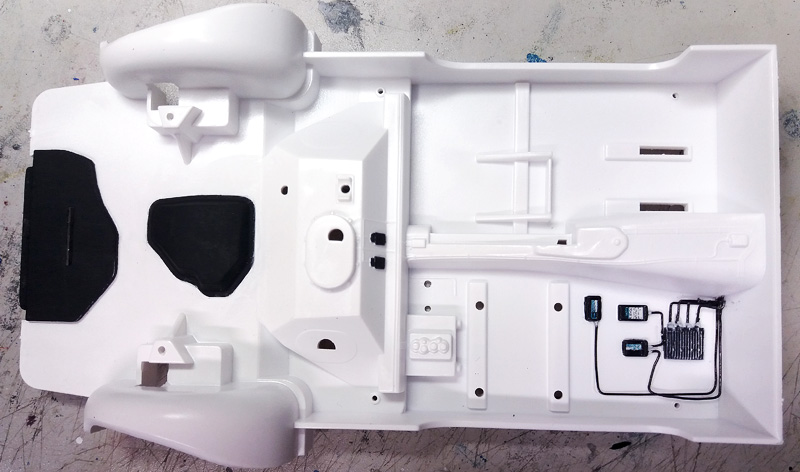 Thanks, Ismael |
|
|
|
Post by Joel_W on Mar 16, 2019 4:48:39 GMT -8
Ismael,
Honestly, if you didn't post that those electrical boxes were molded into the tub, I'd have sworn that you added them. Perfectly painted with no tell tail black paint over runs off the sides by just a tad (my personal trademark I might add).
Nice job of wiring. I'm going to assume that you glued some small pcs of tubing to the sides of the boxes, then glued the wire cables to them. Really looks perfectly done.
Joel
|
|
|
|
Post by tatocorvette on Mar 16, 2019 7:55:08 GMT -8
Hello, Black objects on white backgrounds are the hardest to photograph. Also these pics are larger than actual size. Wired the power distribution module with 2 different sizes of wires as per references. Added a metal strap to the fire suppression tank. Also added a parts box decal, gauge decal and a line. Also added parts box decals to the 2 little electronic boxes behind the center tunnel. Those will be wired eventually. The kit has a weird clear part bracing. In my references, there is just an aluminum plate in that area, which I added. Nothing looks like aluminum better than aluminum itself Lots of black and wires still remaining but slowly getting there. 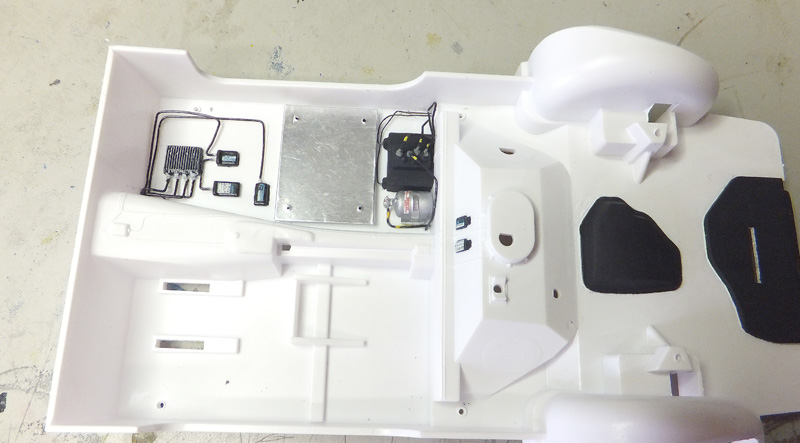 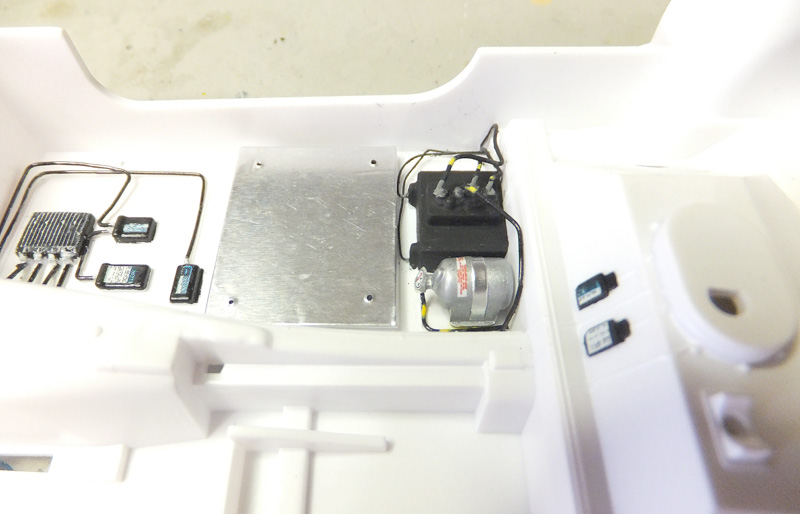 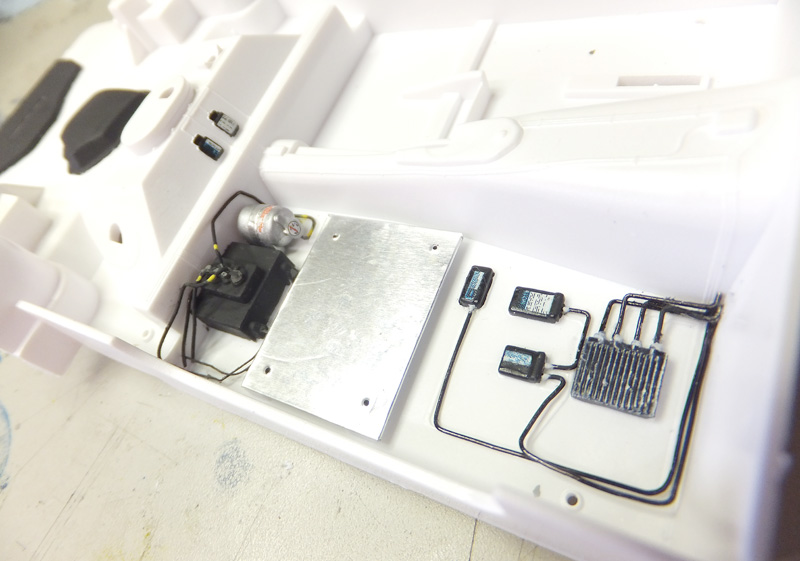 Thanks, Ismael |
|


 ) car newbie self-inflicted wounds, but overall, it's a good kit of a cool subject. You'll probably want to treat it more like a limited run kit.
 I'm scared of it.