|
|
Post by martinb on Feb 18, 2021 0:55:28 GMT -8
Welcome! Following strict advice; this is my personal build log for my version of the 1/12 GT40 MkII by Trumpeter. Mine will be an attempt at the (shock horror) Ken Miles No.1 version. I'm not the most active of users, and - to be honest - not the best recorderer of my work. But I should at least try as this seems a popular build at the moment. I will no doubt forget to photo a step or even not bother if I feel it not interesting or seems too obvious - or has been covered well enough on one of the other threads; so I am more than happy to explain something if someone would like to know what I did at any stage. Anyway, here we go... As of 18-Feb-2021: Specific items purchased: Trumpeter 1/12 GT40 MkII (mine is a Magnifier MAG00019, although my box doesn't even seem to have the 'Magnifier logo... maybe it's a fake!  ) KA Models Super Detail-up Parts Kit (KS00007) Indycals aftermarket decals Icon Automotive miniatures aftermarket Tires Set Meng Nut and Bolts - Large Set A Top Studio 1/12 weld lines Top Studio Resin Hose Joints (large) Plus Model Bolts & Nuts (1.3 & 1.5mm) |
|
|
|
Post by martinb on Feb 18, 2021 1:06:50 GMT -8
As anyone with this kit or has read on other threads; there is no ignition system supplied with this kit. With that in mind, I decided to make a distributor: I filled a small bottle cap with epoxy and inserted a brass tube. Once set, I used a Dremel as a mini lathe and turned the shape. Drilled and inserted 9 x Ø1.2mm s/s tubes. To tidy the outside; I used a piece of heat-shrink tubing and painted the whole thing black. Will look at making a VA unit at some point too   |
|
jimc7
Qualifier

Posts: 51
|
Post by jimc7 on Feb 18, 2021 6:48:52 GMT -8
Martin, what a great way to fabricate a distributor, I would never have thought of that. Thanks for the step by step. Of course, your craftsmanship shows through on that piece, well done!
|
|
|
|
Post by Chris K. Hale on Feb 18, 2021 7:50:51 GMT -8
Nice Job on that distributor , Martin, sometimes a little innovation works well! Chris
|
|
|
|
Post by pnance26 on Feb 18, 2021 14:17:18 GMT -8
The Ford GT40MkII did not have sharp angles on the distributor cap. That is incorrect for the year and model... I'm kidding of course. I don't know angled from round.
I think it looks pretty damn good. That is the single thing I have heard that is good about the MENG 1/12th Ford GT40MkII... it has a distributor cap.
|
|
|
|
Post by martinb on Feb 18, 2021 22:10:53 GMT -8
The Ford GT40MkII did not have sharp angles on the distributor cap. That is incorrect for the year and model... I'm kidding of course. I don't know angled from round. I think it looks pretty damn good. That is the single thing I have heard that is good about the MENG 1/12th Ford GT40MkII... it has a distributor cap. Thanks all. I realise a lot of details cannot/will not be seen once finished; but I have an idea of finishing the model in a 'race finish' state. The idea being that I would build some form of diorama with the car on stands in the garage with a few parts removed. Not sure this will enable more access to viewing some of the hidden details or not; but I wouldn't want to miss anything if there is the opportunity to add detail here and there. That cannot be the ONLY thing the Meng kit wins on? |
|
|
|
Post by pnance26 on Feb 19, 2021 11:54:21 GMT -8
Martin, Have you seen a kit review of the MENG? The seats are rubber, the body is wrong, and the entire think looks like a cartoon! Let me see if I can find it... you have the Magnifier, correct? Here it is... for $400 prepainted when you can get the Magnifier for $99.95? There is nothing in this kit worth $400 prepainted or $200 unpainted. I'm glad I made the choice I have! www.youtube.com/watch?v=ZbKhLM5Gd2g&t=40s |
|
|
|
Post by martinb on Feb 19, 2021 14:47:45 GMT -8
Martin, Have you seen a kit review of the MENG? The seats are rubber, the body is wrong, and the entire think looks like a cartoon! Let me see if I can find it... you have the Magnifier, correct? Here it is... for $400 prepainted when you can get the Magnifier for $99.95? There is nothing in this kit worth $400 prepainted or $200 unpainted. I'm glad I made the choice I have! www.youtube.com/watch?v=ZbKhLM5Gd2g&t=40sI had watched that video, but at the time only skimmed through as was only really interested in seeing just how bad those rubber seats were after your review!  But, yes, I'm very happy with my choice. I know the limitations of this kit and exactly which parts need to be replaced/improved, and I think it is excellent value - as a base model. Yes, the costs to improve it have spiralled out of control; but it would have been exactly the same (possibly worse?) with the Meng version. (Those solid pipes in the Meng kit too... ) |
|
|
|
Post by 65slotcar on Feb 21, 2021 11:07:29 GMT -8
looking forward to your build, looks like the red #3 Dan Gurney car has not been started yet and may go for that one for a future build.
|
|
|
|
Post by pnance26 on Feb 21, 2021 13:07:38 GMT -8
looking forward to your build, looks like the red #3 Dan Gurney car has not been started yet and may go for that one for a future build. I am pretty sure IndyCals has the correct decals... Here you go! Would make a great addition to the group! indycals.net/decals/lemans/66gt40-3.html |
|
|
|
Post by pnance26 on Feb 21, 2021 13:10:16 GMT -8
There were actually 8 different paint schemes at LeMans that year (1966). The #4 is just plain ugly, the #5 meh, the #6, #7, and #8 are all pretty cool.
|
|
|
|
Post by martinb on Mar 1, 2021 23:50:51 GMT -8
Well, time for an update. I decided to take on the challenge of replacing the rear brace. I really didn't like the supplied beam and bar so it seemed a reasonable challenge! I used styrene sheet and cut the gearbox mount and the two frame supports from the existing part - which will hopefully maintain assembly accuracy.... Engine side:  Rear face:  In order for the new bar to seat correctly on the new saddle locations, I needed to straighten the 'lazy' bends in the plastic piece. You can probably see the joins where I attempted to replace those sections with some sprue from the kit (coincidentally, the same diameter...) which I bent and inserted. In the end, I decided to make a new bar out of some 0.062" piano wire. I felt the plastic one was just too chunky compared to the pictures I'd seen:  I will now finish off the saddles to hold the wire in place before installing the shock pieces:  I hope it all fits.  |
|
|
|
Post by Chris K. Hale on Mar 2, 2021 7:00:49 GMT -8
Nice job, when I made this part, top of the rear cradle that bolts the trans, sway bar, rear shocks on to the main section of the rear cradle, I made it out of multiple layers of styrene and square tube. 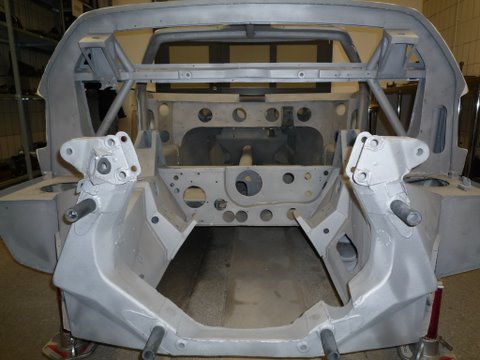 this is the bottom part , the part you made bolts across the top completing the cradle.  this is the two part piece I made for My 1/16 scratchbuilt version. Cool Scratch building on your too.. Thanks for showing, some parts are hard to understand. Chris |
|
|
|
Post by pnance26 on Mar 2, 2021 8:23:46 GMT -8
Looks good! I don't know that I would have taken on that entire bar! You are a better man than I, Gunga Din! Now don't forget those PE "rings" on your new wire suspension piece that accepted the clamshell wires/chains many, many steps down the way!
|
|
jimc7
Qualifier
Posts: 51
|
Post by jimc7 on Mar 6, 2021 6:07:02 GMT -8
Very nice fabrication Martin!
|
|


 )
)


