|
|
Post by Joel_W on Aug 27, 2021 5:33:48 GMT -8
Adrian,
Thanks so much for your big Thumbs up on the painting and decaling. It's much appreciated.
I gotta confess about the clear gloss. Once again I chickened out and went with this time some of the Super Gloss I bought from Scale Finishes. As for the 2K system I've got on the shelf calling my name, it's the Gravity System. Just can't get myself to "push the button" and go for it.
joel
|
|
|
|
Post by Chris K. Hale on Aug 27, 2021 9:23:12 GMT -8
Joel The Color came out just right, Good Job on the respray. For decals I use warm water , soak the decal for a moment, then let it sit to release and apply, using a Make Up Sponge ( my wife keeps asking where they are going...I dont know! LOL..)I position it, smooth it and try to get it into the panel lines and the like, it will also remove the excess water then I use a semi-liberal coat of Solvaset, it wrinkles the decal up , and dont touch it or it will self destruct, After it dries for several hours it will suck down and smooth out and normally I dont have to do any thing except clear it or not. should you have any offensive bubble, wrinkles or misc then take a very sharp needle and pierce the offending area , not a lot , you shouldnt be able to see the tiny hole, and apply a small drop of Solvaset on the hole, it will go under and suck it down for a perfectly smooth finish. I have done this on kit decals, Indy Cals, Fred Cady, Cartograph and every decal I use unless its a flat area and the decal goes down nice and smooth, then I dont use setting solution. I use a similar method for compound curves and the like. Hope you continue to get great results like on this Lotus. I looked at the color of the Lotus ST127 and it is identical to the 79, your paint matches up really well. Keep it up.. 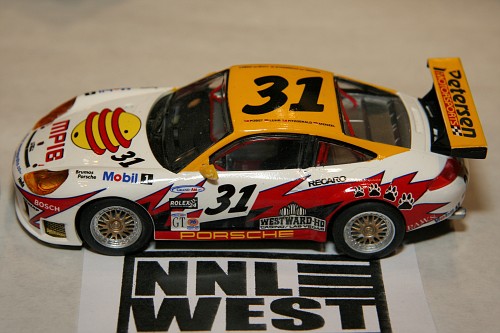 The decals on this are everything that is not white, so the yellow red etc. quite a bit of decal coverage but I used the method described.. Simpler is better for me..Chris |
|
|
|
Post by Joel_W on Aug 27, 2021 9:55:56 GMT -8
Chris,
Wow!! That's some decal job. It's just amazing.
Your process is so simple, yet so effective. Will be trying it out for sure. So you don't even bother with the Micro system. just soak, place, and Solvaset. I'm assuming that the water you brush on the surface so you can position has a drop or two of Dawn or a similar brand so that the water doesn't bead up?
I gotta tell you that the best thing I ever did for improving my modeling, is joining this site. The guys including you and JC really have helped me up my game. Even if I don't detail to the level that most of the members do, the builds are great and just help to keep my Mojo tank full.
joel
|
|
|
|
Post by Chris K. Hale on Aug 28, 2021 6:25:22 GMT -8
Joel, I dont like to complicate things, I dont add anything to the decal water just soak in warm water and apply, I am always afraid that there may be residue from the soap that would effect the clear if I use clear. Early race cars did have clear over the decals so not many of mine do either. To prevent beading I use distilled water and that seems to do it. The Make Up Sponges soak up the excess so there normally isnt any water to bead. Those are those little wedge shape, white sponges found at the super market in the cosmetics section or my wife's bathroom too... That was my original reason for starting this forum, to learn, share and enjoy model car building, NO B.S. no wise cracking or flaming just a bunch of people who enjoy Our Hobby. Glad to have everyone here, novice to pro, everyone is the same in my book.. ps. that Porsche is a 1/32 Hornby kit, great kit , that came out months after this Porsche won big time at Lemans, I have a few more and recommend them highly, not bad for a curbside either , with a full roll cage and interior too. I think I have 4 or 5 various subjects like a beautiful Gulf GT40 that I havent built yet. 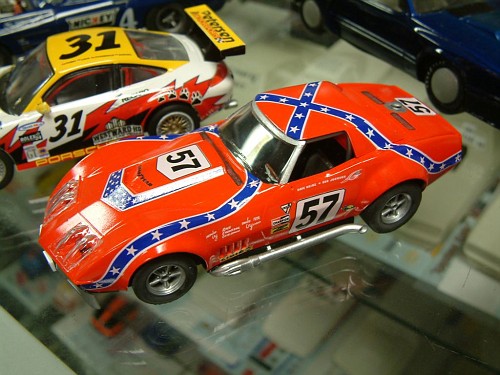 the Corvette came out just as nice, again lots of decal work.. |
|
|
|
Post by Joel_W on Aug 28, 2021 7:27:58 GMT -8
Chris,
Every one of your completed builds I've seen has had flawless decaling. Yet, you're the only one that has used such a simple one step system, which works to the nth degree.
One master modeler I've followed since meeting him in the 1970s at the IMPS Nationals held in the Northeast is Paul Budzik. It's his decaling method that I've copied, tweaked, and have used for years without issues. He really doesn't touch the decals much during his 3 step process other then just patting them down to remove fluids under the decal and set it in the correct place. Like you, the less you play with them, the better off you are. And Step #3 is Solvaset. Then there's Paul from International Scale modeler who literally works the decals to near death. While I find him to be an excellent basically OOB builder, I've told him that for my money he works the decals way to much, and that's why he had issues with the Indy Cal decals.
joel
joel
|
|
|
|
Post by Chris K. Hale on Aug 28, 2021 8:56:51 GMT -8
Joel, Maybe that's why I have never had a single problem with Indycals. I learned my method from my Dad way back in the seventies. Don't try to fix what isn't broken , as they say... Chris
|
|
|
|
Post by Chris K. Hale on Aug 29, 2021 10:38:13 GMT -8
 Nailed it Joel!! Chris |
|
|
|
Post by Joel_W on Aug 29, 2021 13:40:56 GMT -8
Chris,
Thanks, it's much appreciated, but the real thanks goes to Gravity as they mixed the paint which is meant to go over neutral gray primer, which I did use.
joel
|
|
|
|
Post by adrian29341 on Aug 30, 2021 8:41:04 GMT -8
Chris, Every one of your completed builds I've seen has had flawless decaling. Yet, you're the only one that has used such a simple one step system, which works to the nth degree. One master modeler I've followed since meeting him in the 1970s at the IMPS Nationals held in the Northeast is Paul Budzik. It's his decaling method that I've copied, tweaked, and have used for years without issues. He really doesn't touch the decals much during his 3 step process other then just patting them down to remove fluids under the decal and set it in the correct place. Like you, the less you play with them, the better off you are. And Step #3 is Solvaset. Then there's Paul from International Scale modeler who literally works the decals to near death. While I find him to be an excellent basically OOB builder, I've told him that for my money he works the decals way to much, and that's why he had issues with the Indy Cal decals. joel joel
Then I lay on 2 light coats of Future - no distilled water added to dilute - most guys advise that but I tried just staright undiluted Future once and found it worked much better that way. This creates a perfect covering for the final clear coats to adhere to - thus once done you have your decals under your top coat with no bumps or raises etc.
I think it sounds simple but that is my method and so far so good! |
|
|
|
Post by Joel_W on Aug 31, 2021 8:11:07 GMT -8
Just a quick update as I finished the Clear Gloss, followed by 8.000 then 12.000 Micro Mesh with plenty of water, and then Gravity’s 3 step polishing system, I originally was going to use cut pieces of black decals to replicate the rubber seals on the bottom of the side pods that floated over the track to create the suction generated by the air moving through the aero tunnels. further research showed that the lower visible portion of the seal was just a removable piece of Aluminum with a rubber trim piece. So I decided to replicate the aluminum with Matt Aluminum BMF as I didn’t want to chance masking over the decals as I’ve had issues with pulling parts up back in my aircraft days. The BMF went down and smoothed out perfectly. At the same time I did the small rear section on the back of the engine cover where the exhaust existed the headers. Again, the BMF worked perfectly, and it’s more then 5 years old. And finally the 1st coat of Gravity wax. So here’s where the body shell is at once again dry fitted.    Now it’s back to the engine/transaxle, and rear suspension. joel |
|
|
|
Post by Joel_W on Aug 31, 2021 9:18:32 GMT -8
Adrian,
Your decaling procedures are also much simpler then mine. Your results certainly speak for themselves. So on my next build I'm going to simplify my method as you and Chris have certainly opened my eyes.
Joel
|
|
|
|
Post by chrissmith on Aug 31, 2021 12:24:29 GMT -8
Looking great Joel! The paintwork is top notch.
|
|
|
|
Post by Joel_W on Aug 31, 2021 13:36:33 GMT -8
Chris,
Thanks for the thumbs up. It's greatly appreciated.
joel
|
|
|
|
Post by pnance26 on Sept 1, 2021 17:02:38 GMT -8
Chris, Every one of your completed builds I've seen has had flawless decaling. Yet, you're the only one that has used such a simple one step system, which works to the nth degree. One master modeler I've followed since meeting him in the 1970s at the IMPS Nationals held in the Northeast is Paul Budzik. It's his decaling method that I've copied, tweaked, and have used for years without issues. He really doesn't touch the decals much during his 3 step process other then just patting them down to remove fluids under the decal and set it in the correct place. Like you, the less you play with them, the better off you are. And Step #3 is Solvaset. Then there's Paul from International Scale modeler who literally works the decals to near death. While I find him to be an excellent basically OOB builder, I've told him that for my money he works the decals way to much, and that's why he had issues with the Indy Cal decals. joel joel
Then I lay on 2 light coats of Future - no distilled water added to dilute - most guys advise that but I tried just staright undiluted Future once and found it worked much better that way. This creates a perfect covering for the final clear coats to adhere to - thus once done you have your decals under your top coat with no bumps or raises etc.
I think it sounds simple but that is my method and so far so good!(Doing my best Frank Caliendo doing John Madden) "And here's a guy that likes using Future as his clear coat!" I hear so much negative about Future it is amazing. And then I read stuff like this... lucky for me the MCW guys swear their paint doesn't need clear which I can believe based on the little I have used them... and the neon red is a matte finish which is how their neon shoots. So I don't have to worry about it... theoretically. I may shoot the blue, do the decals, then if it needs a clear coat, I will use MCW and then shoot the red. That is all dependent on the spoon test. I wish they made plastic tablespoons sizes. But to me, decaling in race cars is really really the frosting on the cake! A bad decal job can ruin the whole works! |
|
|
|
Post by pnance26 on Sept 1, 2021 17:05:01 GMT -8
Joel, great work on the decals. I have never been much for that green livery after the stunning black and gold for years. But hey, you dance with the one you brung! Will be looking forward as you mush forward!
|
|


