|
|
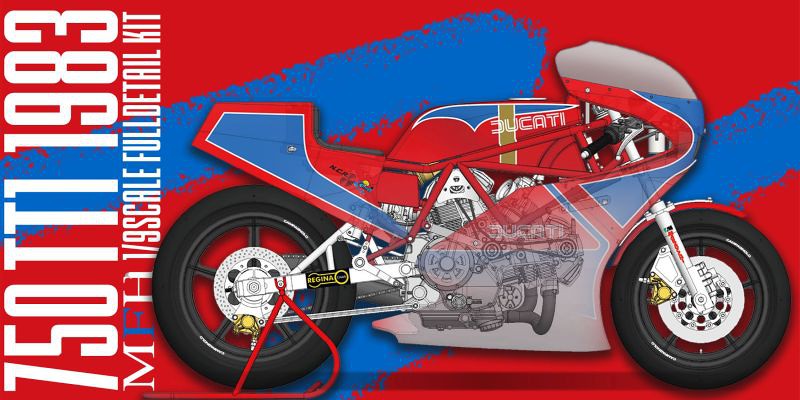
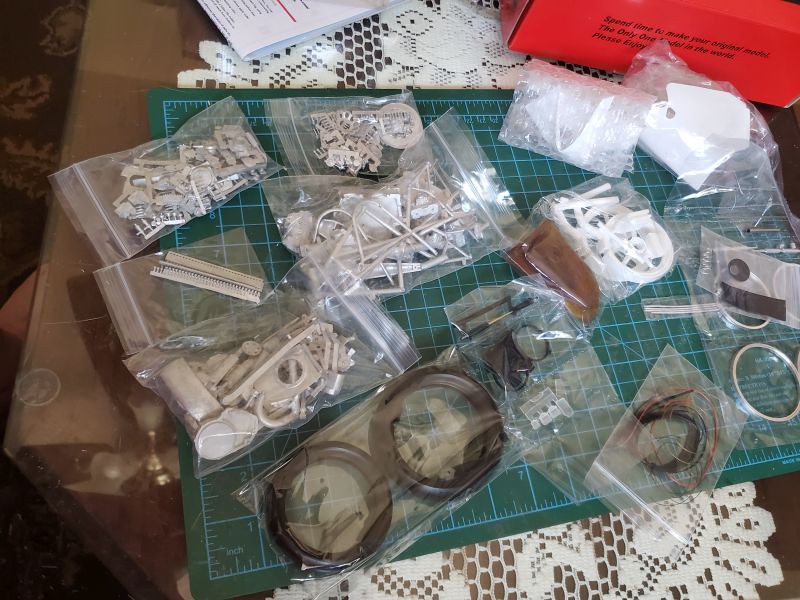
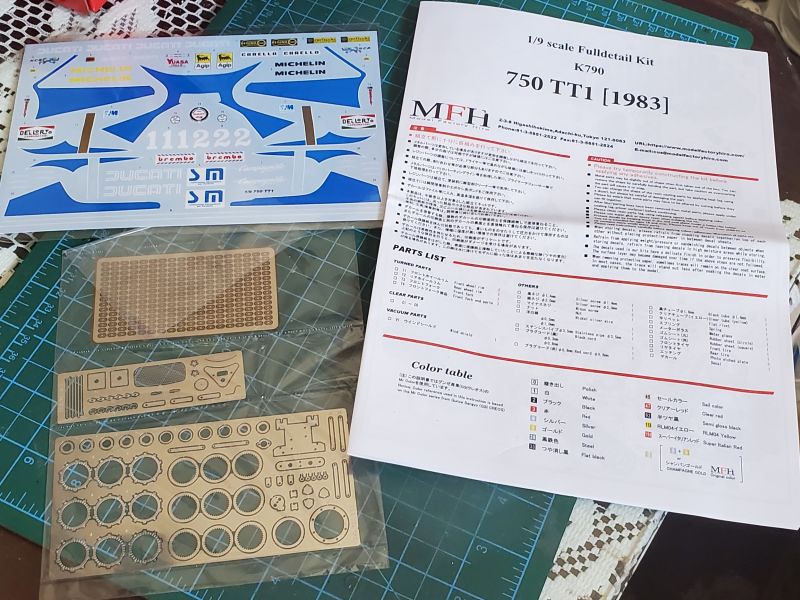
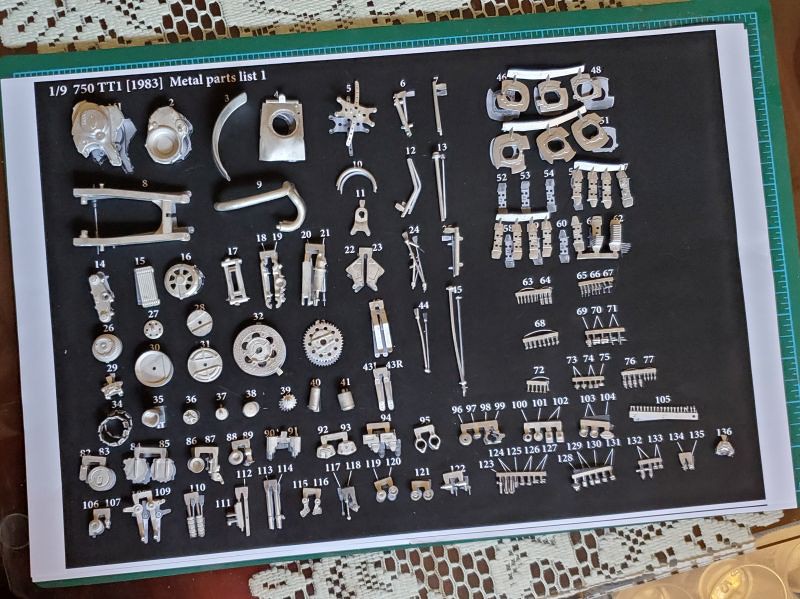
Post by 2whl on Jan 11, 2022 11:45:37 GMT -8
|
|
|
|
Post by arcticwolf on Jan 11, 2022 12:30:05 GMT -8
You have my attention on this one for sure!
|
|
|
|
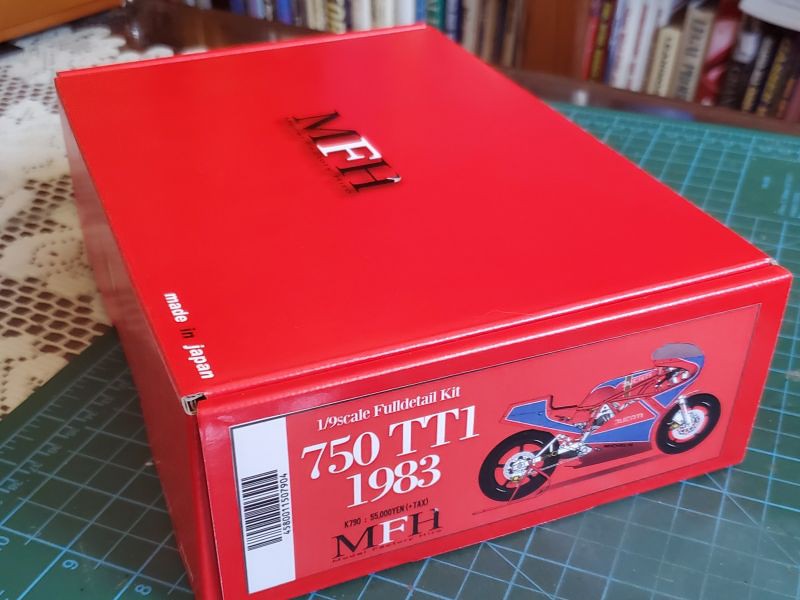
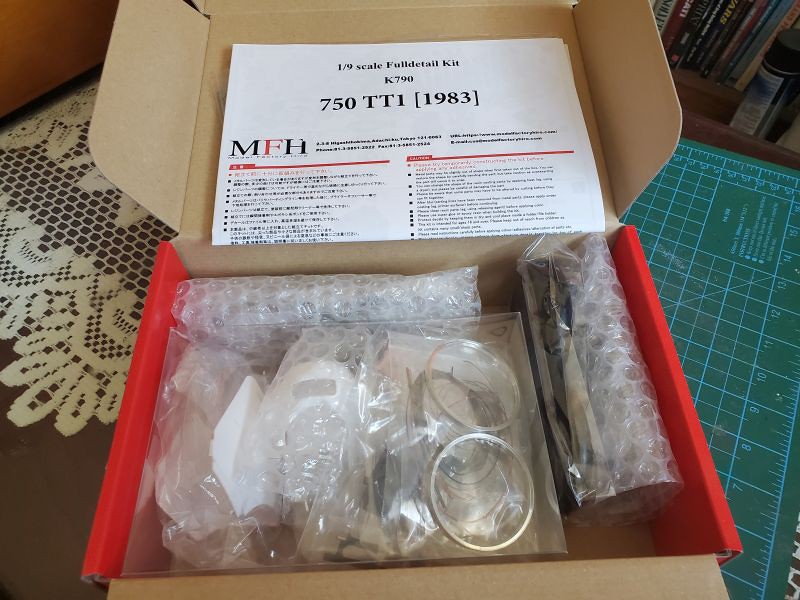
Post by mustang1989 on Jan 12, 2022 17:55:48 GMT -8
That's a spiffy 1:1 bike you've got there Paul. Looks like a well detailed out kit with a HUGE parts count.
|
|
|
|
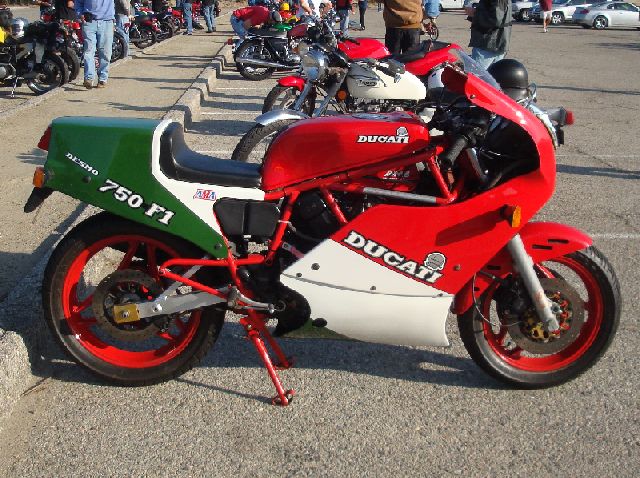
Post by 2whl on Jan 13, 2022 9:57:39 GMT -8
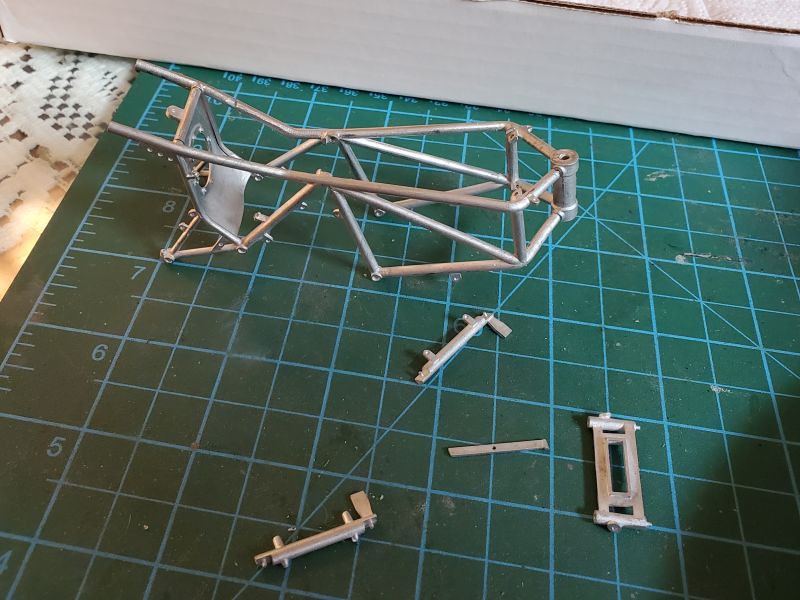
That's a spiffy 1:1 bike you've got there Paul. Looks like a well detailed out kit with a HUGE parts count. Thanks. It is very original. I got it from a guy and it only had 300km on it. Other than replacing the tires, I all I've done is ride it. The rear swing arm pivots off of the engine. 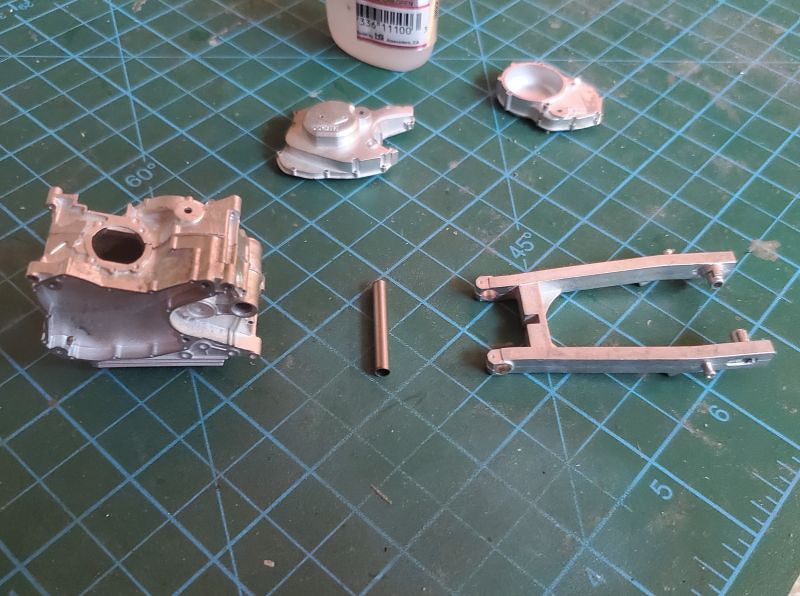 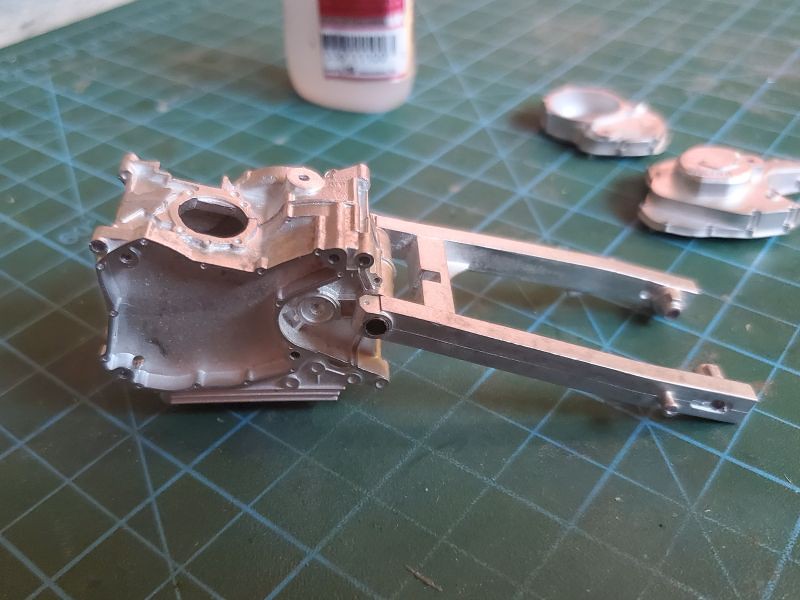 + Got the frame glued together. 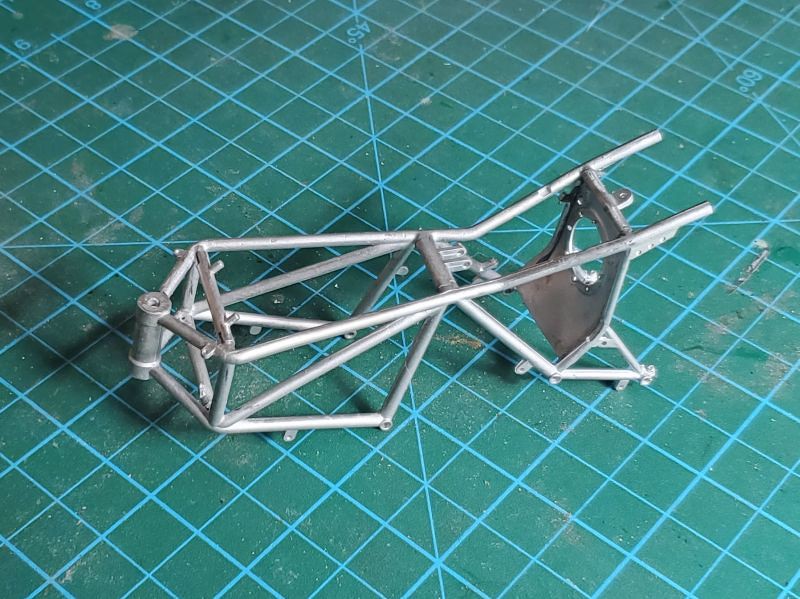 61 |
|
|
|
Post by sam on Jan 16, 2022 14:43:03 GMT -8
I still have not built the Tamiya kit I got from you.
|
|
|
|
Post by 2whl on Feb 10, 2022 14:52:32 GMT -8
I still have not built the Tamiya kit I got from you. Why not??? Slacker....lol I put the engine case together and jigged it up in the frame. It took a bit of twisting to get mounting points lined up. 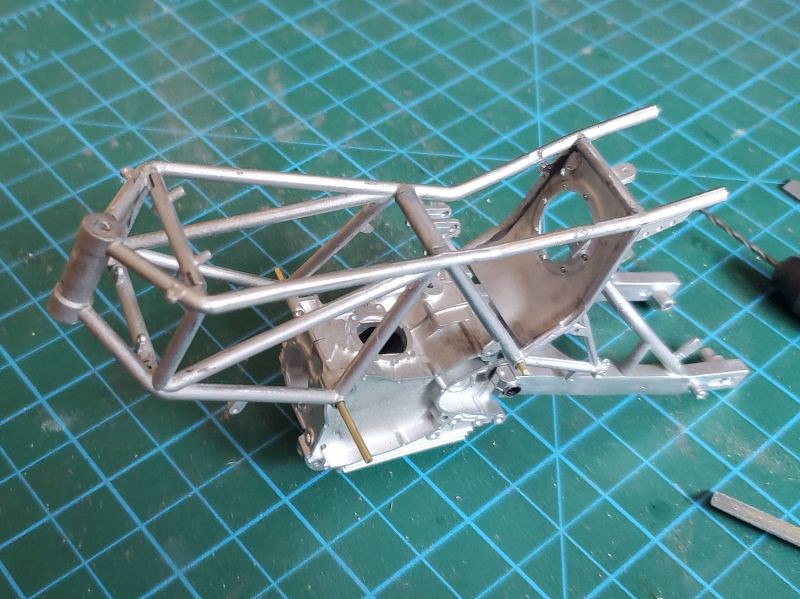 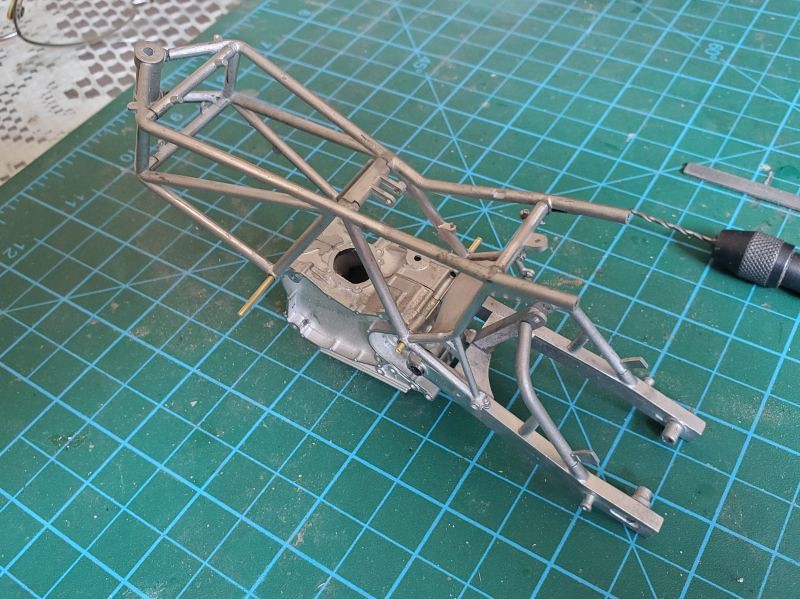 It almost looks like a motorcycle 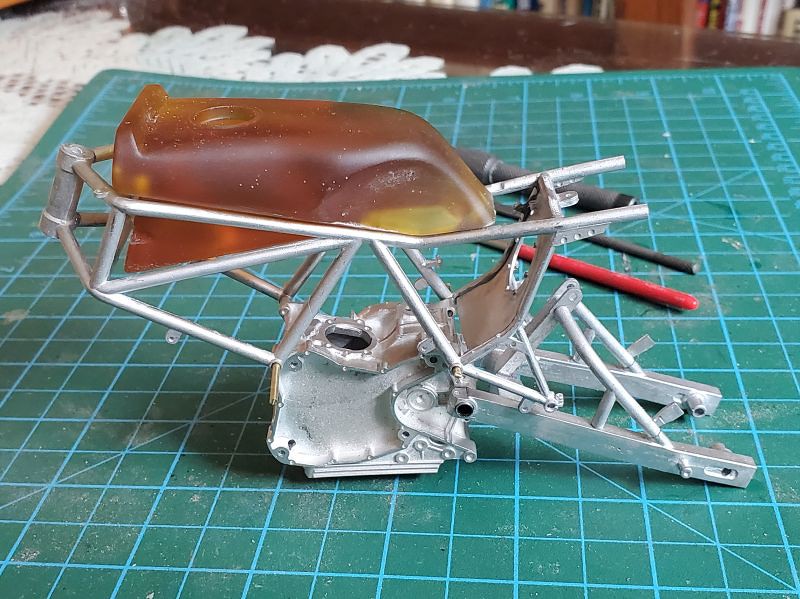 Rear stand together, then tweaked to fit pegs. 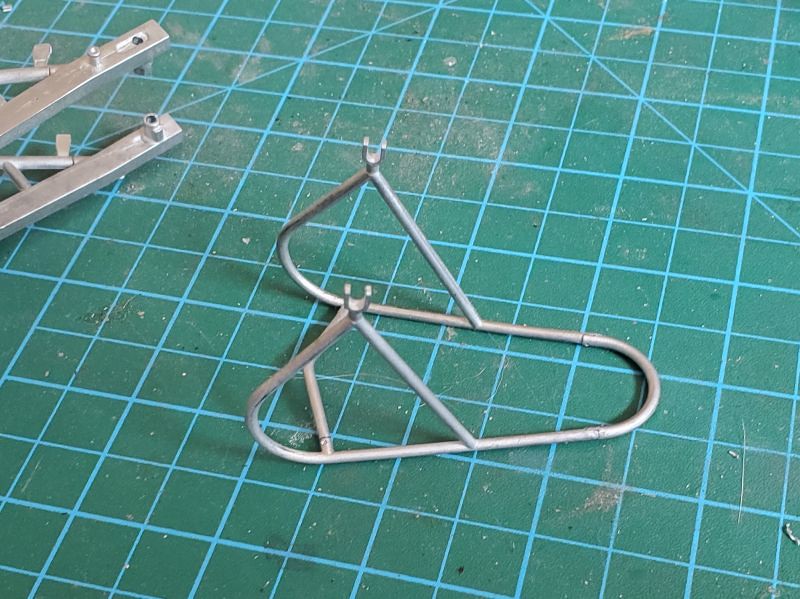  149 |
|
|
|
Post by arcticwolf on Feb 10, 2022 17:28:31 GMT -8
I was wondering where this went. 
Yes. it looks like a motorcycle, a real one.
|
|
|
|
Post by 2whl on Feb 12, 2022 8:36:26 GMT -8
I was wondering where this went.  Yes. it looks like a motorcycle, a real one.
Thanks for looking in, Paul It's still near the top of the pile. At least until the next 'squirrel' comes along.  Back part of chassis is the battery mount. I checked to see how the cowl fits with the battery in place. It'll be a real tight fit with the battery cables in place.  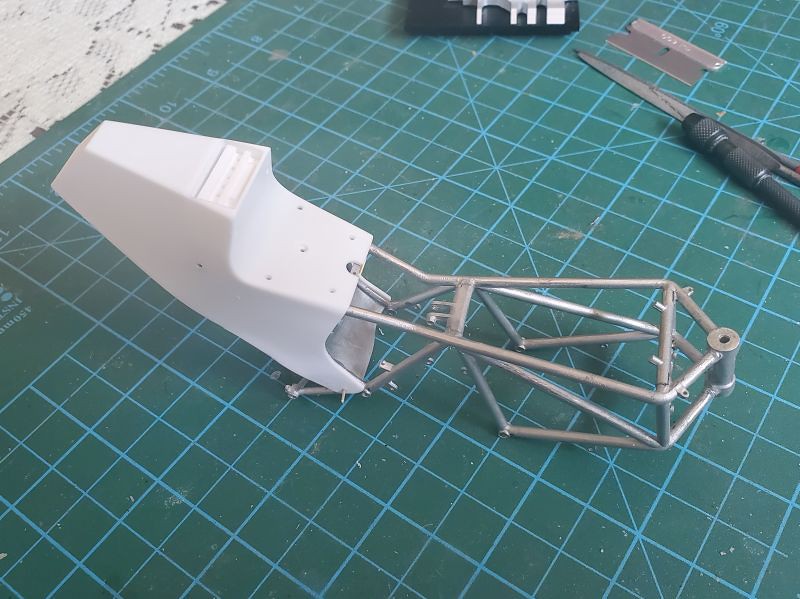 Also got the holes drilled for the shock protector.  The front suspension has gotten the parts drilled and fitted. 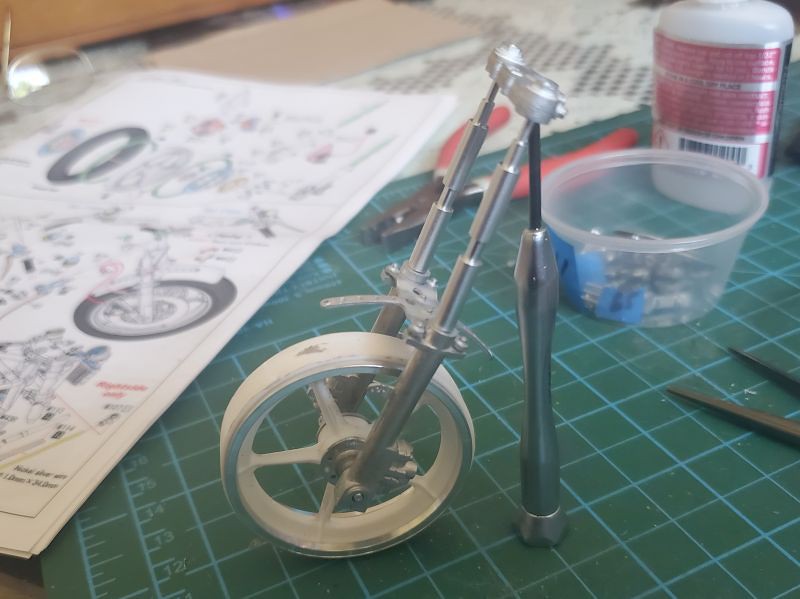  192 |
|
|
|
Post by arcticwolf on Feb 12, 2022 12:18:48 GMT -8
That's going to look great. I wish somebody had made a kit of my old Sebring.  |
|
|
|
Post by 2whl on Feb 12, 2022 19:22:51 GMT -8
Thanks Paul My painting session today included getting color on the frame. Tamiya TS-86 Pure Red 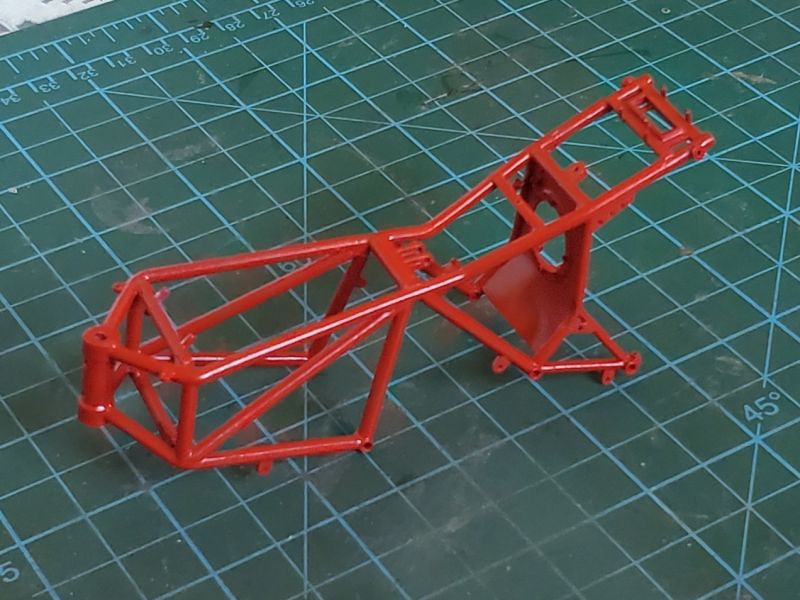 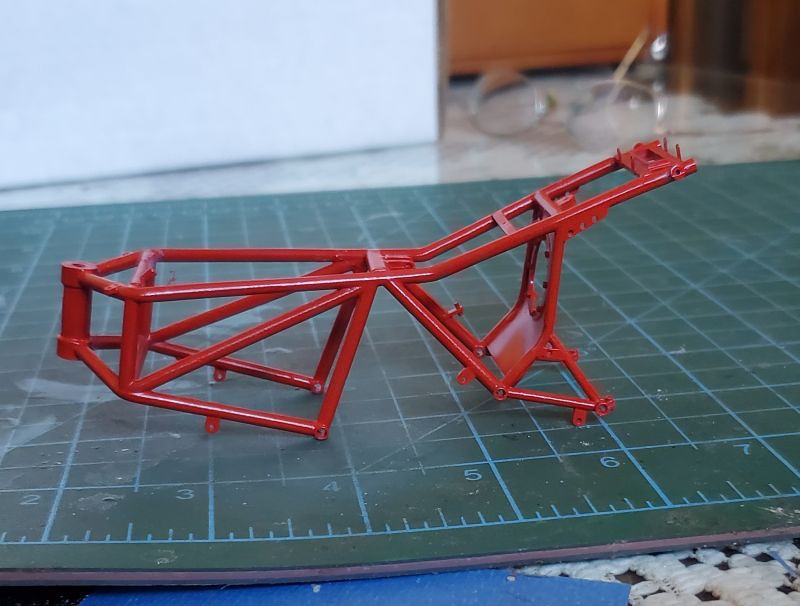 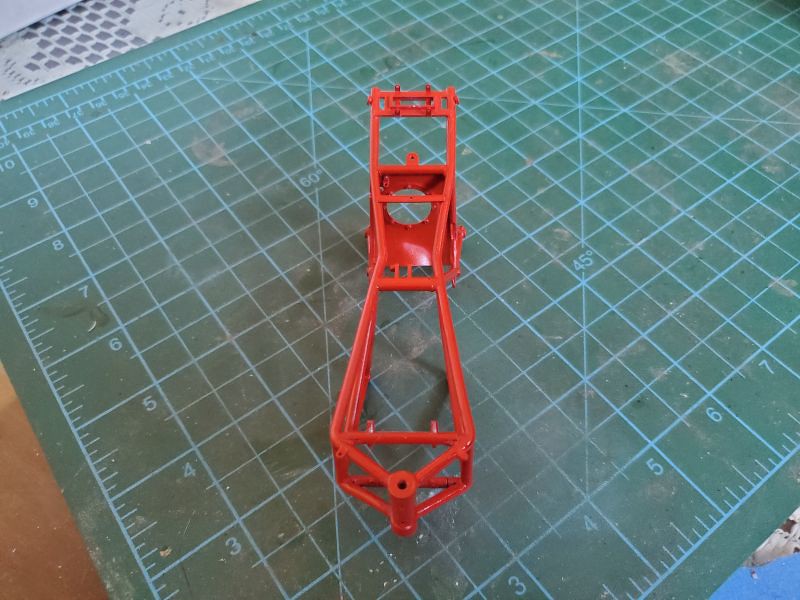 224 |
|
|
|
Post by sam on Mar 16, 2022 16:57:10 GMT -8
I was rearranging my models in my showcases and was thinking about you when I sorted out my motorcycles. This thing is looking good. Oh, and I have 98 models displayed with three spots for cars and one for a motorcycle. Trouble is, I have two big rigs and four cars on the bench...
|
|
|
|
Post by Joel_W on Mar 17, 2022 7:48:36 GMT -8
Just got a chance to catch up on another one of your MFH builds. I don't know a thing about bikes, but the build from a modeler's point of view is coming along beautifully. I'm always amazed that all of you MFH guys spend so much time drilling holes.
The paint job looks super glossy and about as perfect as one could get. Did you decant the rattle can, or apply it straight from the can?
joel
|
|
|
|
Post by 2whl on Mar 17, 2022 9:31:38 GMT -8
Just got a chance to catch up on another one of your MFH builds. I don't know a thing about bikes, but the build from a modeler's point of view is coming along beautifully. I'm always amazed that all of you MFH guys spend so much time drilling holes. The paint job looks super glossy and about as perfect as one could get. Did you decant the rattle can, or apply it straight from the can? joel Thanks Joel. I did it straight from the can. I primed it with a metal etching grey primer. Then shot TS-86 Pure Red straight from the can. The common joke amongst MFH builders is if you pay yourself $1 for every hole you drill, by time your done, you can by a new kit with the money..... |
|
|
|
Post by Joel_W on Mar 17, 2022 11:40:02 GMT -8
Judging from what you guys keep on saying about drilling holes, that sounds about right
joel
|
|