|
|
Post by Oldtimer on Jul 23, 2019 6:17:32 GMT -8
So, I think I had a successful date with Dr. Dremel last night, although it was a lot more involved than simply grinding away some plastic. First, I needed to take everything apart, starting with the dash, so that I could also remove the windshield (so as not to scratch it) to mark the apparent obstruction.    And then put the dashboard back in and get a reference line drawn. 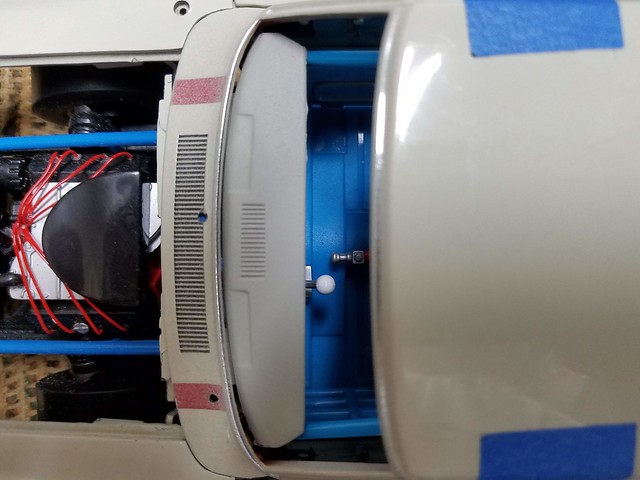
 And then grind away, and refit.  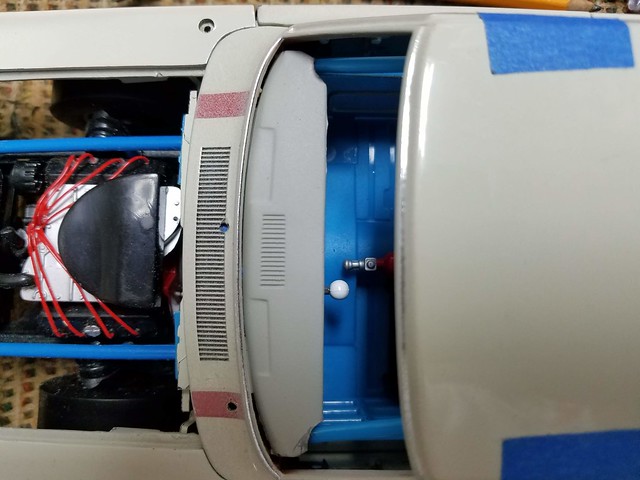 There were several iterations, each one requiring the dashboard to be removed and then reinstalled. 
And then full reassembly. 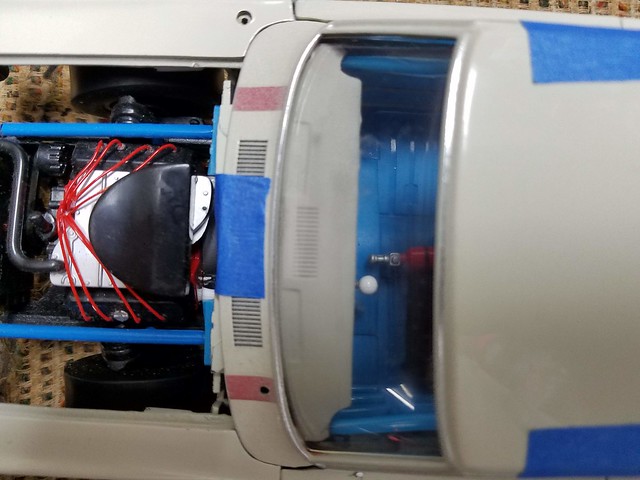 From the side Before Surgery  Post Surgery 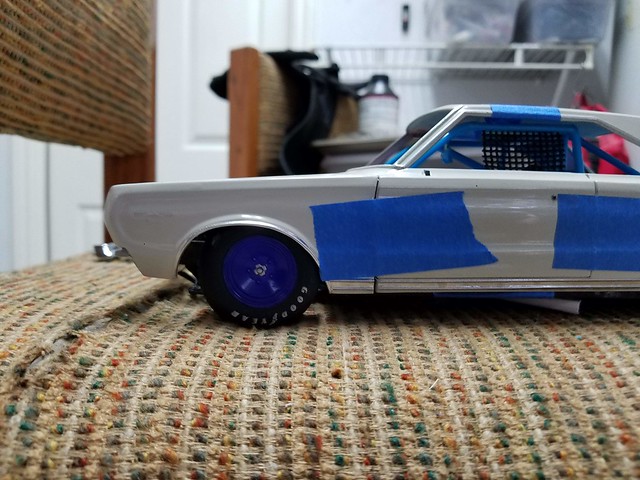 And while working with the body last night, I decided that the plastic angle I used to replace the front bulkhead isn't substantial enough, so I ordered some brass angle to replace it. These two pieces will be recut from the brass angle and then re-primed. 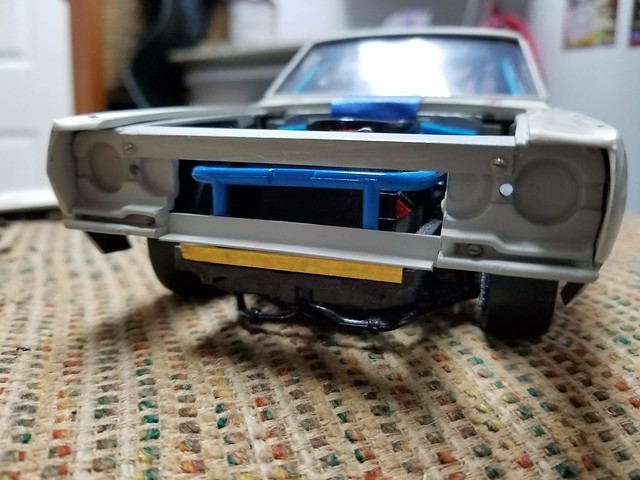 |
|
|
|
Post by pnance26 on Jul 25, 2019 8:17:26 GMT -8
Hey, Jim, I was wondering it the actual roll cage sits so far beneath the roof of the car that you can virtually see all of it as in the profile photo two shots above. Seems like the roll cage would fit flush up against the roof.
Just curious what you are thinking there...
|
|
|
|
Post by Oldtimer on Jul 25, 2019 10:03:26 GMT -8
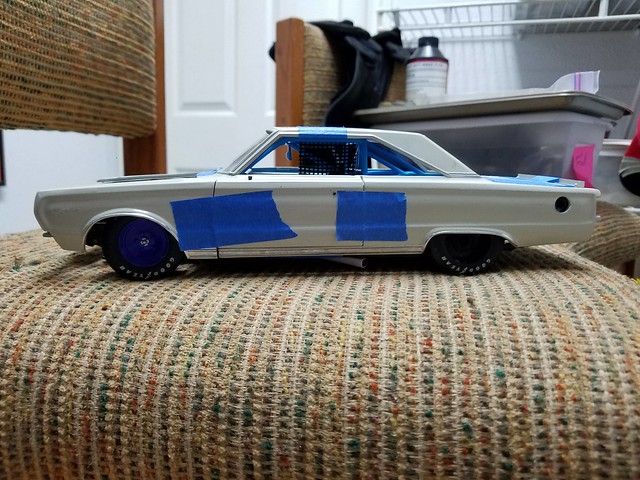
Hey, Jim, I was wondering it the actual roll cage sits so far beneath the roof of the car that you can virtually see all of it as in the profile photo two shots above. Seems like the roll cage would fit flush up against the roof. Just curious what you are thinking there... That's one of the issues I am dealing with. When I added the firewall, that interfered with the chassis rails, and I cut it down. Then I added the dash, and that added more interference. I'm thinking I need to go back to the firewall (still held in by tape) and cut it down even further. If you look at this picture (pre-firewall/pre-dash), you couldn't see the front roll cage bar behind the top plastic angle, and the roll cage right right up to the roof, like its supposed to be.  With the firewall/dash in place, you can see how that has changed in terms of the height of the roll cage bar compared to the plastic angle. Clearly I have lost something along the way. Working on these isn't like working on a real racer. It's hard for me to stick my head inside the engine compartment and see exactly where the interference is, or what is causing it. But I agree with you, the fit still isn't right. The unfortunate thing is that I only have one firewall to play with. Thanks for your input, I really appreciate it! |
|
|
|
Post by pnance26 on Jul 25, 2019 17:21:55 GMT -8
Jim, I really admire your fortitudein taking on such a project, so I hope I didn't offend you!
More photos!
|
|
|
|
Post by Joel_W on Jul 26, 2019 4:56:20 GMT -8
Jim,
You're certainly making excellent progress. The roll cage now seats a lot closer to the roof as it should. Looking forward to seeing how the new Angle Iron changes the look of the front end.
Joel
|
|
|
|
Post by Oldtimer on Jul 26, 2019 6:47:27 GMT -8
Jim, I really admire your fortitudein taking on such a project, so I hope I didn't offend you! More photos! No offense taken. I live on the feedback I receive, and it makes me a better modeler to have an honest critique of my work. I thought the culprit might be the firewall, so I took it out and shaved it down a bit, but the body still was too high, so I took out the dashboard and work on it a bit. Now the clearance is way too big, but I think I can fix that. Was too late to take more detailed pictures, but sneaking up on it, I think. 
 Also wondering if maybe the rake is off, so I'll be looking at how the rear of the body is matching up with the chassis. Again, thanks, everyone, for your comments and encouragement! |
|
|
|
Post by pnance26 on Jul 26, 2019 10:57:08 GMT -8
Can you cut the A pillars without doing too much damage?
|
|
|
|
Post by Oldtimer on Jul 26, 2019 16:57:46 GMT -8
Can you cut the A pillars without doing too much damage? The windshield and rear window are all one piece. Changing the distance at the front is exaggerated toward the rear, making it very sketchy. Plus you also have to cut down the windshield. Good idea, but not necessarily accomplishable. Thanks! |
|
|
|
Post by Oldtimer on Jul 28, 2019 6:17:31 GMT -8
Update on the dashboard project. Dr. Dremel and I may have been a little too enthusiastic in search of a cure for clearance, so a little bit of cosmetic surgery is called for. Got out my trusty tube of body filler, and some blue masking tape. 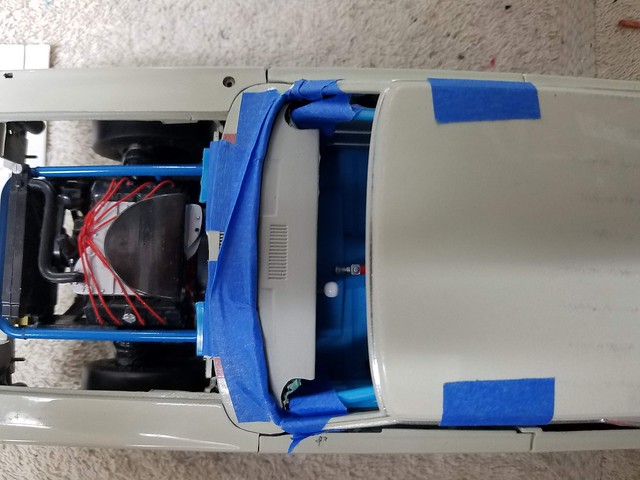 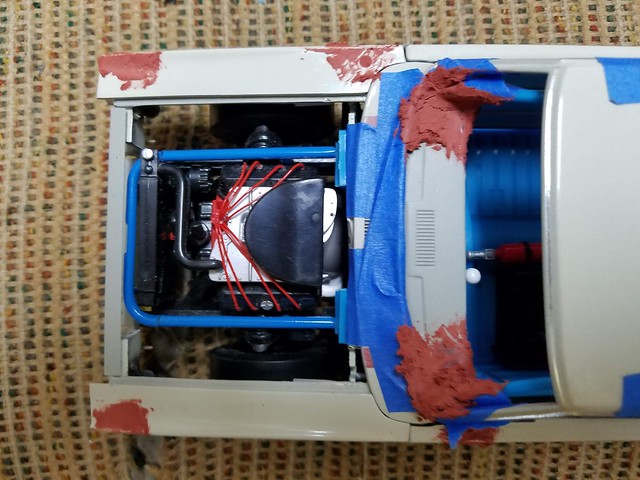 First pass taught me some lessons, so I ground away most of what I didn't like, and went at it again. This is currently curing on my workbench, not sure I will be able to do much for a few days. 
Brass angle arrived yesterday, as well, and still thinking about the means to duplicate the two plastic angle pieces. |
|
|
|
Post by Joel_W on Jul 28, 2019 7:25:58 GMT -8
In the case of your dash I do have some concerns. Have you glued in some backing under the Bondo for support so that the Bondo can be blended in and shaped around the roll cage bar?
Joel
|
|
|
|
Post by Oldtimer on Jul 28, 2019 7:49:35 GMT -8
In the case of your dash I do have some concerns. Have you glued in some backing under the Bondo for support so that the Bondo can be blended in and shaped around the roll cage bar? Joel Going to do that as the second pull on this stage. Was hoping that I could get a good contour around the cage tubes first, and then back it up with more body filler. The alternative is going to be to scrap all the body filler, and build scab pieces out of styrene. |
|
|
|
Post by Joel_W on Jul 28, 2019 8:11:42 GMT -8
Honestly, I'd scrap the Bondo filler as it was never meant for this task. There is always the chance that the Bondo will crack or chip, or worse, break off due to a vibration or being tapped or even hit. Sheet plastic glued and shaped is the way to go, then Filler used to blend it in. But that's only how I would go about it. I'm sure that there's several other ways.
Joel
|
|
|
|
Post by Oldtimer on Aug 5, 2019 13:09:58 GMT -8
Honestly, I'd scrap the Bondo filler as it was never meant for this task. There is always the chance that the Bondo will crack or chip, or worse, break off due to a vibration or being tapped or even hit. Sheet plastic glued and shaped is the way to go, then Filler used to blend it in. But that's only how I would go about it. I'm sure that there's several other ways. Joel Okay, well on to Plan B. One of my favorite substances for modeling is JB Weld, just like Frank's Red Hot Sauce, I'd put that s**t on anything. So, with these gaps to fill. 
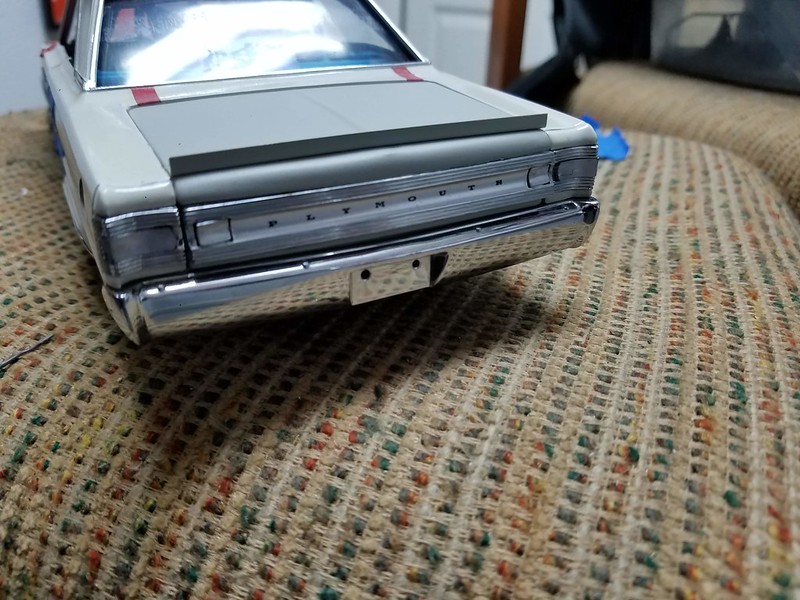
Over the weekend, I finally produced this. 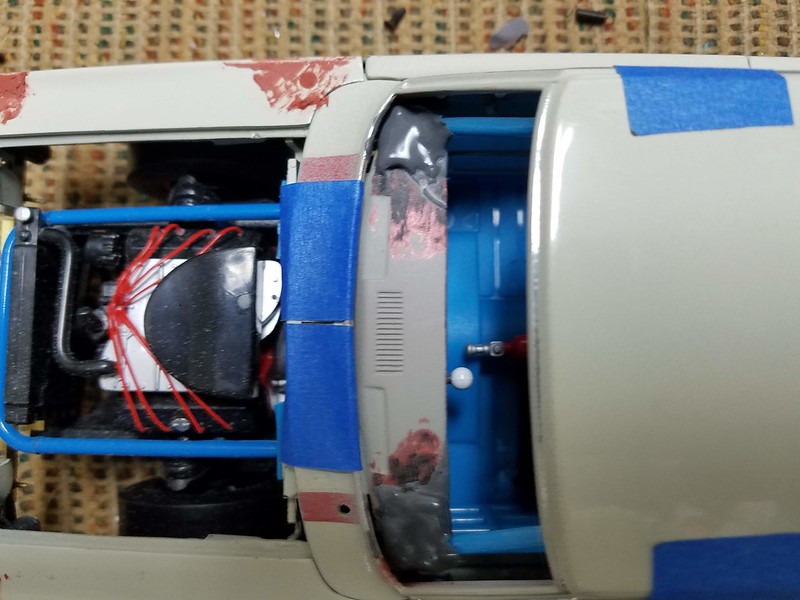  And don't worry, I had the rollcage bars wrapped in blue masking tape, so this is the end product.  Had the dashboard in and out so many times I was dreaming about it. There are about four layers of JB Weld, as I started with a layer on the top, took the dashboard out, lay in a layer on the bottom, and then did that same process one more time. Along the way, I filled in the holes in the hood where the original hood scoops on the donor model were, as well as where the hood ornament was. Threw some primer at the hood just to see how I did.  Still a little rough, but when I send the body off to the guy who strips the paint for me, it should clean up just fine with a little bit of sanding. Roughed in the front and rear bumpers, just to get an idea about the final. I'm pretty pleased with where we are, and just need a few more details taken care of. 
 |
|
|
|
Post by Oldtimer on Aug 23, 2019 10:01:05 GMT -8
It is hot down here in Texas these days, which restricts my working from my non-air conditioned garage workspace, but I've been trying to make progress when I can. One of the issues I had pointed out previously is the rake of the body on the chassis, and how it didn't appear right. Here's where we were and clearly the rear of the car is way too low.  This is what a real one looked like on the track.  You can clearly see that back in the day, these cars used rear leaf springs, and one of the ways to change the rear ride height was to install a spring shackle in the rear where it mounted to the chassis. With multiple holes in the aftermarket shackle, you could adjust the ride height to suit the track. 
The other way (and frequently used in combination with the shackle) was a lowering block between the leaf spring and the axle mounting point. 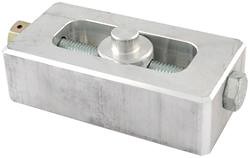
Well with diecast, and how the diecast and plastic pieces are created, neither of these methods is available. For this chassis, the rear axle assembly is firmly mounted to the chassis with two screws.  So what I have done is built spacers out of brass and aluminum tubing to replicate the effect of lowering blocks.  Which required acquiring longer screws than those which located the rear axle in the original location.  I experimented with a couple of different heights of my "lowering" blocks, but think I may have nailed the rake pretty closely (although I'm still not fully comfortable with the front). 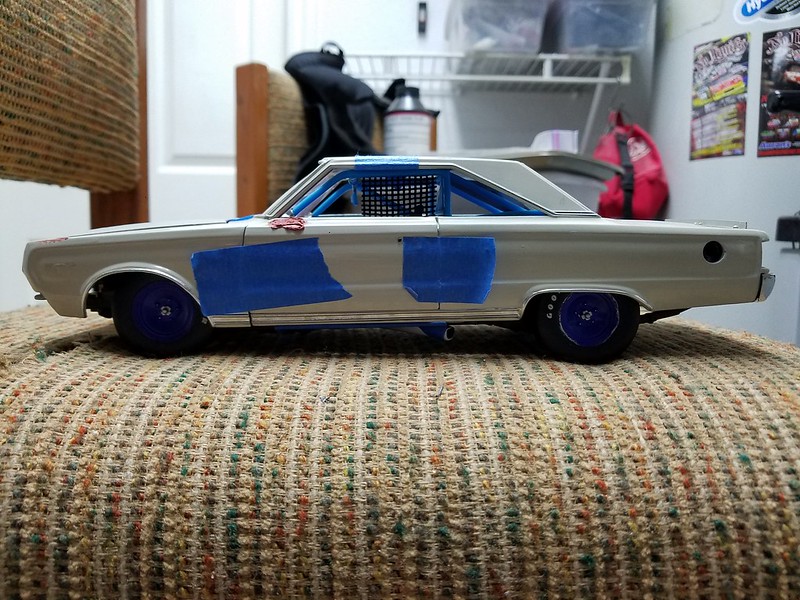 You can see, however, that now the rear of the model's leaf springs don't match up with the model's chassis. 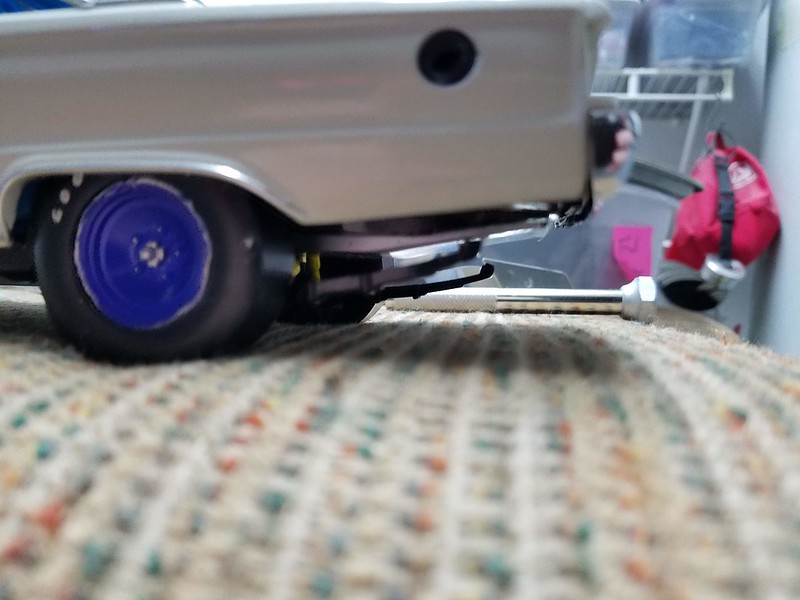 To cure that, I will actually build my own "shackles" out of Styrene rectangular rod, and drill down through them all to make it all fit.   |
|
|
|
Post by Joel_W on Aug 24, 2019 6:12:29 GMT -8
Jim,
That's some really nice engineering to raise the height of the rear of the body. looking forward to your fix so that the leaf springs attach to the chassis.
Joel
|
|


