|
|
Post by tatocorvette on Jul 6, 2020 8:10:21 GMT -8
That interior is looking really good and purposeful.
|
|
|
|
Post by mickgee on Jul 6, 2020 8:47:37 GMT -8
Joe, great to see an update on your project! Also I'll have to write, grateful that you explained about the 3 month pause....I get it. Correct or not, the seatbelts look just fine and are absolutely convincing, well done. Interior looks like business to me.
The shifter....what a pita, I agree there must be other methods to achieve the same view. Good you're back at it....I'm hoping to get back too this month....never had a pause like this one. Mike..
|
|
|
|
Post by mustang1989 on Jul 6, 2020 13:13:53 GMT -8
Thanks guys! I do appreciate the kind words and hang in there Mike. A good little break never hurt anybody. Looking forward to your return.
|
|
|
|
Post by mustang1989 on Jul 7, 2020 5:09:44 GMT -8
Got the shift linkage/ rods installed this morning. Now....for that tachometer.....  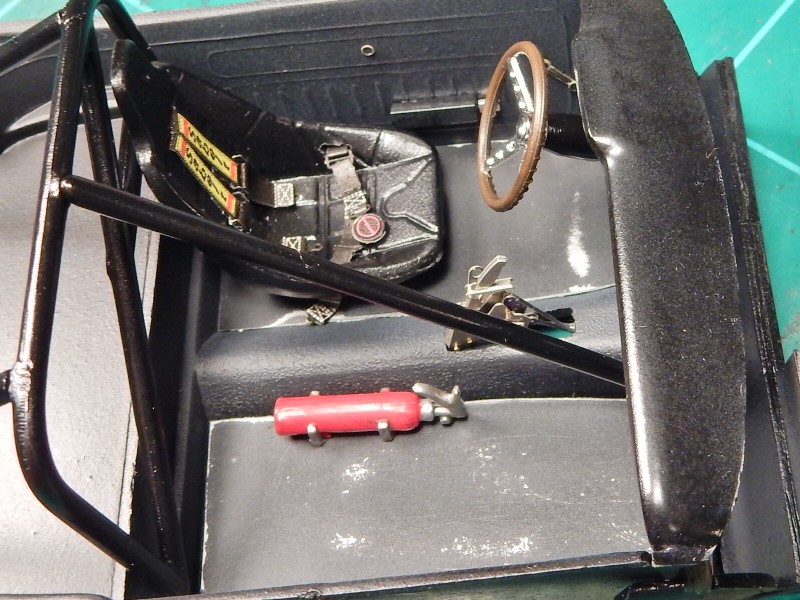 |
|
|
|
Post by Joel_W on Jul 7, 2020 11:13:53 GMT -8
Joe,
Wow!! Both the shifter and the shift rods look as real as a model can get.
joel
|
|
|
|
Post by mustang1989 on Jul 7, 2020 13:33:14 GMT -8
Joe, Wow!! Both the shifter and the shift rods look as real as a model can get. joel Thanks Joel. I appreciate that man. |
|
|
|
Post by mustang1989 on Jul 10, 2020 6:02:37 GMT -8
This morning I got her standing on her own. Rear tires will be going in a smidgen to give her the proper look but this is going to be the ride height. All this time I had to find a way to lock the front suspension ride height in and I finally was able to do this by drilling small holes in the front of the frame and installing locating pins. Worked like a charm:  Test fitted the AMT 67 Mustang shock tower panels and found that I had to remove the battery pedastal/ battery box because the battery is mounted in the rear of the car. I worked a lot on the firewall this morning by modifying to work with the Mustang shock towers. Plus I needed all the room I could get with that big ass 427 in that engine bay. I'll post progress of the firewall on the next update. Before....  and after.... 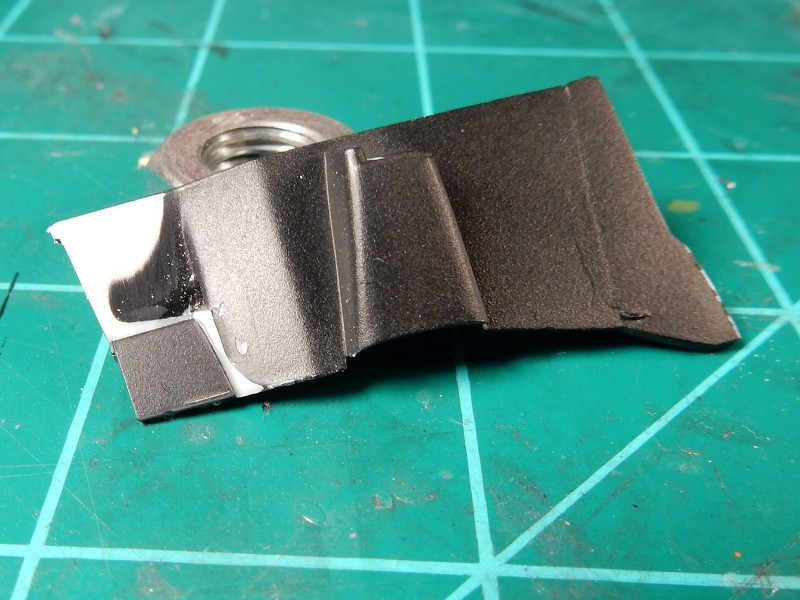 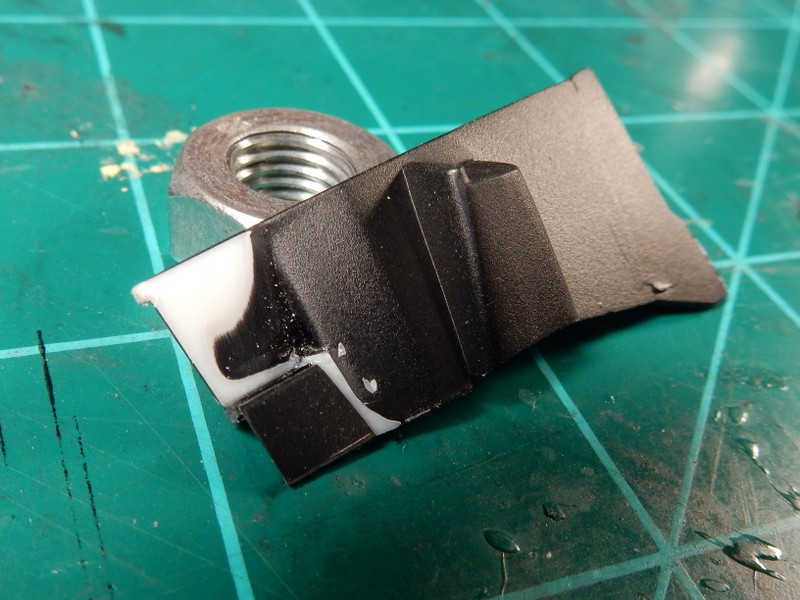 |
|
|
|
Post by Joel_W on Jul 10, 2020 12:54:42 GMT -8
Joe,
Nice modifications to the shock towers. Looking forward to your pictures with the rear wheels in the correct positions.
joel
|
|
|
|
Post by mustang1989 on Aug 8, 2020 4:51:27 GMT -8
Joe, Nice modifications to the shock towers. Looking forward to your pictures with the rear wheels in the correct positions. joel Still on this one gang. Work has had me tied up and busy for the last few weeks which is not a good time for me to be doing mod after mod on a build. I've moved over to a 1/35 scale Ryefield Type 82 E Volkswagen mostly OOB build to keep me in the modeling swing as I work through the hard times at work. I'll be back on this one shortly....... |
|
|
|
Post by mustang1989 on Nov 19, 2020 10:23:45 GMT -8
Ok......I'm finally back in action on this one. After months and months of thought and fizzled out ideas I've finally got it. Sorry it took so long to get back to you Roger. I was just flabbergasted at the whole thing when it came to this part. First off...I had an idea for the fenderwells that have been giving me so much grief and pause on this build. We'll be moving forward using soda can aluminum for those. I have to move the shock tower just a shade to the rear of the engine bay to make this work so here's the plan moving forward. First off, I didn't have a Diet Coke can but I did have a Sprite offering.  aaaaaaaaaaaaaaaaaand Presto!!! I've still gotta play around with cutting and trimming here and there to get it all to fit just right but you get the idea. Now I can cut the shock tower from the plastic piece and adhere it to the aluminum part in the correct place and I also get rid of that windshield washer bag that shouldn't be there. BONUS!!! 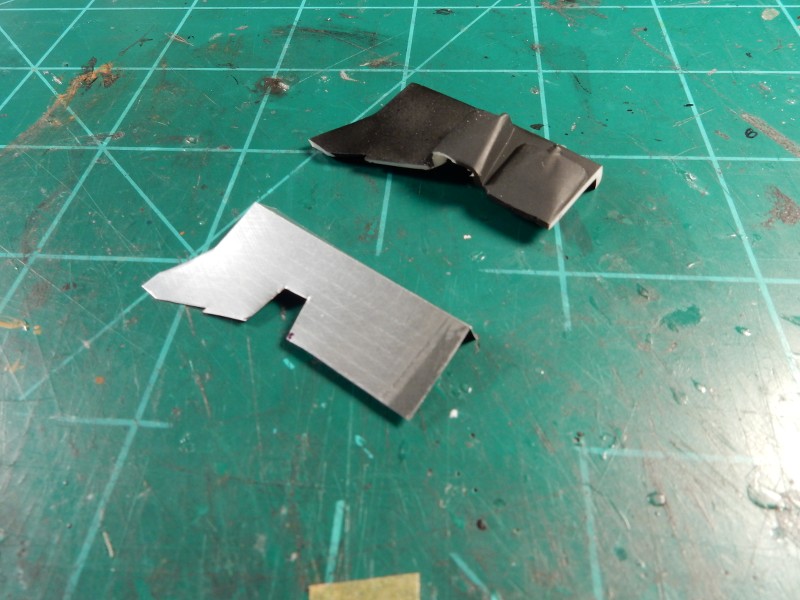 |
|
|
|
Post by mustang1989 on Nov 20, 2020 3:07:33 GMT -8
A little more test fitting and some trial & error later yielded some promising results. The I cut the shock towers from the plastic inner fenderwells and will be putting these onto the newly formed fenderwells. Cut shock tower is shown resting on the area just in front of the radiator core support in the pic here. 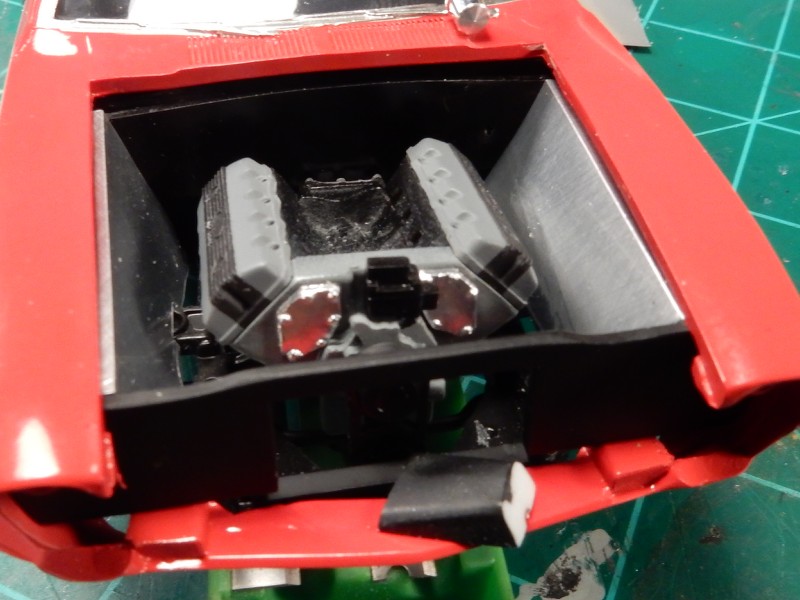 |
|
|
|
Post by mickgee on Nov 20, 2020 13:06:55 GMT -8
Great that you post again!
The aluminum idea is a hit! Drink cans are an excellent source, although the ones I've had, an inside coating that is not paint friendly. Hoping that your selection is better.
Such a small car, with a huge motor, changing the panels is excellent modeling. Plus, the real metal is indeed another level.
Mike..
|
|
|
|
Post by mustang1989 on Nov 21, 2020 8:48:09 GMT -8
Great that you post again!
The aluminum idea is a hit! Drink cans are an excellent source, although the ones I've had, an inside coating that is not paint friendly. Hoping that your selection is better.
Such a small car, with a huge motor, changing the panels is excellent modeling. Plus, the real metal is indeed another level.
Mike..
Thanks Mike!! Progress is movin' right along on this one finally. Managed to thin the radiator out so the engine would fit nicely in the engine bay and re-apply the radiator cooling fins to the back of it after thinning. I also test fit the modified headers in place. Looks like this is going to work out very well as they fit great and exit in just the right place. 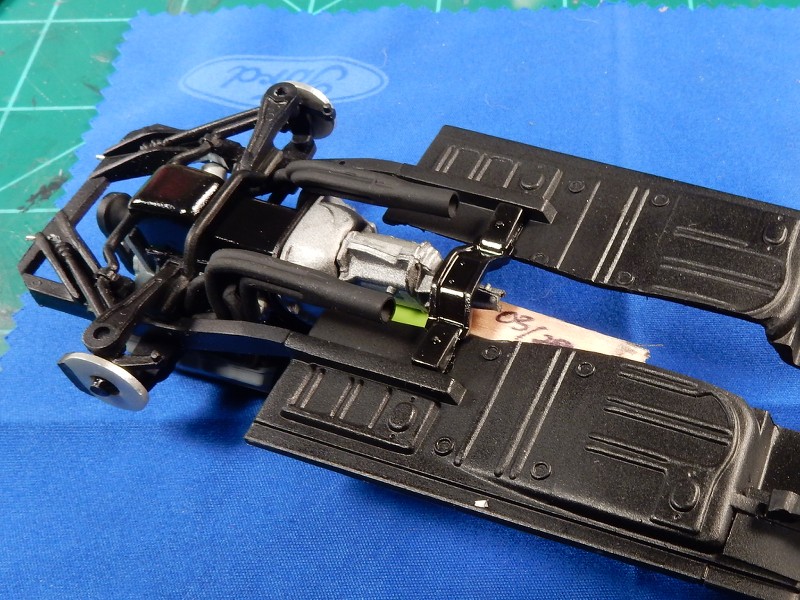 |
|
|
|
Post by arcticwolf on Nov 21, 2020 10:16:48 GMT -8
Those headers fit in perfectly, looks great.
|
|
|
|
Post by Joel_W on Nov 22, 2020 13:18:20 GMT -8
Looking forward to seeing how the Sprite can mod looks when it's completed. I have complete faith in you to score a perfect 10.
Engine and the exhaust headers really do look quite nice in the bottom view pic.
Joel
|
|


