|
|
Post by afx on Mar 2, 2020 7:26:32 GMT -8
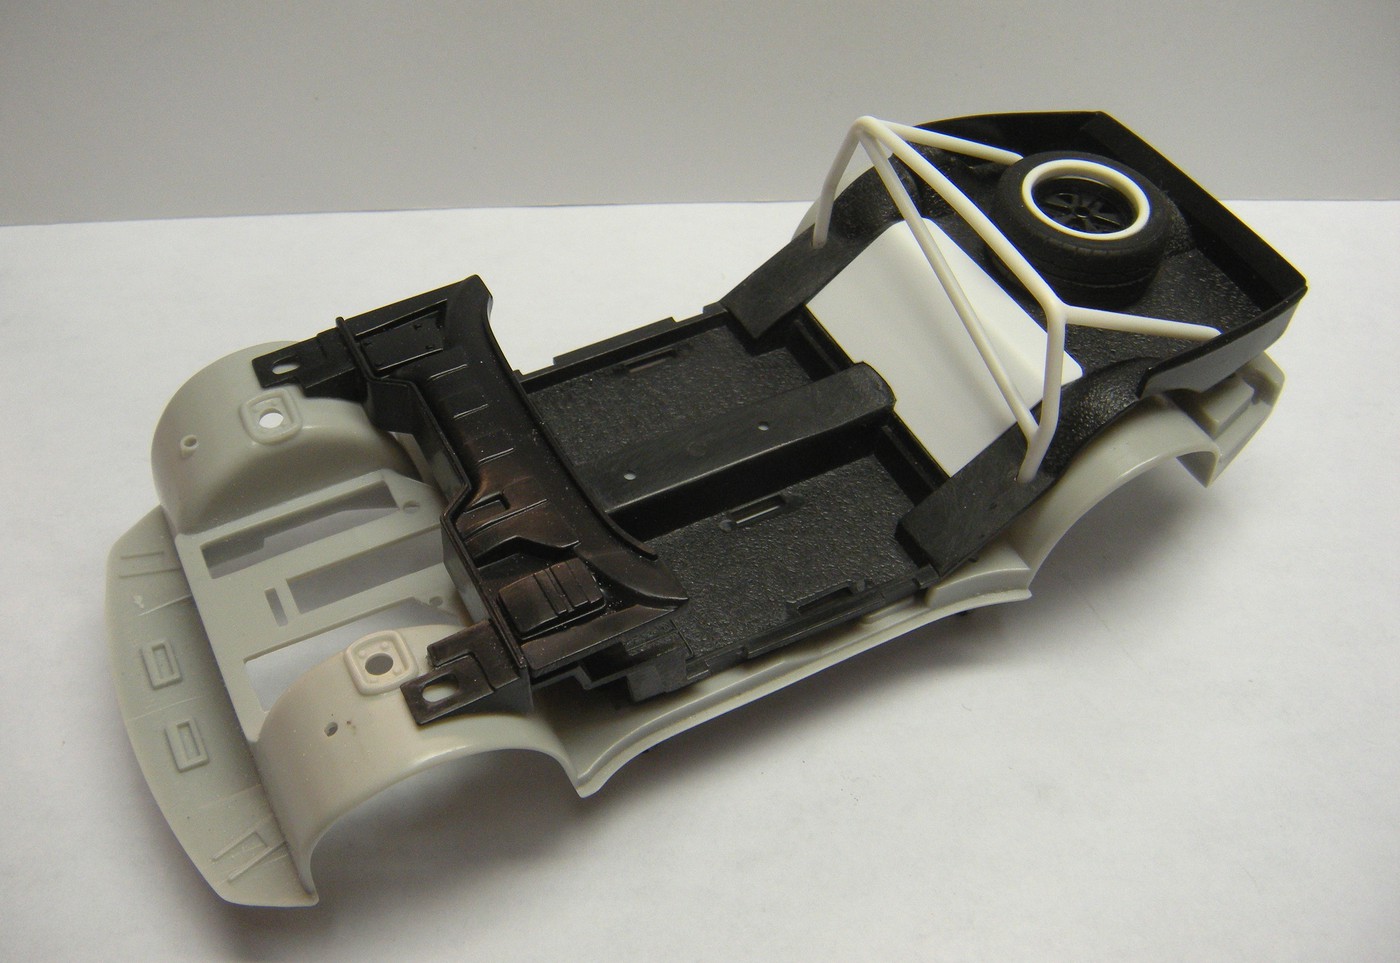
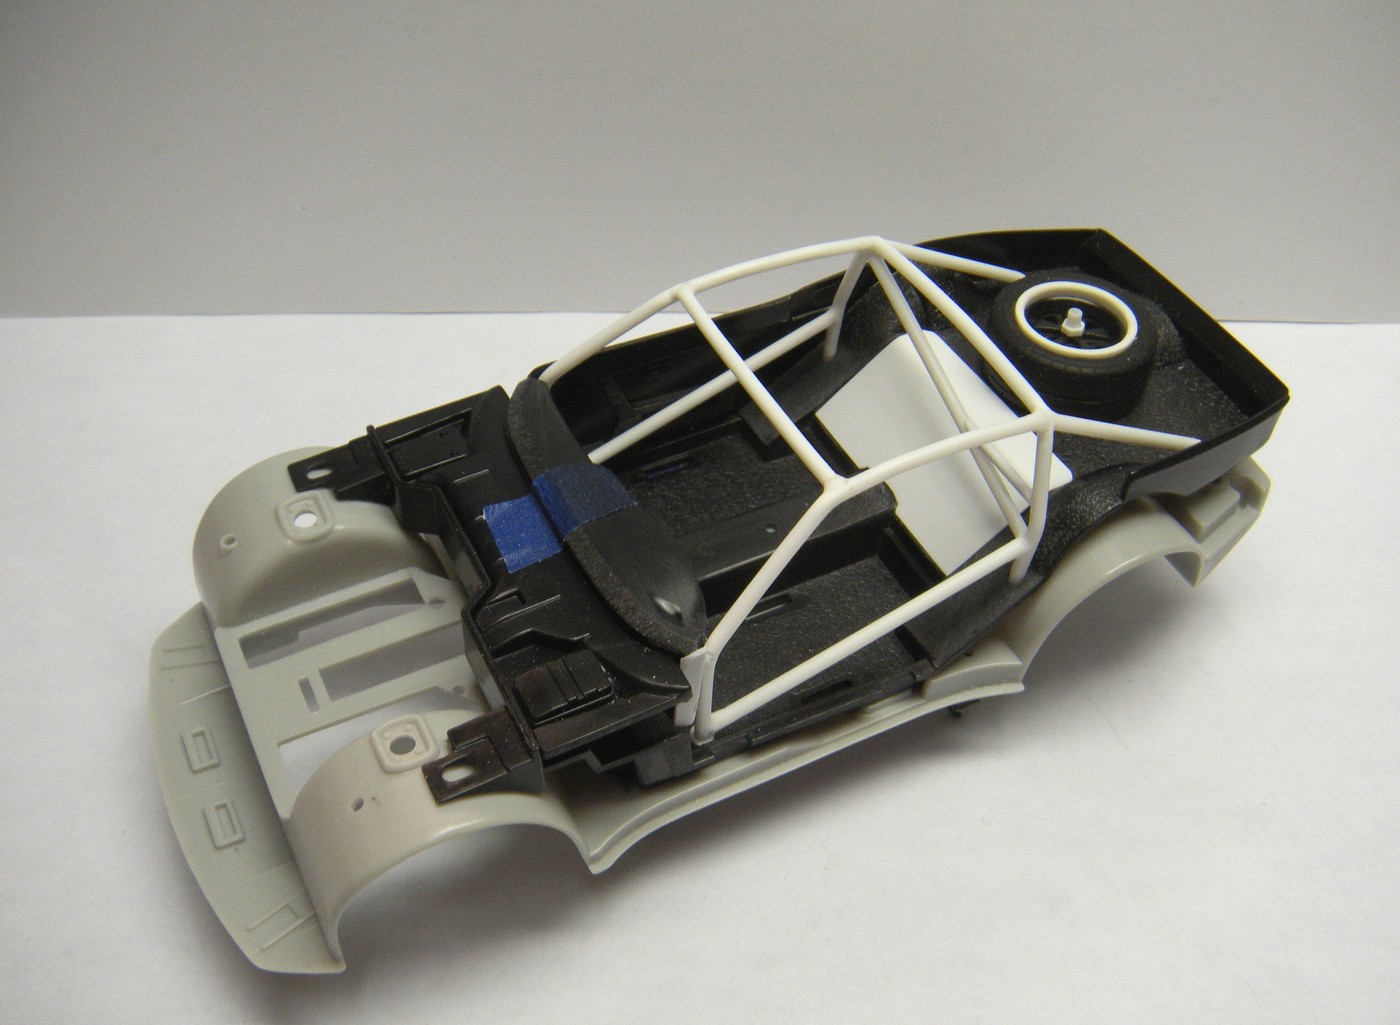
This is the technique I use to build a roll cage. Not the only way to do it but it works for me. This gives you the basic structure, you can then add all the cross bars, down bars (kickers) head rest etc. as you desire. Only variation I usually make is I fabricate the rear kicker bars to lock in the position of the main roll hoop before measuring and fabricating the forward bar above the door and down the "A" pillar to the floor Phase 1 of my technique:  Phase 2:  |
|
|
|
Post by afx on Mar 2, 2020 7:34:07 GMT -8
A common mistake I see is builders using too large a diameter material. Most cages are 1.5" to 1.75" tubing, a 1/4" difference in scale is very difficult to discern. What I typically use is .062 (1.6mm) solid rod for two reason: 1. The size in scale splits the difference between 1.5" and 1.75" and therefore can be used nearly universally 2. Solid rod doesn't kink as easily as hollow tubing when you are creating the bends |
|
|
|
Post by afx on Mar 2, 2020 9:06:50 GMT -8
|
|
|
|
Post by Chris K. Hale on Mar 2, 2020 9:56:40 GMT -8
Nice, Great Tutorial on a sore subject that has plagued more than a builders over the years...Thanks...Chris
|
|
|
|
Post by illeagle10 on Mar 2, 2020 13:12:41 GMT -8
JC what would we ever do without Evergreen stock plastic? Great info!
Jim
|
|
|
|
Post by Ben_B on Mar 2, 2020 13:18:13 GMT -8
Thank you for posting this! I have two future projects that I’ll have to add roll cages to.
BTW, Wheeler Dealers is a great show!
Ben
|
|
|
|
Post by 4wheels on Mar 2, 2020 15:23:57 GMT -8
A technique I've started using is to build the basic four post cage structure, fitting the front uprights to the angle of the windshield pillar (if appropriate), rear hoop bracing, dash bar and top windshield bar, one door bar on each side, usually the top one, leaving the four main legs long. I drill four clearance holes in the frame or floor pan, insert the cage legs thru, then mock up the frame or floor into the body, adjust the height to where I want it, either tight to the roof or leave a little clearance for padding or window glass, then glue the four legs to the frame or floor and trim the excess flush underneath. This method takes height out of the equation, you only have to concern yourself with overall width and length and you get a perfect fit to the roof. After the main cage is built and glued in, I finish installing all the additional diagonal bracing, door bars, etc.
Brian
|
|
|
|
Post by afx on Mar 2, 2020 16:32:10 GMT -8
JC what would we ever do without Evergreen stock plastic? Great info! Jim Agreed Jim. I buy Evergreen every time I'm at the hobby store. I've bought sizes and shapes I wasn't sure I would ever use but they come in very handy on various projects. Its great stuff! |
|
|
|
Post by afx on Mar 2, 2020 16:37:14 GMT -8
A technique I've started using is to build the basic four post cage structure, fitting the front uprights to the angle of the windshield pillar (if appropriate), rear hoop bracing, dash bar and top windshield bar, one door bar on each side, usually the top one, leaving the four main legs long. I drill four clearance holes in the frame or floor pan, insert the cage legs thru, then mock up the frame or floor into the body, adjust the height to where I want it, either tight to the roof or leave a little clearance for padding or window glass, then glue the four legs to the frame or floor and trim the excess flush underneath. This method takes height out of the equation, you only have to concern yourself with overall width and length and you get a perfect fit to the roof. After the main cage is built and glued in, I finish installing all the additional diagonal bracing, door bars, etc. Brian I drill through the interior tub to give me some flexibility with height but I prefer not to drill through the chassis pan. Like I said there are other methods and techniques, thanks for sharing your's Brian. |
|
|
|
Post by swede70 on Jun 29, 2020 13:55:38 GMT -8
(Just migrating some content over before the Model Car Magazine Forum turns off)Just short notes consistent with suggestion minor alternate directions, with the appropriate technique being that which for any potential builder discovers best...
Not absolutely necessary this, but a spare body and chassis to establish the tightest fit with the dash and plastic 'glass' installed helps a lot. I realize this isn't an option for all and that resources can sharply restrain ambitions in this regard - but it helps! A good supply of file cards and scissors to come up with initial shapes is advised - sort of what 1:1 fabricators would call CAD, or rather Cardboard Aided Design. Sometimes too I'll take fuzzy pipe cleaners to establish the rudiments of what will be required for multiple bends and angles I'll need to reproduce.
If something is a scale replica of a period racer, definitely pile on the research. Some problems will 'go away' for careful analysis of why this team or that opted to do things in a particular fashion. This said, plastic model cars have thick floors and thick roofs, and this reality will impact how much carries over.
Concerning materials, I don't use rod plastic, but rather employ plastic tube with a brass wire core inserted and glued within. Tubing collapse isn't a terrible problem if the wire chosen is appropriately sized, while sharp bends won't strictly disturb the shape of material both 'upstream' and 'downstream' of the bend. Ideally, the brass wire will be stiff enough to resist distortion along the lengths of material you'll wish to keep straight. Moving along, sometimes a brass 'core' can be used to site a particularly tough bar relative to another; i.e. drill a discreet hole in one, and factor in the reality that the brass core may have to be a bit longer to plug into it from the tube to be attached to it after properly filing and preparing a fishmouth contour or contours as required.
As for bending, I have a small bread board that has a nail tapped into it; i.e. a mandrel bend in miniature. If a softer or rounder bend is called for, on occasion I may press some plastic rod into service in keeping with replicating the radius desired. Just to be consistent, even the tiniest bars will have a brass core on my efforts. Happily none of my scale drivers has thus far been hurt...
For the use of a pointed tip Sharpie marker, I'll try to ink mark where the bend has to begin. It's an approximate process given it's all too easy to place a bend too high or low, while the angle and factoring in having extra material to trim to size both 'upstream' and 'downstream' again is important. With regards to matters related to symmetry and the battle to secure this quality, I always endeavor to do bars in matching pairs. Go in expecting to waste a fair amount of material for misjudging much; i.e. it's too short, it's too tall, it's asymmetrical, etc. When something is 91% of what you need but doubts linger, part of the satisfaction of scratch building is knowing that you can toss matters aside and start again without suffering huge guilt. I pretty much expect to fabricate each bar twice or three times over, while if I'm any better or more accurate, personally surprise is registered.
Alignment of materials as they attach and as the glue sets can be a challenge, with the creation of a rudimentary fixture to hold this or that bar 'just so' sometimes required. Although basic, stacked audio cassette boxes and small scrap sheets of plastic with quickly made extensions of rectangular stock can serve very well, stabilized for the use of a discreet length of two of Tamiya tape holding everything securely to the table the total setup rests upon. Do allow things to properly setup and dry. No need then to court bitterness for trying to achieve too much, too soon.
Concerning glue, again - nothing set in stone, but I like thick CA glue and typically touch in bends with additional applications combined with a dusting of a filler known as MicroBalloons. Others recommend the discreet use of favorite putties including Milliput, etc. Residue removal and final shaping follows this. Your mileage may vary. Tax, title and license extra!
Mike K./Swede70
|
|
|
|
Post by Ben_B on Jun 30, 2020 1:37:57 GMT -8
Thanks for the additional tips, Mike!
Is the Model Cars Mag forum finally going the way of its parent magazine? If so that's too bad. It's one of the better forums out there.
Ben
|
|
|
|
Post by arcticwolf on Jun 30, 2020 15:46:11 GMT -8
Has anybody tried using copper house wire for this? I use it to make exhaust headers, I'm thinking of trying it with a roll cage, maybe a space frame. 18, 16, 14, 12 guage are all handy diameters depending on the scale you're working with. And you could either CA it or solder it together. Just wondering?
|
|