|
|
Post by mustang1989 on Apr 17, 2020 19:42:26 GMT -8
I'd be happy with that mask off job as well Ismael! Turned out perfect bub.
|
|
|
|
Post by Ben_B on Apr 18, 2020 2:21:26 GMT -8
Don't you love those "mask for an hour, spray for five minutes" jobs?  Your work on this model has been outstanding! Ben what really stinks is after spending all that time masking and I get bleed through  You can often minimize bleed through by putting a clear coat down along the edge of the tape before you spray the next color. That will help seal gaps. I've had good luck with brushing Future floor polish along the tape edges. Ismael, beautiful work on an odd-looking flyin' machine! Ben |
|
|
|
Post by Joel_W on Apr 18, 2020 5:56:04 GMT -8
Ismael,
You really nailed the canopy painting, and the thin wire for the wipers really looks great. Simple, yet so effective.
Joel
|
|
|
|
Post by tatocorvette on Apr 18, 2020 12:24:44 GMT -8
Hello, Up until 2 days ago, the nose of this aircraft was the most disappointing part of this build. To the point I considered either ordering another kit to try again or (GASP!) putting it aside altogether... So, after hours of fighting it, I'm happy to report it is now acceptable. I still don't like the yellow decal because of the the spherical shape but that's the best I could do. Have I ever mentioned I don't like decals? Once again, masking tape came to the rescue. The bars over the grilles, the black separation line below the grilles (where the door actually open in the 1:1) and the lower grille frame is all painted Tamiya masking tape. There is a landing light at the bottom front of the nose. The kit has a little round white decal for it. Yeah right, that won't cut it. so I did my own light. Simply a dome of white glue. I'm liking where this is going. I want to finish it so I can go back to cars...... or other helicopters.... or other aircraft...... or ........ 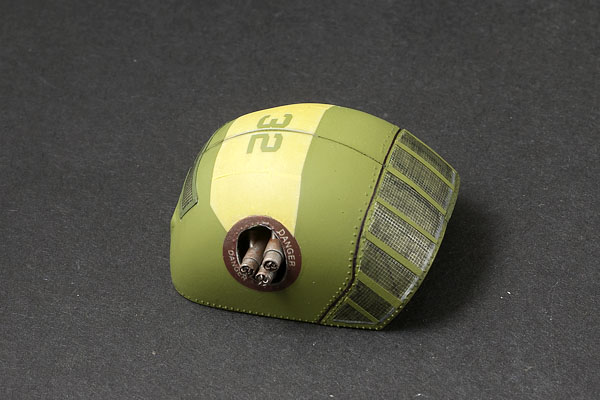 There is still a decal pending for the side grille. 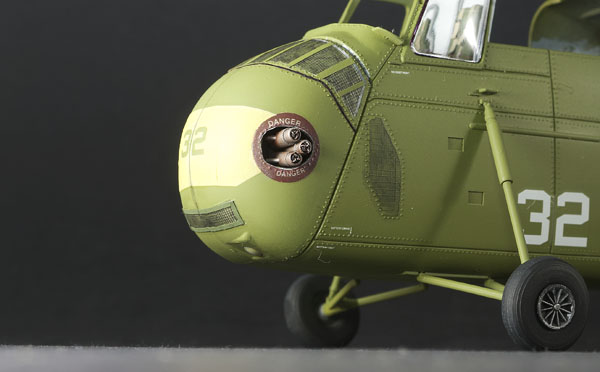 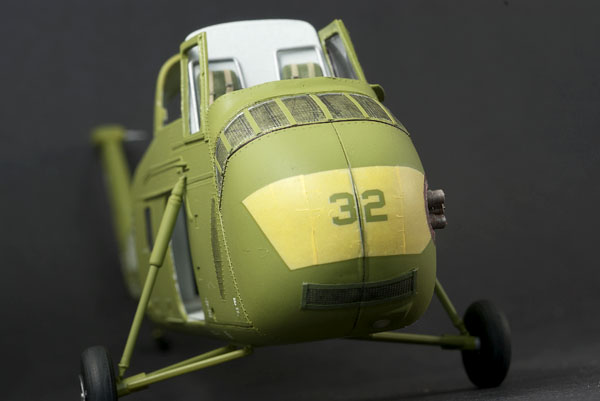 Thanks, Ismael |
|
|
|
Post by jchrisf on Apr 18, 2020 12:36:28 GMT -8
Wow! You've really brought it to life. Looks so real!
|
|
|
|
Post by Joel_W on Apr 18, 2020 13:31:55 GMT -8
Ismael,
The nose looks fantastic. If you didn't tell us that the black line below the grills was just masking tape, I'd have just assumed that it's a recessed molded panel line. From the front picture the nose really looks exceptional, especially with that exhaust. I'd say you really nailed it.
Joel
|
|
|
|
Post by tatocorvette on Apr 19, 2020 20:43:00 GMT -8
Hello, Just keep swimming..... Churning along getting closer to completion. 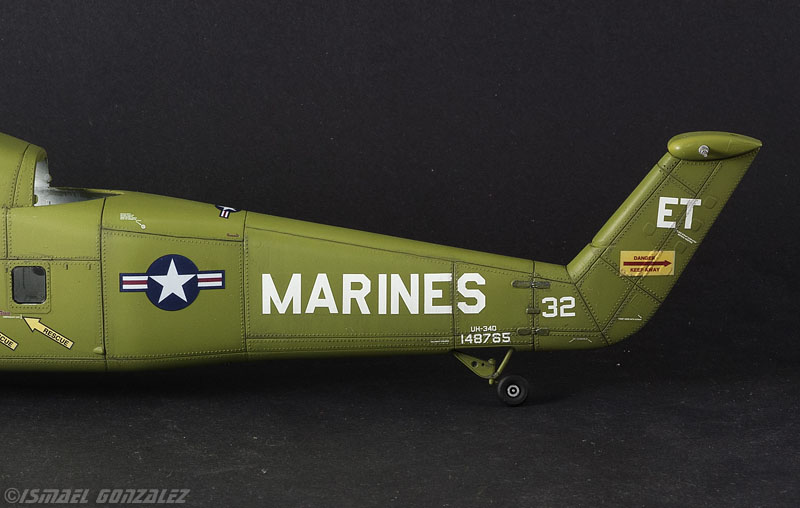 Thanks, Ismael |
|
|
|
Post by Ben_B on Apr 20, 2020 2:34:21 GMT -8
Looks great! Something I learned from applying airliner decals, is that heat is great for making decals like that yellow one conform to fit around complex curves. I microwave a small bowl of water until the water is hot enough to be uncomfortable if you dip your finger in it. Then dip a q-tip and use it to press the decal in place. The decal will still be a little wrinkly, but should lie down as it dries. If not, hit it again with the hot water or fine-tune it with your favorite setting solution. That's how I got the decals to lie down on the M6. I've also seen people use hair dryers to heat the decals, too, but I'm afraid of heating more of the model than necessary.
Ben
|
|
|
|
Post by tatocorvette on Apr 20, 2020 6:43:06 GMT -8
Thanks for the tip on hot water! I was not aware of that.
|
|
|
|
Post by jchrisf on Apr 20, 2020 7:24:50 GMT -8
It is a beauty and coming to life. I can't believe how deep those panel lines look and the rivets really pop.
|
|
|
|
Post by Joel_W on Apr 20, 2020 15:49:54 GMT -8
Ismael,
The decaling and weathering on the tail really looks good. And Ben, thanks for that tip with the hot water. I use slightly warmer then room temp water when I decal and change it as often as necessary. Just never knew about almost hot water helping to settle decals into those pesky nooks and crannies.
Joel
|
|
|
|
Post by mustang1989 on Apr 21, 2020 6:41:32 GMT -8
Looks great! Something I learned from applying airliner decals, is that heat is great for making decals like that yellow one conform to fit around complex curves. I microwave a small bowl of water until the water is hot enough to be uncomfortable if you dip your finger in it. Then dip a q-tip and use it to press the decal in place. The decal will still be a little wrinkly, but should lie down as it dries. If not, hit it again with the hot water or fine-tune it with your favorite setting solution. That's how I got the decals to lie down on the M6. I've also seen people use hair dryers to heat the decals, too, but I'm afraid of heating more of the model than necessary. Ben Great tip. I've always had a lot of trouble with the prop spirals on Luftwaffe aircraft and even though I whipped 'em into shape with ALOT of Microsol , I think the job would've been easier with some hot water. I'll be trying that on my next set of spirals. |
|
|
|
Post by mustang1989 on Apr 21, 2020 6:43:42 GMT -8
This is looking really good so far Ismael. Did you put a gloss coat on before applying the cals? I'm with Joel that if you didn't point it out I probably wouldn't have noticed.
|
|
|
|
Post by tatocorvette on Apr 21, 2020 16:40:18 GMT -8
Hello, Joe: The base paint was kind of semi glossy. After the decals were dry then I airbrushed dullcoat over the whole fuselage. OK, so, it is not that I don't like the kit's parts. It is just that..... well, OK, I'm not normal. So what!  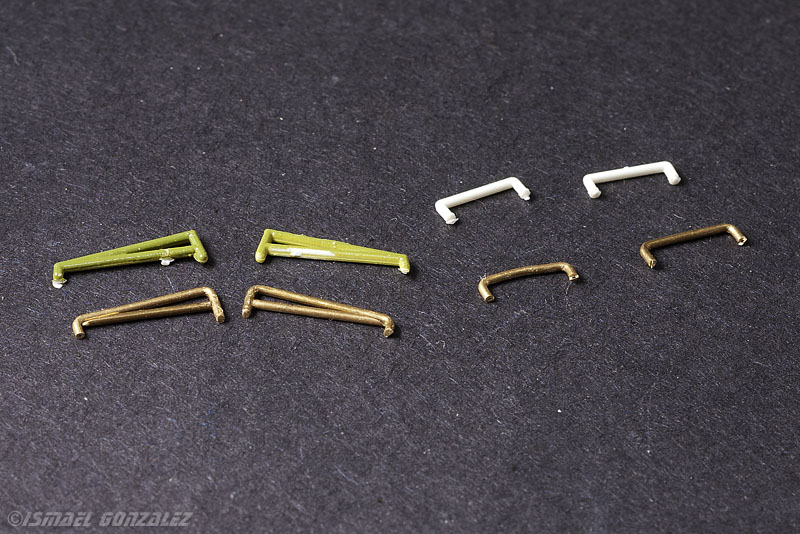 The tail rotor blades were all serialized, pasteurized and homogenized 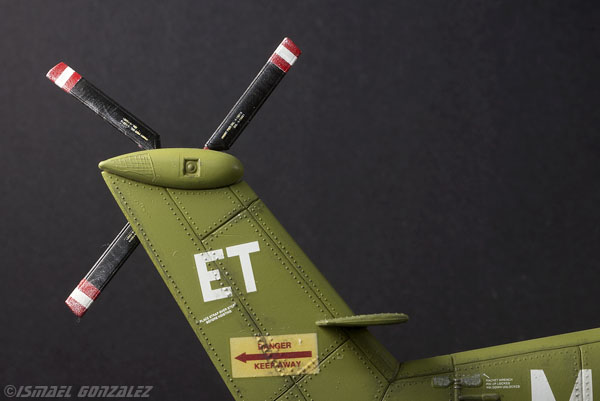 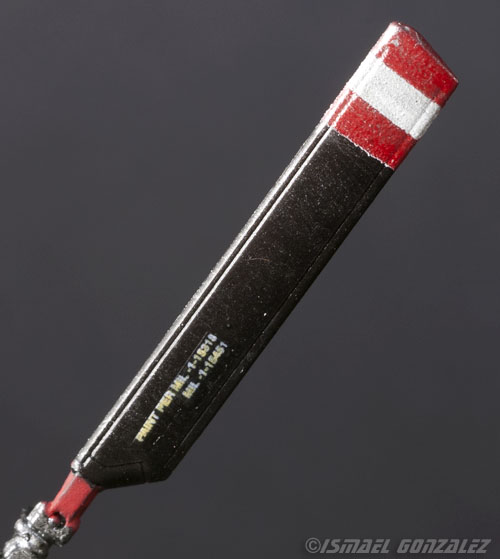 Keep in mind this is many times larger than actual size. Thanks, Ismael |
|
|
|
Post by tatocorvette on Apr 21, 2020 20:42:55 GMT -8
Hello, Entering the home stretch! Most likely the last in-progress update before completion! The whole purpose for this particular vehicle to exist is the rescue winch. I'm working on that along with nav lights, some hydraulic lines, handles, steps, antennas etc. Still need to black wash the grilles below the cockpit. The holes you see in the fuselage are for pending items to be installed. No, it wasn't shot at. I really hope to wrap this up by this weekend. Already thinking on how to photograph the finished model. Anyways, she can fly as it is now... 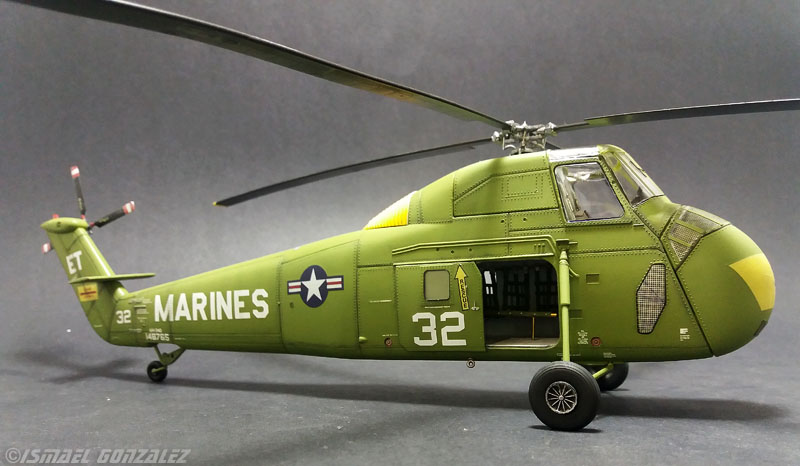 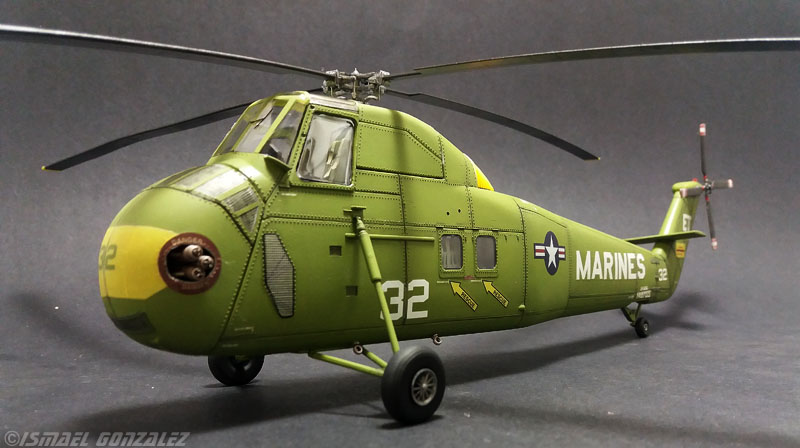 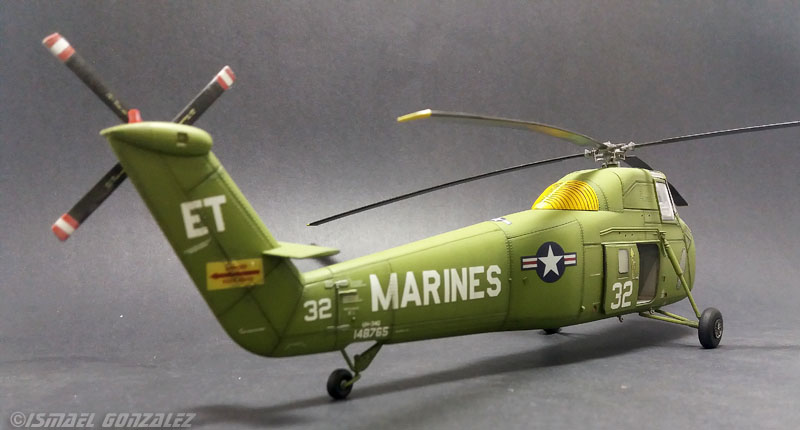 JUST WARMING HER UP!!... WHAT? CAN'T HEAR YOU! 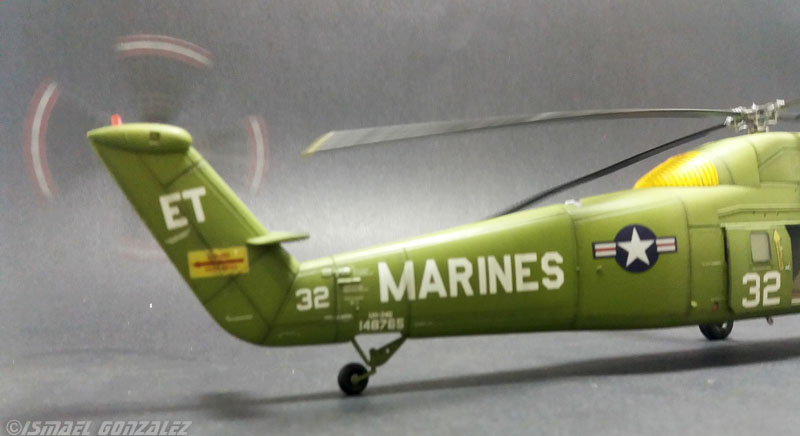 Thanks, Ismael |
|


 Your work on this model has been outstanding!


