|
|
Post by Ben_B on Apr 22, 2020 3:35:52 GMT -8
Ismael, Here are some close-ups of the winch. They're zooms from the photos of the one at the Marine Corps Museum in Quantico. Unfortunately, I didn't get a full walk-around of it, as I was mainly interested in the life-size diorama, which was amazing.   Ben |
|
|
|
Post by mustang1989 on Apr 22, 2020 6:05:07 GMT -8
Really good lookin' aircraft so far Ismael. All the little neat tricks you've put into this build are all adding up.
|
|
|
|
Post by tatocorvette on Apr 22, 2020 6:16:48 GMT -8
Thanks Ben! Great pics of the winch. Debating whether or not to use the kit's winch as it is quite basic but I really want to finish this soon  |
|
|
|
Post by Joel_W on Apr 22, 2020 6:39:19 GMT -8
Ismael,
This build, which is one of the best 'copters I've seen in years, just goes to prove what a universal great modeler you are. I'd take my hat off to you, but I'm not wearing one inside these days.
Joel
|
|
|
|
Post by 4wheels on Apr 22, 2020 6:59:08 GMT -8
Been watching this build even tho I don't build aircraft, as you never know what you might learn! Amazing work being done here! I did want to comment on the hot water/decal thing and give couple of other tips that have helped me greatly over the years. I use only distilled water for decalling, no minerals or chemicals to stain or affect the decals or finish. Always use very warm, almost hot water, but I also keep a hair dryer handy. It can focus heat on a problem area AFTER the decal is applied, to soften and stretch things into place. It also can help speed up the drying time of your setting solution, so you can see the results quicker and apply more if needed. I also use Micro-Scale Decal Film as a glue to hold down decals that want to curl up because of over-wetting or weak adhesive, this has been saving me on a current commission build where I apply a decal, use setting solutions, hair dryer, everything I can, and then an hour later the darn decals are curling up and almost falling off the car. Very frustrating! I have to brush the Decal Film under and around the edges of the decals and watch them until dry, literally holding them down until then. Sorry for the minor hijack! I have two helicopter models in my collection, a Revell Sikorsky Sky Crane and the MASH Bell H-13H. I may give one of them a shot, sometimes I just need to get away from cars for a while.
Brian
|
|
|
|
Post by mustang1989 on Apr 22, 2020 7:23:54 GMT -8
Been watching this build even tho I don't build aircraft, as you never know what you might learn! Amazing work being done here! I did want to comment on the hot water/decal thing and give couple of other tips that have helped me greatly over the years. I use only distilled water for decalling, no minerals or chemicals to stain or affect the decals or finish. Always use very warm, almost hot water, but I also keep a hair dryer handy. It can focus heat on a problem area AFTER the decal is applied, to soften and stretch things into place. It also can help speed up the drying time of your setting solution, so you can see the results quicker and apply more if needed. I also use Micro-Scale Decal Film as a glue to hold down decals that want to curl up because of aver-wetting or weak adhesive, this has been saving me on a current commission build where I apply a decal, use setting solutions, hair dryer, everything I can, and then an hour later the darn decals are curling up and almost falling off the car. Very frustrating! I have to brush the Decal Film under and around the edges of the decals and watch them until dry, literally holding them down until then. Sorry for the minor hijack! I have two helicopter models in my collection, a Revell Sikorsky Sky Crane and the MASH Bell H-13H. I may give one of them a shot, sometimes I just need to get away from cars for a while. Brian Good set of skills there Brian. I've got plenty of distilled water so I may just have to give that a whirl. |
|
|
|
Post by Joel_W on Apr 22, 2020 8:19:19 GMT -8
I've heard about the hairdryer technique several times, but honestly, I've been just to chicken to actually try it out of fear of damaging or destroyed the decal, and even warping the model surface.
Joel
|
|
|
|
Post by 4wheels on Apr 22, 2020 13:22:18 GMT -8
The low heat setting is most used, esp. on plastic models. Never had an issue with the heat hurting a decal.
|
|
|
|
Post by Joel_W on Apr 22, 2020 13:27:12 GMT -8
The low heat setting is most used, esp. on plastic models. Never had an issue with the heat hurting a decal. Any issues with damaging small delicate plastic parts? I also have to take into consideration my usual bad luck. Joel |
|
|
|
Post by 4wheels on Apr 22, 2020 16:57:27 GMT -8
I usually keep a hand or at least a finger or two in the airstream from the hair dryer so I can gauge the heat. If my skin can take it the model should be safe!
|
|
|
|
Post by Joel_W on Apr 23, 2020 11:49:27 GMT -8
Interesting technique. Never thought of that as a gauge.
Joel
|
|
|
|
Post by tatocorvette on Apr 24, 2020 10:28:26 GMT -8
Hello, Most likely the last in-progress update before completion! Hello, Ok, I lied This is what the box stock winch looks like in the box 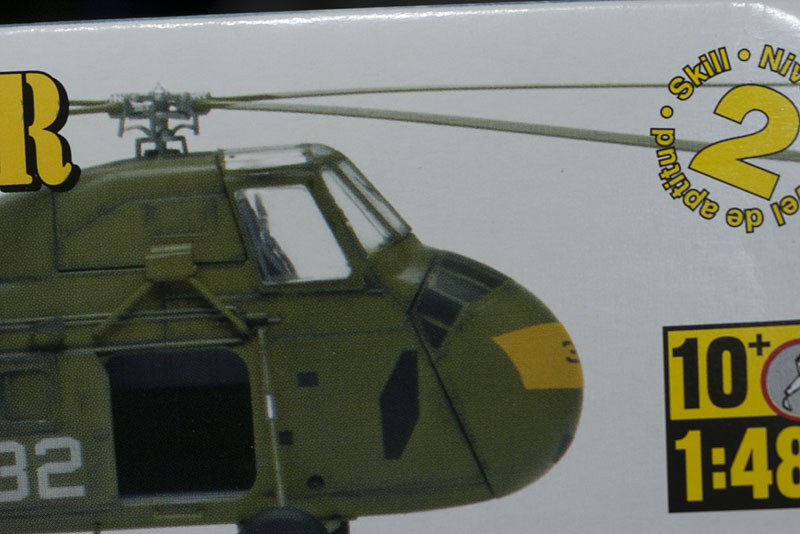 Somehow I get down this rat hole... 8 more parts added to the original 2. 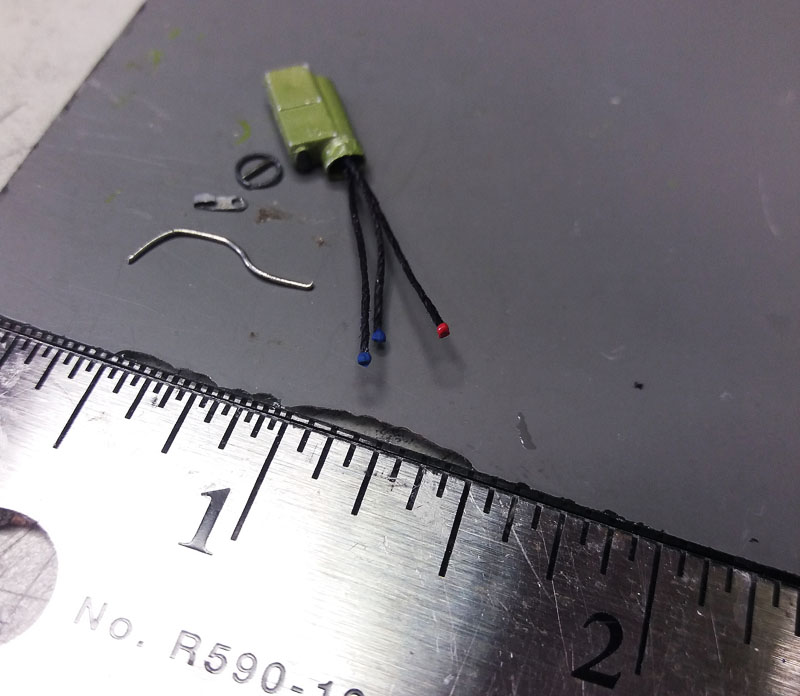 And this is how it looks now. Still pending dullcoat to tone down a bit. Note the bottom brace was added as it was missing in the kit. 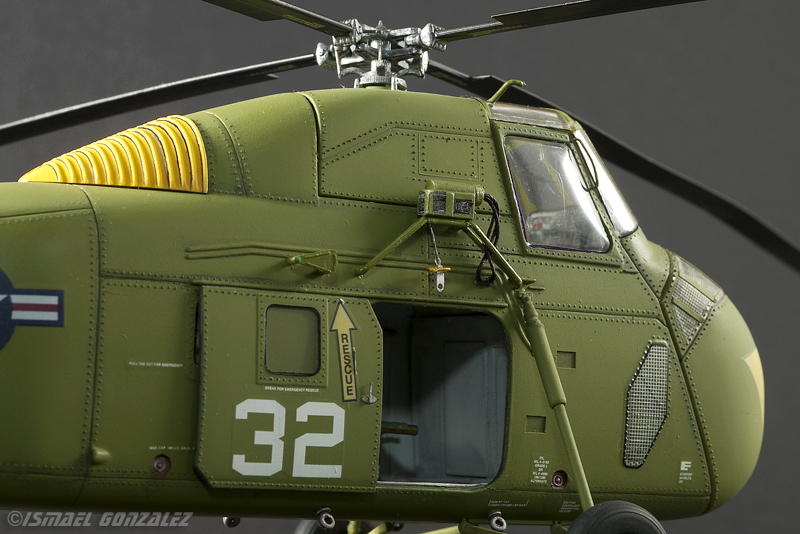 Almost there! Still a few tweaks but almost there! Thanks, Ismael |
|
|
|
Post by 2whl on Apr 24, 2020 10:52:57 GMT -8
More details that are making this an exceptional build. Bravo !
|
|
|
|
Post by Joel_W on Apr 24, 2020 11:01:12 GMT -8
Ismael,
That winch is simply amazing.
Joel
|
|
|
|
Post by tatocorvette on Apr 25, 2020 21:06:04 GMT -8
Hello It is FINISHED!!!!!!
Currently working on dozens of pictures I took but here is a sneak peek... This is an exclusive for this forum. Stay tuned for the reveal! 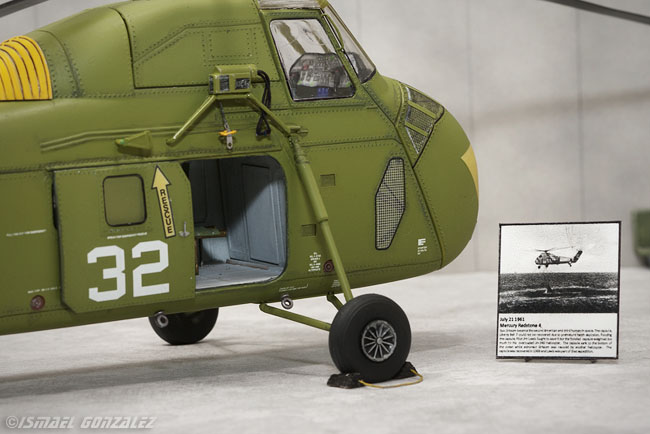 Yes, that is a bench seat in the back against the wall... Thanks, Ismael |
|


