|
|
Post by bsmooth on Jul 1, 2020 11:26:45 GMT -8
Since my main hobby is Photography, I was just wondering what you use for taking images of your beautiful subjects. I am looking to get a macro lens for one of my cameras Olympus EPL-2. But I was wondering what you use and how you do your setup? I think this would be useful for everyone reading, since you spend so much time getting that car just right, it only goes you should take the best image you could of it. I've been fooling around with a homemade lightbox made from 1/2 PVC pipe and pillowcases, with a couple of table lamps on each side. So let us hear how you do it !
|
|
|
|
Post by tatocorvette on Jul 1, 2020 14:25:38 GMT -8
Hello, I'm a semi-pro photographer so I get to combine both hobbies when I photograph models. I used to write for Model Cars Magazine a few years ago. Proud to have 3 covers on the mag over the years. I'm currently using a 50mm f4 macro lens on APS-C camera. I've been using Pentax gear since 1989. But I've used 50mm f1.7, 40mm, 70-210 and more. But the most important part is not the camera nor the lens. It is the light and the angle. Of course a good background helps. Remove any reference to size. Back to the camera setup, You need a good lens with close up capabilities, not necessarily a macro. A longer focal length is preferred over a wide angle lens to help with lens compression. Remember, you are trying to replicate a real thing from a certain distance. You want to use the appropriate aperture for proper depth of field. If you want a shallow DoF, you need a fast lens. As for Megapixels, forget about them. One of the covers in the mag was shot with a 3.2 MP bridge. I currently use a 6MP DSLR for models to control the file size. A 20MP file will eat hard drive space like crazy. Since your camera is a mFT, make sure you have plenty of space to work with longer lenses. I did my own light box, which is nothing but a big box (from a water heater) with the sides cut out and replaced with white paper to diffuse the light. A strong light on top and you are ready to go. If you are using exterior natural light, beware of shadow direction vs subject. The best way to explain is with some examples: From this angle, it looks like a model  But from this angle it looks more real... and of course the background helps as well. 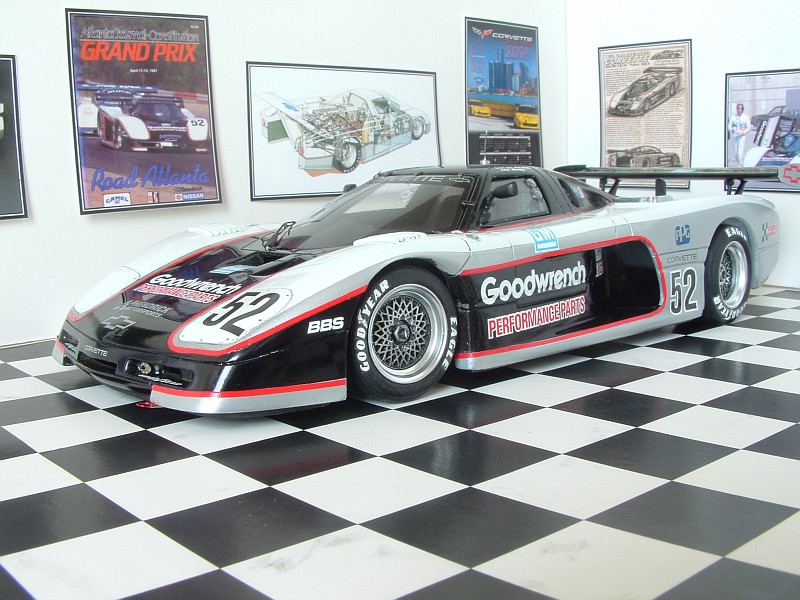 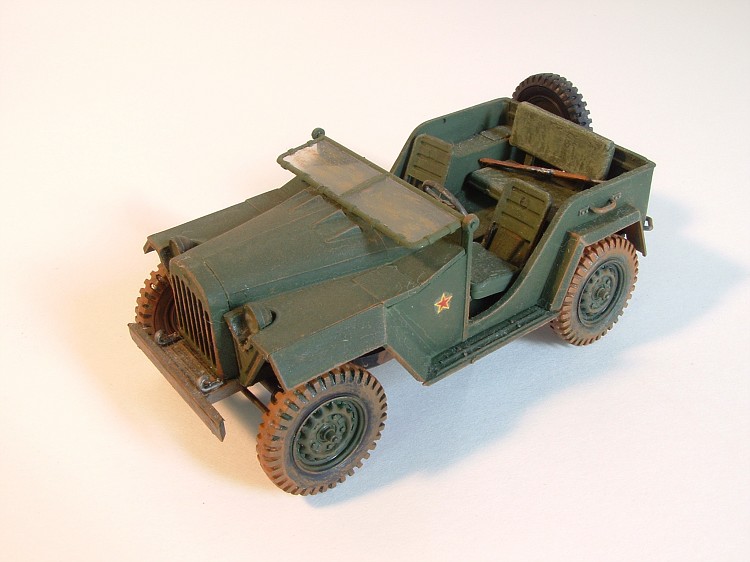 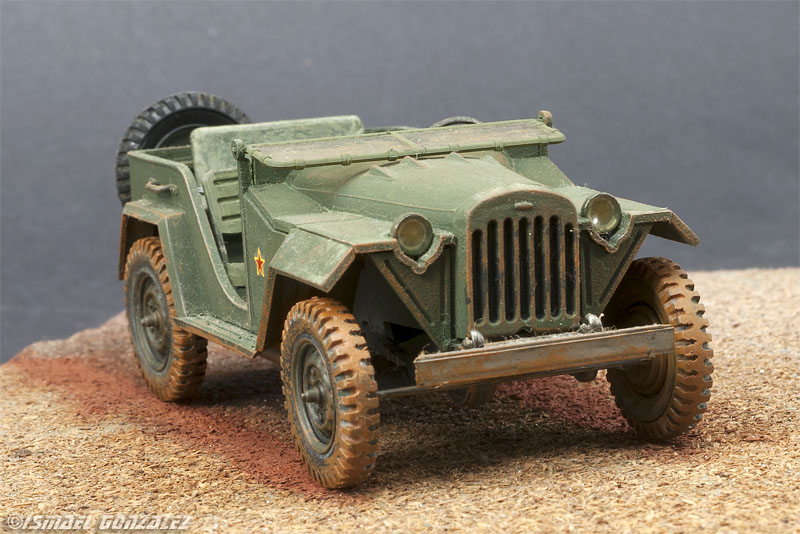 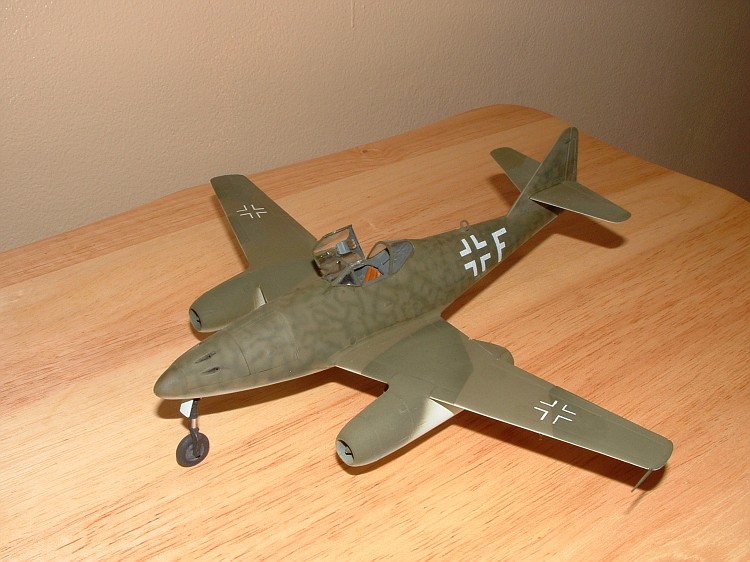 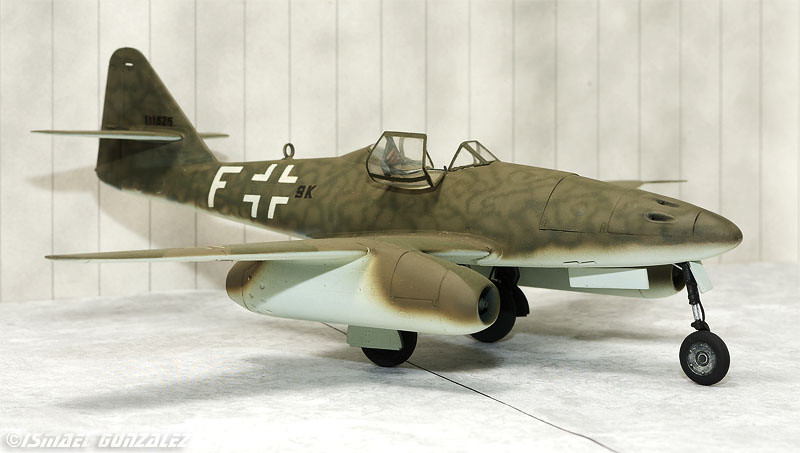 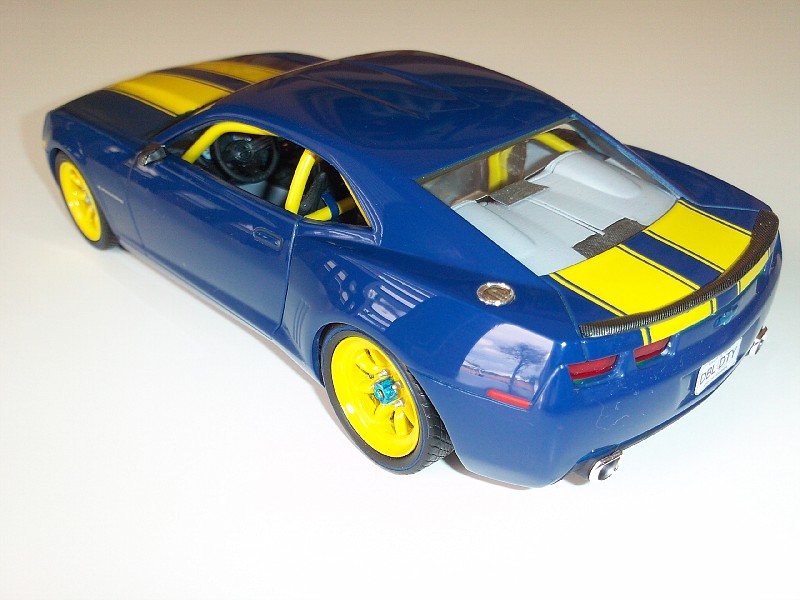 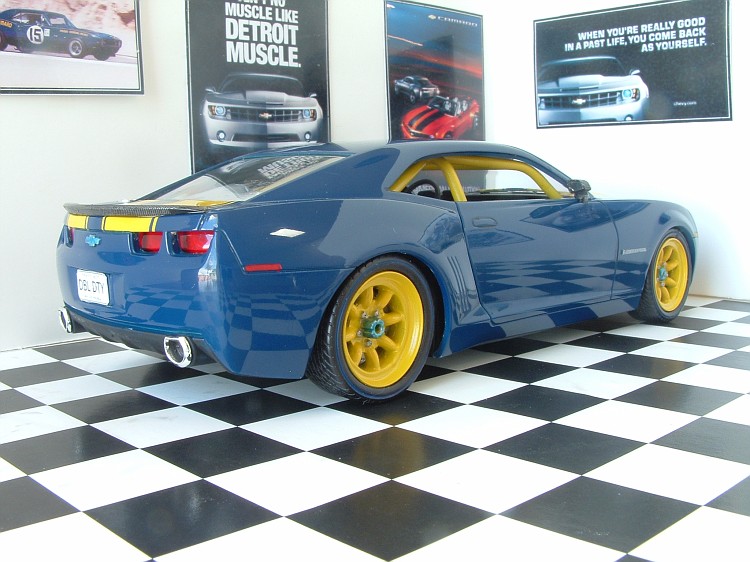 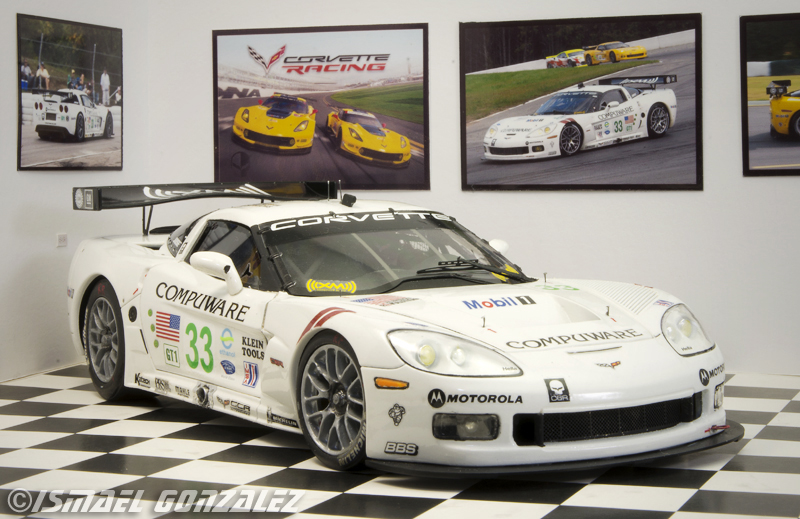 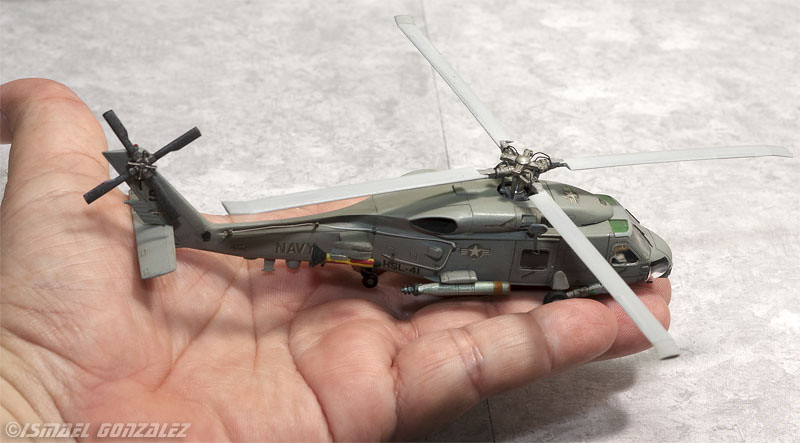 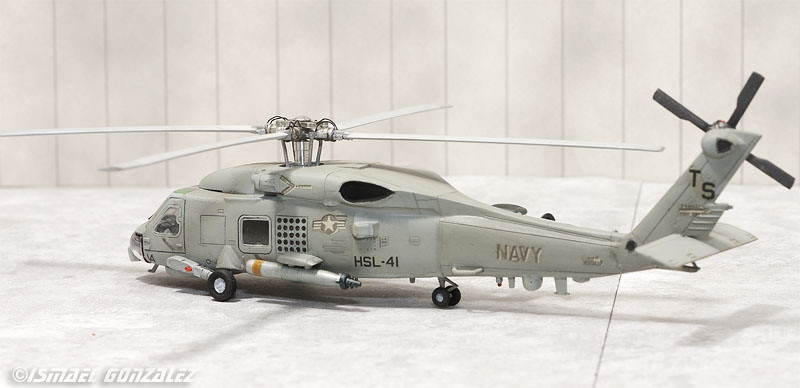 If you are interested, I can probably do a quick video of my setup. Let me know if you would be interested. Thanks, Ismael |
|
|
|
Post by Bernard Kron on Jul 2, 2020 9:45:53 GMT -8
My rig is very modest, to say the least. My camera is an old Fujifilm E900 9 megapixel compact camera set to its built-in optical macro lens setting and aperture priority set to its smallest opening, f8. My "photo booth" is my kitchen ventilator hood which has four spotlights at the corners aimed to cover the cooking area. I generally use a plain white background although I will occasionally shoot to a black background. I don't use any props or dioramas as a rule. The key to decent photos has been in 2 areas - the first and most obvious is to use a tripod and the camera's built in timer to allow hands-free shooting. The other key is that the Fujifilm E900 was the cheapest camera I could find that has a good sharp lens and will shoot RAW. This increases my dpi from the default jpeg 72 up to 240. I'm an experienced Photoshop user and P-shop is an important part of approach. It allows me to frame and crop my photos and also to correct for color and exposure, etc. directly from the RAW file and then save to the appropriate size jpeg to post on the web. I usually post 1024x768 72 dpi jpegs compressed using the Photoshop applet for such purposes set to its highest quality. In the past I post 800x600. Even in the larger size the images are still pretty compact in data size and I post them using imgBB as my hosting service. I'm primarily a hot rod and drag car modeler. Here are some examples: This is a summary composite of 4 images, something I often do because I know increasingly users are viewing images on small devices like tablets and phones accessing via their cell phone accounts.
I make my own decals and sometimes will incorporate the graphics into my photos: Photoshop allows me to manipulate the details of the image, such as this shot where the engine compartment area was a little underexposed and I was able to us P-shop to bring out some more detail:
And of course Photoshop allows for trick photography effects like this "ghost view" cutaway:
Here's a black background photo:
|
|
|
|
Post by bsmooth on Jul 2, 2020 11:38:22 GMT -8
I would be very interested in seeing how its done, but lets see how many respond, I thought a lot would considering most heres only way to see other peoples work is by the photos they take.
BTW on your Me262, did you have to use extra weight in the nose to get it to balance out right ? I remember years ago mine was tail heavy.
|
|
|
|
Post by tatocorvette on Jul 2, 2020 18:58:37 GMT -8
I'll try to put something together soon. I don't recall exactly but I think the Me262 may have a penny or two glued inside the nose. That was built over 20 years ago. That was my common fix to tail heavy aircraft. I do remember at some point buying little lead fishing sinkers.
Thanks,
Ismael
|
|
|
|
Post by tatocorvette on Jul 3, 2020 9:10:41 GMT -8
Uploading the video. (link shortly)
More than my voice, I just HATE my accent! It sounds as if English is my second language... Wait: IT IS!
|
|
|
|
Post by tatocorvette on Jul 3, 2020 10:12:23 GMT -8
Hello,
A few disclaimers:
-I don't like my voice, but more than that, I HATE my accent. After all, English is my second language.
-This was recorded in a whim. A pro video would have been dubbed over etc. So background noise is annoying.
-There are countless ways of doing this. This is only how I do it. There are most likely better ways to do it.
-I just had fun with it.
-Let me know if you have any questions or comments.
Thanks,
Ismael
|
|
|
|
Post by bsmooth on Jul 3, 2020 11:25:29 GMT -8
Thanks Ismael, that was pretty informative. So If I didn't have strobes, just steady lights on each side would be ok too wouldn't it? I've always read that lights actually mounted on the camera itself aren't that great unless you can mount them off to the side or like you have setup here.
I like the fact you used just what you had and it turned out really well. Thanks again for showing us how you get those great pictures, plus the fact that there pretty cool subjects as well, that certainly helps.
|
|
|
|
Post by tatocorvette on Jul 3, 2020 12:39:05 GMT -8
Thanks! Steady lights are ok. However, be aware of 2 things: light color that can affect the white balance and if you use fluorescent and/or led lights, any camera with only electronic shutters will have a hard time and will show very annoying dark horizontal lines due to sync. The other part of the equation is processing the pictures. I shoot in RAW exclusively simply because I take care of white balance in postprocess, not in camera. That is another whole different can of worms  For critical color accuracy, I use a calibration color chart. NOT MY model. This was a test shot in a show I covered for the mag a few years ago. 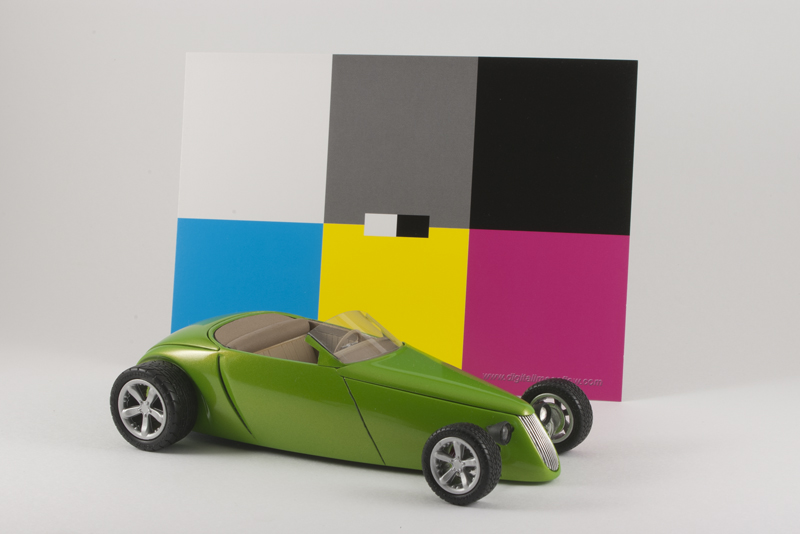 Thanks, Ismael |
|
|
|
Post by bsmooth on Jul 3, 2020 16:49:38 GMT -8
First thing I thought of when I saw that model was , must be an example, certainly not his, but it IS an interesting color. I do my processing in Photoshop too as well as DXO Photolab 3. Afraid my Photoshop is only CS6 as there is no way I'm doing a subscription to Photoshop, just not a big fan.
|
|
|
|
Post by tatocorvette on Jul 3, 2020 17:00:47 GMT -8
I run CS5 just fine. Actually finishing some senior portraits as we speak. I run a small home studio as I have multiple parallel lives |
|
|
|
Post by Bernard Kron on Jul 3, 2020 17:38:22 GMT -8
...I do my processing in Photoshop too as well as DXO Photolab 3. Afraid my Photoshop is only CS6 as there is no way I'm doing a subscription to Photoshop... Same here. Fortunately it will take more than my lifetime to master all that CS6 offers so I have no problem not keeping with the latest to the tune of $20.99 per month! |
|
|
|
Post by Joel_W on Jul 4, 2020 6:59:10 GMT -8
Ismael,
As Usual I'm once again not only impressed but surprised as well. You're certainly a man of many talents.
Photography was also my 2nd hobby but with my eyesight issues (that are now once again becoming a major issue as Monday I'm at another Retina Specialist). These days I just use my Nikon gear for model photography. I've been very lazy over the years and just kind of use a gray towel taped to the wall by my bench, and two 5000k lights. After seeing your photo booth, I think I'll just get off my fat duff and build something similar that I will at least use for final photos as I just don't have the space in my model/computer room for more stuff to be stored.
Joel
|
|
|
|
Post by bsmooth on Jul 8, 2020 6:06:55 GMT -8
I have a chance to get a 3.5 30mm Macro lens for taking pictures with my Micro Four Thirds Olympus EPL-2 camera. I wanted the 60mm Macro but will the 30mm suffice ?
|
|
|
|
Post by tatocorvette on Jul 8, 2020 7:41:46 GMT -8
I would say yes. A 60 in a micro four thirds you will have to step back quite some distance to get your subject in the frame. The 30mm seems to be popular in the mFT community. I'd say got for it! Another benefit is that if it doesn't work you can always sell it to fund the next one. (That's the first sign of LBA;Lens buying addiction, part of GBA: Gear buying addiction which also contains CBA:Camera buying addiction). Just ask Sam and me...  Thanks, Ismael |
|


