|
|
Post by ShawnS on Jul 13, 2021 2:32:34 GMT -8
Hi guys.
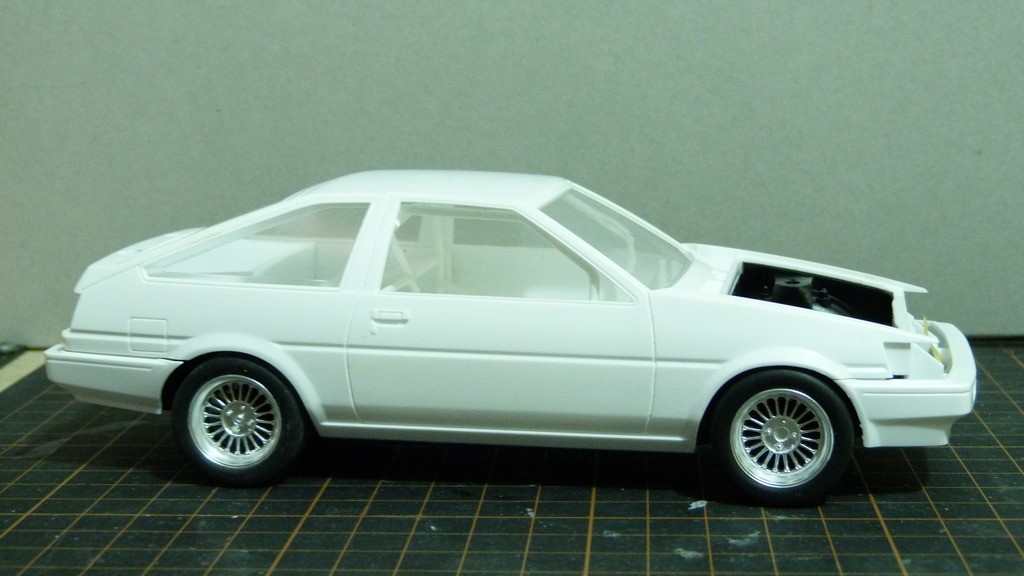
Winter is well and truly underway in my part of the world so that means no painting until October/November so what else is a guy going to do but start preparing for painting season. I've had these on the shelf for a while and I have decided to pull the trigger and get them going. Here's what I am going for.
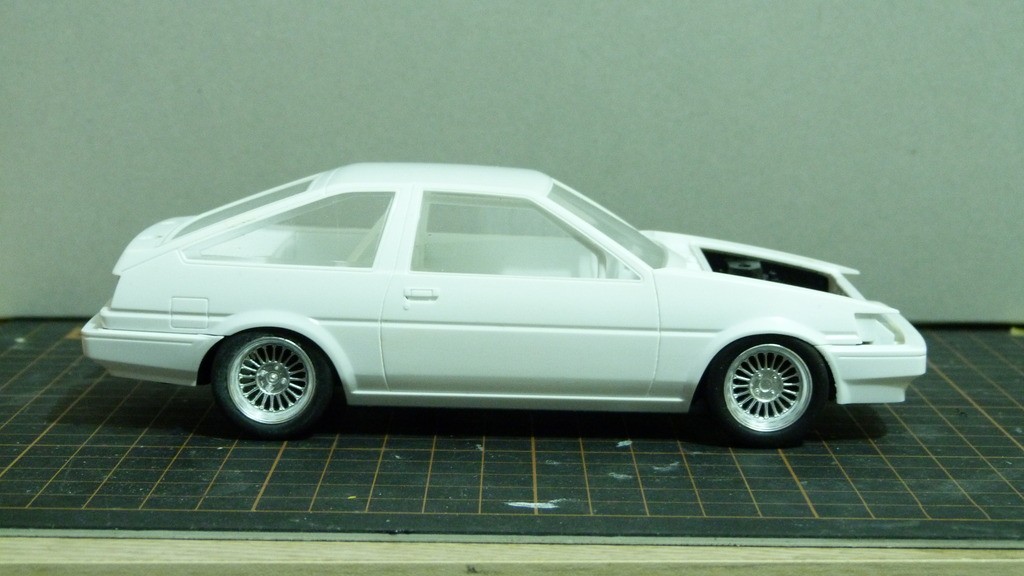
And this is what I'm going to start with.
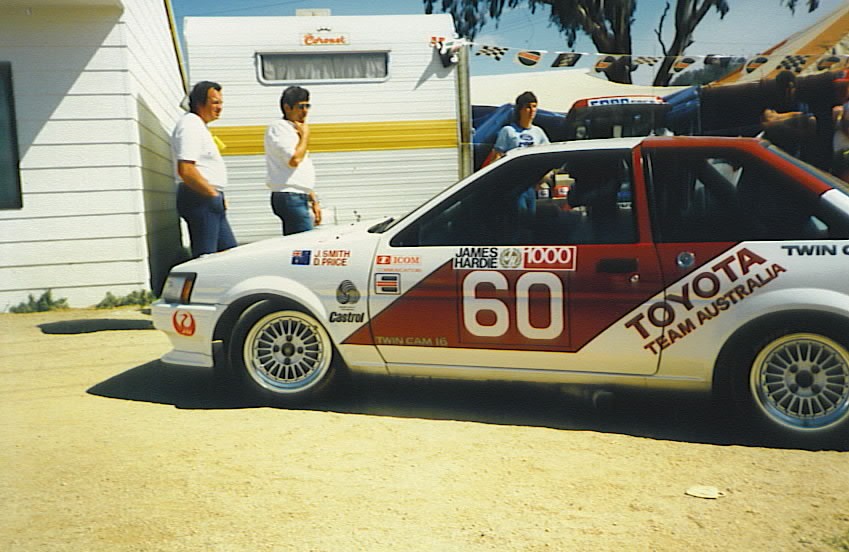
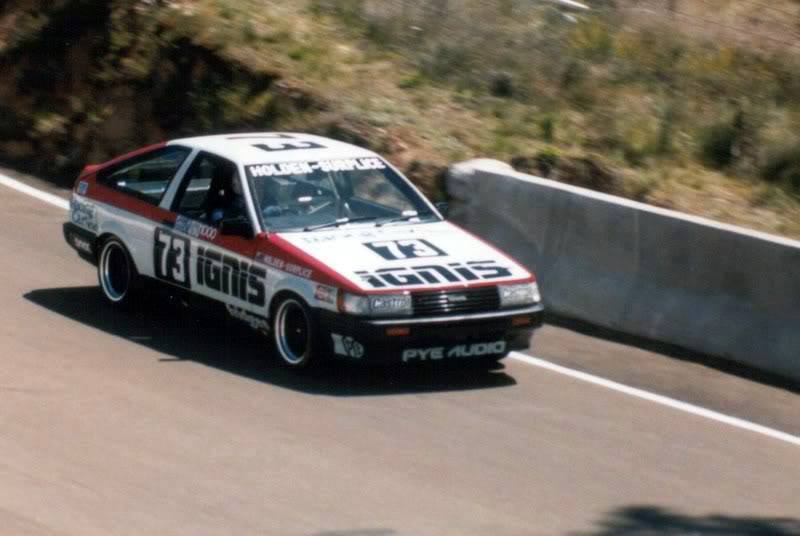
This is the AE86 that Bob Holden and Alexandra Surplice ran in the 1984 Bathurst 1000. They were a late inclusion to the grid (sunday morning!!!) and started 63rd out of 64 and finished 26th.
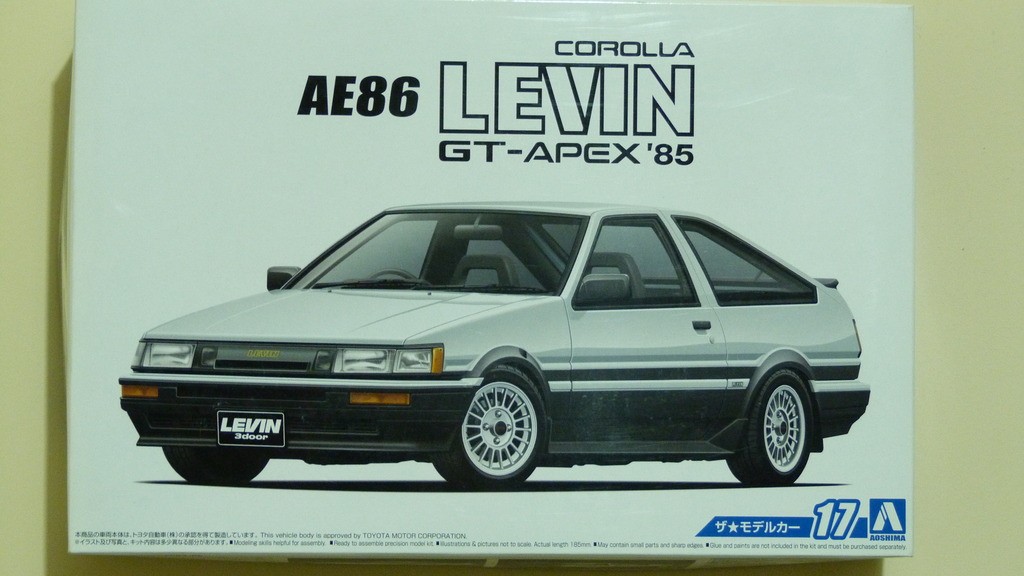
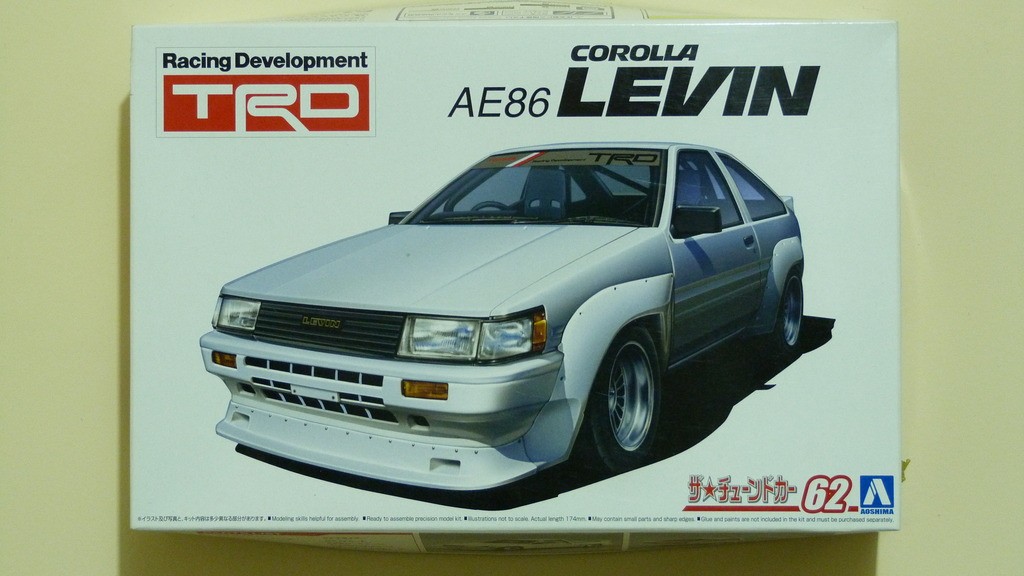
These are the kits I will be using.
This one for the road car bits
and for the race bits.
These are actually great kits. Unlike a lot of Aoshima JDM kits there is no provision for motorization and they are full detail inside and out with some very crisp molding, even real springs for the suspension. I would totally recommend these kits for anyone of any skill level. Some of the road car versions come with great engine detail too.
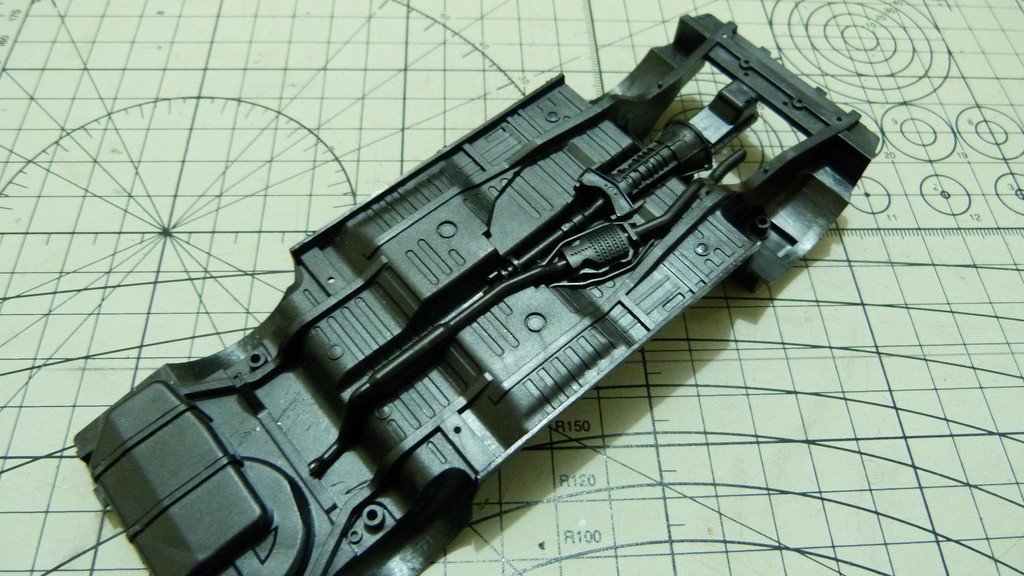
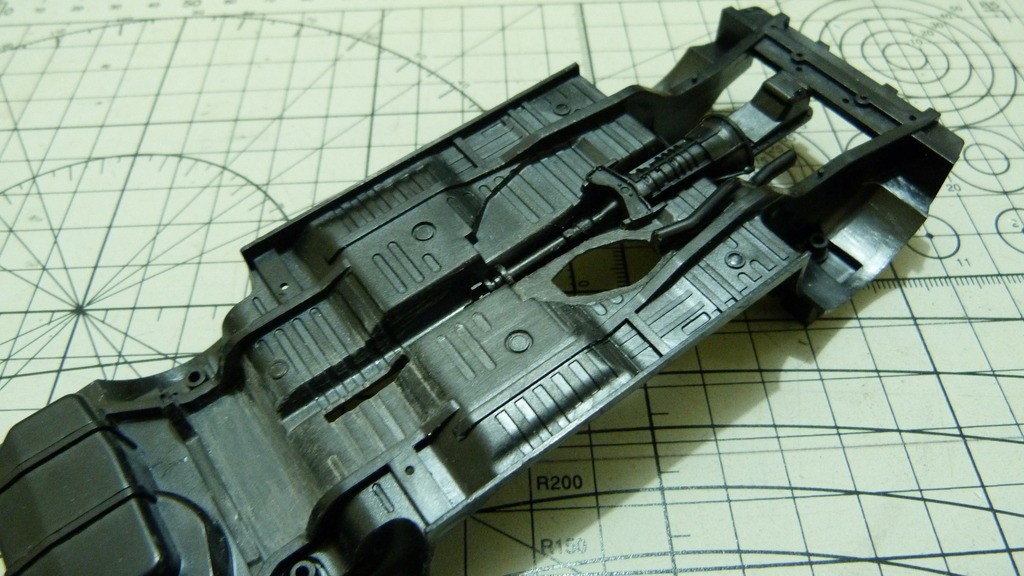
Let's get started. One hurdle faced by anyone trying to turn a road car kit into a race car is the dreaded molded in exhaust. The trusty old Dremel and some chisels come in handy for this job. I filled in the holes and blended them in with some Tamiya liquid primer. A muffler from the spares box and some Evergreen tube completes the exhaust.
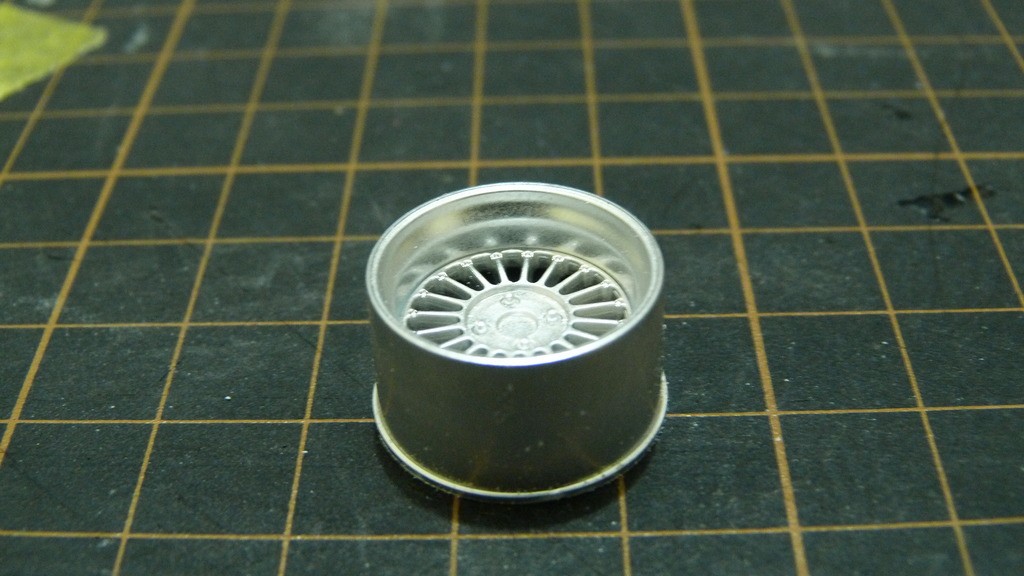
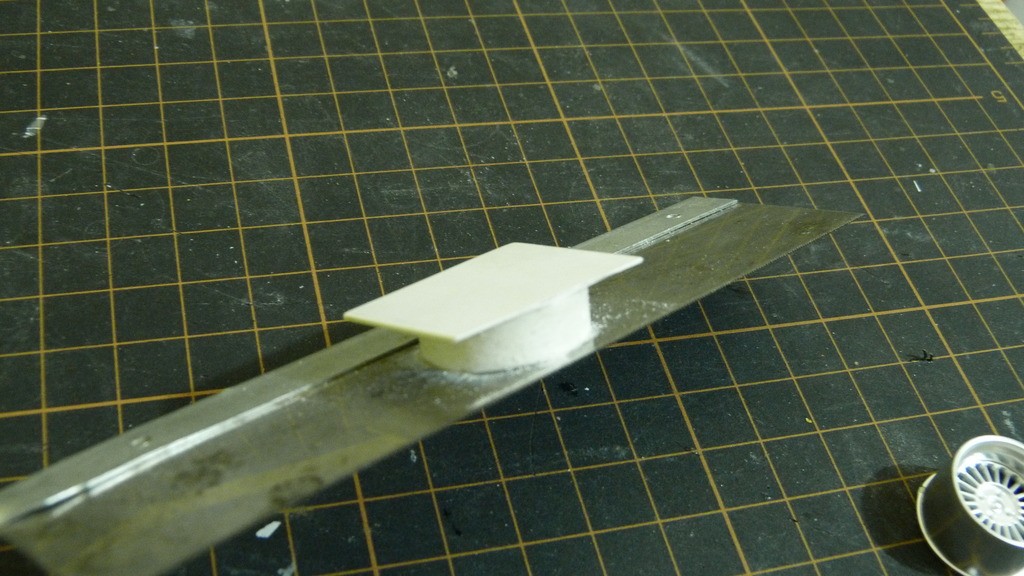
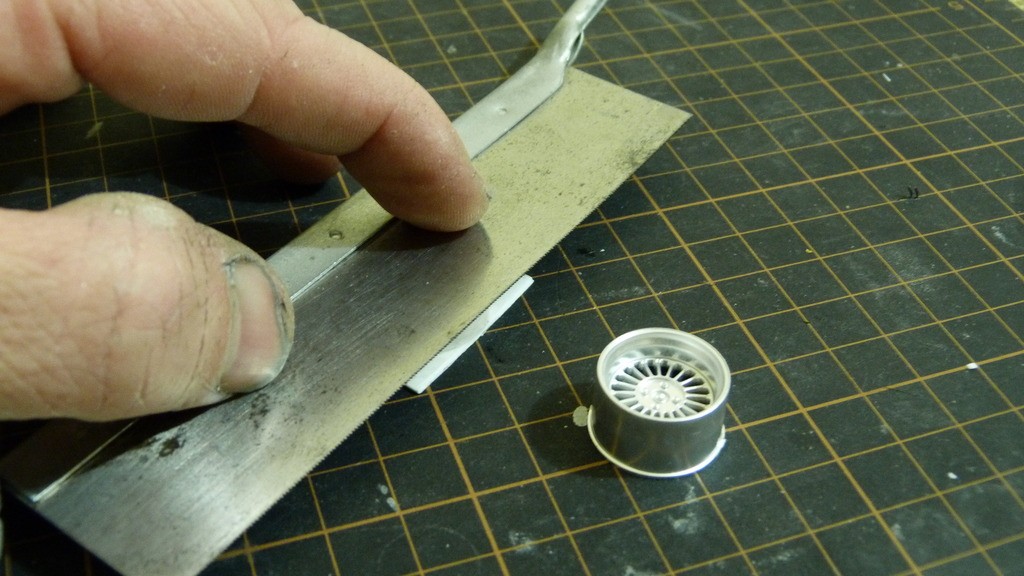
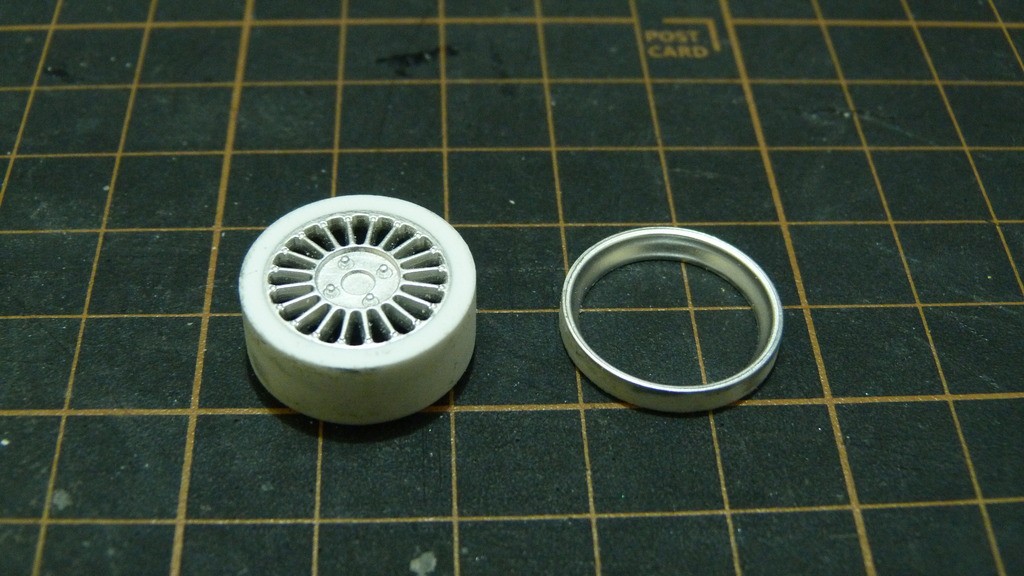
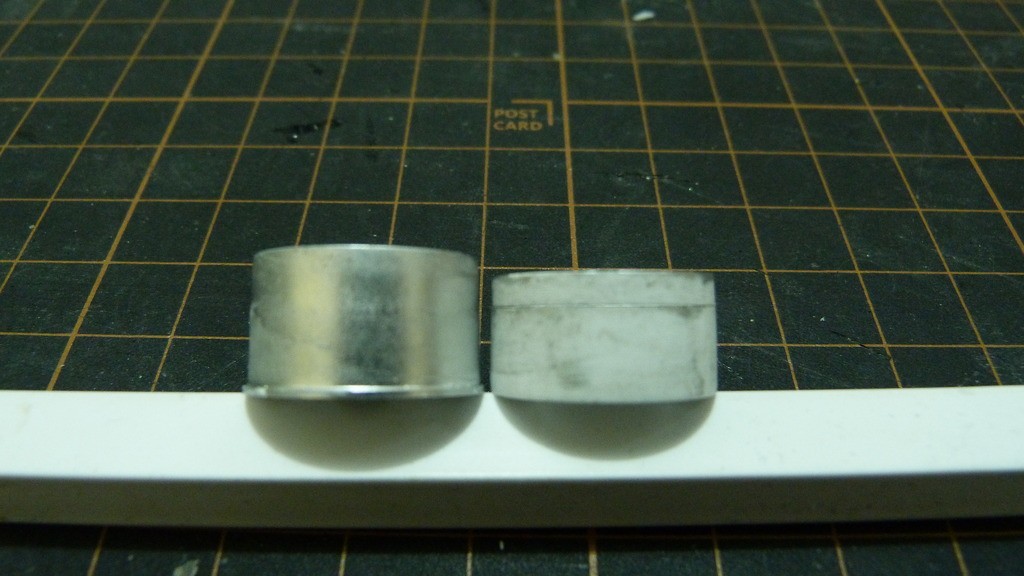
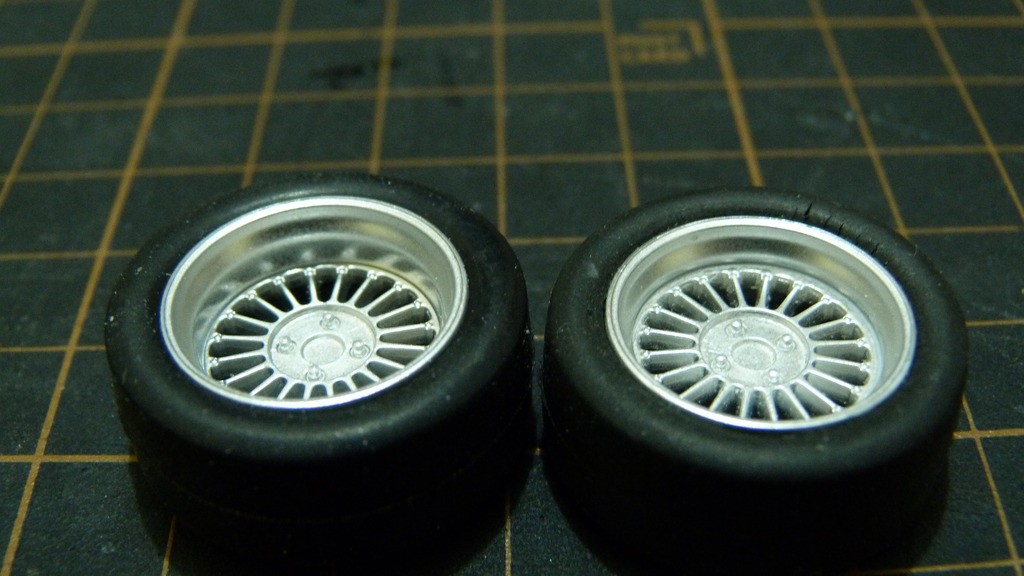
On to the wheels. The wheels from the TRD Levin have the correct spokes but are way too deep so I had to fix that too. I delved into my scrap box and found some things to use as a spacer to get the right height to cut the wheels. I glued that spacer to a spare saw. Holding the saw flat and firm on the cutting mat I then moved the wheel against the saw to get the cut even all the way around the wheel. I then just sanded the two pieces to the required sizes. Before (left), after (right) The TRD kit doesn't come with slick tyres so I raided the spares box and found some from those useless Fujimi BMW M3 kits.
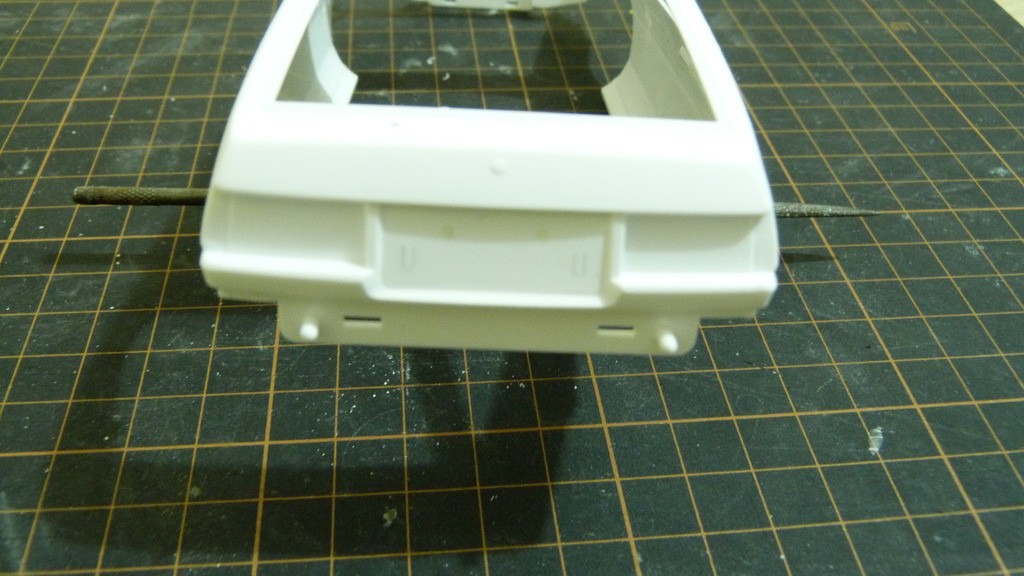
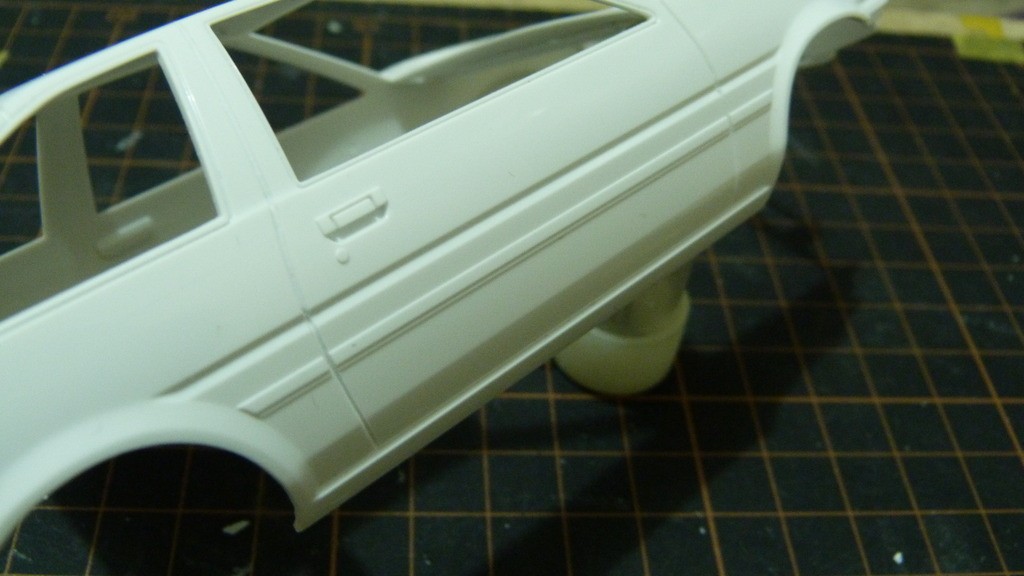
The body from the TRD levin is set up for those wide flares and has the wheel arches ground out from the factory so I have to use the body from the road car kit. Just had to fill the holes in the tail panel and remove the trims from the sides.
Work has started on the interior and that will be in the next update very soon.
Cheers ShawnS
|
|
|
|
Post by afx on Jul 13, 2021 6:32:29 GMT -8
Tidy work as always Shawn.
|
|
|
|
Post by Ben_B on Jul 13, 2021 7:08:01 GMT -8
Nice!
Ben
|
|
|
|
Post by ShawnS on Jul 16, 2021 3:00:08 GMT -8
Hi guys.
Work on this one is moving quite nicely and I got most of the interior done this week.
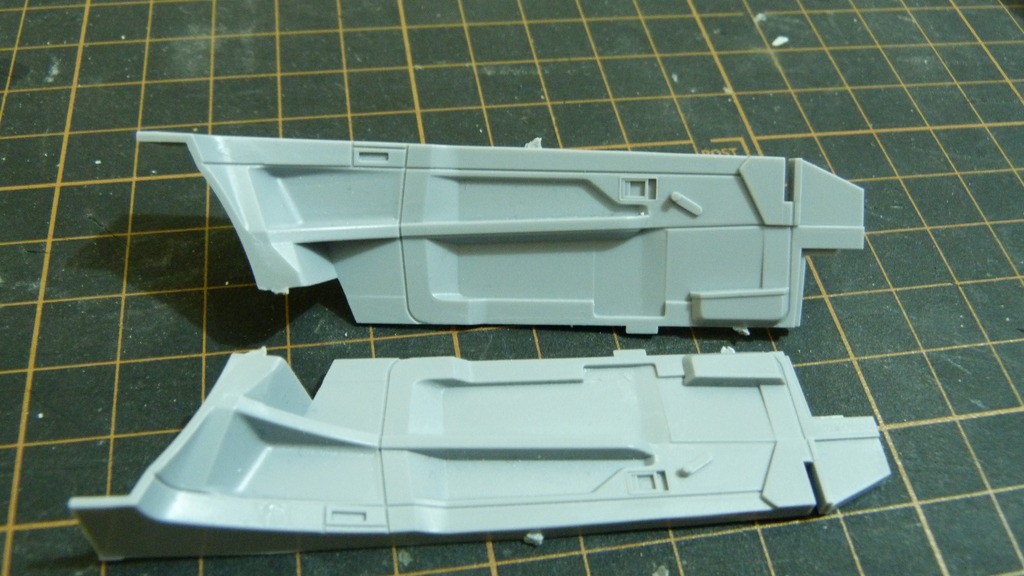
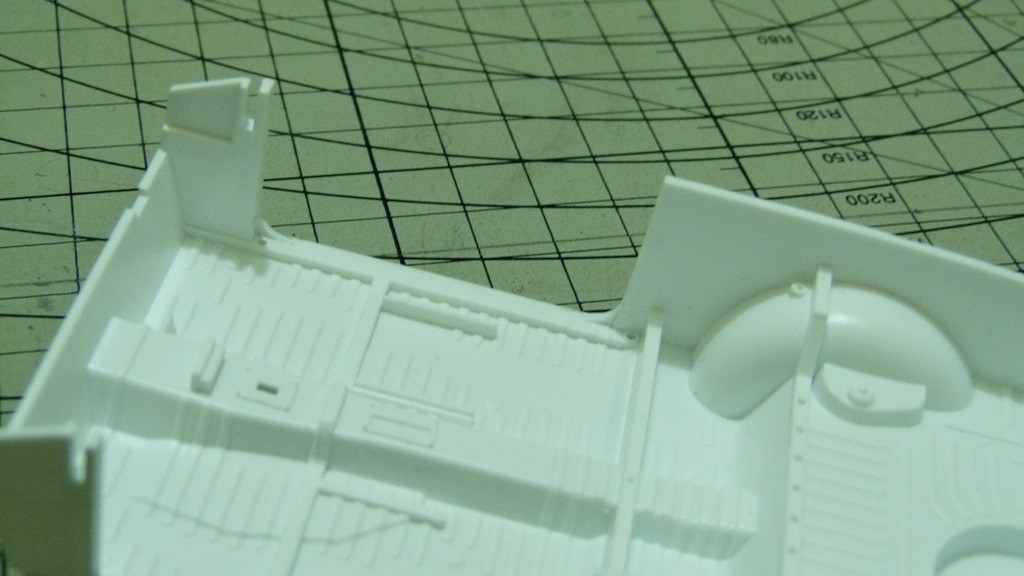
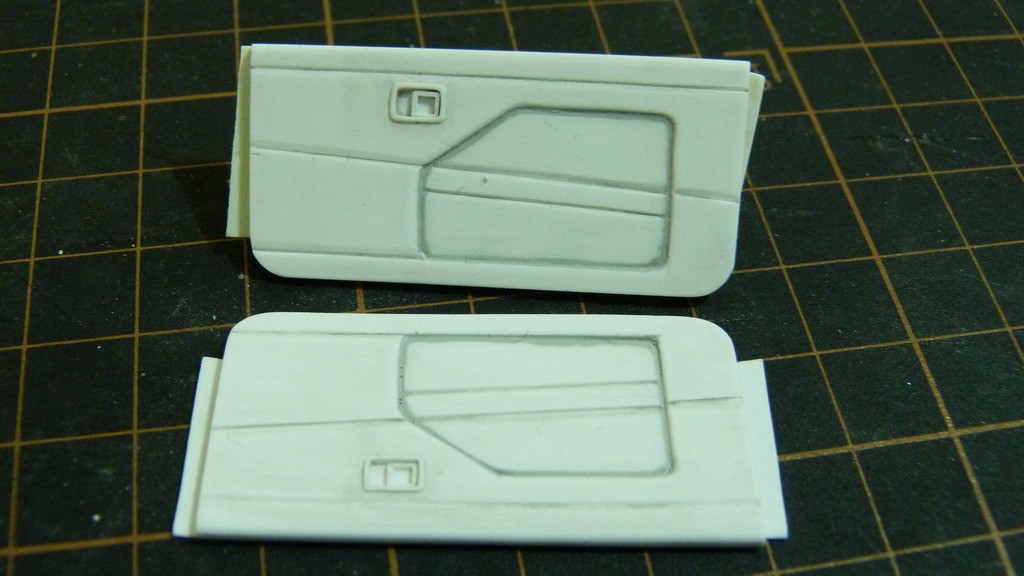
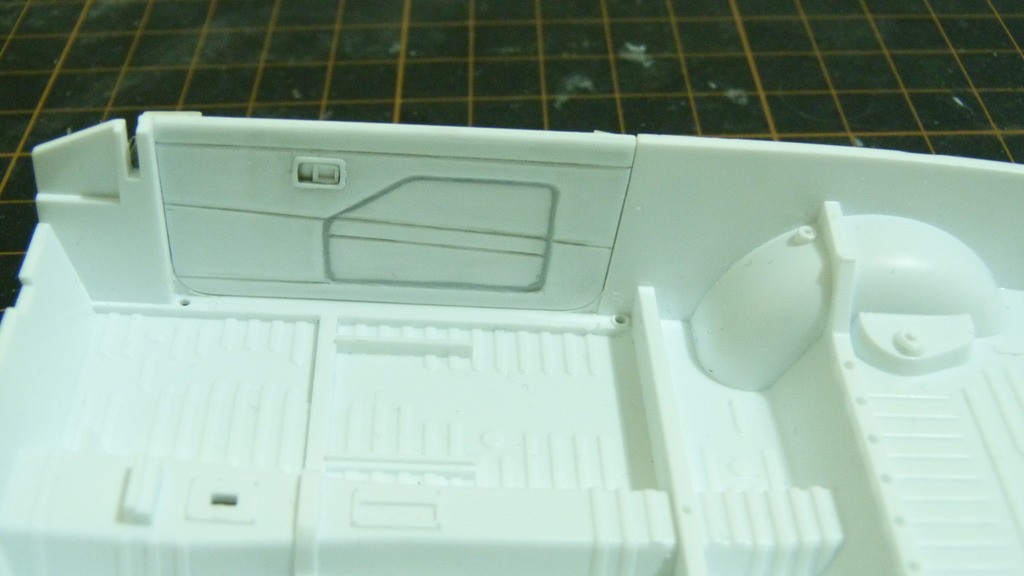
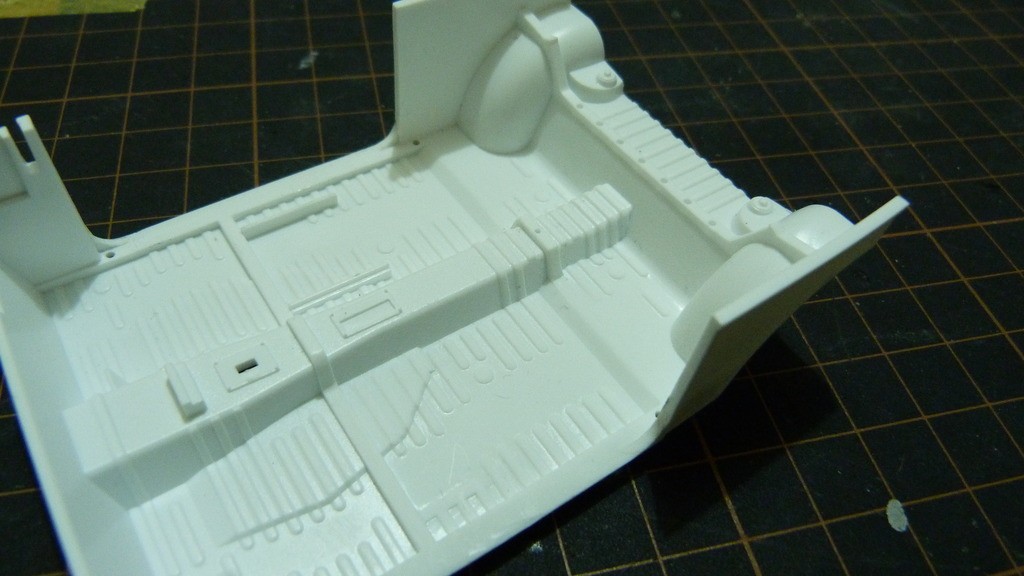
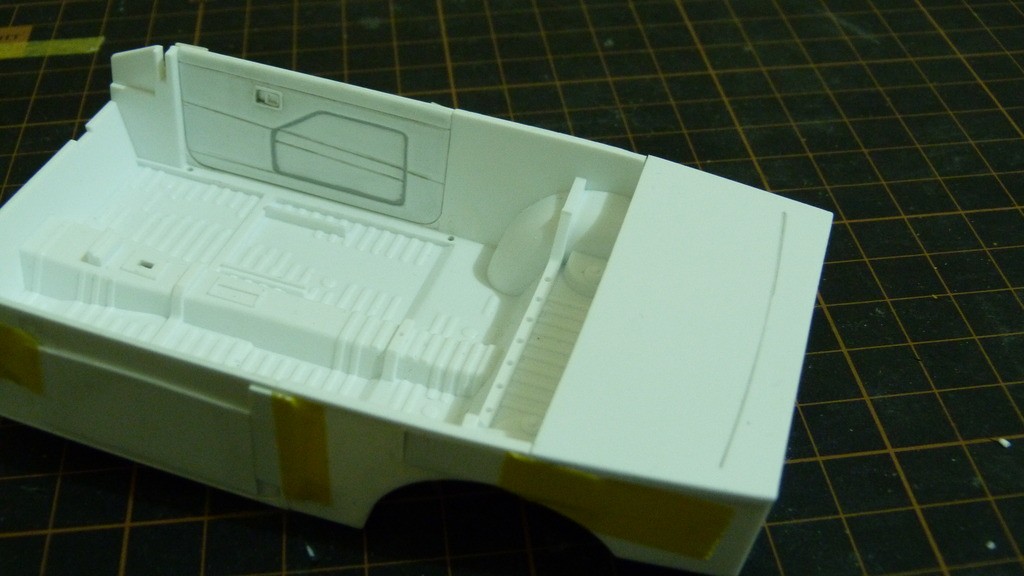
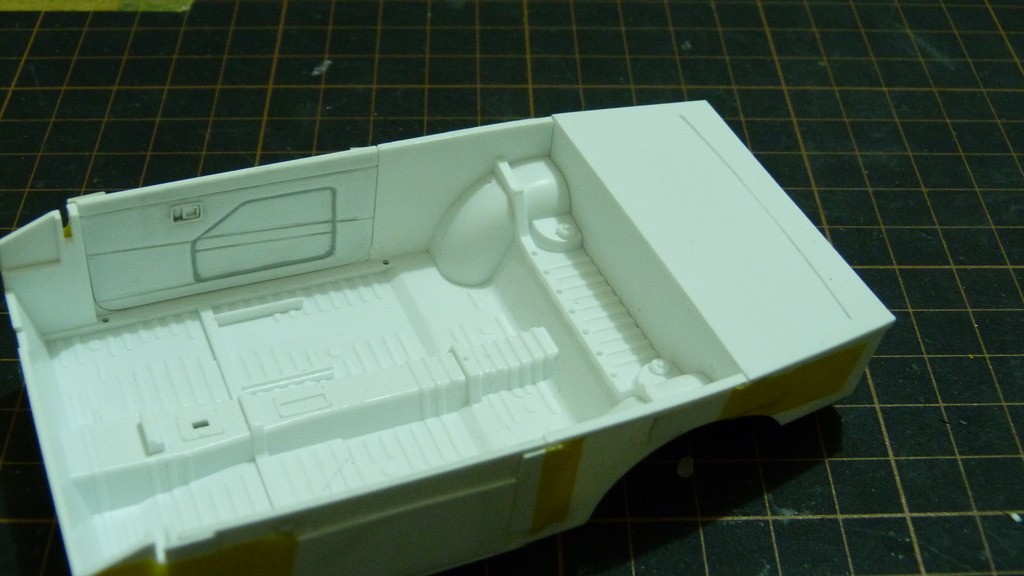
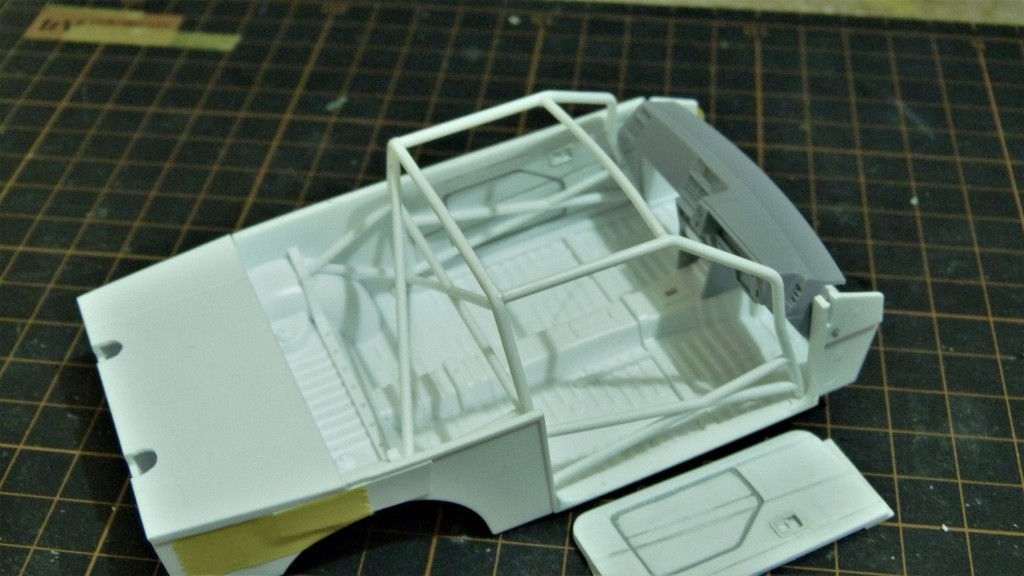
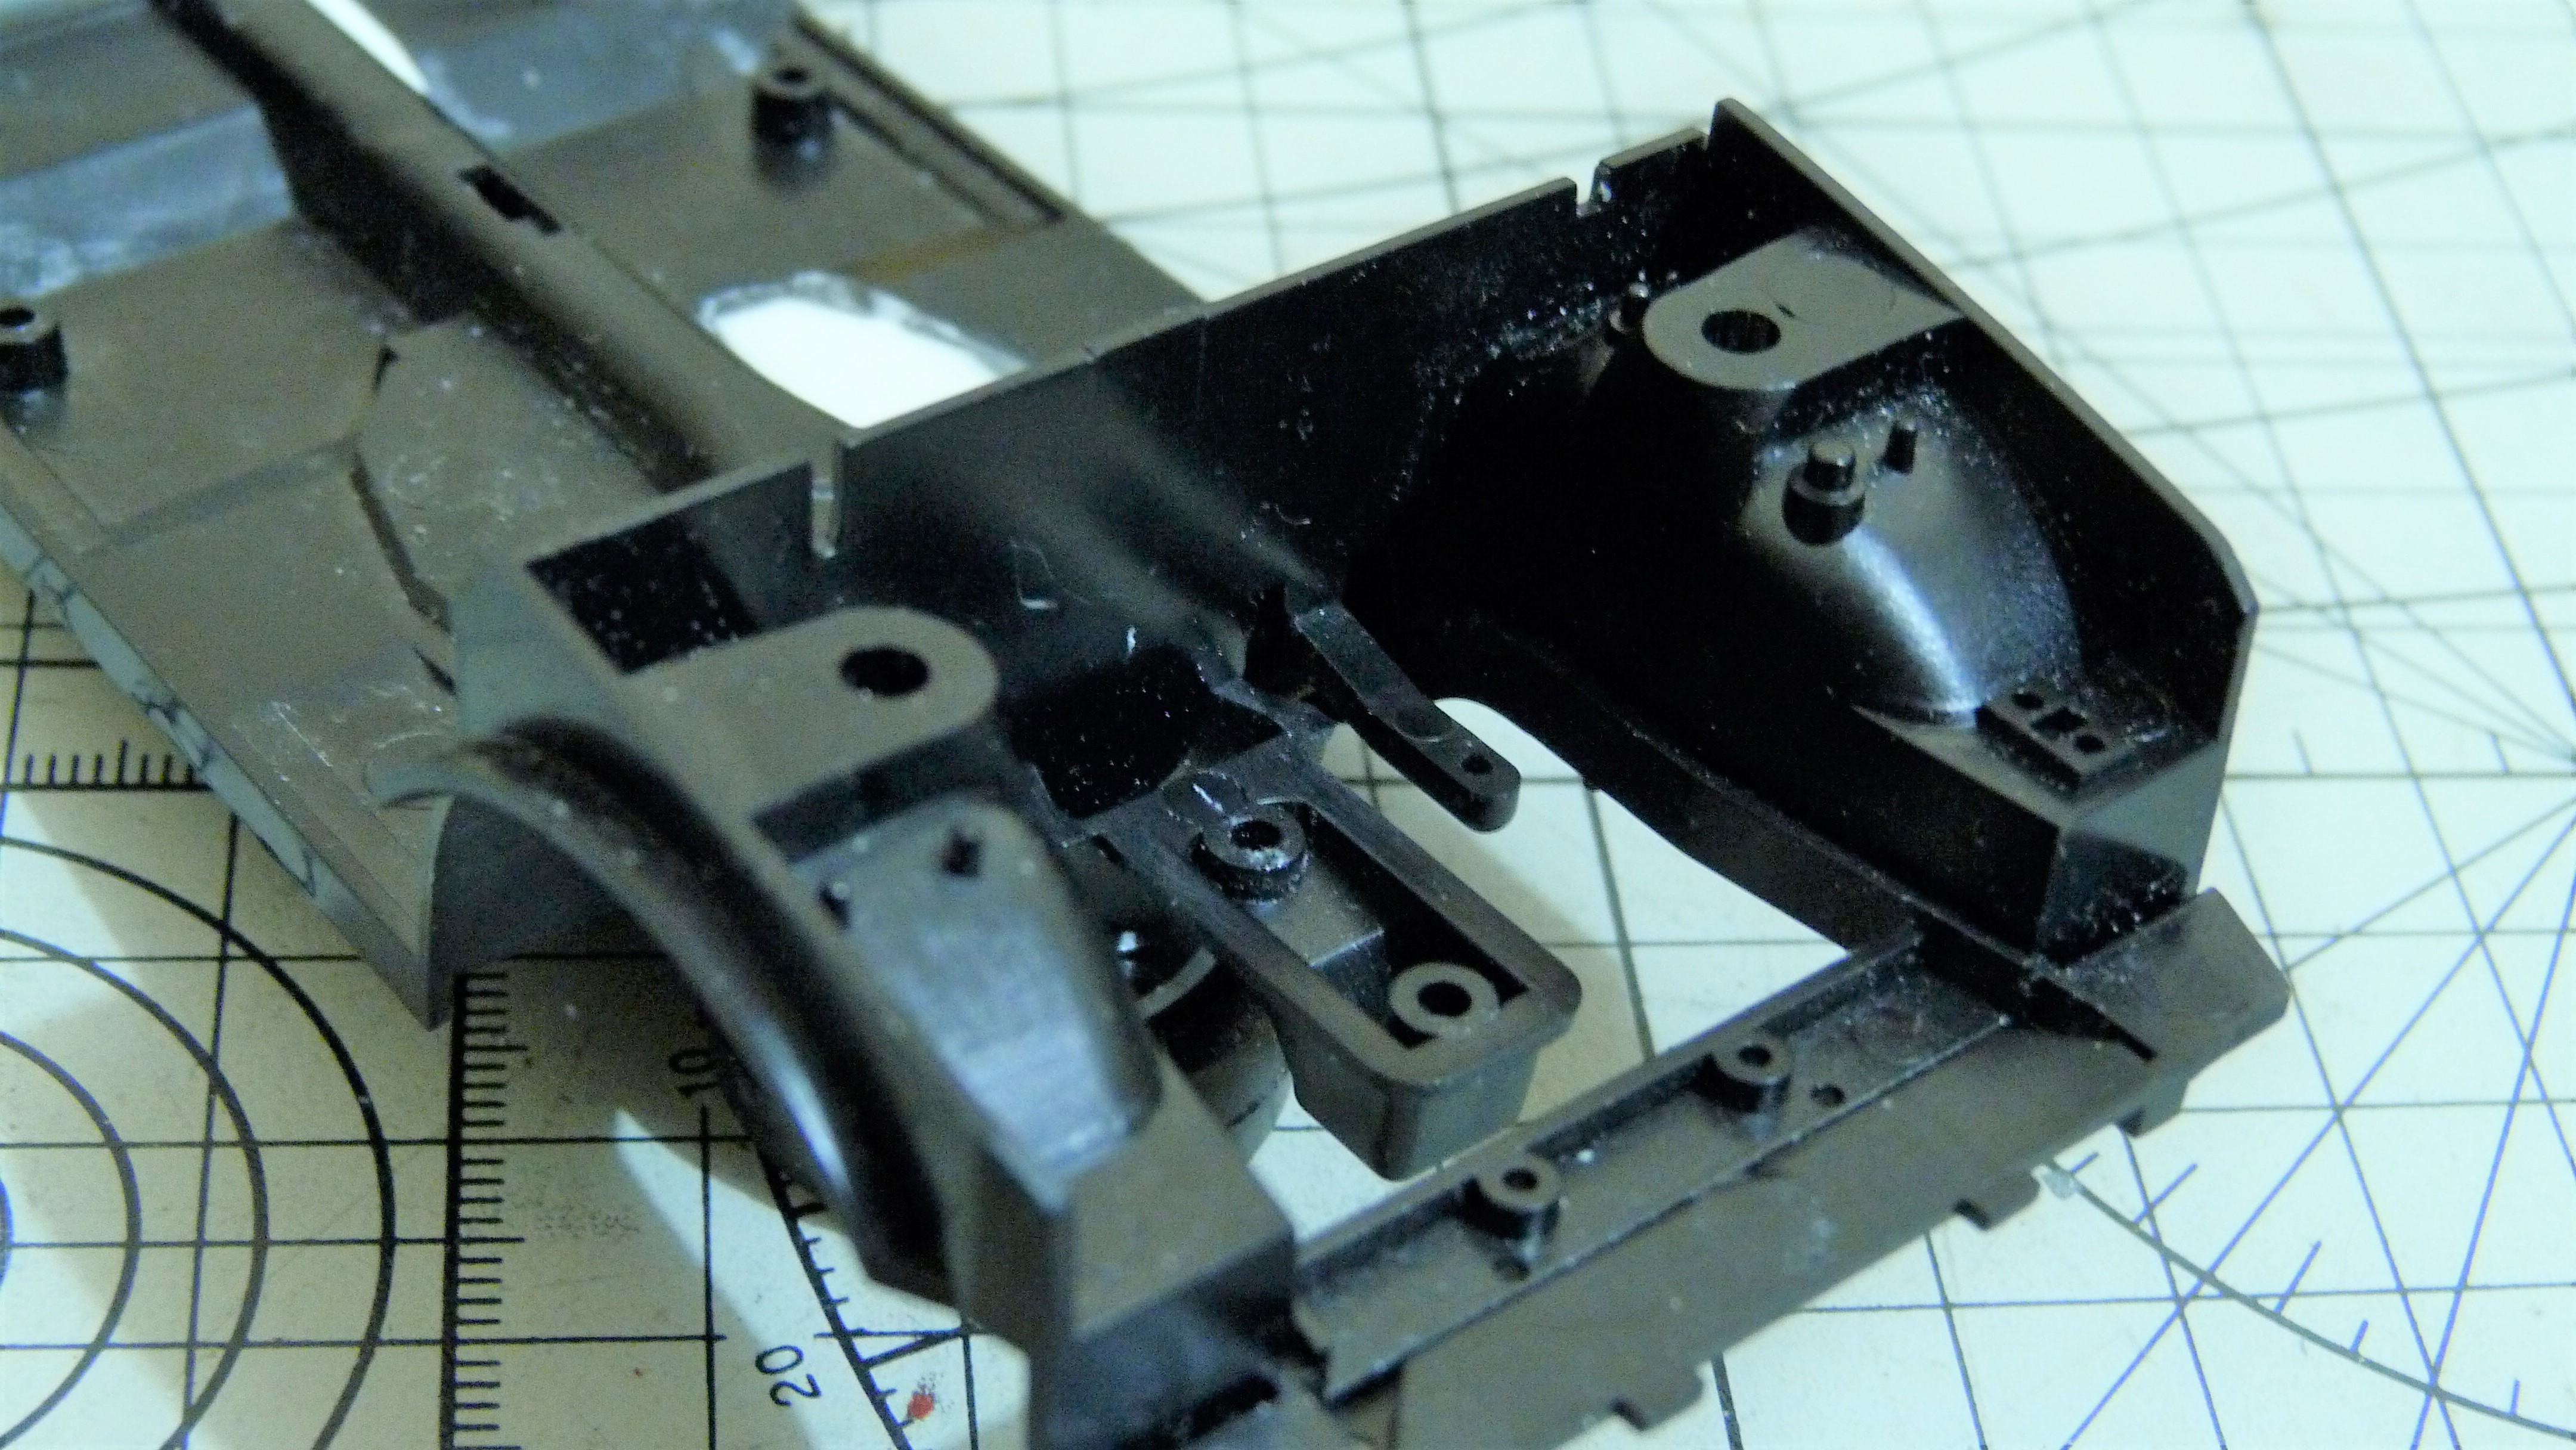
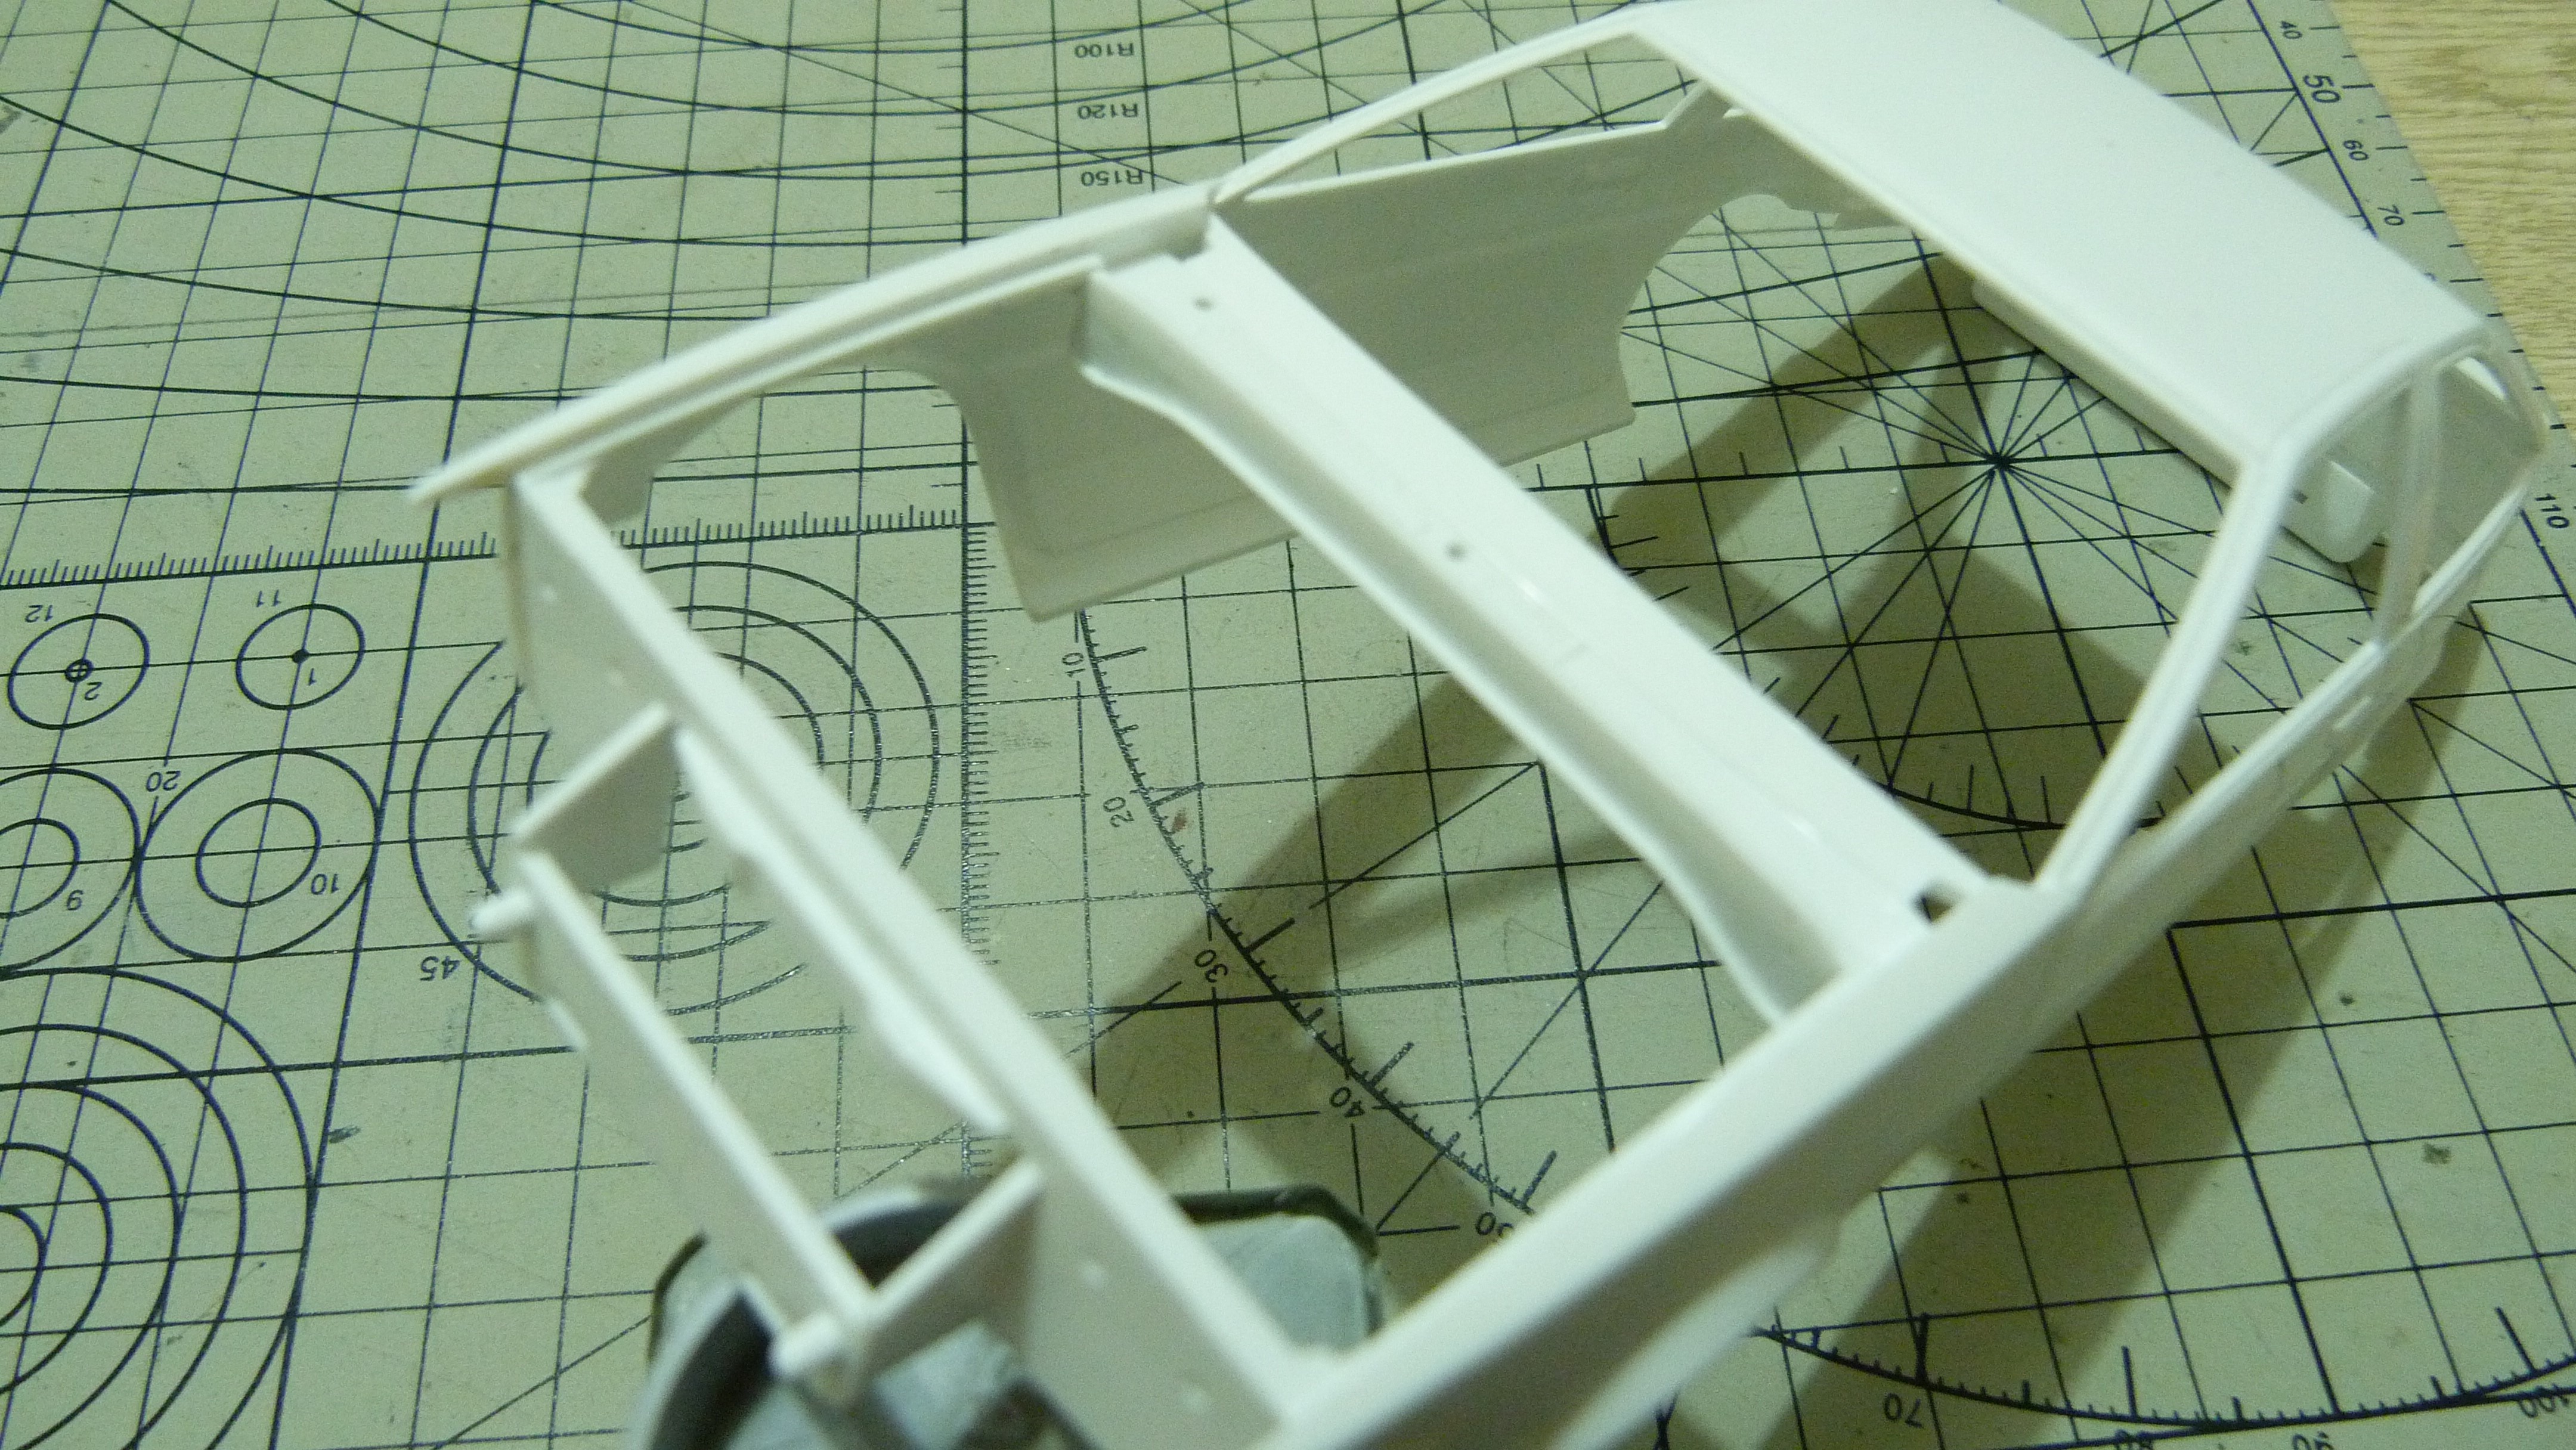
Here is the stripped out racing interior tub from the TRD Levin kit. It's a nice piece but it's totally devoid of door card detail so that will need to be attended to as well as changing it to get closer to my reference pics of the 1:1. The road car kit has these door panels but they are too much for a racing car so I will have to do my own. I cut the panel out of the tub. I found some photos online of the basic type of door cards that were used on the Group A touring cars so that's what I aimed for. I will add the window winders later. One feature of early Group A cars was the sheet metal bulkhead/firewall that separated the fuel tank from the drivers compartment. Rather than trying to cut out a piece of Evergreen sheet to the correct shape I decided to cut the whole rear section off and use that as a supporting structure for the styrene sheet sections. To get an even cut I tacked some scrap Evergreen pieces to the underside to use as a guide and went to work with the saw. This is the rear section after it was boxed in with the Evergreen sheet. A couple of other things I needed to tackle were this thick brace in the floor of the tub that doesn't show up on my reference pics, and the passenger side seat mounts which were chiseled out.
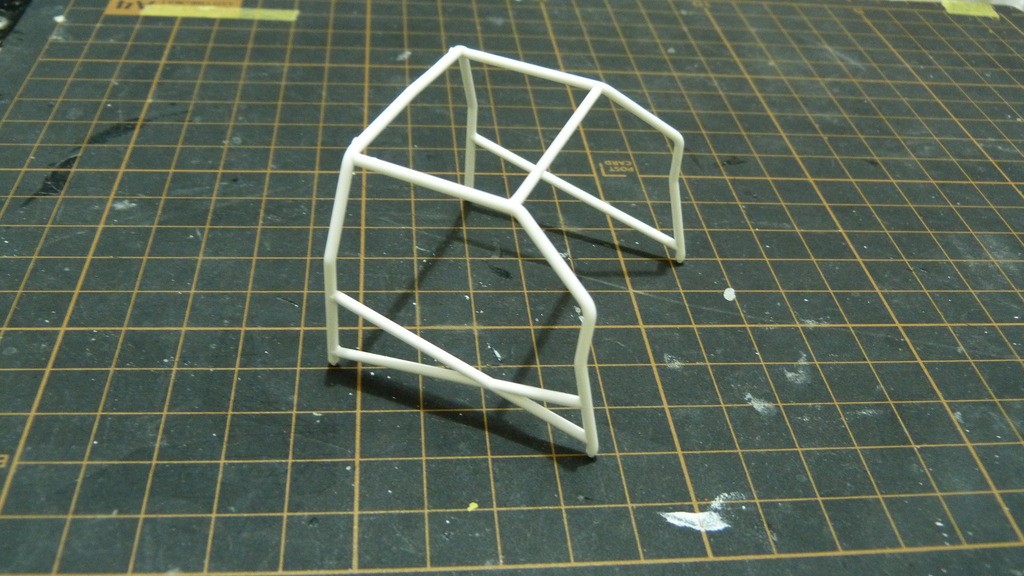
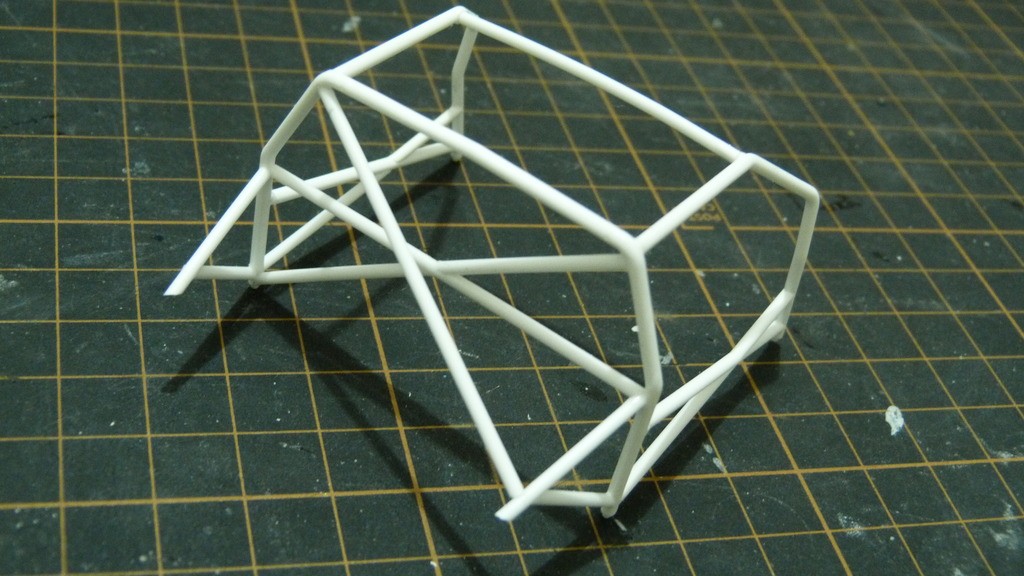
Now on to the rollcage. This is the section of the TRD Levin rollcage that I will be using,
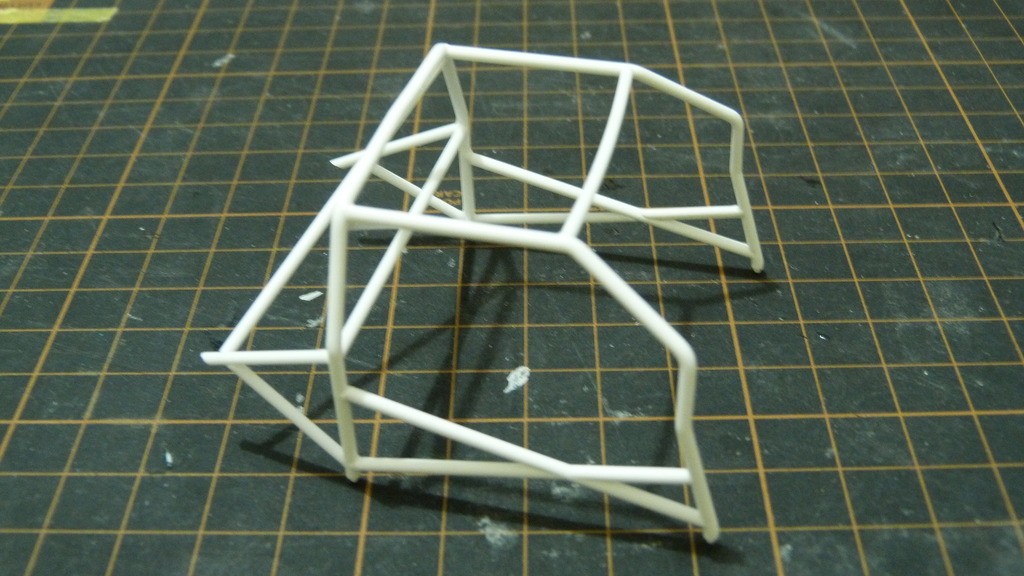
and this is how it ended up.
I scribed some lines onto the rear cover and added some cut outs for some fuel fillers that I found in my spares box. The fuel fillers on the rear hatch
That's all for now. This weeks work will focus on finishing the interior details and then on to the engine bay.
Cheers ShawnS
|
|
|
|
Post by Joel_W on Jul 20, 2021 5:58:11 GMT -8
Shawn,
Just a great conversion build. Your solutions to removing molded on kit details, as well as adding details all are so logical that even I could do it.
looking forward to your next update.
joel
|
|
|
|
Post by ShawnS on Jul 23, 2021 1:46:08 GMT -8
Thanks Joel.
Got some more work done since the last update. I finished up the interior fabrication and moved on to the suspension.
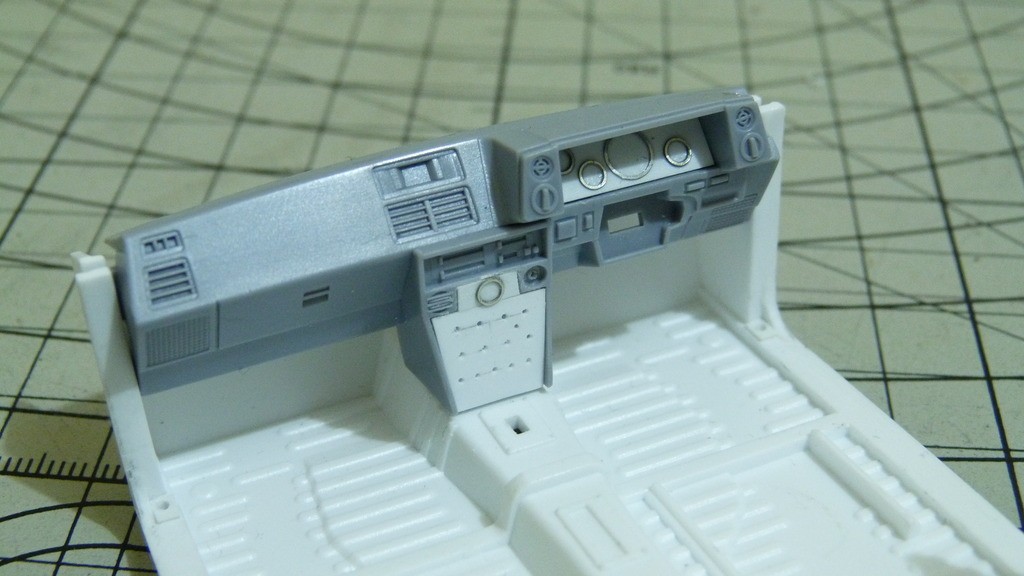
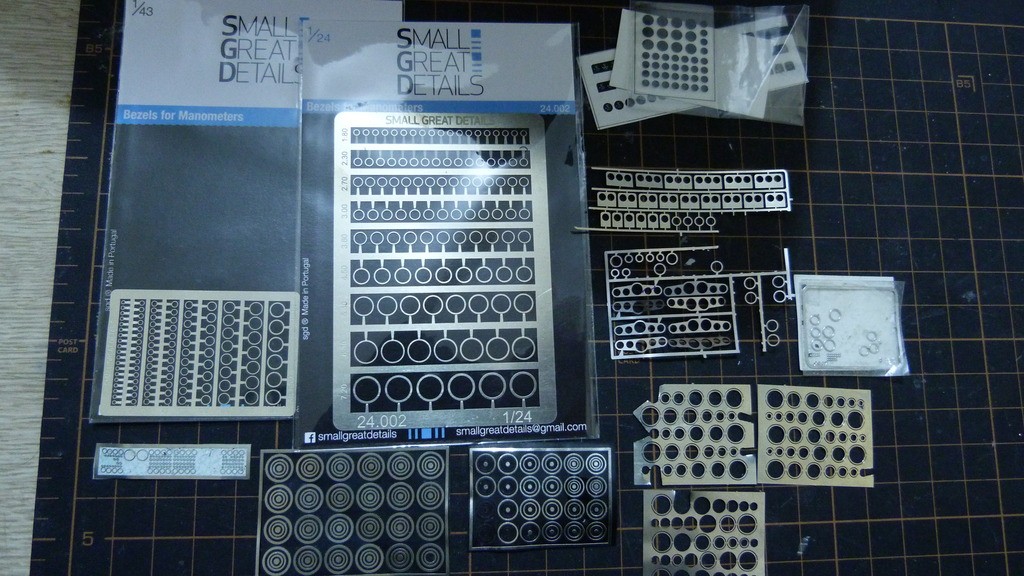
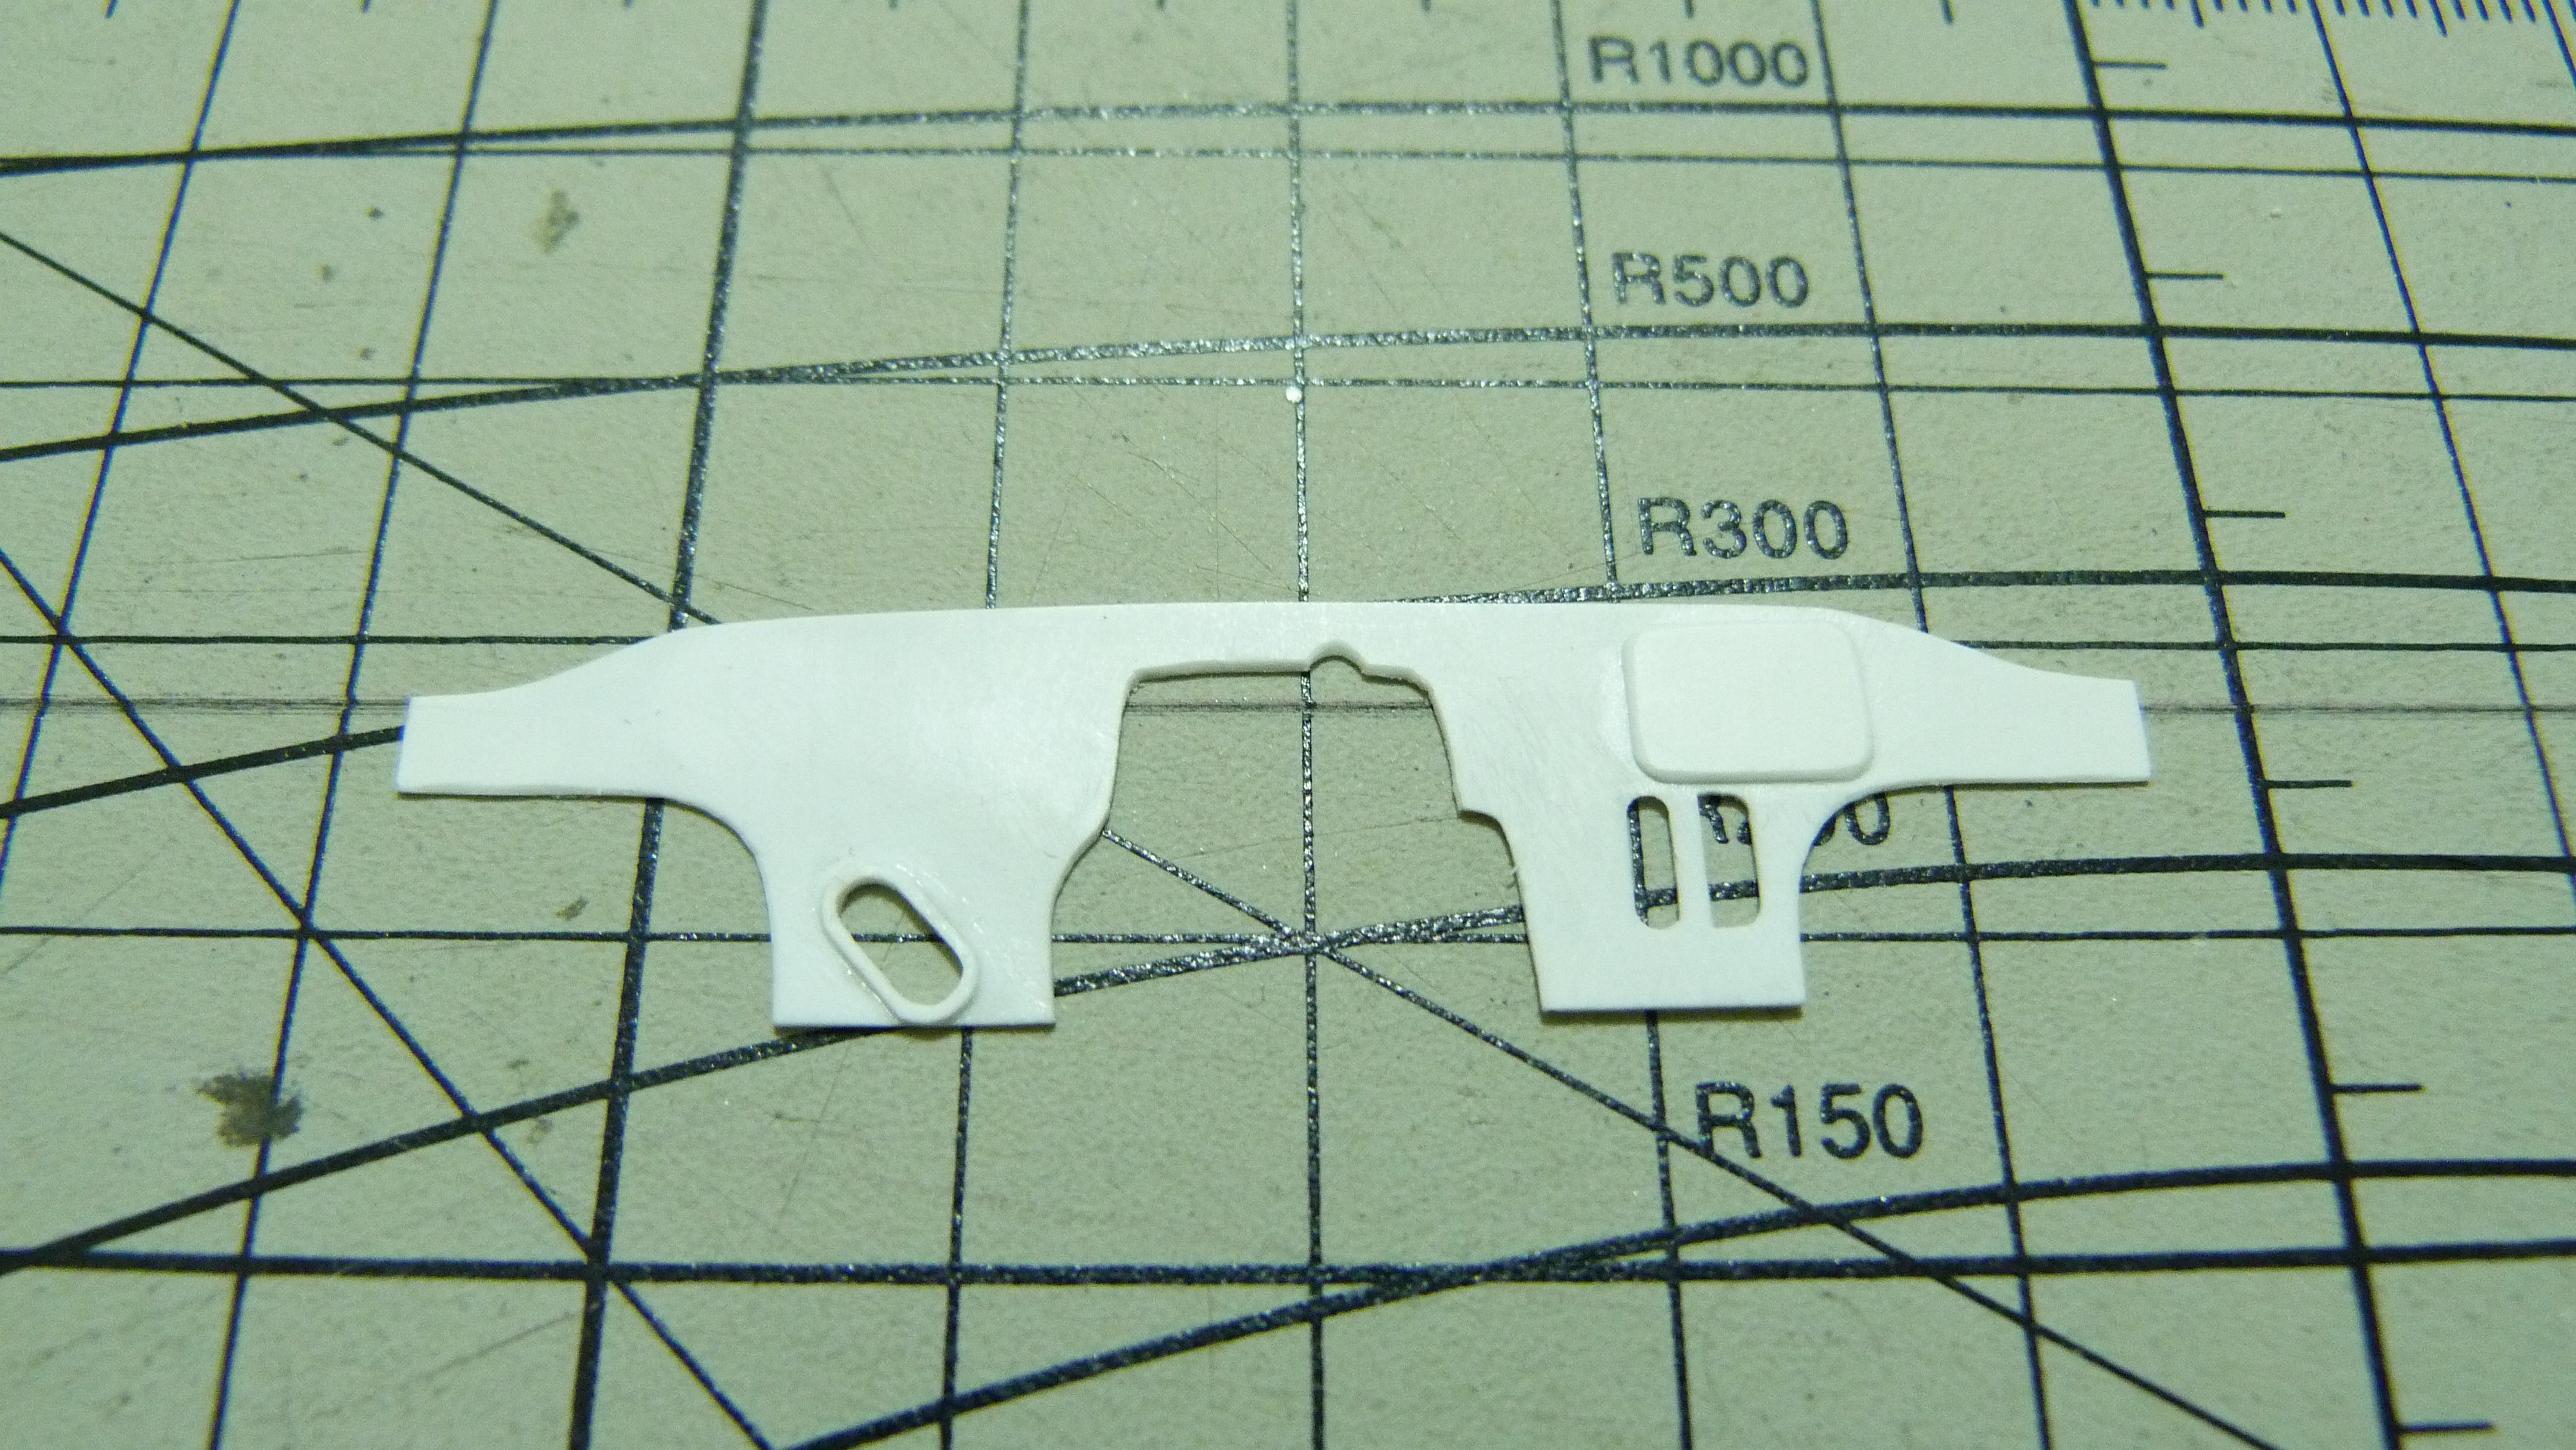
The dash is complete with PE gauge rings and the centre plate is pre-drilled ready for an assortment of aftermarket toggles and buttons after paint.
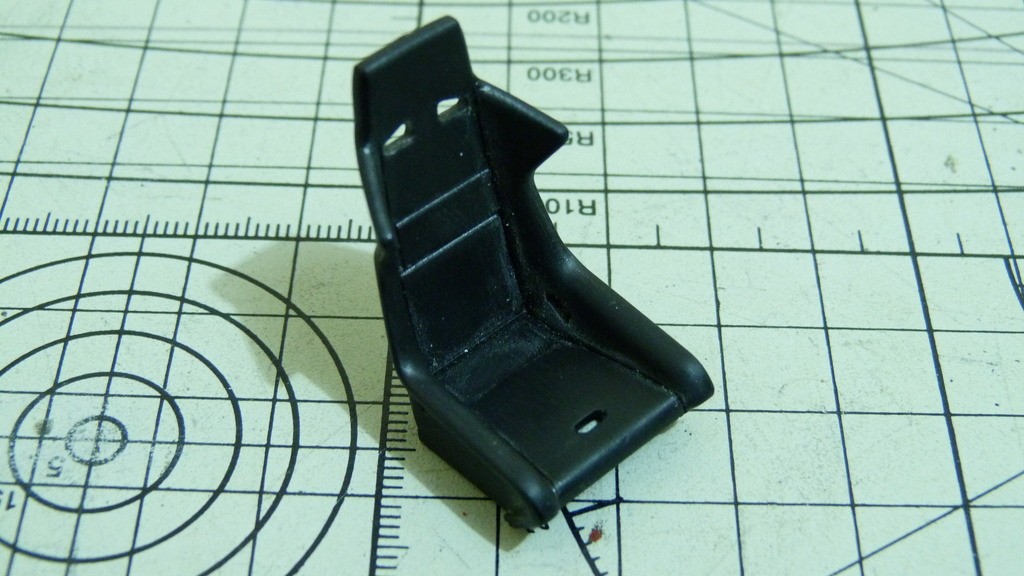
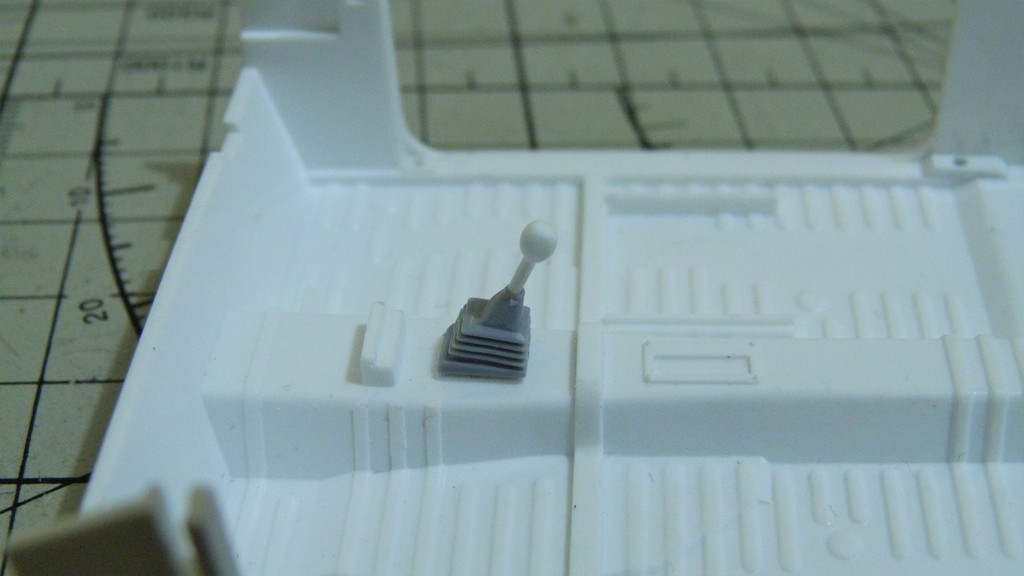
I cut the slots for the harnesses in the seat. I combined the race car gear stick with the road car boot to match my reference pic of the 1:1.
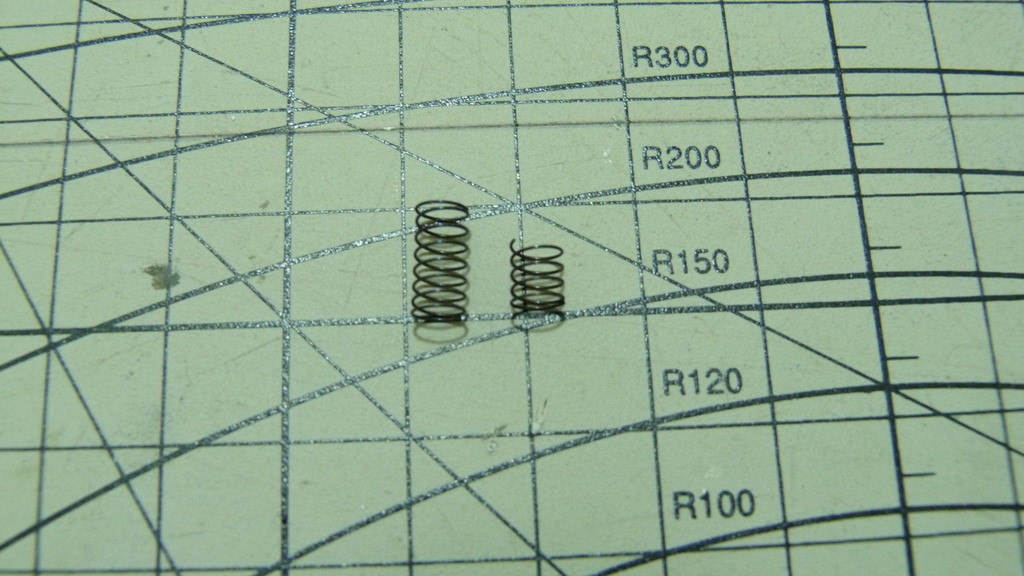
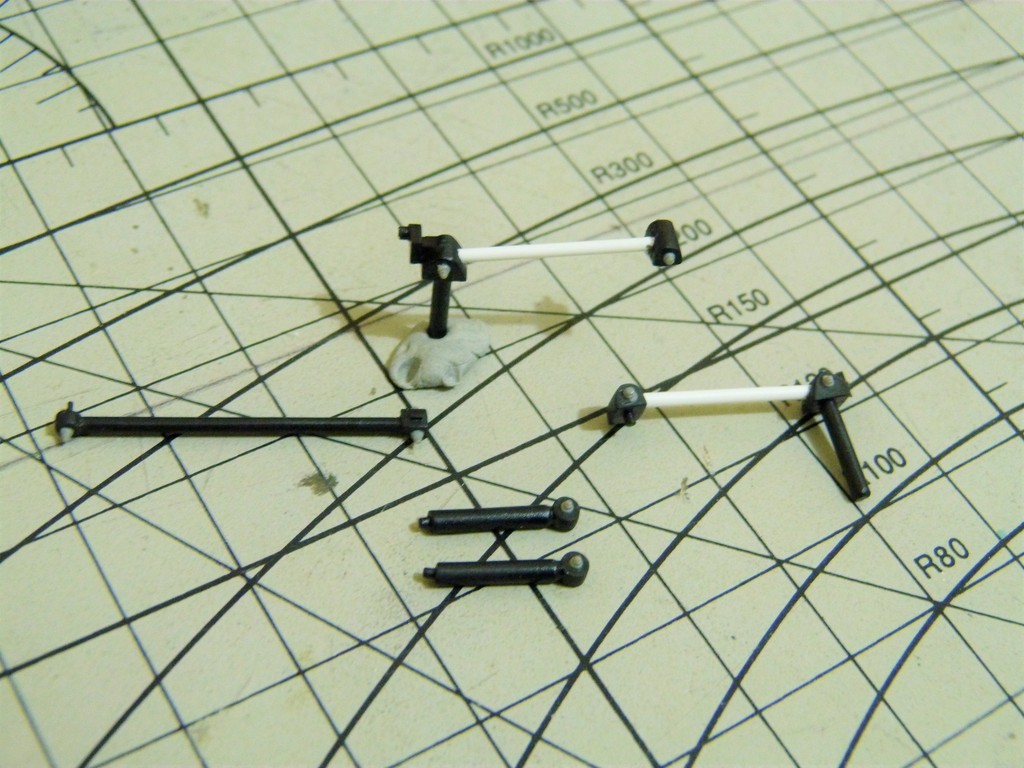
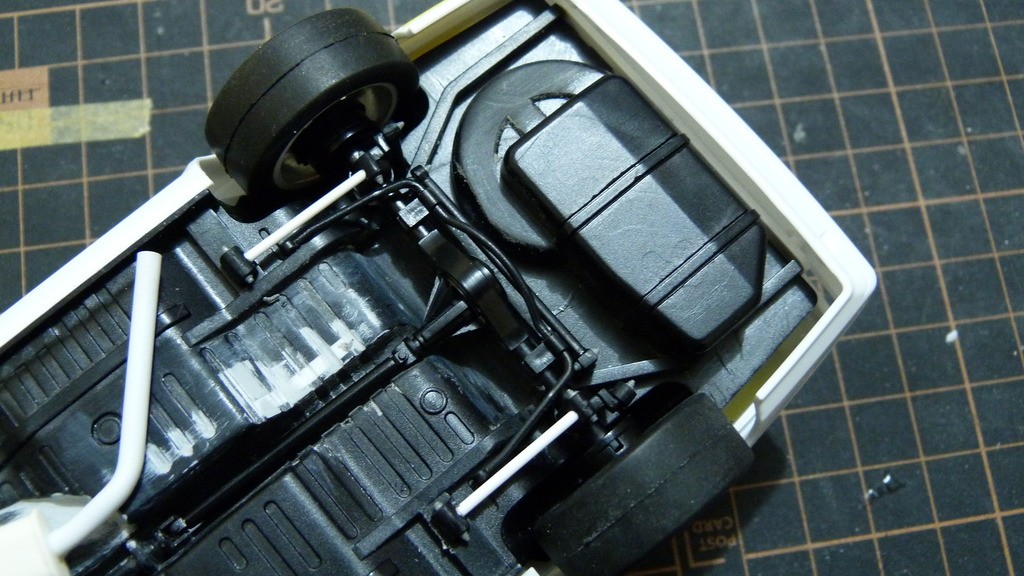
That's it for the interior until painting and detailing. I then moved on to the suspension. Here is the original stance. The front ride height was an easy fix as all I had to do was add a spacer to the upright and cut down the spring. All four of the springs had to be cut down by almost half. (the original spring on the left) Cutting the springs meant that I had to redo the control arms at a different angle. Evergreen rod to the rescue. While I was working on the suspension I noticed that the bolt head detail on the original parts was a bit rough so I replaced the bolt heads with some from Meng. Everything test fitted and no further issues to fix. The race car stance.
I can finally move on to the last piece of the puzzle, the engine bay. That will be in the next update.
Cheers ShawnS
|
|
|
|
Post by afx on Jul 23, 2021 2:18:15 GMT -8
Stance looks great Shawn. Where are you getting your PE gauge rings?
|
|
|
|
Post by Joel_W on Jul 23, 2021 8:15:55 GMT -8
Shawn,
Great job in lowering the front suspension. Are those nuts and bolts from Meng peel off the sheet or do you have to carefully cut and glue each one as needed?
The dash really is coming along.
joel
|
|
|
|
Post by ShawnS on Jul 23, 2021 15:40:45 GMT -8
Stance looks great Shawn. Where are you getting your PE gauge rings? Thanks guys,
JC, I have an assortment of PE gauge rings from Scale Production, Detail Master, Easy Decal, Small Great Details, some others that I can't remember and some good ol' Wizard 'O's.
Joel, The Meng nuts are styrene and require a sharp chisel type blade to remove them from the sheet. Just glue them on with extra thin cement, One tip is to score around the base before trying to cut them off as they will come off cleaner.
Cheers Shawn
|
|
|
|
Post by ShawnS on Aug 9, 2021 3:05:17 GMT -8
Hi Guys,
I've been at this thing almost non-stop for a little while now and it seems to have turned into a bit of a monster. I have got to that stage where once I modify one thing another thing needs attention too but I can see the light at the end of the tunnel.
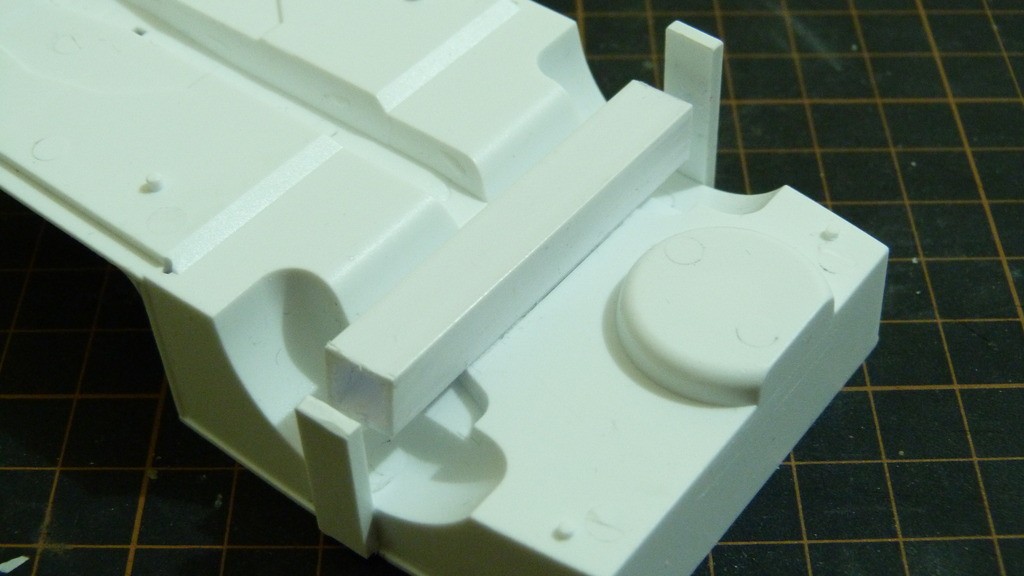
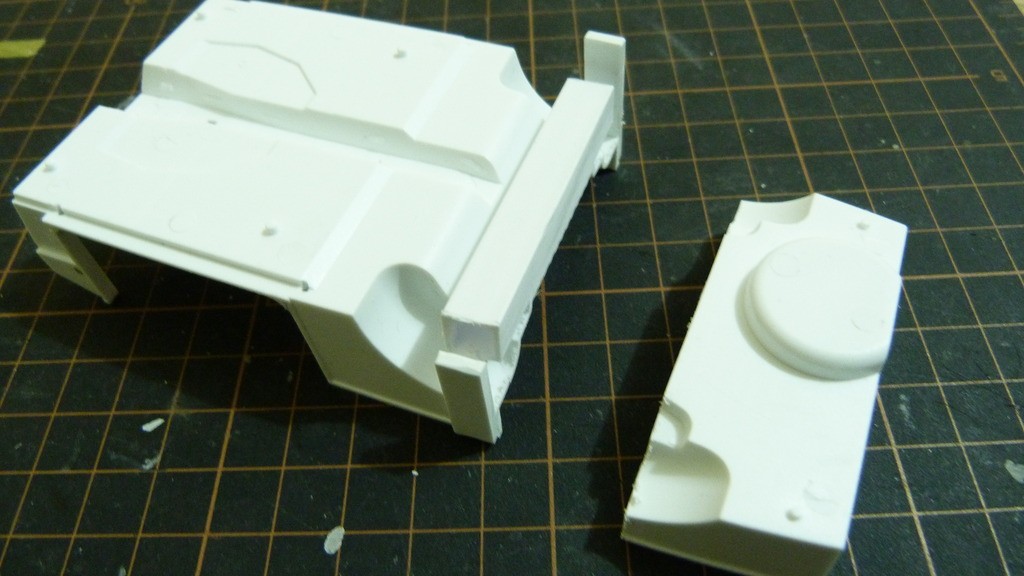
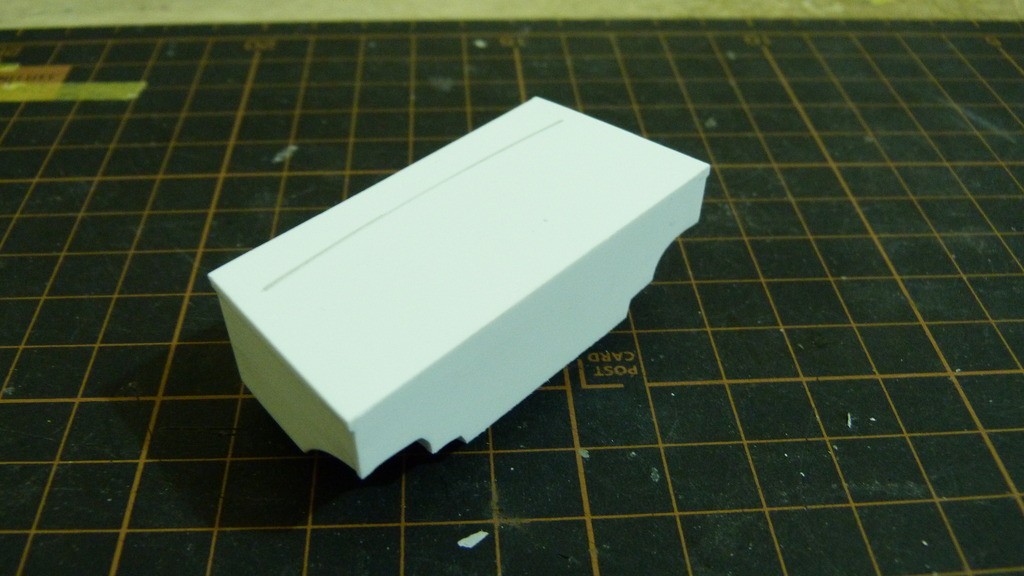
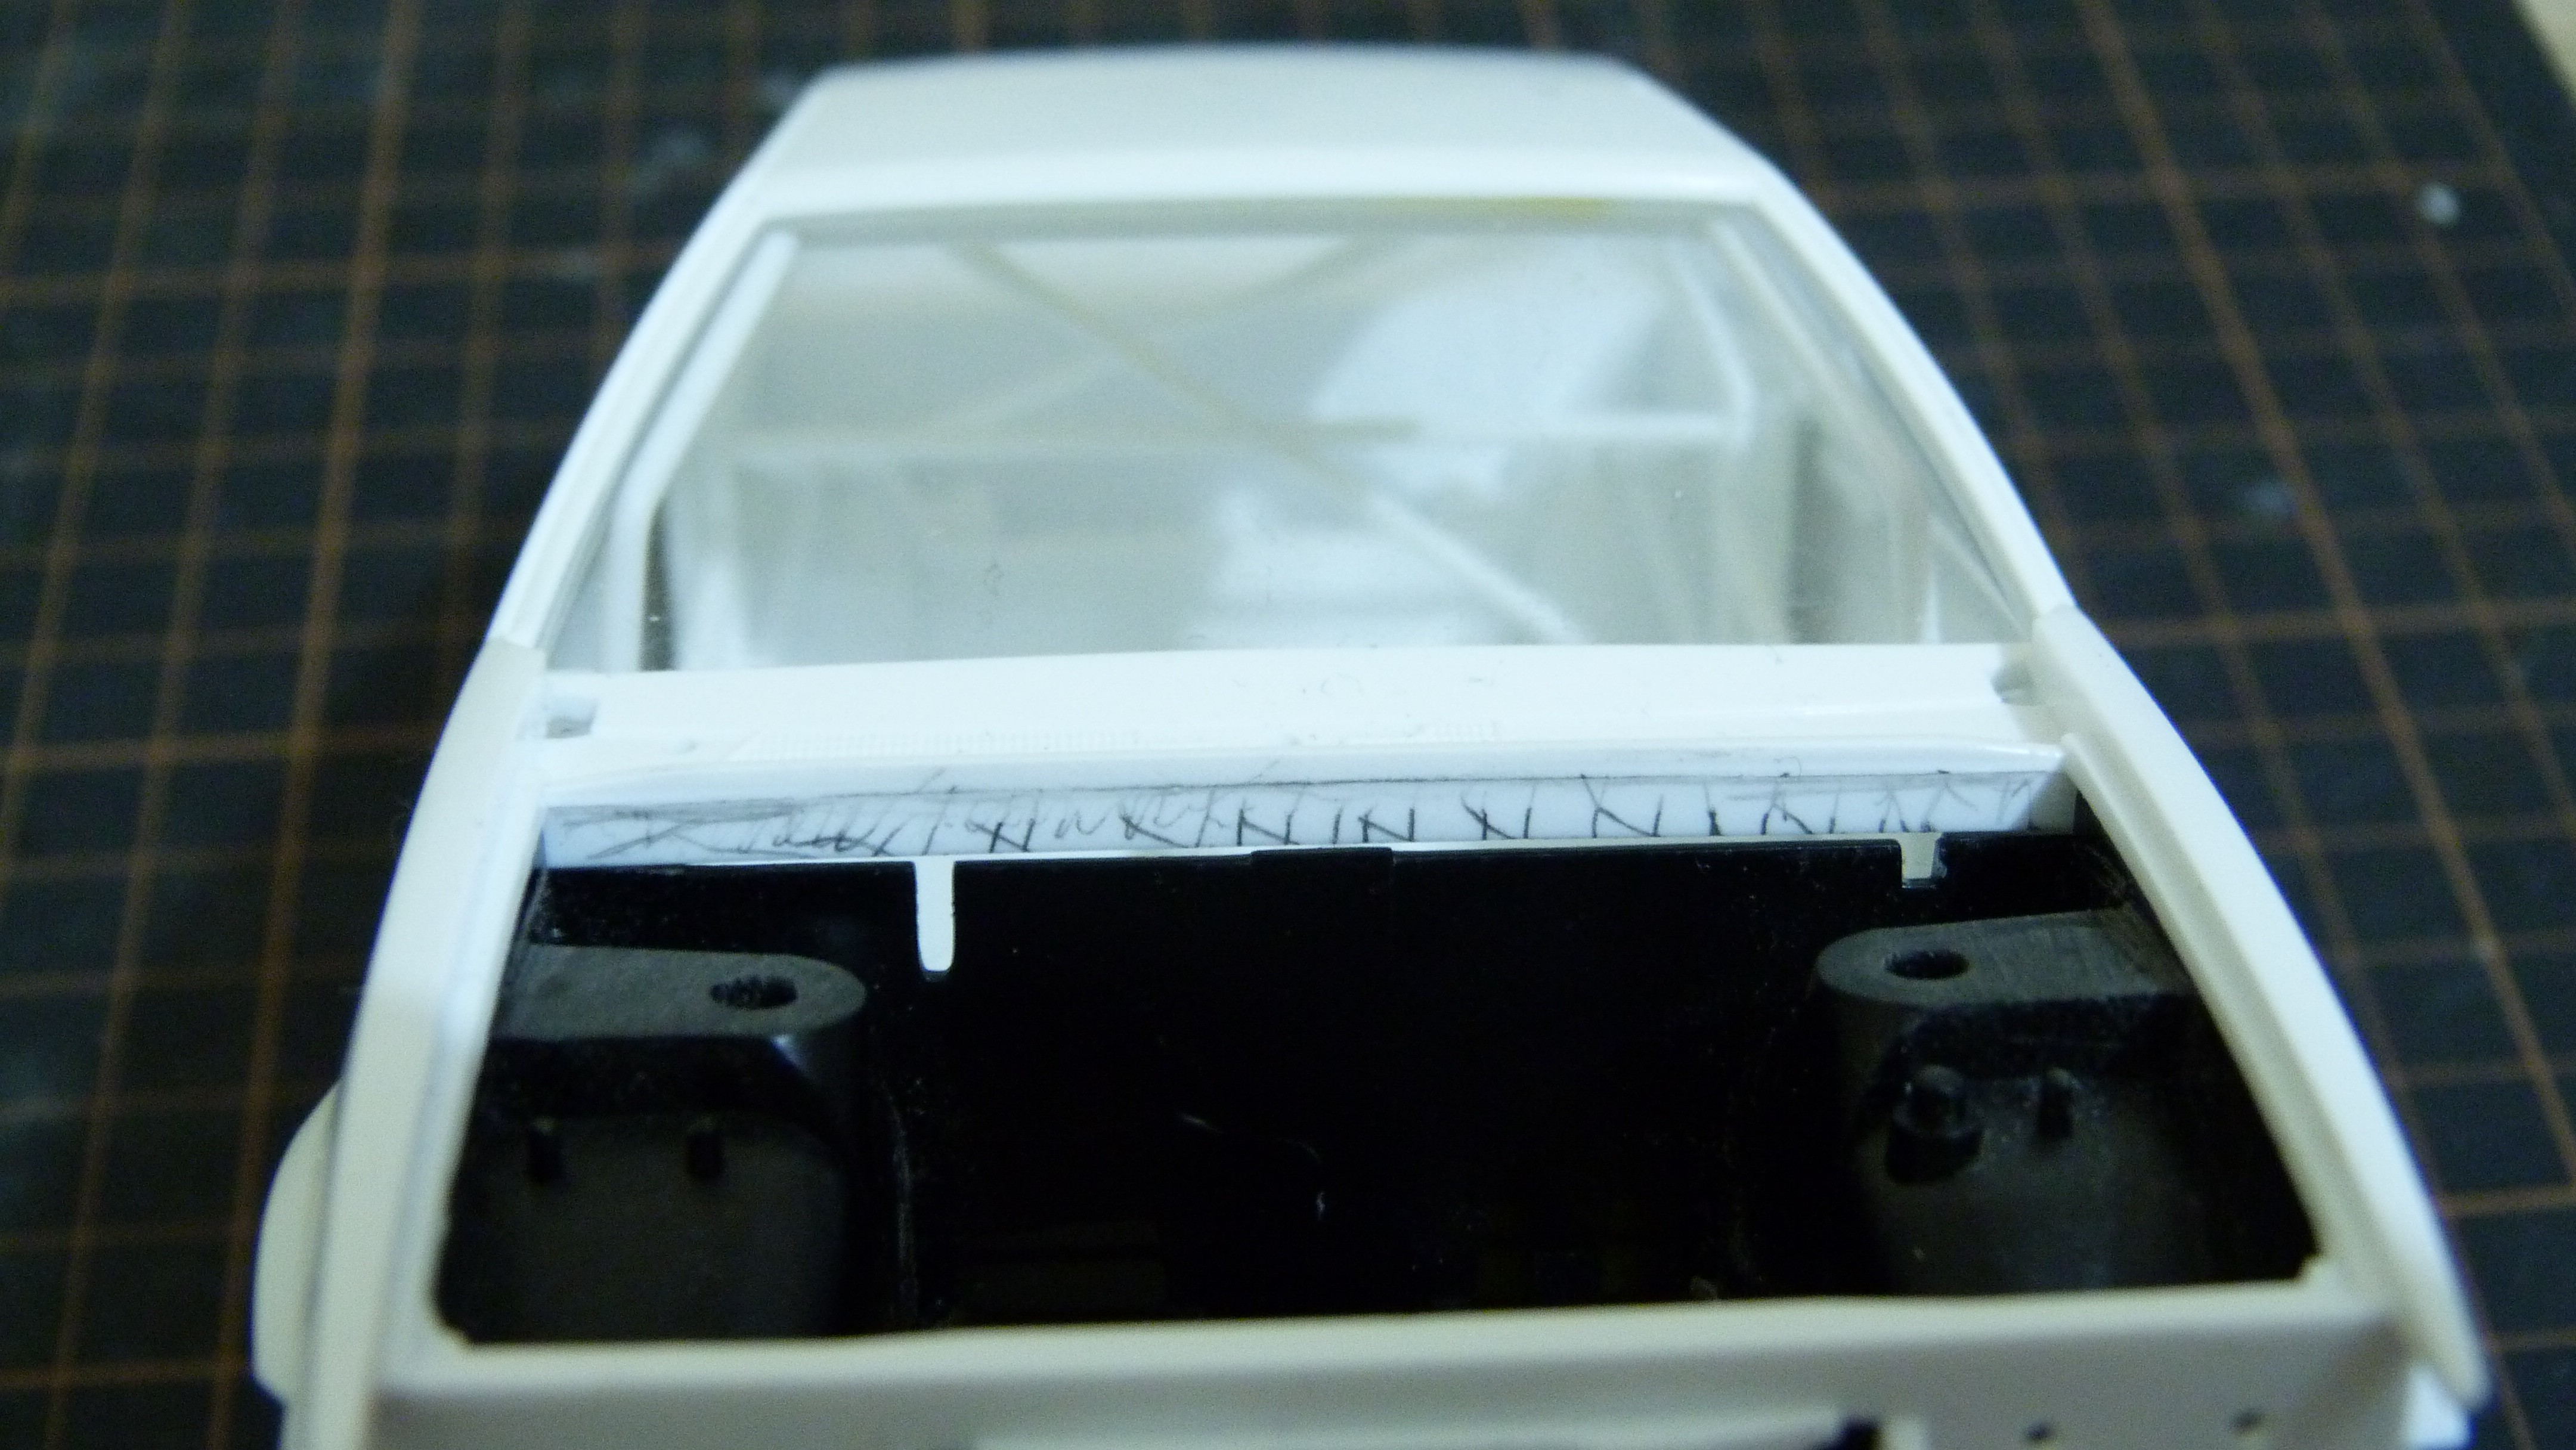
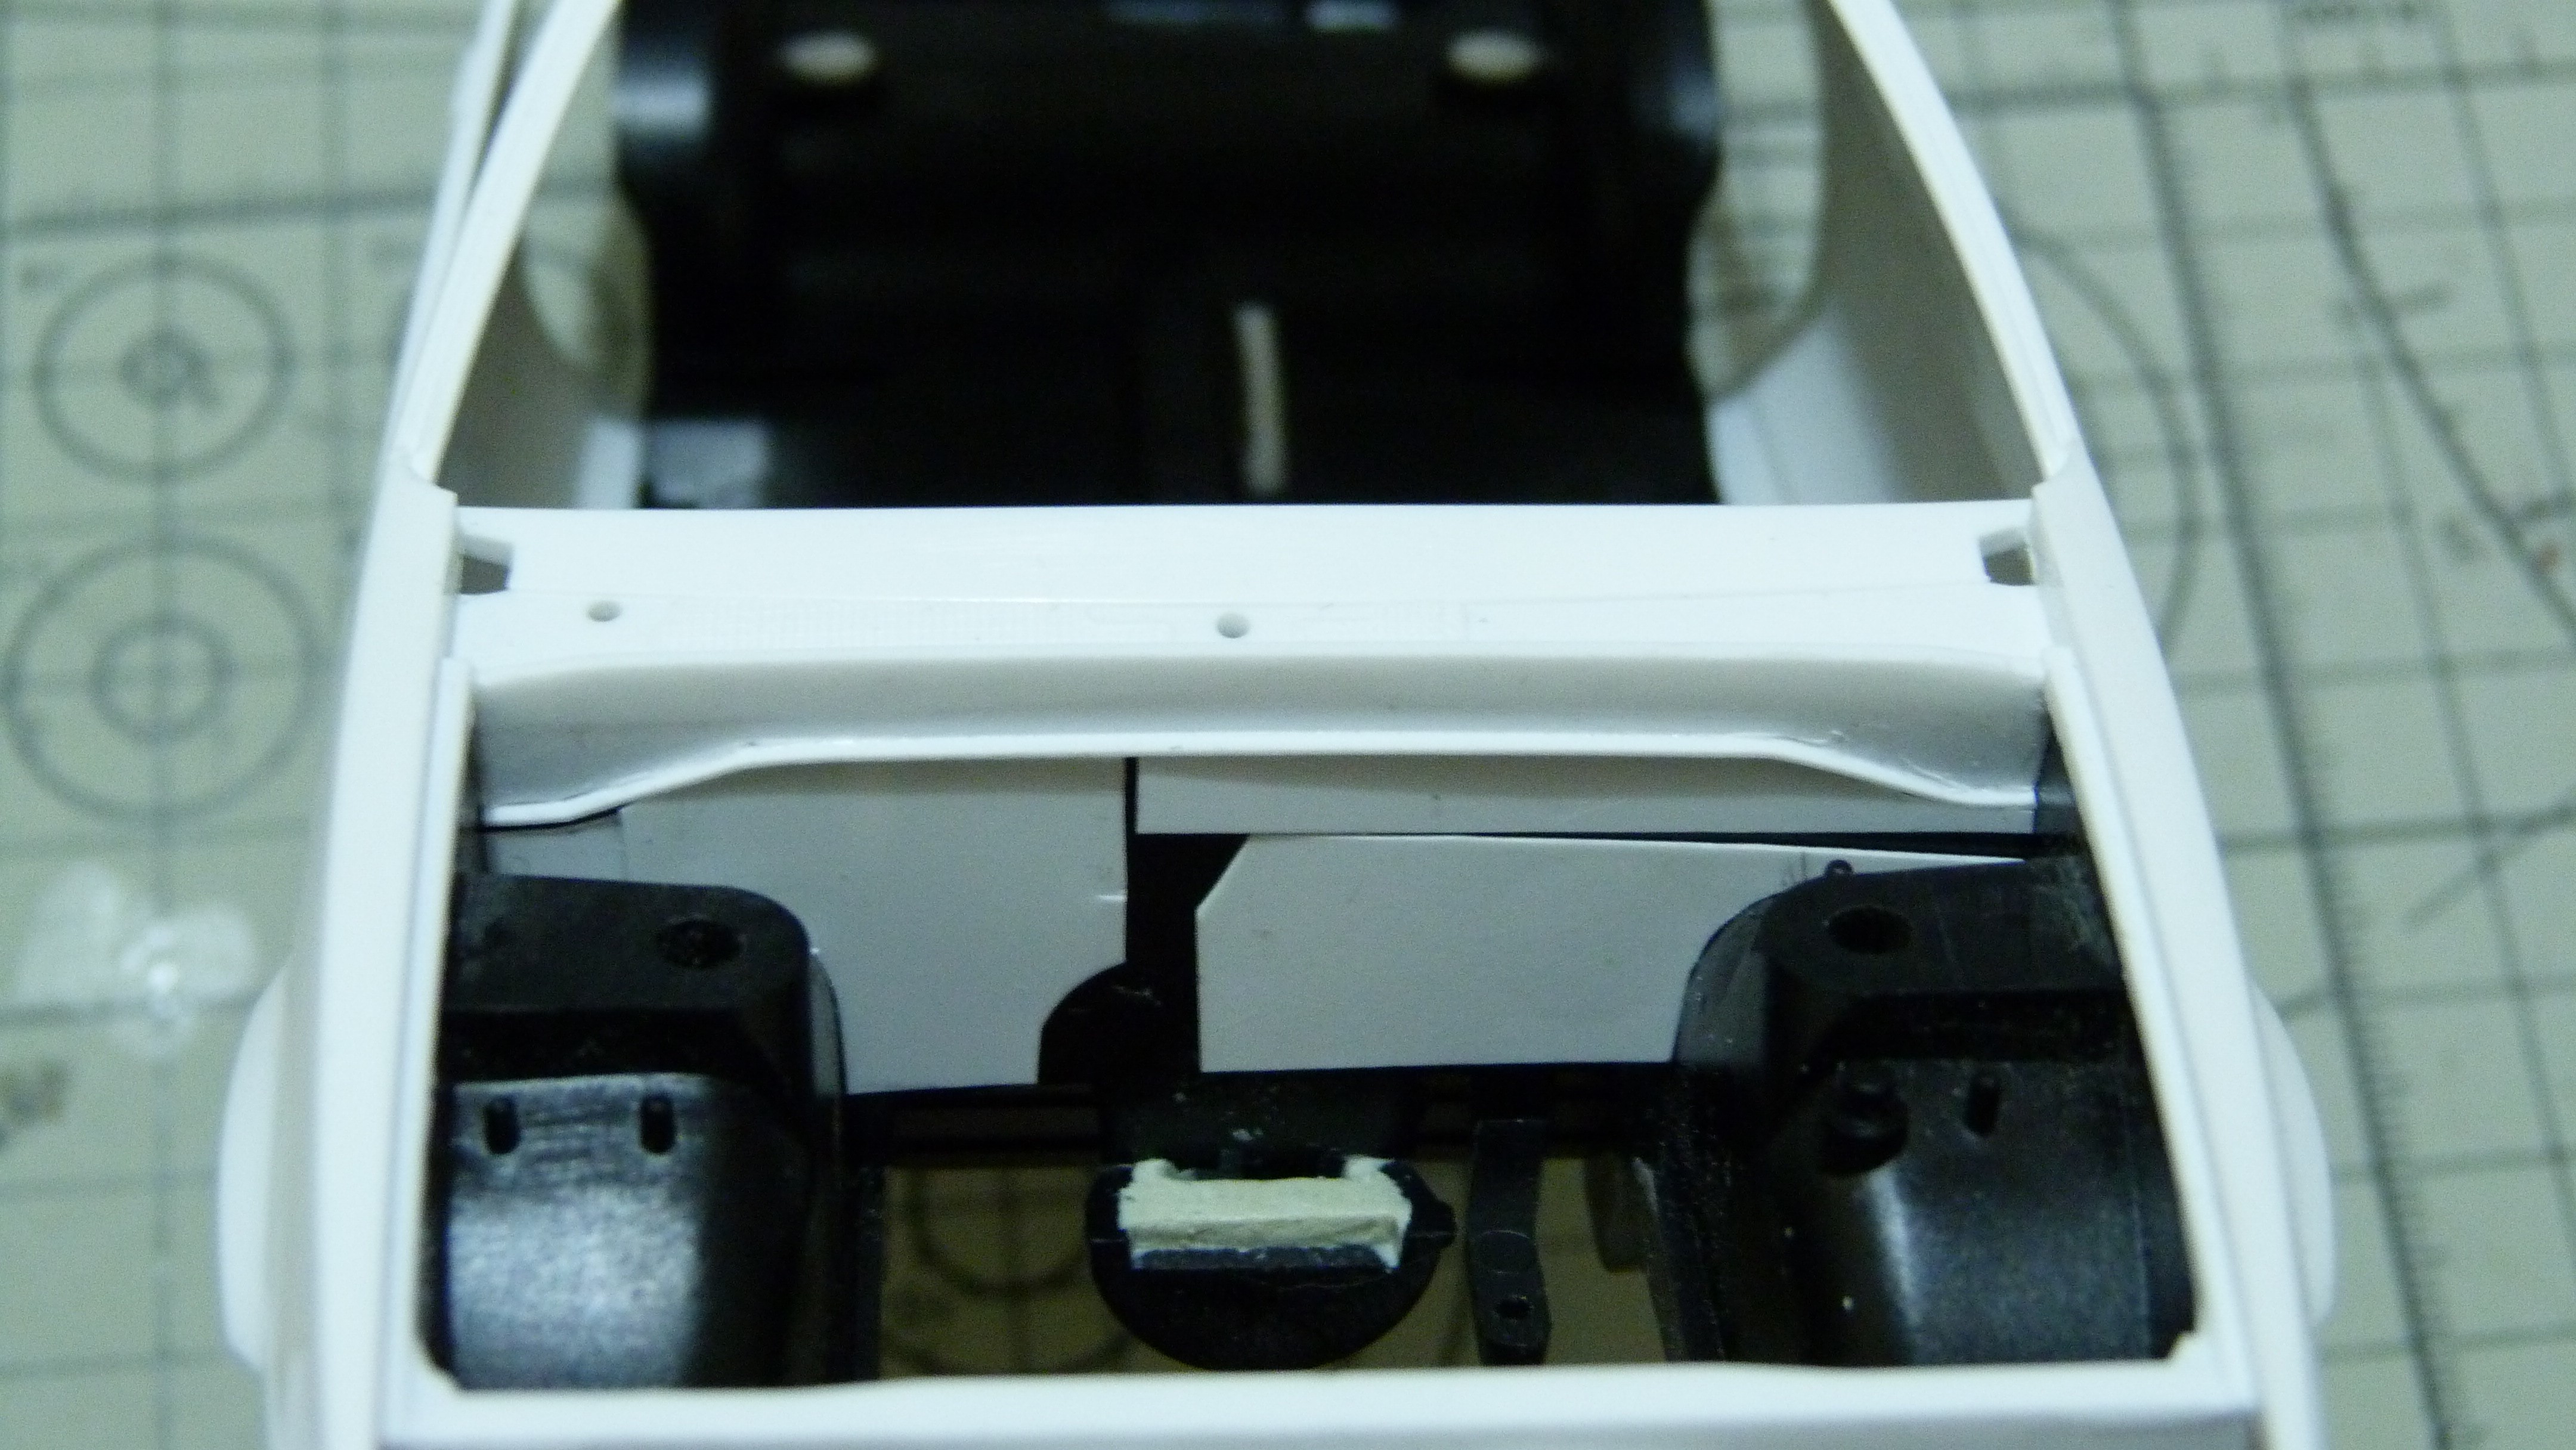
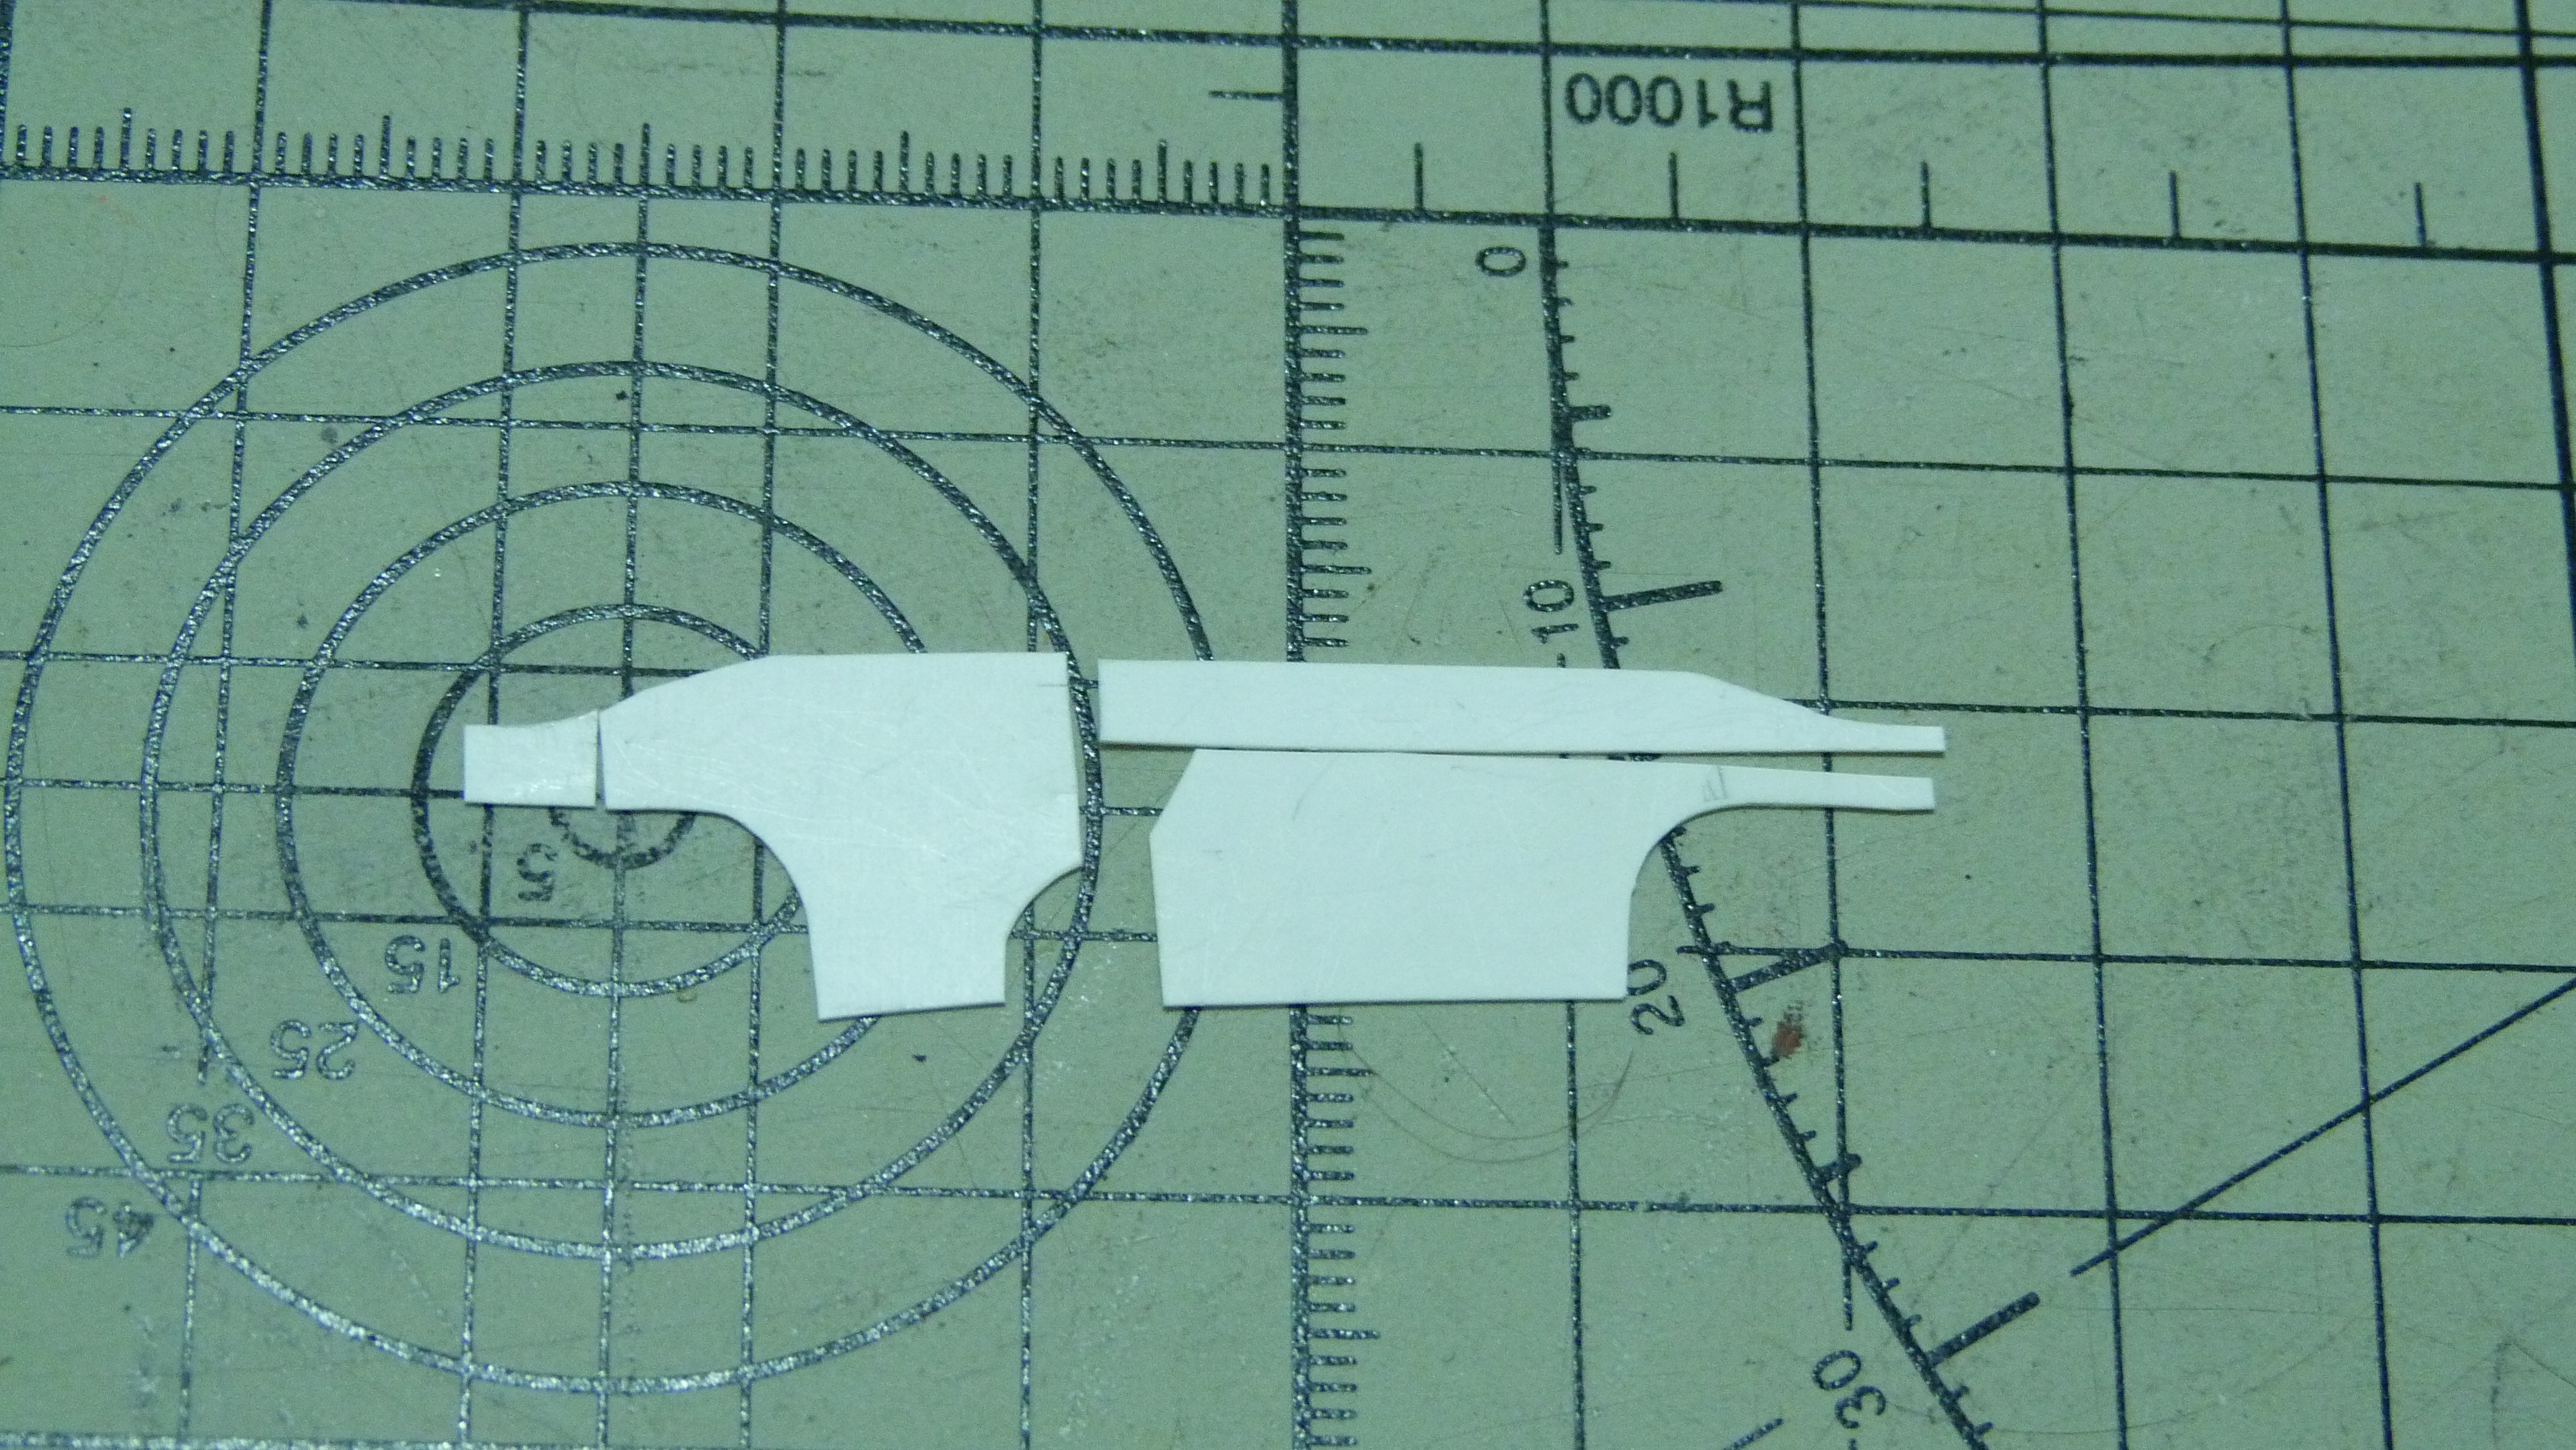
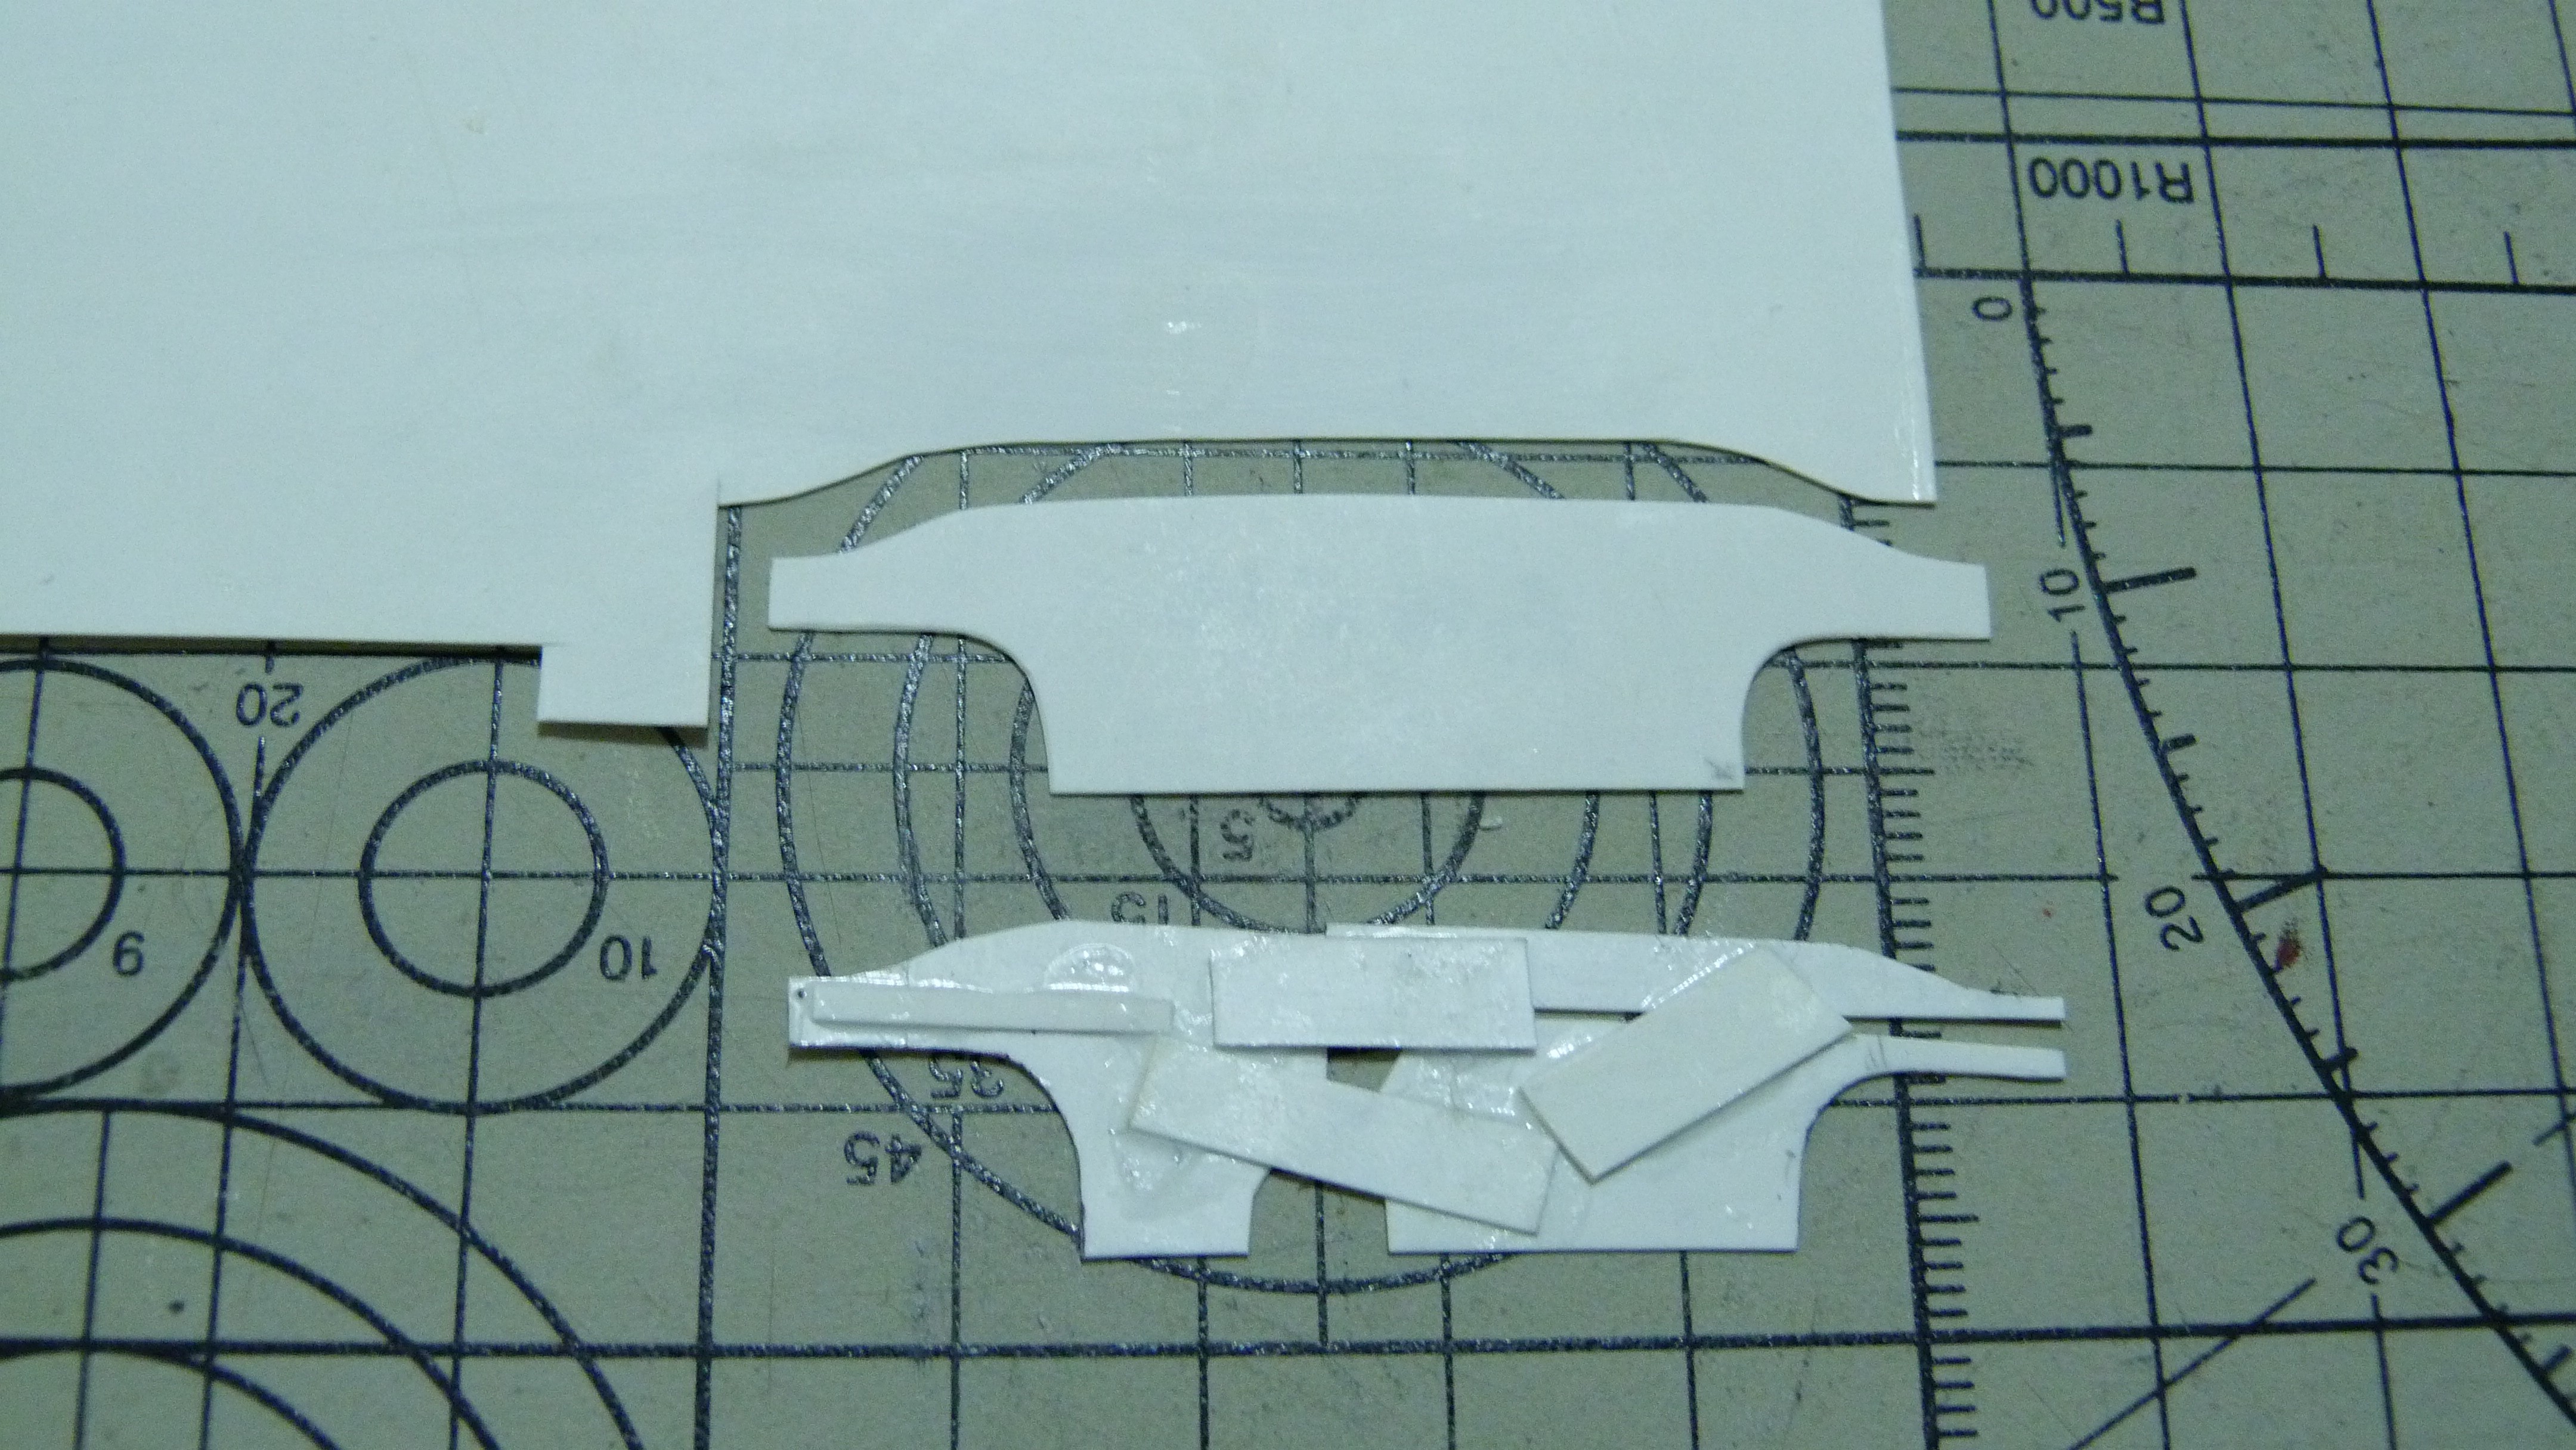
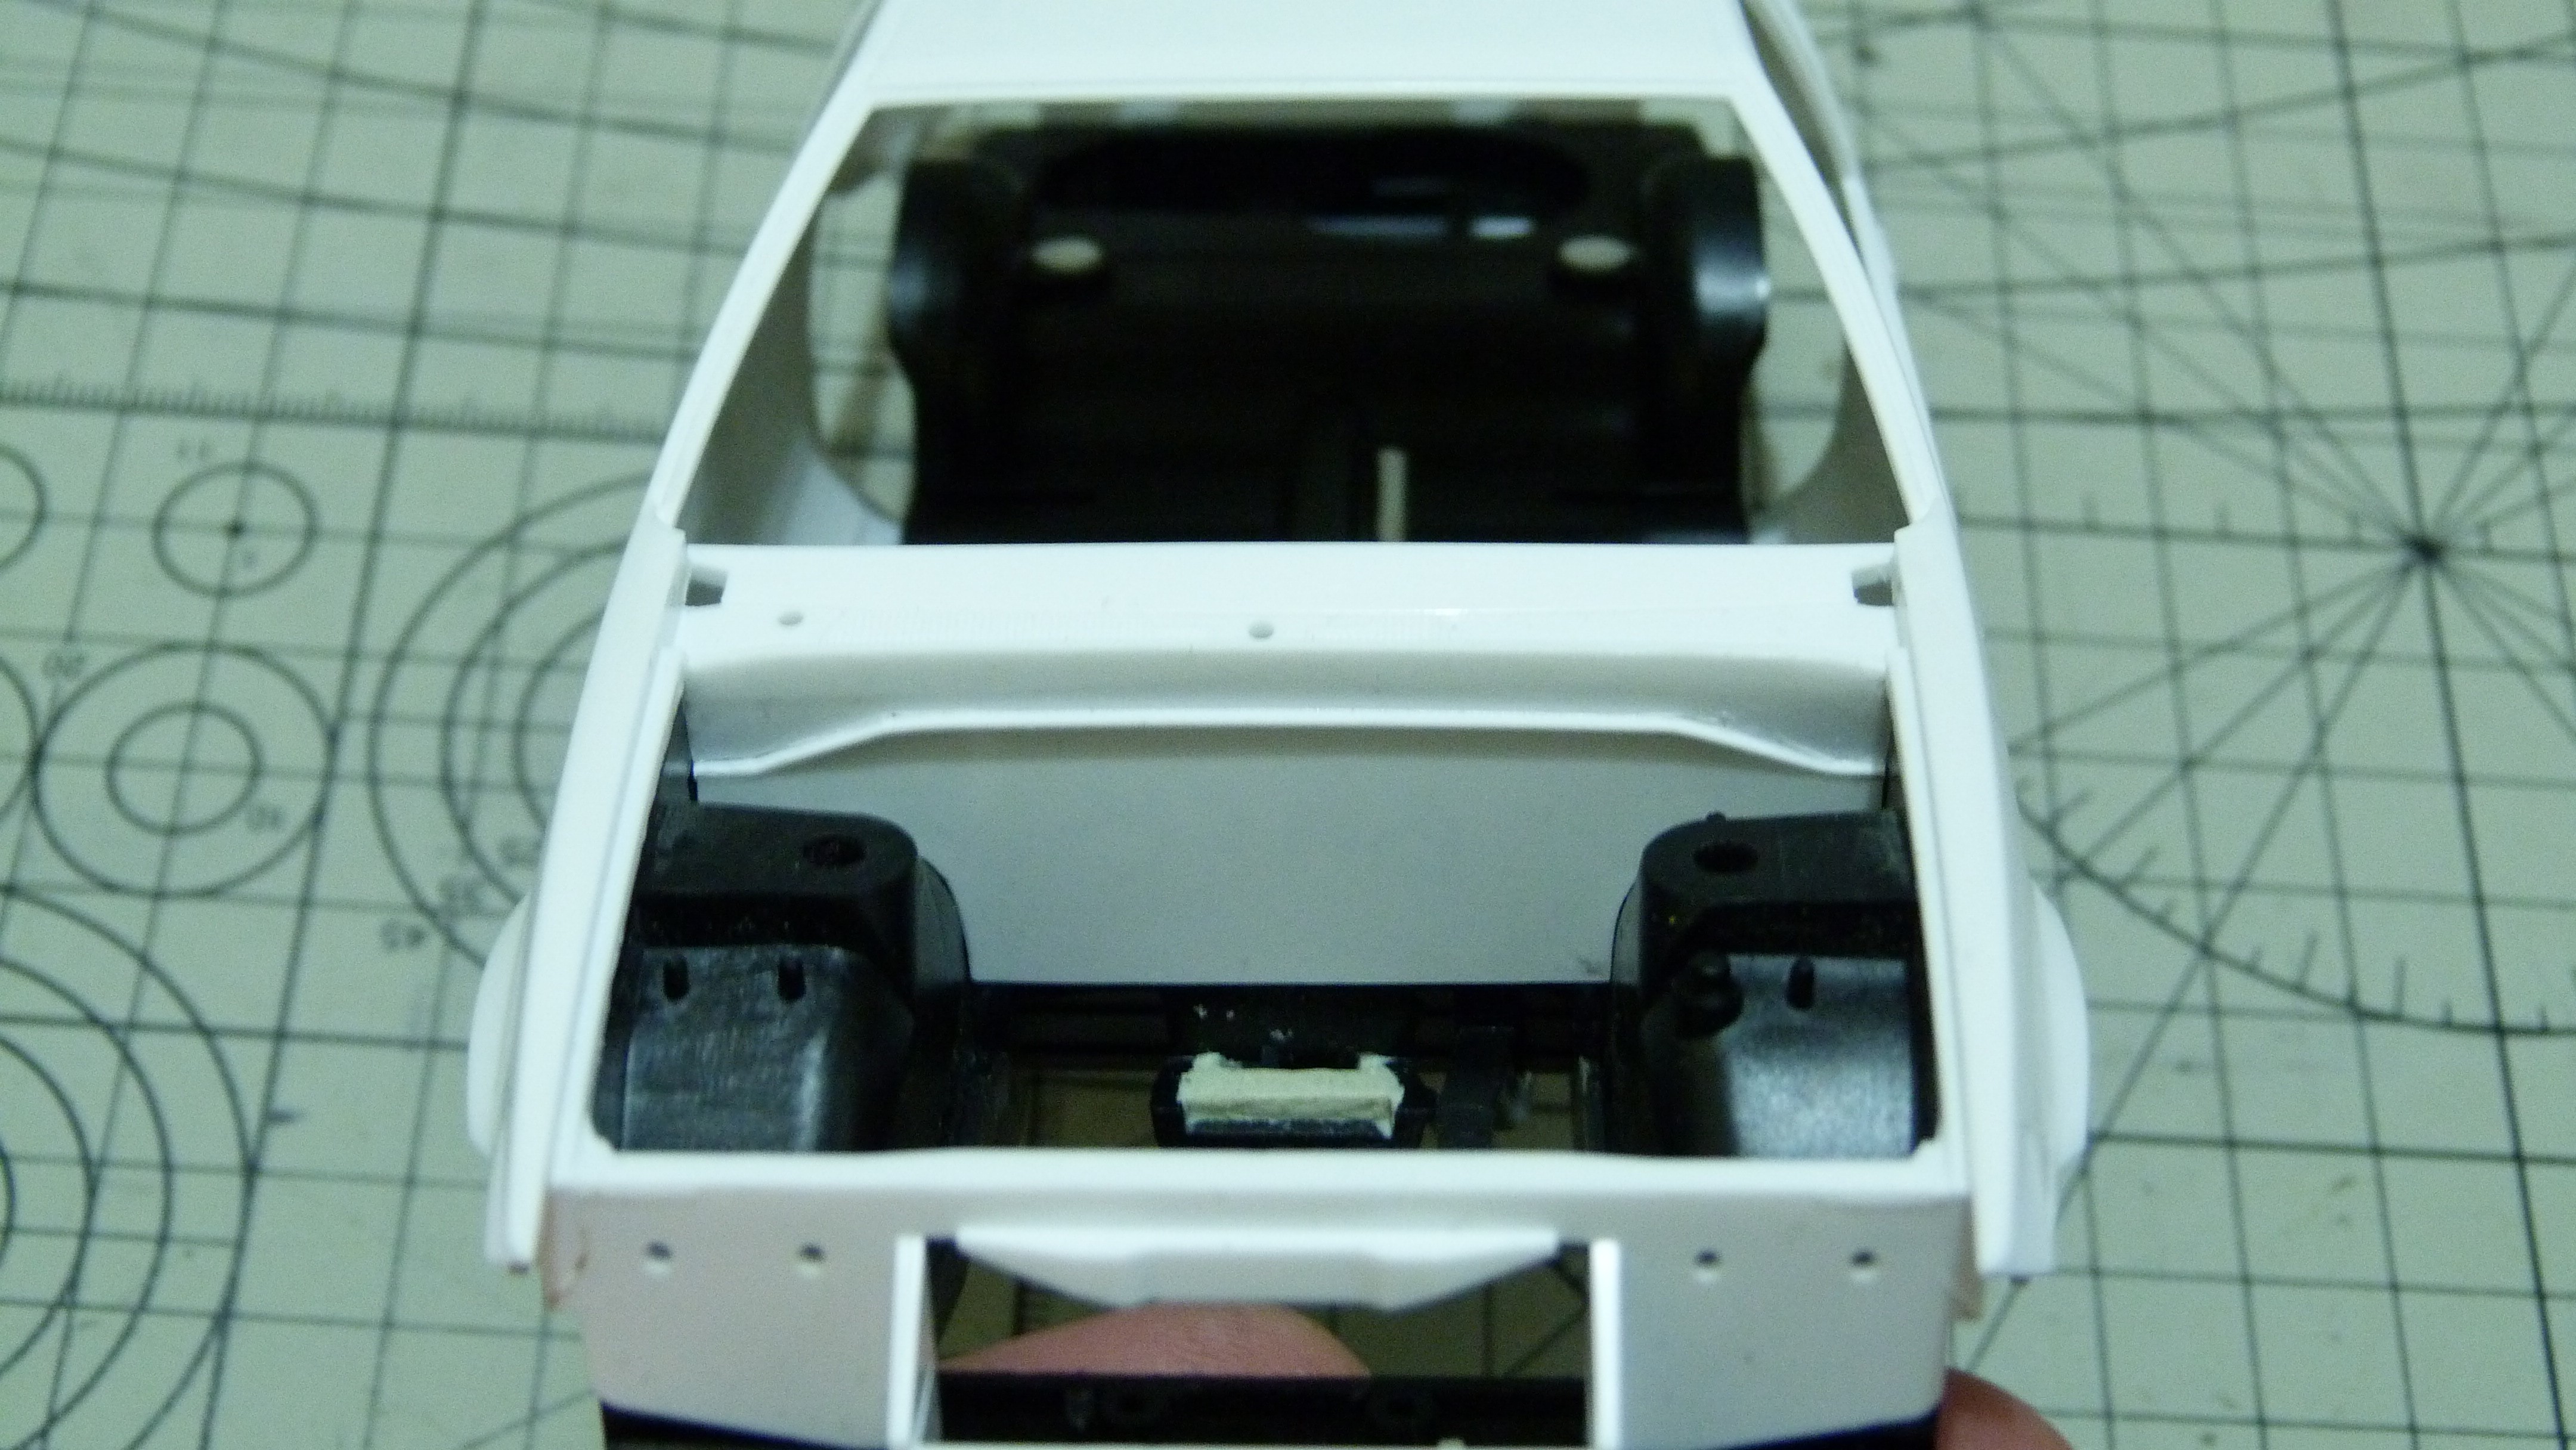
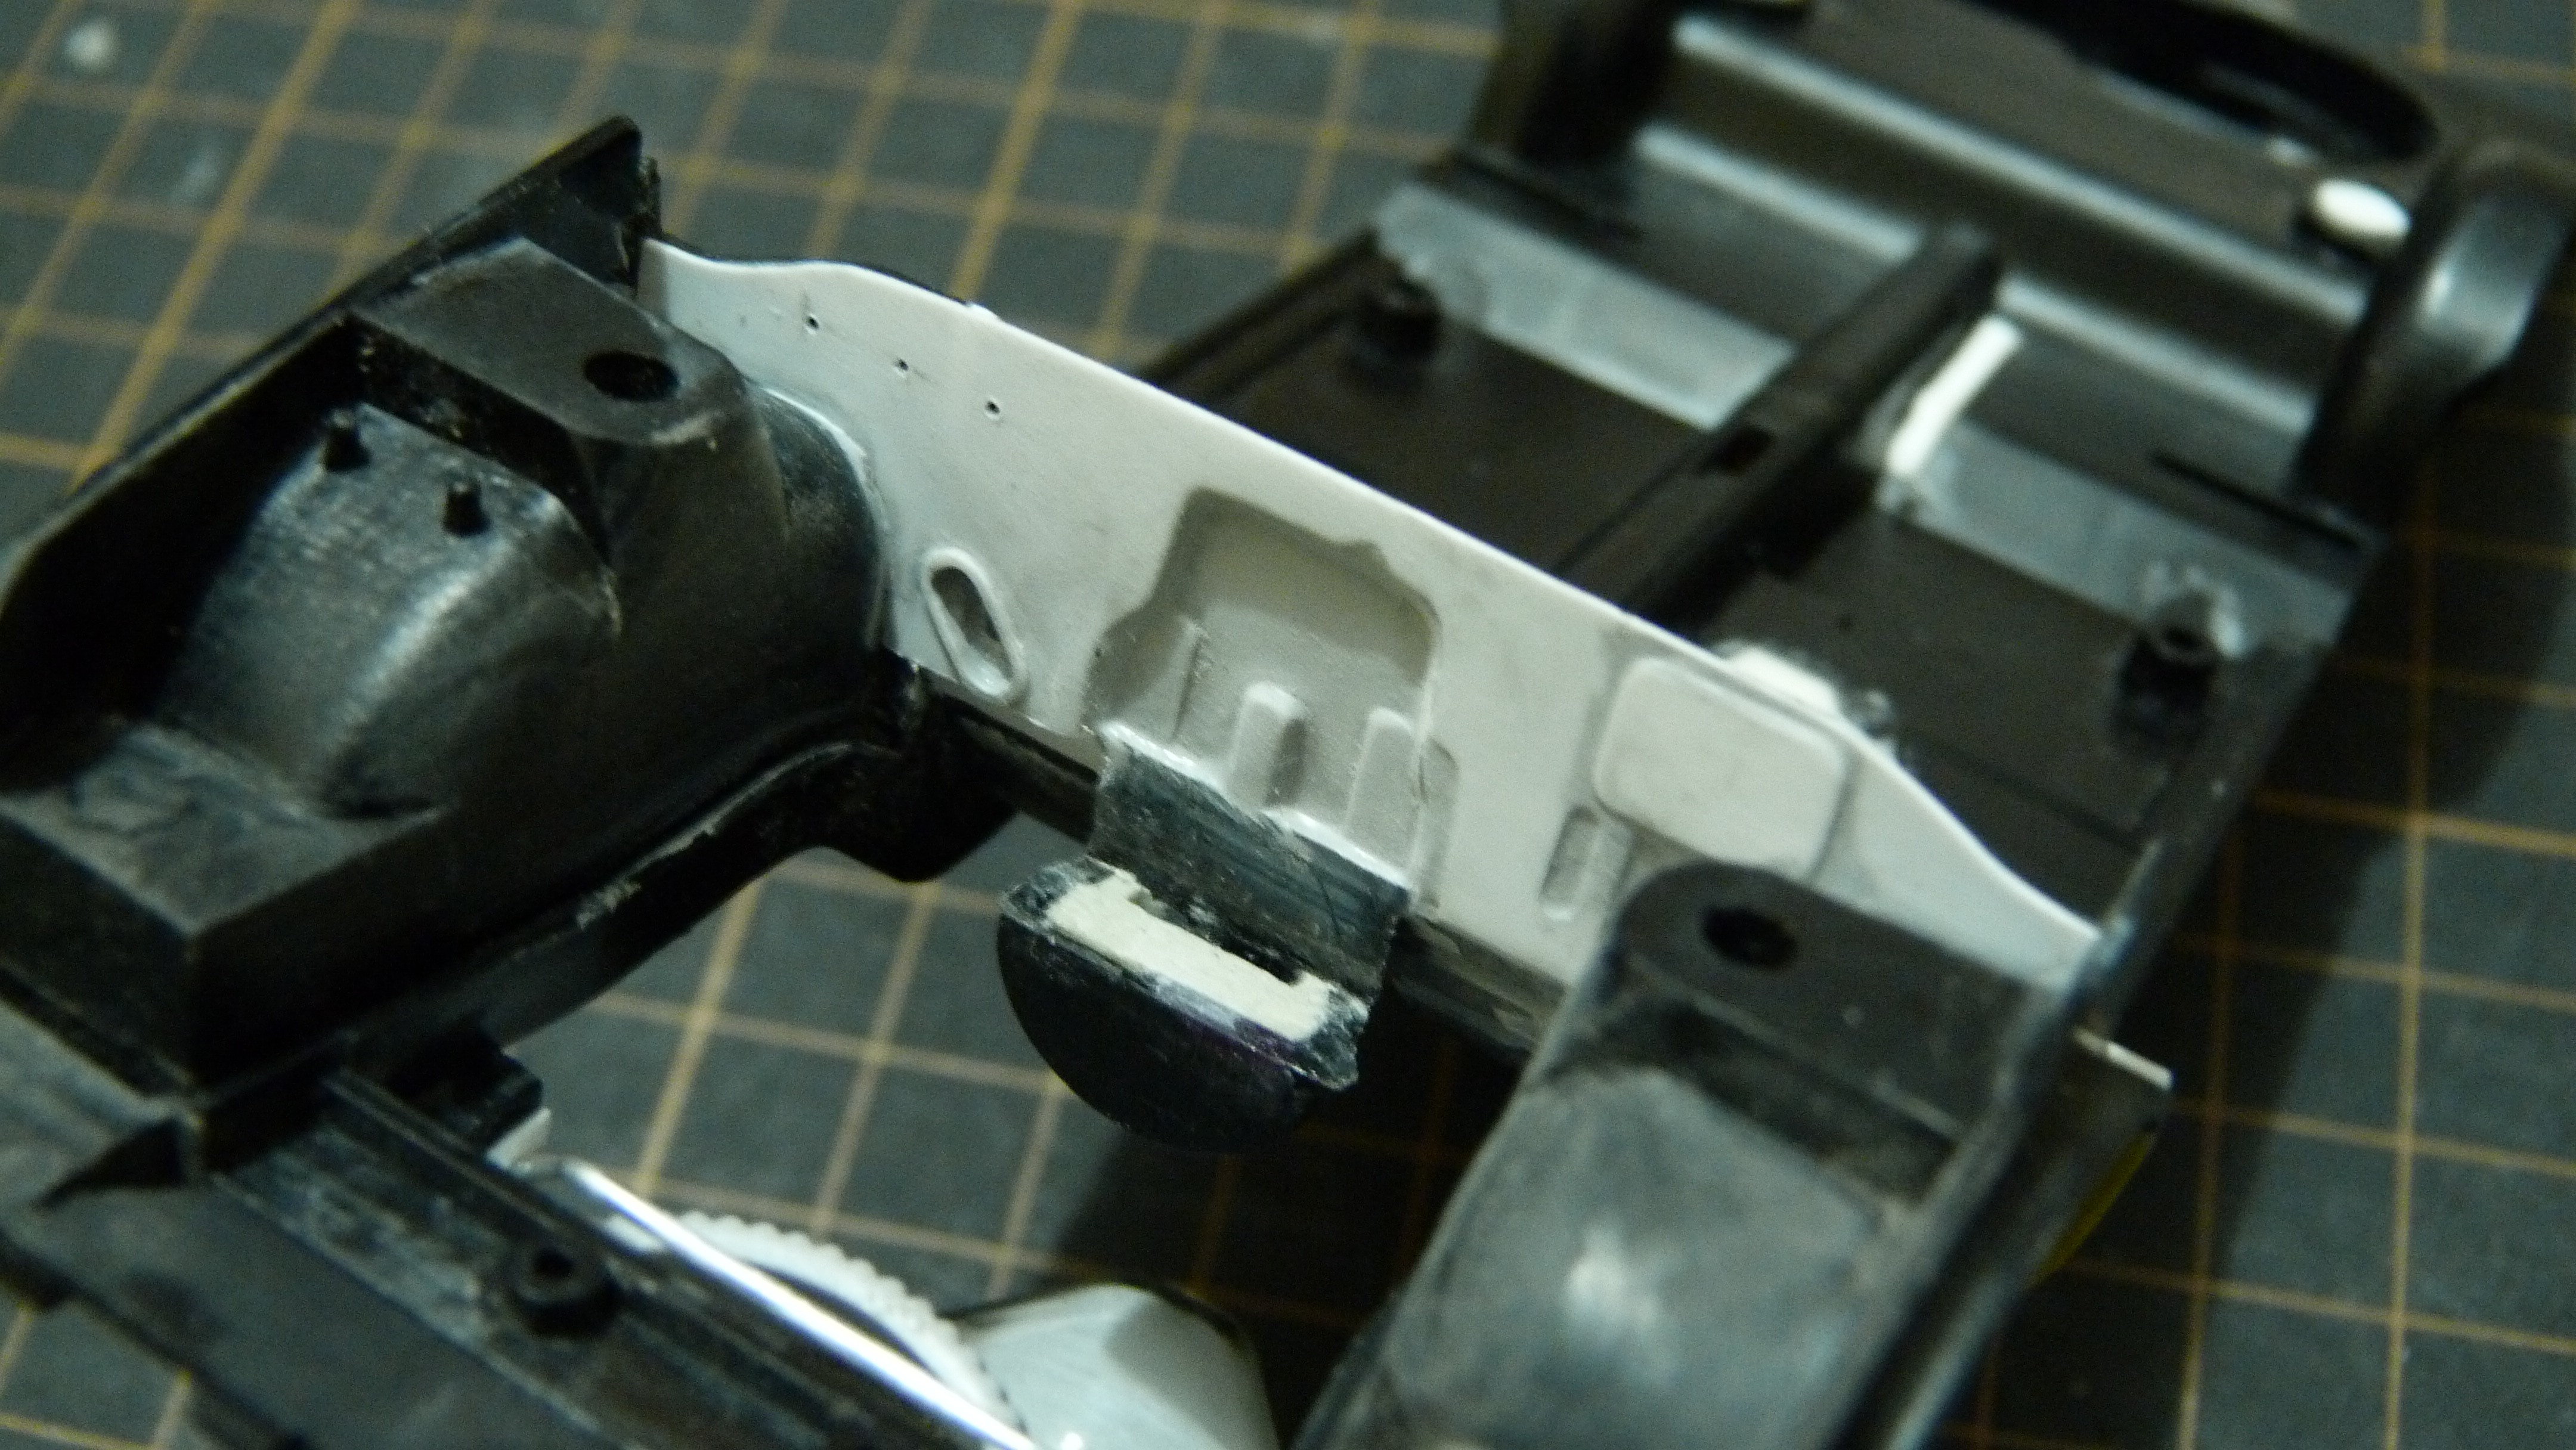
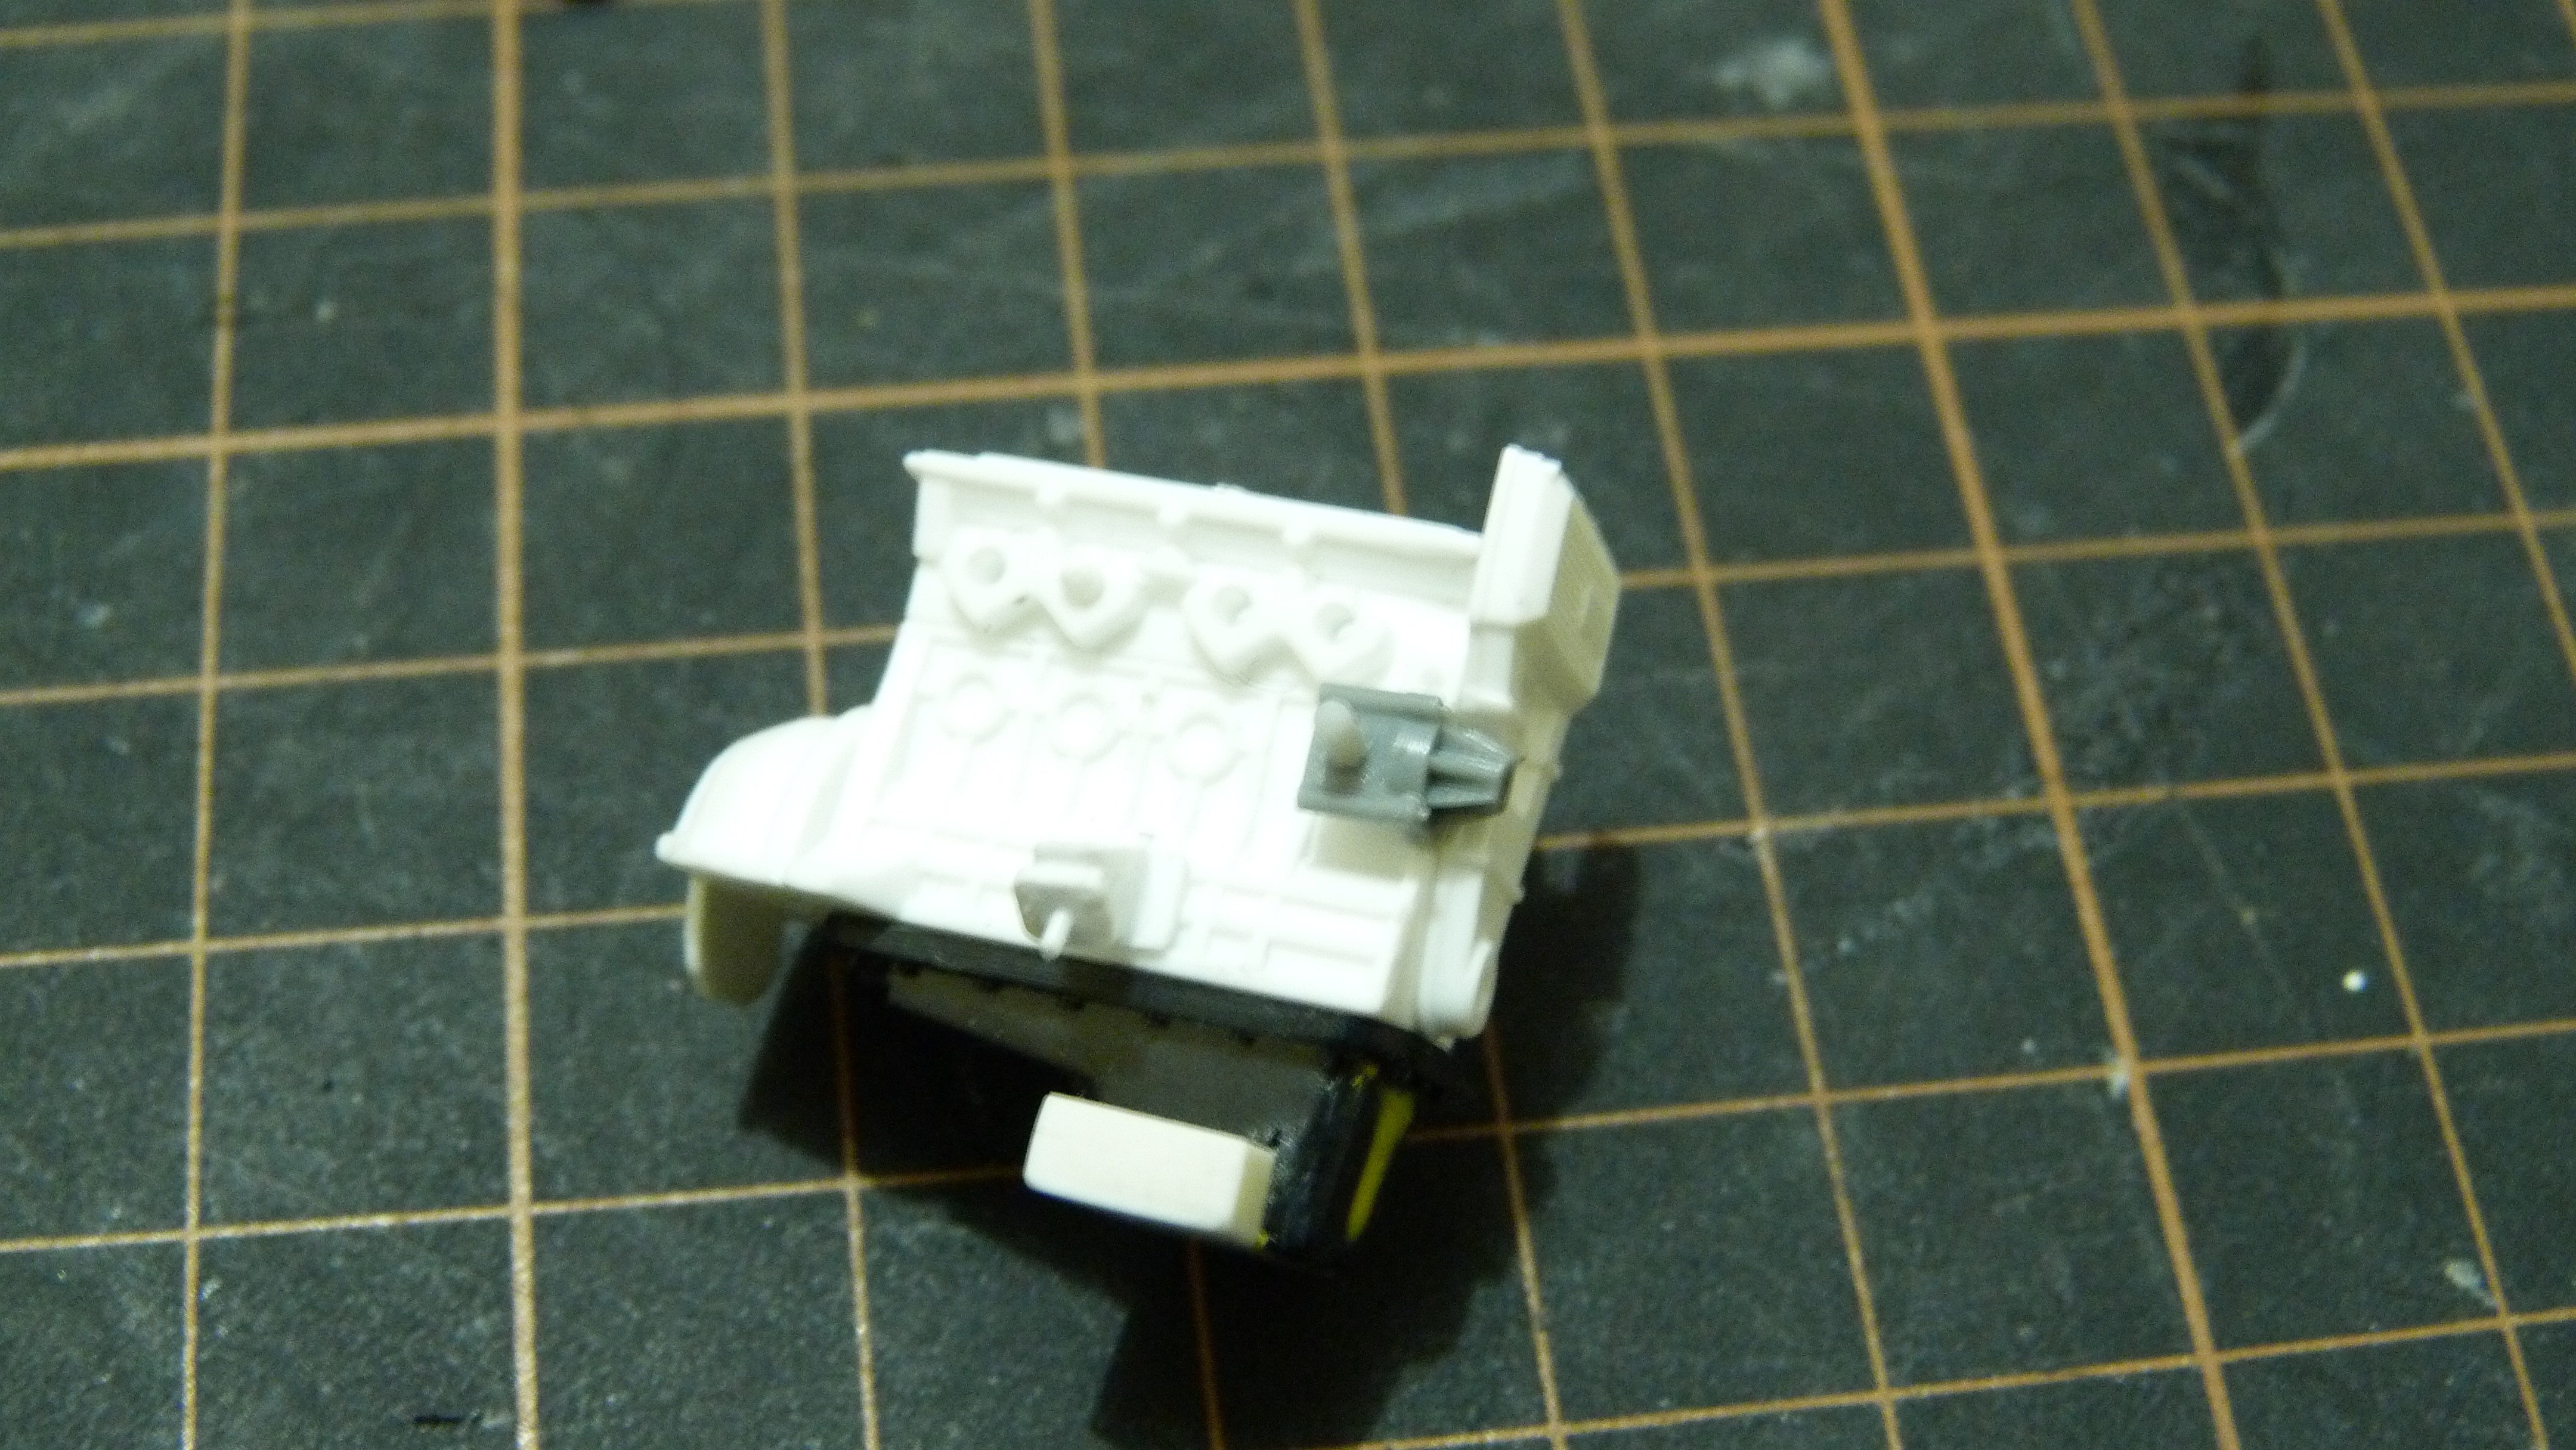
This update starts with the engine bay. The firewall at the back of the model's engine bay is just a blank panel so I decided to make it look a bit like proper stamped sheet metal. Starting with the top part that is attached to the body. That area is not the right shape and there is a gap between that and the firewall on the chassis part. fixed The next step was to make a template of the firewall. I hate making templates as it's difficult to get all the areas right, so I decided to use some scrap styrene sheet from my off cuts box and do it in a few different sections. I tacked them together in place with more scraps and used that as a template to cut out a full new one. The idea was to make the firewall in three layers with the new piece as the visible outer layer and the kit firewall as the middle layer and a piece behind that as the 3rd layer. Here is the new piece after I did the cut outs. This is the cut out area on the firewall. When the layers were glued together I put some Tamiya liquid primer in to fill out the edges. Here is the final result.
Here's where the tricky stuff begins
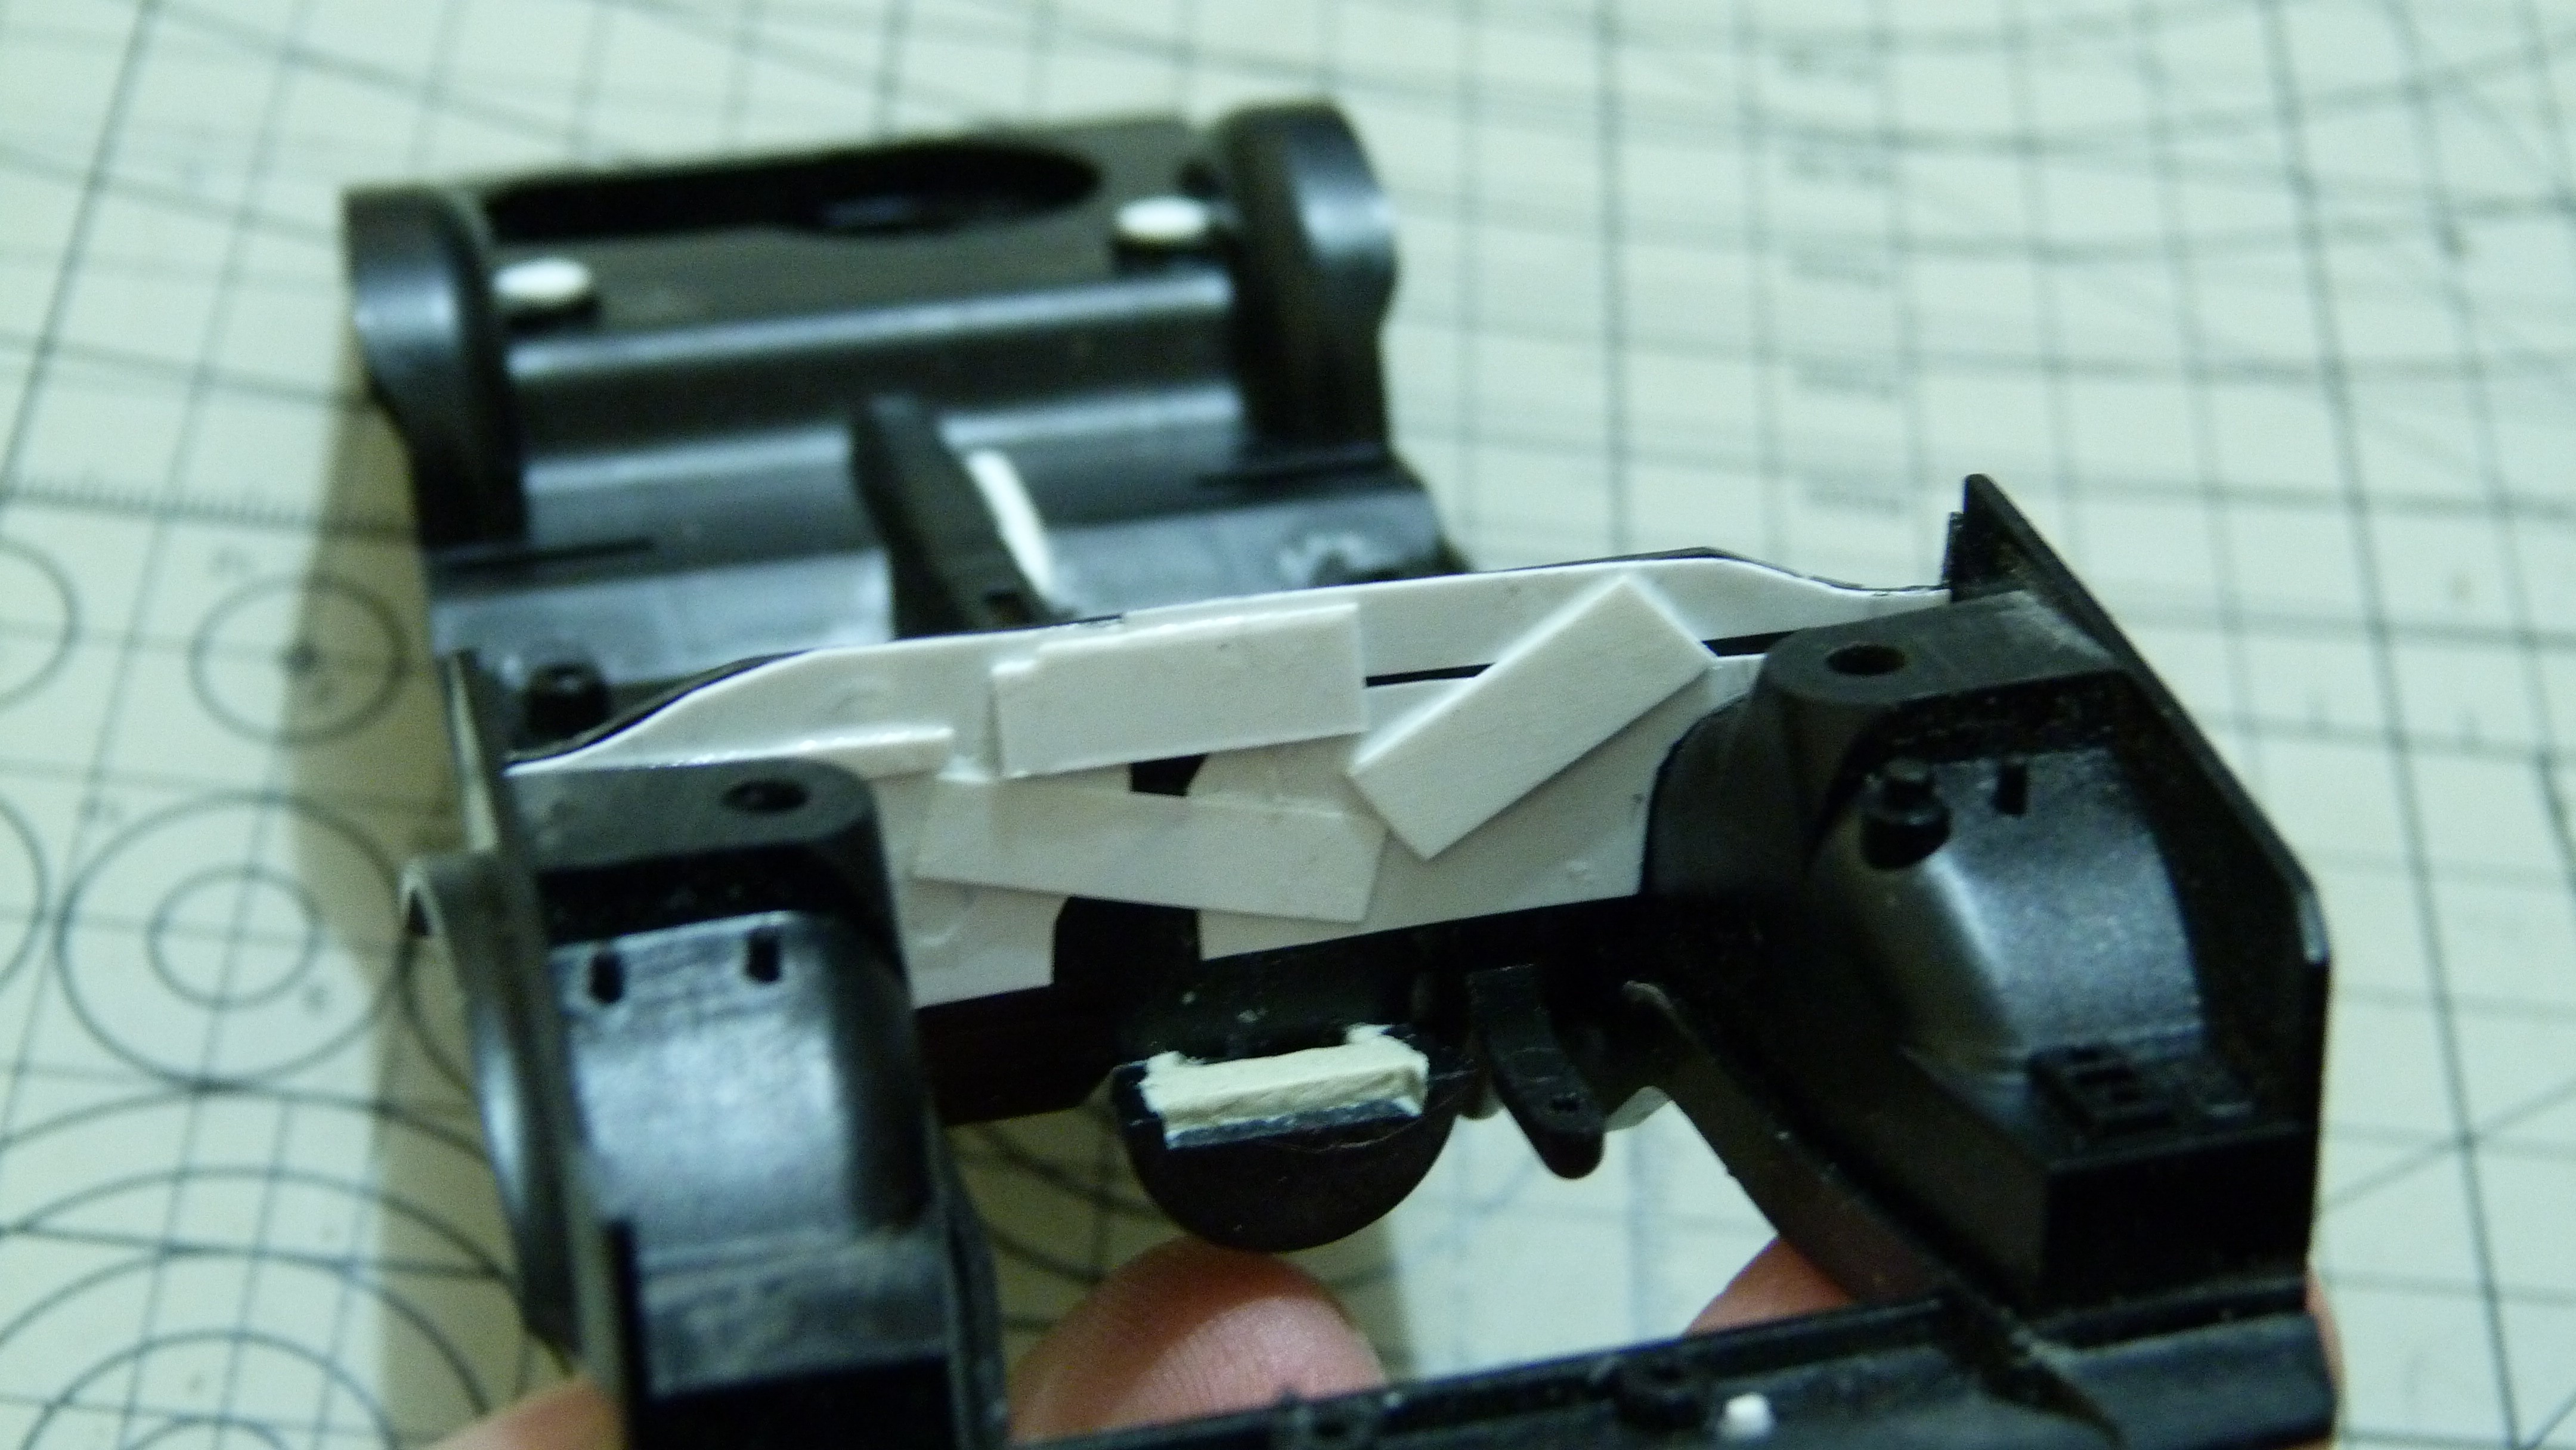
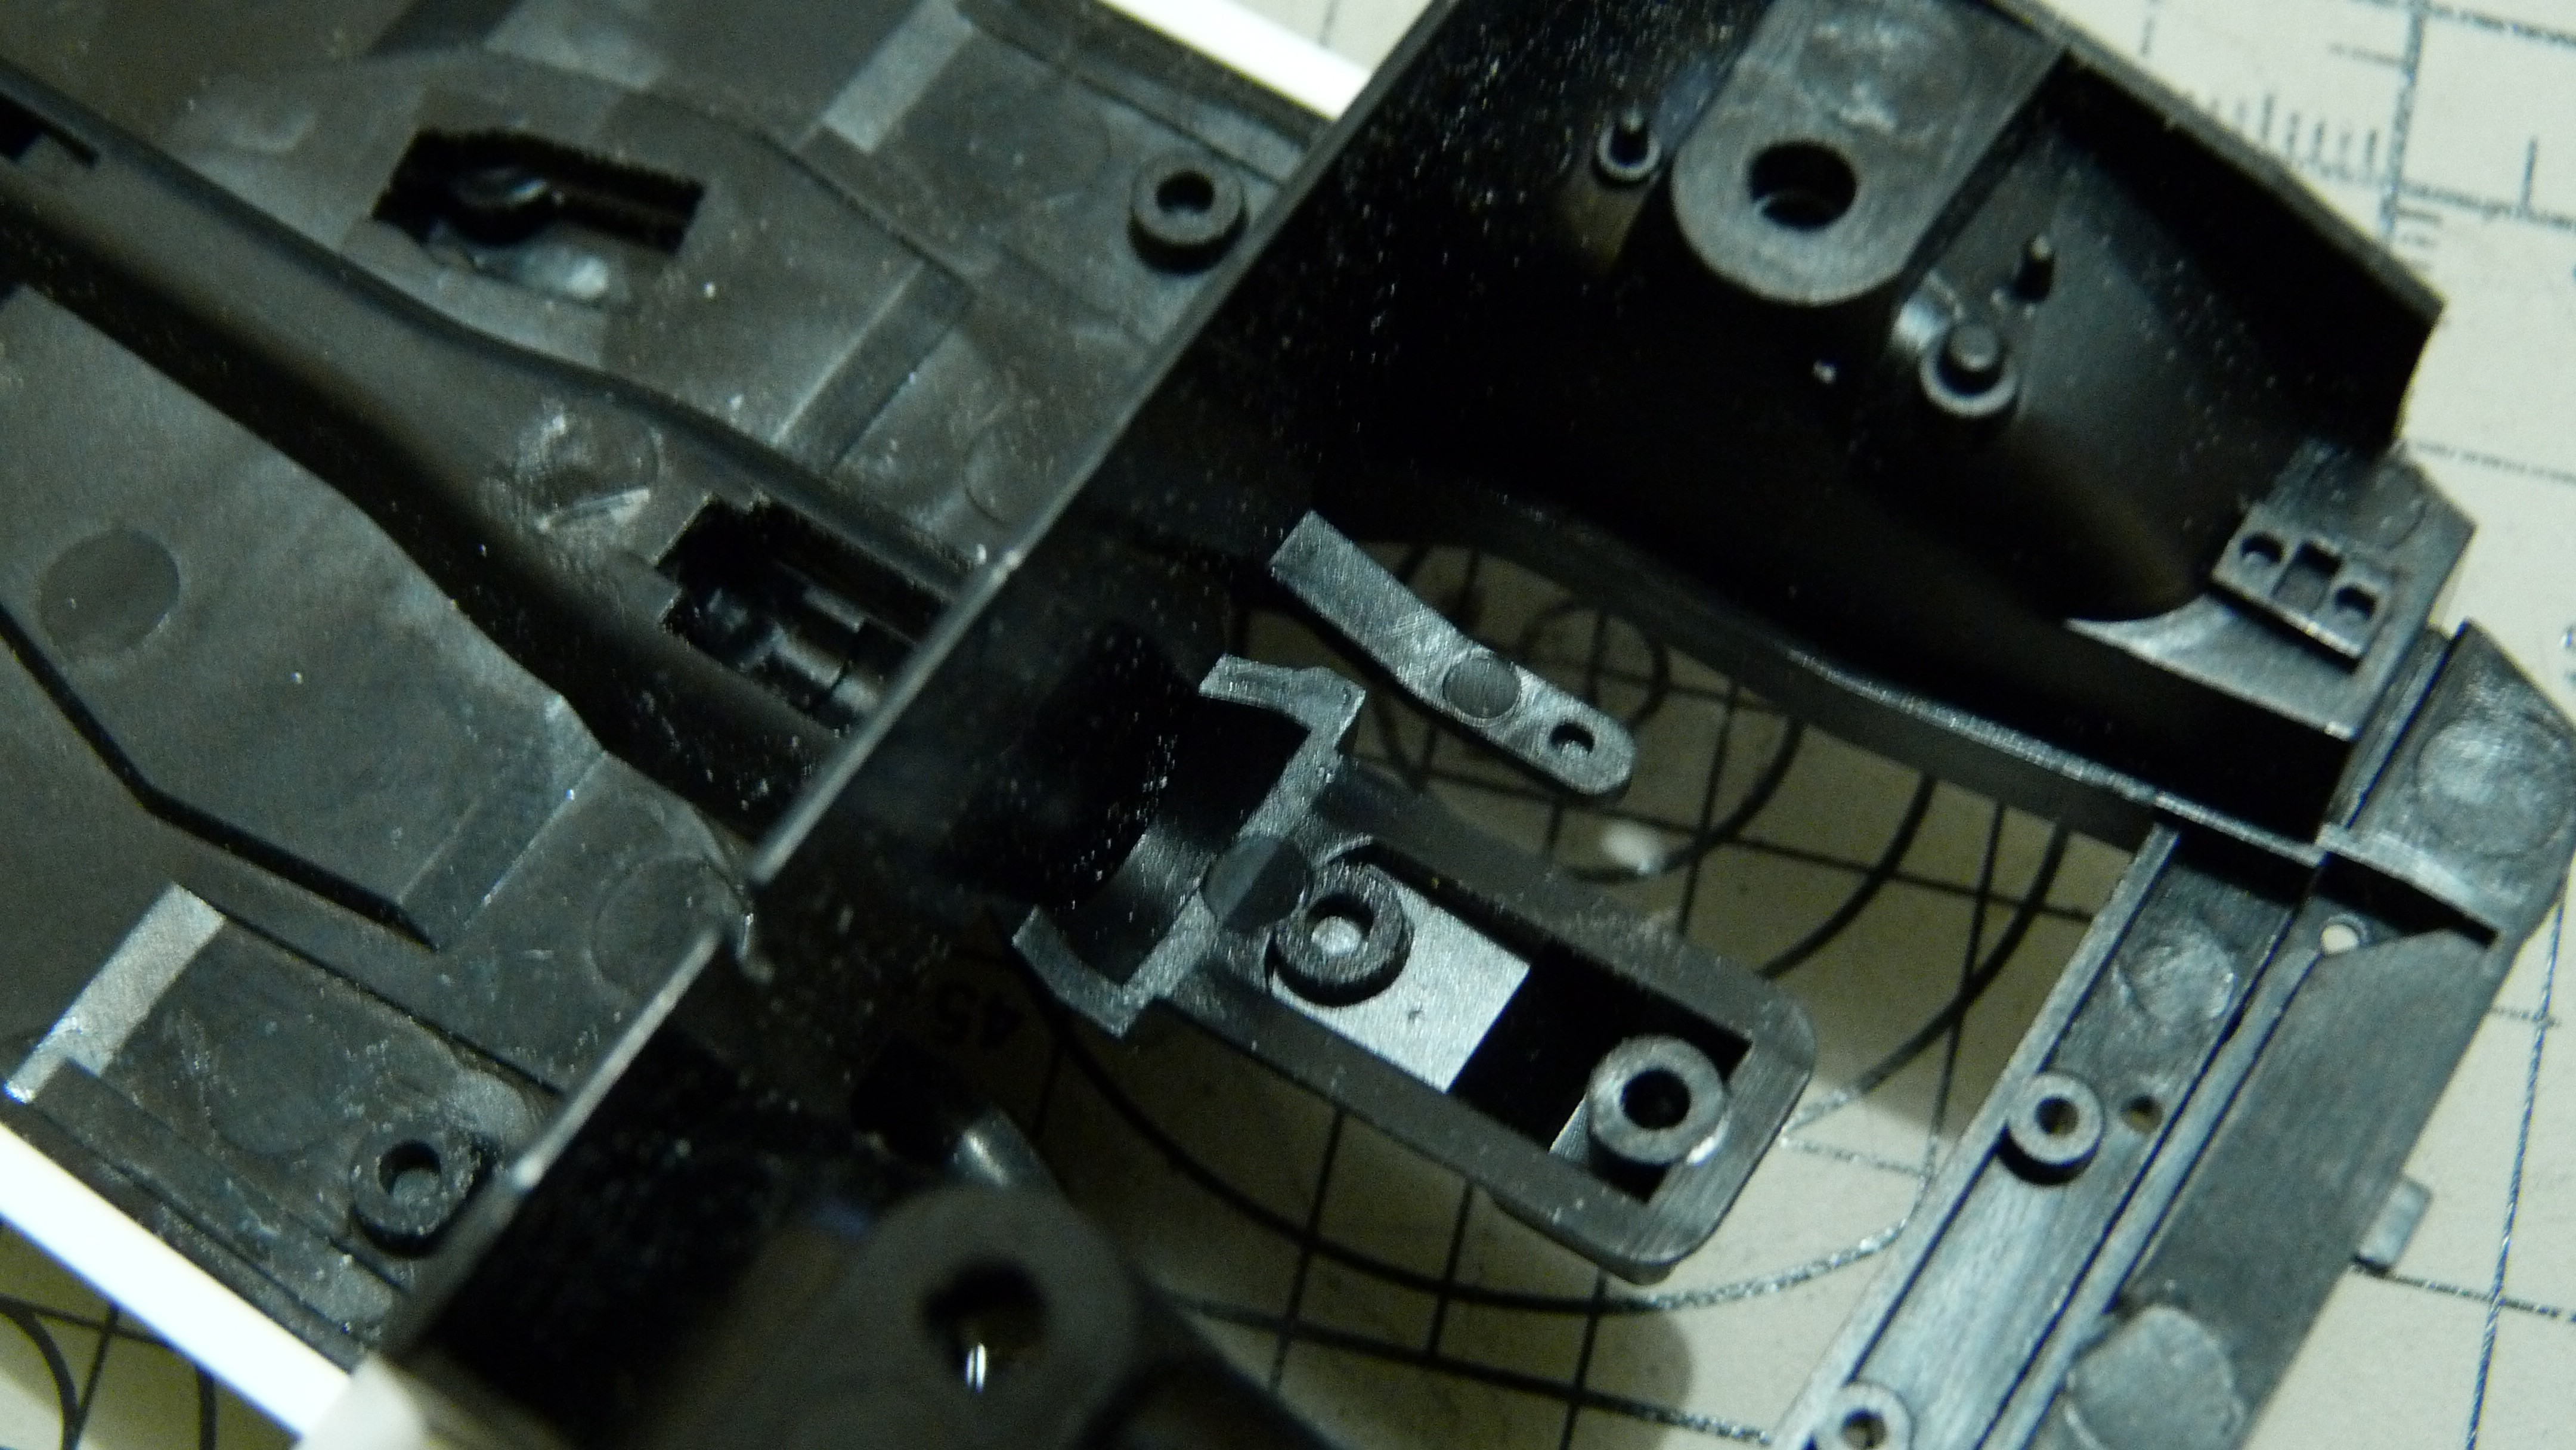
The kit uses the molded in oil pan and exhaust to mount the engine block on.
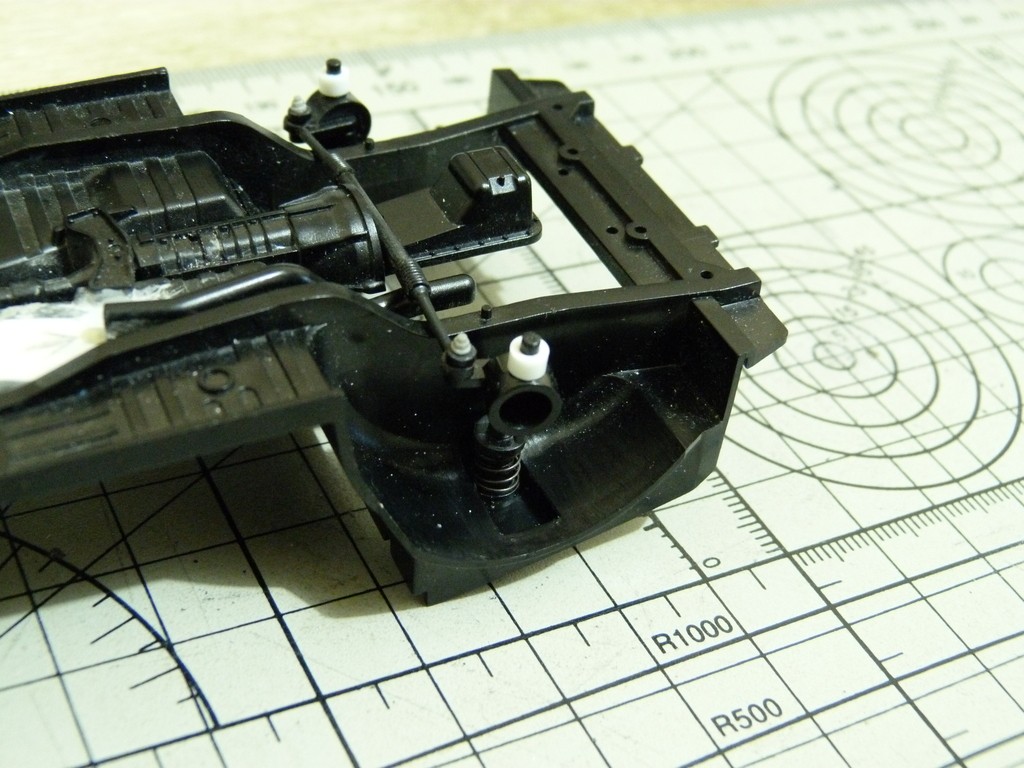
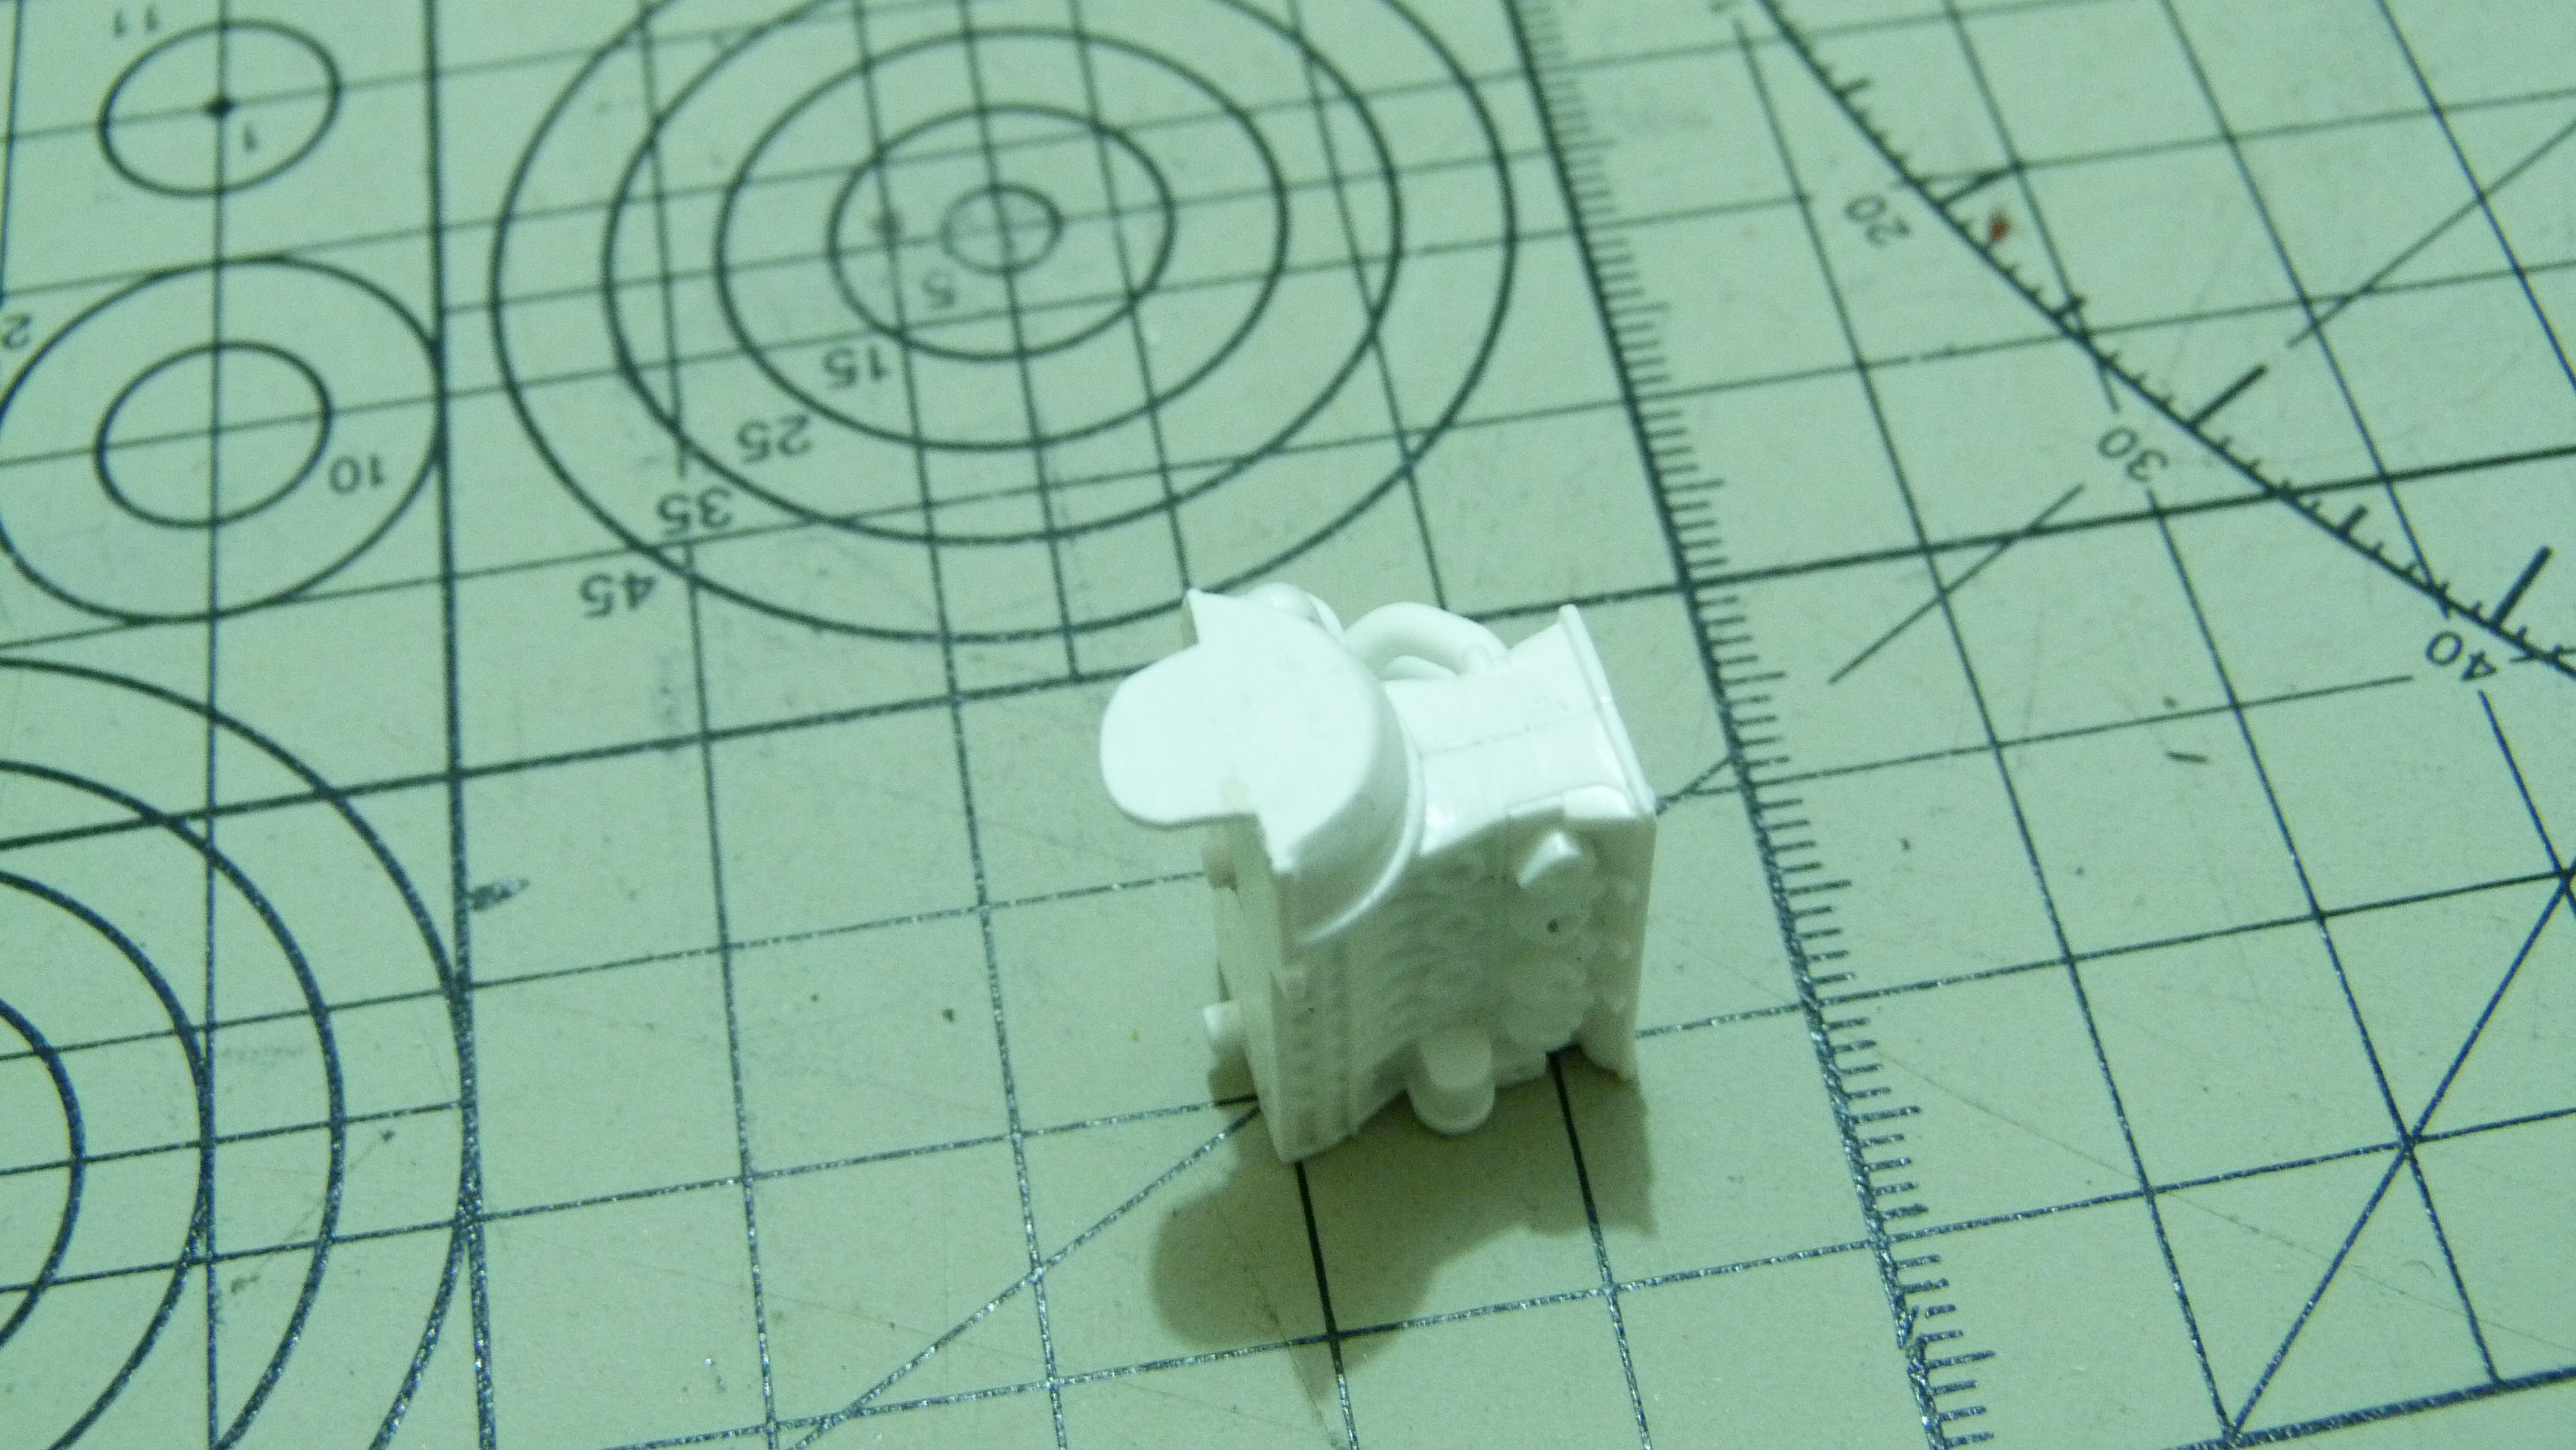
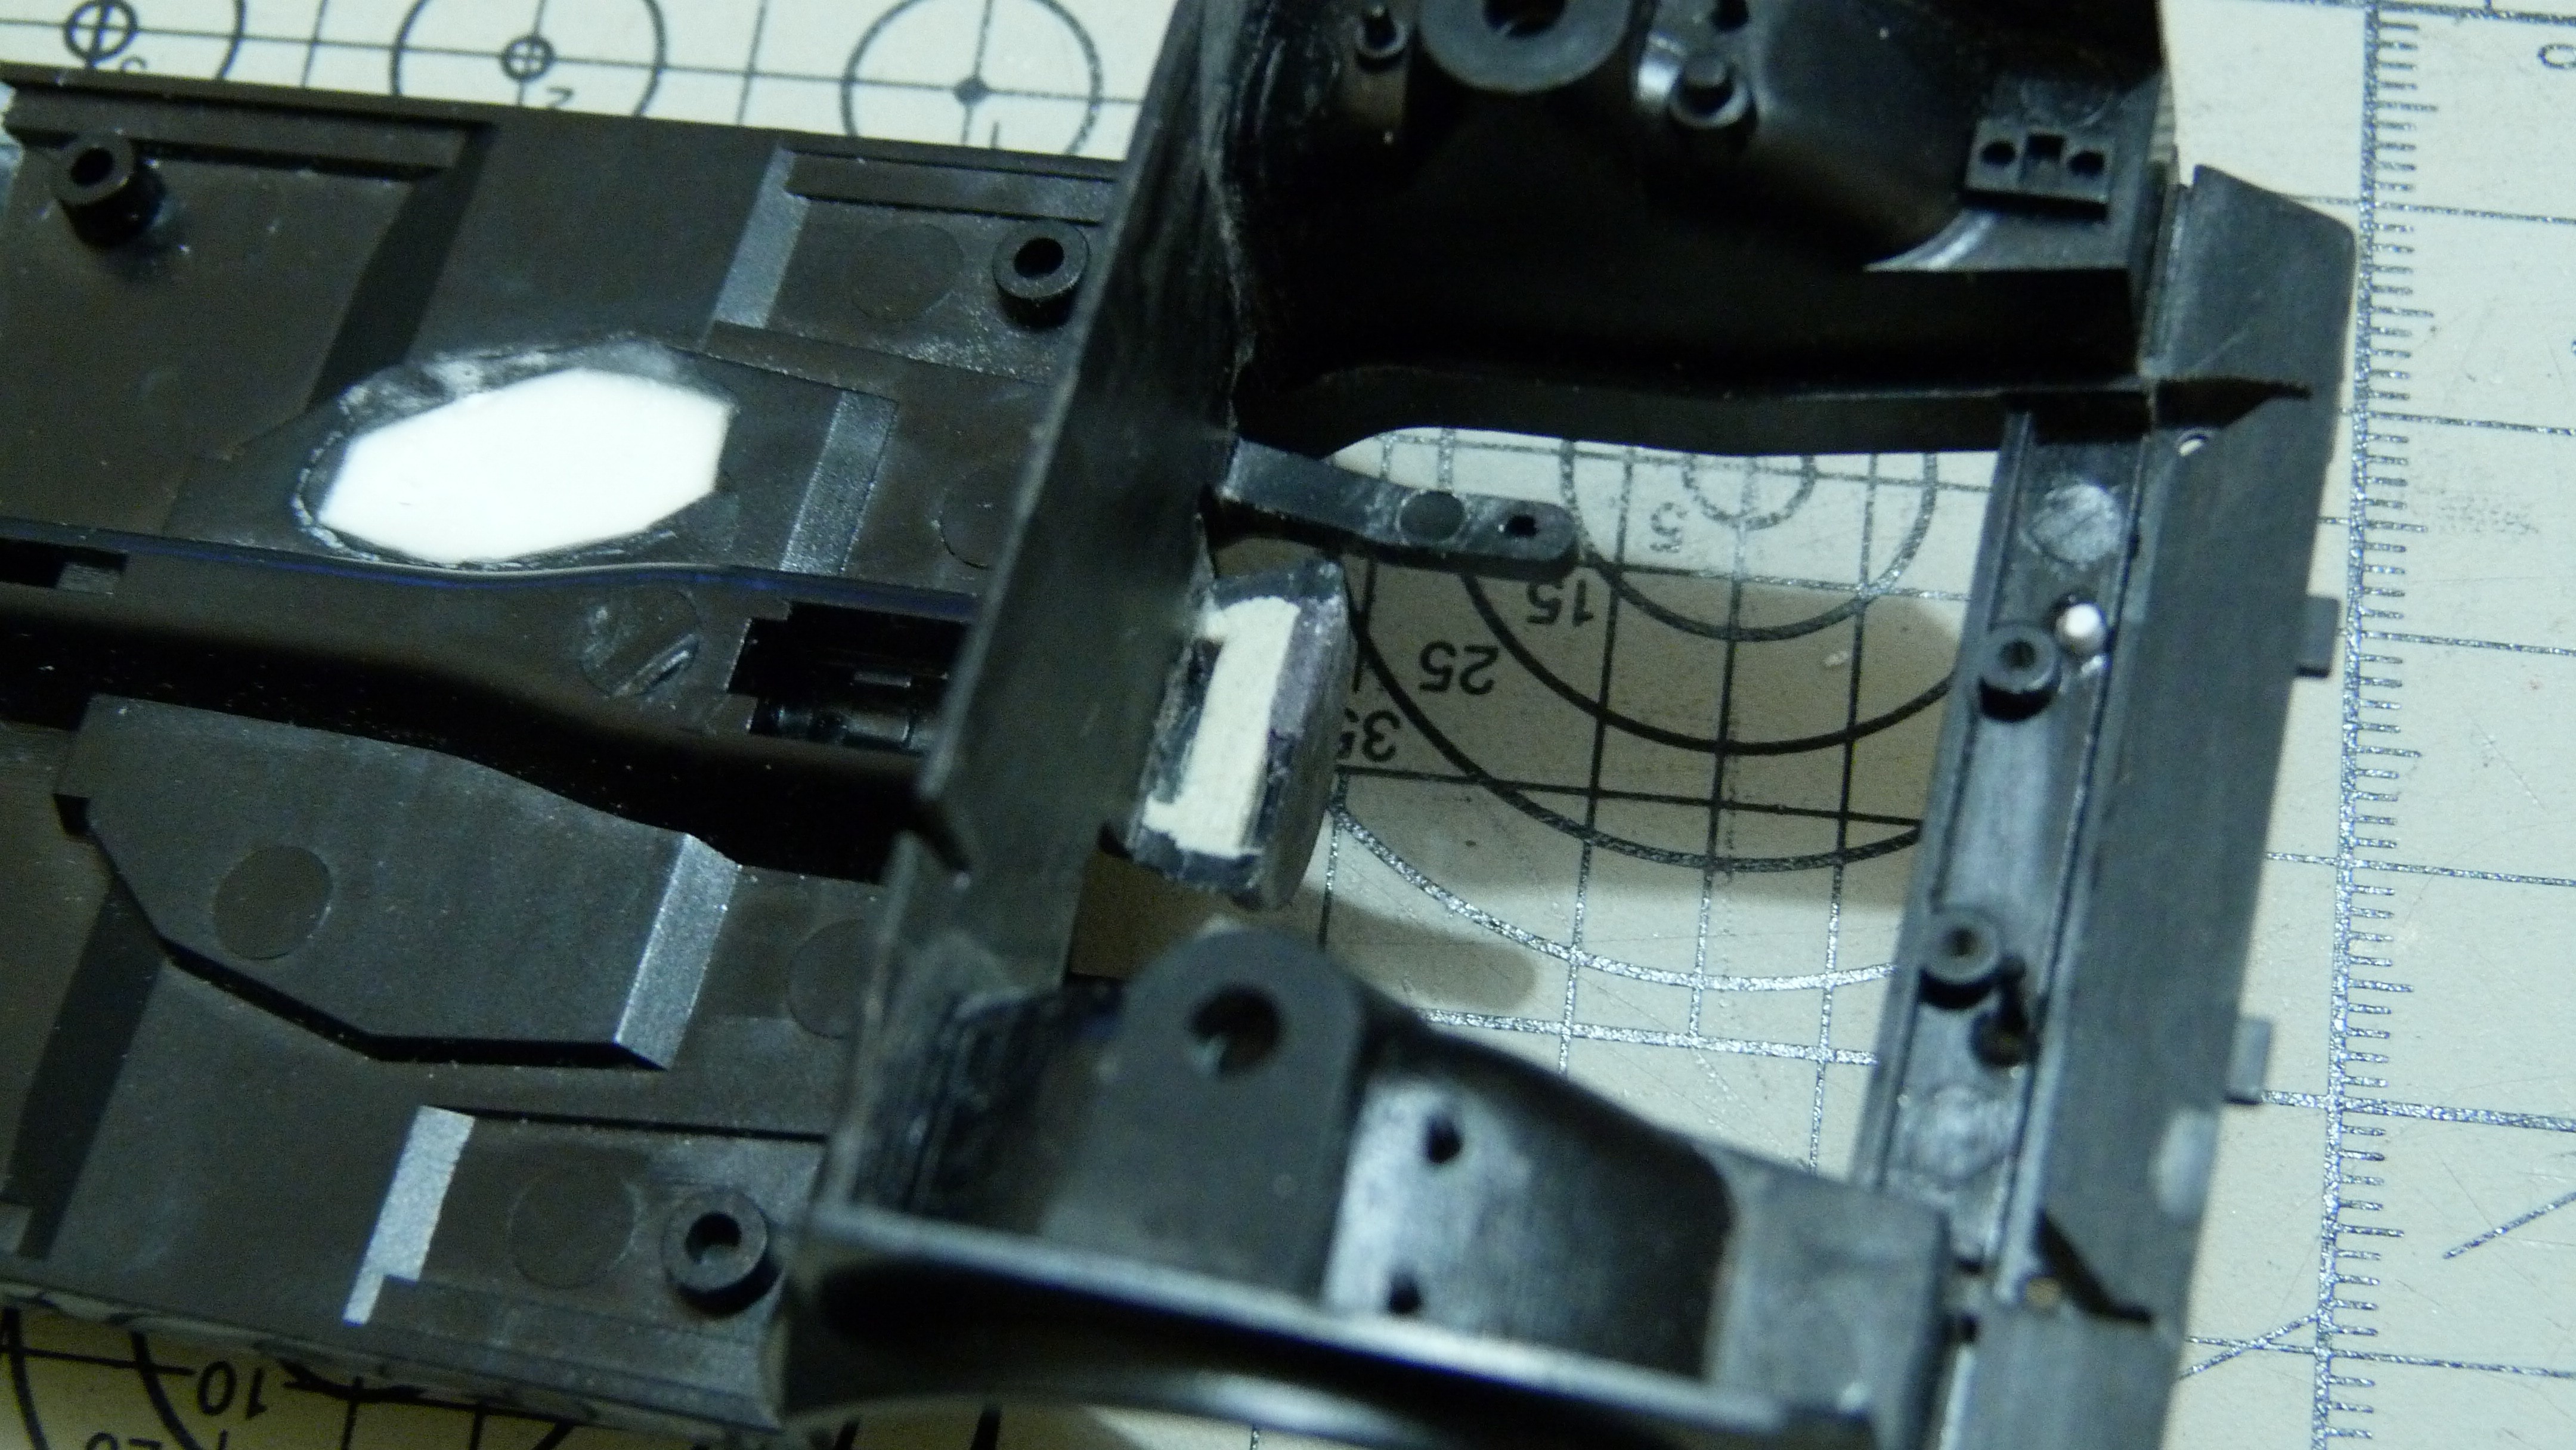
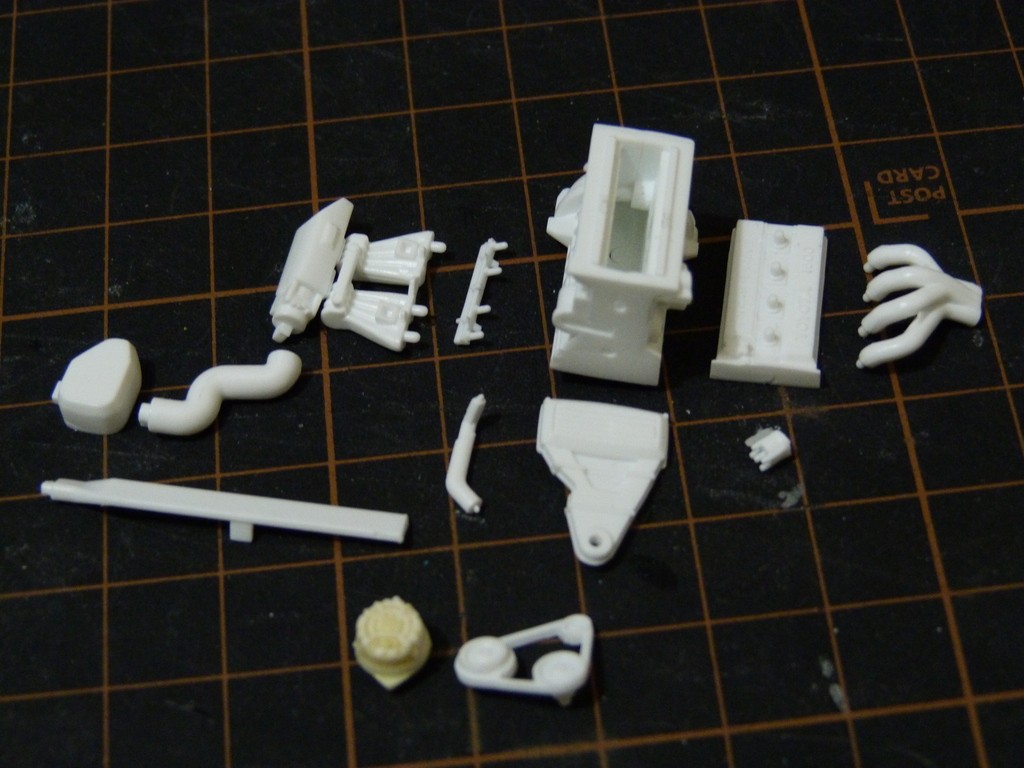
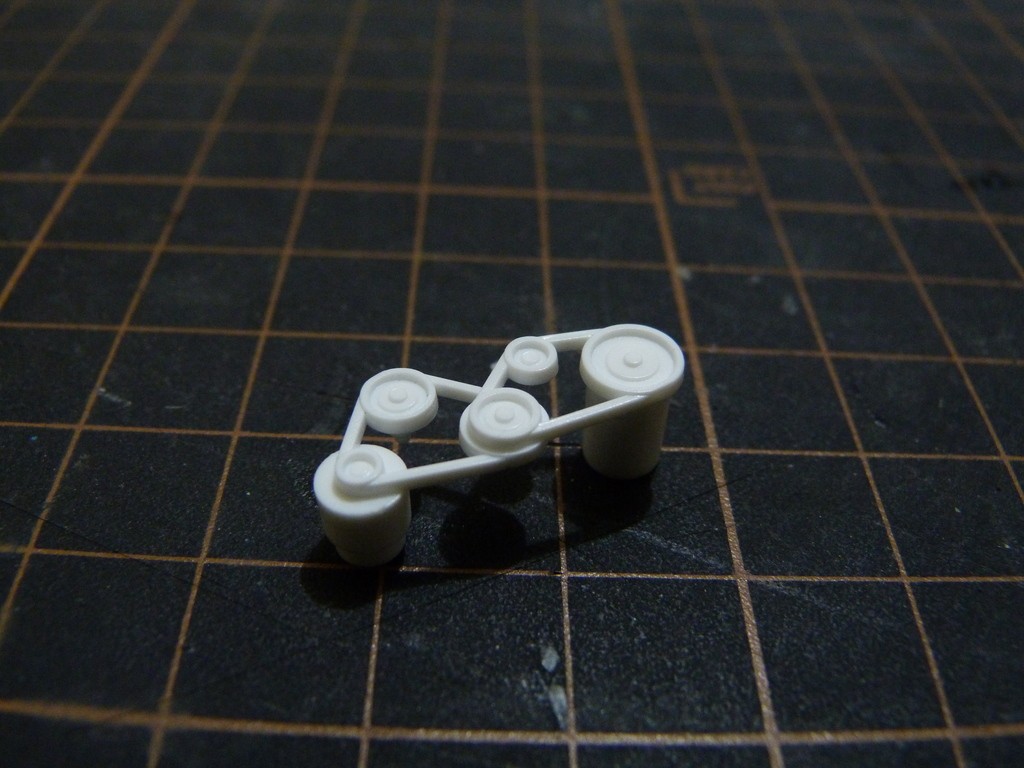
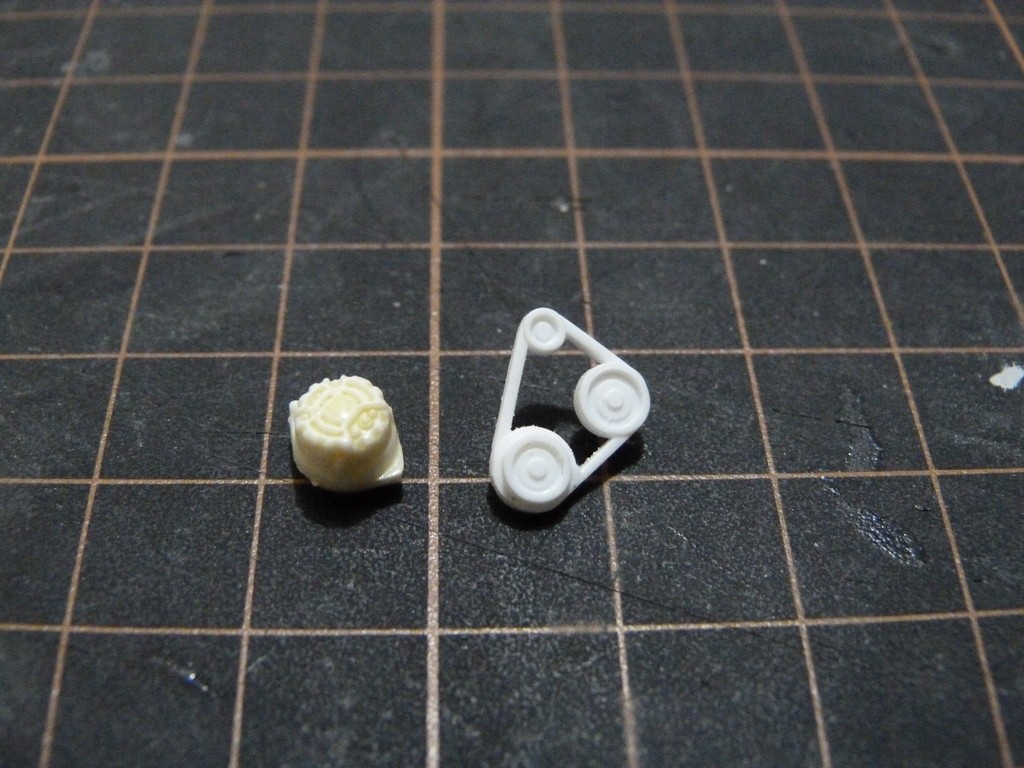
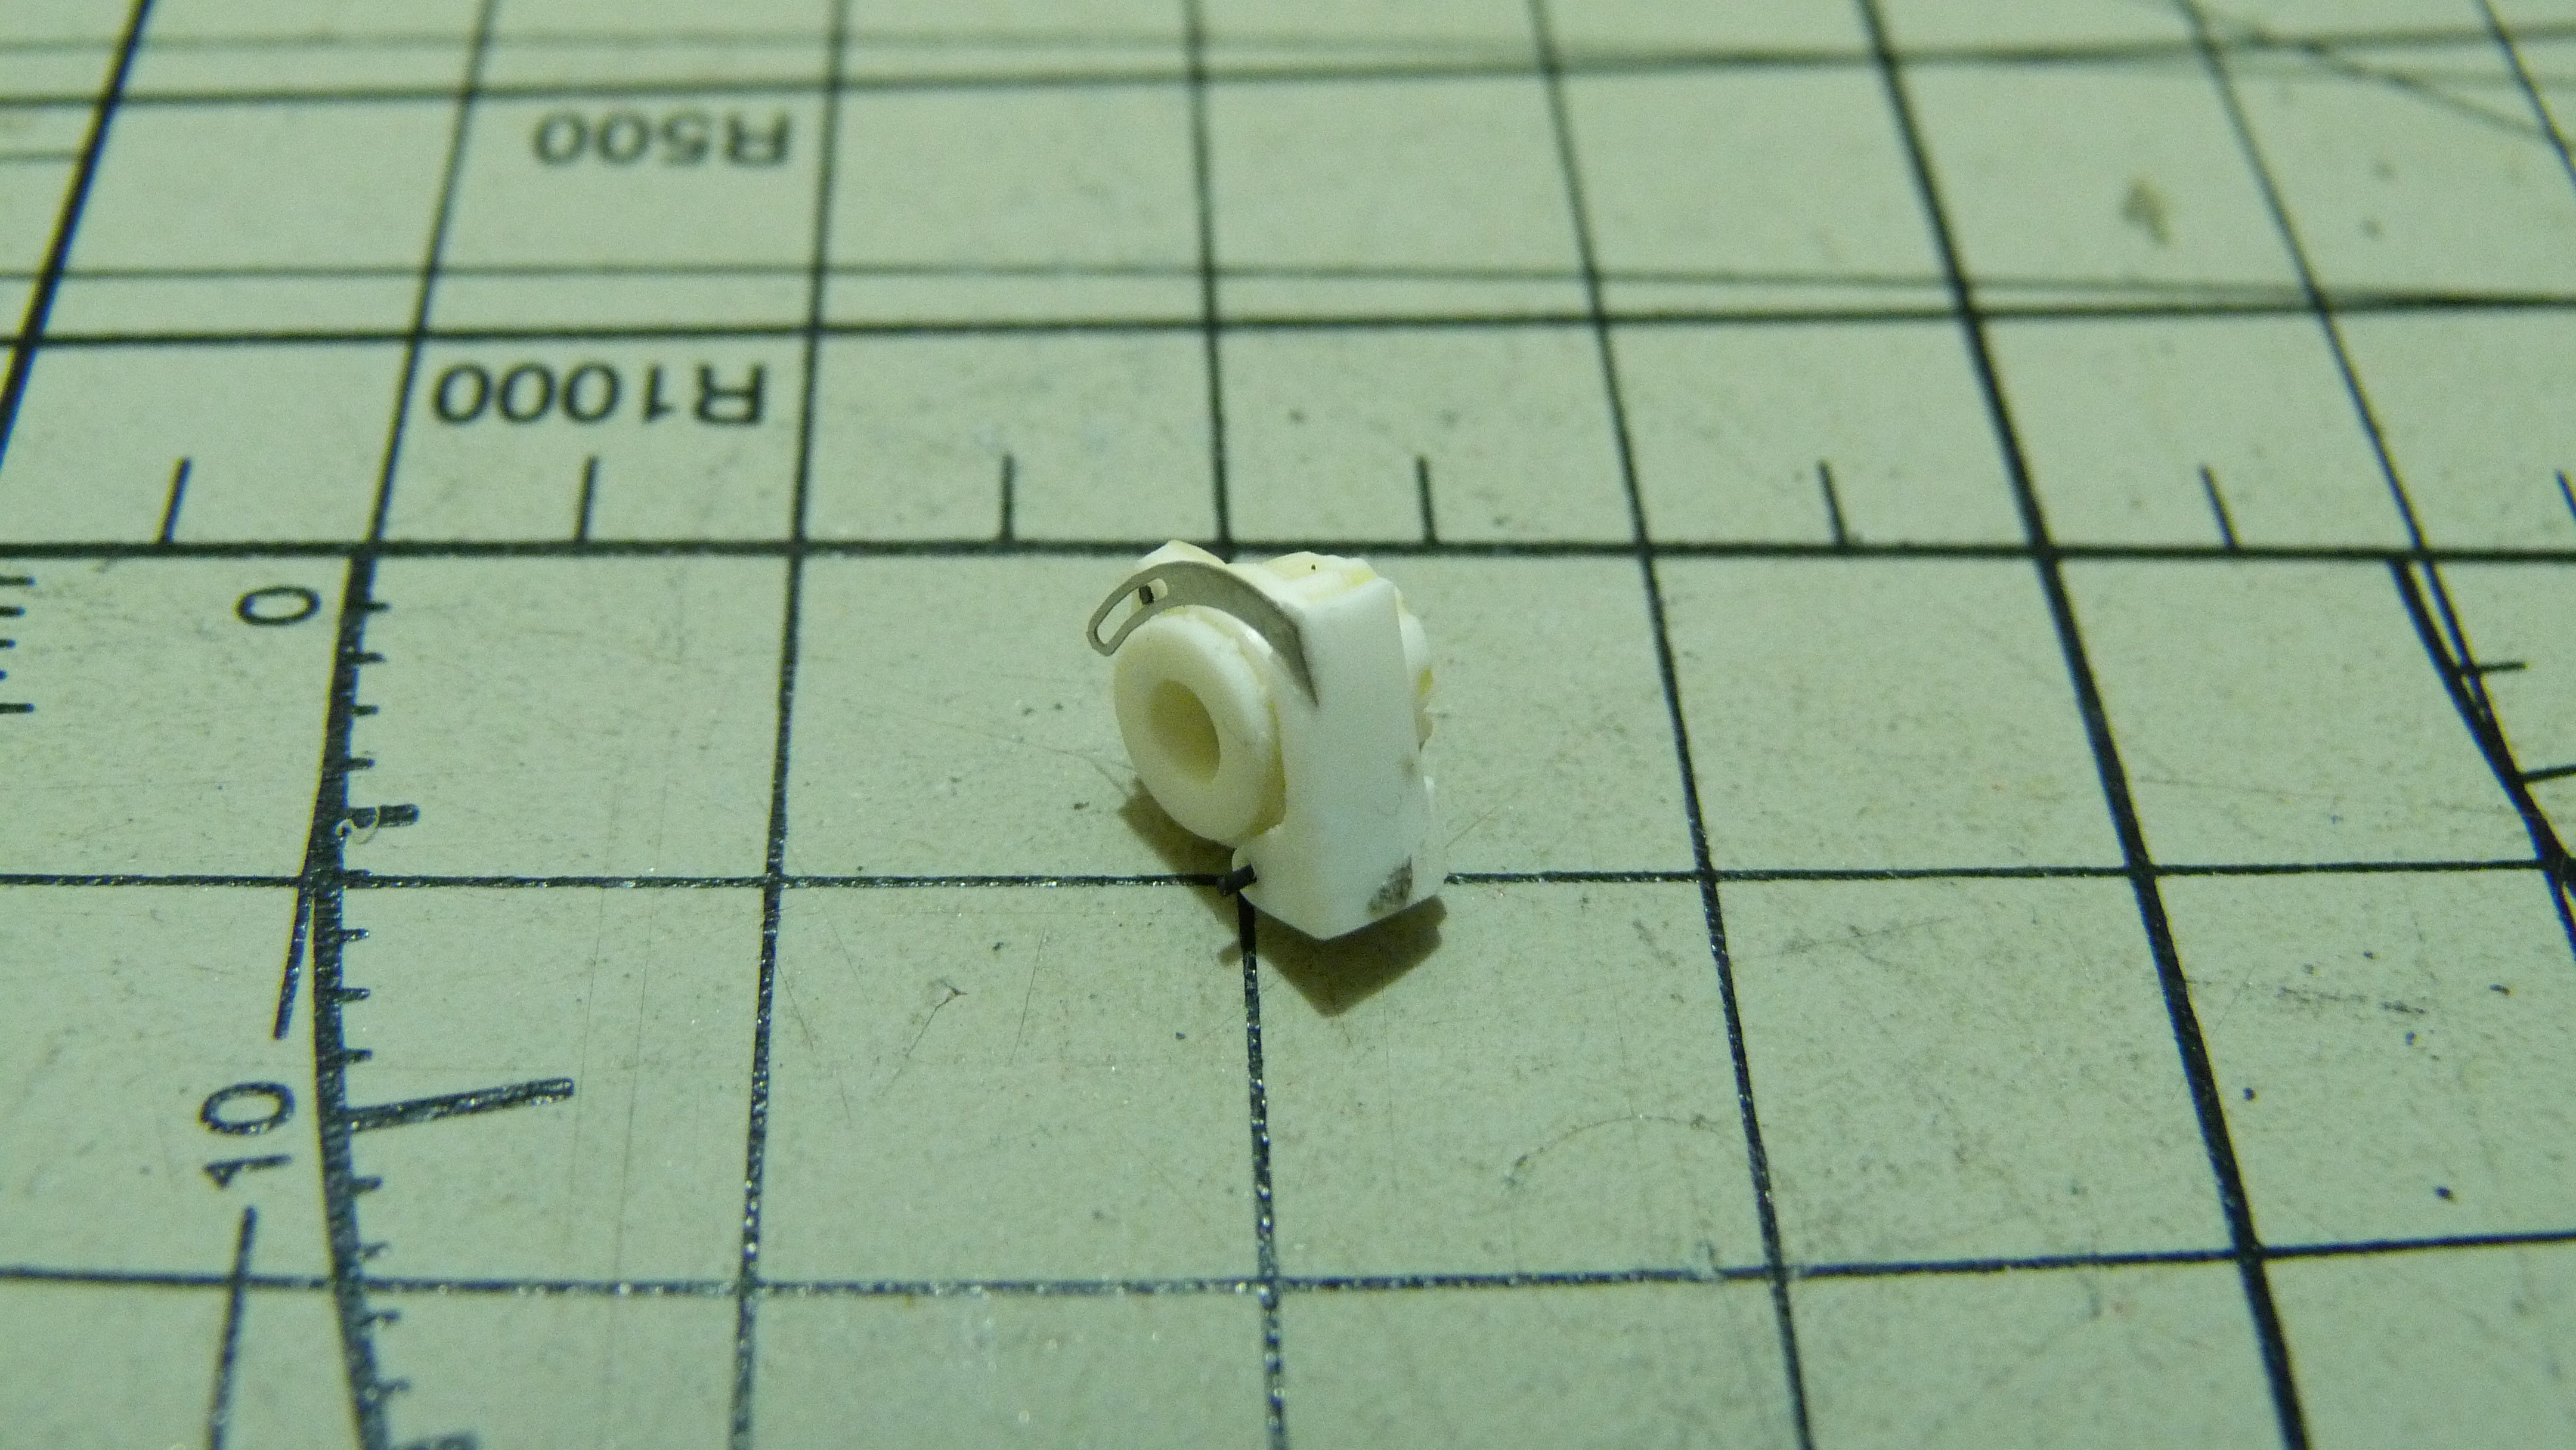
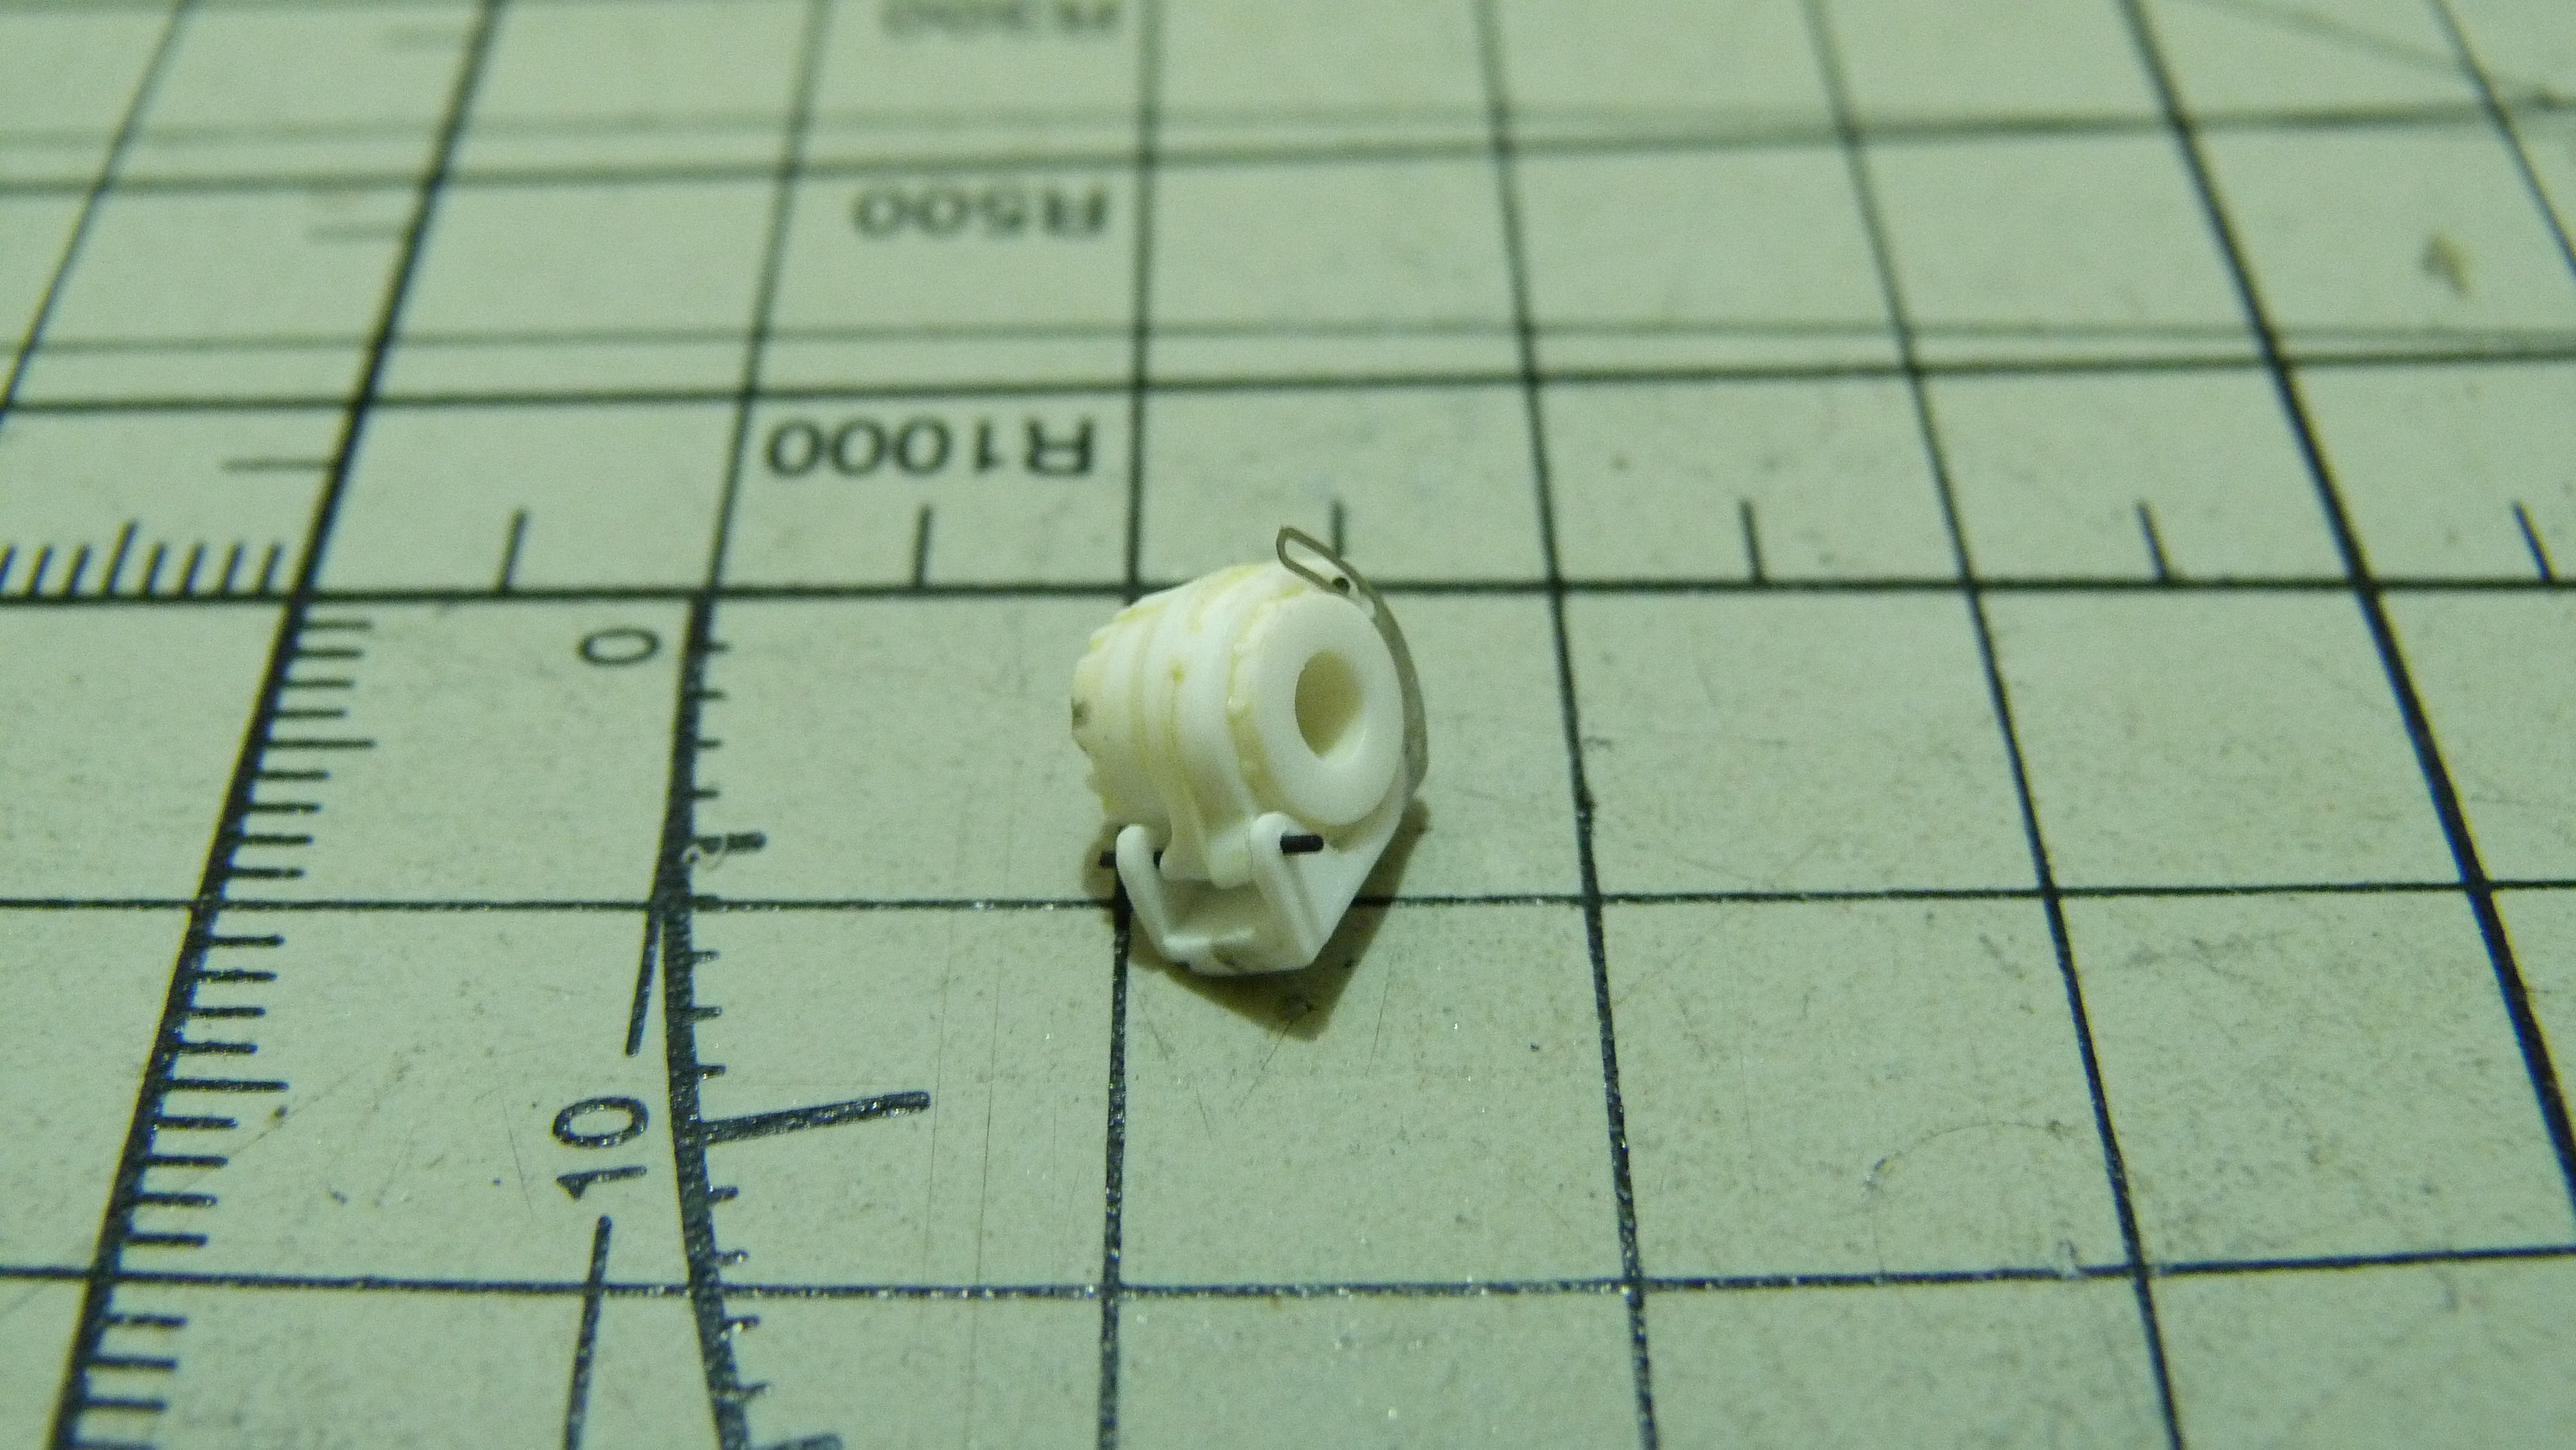
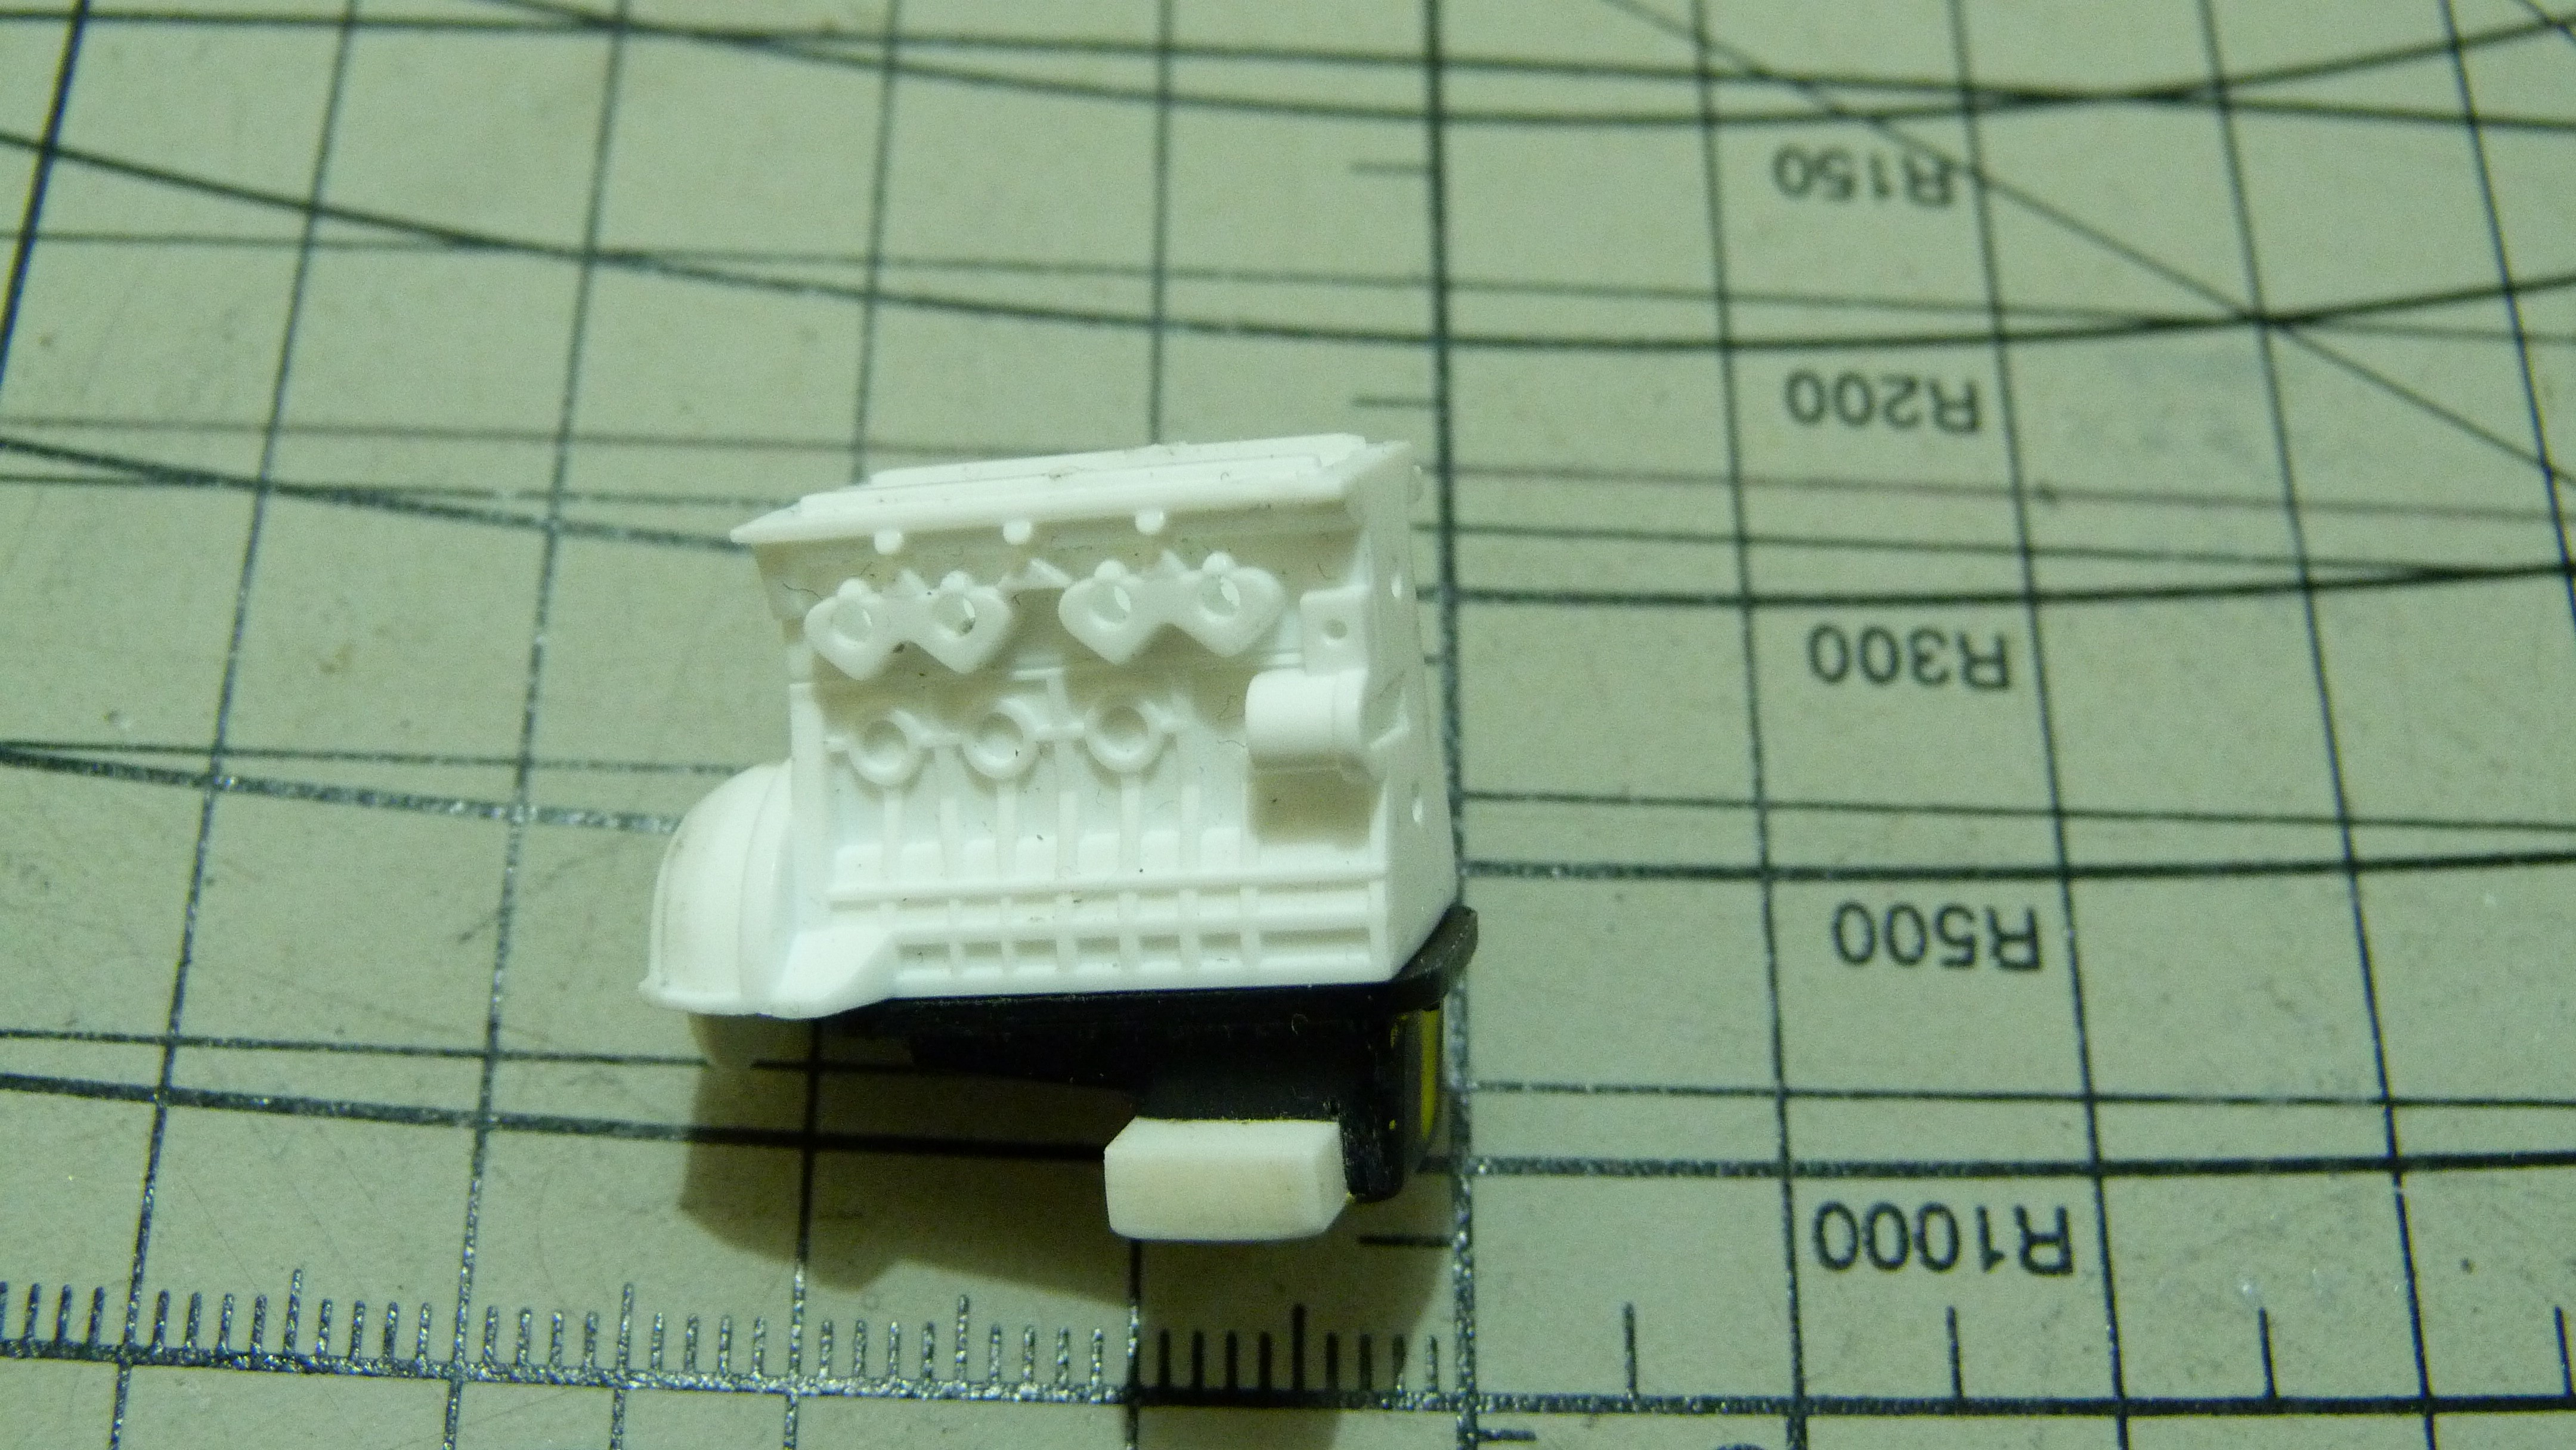
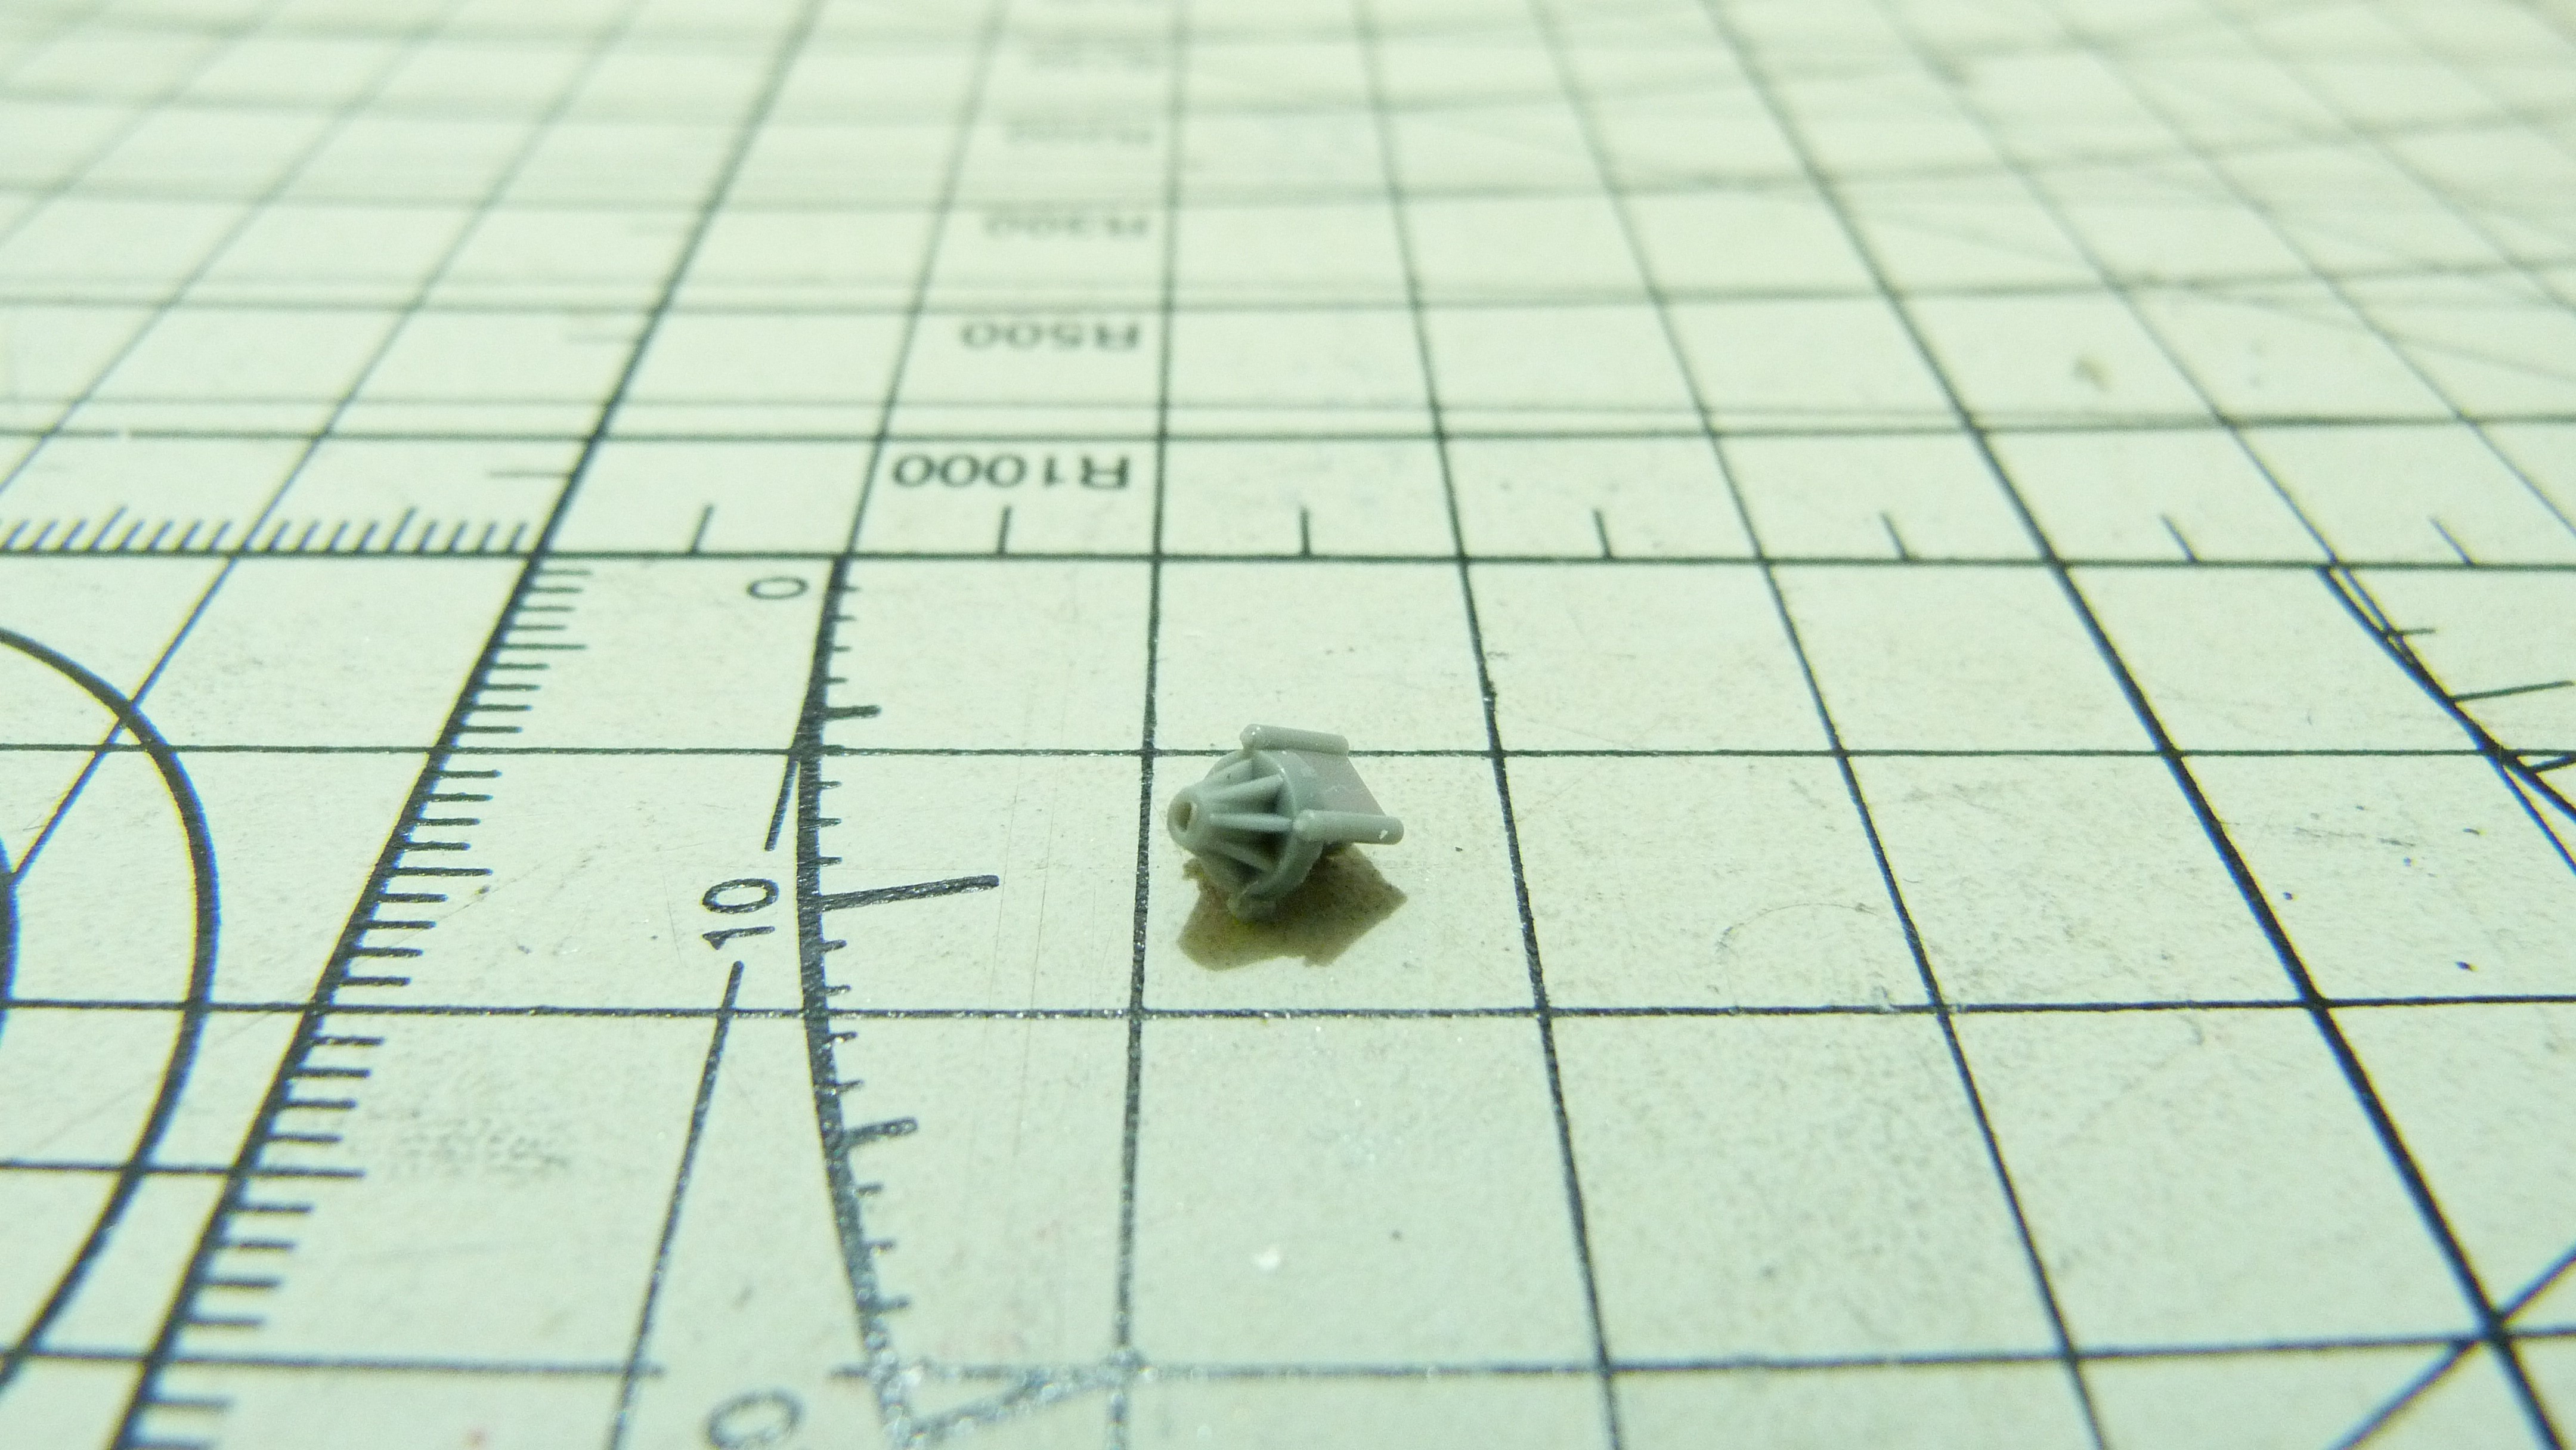
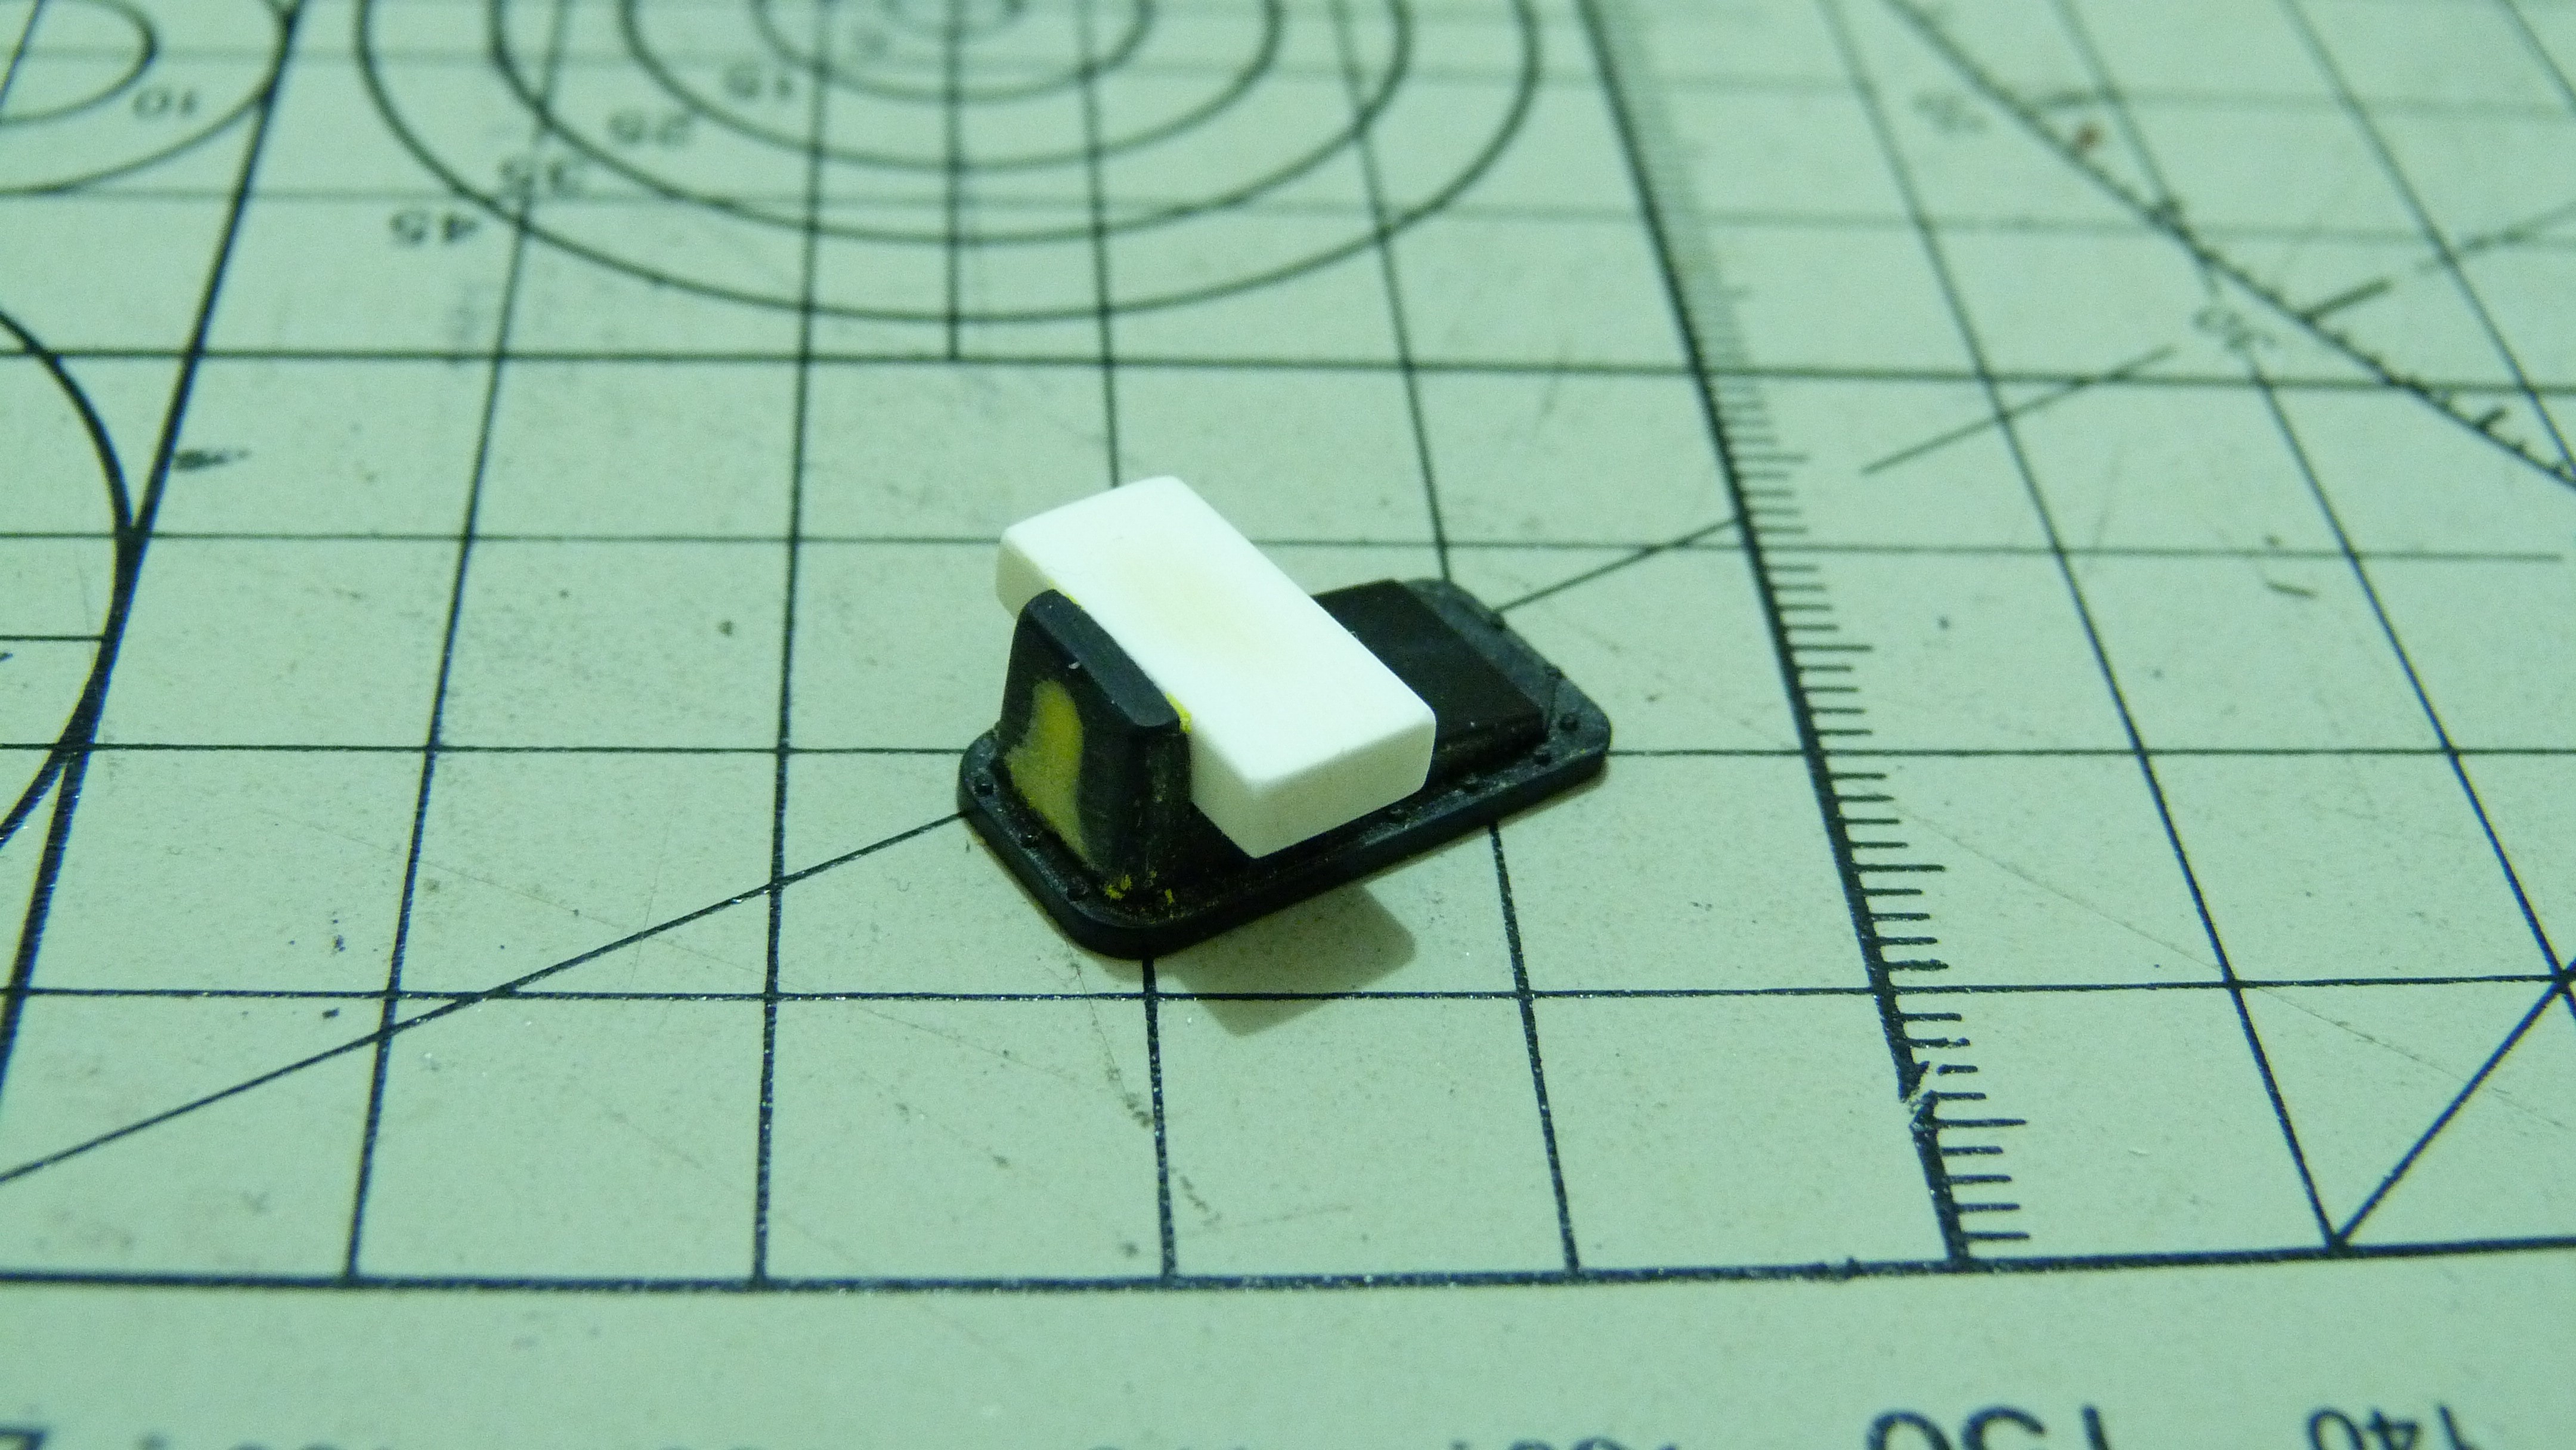
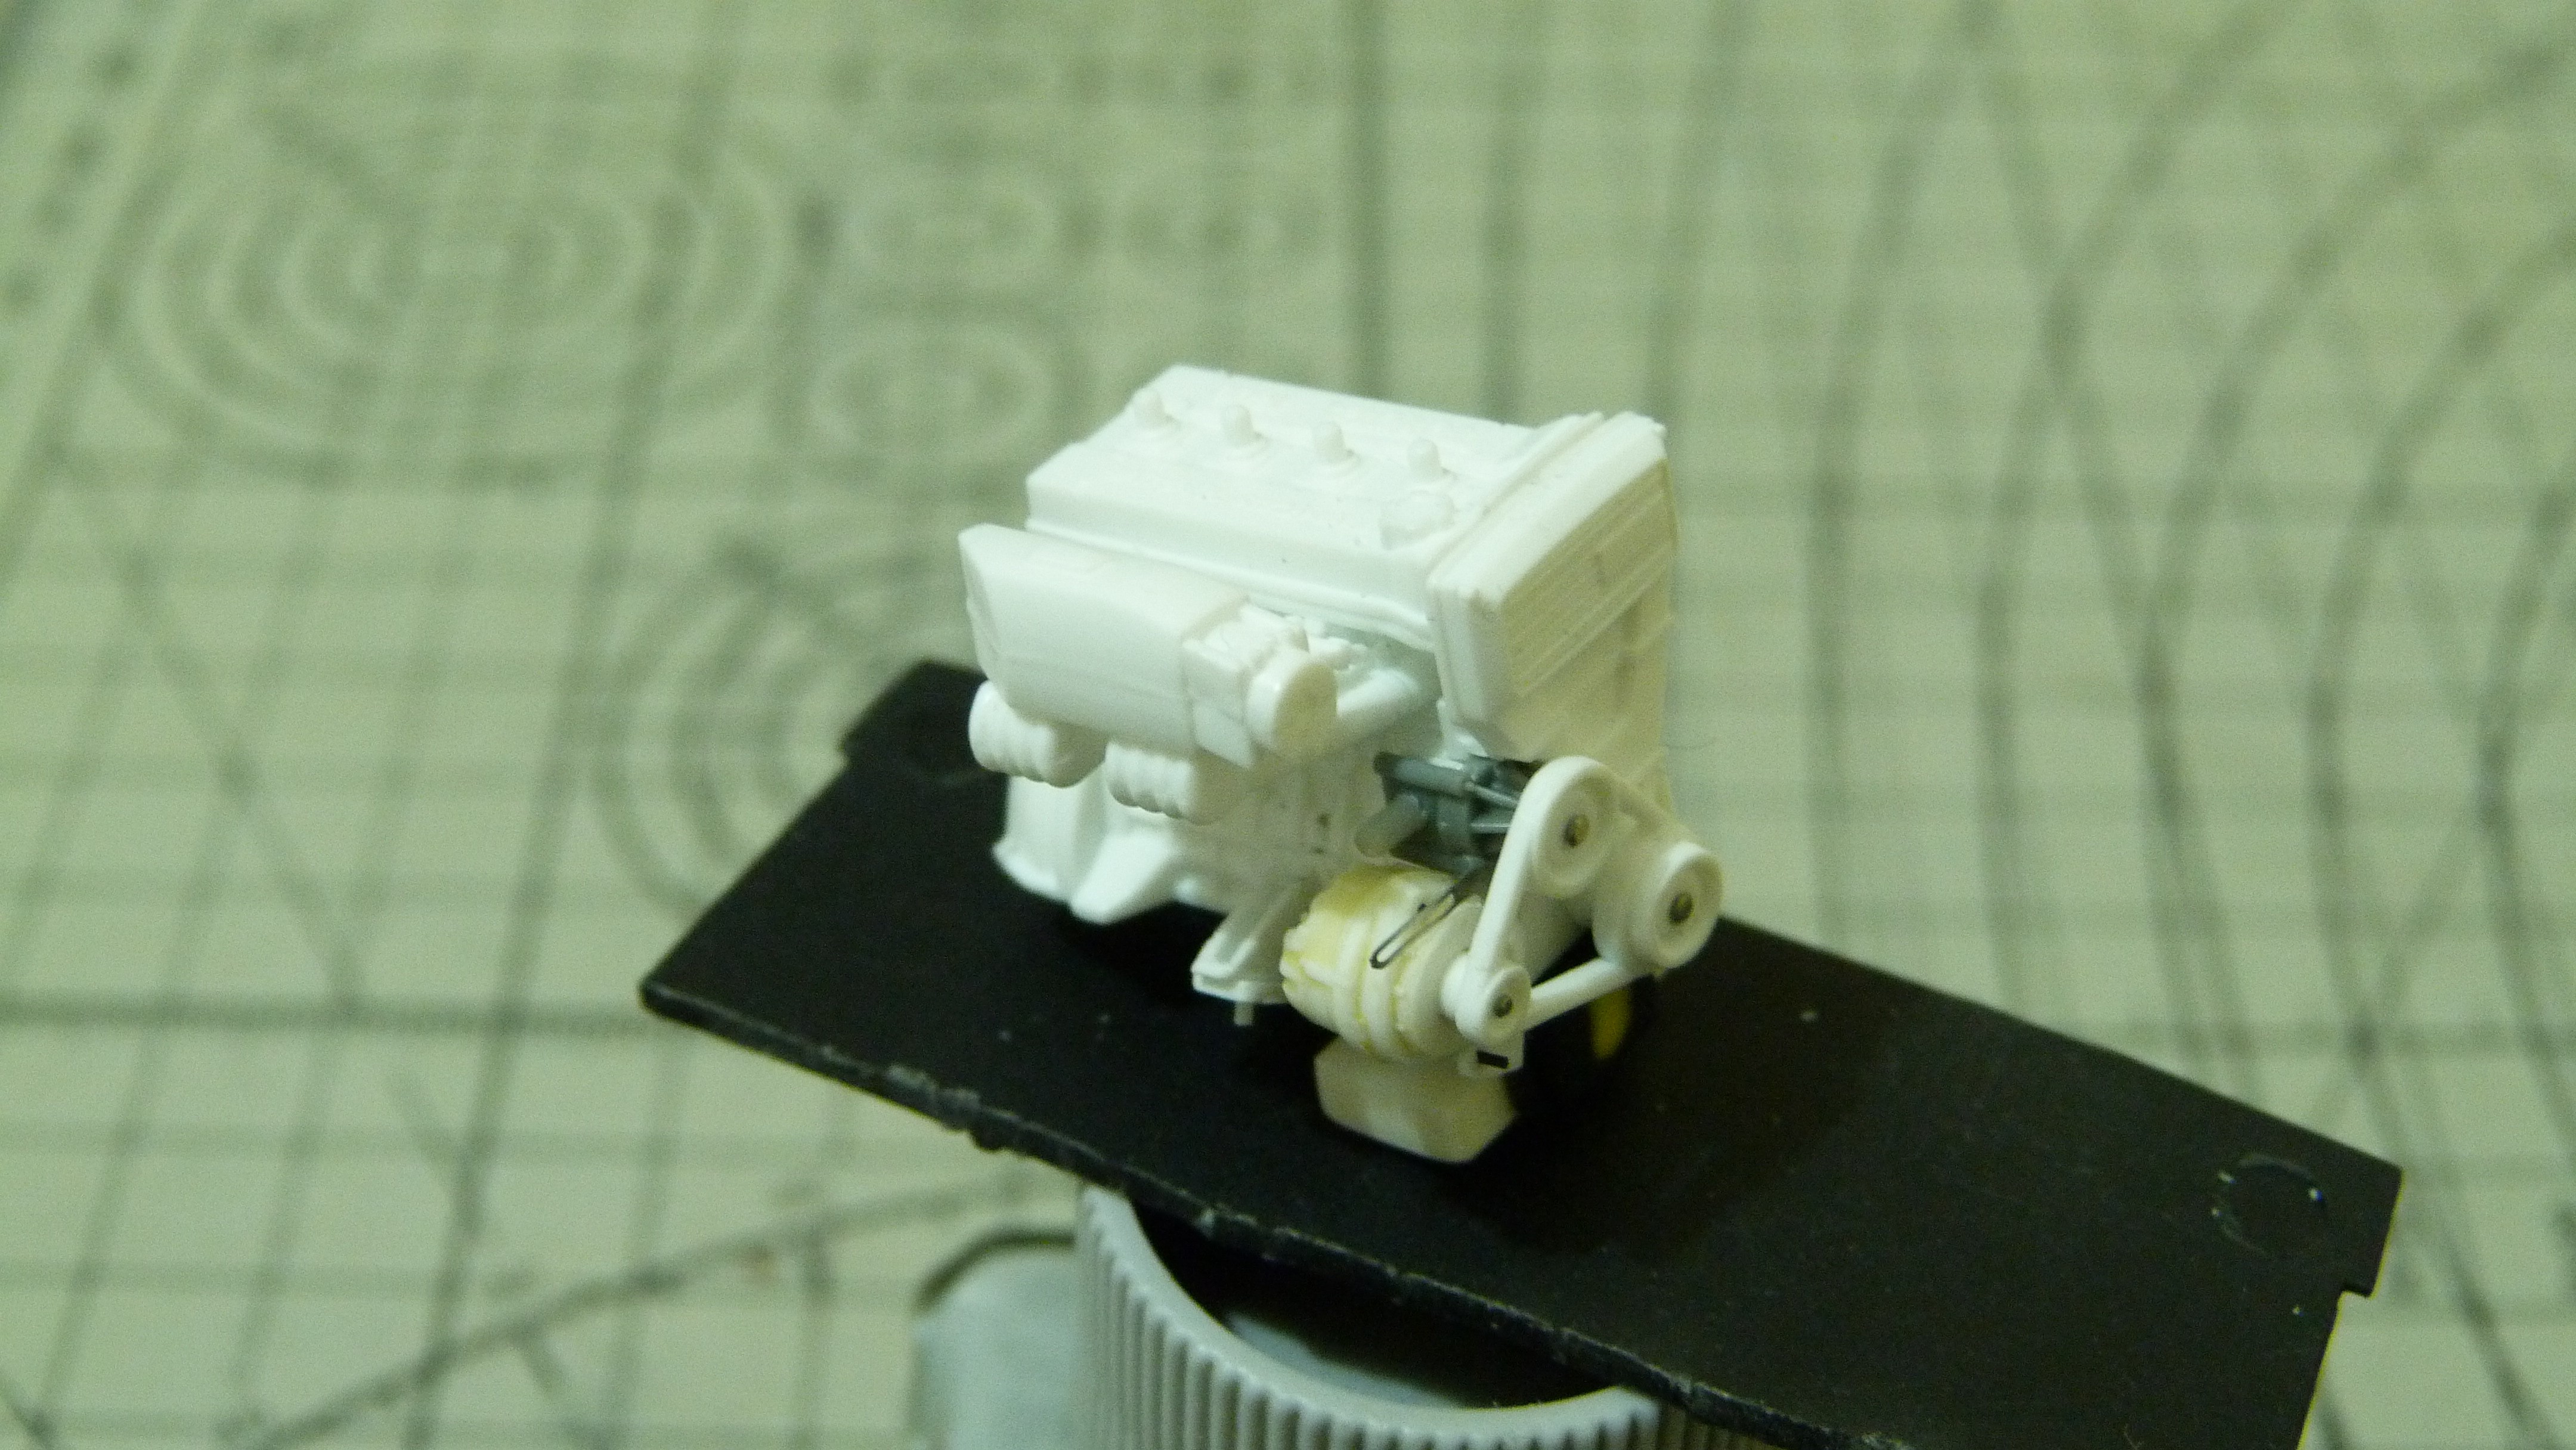
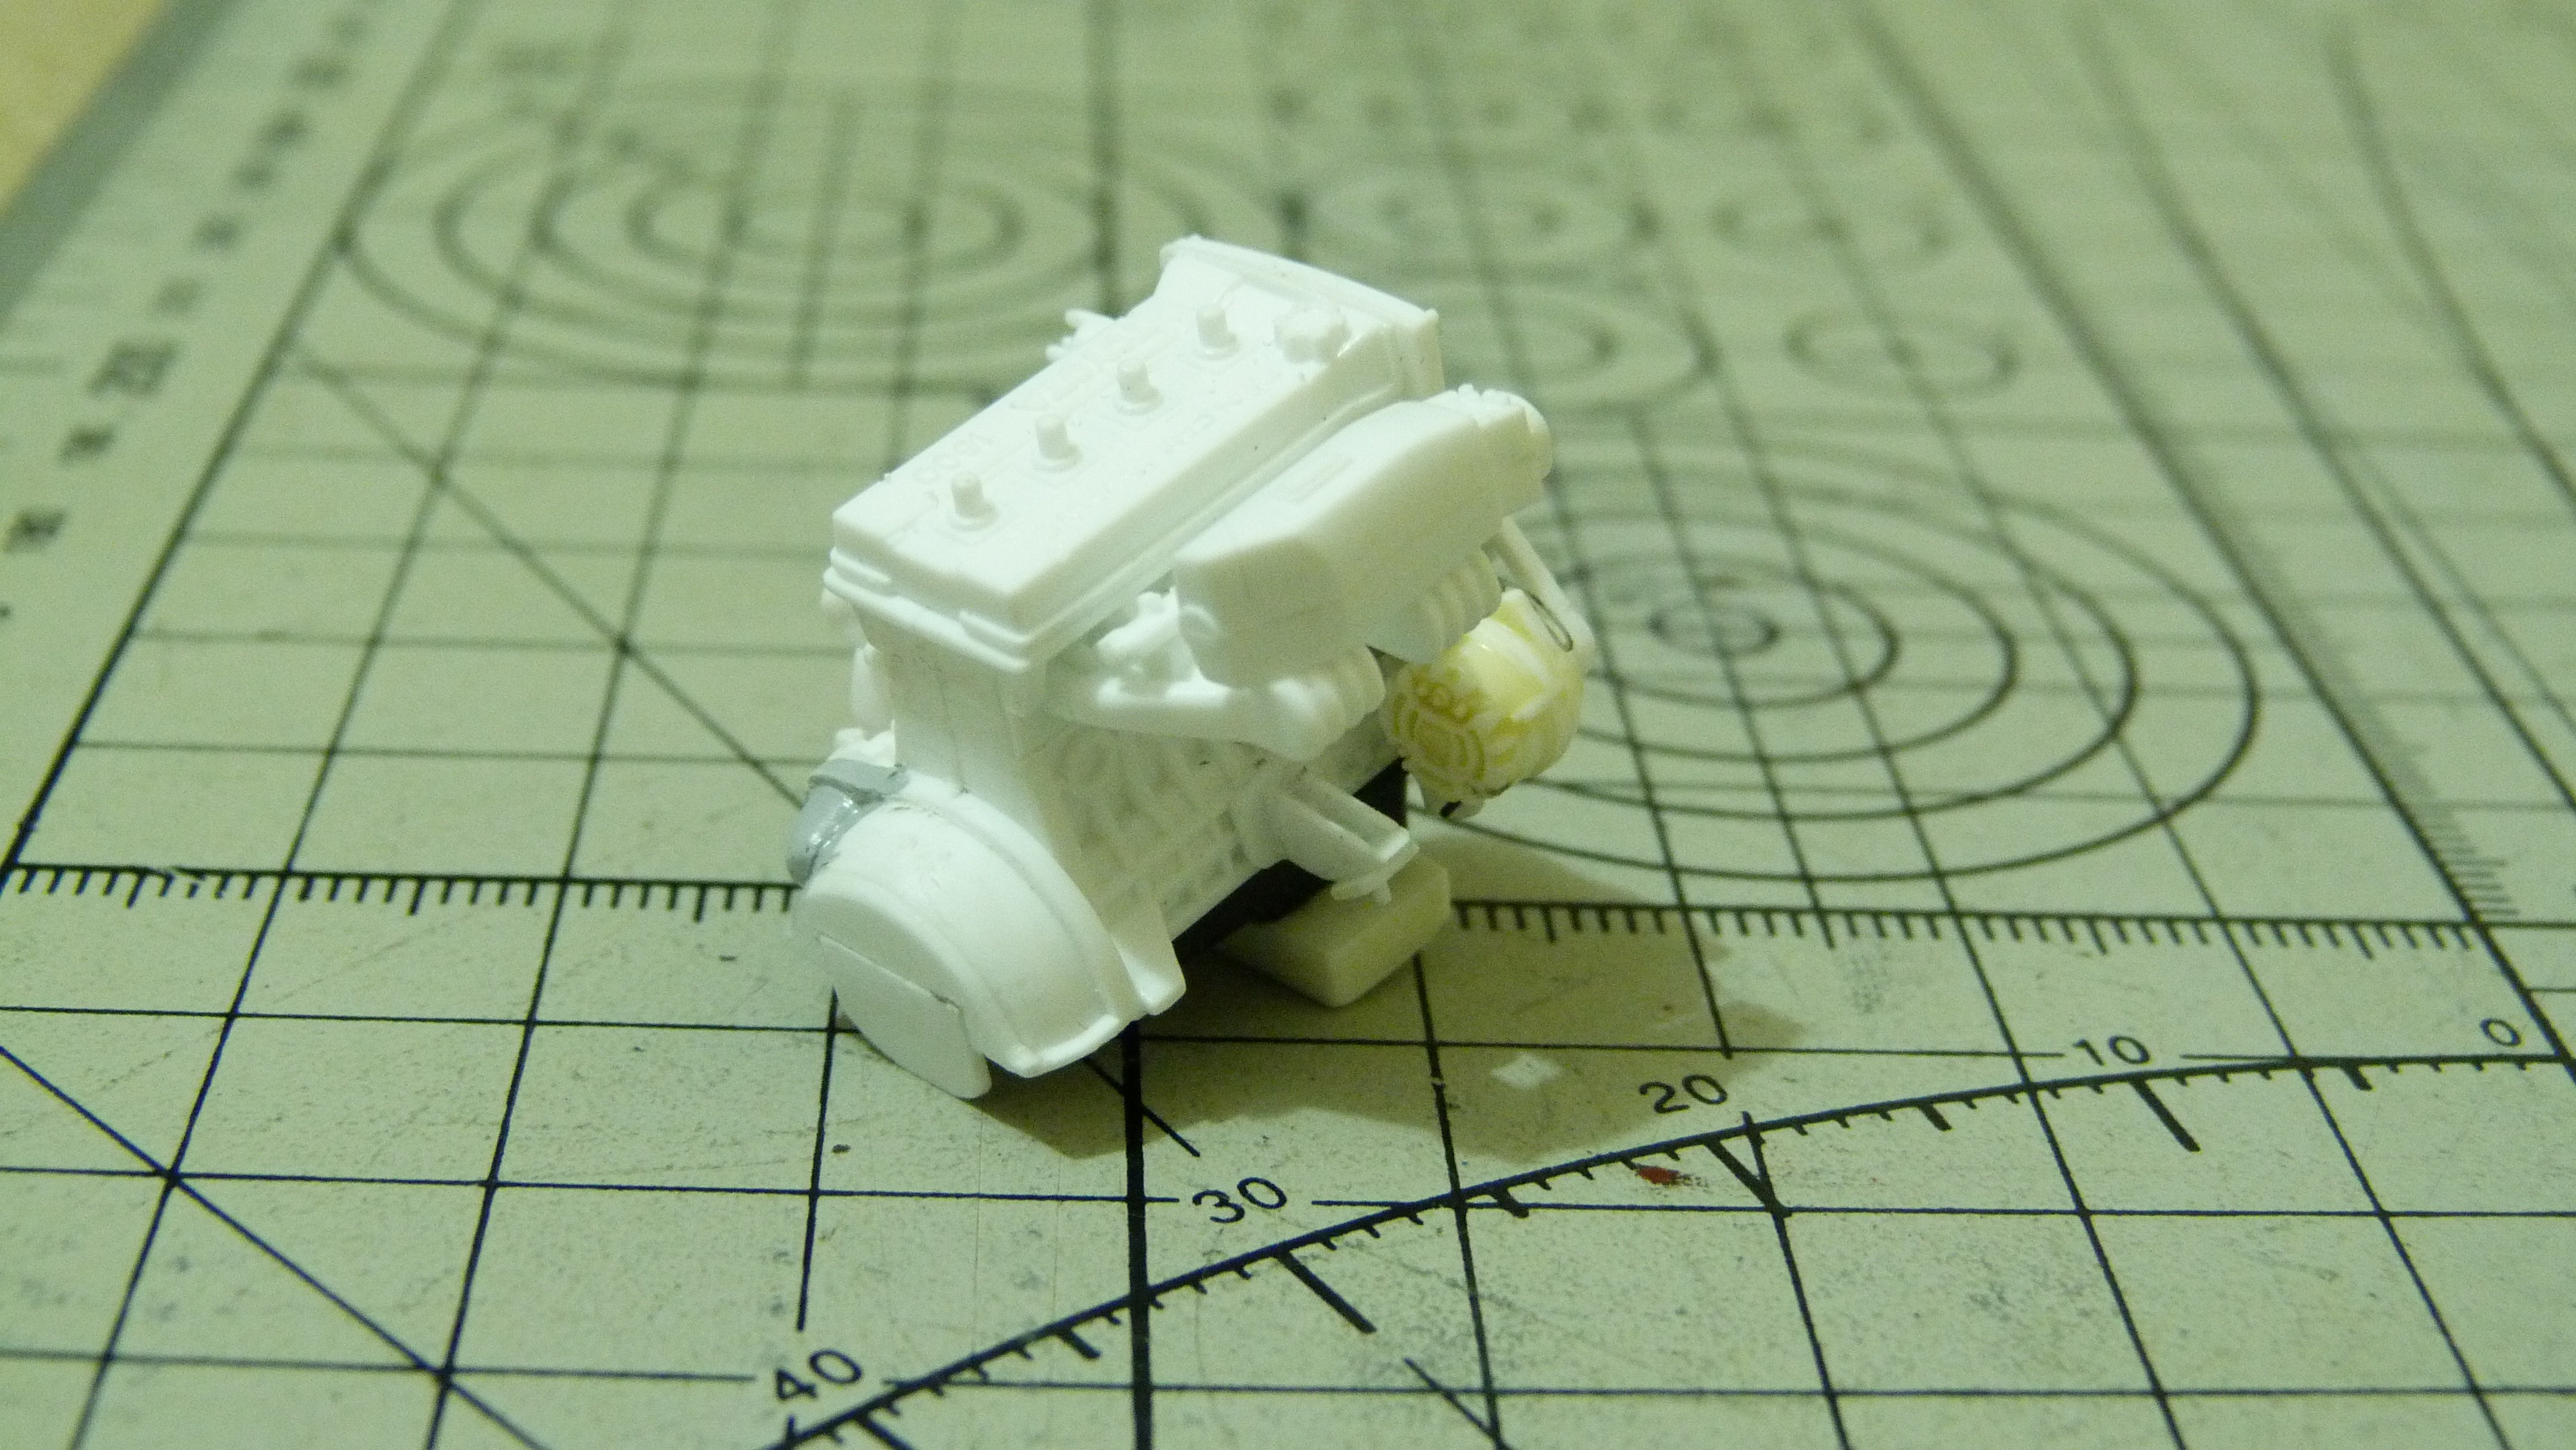
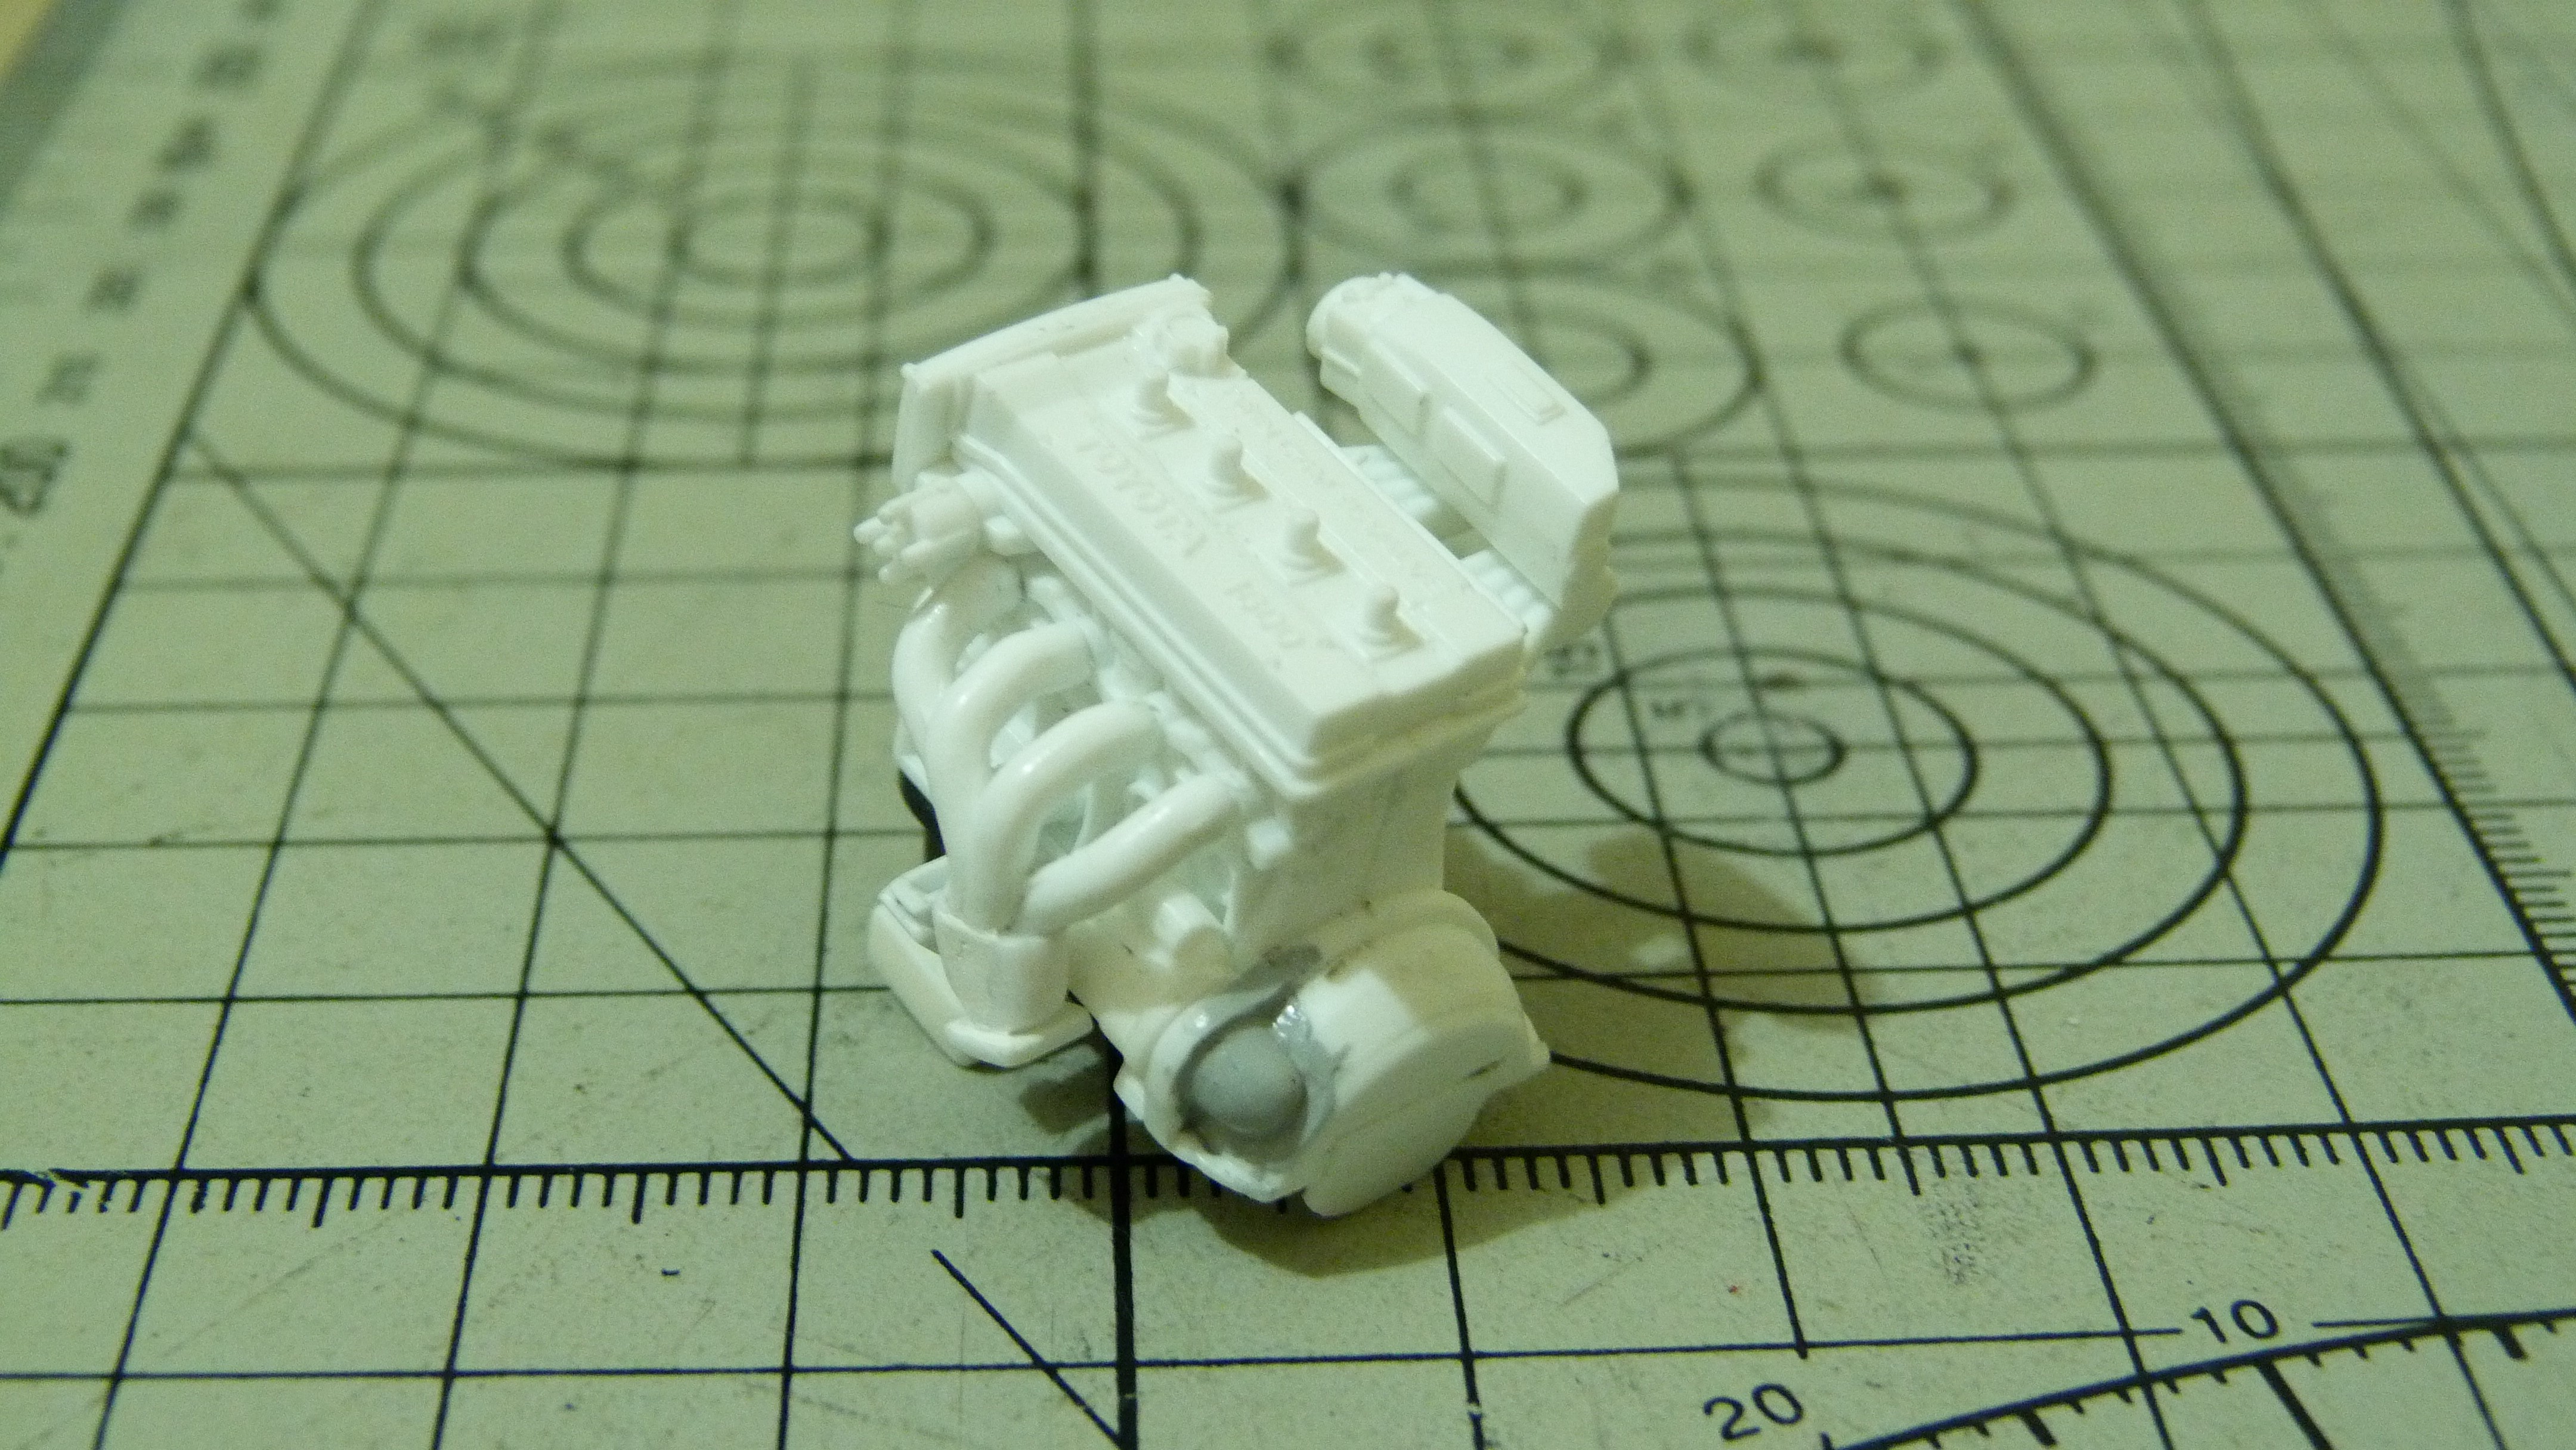
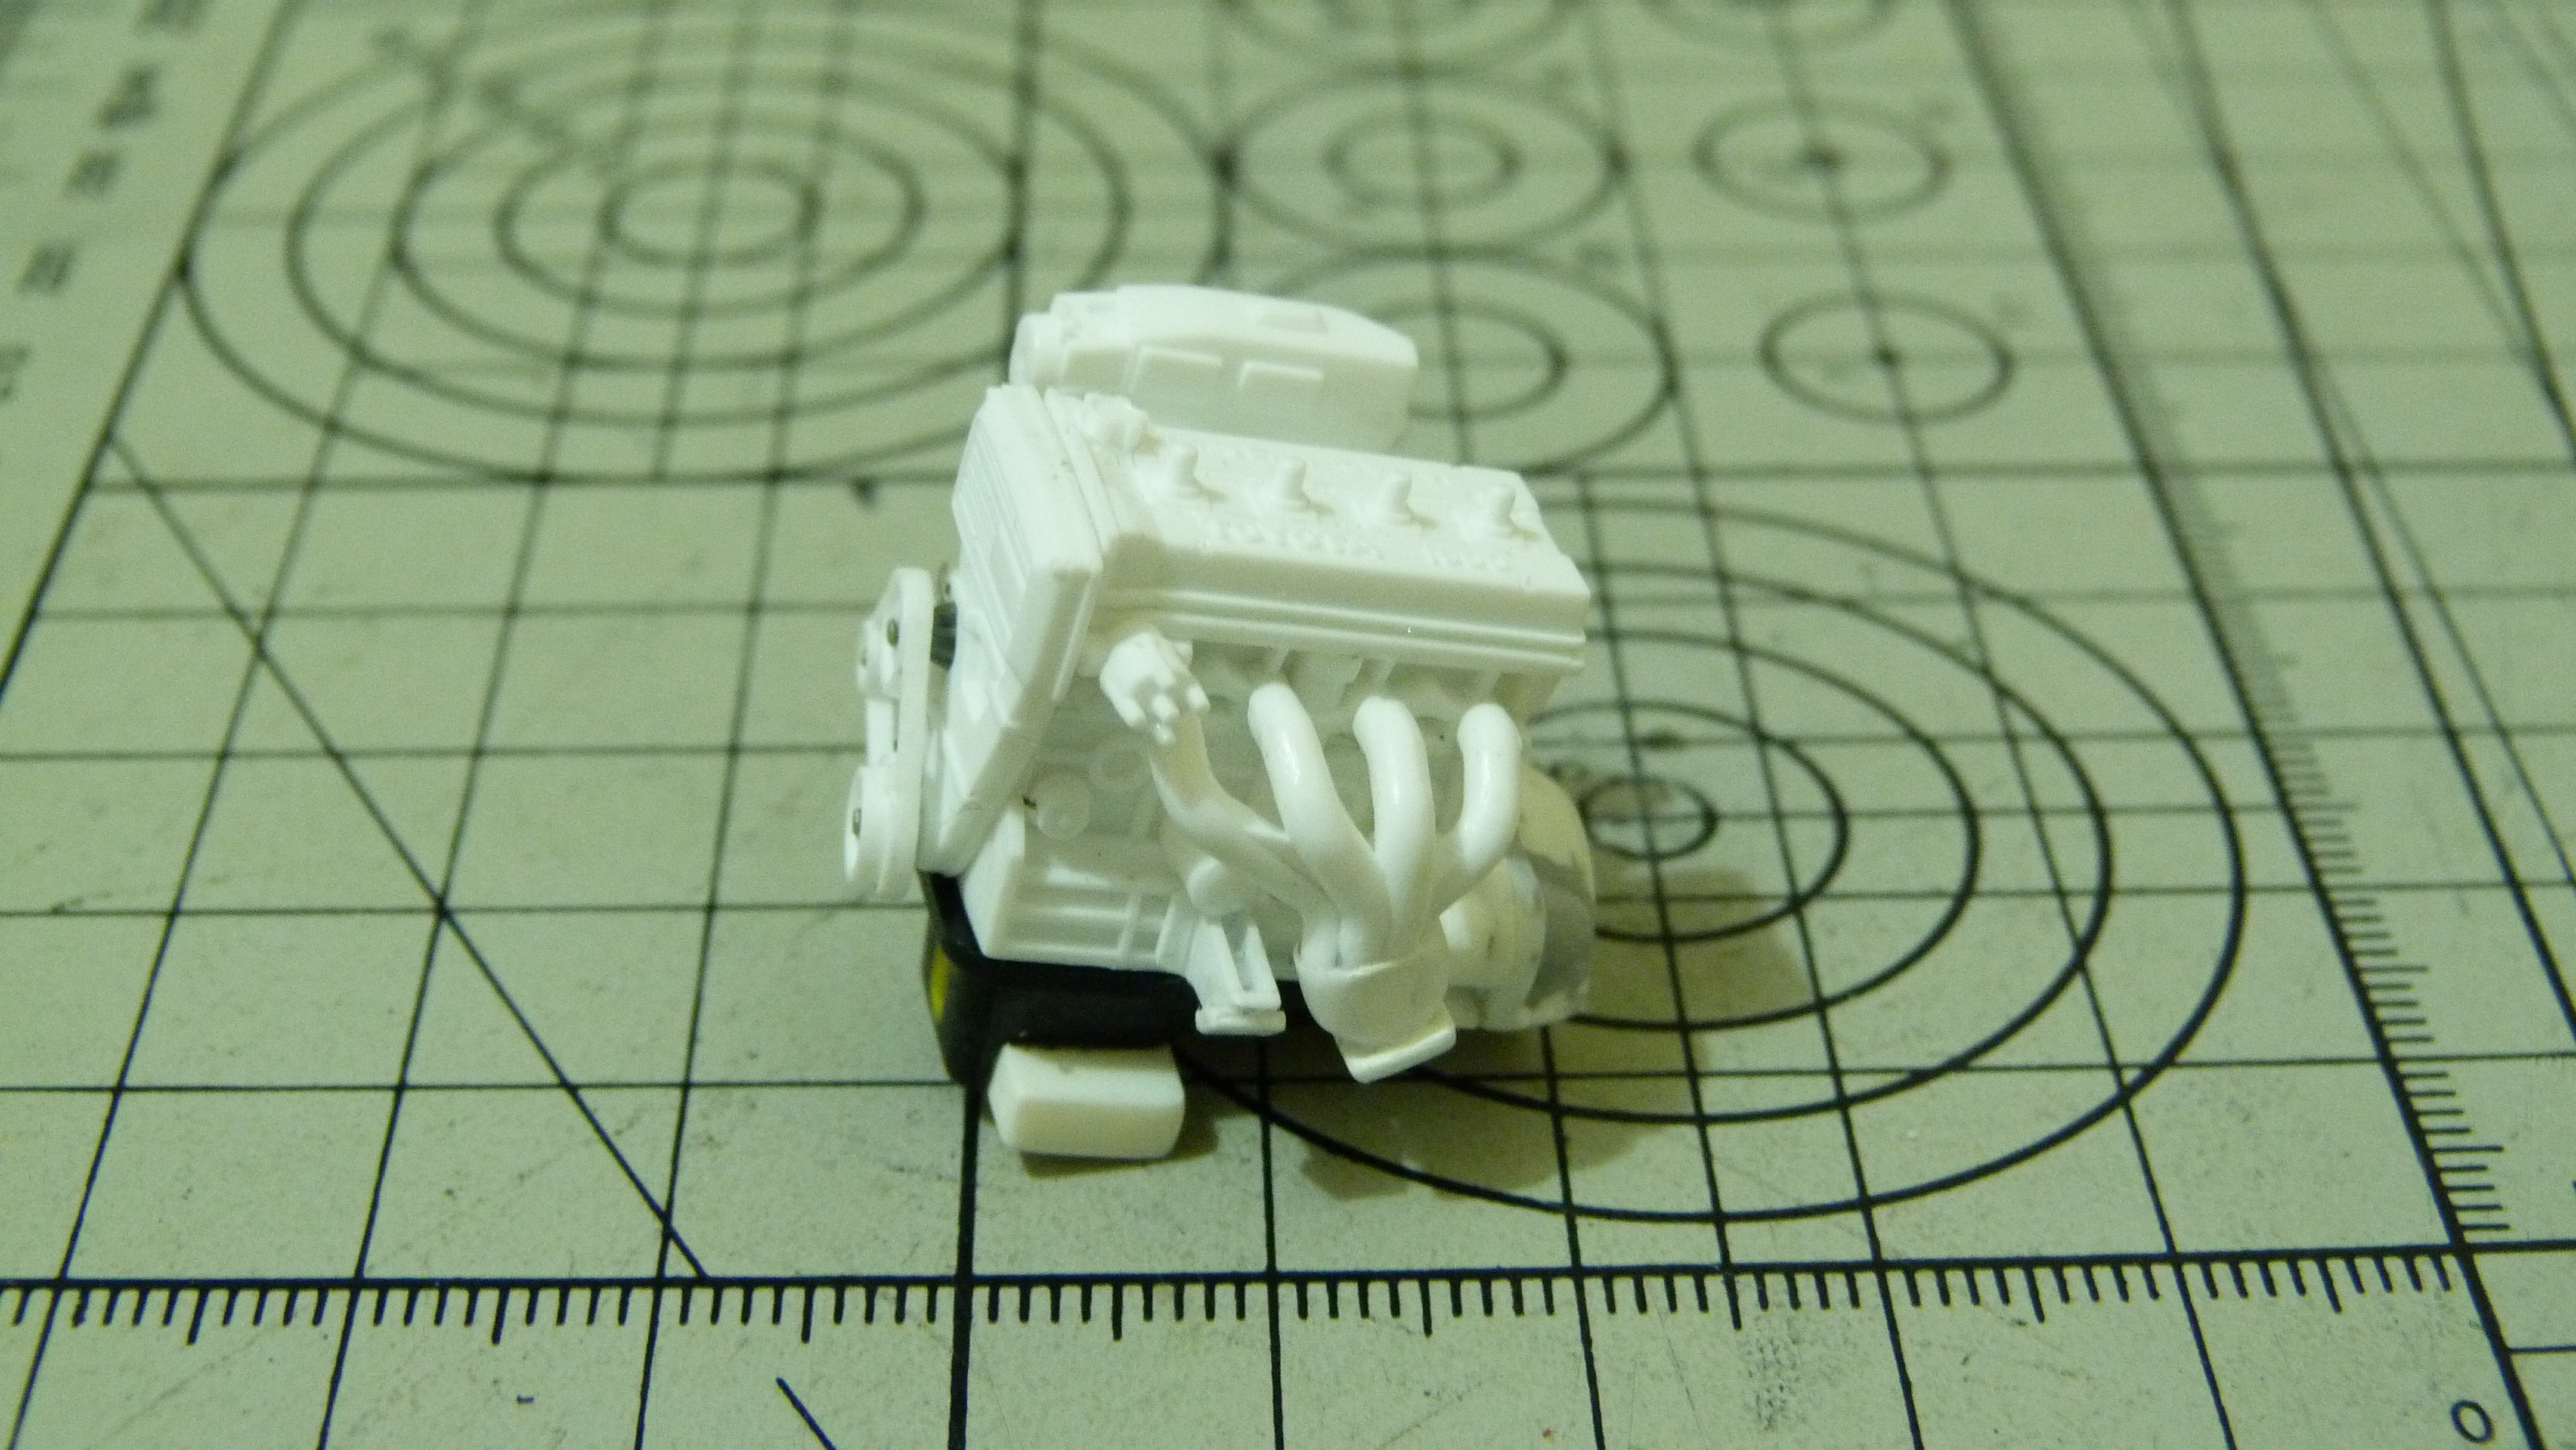
I had to remove the oil pan to modify it but in doing so I had taken away the one main way of mounting the engine so I had to come up with a way to keep the engine in place when I was to later make the proper engine mounts and other engine parts. I came up with a way by putting a tab on the back of the engine and then filling the top of the bell housing with epoxie sculpt and while the epoxie sculpt was still wet I pressed the engine tab in and then gently removed it leaving a nice slot that the tab sits in to hold the engine in place. So from there I moved on to the engine. Here is the kit engine and all it's parts. Although it's well detailed, the kit doesn't come with an alternator or starter motor.
By this stage I had already removed the extra unwanted belts and pulleys and added an alternator from the spares box. Of course the alternator needs a mounting bracket. The water pump was molded as a generic cylinder on the right side of the engine block. I found a small water pump in the spares box and made it fit. I put winged section on the oil pan.
Everything nicely in place
Another update soon.
Cheers ShawnS
|
|
|
|
Post by afx on Aug 9, 2021 3:24:45 GMT -8
Very nice work Shawn. I always enjoy your projects.
|
|
|
|
Post by arcticwolf on Aug 9, 2021 5:16:47 GMT -8
That's taking the kit to a whole new level, I love it!
|
|
|
|
Post by Joel_W on Aug 9, 2021 5:39:11 GMT -8
Shawn.
what a great idea on how to create a fire wall or any multi curved surface. I've always struggled with just getting close after numerous tries. But your multi pc method should make it just somewhat easier.
Excellent detailing on the engine as you're just making it come to life.
joel
|
|
|
|
Post by ShawnS on Aug 10, 2021 3:26:14 GMT -8
Thanks guys.
Does anyone know of an aftermarket source for detailed alternators? I don't have any good ones left in my spares box and I was wondering as 3d printing is getting more the industry standard does anyone do anything other than carbs and turbos?
|
|
|
|
Post by arcticwolf on Aug 10, 2021 11:18:29 GMT -8
Thanks guys. Does anyone know of an aftermarket source for detailed alternators? I don't have any good ones left in my spares box and I was wondering as 3d printing is getting more the industry standard does anyone do anything other than carbs and turbos?
|
|