|
|
Post by Joel_W on Sept 2, 2021 5:05:19 GMT -8
Patrick,
Thanks so much for stopping by and checking out my progress to date.
Like you, I loved the gloss Black Lotus JPS paint schemes. So far I've built two of them, but the pin stripping is very time consuming, and certainly isn't the easiest decals to apply, but when finished it's a thing of beauty.
joel
|
|
|
|
Post by adrian29341 on Sept 9, 2021 9:08:25 GMT -8
This conversation is interesting, mainly because it never ceases to amaze me how many different methods guys use for each process in scale model building. I have always been lucky enough to receive compliments on my decaling due to the fact that I always have them under my final clear coat. I know the real race cars are almost 100% applied decals, but when you go to the size of a model I always loved the way BBR and other companies had there decals under the Clear/Top coat so perfectly. My method is simple as well - I literally soak in water for 30 seconds and lift out and let the decal sit for a minute on the backing. I place the decal as close to the final position as I can, and then I put my finger in the water and bring a drop over to the decal and touch it lightly which give enough lubrication to position the decal in it's final spot. I then press down on it with paper towel gently - roll from side to side, and when I lift up it is usually in perfect position with no bubbling or residue anywhere. I then hit it gently with Solvaset on a clean thin but wide brush. by the morning they are all settled perfectly into place in all the crevices etc.
Then I lay on 2 light coats of Future - no distilled water added to dilute - most guys advise that but I tried just staright undiluted Future once and found it worked much better that way. This creates a perfect covering for the final clear coats to adhere to - thus once done you have your decals under your top coat with no bumps or raises etc.
I think it sounds simple but that is my method and so far so good! (Doing my best Frank Caliendo doing John Madden) "And here's a guy that likes using Future as his clear coat!" I hear so much negative about Future it is amazing. And then I read stuff like this... lucky for me the MCW guys swear their paint doesn't need clear which I can believe based on the little I have used them... and the neon red is a matte finish which is how their neon shoots. So I don't have to worry about it... theoretically. I may shoot the blue, do the decals, then if it needs a clear coat, I will use MCW and then shoot the red. That is all dependent on the spoon test. I wish they made plastic tablespoons sizes. But to me, decaling in race cars is really really the frosting on the cake! A bad decal job can ruin the whole works! Patrick!!! You cracked me up at work - thank you sir  I literally laughed out loud at the Frank C. line as I am a huge fan and when I need a laugh I pull up one of his appearances on those obscure Buffalo News Channels where he has the hosts in stitches. Love the Madden "And here's a guy who shaves with a Razor" lol. |
|
|
|
Post by adrian29341 on Sept 9, 2021 9:28:42 GMT -8
I think this topic is one I love because decaling can be either a very enjoyable task or a pull your hair out by the roots experience.
I have always simplified my process despite hearing all kinds of different approaches - some involving all different kinds of setters etc.
I have always just relied on good ol' Solvaset as the only chemical in my process - not a bug fan of Micro to be honest - despite it's popularity in the hobby.
As to the other very controversial Topic of 'Future' I think it's incredibly interesting as well. So many modelers say they don't trust it - or that it is not a real
Modeling tool. They will give you a glare so to speak if you bring it up! To me this is just insane - what is a modeling tool anyway? If you are asking me it is any
damn thing I can think of or find inside or outside my house that I can use to improve the end result of my models.
I have always used Future as a top coat for decals, as well as dipping windshields in etc. to create the more realistic Glass look - this is because the future fills
in the small scratches on any plastic mold - which to me is just brilliant stuff - any Aircraft Modeler worth his salt uses it. I have always had nothing but success
with it despite hearing of others struggles - not sure what they are doing wrong but I moved to non diluted over diluting with distilled water and if applied lightly
in several coats it works fantastically.
**Let me be perfectly clear though, I don't use it as my Clear coat. Although I have experimented with a number of different methods I have recently settled on Mr. Super Clear UV Cut. I kind of stumbled on my method by accident, and it may sound very simple to a lot of modelers here, but I love the end result so I continue to use it. I apply about 5 or 6 coats of MSC and then the final coat is babysat for about an hour after application to make sure it's as even as I can get it. Then after drying for 2 days I hand speed buff the entire thing - which is an exercise in elbow grease no doubt - but it just makes the MSC shine like crazy - like glass - and it's always over top of the decals - for me that an essential look.
|
|
|
|
Post by adrian29341 on Sept 9, 2021 9:33:19 GMT -8
Adrian, Your decaling procedures are also much simpler then mine. Your results certainly speak for themselves. So on my next build I'm going to simplify my method as you and Chris have certainly opened my eyes. Joel Joel your decaling looks fantastic! Despite what a lot of fans think of this paint scheme I actually love it. You have always achieved excellent decal results and I honestly wouldn't mess with your technique unless you really want to experiment. My method is very simple but effective which is why I have stuck to it. This British beauty is looking stunning and I can't wait to see the final model Joel! |
|
|
|
Post by Joel_W on Sept 9, 2021 9:43:17 GMT -8
Had a few decals to apply today, so I experimented with less solutions/steps. I diluted Micro Set 1:3 with water and a few drops of Dawn dishwashing liquid that I applied to the model surface. After the decal was applied and positioned I lightly brushed on Micro Set and when almost dry lightly rolled a Qtip over it, skipped the Micro Sol, and went directly to the Solvaset. Set it do it's thing and when almost dry I also lightly rolled it with a Qtip. Looked great without a wrinkle to be seen once it dried.
Less solutions, and a lot less rolling the decal with a Qtip. The results speak for themselves.
Joel
|
|
|
|
Post by pnance26 on Sept 9, 2021 11:09:13 GMT -8
(Doing my best Frank Caliendo doing John Madden) "And here's a guy that likes using Future as his clear coat!" I hear so much negative about Future it is amazing. And then I read stuff like this... lucky for me the MCW guys swear their paint doesn't need clear which I can believe based on the little I have used them... and the neon red is a matte finish which is how their neon shoots. So I don't have to worry about it... theoretically. I may shoot the blue, do the decals, then if it needs a clear coat, I will use MCW and then shoot the red. That is all dependent on the spoon test. I wish they made plastic tablespoons sizes. But to me, decaling in race cars is really really the frosting on the cake! A bad decal job can ruin the whole works! Patrick!!! You cracked me up at work - thank you sir I literally laughed out loud at the Frank C. line as I am a huge fan and when I need a laugh I pull up one of his appearances on those obscure Buffalo News Channels where he has the hosts in stitches. Love the Madden "And here's a guy who shaves with a Razor" lol. "And these guys are linemen and you can tell because they've got dirt on their shirts and that's one way to tell a lineman has gotten dirty doing his job because he has to get down in the dirt. That's why they call them linemen, I think... but that's how to tell they got dirty because there is dirt on their shirts..." You can also see a lot of Frank Caliendo clips on YouTube. His extended interviews with Dan Patrick are always funny. Also he does one of the best Morgan Freeman voices around... |
|
|
|
Post by Joel_W on Sept 14, 2021 16:42:06 GMT -8
I finally managed to finish the basic engine. Modeling time at the bench these last few weeks hasn't been much if any at all for days at a time. Eventually, I found enough time to complete the basic engine assembly. Tamiya did their usual excellent job of molding the Ford Cosworth DFV 3 liter V8 engine. It's the same basic engine that they've used in several of their other 1/20 F1 kits that used this engine. All the various parts were primed in my custom Tamiya Gray/White Primer mix, when dry I air brushed the various parts with Alcad Matt Aluminum. The cast Aluminum supports for the fuel injection intakes and trumpets were air brushed with Alcad Dark Aluminum, but just doesn't show up as a darker shade then the block in the pictures compared to up close and personal. The next day I gave the entire engine a careful wash with Tamiya Black panel line wash, when dry I wiped off the excess so that there was a visible variation in the tone of the Aluminum block. The two twin cam covers were air brushed Matt Black, then I picked out all the nuts and bolts with silver applied with a toothpick. I lost count of how many times I had to clean off a miss and start over again. Good thing I used Ammo by Mig Acrylic paint. No matter how many times I tried to paint the Ford name on the covers, I just couldn't see it well enough even with a #5 Optivisor, so after a good 6 attempts I just gave up. I've got several pictures with the White Ford raised lettering being just about worn off, but that's on a race engine, not a display engine. I'm taking a modeler's mulligan on this one.  The kit comes with just enough black ignition wiring to get the job done, but no clear fuel lines. The thinnest clear solid tubing I had was an old MFH pack I bought several years ago. It's super soft so as not to put up a fight for a change trying to feed each line into position and stay there. What I totally forgot about was the two trays that had the intake Trumpets molded into them. The trays are where the mesh intake covers attach to through the engine cover. I had put them is a storage bin so that I wouldn't loose them, but then I totally forgot about them till after I finished the engine sub-assembly. Good thing I've still got the gearbox and rear suspension to build and paint. Here's a few pictures of where the engine build is presently at. joel 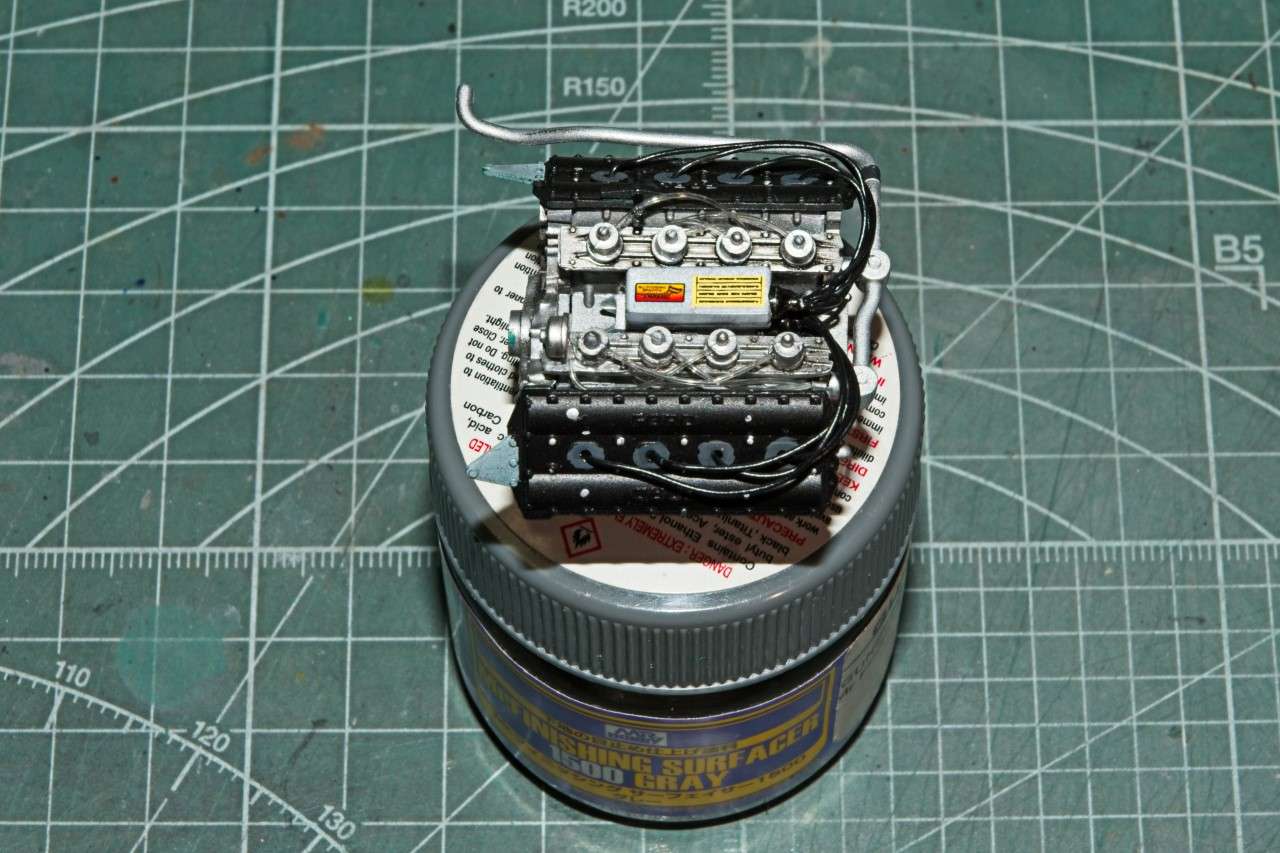 ![]()   |
|
|
|
Post by pnance26 on Sept 15, 2021 16:21:14 GMT -8
That's the 1/20th scale engine build? Looks as good as any 1/12th scale I've ever seen!
|
|
|
|
Post by Joel_W on Sept 15, 2021 16:38:08 GMT -8
Patrick,
Thanks for stopping by, it's much appreciated. But it doesn't hold a candle to your 1/12 engines by any means.
Joel
|
|
|
|
Post by Joel_W on Sept 29, 2021 11:53:47 GMT -8
Finally time for the next update. Unfortunately, family medical issues just keep on getting worse, and modeling time has decreased proportionally. My wife will be getting hip surgery to replace one hip as there’s no other options left. And my brother in law fell down the steps and broke his ankle in 3 places, so he’s going to need surgery to repair the ankle as soon as the swelling goes down. I’ve been concentrating on the Transaxle/rear suspension which I finally finished yesterday. The Transaxle, and rear brakes were painted with 6 different Alcad 2 colors. I can now cleanout my air brush and apply the next color in just a few mins time. Rather then going through what colors were applied to what areas, here’s a few pictures with the transaxle/rear suspension try fitted to the Ford Cosworth engine so you can judge for yourself the effectiveness of the various Alcad 2 Metallics. I’ve applied a Black panel line wash to the casing and brakes, then highlighted the raised areas of the gearbox with a lighter shade of Aluminum. Joel  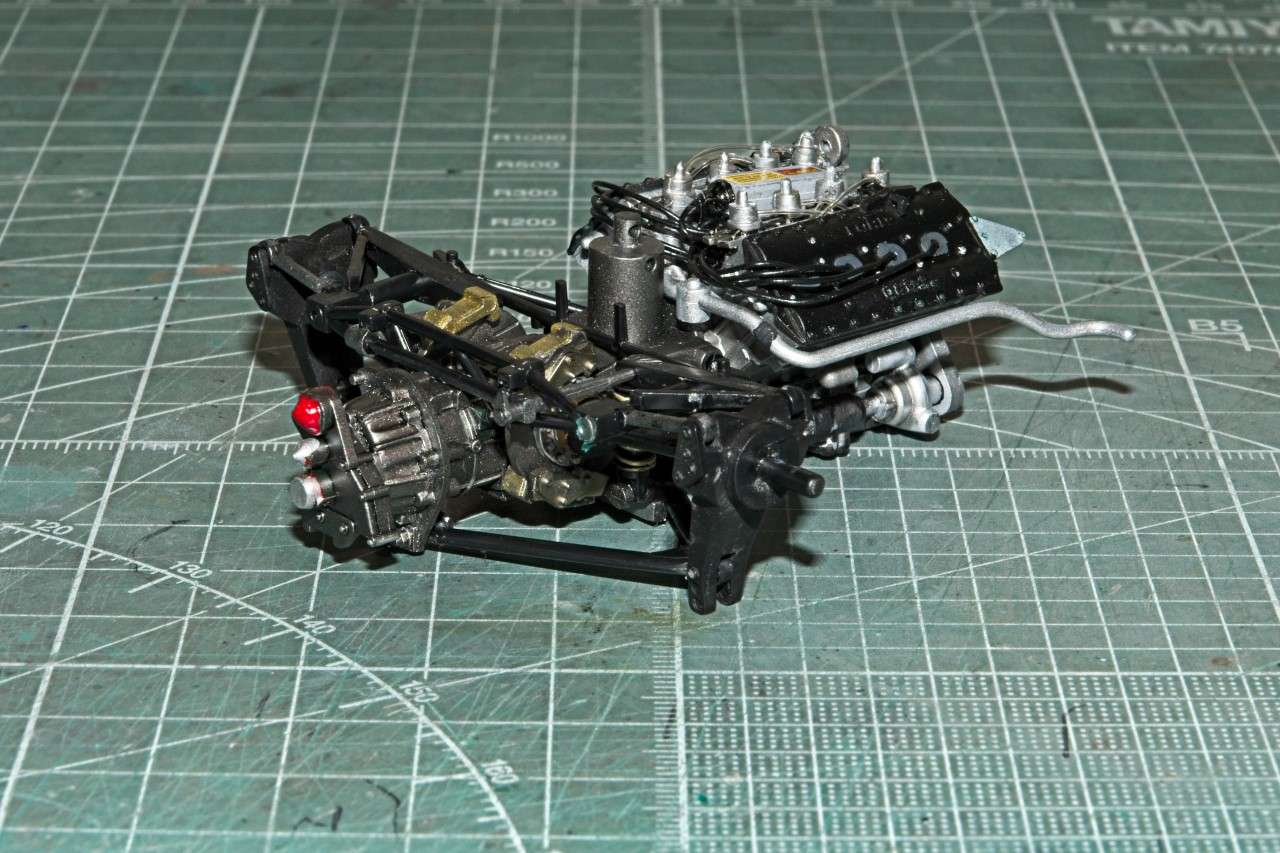  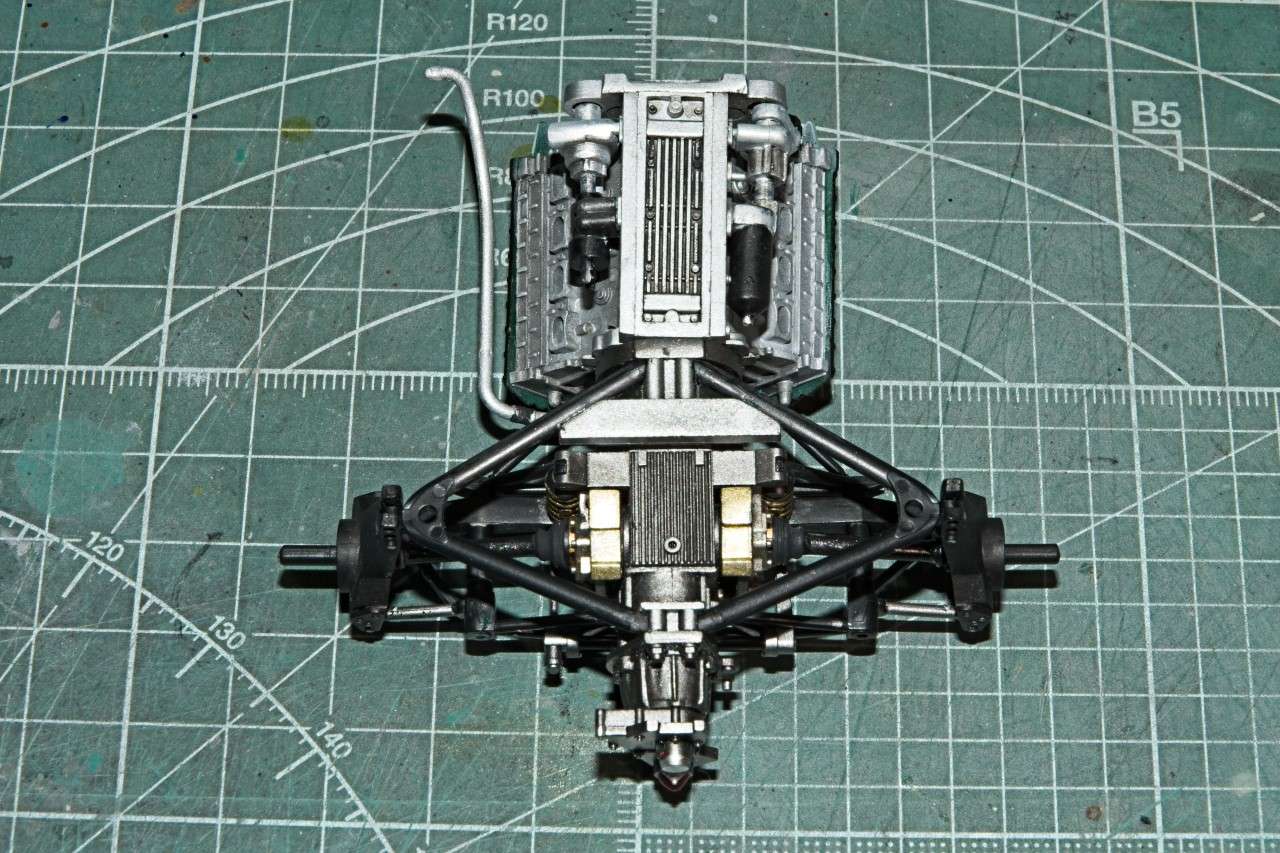 |
|
|
|
Post by Ben_B on Sept 30, 2021 1:38:15 GMT -8
Wow, Joel, that's looking really good!
Ben
|
|
|
|
Post by arcticwolf on Sept 30, 2021 5:25:07 GMT -8
Turned out very nice Joel.
Sorry to hear about the medical issues, hopefully they can get fixed up as soon as possible.
|
|
|
|
Post by Joel_W on Sept 30, 2021 7:20:07 GMT -8
Ben & Paul,
Thanks guys for stopping by and checking out my progress to date. It's greatly appreciated. Tamiya really should get an award for this kit, the engine/transaxle/rear suspension is super detailed, yet every single peace fit like a fine leather glove. Not exactly what I was expecting.
joel
|
|
|
|
Post by chrissmith on Oct 4, 2021 20:42:44 GMT -8
Looking good Joel!! Hope your wife gets up and about sooner than later. Hip replacement is no joke, lots of rehab in the future for you both.
Stay strong and positive it will help you both
|
|
|
|
Post by Joel_W on Oct 5, 2021 8:48:36 GMT -8
Chris,
Thanks for your thumbs up on the Lotus 79. So far so good.
I'm more worried then my wife is about the surgery, by her way of thinking, right now being basically not able to do much of anything, she's looking forward to it and the rehab to get her life back.
joel
|
|


 I literally laughed out loud at the Frank C. line as I am a huge fan and when I need a laugh I pull up one of his appearances on those obscure Buffalo News Channels where he has the hosts in stitches. Love the Madden "And here's a guy who shaves with a Razor" lol.

