|
|
Post by Art on Dec 26, 2017 9:35:58 GMT -8
It's looking really good, Chris! Impressive!
|
|
|
|
Post by Patrick on Dec 27, 2017 15:12:53 GMT -8
Bravo!
Gato
|
|
|
|
Post by shunter on Jan 18, 2018 1:19:05 GMT -8
This looks great, excellent work.
|
|
|
|
Post by Chris K. Hale on Jan 22, 2018 8:03:32 GMT -8
Five steps forward and Three Back.. I went to check fit the Radiator I made and it wouldnt fit due to un-used body work in side the nose, so I get the dremel grinder and open it up, nothing that shouldnt have been there anyway, but then it doesnt go in far enough so I cut the radiator down with the dremel, having used 4 layers of photoetch, it go well so....today make New Radiator and chassis mounts... AAAAARRRRGGGGGHHHHH>>>
|
|
|
|
Post by Patrick on Jan 23, 2018 11:57:08 GMT -8
Damn! That's the part I hate! We do great visualization on how things "should" fit together and then this happens! Don't we love scratch-bashing?  You'll overcome this little step back (By the way, your "3 steps forward" words are from Comrade Lenin! LOL!!) Love ya Baby Bro! Gato |
|
|
|
Post by Chris K. Hale on Feb 6, 2018 12:07:15 GMT -8
|
|
|
|
Post by vintagerpm on Feb 6, 2018 14:17:06 GMT -8
That is really looking good, Chris.
Mike
|
|
|
|
Post by afx on Feb 6, 2018 17:03:38 GMT -8
Coming along nicely.
|
|
|
|
Post by Chris K. Hale on Mar 4, 2018 10:35:57 GMT -8
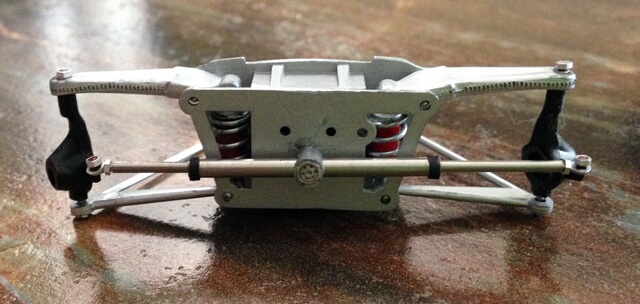
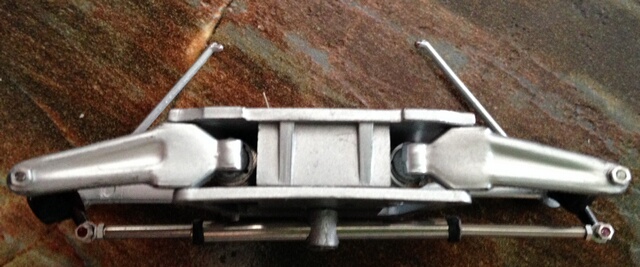
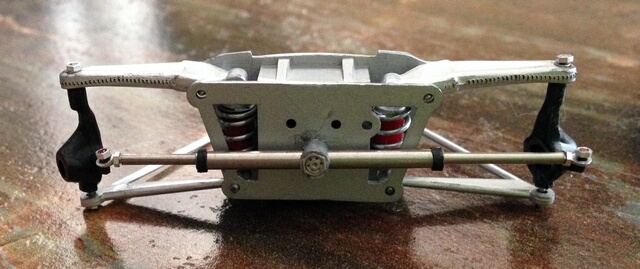
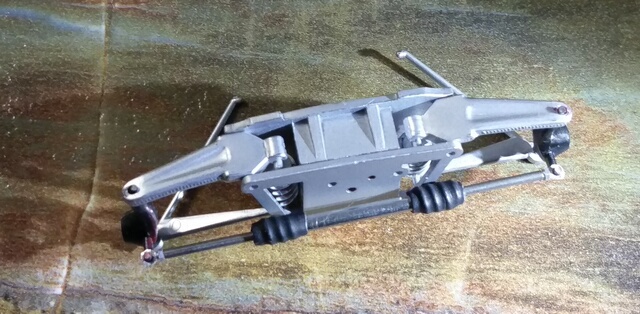
 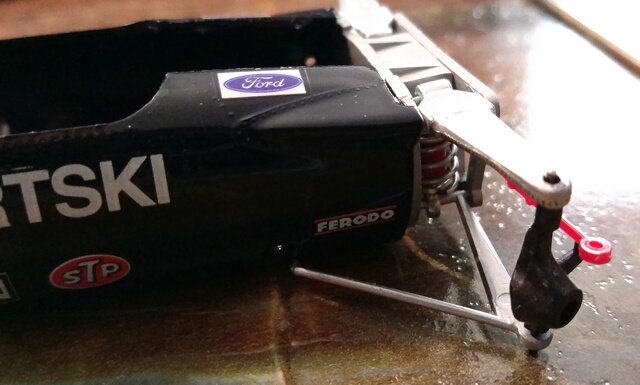 Well I suppose a few felt I had abandoned the project, but actually I have been very busy, I had to find or make the coil over springs for the shocks after trying to make them for a couple of weeks I final went to the Local Hardware stores and started the search... I ended up at Ace Hardware and bought several packages of small 3/16 and 1/4 springs. Then the work to make the shocks started I cut down the springs , several springs and finally got a set of front and rear coil over shocks that looked right.. Of course when working with a kit made in 1968 things break , like the upper and lower spindle mounts, that meant I had to drill them out cut stainless wire and fiddle with them until they would accept a nut on them. next the rack and pinion had to be tossed and made, The R&B rod ends were had a hole too small in the appropriate size so I had to drill them out, next was the challenge of fitting the rod end into a small stainless steel surgical tubing of the right size.. meaning I had to hand reduce the diameter of the stem on the rod end.. done, next I had to thin the end of it so it had a lower profile when attached to the spindle making it more realistic when the very thin cnc nuts are added .....done! currently I am cutting stainless tubing for the rack and pinion and attach it to the front end to complete the steering gear... so not many posts but an hour or two a day of making parts for weeks.. not to mention a couple of shock ends flying into the gravel outside while painting the..lost forever. Made new pieces and Yoli ordered a portable paint booth so I can spray future parts inside my outside shop!!! The small spindly stuff is a real pain but a little perseverance and attention to detail goes a long way, Work goes on with the end in sight.. Chris Ps. notuce the Archer decal weld lines on the upper A-arms.. |
|
|
|
Post by Patrick on Mar 6, 2018 10:55:04 GMT -8
Excellent Baby Bro!!
|
|
|
|
Post by Chris K. Hale on Mar 7, 2018 10:27:28 GMT -8
  Yesterday I made the basic rack and pinion, just need to make the center steering box and mounts.. I made the boots using shrink tubing and a metal screw! the center and ends are stainless surgical tubing and R&B rods ends. I had to thin the rod ends to allow for nuts on the spindles.. work goes on daily... Thanks for all the comments, they provide motivation and are appreciated.. Chris |
|
|
|
Post by dustymojave on Mar 10, 2018 0:48:21 GMT -8
Will the new steering still allow posability? Or will the wheels be locked in straight-ahead mode? The boots came out pretty good! I've seen a modeler use the boots/seals for weather-proof automotive electrical connectors. But they would tend to be short for this application.
|
|
|
|
Post by Chris K. Hale on Mar 11, 2018 9:57:23 GMT -8
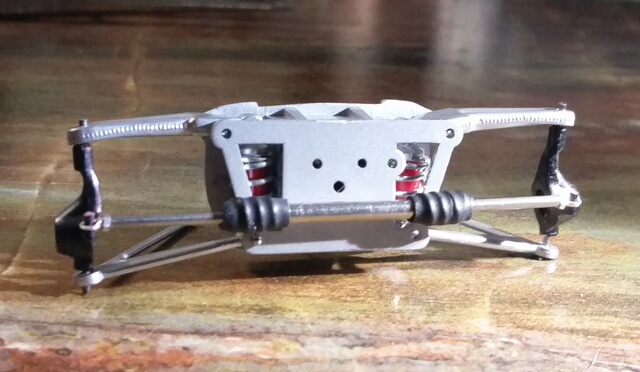
I finally found a photo showing the boots/seals on the rack and pinion and they didnt have boots, they had seals so I removed the boots and made seals, I also made the steering box and re-thought the rack with the idea of making the wheels posable and not fixed, Thanks Richard for your comments.. when I put the nuts on the spindles this may change but I have a few options to make it work.. pics to come as always. Chris
|
|
|
|
Post by 4wheels on Mar 11, 2018 11:23:29 GMT -8
Been following this one, it's looking super, Chris!
Brian
|
|
|
|
Post by Chris K. Hale on Mar 15, 2018 19:51:00 GMT -8
|
|


 Pro Tech | MAD | Scale Motorsport


 You'll overcome this little step back (By the way, your "3 steps forward" words are from Comrade Lenin! LOL!!) Love ya Baby Bro!
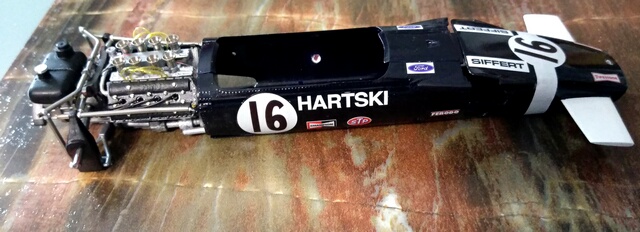
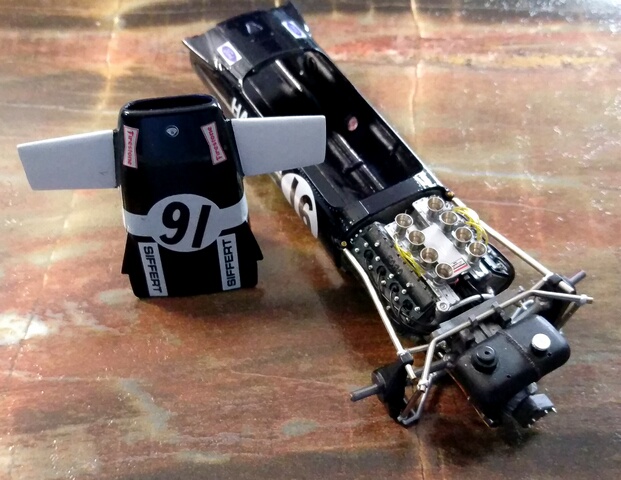
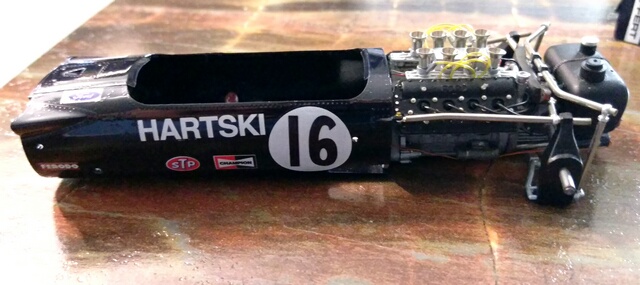
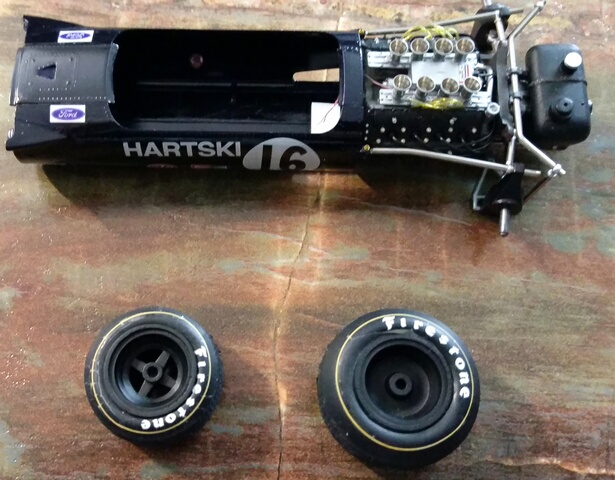
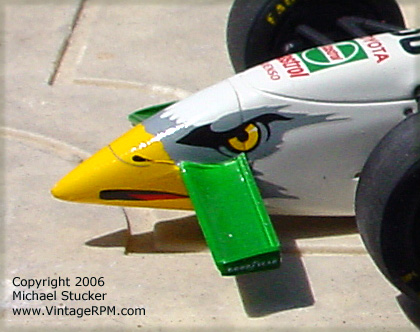
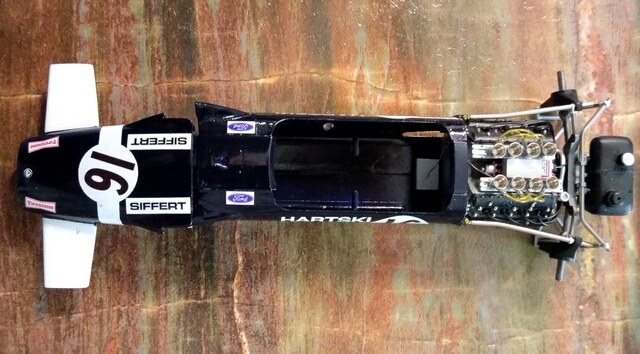 I have been hard at work on the Lotus 49B , with the engine now attached to the main body, the upper stainless suspension done, still have to complete the lower radius rods but I have the dash done and interior panels done I am contemplating the seat..and working on a new proper radiator as well working on the front suspension... Chris