


Beemax 1/24 scale Kremer Porsche 935 K2
May 31, 2019 13:09:08 GMT -8
Chris K. Hale and Ben_B like this
Post by Joel_W on May 31, 2019 13:09:08 GMT -8
Work finally commenced with step 1 on page 1, as the steps for the build seem logical and well thought out. I started by removing all the call out parts, then cleaning them up. the front suspension arms have rather large seams, as does the molded chassis rails for the engine mounts. They certainly don't look like molding flash that neeeded to be removed, so I left them as is, but did remove mold lines from all the other parts, and even sections of the suspension arms.
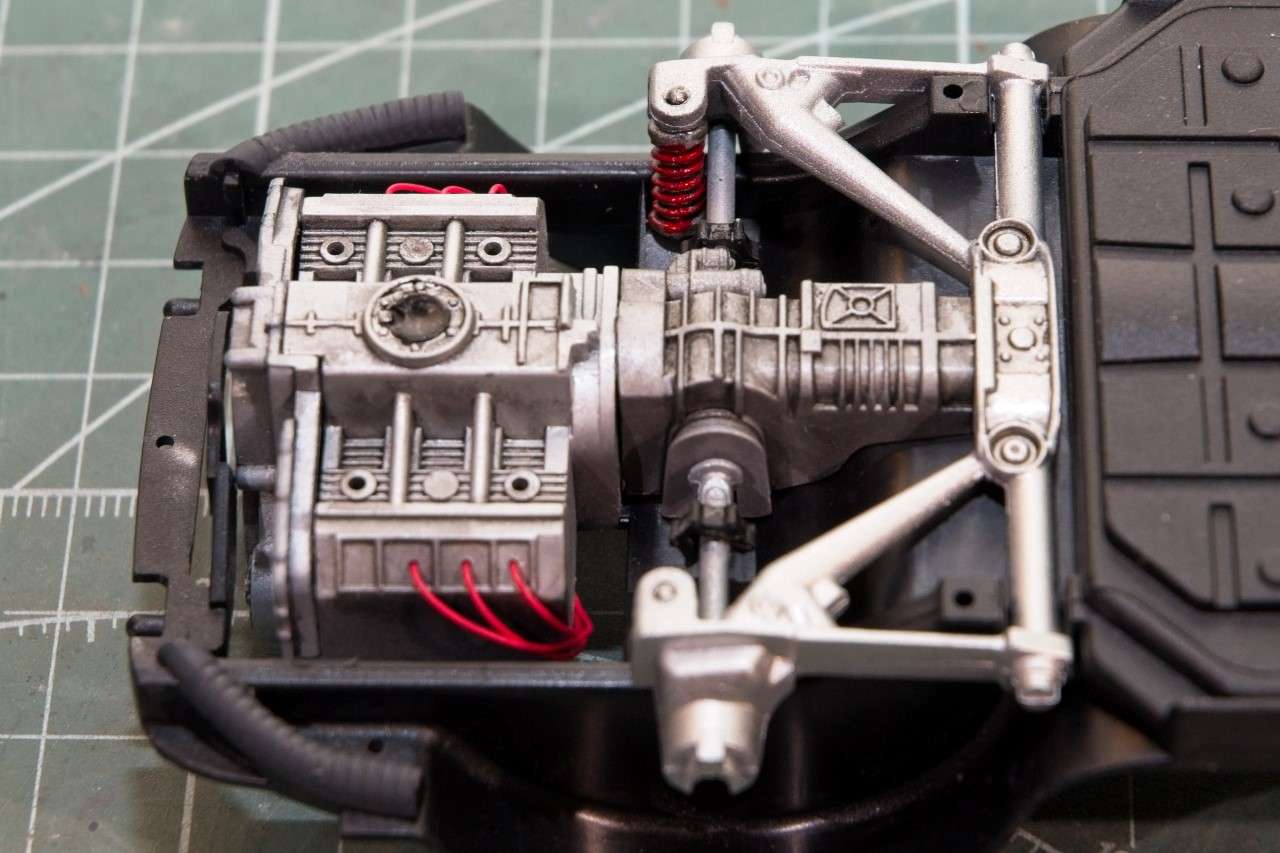
Next up was to paint everything including the lower engine block. Beemax, which is located in Macau china simply calls out everything that is Aluminum cast, Steel, Polished steel, Aluminum Alloy, etc. to be painted Silver. I've often run into this issue with Chinese kits, so I'm thinking that the issue is that while they most likely have the correct shades of metal in their Chinesed Dialect, they just might all translate into plain old Silver. Fortunately, I've got enough research material to paint the parts the appropriate colors, or get close enough.
The first step was to prime all the parts with Mr.Hobby Mr.Finishing Surfacer 1,500 thinned 1:1 with #400 Mr.Leveling thinner. I gave that a hour to dry, then shot the engine block Aclad2 101 Aluminum. The Transmission was air brushed with 103 Dark Aluminum. The suspension was air brushed with Mig Ammo Polished Steel also thinned with Mr. #400 Leveling Thinner @ a 1:1 ratio.
Now I know that the protocol is to thin true Acrylics with Iso Alcohol, their protiretary Thinner, or distilled Water. But I've always been under the assumption that you can thin everything with Lacquer Thinner, and the two best I've ever used are #400 leveling Thinner, and Tamiya's Yellow Cap that doesn't have a leveling agent as far as I know. I let everything dry over night, then the following day a few coats of Model Master's Glosscoat, thinned with @ a 1:1 ratio with Yellow Cap. Let that dry till the next day, then Tamiya Black panel line wash to both kill the engine and transmssion new look some, and make the details pop.
Next I turned my attention to the all 4 shocks. The shocks where shot with Mig Ammo Polished Steel, given a few hours to dry, then I just applied a liberal coating of Tamiya Black panel line wash between the springs windings. Gave that a good half hour to dry, then I painted the springs Tamiya X-7 Gloss Red. After shaking the bottle I just used the cap which had paint in it, and added one drop of Tamiya Yellow Cap, and then I carefully hand brush painted the springs. It took two coats to get a nice shiny look to the springs.
The drive shafts were painted Mig Ammo Polished Steel, and when dry i added the donuts to each side. And finally I painted the hoses that I'm pretty sure are to funnel the hot turbo gases away from the car with a Dark Gray. I still need to apply a Back wash to them for some depth, as they look pretty poor as they stand right now.
I'm planning just basic wiring and some braided lines for a little added interest. So I drilled the 3 plug holes on each side of the block, and then glued in Red spark plug wires that were just glued off to the hollow top of the block.
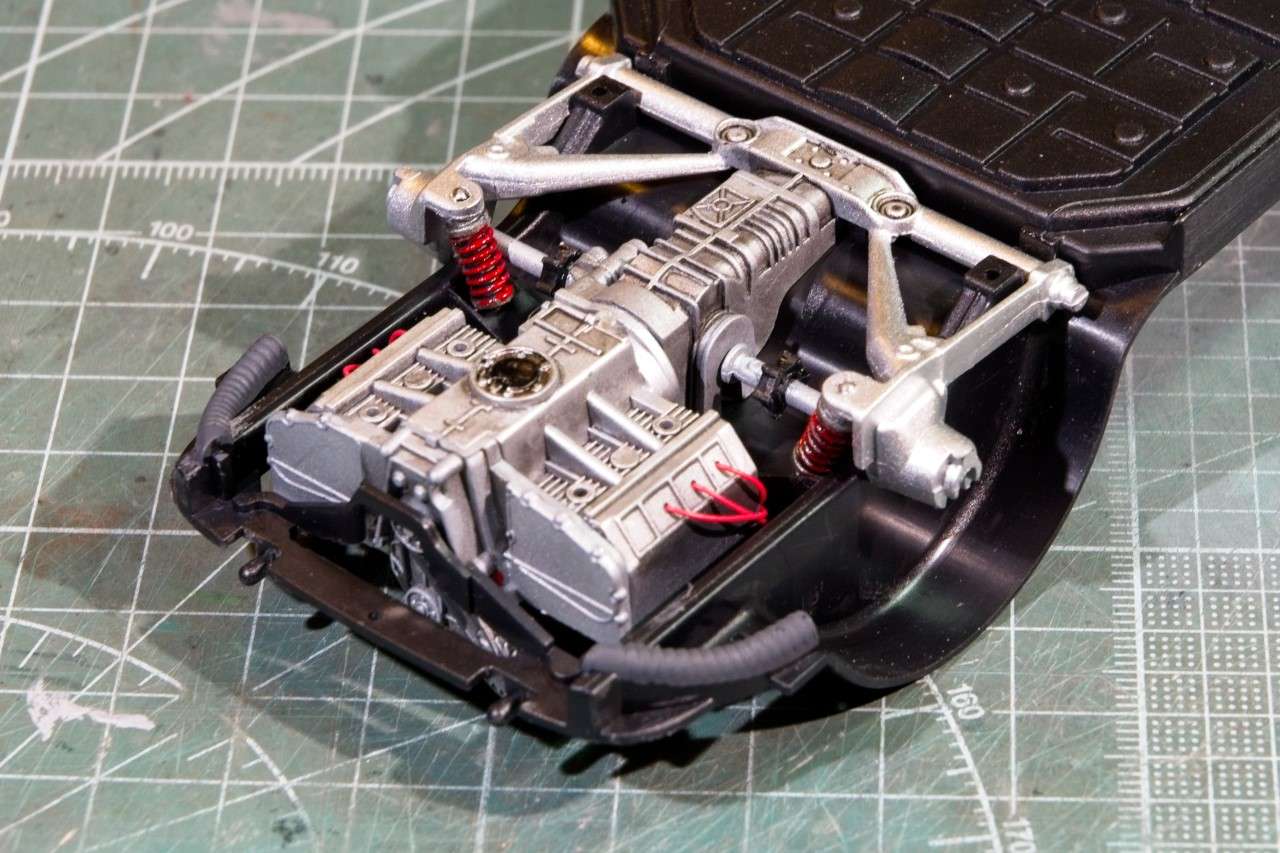
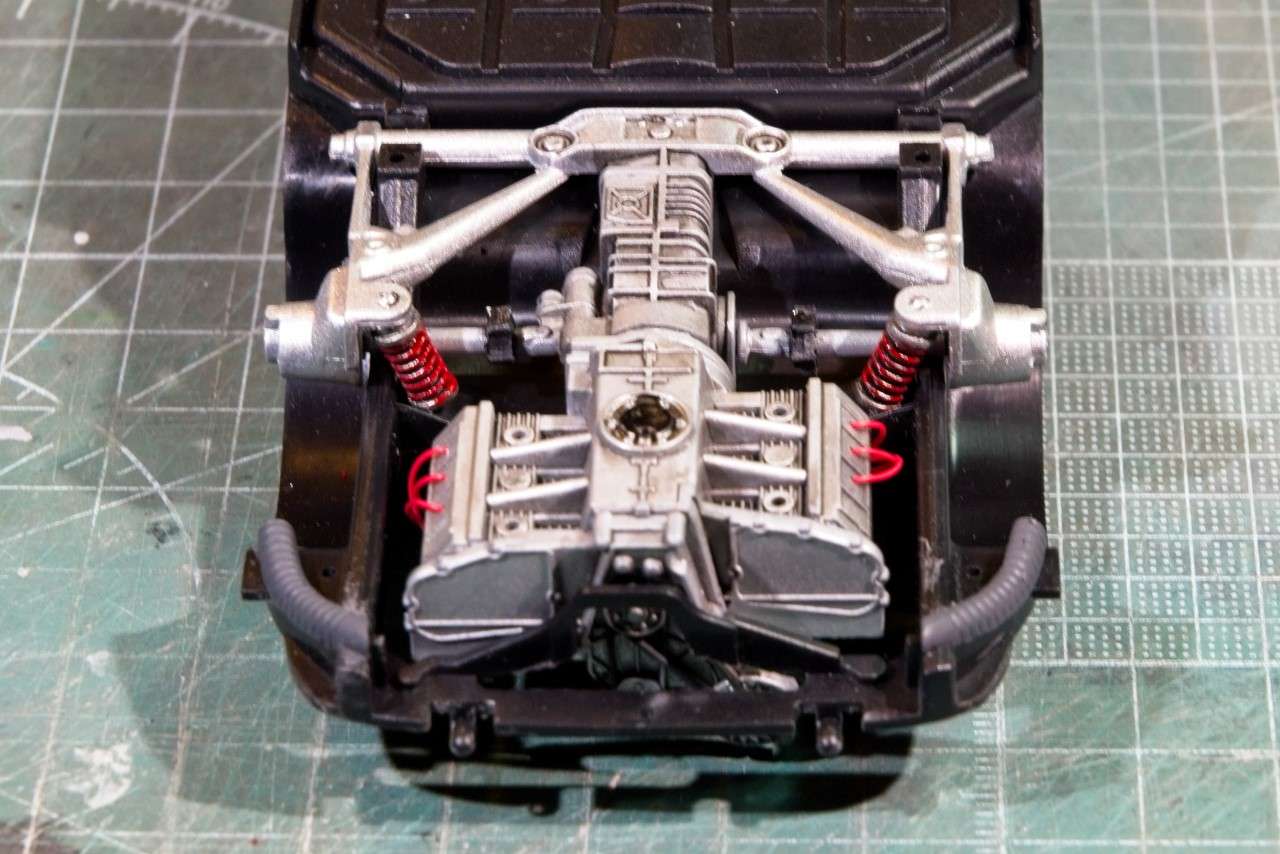
And here's how the lower Chassis looks with the engine and suspension installed.
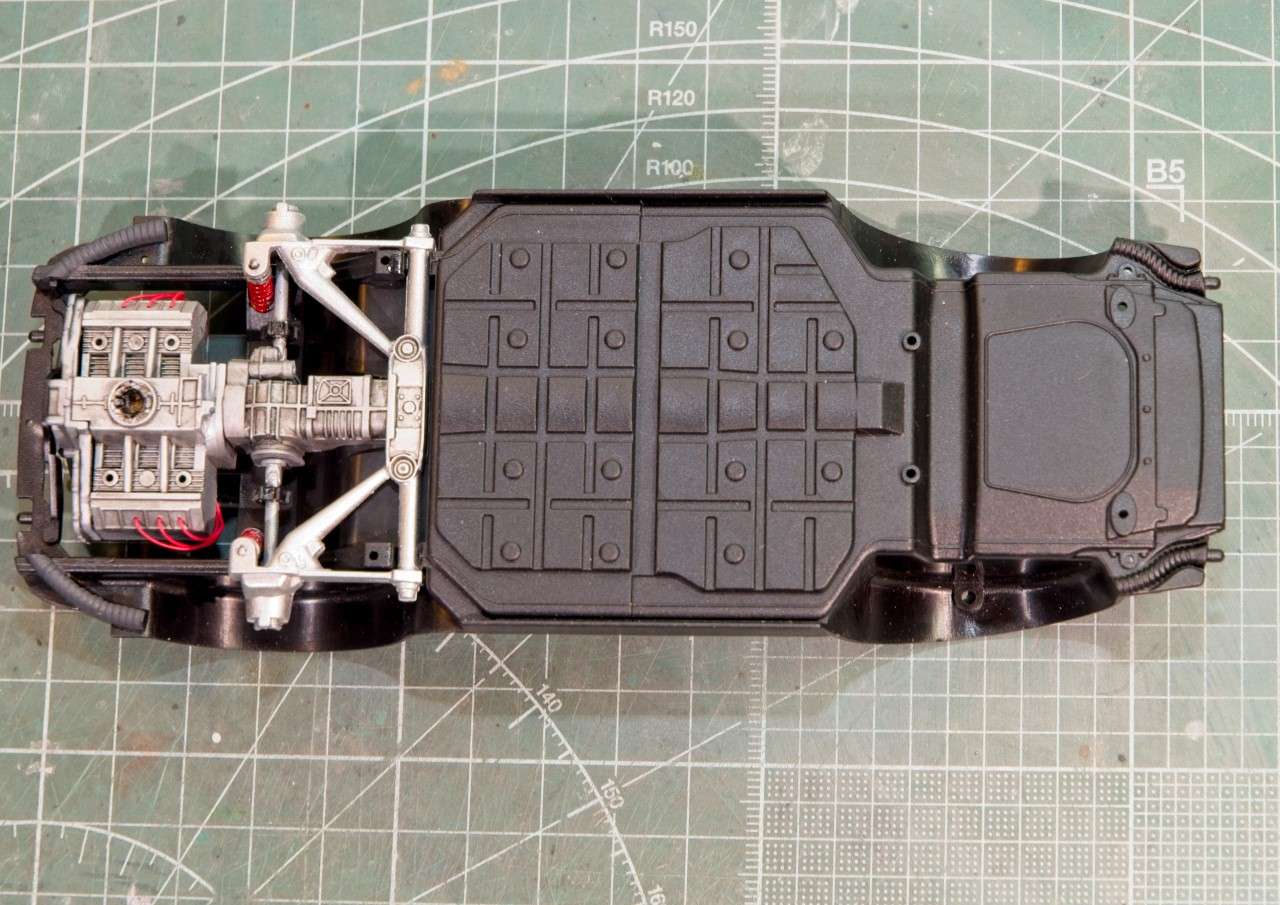
I still need to work on the single Turbo charger, the exhaust headers, as well as disc brake assemblies. Then it's on to the front end. and then my attention will turn to some weathering, but not much of the bottom of the chassis.
Thanks to all for stopping by and checking out my build to date, it's always greatly appreciated.
Joel
Next up was to paint everything including the lower engine block. Beemax, which is located in Macau china simply calls out everything that is Aluminum cast, Steel, Polished steel, Aluminum Alloy, etc. to be painted Silver. I've often run into this issue with Chinese kits, so I'm thinking that the issue is that while they most likely have the correct shades of metal in their Chinesed Dialect, they just might all translate into plain old Silver. Fortunately, I've got enough research material to paint the parts the appropriate colors, or get close enough.
The first step was to prime all the parts with Mr.Hobby Mr.Finishing Surfacer 1,500 thinned 1:1 with #400 Mr.Leveling thinner. I gave that a hour to dry, then shot the engine block Aclad2 101 Aluminum. The Transmission was air brushed with 103 Dark Aluminum. The suspension was air brushed with Mig Ammo Polished Steel also thinned with Mr. #400 Leveling Thinner @ a 1:1 ratio.
Now I know that the protocol is to thin true Acrylics with Iso Alcohol, their protiretary Thinner, or distilled Water. But I've always been under the assumption that you can thin everything with Lacquer Thinner, and the two best I've ever used are #400 leveling Thinner, and Tamiya's Yellow Cap that doesn't have a leveling agent as far as I know. I let everything dry over night, then the following day a few coats of Model Master's Glosscoat, thinned with @ a 1:1 ratio with Yellow Cap. Let that dry till the next day, then Tamiya Black panel line wash to both kill the engine and transmssion new look some, and make the details pop.
Next I turned my attention to the all 4 shocks. The shocks where shot with Mig Ammo Polished Steel, given a few hours to dry, then I just applied a liberal coating of Tamiya Black panel line wash between the springs windings. Gave that a good half hour to dry, then I painted the springs Tamiya X-7 Gloss Red. After shaking the bottle I just used the cap which had paint in it, and added one drop of Tamiya Yellow Cap, and then I carefully hand brush painted the springs. It took two coats to get a nice shiny look to the springs.
The drive shafts were painted Mig Ammo Polished Steel, and when dry i added the donuts to each side. And finally I painted the hoses that I'm pretty sure are to funnel the hot turbo gases away from the car with a Dark Gray. I still need to apply a Back wash to them for some depth, as they look pretty poor as they stand right now.
I'm planning just basic wiring and some braided lines for a little added interest. So I drilled the 3 plug holes on each side of the block, and then glued in Red spark plug wires that were just glued off to the hollow top of the block.
And here's how the lower Chassis looks with the engine and suspension installed.
I still need to work on the single Turbo charger, the exhaust headers, as well as disc brake assemblies. Then it's on to the front end. and then my attention will turn to some weathering, but not much of the bottom of the chassis.
Thanks to all for stopping by and checking out my build to date, it's always greatly appreciated.
Joel


