|
|
Post by Joel_W on Aug 3, 2019 5:35:19 GMT -8
Joel. , it’s looking good. Love the IP. Gauge’s came out very nice. The different shades of aluminum color’s will give it some interest. Keeping racing towards the finish line. CC 😎 CC, Thanks for the thumbs up, it's greatly appreciated. Joel |
|
|
|
Post by Joel_W on Aug 8, 2019 13:04:42 GMT -8
Well, it's time for my weekly update give or take a few days. Once again, not enough quality time at the bench as life just keeps on interfering. But some time is way better then no time. I reached the point of the build where I needed to prime, paint, decal, and gloss finish all four of the body panels, as the lower two side panels need to be installed prior to the completion of the both the front and rear suspensions. I've already primed the panels so the next step was the color coats.  I'm once again opting for Gravity's pre-thinned lacquer paints: color GC-113 Lotus British Racing Green. Air Brushed @ a flow rate of 16 psi. I always apply one really light tack coat, then just add light, even coats till I get a consistant color coat. For some strange reason the coat looked grainier then usual which took me by surprise. I gave the color coat 24 hrs to dry and cure, then instead of my usual wet rub with #3,000 sponge, I opted to go with #8,000 as I've had a nasty tendency of rubbing through some of the high spots. The use of #8,000 cured that issue, but the finish turned out not as smooth as I'm use to. Still it was more then smooth enough for decaling without a base gloss coat. 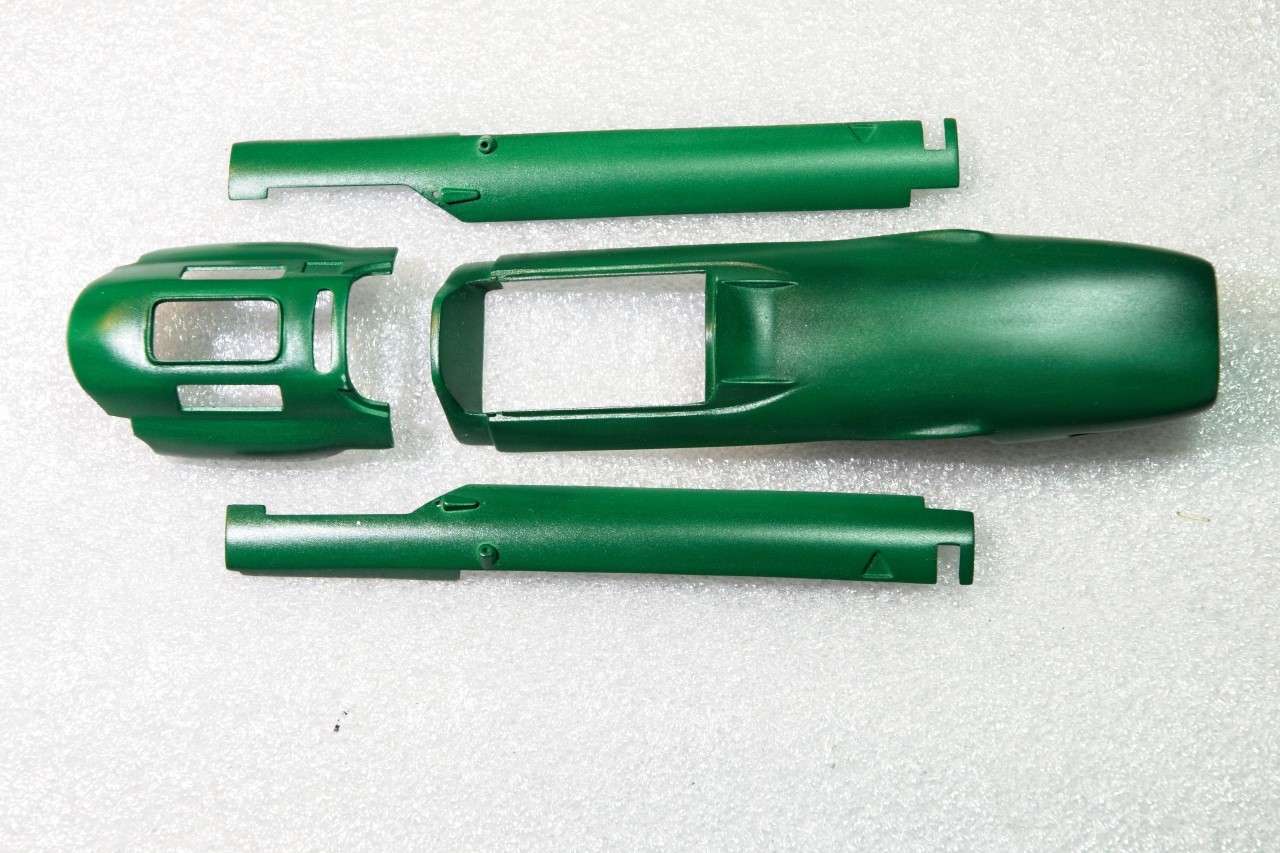 I had decided to use Indy Cal's decals rather then the Tamiya decals, as the Tamiya's Yellow stripe was much to bright compared to some of my research pictures, while the Indy Cal decals had a much paler Yellow. The Tamiya decals are indidually printed so that it's easy to cut them off the sheet, or as a group like the front stripe, space, white number circle, space, & stripe. I really don't mind the extra work in preparing the decals as the Indy Cal sheet is just one big decal. The issue was that I just assumed that the same sequence applied to their decals. Unfortunately it didn't work out that way. I started at the cockpit with the big Yellow stripe using my usual decal procedures. Then I decided that the next decal should be the Yellow stripe that ends at the nose. I came to this conclusion because I had no idea of how much space actually would be allocated for the number circle, which also has a small BRG separation ubove and below the White number circle. As it turned out the Yellow stripes didn't leave any separation and were in fact to long so the number circle overlapped them!! Now I'm really screwed as even my wife could see this error. I then noticed on the decal sheet that there was two small BRG decals that were as wide as the stripes and as long as the needed spaces!! Of course cutting them out was a real nightmare, but I managed to get both done without cutting the decals to pieces. Then came the problem of trying to apply them as I'm not the most danty of guys. Some how I managed to get them applied, and to my utter amazement, they looked perfect!! Ok, enough patting myself on my back, now back to the engine cowl. 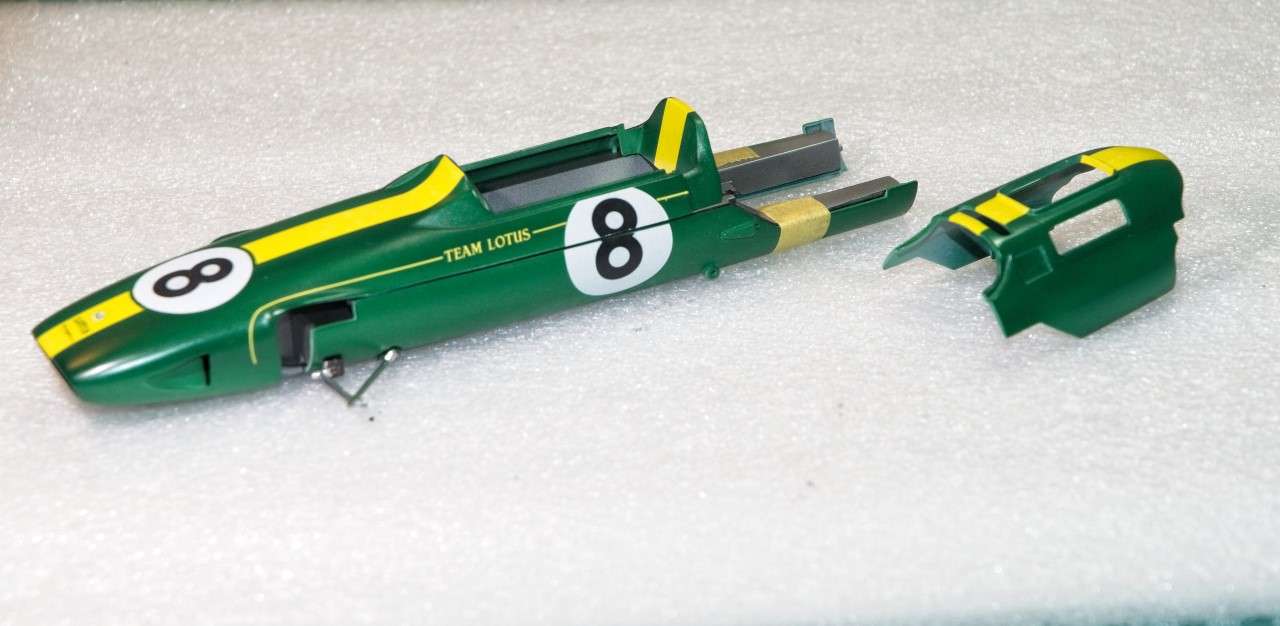 As You can see, the cowl has 3 separate sections that need to be decaled. No big deal as the decals laid down perfectly including those lips. Next up I applied the upper halves of the side number circles on both sides, then came those L-O-N-G T-HI-N Yellow lines that wrap around the lip of the front suspension just to make it a little more interesting. Somehow I also managed to get both sides on, and then just as I thought I beat the Reaper, the curved section on the 2nd decal just disolved from the Walthers decal Solution I was using! I cut a piece of the Tamiya decal which is a little brighter yellow, and aligned it the best I could. Came out pretty good if you ask me.  The following day I finished up the decals starting with the 2 split 8's that were on the Lotus for the 1963 USGP. Hardest part was deciding where to cut them. I couldn't find a picture of the car, but I managed to get it close enough to fool one's eye.  Next up is removing both side panels and glossing all 4 body panels. Hopefully, it will have a good enough smooth and glossy finish. Joel |
|
|
|
Post by arcticwolf on Aug 8, 2019 13:39:27 GMT -8
Hi Joel.
I did the same thing with the stripe, except I painted it on. Then realized it wasn't continous, but 2 seperate stripes that stopped just short of the circle. Still trying to resolve that one.
As to the paint finish, are you building a show car or a race car? I'm asking because, when you see a restored historic car today, they all have beautiful high gloss finishes and sparkle in the sun. But in 1964 they weren't so shiny, especially the British ones. The paint quality wasn't there plus I don't think they cared that much.
Odd part is I can't remember where I put my glasses but I do remember 1964 - it's most disconcerting.
I build my cars as if they were sitting in my own showroom but I know some people like them "race accurate".
Just curious.
Paul
|
|
|
|
Post by afx on Aug 9, 2019 3:15:45 GMT -8
Another nice open wheel build Joel.
|
|
|
|
Post by Joel_W on Aug 9, 2019 4:40:43 GMT -8
Hi Joel. I did the same thing with the stripe, except I painted it on. Then realized it wasn't continous, but 2 seperate stripes that stopped just short of the circle. Still trying to resolve that one. As to the paint finish, are you building a show car or a race car? I'm asking because, when you see a restored historic car today, they all have beautiful high gloss finishes and sparkle in the sun. But in 1964 they weren't so shiny, especially the British ones. The paint quality wasn't there plus I don't think they cared that much. Odd part is I can't remember where I put my glasses but I do remember 1964 - it's most disconcerting. I build my cars as if they were sitting in my own showroom but I know some people like them "race accurate". Just curious. Paul Paul, I can only think of two ways to solve those missing BRG spaces. The 1st is to cut mask from Tamiya tape, which is something I'm not physically able to do with my crappy eyesight, but if you can, you're home free. The 2nd way will cost you the price of a decal sheet from Indy Cals. As I've said, they have two of those spacers on their decal sheet. As for the paint finish, all my cars are more towards the museum type of finish, then either before or after a race. The issue with the color coat are two fold, and both mine. The more I think about it, the more I'm convinced that I just plain forgot to increase the paint flow from the tack stage which would let the paint have a more wet look. Don't know why I screwed it up that way, but it sure looks like it was the original cause of the finish. The 2nd issue was that I decided to go with #8,000 grit wet emery cloth to rub out the paint instead of #3,000 which I've always used due to my habit of rubbing through the occasional high spot or two. The surface was smooth enough to decal over without any silvering issues, so that gives me hope that if I don't screw up the clear Glosscoat, I should be ok. That's just ok at best, not the final finish I achieved on the Porsche 935 K2. Joel |
|
|
|
Post by Joel_W on Aug 9, 2019 4:41:14 GMT -8
Another nice open wheel build Joel. Thanks JC, it's much appreciated. Joel |
|
cc
Full Time Ride
  
Posts: 141
|
Post by cc on Aug 9, 2019 4:52:58 GMT -8
Joel, paint and decals look great. If you dont try differnt technique’s you never know if it works better. I know you just did not want to admit thats what your are doing. LOL. Keep it going looking to see it on its tires. Standing by...
CC 😎
|
|
|
|
Post by Joel_W on Aug 9, 2019 14:23:31 GMT -8
Joel, paint and decals look great. If you dont try differnt technique’s you never know if it works better. I know you just did not want to admit thats what your are doing. LOL. Keep it going looking to see it on its tires. Standing by... CC 😎 CC, Ok, you found me out. I did manage to gloss all the body panels yesterday with Mr. Hobby c-46 Lacquer Gloss clear cut 1:1 with #400 leveling Thinner. So far it looks way better. Hopefully, with a decent rubout, polishing, and then wax, it should pass my eye test. Joel |
|
|
|
Post by 2whl on Aug 10, 2019 10:14:22 GMT -8
Looking very nice, Joel. I'll have to go look at my kit decals and consider using Indycals instead.
|
|
|
|
Post by Joel_W on Aug 10, 2019 13:28:20 GMT -8
Looking very nice, Joel. I'll have to go look at my kit decals and consider using Indycals instead. 2whl, they're priced very reasonable, just need to be carefully cut out. And unlike the old Fred Cady decals where every color was separate, these are like regular decals. Just the Lotus emblems, logos, and numbers need to added separately. Joel |
|
|
|
Post by pnance26 on Aug 12, 2019 7:10:01 GMT -8
Very nice job, Joel. Thanks for including the settings for your airbrush. Never heard of Gravity paints... is that the brand or the type of airbrush?
Speaking of paints, have you ever used Zero? Apparently, they are the same guy who does HIRO kits and he gets the formula for paint colors from the various teams and then duplicates them. Unfortunately, there are two problems... 1) long wait time on product and 2) they are "hot" and clean up with lacquer thinner of which I am NOT a fan! I use Tamiya paints exclusively.
Will continue following...
|
|
|
|
Post by Joel_W on Aug 12, 2019 8:41:43 GMT -8
Very nice job, Joel. Thanks for including the settings for your airbrush. Never heard of Gravity paints... is that the brand or the type of airbrush? Speaking of paints, have you ever used Zero? Apparently, they are the same guy who does HIRO kits and he gets the formula for paint colors from the various teams and then duplicates them. Unfortunately, there are two problems... 1) long wait time on product and 2) they are "hot" and clean up with lacquer thinner of which I am NOT a fan! I use Tamiya paints exclusively. Will continue following... pnances26, Thanks so much for stopping by and checking out my progress to date, it's always greatly appreciated. I've since the update cleared glossed all the body panels, and then the proper rub, polish, & wax. Looks 100% better, but still is lacking in that mile deep finish due to the color coat issues. As for paints, yes I've used Zero paints, and have about 12 different bottles on my paint rack. My Lotus 49 will be using Zero colors as Gravity doesn't make the proper Yellow. As for the paints themselves, the two outlets here are now down to one, and that vendor had, and still has a huge out of stock issue on Zero paints. I tried to get them from Canada but they wouldn't ship them to the states. I can now get them from Spot models of Spain, and Grand Prix Models from England. Zero & Gravity paints are almost identical types being true lacquers, and the formulas come from the same resources, so the colors are just about identical. And yes, being lacquer based they're hotter then enamels, true Acrylics, or Acrylic Lacquers. The trick is a good primer coat and even with that a few tack coats to seal the plastic. Then you're good to go. As for clean up I use the cheapest Lacquer Thinner I can find from my local big box store. With that being said, one needs to use the proper painting procedures & precautions. I have a paint booth that I use 100% of the time that is properly vented to the outside. I clean the two filters like old doormats outside, and I replace them a few times per year, as they're really cheap. I wear a chemical respirator even when cleaning my air brushes, and I wear gloves, generally just one for the hand that holds or turns the model stand. Even when I paint with Acrylics and Acrylic Lacquers, I thin with #400 which is LC with a Retarder, and use LC to clean my Air Brush. I've yet to have any of these paints gum up in any of my air brushes of which I have 2, and will be adding a 3rd one just for 2K clears that I'm getting ready to try. Speaking of Tamiya Paints, their true Lacquer line is now available in England, and Spot Model is starting to carry them as well. Colors seem to be their standard color chart. They have a LC thinner with retarder, and the combination from what I've read and seen are truly amazing. Joel |
|
|
|
Post by Joel_W on Aug 16, 2019 11:38:28 GMT -8
Well, it's been another week and I've managed to get enough done for my weekly update, so lets get right to it. While I wasn't thrilled with how the base color BRG came out, I had applied all the decals, then a clear gloss coat of Mr. Color C-46 Acrylic lacquer thinned 1:1 with Mr Hobby's Mr. Color #400 leveling Thinner. I applied light, even coats with my air brush @ a flow rate of 16 psi, then gave all the panels 3 full days to dry and cure. Next up was rubbing the gloss out with Alpha Emery Cloth sheets soaked in warm water: 6,000, 8,000, & 12,000. A quick wipe, and then air dried in my drying booth. When dry I used Gravity's 3 part polishing system followed by their excellent GC-311 synthetic wax, then glued on the lower side body panels very carefully with Tamiya Extra Thin. By a pure stroke of luck I didn't get any on the body. Next up I finished the front suspension, then the basics of the rear suspension with several different shades of Alcad 2 as well as Mr. Color's Metallics. The effect of the various shades really helps to make the suspension, brake & clutch reservoirs, as well as the radiator (which also received a black panel line wash)just pop. Finally, I detailed the upper water line that runs from the radiator through the cockpit to the engine. The pipe is wrapped in insulation, so I used a little modeling license creating it from layered masking tape, then made clamps out of another layer of masking tape. I painted the insulation Gloss Red, and the the clamps Aluminum. The last step was to paint up the outboard coil over shocks. Again, I used a little modeller's license as I painted the springs Gloss Red,the effect adds some much needed color to the rear suspension. Finally I got to test fit the shell, and it does still fit without any needed pressure on my part. 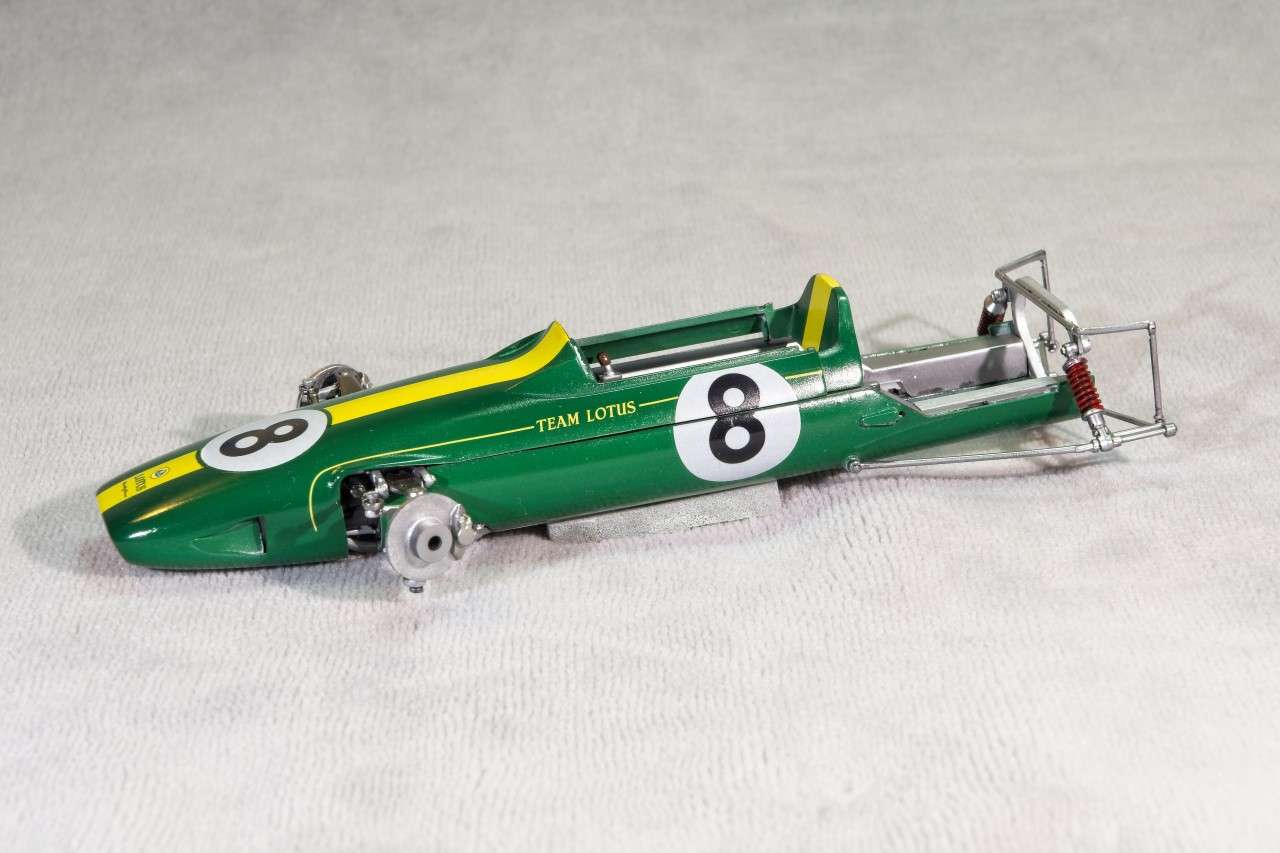 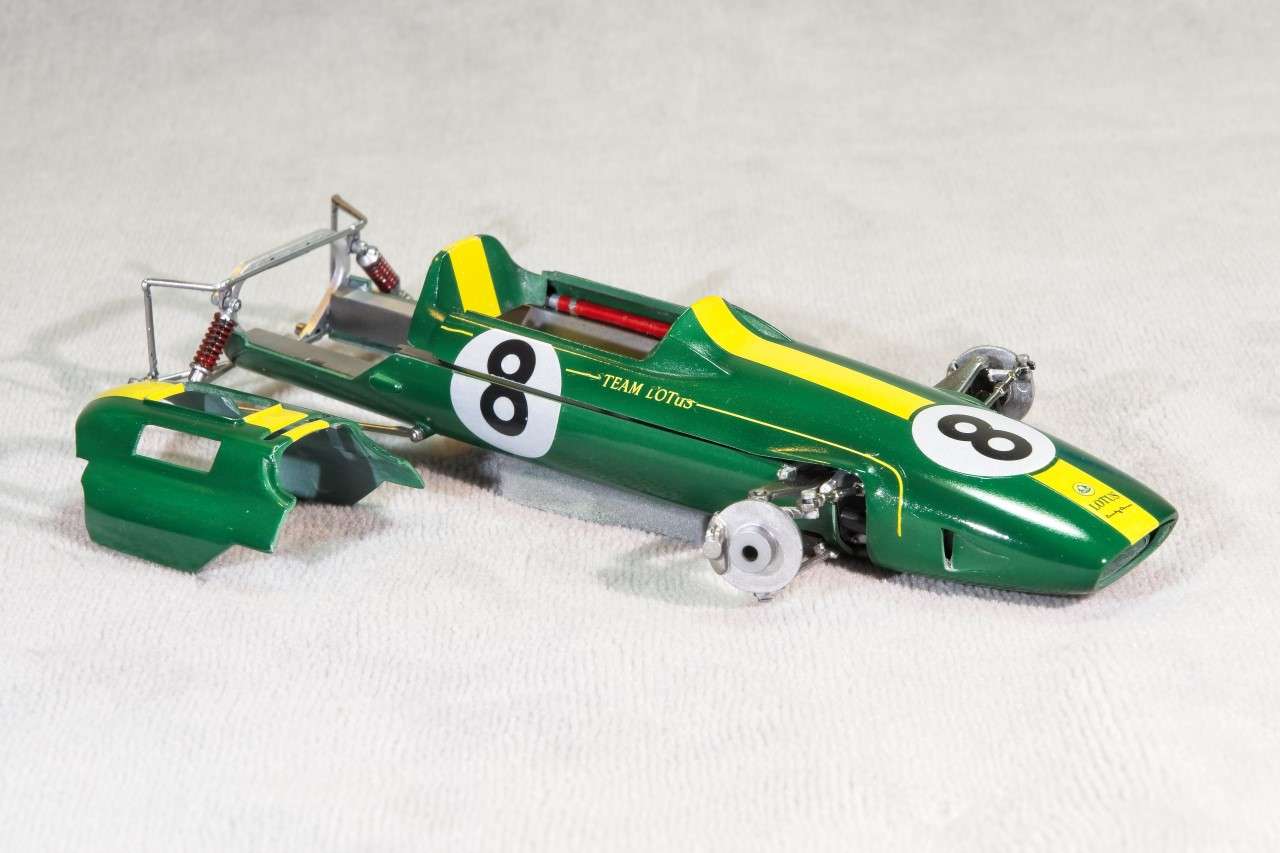 Then I pulled off the top of the shell for some better interior pictures. 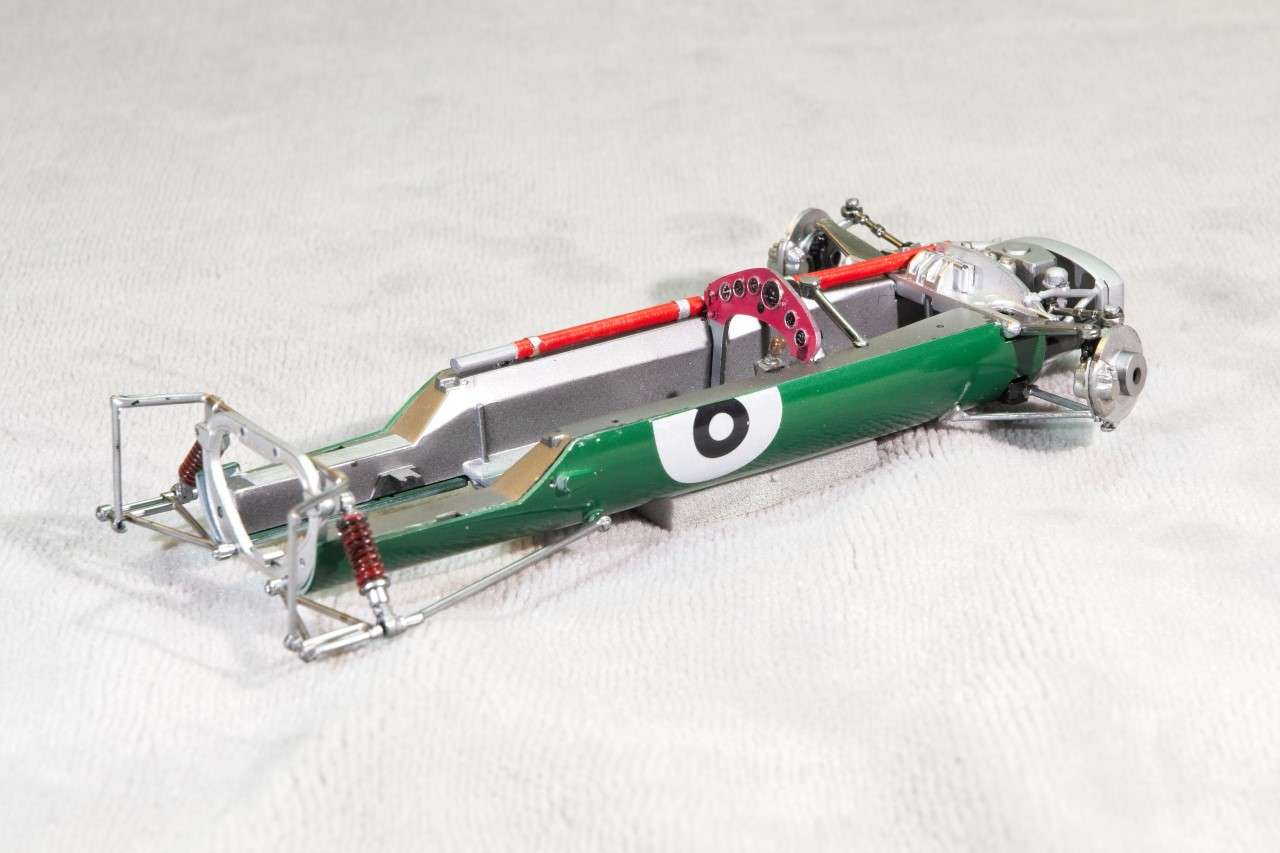 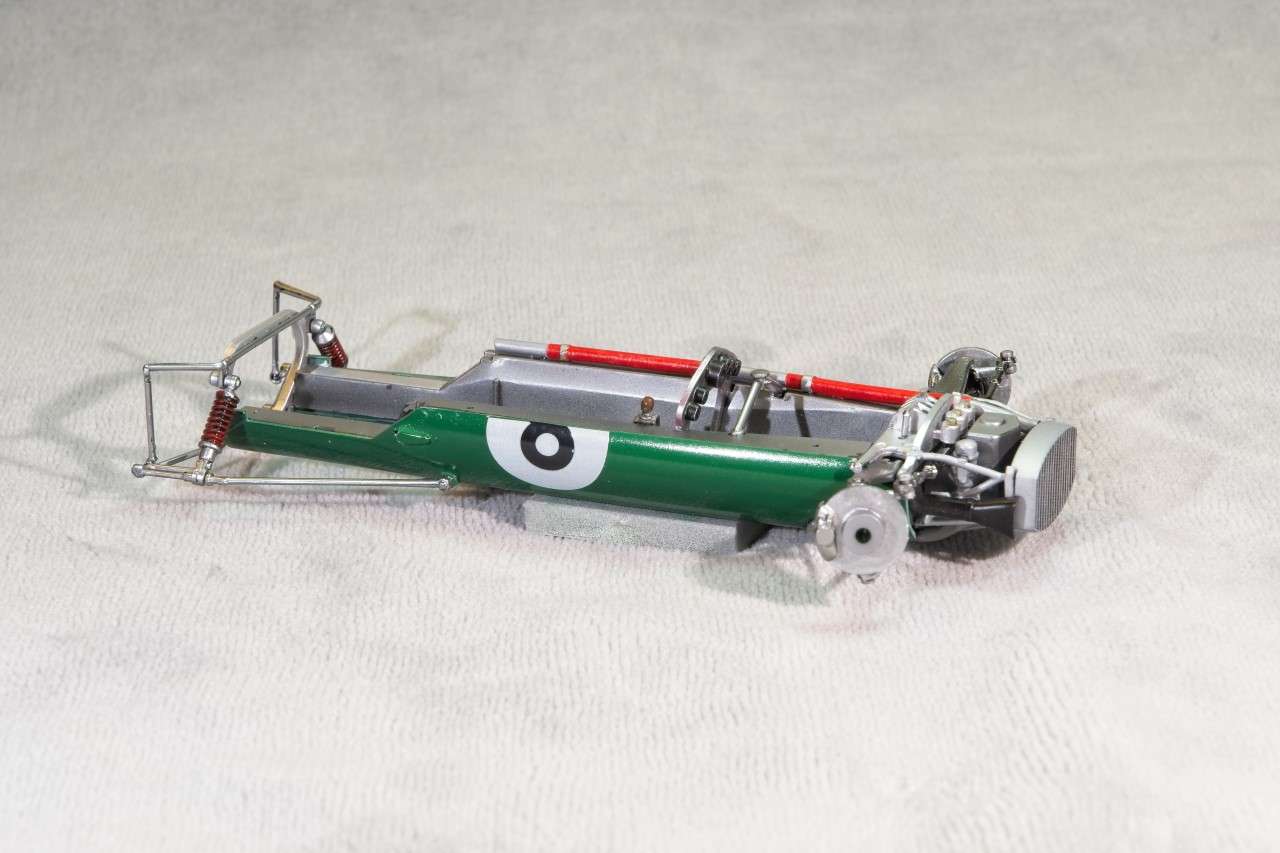 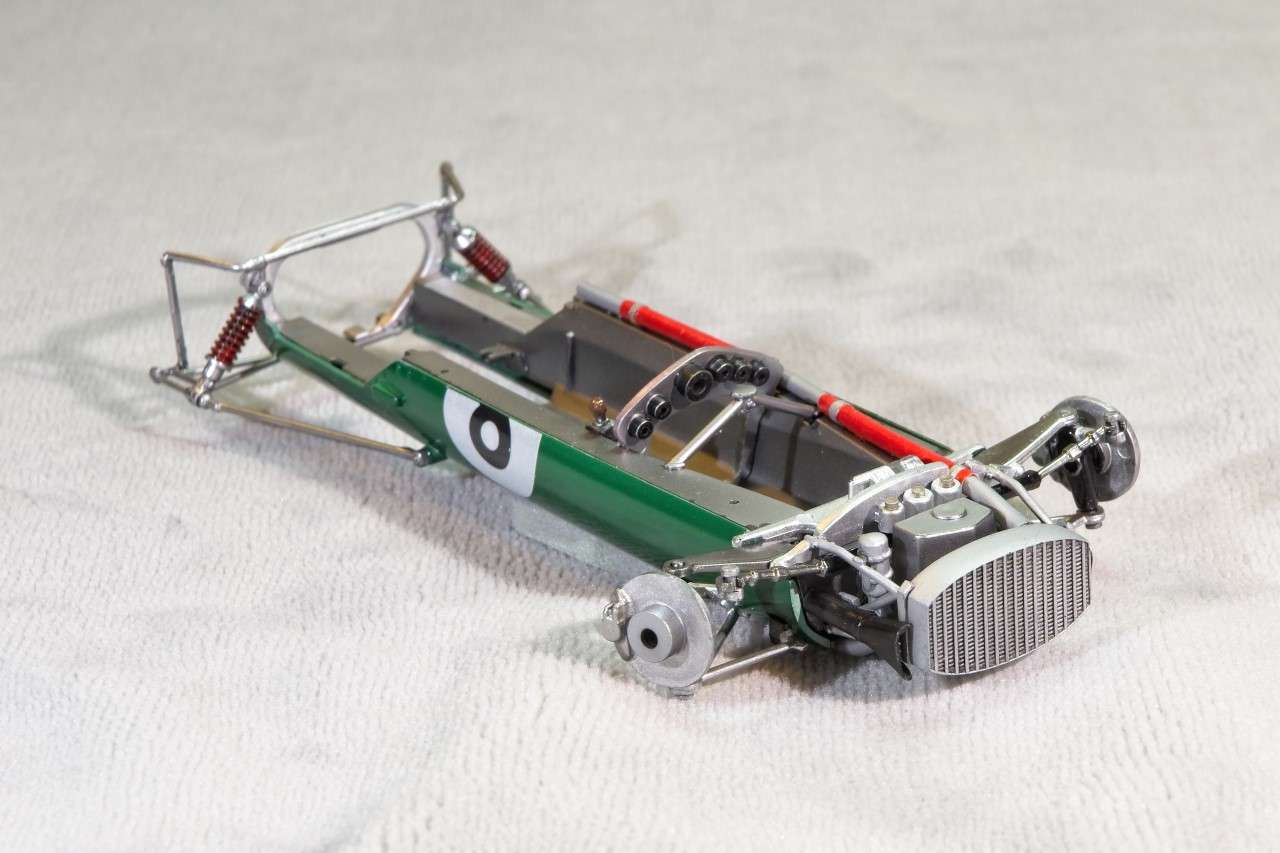 Now the fun really starts; those solid alloy wheels. I primed them with Mr Hobby lite gray primer rather then White, as I wanted the Yellow to be on the duller side, not super bright. I applied a good 9 lite coats of Tamiya Gloss Yellow, and let the wheels dry for a full day. I made masks with my Flex-0-file, but really had a hard time getting the single circles to cover correctly simply because I only had a ruler to measure the dia. with as I still haven't bought a decent set of Calipers So I made half circles each a half mm larger, and over lapped them. Worked out just fine. For the Aluminum which I also didn't want super shiny, I opted for Mr. Color Metalizer Aluminum. let them dry for a few days, then a clear coating of Alcad Semi Matt to further tone down the Aluminum and the Yellow. Finally I brush painted the lug nuts with good old Testors Silver enamel. Boy have those little bottles gotten expensive. The final touch was to add the tires which came pre-lettered.  As usual, thanks for stopping by, and checking out my progress to date, it's always greatly appreciated. Joel |
|
|
|
Post by arcticwolf on Aug 16, 2019 15:18:23 GMT -8
Looking great. I'm curious about the aluminum radiator. I just assumed in 1962 it was copper, but I don't know?
cheers
|
|
|
|
Post by Joel_W on Aug 17, 2019 5:25:51 GMT -8
Looking great. I'm curious about the aluminum radiator. I just assumed in 1962 it was copper, but I don't know? cheers arcticwolf, Thanks for checking out my build to date, it's greatly appreciated. As for the radiator, I thought the same, and to some extent I still do. Tamiya calls it out as Aluminum. All the reference pictures I have are B&W, so that doesn't help. And unless the restoration is certified as accurate with documentation, it's not worth a whole lot. I've got pictures of Lotus 25s with the Yellow stripe in several different shades, even the box art for both the BRG and the Yellow are just way to bright. In any event the top fuselage main section will be glued into place, so that only the engine cover will be removable. All that will ever be seen of the radiator is the front if that. That's why I didn't bother with any detail painting of the Clutch and Brake reservoirs. Joel |
|