|
|
Post by Chris K. Hale on Aug 17, 2019 5:50:27 GMT -8
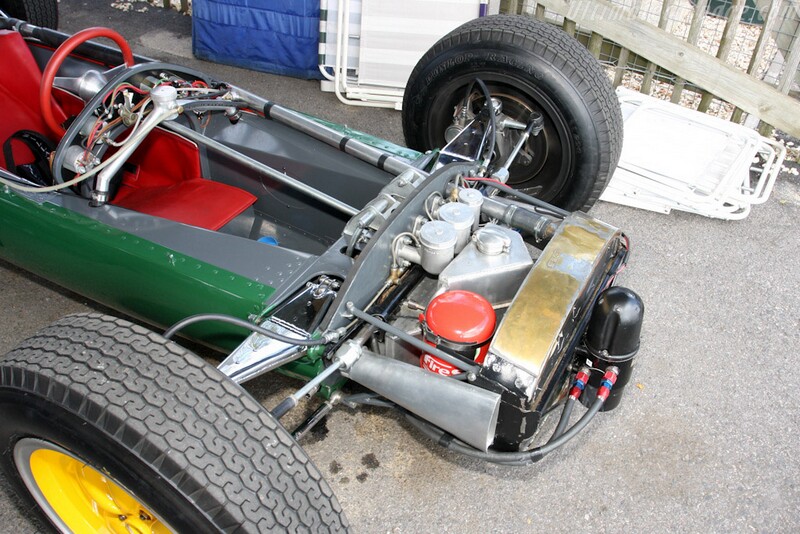 The radiator is actually Brass with lots of solder on the sides! It is a year or two too early for Aluminum, they didnt know how to successfully weld Aluminum quite yet. I have a album on my fotki that has more research on this car. public.fotki.com/pmodwrks/lotus-25-jimmy-clark/page3.html as always feel free to check out the numerous photos of this car, unfortunately a lot are in race shots or restored views but there are enough original shots to aid in your build.. Chric |
|
|
|
Post by Joel_W on Aug 17, 2019 6:26:37 GMT -8
Chris,
Thanks for the info. As usual I'm a day to late. I'll try to wedge off the radiator from the 3 pipes, but I'm not so sure I can successfully accomplish that. As I said, the body will be glued on, so the only part of the radiator that will be visible is the front. And speaking of the front, I'm really interested in what that black container is, and adding it and the two lines. I'm also curious as to that Red container next to the radiator. I just left it Aluminum as it can't be seen once the body is closed up.
I'm thinking that this is a restored car as even the air intakes are different then the instruction callouts and from the few pictures I've got.
Will be heading on over to your Album, as late is way better then staying home and missing the party.
Joel
|
|
|
|
Post by Joel_W on Aug 17, 2019 6:35:21 GMT -8
Chris,
Just spent some time on your site, and I forgot that I was previously there. Talk about old age and a fading memory. Still downloaded a few more of your pictures. Hope that's ok.
One issue that I saw in your posted picture. The tank behind the radiator is Aluminum and is welded. So I'm wondering why soldering it worked, but the same method wouldn't work on the radiator?
Joel
|
|
|
|
Post by Chris K. Hale on Aug 17, 2019 7:06:34 GMT -8
I believe You got it right, There is a big difference between a Tank (Oil) I think with little or no pressure and can be mostly formed VS a radiator that holds hi-pressure, has many, many parts, small parts, ( ver see how one is made?, and can successfully handle the heat with out falling apart, I dont think the technology was quite there but Lotus/Chapman was the first to use them for their weight savings and superior cooling. I was looking at the pic and I am not sure what that black thing in front is but it is not original I am sure. I hope the album cleared some things up , and Again I just want to tell Our Fellow Model builders, My Fotki Page is only there for one Reason, Research for Model Car Builders Please Use It!!! Chris
|
|
|
|
Post by arcticwolf on Aug 17, 2019 8:36:25 GMT -8
Brass would be logical, right on.
About that black tank, but this is only a guess: We had a Fiat X1-9 race car some years back. On it we installed an air bladder pressure tank, so the engine always had oil pressure even if it wasn't running. It was to save wear on startups, mostly. The tank looked a lot like that thing on the Lotus. Maybe someone installed one, but why he would put it up front is beyond me.
cheers
Paul
|
|
|
|
Post by Joel_W on Aug 17, 2019 8:40:43 GMT -8
Chris,
Again, thanks so much for the support in all of my builds, as well as the technical issues, and references. All of you help has made each build that much more realistic and built to a higher standard.
Your explanation as to pressure being one of the main issues makes a ton of sense now. So if it's possible, I'm going to remove the radiator and repaint the frame or try to mask it off and paint it. I just might see if I can get a near perfect non-glue fit for the main shell so that I can remove it when I want to. I'm close, very close, but close just isn't good enough in this case.
Joel
|
|
cc
Full Time Ride
  
Posts: 141
|
Post by cc on Aug 17, 2019 10:04:04 GMT -8
Joel, that car is coming out great. You radiator is brass and solder together. I know you know but just chiming in. You can do the repaint I have faith. Car’s paint and decal’s came out beautifully. Getting close to the finish line. Looking for the checkered flag. Chris has the best reference site I have ever found on any site. Glad you posted it there Chris. Alright on to the finish.
CC 😎
|
|
|
|
Post by Joel_W on Aug 17, 2019 12:27:54 GMT -8
CC,
Going to try and remove the radiator or some how pull off a full masking with tape and Plastic wrap. Just pondering if it's worth it unless I finesse the top of the body shell to fit perfectly.
Still plenty to do. The full engine and bay with some detailing is up next as well as finishing the pit.
Joel
|
|
|
|
Post by Joel_W on Aug 25, 2019 8:06:19 GMT -8
Well, another week, and time for my latest update on the Coventry Climax Lotus 25. This week I focused on the engine assembly, which for a kit this old is really quite detailed, and as usual Tamiya got the parts to fit perfectly. The 1.5 liter Coventry Climax V8 engine/transmission is just 3 large parts: Right side, left side, and the top of the block casting. These parts were primed with flat Black, then air brushed with Alcad 2 ALC 101 Aluminum. The oil pan was primed with Tamiya Semi gloss Black, then it was air brushed with Alcad 2 ALC 101 Aluminum for a slightly shinier look. The engine has twin cam shafts for each bank of cyclinders, so there's two double valve covers, one for each bank that was painted Tamiya X-18 Semi Gloss Black. Then the raised lettering was picked out with a 5/0 paint brush, and good old Testors Enamel Silver paint in those very expensive 1/4 oz little bottles. I'm determined to use up those bottles before I switch to my newest find, Gunze's Super Metallics2 that you can actually use for hand painting, as well as air brushing once thinned 1:1. But be prepared for sticker shock as Sprue Brothers is selling them for $10.95 per bottle. I'm going with just 3 different colors for now as I want to move away from the Alcad's, I never muched liked how several of their colors look. All are too dark as far as I'm concerned. Then I glued on the plateforms for the fuel injector intakes, painted a slightly different tinted shade of Alcad 2 Aluminum. I've got several pictures of both the car that Clark drove as well as restorations. Clark's car had Black spark plug wires, while the restorations had either Yellow or Red. I decided that a little color variation was needed so I went went Yellow using my modeling license. Next I used that same license to run the fuel injection lines, as every picture has them run somewhat differently from the meter to the injectors. I opted to drill holes in the two plateforms right next to where the intakes mount, and ran the lines down to where the injectors would be at the base of the intakes. As usual, I used clear Fly Fishing leader as I have a nearly endless supply in various sizes from Bass Pro Shops. Next came the dreaded exhaust headers, which weren't that bad. They came as one 4 pipe pc with two for each bank, then the next one with two pipes one for each bank, and finally two single pipes one for each bank. The collector that each set of 4 exhaust pipes is attached to is two parts, with the lower half of each side molded directly to the 1st 4 pipe pc. The instructions call for the top halves to be glued in place after all the pipes are installed. Test fitting showed this to be a much harder way to align everything, so I glued the top halves in place, then ran the rest of the exhaust headers. Worked perfectly. Finally I glued on the water pump, and aluminum lines, the Generator, and oil filter canister cover assembly, as the filter was a cloth fiber type that fits into the canister. You can tell this by the bolt on the bottom of the canister. Believe me I know only to well, as my MGBs had this, and it was a pain in the butt to change filters. Now for the moment of truth. I slipped the engine into place, and it fit perfectly!! So I glued it in place from the bottom with Extra Thin. As you can see in these way greater then 1:1 pictures, I need to spend quality time touching up all the issues where I just missed or screw up. In real life these issues really are hard to see, and being a one eye old man makes it just that much harder. Here's some pictures of where I'm at on my build. And as usual, thanks for stopping by, it's always greatly appreciated. Joel 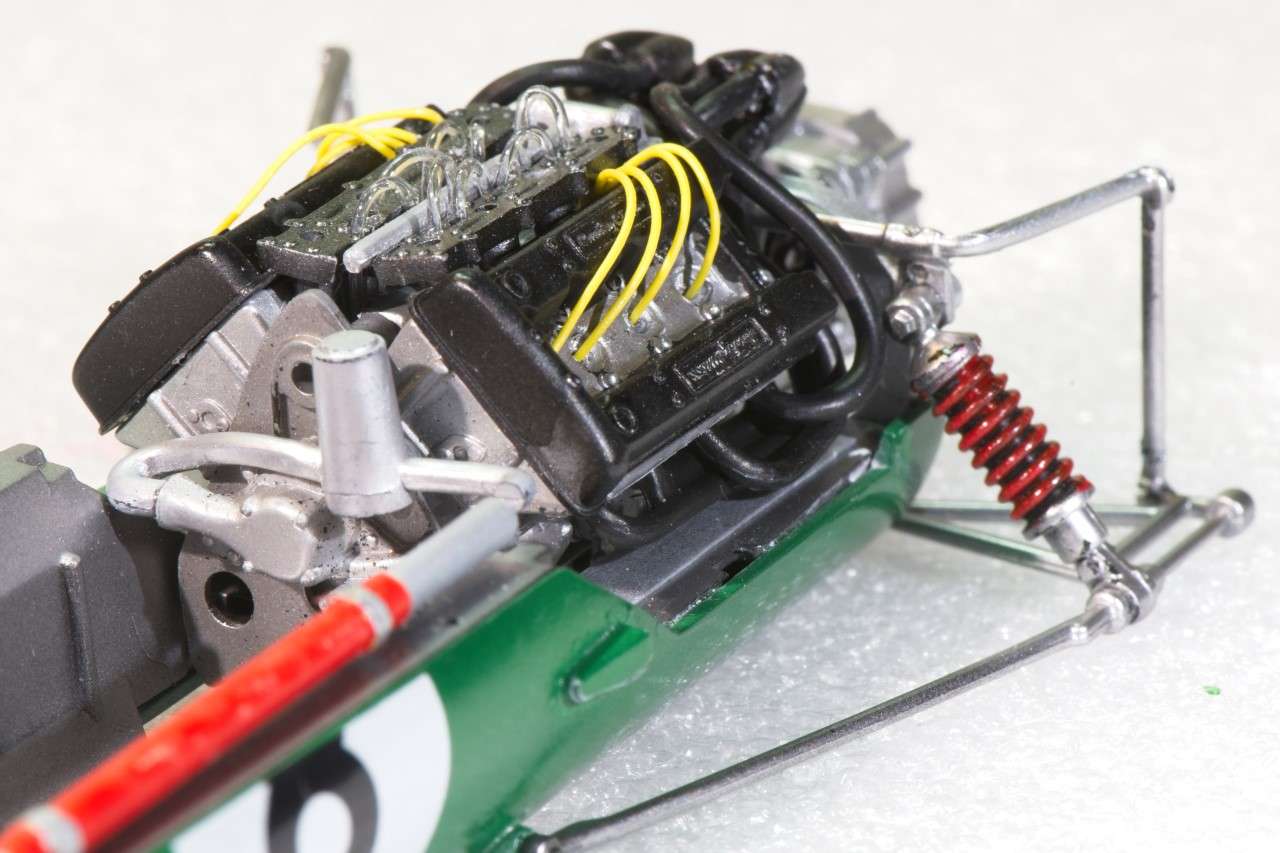 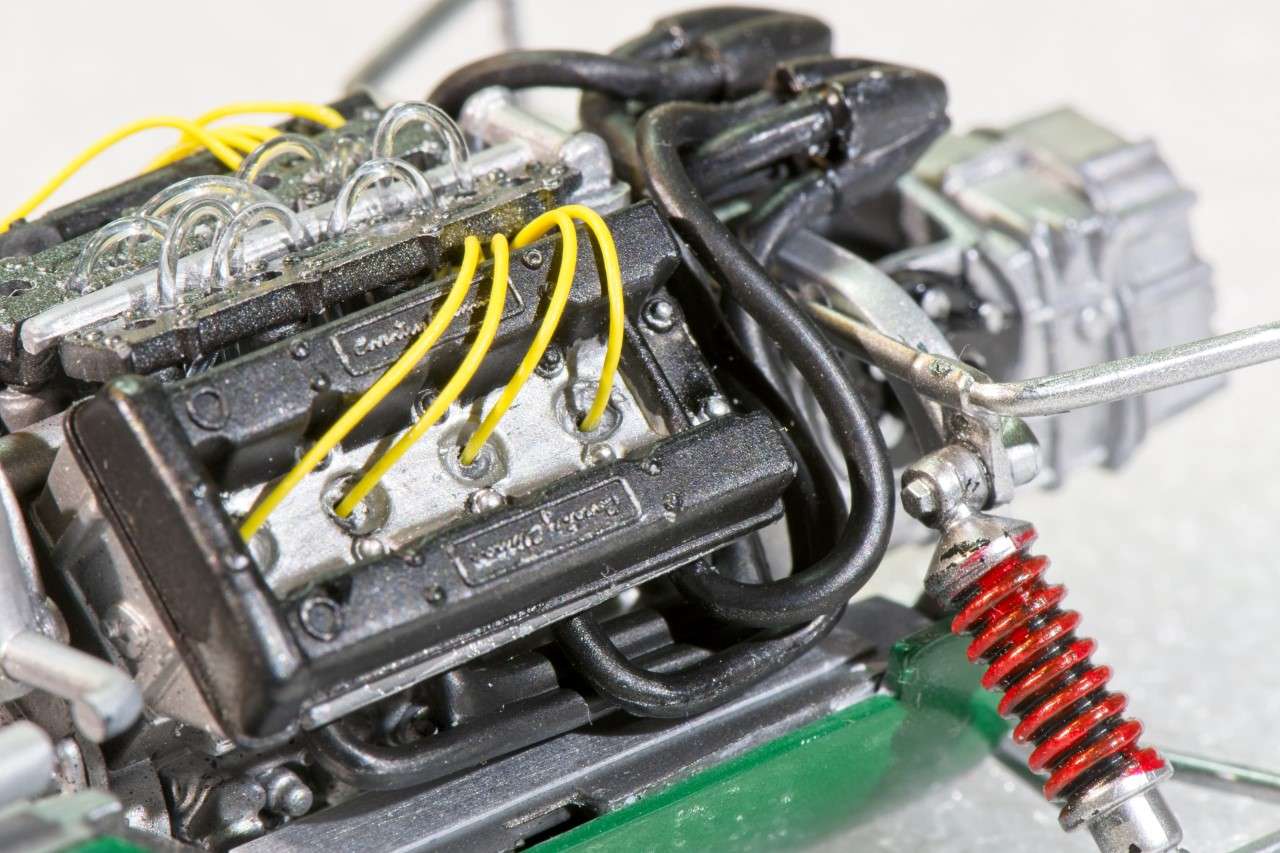 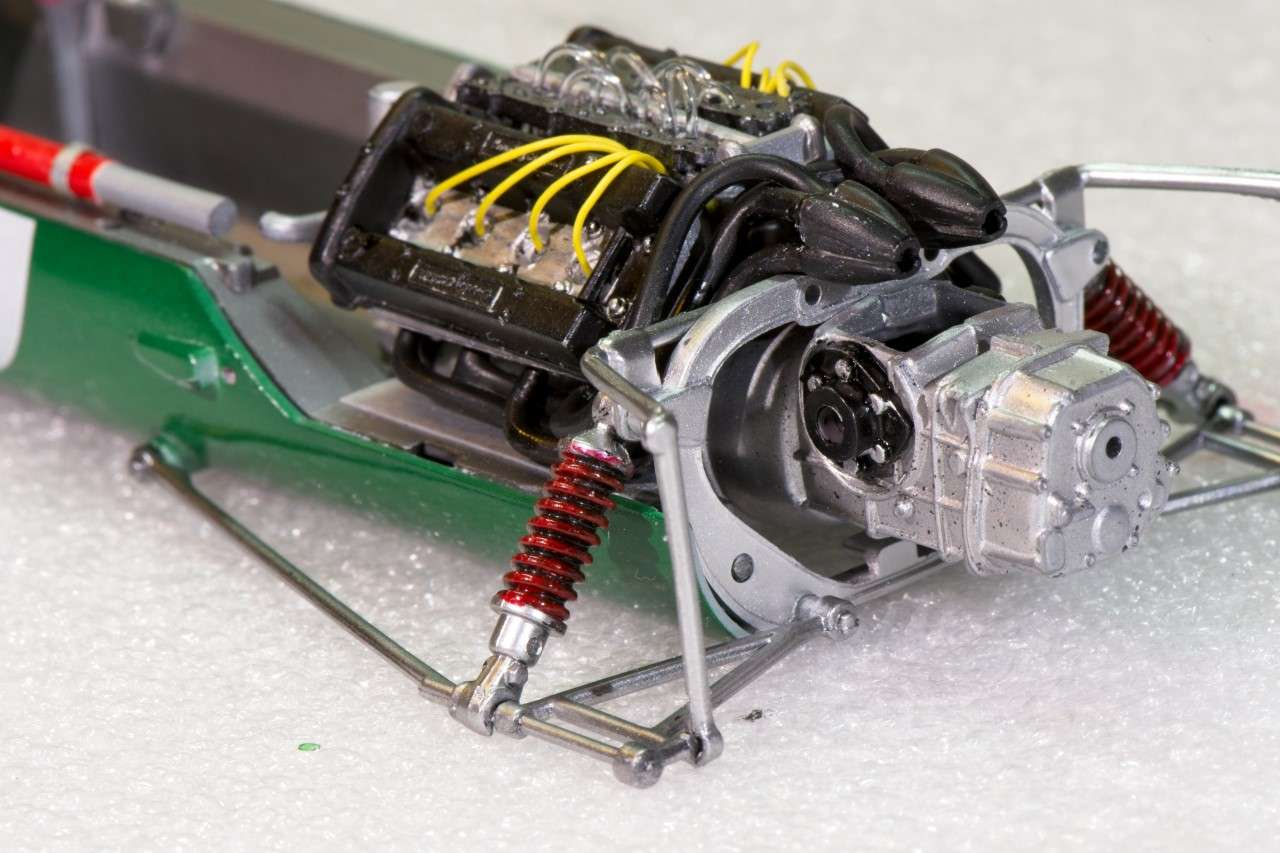 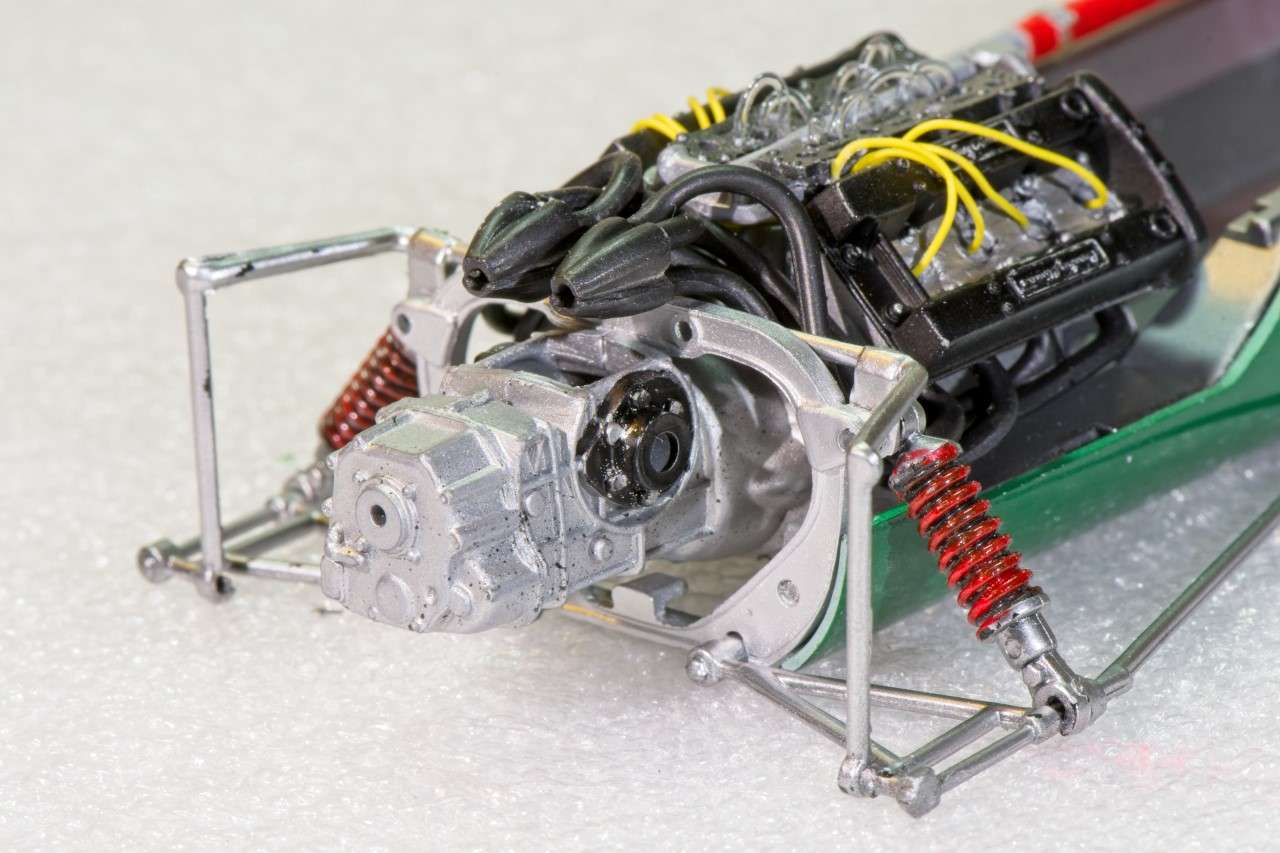 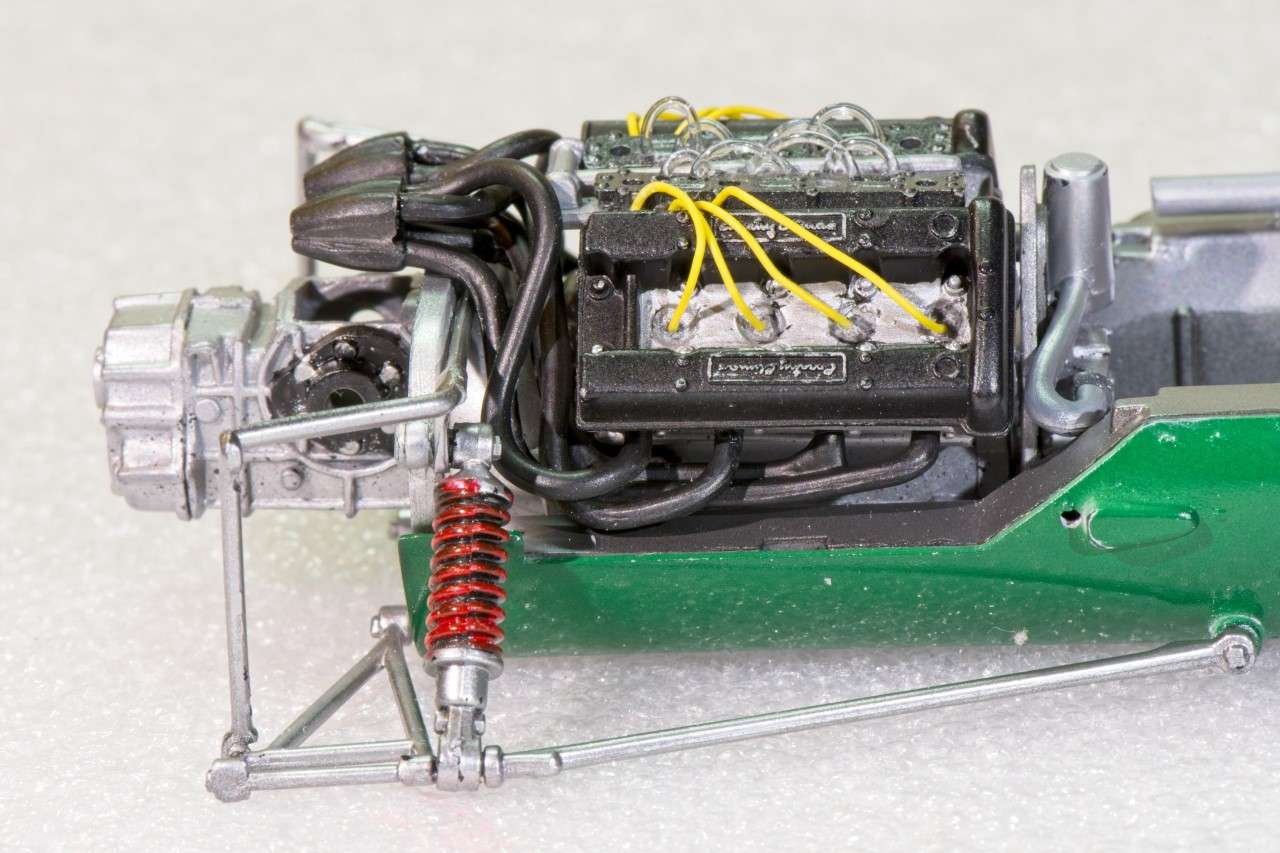 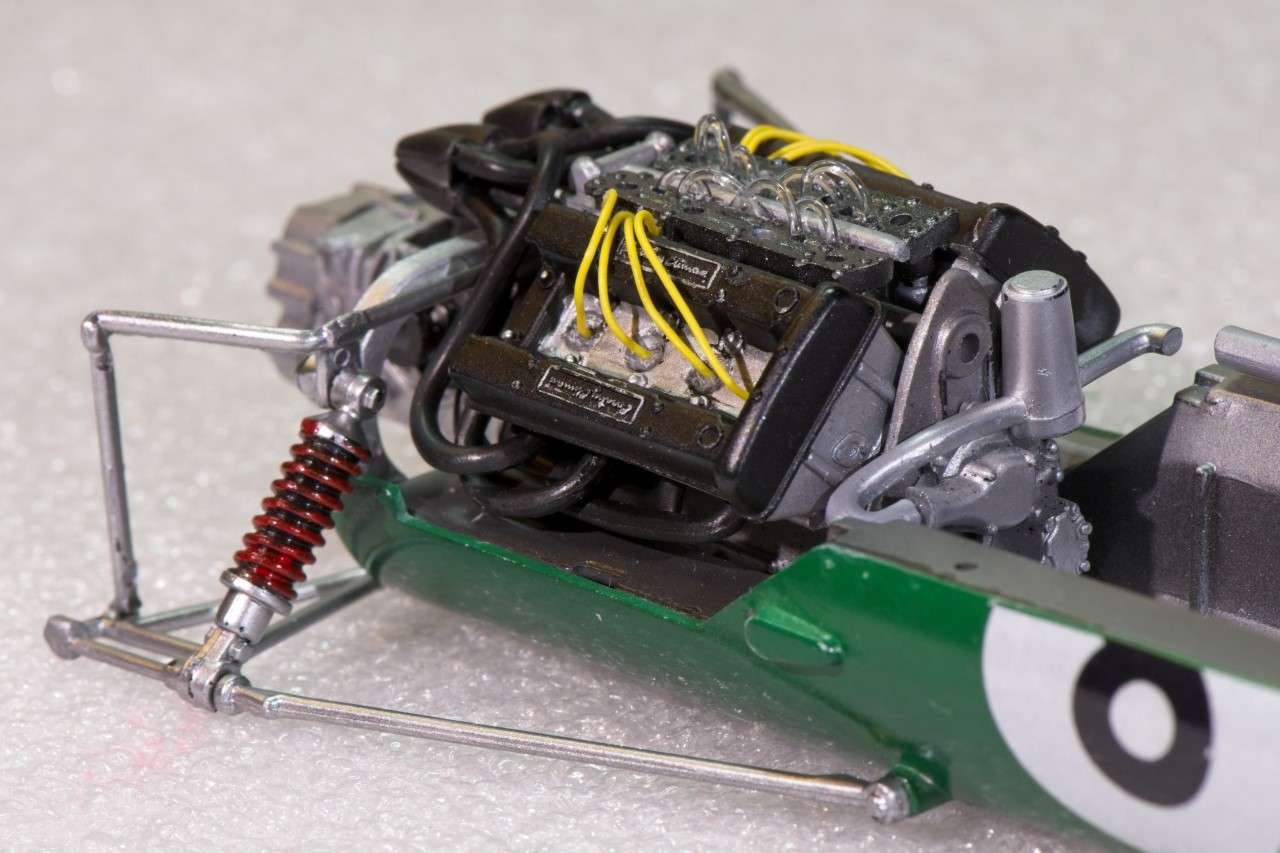 |
|
|
|
Post by arcticwolf on Aug 25, 2019 8:13:19 GMT -8
Beautiful work Joel. Makes me want to go back and improve mine. I did the same thing with the exhaust as you, it just seemed to make more sense.
|
|
|
|
Post by eagle36 on Aug 25, 2019 8:23:08 GMT -8
Brass would be logical, right on. About that black tank, but this is only a guess: We had a Fiat X1-9 race car some years back. On it we installed an air bladder pressure tank, so the engine always had oil pressure even if it wasn't running. It was to save wear on startups, mostly. The tank looked a lot like that thing on the Lotus. Maybe someone installed one, but why he would put it up front is beyond me. cheers Paul I think that black tank is the high pressure pump for the fuel injection system. Keeping it cool was always important. To contradict myself, I looked at three references and could not find a picture with anything mounted in front of the coolant radiator and with the technical discussion describing the pump as "black cylinder" and emphasizing the need to keep it cool but saying it was mounted on the transaxle. |
|
|
|
Post by Joel_W on Aug 25, 2019 9:59:41 GMT -8
Beautiful work Joel. Makes me want to go back and improve mine. I did the same thing with the exhaust as you, it just seemed to make more sense.
arcticwolf, Thanks so much for not only checking out my update, but actually liking what I accomplished. As you can tell, I'm my worst critic by far. Still there's plenty touch ups to do before I move to the next step. No modeling today as we're having the house power washed, and it really needs it especially the north side. Joel |
|
|
|
Post by Joel_W on Aug 25, 2019 10:04:36 GMT -8
Brass would be logical, right on. About that black tank, but this is only a guess: We had a Fiat X1-9 race car some years back. On it we installed an air bladder pressure tank, so the engine always had oil pressure even if it wasn't running. It was to save wear on startups, mostly. The tank looked a lot like that thing on the Lotus. Maybe someone installed one, but why he would put it up front is beyond me. cheers Paul I think that black tank is the high pressure pump for the fuel injection system. Keeping it cool was always important. To contradict myself, I looked at three references and could not find a picture with anything mounted in front of the coolant radiator and with the technical discussion describing the pump as "black cylinder" and emphasizing the need to keep it cool but saying it was mounted on the transaxle. Paul, Both theories sound logical to me, but honestly I haven't a clue. Sure seems that so many of the Historic race cars have been modified so that they last longer on the track without issues. Joel |
|
|
|
Post by starfighterace on Aug 25, 2019 11:21:20 GMT -8
Enjoying watching the build.
|
|
|
|
Post by Joel_W on Aug 25, 2019 11:37:38 GMT -8
Enjoying watching the build. Sarfighterace, Thanks so much for stopping by, it's always greatly appreciated. Joel |
|