Post by Joel_W on Feb 14, 2020 6:32:47 GMT -8
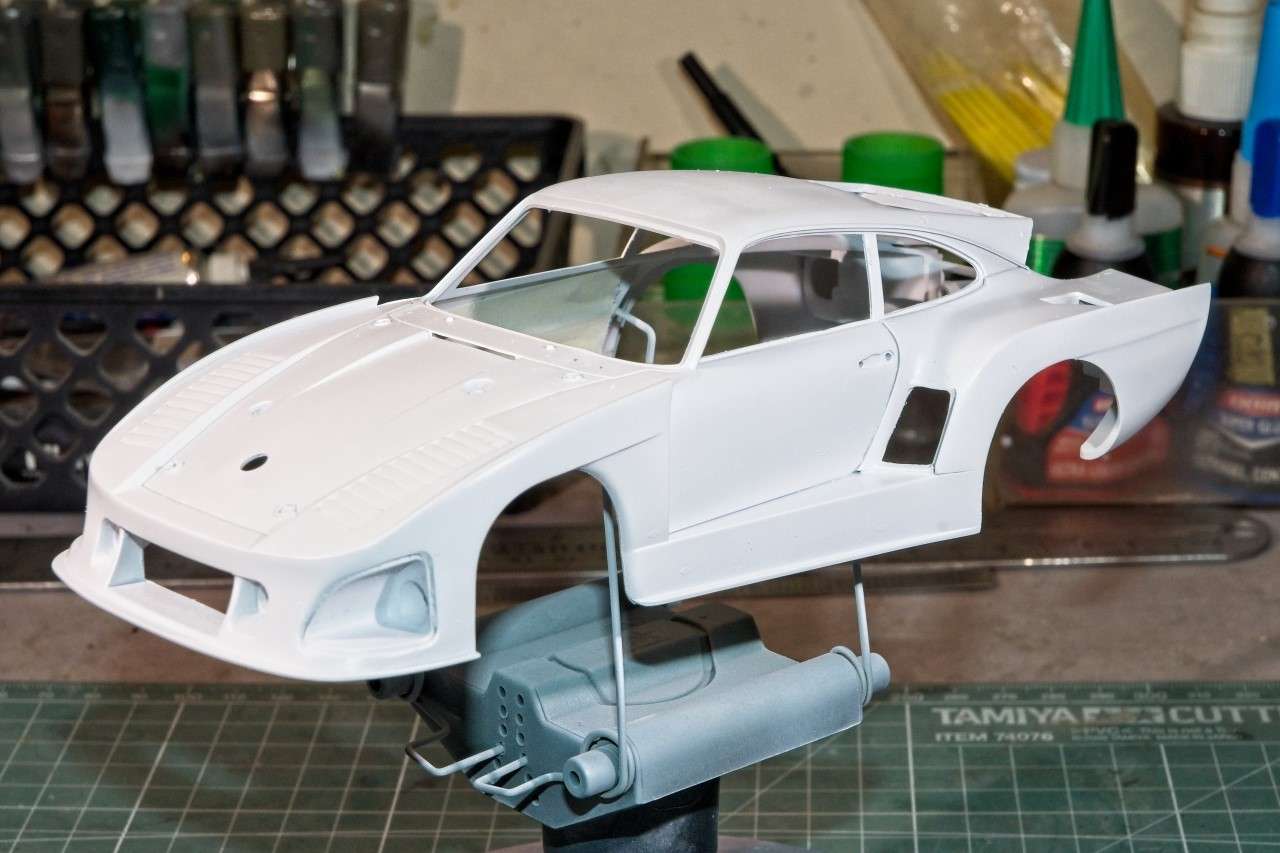
After a few weeks to recoupe and recharge my Mojo tanks, it's time to start my next build. And when it comes to sport car/Tin Top racing in the many world wide series, I'm by far a Porsche fan above any and all other makes. So when the Nunu 1/24 scale Kremer Porsche 935 K3 became available, I jumped at the opportunity to build it. And since I recently built the Beemax 1/24 scale Kremer Porsche 935 K2, I just couldn't wait to have these two side by side on my model display.
There's been quite a lot of discussion about Spot Models having both Nunu and Beemax issuing 1/24 scale 935 K3s. And honestly, it was driving me some what crazy too. The answer to that question is yes and no. They're both releasing 1979 935's, and both are using common parts from the Beemax 935 K2 molds. The NuNu kit is indeed the modified Kremer 935 K3 that won at LemMans, while the Beemax kit looks to be a factory 935-79 fromm that year's LeMans race as well.

Nunu has also produced a Detail Up kit that seems to be the latest rage out of the Orient. So naturally I had to have one.

The black looking ribbon is actually dark blue, the proper color used for the seat harness.
The two decal sheets for the winning LeMans car looks perfectly in register as well as being just thin enough to conform to the many compound curves. But for this build I wanted to do a very special car, the 935 K3 that Bobby Rahal & Bob Garretson drove which was sponsored by Apple Computers. As far as I can tell, this was the only time that Apple ever sponsored a race car. Indy Cals actually has this sheet, so I ordered one. Thanks Michael, it's much appreciated.
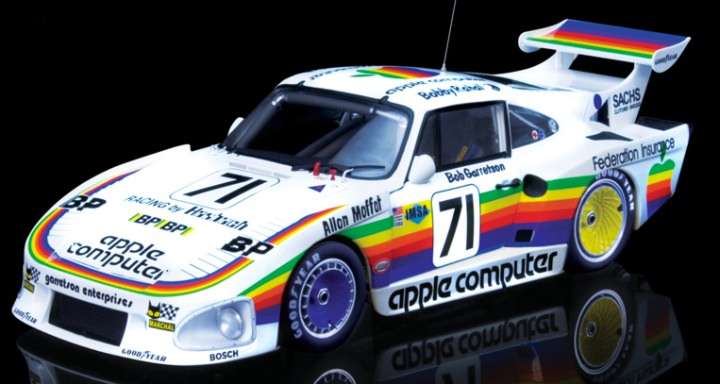
As so many car modelers do, I prefer whenever possible to start with the body shell, so that I can prep, paint, decal, and finish it, then concentrate on the rest of the build. And as with most Tin Tops, that method works perfectly with the 935 K3 kit. Plus it gives me a little extra Mojo when needed to stay focused when things aren't always going my way.
The body shell has been molded as basically a one pc shell. The mold is the basic Beemax 935 K2, has various mold sections, so that they could make several different versions. This does leave quite a few very slight mold lines that needed to be dealt with for the new front clip, and a few for the new rear clip.
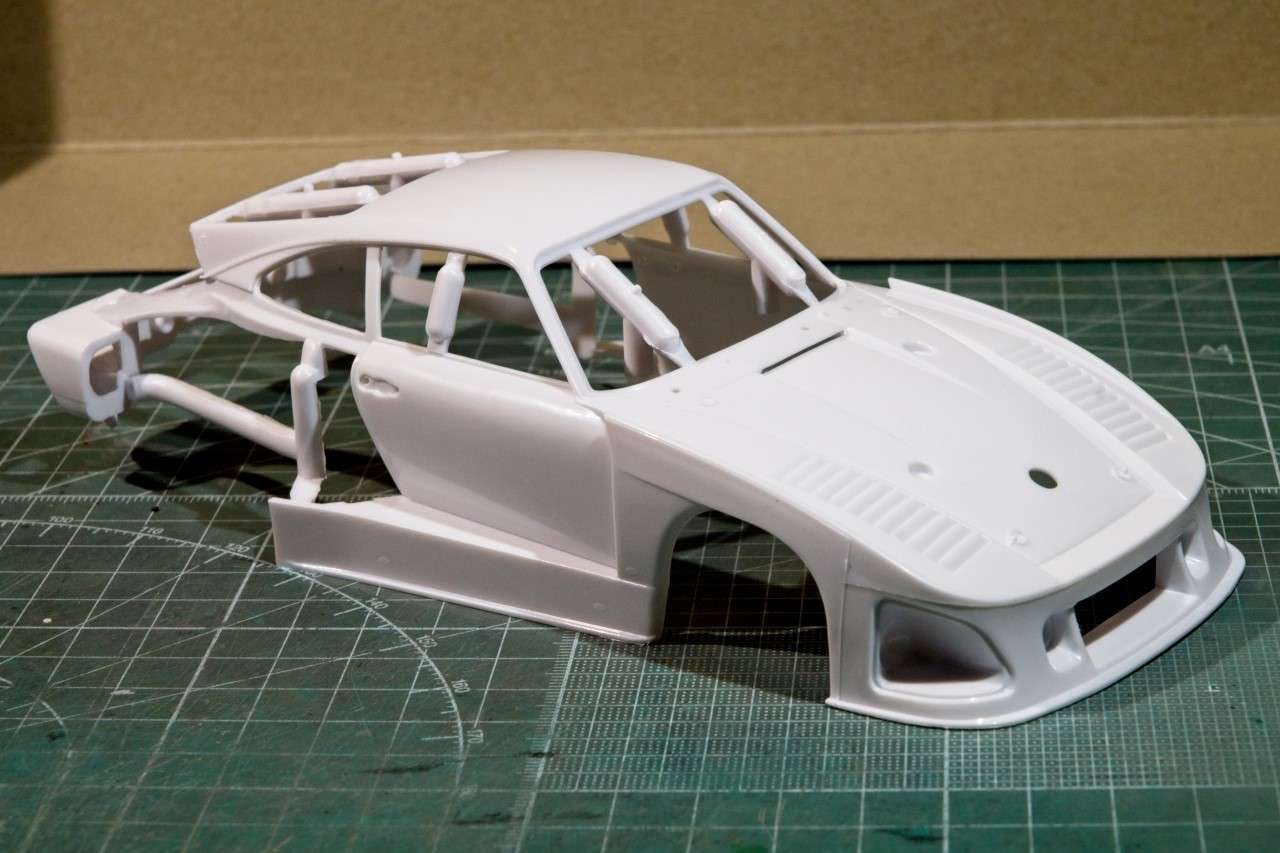
I've gone over the seam lines that needed to be removed on the front clip with a black magic marker. I like this method simply because once the lines are gone, the seams are too.
![]()


What really surprised me was the amount of little bits of flash in tight corners and spaces. I guess that it's a small price to pay for the incredible detail that this kit has. If you look closely at the rear end tubing, you'll see flash bits in a few places.
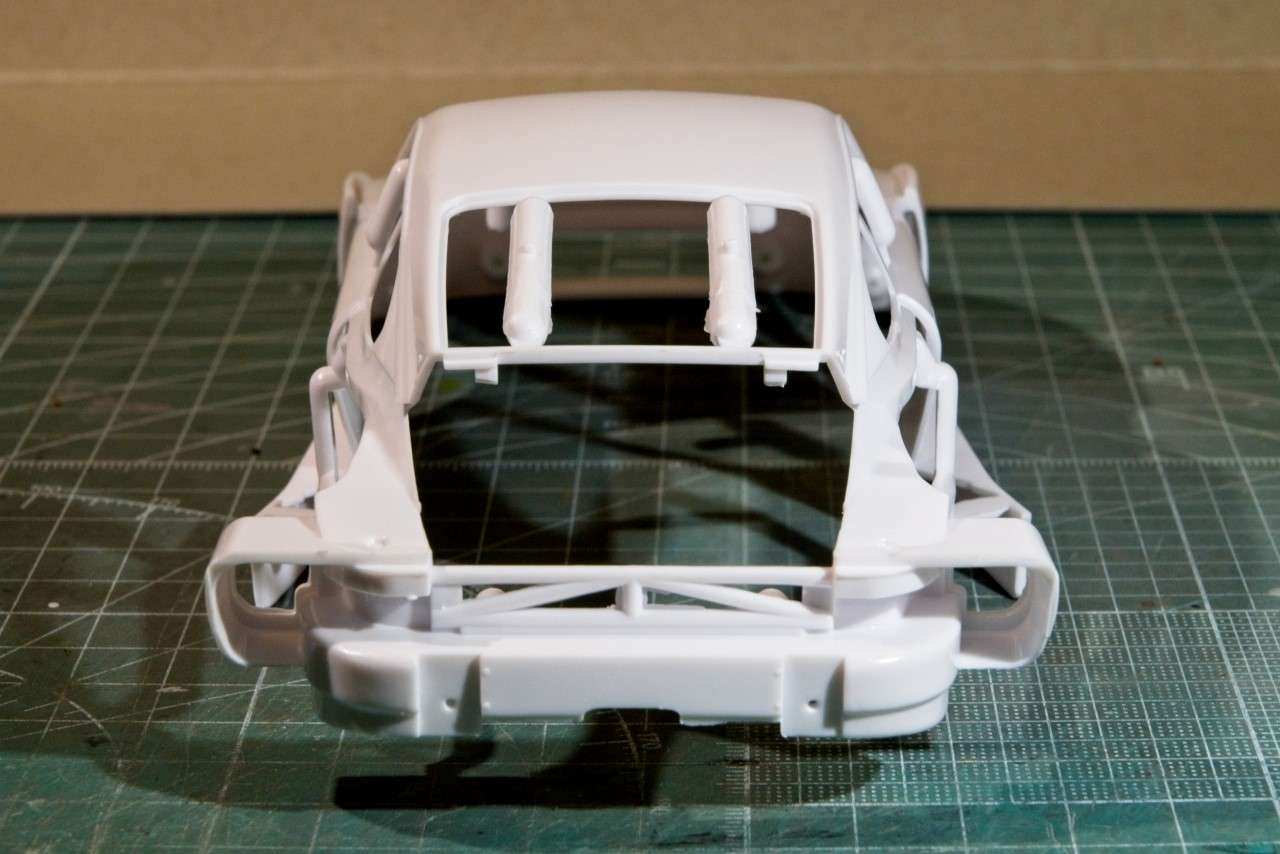
Once I finished cleaning up the front clip, it was time to address the complex flared and enlarged Kremer molded fenders. The kit has them molded into two piece sub assemblies.

I thought about assembling each fender, then gluing them to the body, but the more I thought about it, the more prudent it would be to 1st glue the inner pcs to the body shell, then the following work session, glue the outer facing to the the inner flared wells. After careful test fitting, I glued the inner wells to the body and the fit was nearly perfect, but has slight alignment issues.
The outer sections were super tricky to correctly align as there was a very slight bit of warping. Also the seam between the two became an issue. Most of the pictures I have don't show any seam, but a few do. The issue for me is that most of the pictures are of restorations! so I have my doubts. I ended up removing them with Tamiya Gray putty as you can see in the picture below mostly because of the overall look in model form. Usually after priming I'll need to give them a final thinned coat to blend them in.

Now for the complext rear wing assembly. It's comprised of 4 pieces with the top and back joining at a angle; they're not square. Nunu designed the wing so that I can use the side plates to properly align the top and back pieces, and they actually perfectly aligned. But I somehow managed to screw up and had a slight gap between one side plate and the top, so out came the Tamiya Putty again.

As for the wing, it's also a 4 piece assembly. Top and bottom with the front and back seams on the bottom. They do require some sanding and then putty work, but I much prefer it over the old way of each seam being on the leading and trailing edges. The wing side plates are molded in plastic and are just way to thick so you're going to have to thin them down, or in my case get the detail up kit, as there's PE end plates.

Gotta admit that they look a million times better.
I needed to do a little work on the opening for the rear wing assembly so that it's just a drop in fit. All the seams are on the real car as it's the engine Bonnet as well.

I just wanted to see how the wing looked, so I just laid it on it, and snapped this picture.

And now you're all up to speed with my progress to date.
Joel
There's been quite a lot of discussion about Spot Models having both Nunu and Beemax issuing 1/24 scale 935 K3s. And honestly, it was driving me some what crazy too. The answer to that question is yes and no. They're both releasing 1979 935's, and both are using common parts from the Beemax 935 K2 molds. The NuNu kit is indeed the modified Kremer 935 K3 that won at LemMans, while the Beemax kit looks to be a factory 935-79 fromm that year's LeMans race as well.

Nunu has also produced a Detail Up kit that seems to be the latest rage out of the Orient. So naturally I had to have one.

The black looking ribbon is actually dark blue, the proper color used for the seat harness.
The two decal sheets for the winning LeMans car looks perfectly in register as well as being just thin enough to conform to the many compound curves. But for this build I wanted to do a very special car, the 935 K3 that Bobby Rahal & Bob Garretson drove which was sponsored by Apple Computers. As far as I can tell, this was the only time that Apple ever sponsored a race car. Indy Cals actually has this sheet, so I ordered one. Thanks Michael, it's much appreciated.

As so many car modelers do, I prefer whenever possible to start with the body shell, so that I can prep, paint, decal, and finish it, then concentrate on the rest of the build. And as with most Tin Tops, that method works perfectly with the 935 K3 kit. Plus it gives me a little extra Mojo when needed to stay focused when things aren't always going my way.
The body shell has been molded as basically a one pc shell. The mold is the basic Beemax 935 K2, has various mold sections, so that they could make several different versions. This does leave quite a few very slight mold lines that needed to be dealt with for the new front clip, and a few for the new rear clip.

I've gone over the seam lines that needed to be removed on the front clip with a black magic marker. I like this method simply because once the lines are gone, the seams are too.


What really surprised me was the amount of little bits of flash in tight corners and spaces. I guess that it's a small price to pay for the incredible detail that this kit has. If you look closely at the rear end tubing, you'll see flash bits in a few places.

Once I finished cleaning up the front clip, it was time to address the complex flared and enlarged Kremer molded fenders. The kit has them molded into two piece sub assemblies.

I thought about assembling each fender, then gluing them to the body, but the more I thought about it, the more prudent it would be to 1st glue the inner pcs to the body shell, then the following work session, glue the outer facing to the the inner flared wells. After careful test fitting, I glued the inner wells to the body and the fit was nearly perfect, but has slight alignment issues.
The outer sections were super tricky to correctly align as there was a very slight bit of warping. Also the seam between the two became an issue. Most of the pictures I have don't show any seam, but a few do. The issue for me is that most of the pictures are of restorations! so I have my doubts. I ended up removing them with Tamiya Gray putty as you can see in the picture below mostly because of the overall look in model form. Usually after priming I'll need to give them a final thinned coat to blend them in.

Now for the complext rear wing assembly. It's comprised of 4 pieces with the top and back joining at a angle; they're not square. Nunu designed the wing so that I can use the side plates to properly align the top and back pieces, and they actually perfectly aligned. But I somehow managed to screw up and had a slight gap between one side plate and the top, so out came the Tamiya Putty again.

As for the wing, it's also a 4 piece assembly. Top and bottom with the front and back seams on the bottom. They do require some sanding and then putty work, but I much prefer it over the old way of each seam being on the leading and trailing edges. The wing side plates are molded in plastic and are just way to thick so you're going to have to thin them down, or in my case get the detail up kit, as there's PE end plates.

Gotta admit that they look a million times better.
I needed to do a little work on the opening for the rear wing assembly so that it's just a drop in fit. All the seams are on the real car as it's the engine Bonnet as well.

I just wanted to see how the wing looked, so I just laid it on it, and snapped this picture.

And now you're all up to speed with my progress to date.
Joel


