Post by Joel_W on Oct 12, 2018 10:47:08 GMT -8
Well, it's time for my 1st build update. Being fairly new to car modeling as my background since the 70s has been military modeling, yet my interest in auto racing has been a passion since I was 16 years old. So I just decided that the time had come to concentrate on racing car models, as time is no longer on my side since I retired last January at 70. Basically I'm a OOB modeler, and for now my concentration will be on the overall finish above everything else.
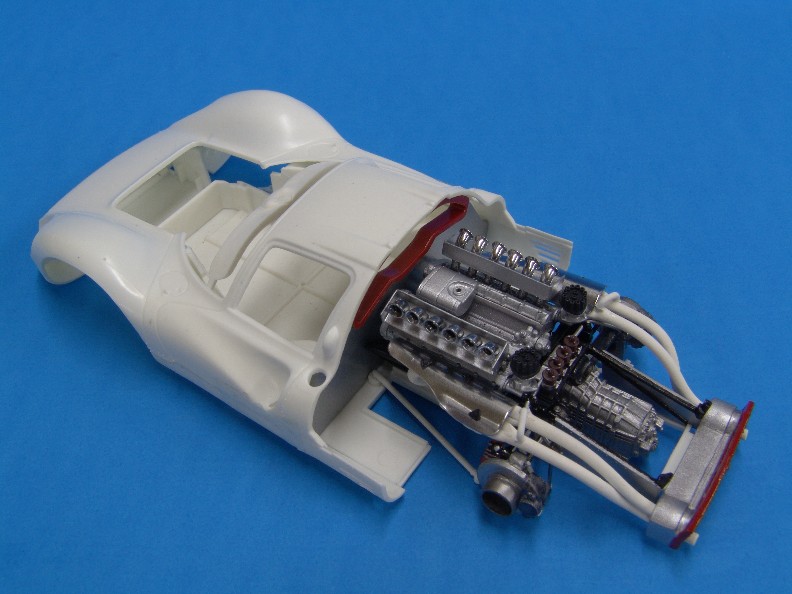
For this build I've decided on the 1/24 scale Fujimi Ferrari 330 P4, which Michael from IndyCals research has shown that this is a P415 not a P4 as it's technically a customer's car, even though NART was considered the North American Ferrari Racing Team.
I finally have enough done for my 1sty update. Rather then starting with the bodywork & prep for painting, I decided to follow the instructions and start at the beginning @ , and so the cockpit was where I started the 330 build.
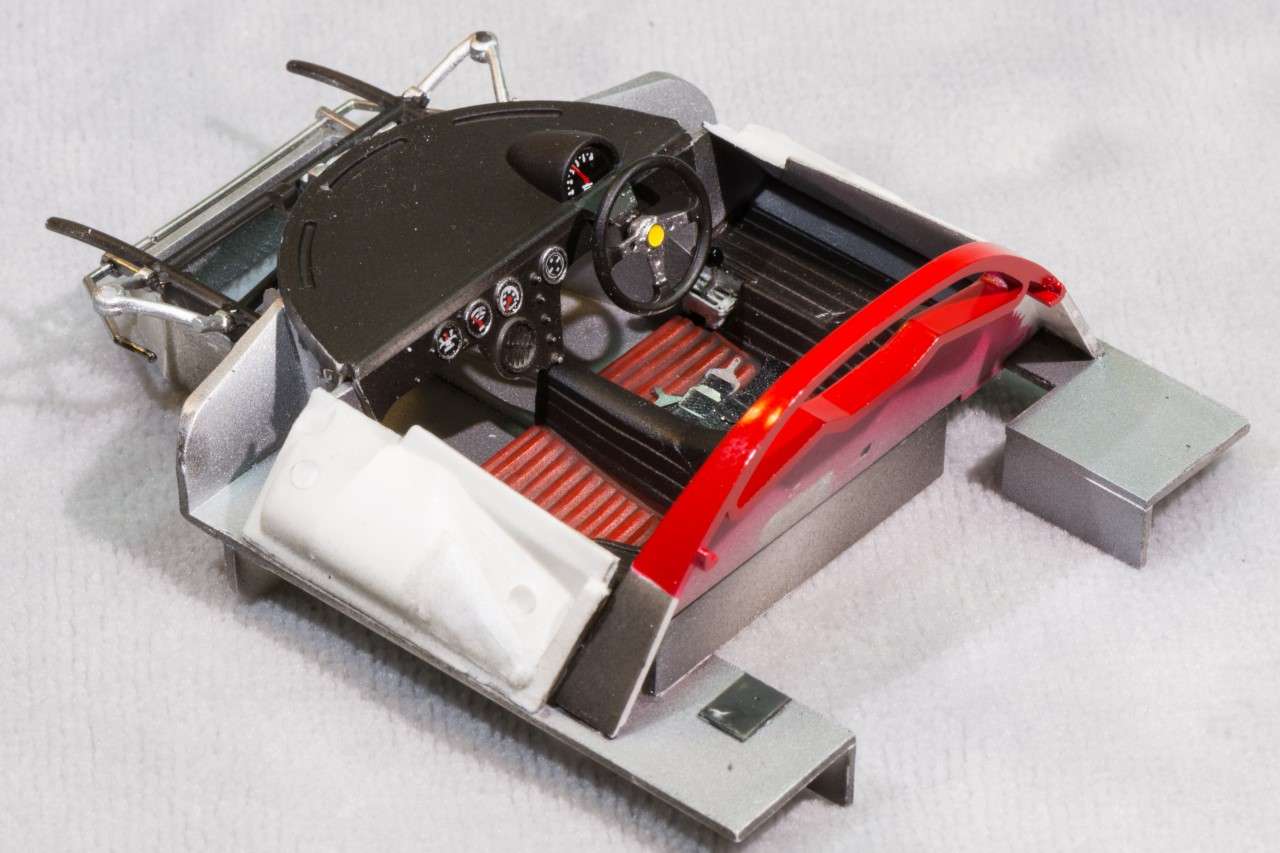
Fujimi's did an excellent job designing the cockpit, so it looks complete, is fairly easy to construct, and doesn't have any build issues.
With that being said, the chassis pan was primed with Tamiya Gloss Black, then followed with Alcad Flat Aluminum. The dash was just painted Tamiya Flat Black. The two seats which are molded as a bench needed some research to decide on the actual colors as they varied all over the place. I went with red leather seats with the side panels and center consul in black. I sealed the seats with Glosscoat, then a wash with Tamiya Black panel wash, as the Red usually gets quite dirty and grimy. Once dry, I sealed all the leather in a 50/50 mix of Gloss & Dullcoat, since the leather would still have a sheen to it.
Next up was the instruments on the dash. I carefully trimmed the bezels with Chrome Silver, then punched out each instrument separately with my UMM-USA punch set as I didn't want all that excess flash to deal with. When dry, I gave each a heavy coating of Micro Krystal Kleer. The Speedometer received it's gloss coat via Tamiya X-22 as I felt it was easier to work with in that oblong space. Then when everything dried, I glued up that sub assembly and installed it.
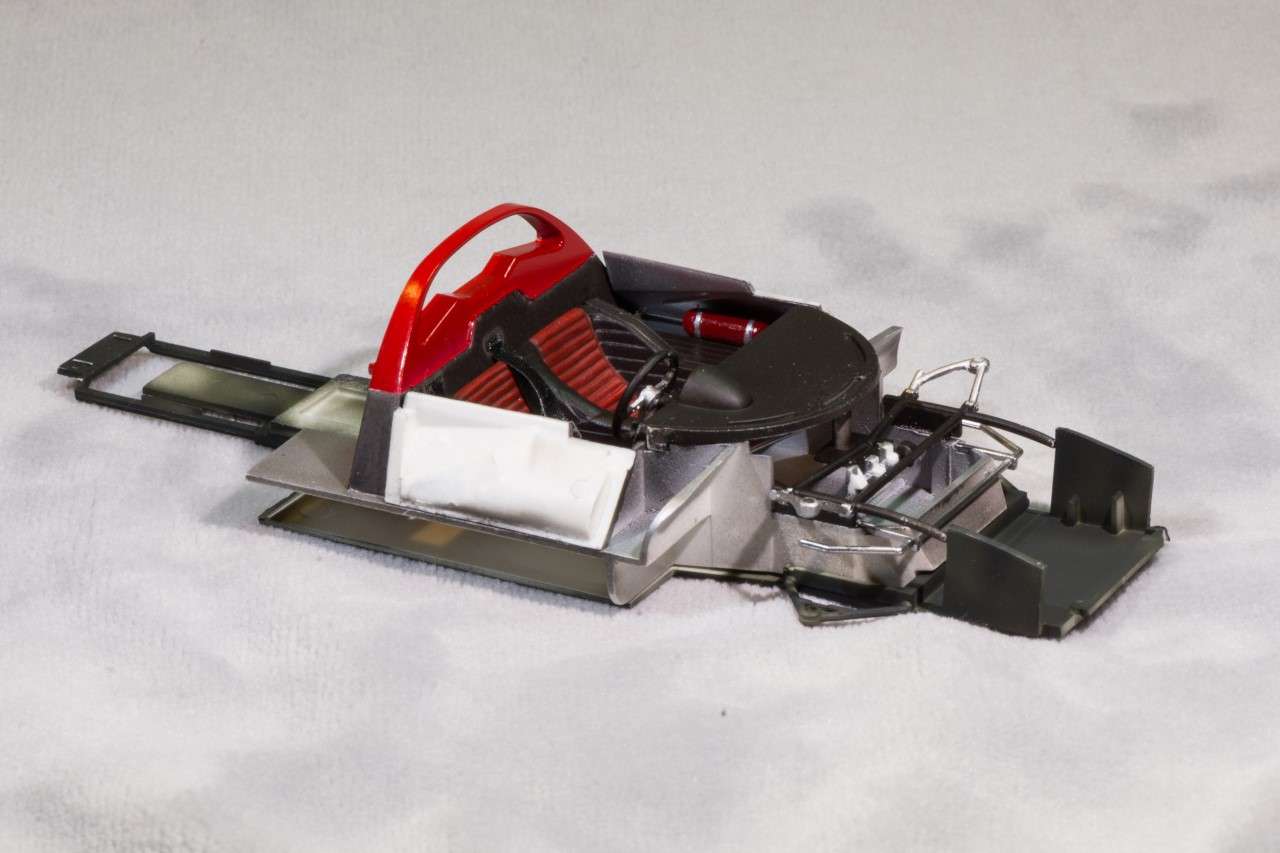
the rear cockpit bulkhead was painted with Tamiya gloss Red and when dry glued in place.
Finally, I used Fujimi's 4 point seatbelt and Harness assembly with PE latches. A little research as to the proper color was once again proving nearly impossible to pin point as most of the pictures I have are restorations. Belt colors vary from Black to Red to Blue. So I went with the default Fujimi Black.
The side panels to the pit where primed Tamiya gloss Black, the finished with Alcad Flat aluminum.

Next up I painted the pan Tamiya Nato Black as it has a much nicer scale effect to it. Then the lower suspension arms were painted polished steel. The bottom of engine pan was also painted Alcad flat Aluminum, while the bottom of the gearbox was painted with a 50/50 mixture of Testors Gold & Silver enamels.

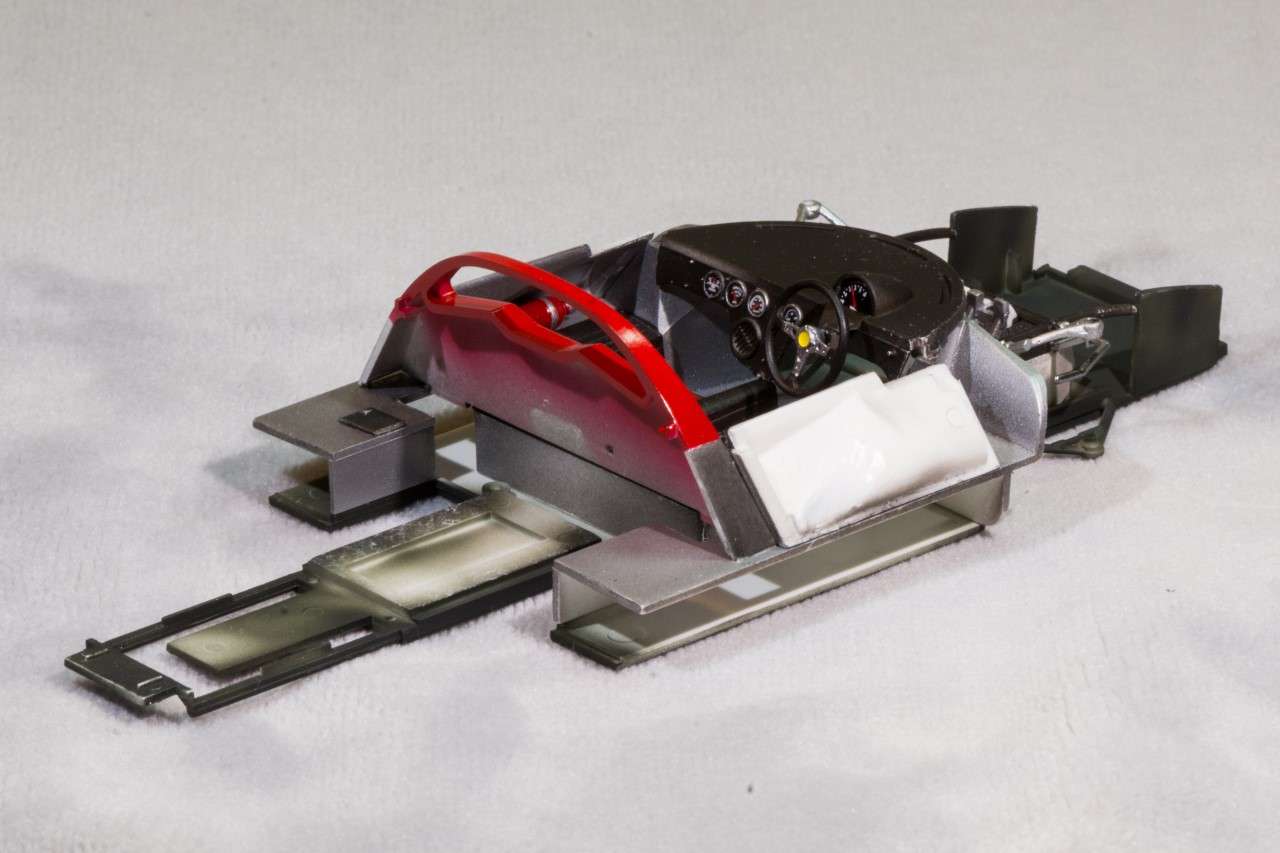
Up next is to seal it, then a slight bit of weathering and dry brushing.
I test fitted the cockpit to the chassis, and the fit was dead on perfect.
![]()
![]()
Joel
For this build I've decided on the 1/24 scale Fujimi Ferrari 330 P4, which Michael from IndyCals research has shown that this is a P415 not a P4 as it's technically a customer's car, even though NART was considered the North American Ferrari Racing Team.
I finally have enough done for my 1sty update. Rather then starting with the bodywork & prep for painting, I decided to follow the instructions and start at the beginning @
 , and so the cockpit was where I started the 330 build.
Fujimi's did an excellent job designing the cockpit, so it looks complete, is fairly easy to construct, and doesn't have any build issues.
With that being said, the chassis pan was primed with Tamiya Gloss Black, then followed with Alcad Flat Aluminum. The dash was just painted Tamiya Flat Black. The two seats which are molded as a bench needed some research to decide on the actual colors as they varied all over the place. I went with red leather seats with the side panels and center consul in black. I sealed the seats with Glosscoat, then a wash with Tamiya Black panel wash, as the Red usually gets quite dirty and grimy. Once dry, I sealed all the leather in a 50/50 mix of Gloss & Dullcoat, since the leather would still have a sheen to it.
Next up was the instruments on the dash. I carefully trimmed the bezels with Chrome Silver, then punched out each instrument separately with my UMM-USA punch set as I didn't want all that excess flash to deal with. When dry, I gave each a heavy coating of Micro Krystal Kleer. The Speedometer received it's gloss coat via Tamiya X-22 as I felt it was easier to work with in that oblong space. Then when everything dried, I glued up that sub assembly and installed it.
the rear cockpit bulkhead was painted with Tamiya gloss Red and when dry glued in place.
Finally, I used Fujimi's 4 point seatbelt and Harness assembly with PE latches. A little research as to the proper color was once again proving nearly impossible to pin point as most of the pictures I have are restorations. Belt colors vary from Black to Red to Blue. So I went with the default Fujimi Black.
The side panels to the pit where primed Tamiya gloss Black, the finished with Alcad Flat aluminum.
Next up I painted the pan Tamiya Nato Black as it has a much nicer scale effect to it. Then the lower suspension arms were painted polished steel. The bottom of engine pan was also painted Alcad flat Aluminum, while the bottom of the gearbox was painted with a 50/50 mixture of Testors Gold & Silver enamels.
Up next is to seal it, then a slight bit of weathering and dry brushing.
I test fitted the cockpit to the chassis, and the fit was dead on perfect.
Joel