|
|
Post by Joel_W on May 3, 2019 5:54:05 GMT -8
Next up on my workbench is a kit nearly as old as I am in "Car Years", it' the Tamiya 1/18 scale Lola T-160 TS (Team Surtees) FIA Prototype Group 7 car for the 1968 Can AM season. For those of you not old enough to have actually been trackside in 1968 to see and hear these normally aspirated Chevy big block V8 427 ci monsters, which delivered 625 Brake hp @ 7,000 rpm. One could easily go deft just hearing them rev in the pits. 1968 was the third season for the Can Am, which ran two-hour sprint races, so no pit stops were needed nor required. Back then they had duel fuel cells that each held 25 gallons of high test gas. Unlike today's super specific rules per series, the rules for the Can AM were pretty minimal, permitting unlimited engine sizes, including turbocharging and supercharging.This was as close to an anything goes series as you could ever have gotten. The rules were just two seats, bodywork that enclosed all 4 wheels, a single engine, and met some very basic safety standards. The T-160 was Lola's answer to the M8A McLarens which was basically a T70 on steriods. Unfortunately for everyone not driving a McLaren Team car including Haas and Penske, your best finish was usually 3rd place or worse. I never missed a Can Am at Bridgehampton, and back in those days we had full access to the pits, cars, and drivers. Need I say more? For a 18 year old I was in race car heaven. Tamiya way back in the late 1960s ventured into plastic car models as motorized toys, as their 1st venture from wooden ship models. Their 5 car 1/18 scale series: Lola T-160 TS, McLaren M8A, Nissan R381, Porsche 910, & the Honda 360 street car? (makes no sense to me), which I believe ended up in that scale, so the model could not only have a small electric motor buried within the engine, but the body could also house two AA batteries inside gas the tanks, at least for the race car kits, was 1st released in the mid 1960's.  By 1970 Tamiya re-released these kits once again, but not with the motors.  And this is the model that I'm now going to attempt to build. My goals are pretty straight foward: 1-Reasonally bring the kit up today's standards. 2-Add detailing to the the engine bay, the engine, the cockpit, and the front end. Since the origins of the kit is a motorized toy, there is no attempt at any kind of realistic suspension. Being a realist at this point in my modeling, I'm going to live with it that way, as I have zero confidence in my abilities to create anything remotely like what was in the real car. Work has just started, and I'm focusing on closing up the battery boxes, and the name plate recess on the bottom of the chassis pan. Then I'm turning my attention to preparing the two piece rear deck for priming as it has a "ton" of ejection marks. Some thinning of intakes and brake exhaust ports as well. Anyway, welcome to my next build. If nothing else, it should be a rather interesting trip back in time, and somethimg completely different from the current State of the Art kits I much prefer to build. If all goes as planned, hopefully, I'll end up with this: 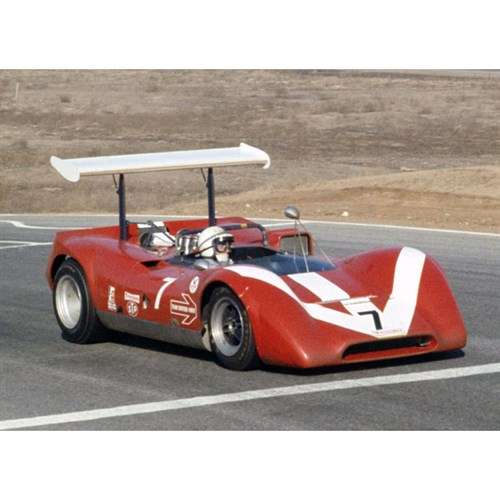 Joel |
|
Deleted
Deleted Member
Posts: 0
|
Post by Deleted on May 3, 2019 6:17:42 GMT -8
I'm in on this one buddy, I'll be sticking with you on this one, always loved the "lines" on these.
|
|
|
|
Post by Ben_B on May 3, 2019 6:35:08 GMT -8
Lola built them pretty back then! I’m too young to have seen CAN AM’s heyday, but the last Mitty I went to a few years ago at Road Atlanta highlighted CAN AM. No T-160s, just T-70s, but the noise was awesome!
Looking forward to this build!
Ben
|
|
|
|
Post by Joel_W on May 3, 2019 10:52:28 GMT -8
I'm in on this one buddy, I'll be sticking with you on this one, always loved the "lines" on these. Bill, Sounds like a great plan. Gotta agree on the Lola lines. They were often the prettiest cars on the grid, but the McLarens were all business. The only thing that we use to argue about, was whose turn it was to win the race: Bruce or Denny's. Joel |
|
|
|
Post by Joel_W on May 3, 2019 10:55:01 GMT -8
Lola built them pretty back then! I’m too young to have seen CAN AM’s heyday, but the last Mitty I went to a few years ago at Road Atlanta highlighted CAN AM. No T-160s, just T-70s, but the noise was awesome! Looking forward to this build! Ben Ben, Now just imagine nearly a full grid of Lolas with a few McLarens up front. The noise was just deafening especially if we were watching the race seating in Echo Valley at the Bridge. Joel |
|
|
|
Post by 2whl on May 3, 2019 14:56:04 GMT -8
|
|
|
|
Post by afx on May 4, 2019 3:11:15 GMT -8
One of my favorite Can-Am cars, wish there was a nice 1/24 scale kit. Looking forward to seeing it come together Joel.
|
|
|
|
Post by Joel_W on May 4, 2019 4:55:17 GMT -8
2whl, thanks so much for the use of your reference material. While I've a good start, it's never enough, so I'll be heading over in a few. Joel |
|
|
|
Post by Joel_W on May 4, 2019 5:00:59 GMT -8
One of favorite Can-Am cars, wish there was a nice 1/24 scale kit. Looking forward to seeing it come together Joel. JC, Me too!! I'm already building in 1/20, 1/24, & 1/25 scales. I'm seriously considering a venture into 1/12 for a model build or two as the center piece of my display. I can understand why Tamiya went with 1/18 scale, but given the popularity of all 4 race cars, new molds of these iconic cars would surely be huge sellers. And since Tamiya has mostly produced curbside kits of closed wheel cars, their previous drawings would still be a valid starting point. To have a 1/24 scale M8A, T-160, and a 910 is what dreams are surely made up of. Joel |
|
|
|
Post by Joel_W on May 5, 2019 11:00:56 GMT -8
Unlike my usual slow poke style of building, the weather has been nearly daily rain, rain, and then more rain. At least the storms have been light enough not to have caused any flooding issues. Can't work around the house in that weather, and I've been avoiding working indoors as well, claiming more back issues, which is basically true. So I started the Lola T-160-TS, not sure if I'll attempt the conversion to a 160/4 or not, as I can't find the old Fred Cady decals, and I'm not to sure if the IndyCal decals for the 1968 Gurney Olsonite Eagle in 1/18 scale would be to small for the numbers and number circles. Up 1st was cutting out the molded in screens from this: 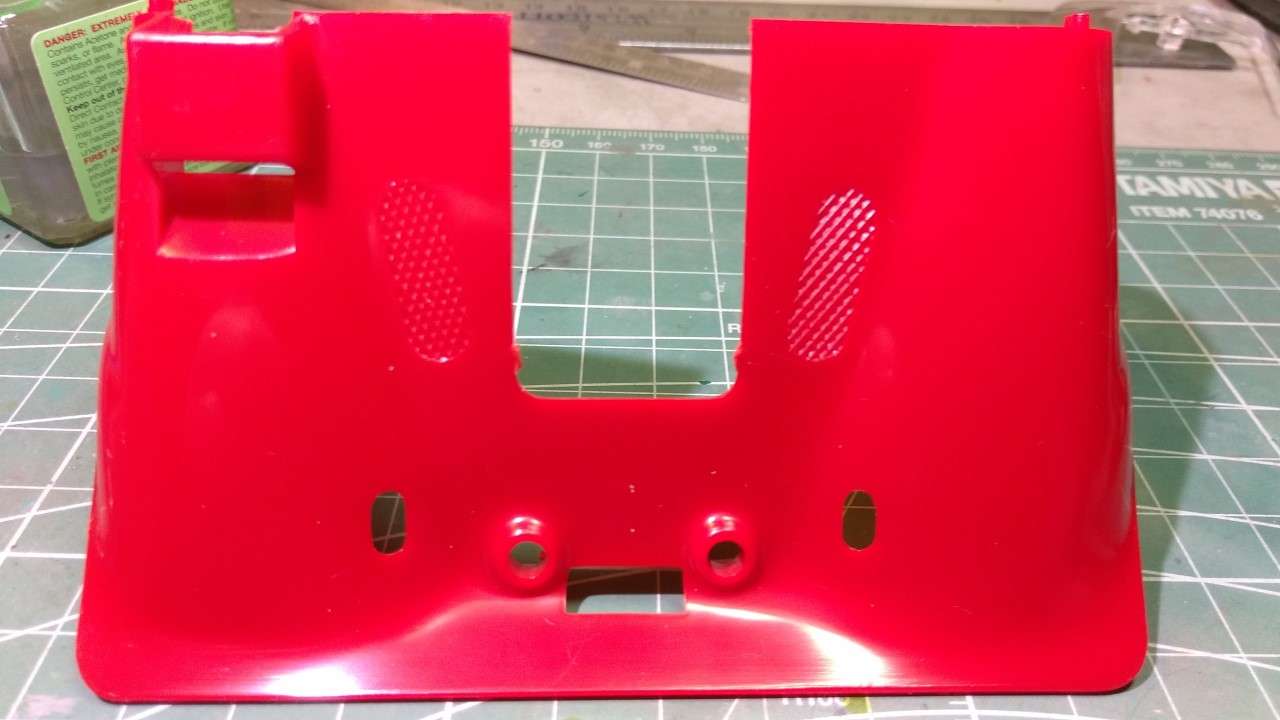 to this:  Then I puttied all the ejection pin marks on the inside of the engine cover. 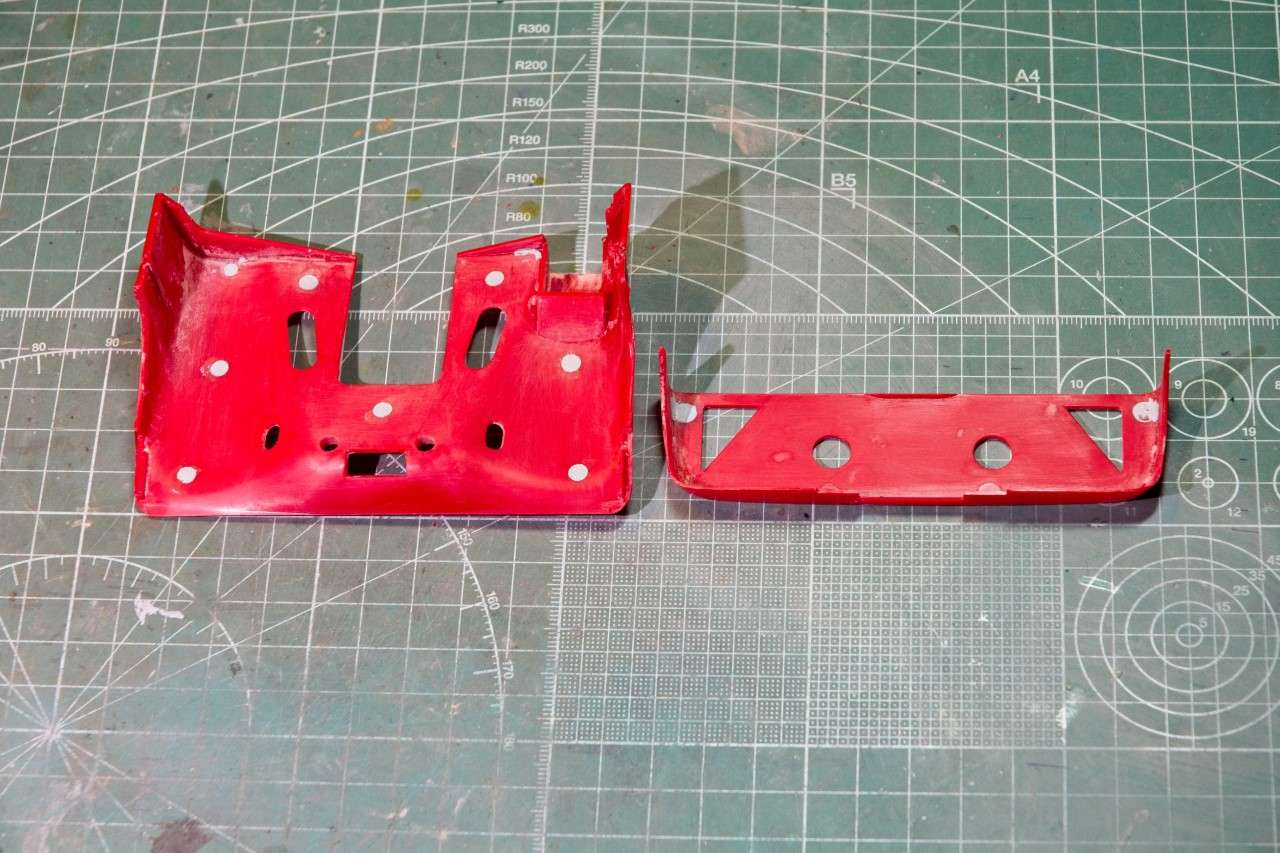 And finally glued on the end clip. 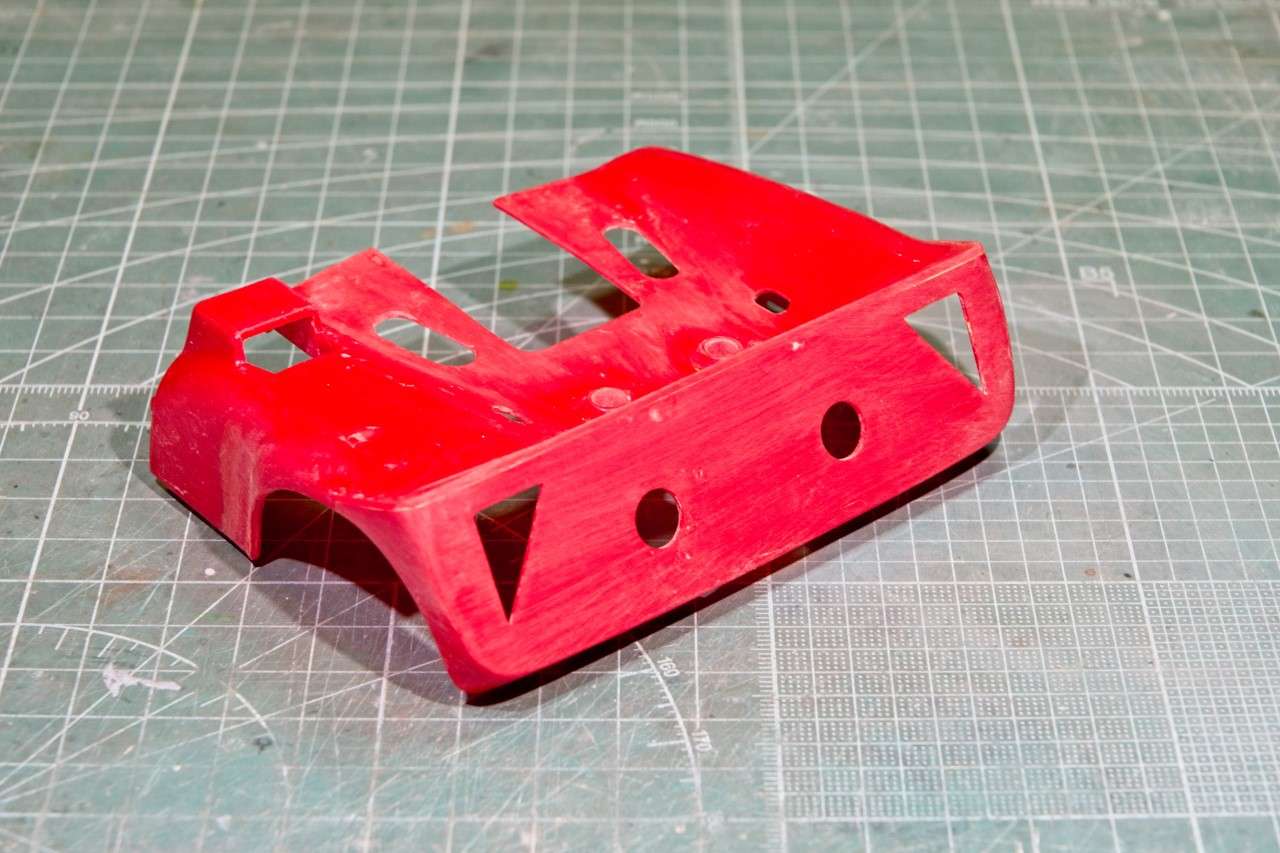 I must have been to heavy handed because as I was doing the final sanding, I heard that dreaded "POP" as some plastic snapped. Turns out that the crack was right by one of the cut outs I was working on. So I applied CCA glue to the top, then some excelorator. That aligned the inside surface but I was leery about the joint, so I used a method I've seen a few Japanese modelers on You Tube use to reinforce the joint. I cut a piece of paper towel so it covered the glue joint, then soaked it in CCA glue, and applied it to the joint area, followed up by more CCA glue. I let this dry for several hours till it was rock hard, then sanded to shape. I'm not to concerned about the blending in of the patch other then some putty before priming. After all, it's not uncommon to have patches on the inside surfaces of the fiberglass to repair stress cracks. Well, that's my excuse. 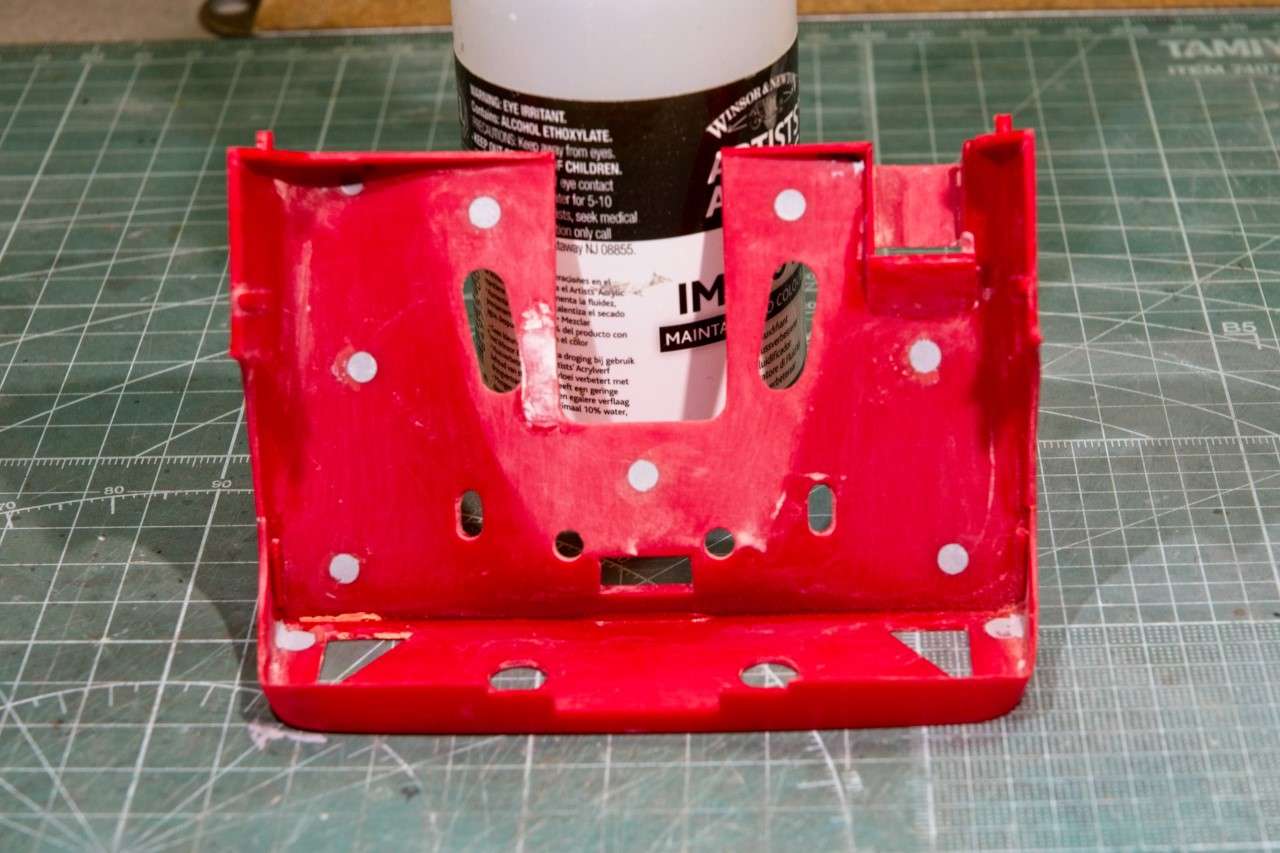 Next up was the bottom chassis pan. As I said this was a motorized plastic model, and as such Tamiya molded two battery door openings in the chassis, as well as supplying those two doors. 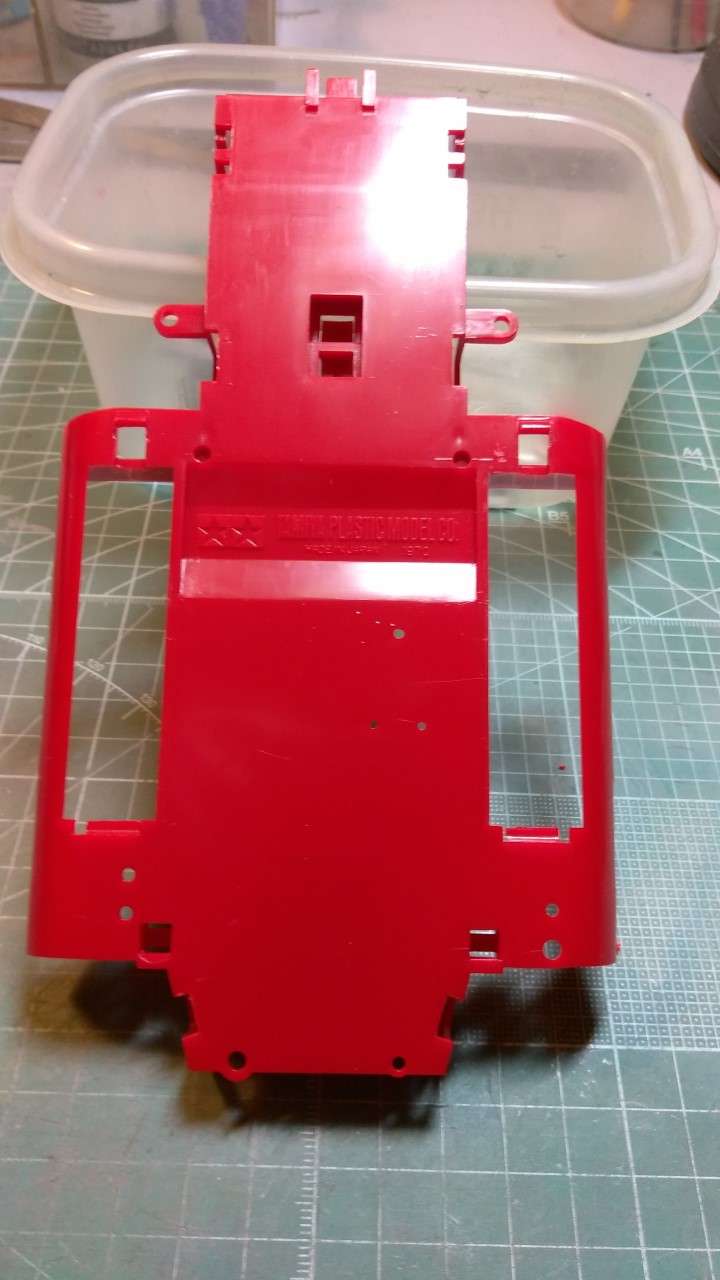 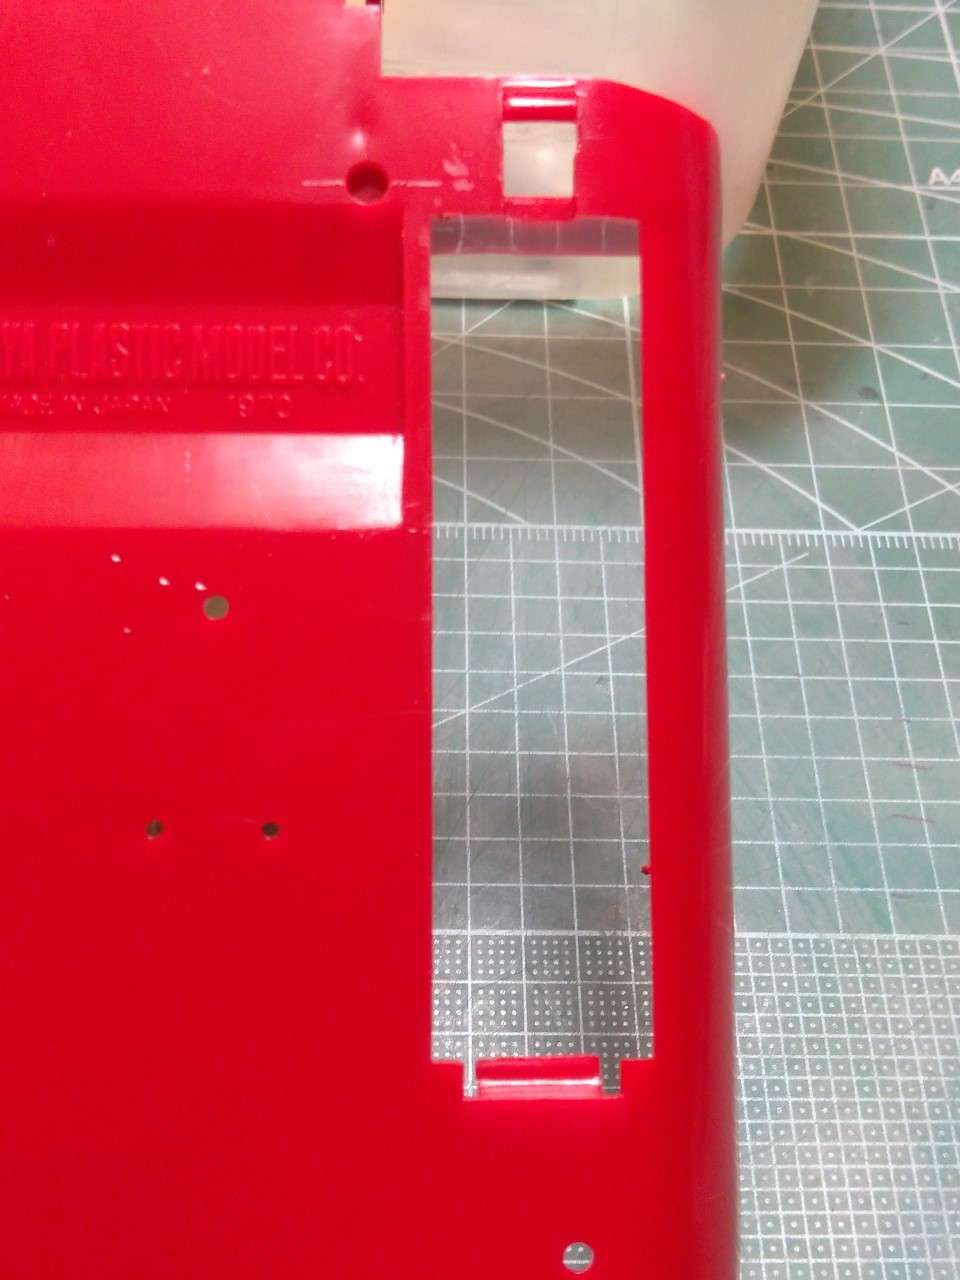 You'll also notice that they decided to create a huge recess area and place the Tamiya Logo there! 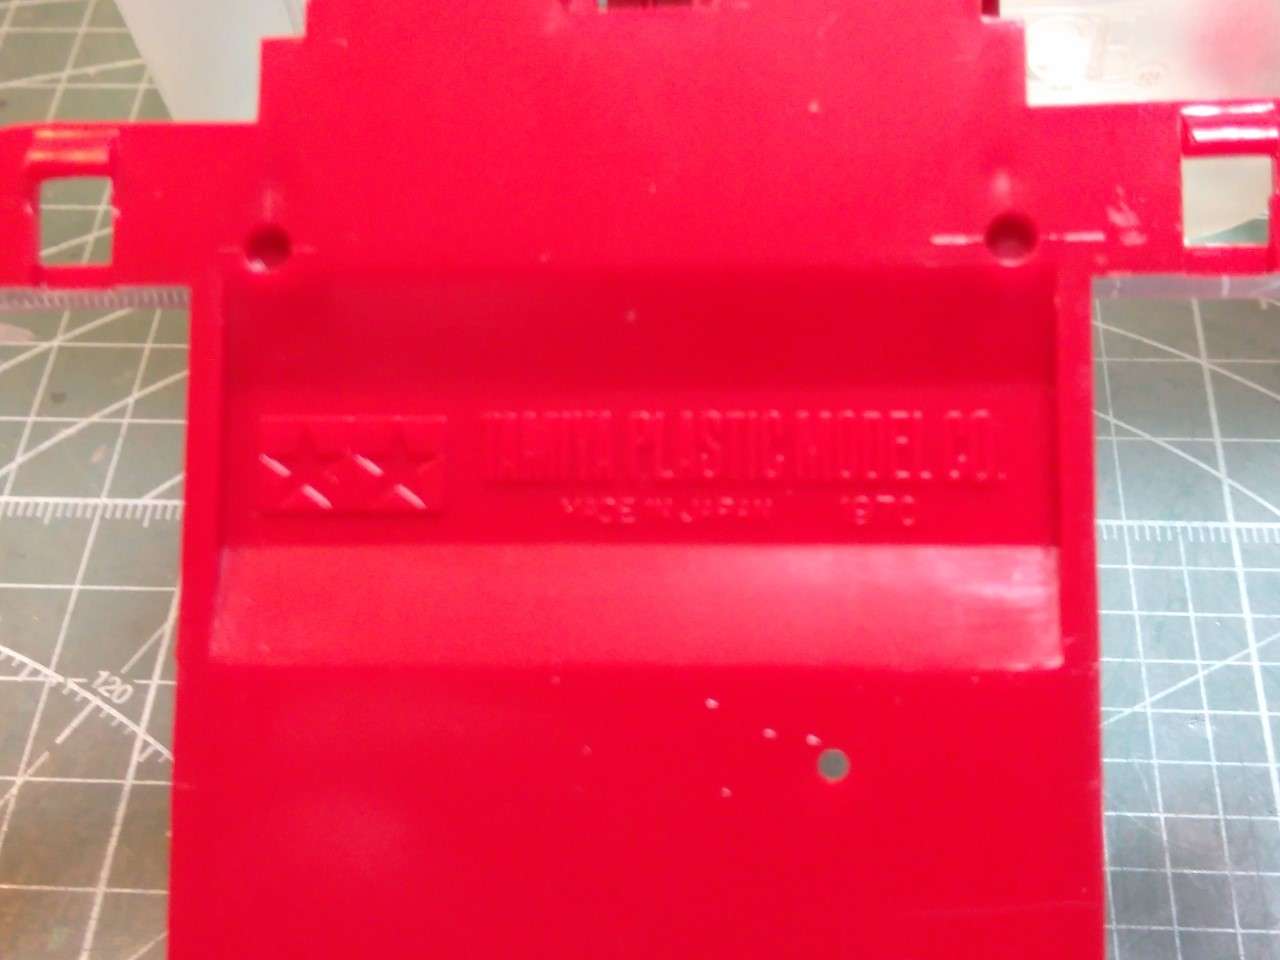 the pan is supposed to be basically flat and smooth. So the 1st step was to glue the doors in place, snap off the battery holders and clips to keep the doors closed. That would allow me to get a better and tighter fit, as well as better glue joints. I also shimmed and filled that recess with scrap pcs of sheet plastic, so I had less space to fill. When the doors had dried, I added sheet shims for a tighter fit. Now for the fun part. How to cover up both doors, as well as the recess? My solution was to try Apoxie Sculpt 2 part putty.  Now I've never used it, nor any other epoxy putty before, so I watched a few vids on You tube. looked easy enough, that is till I had to actually do it myself. I mixed more then I thought I needed, but I needed more. Then I started to push the mix into the recess, then cover the doors. It's not so easy for the a 1s timer. I smoothed out the epoxy, but used way more then I needed. I subconsciously fell back into the old Green Stuff/Bondo routine of more is better as there is shrinkage to be concerned with. Well, there is no shrinkage as there is no evaporation of any Lacquer as I found out the next day. I sanded and blended for more then two hours, but the end results are way better then I thought I'd get. All the filled areas are level and blended in perfectly. I did have a few areas to refill from poor handling on my part. for that I used Tamiya Gray Putty. 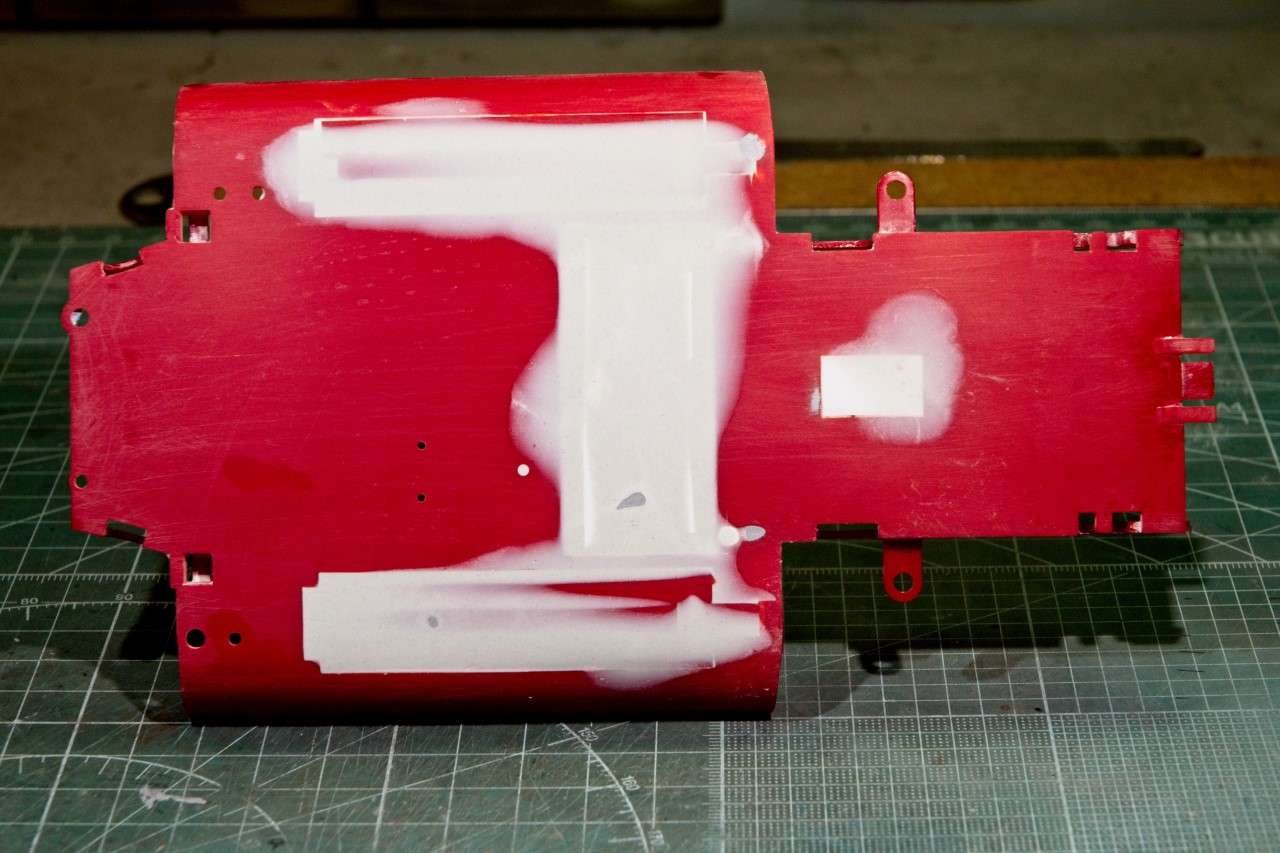 Up next is a primer coat, but I still need to figure out exactly which version I'm going to be building. And thanks for stopping by and checking out my Lola T160 to date. It's always greatly appreciated. Joel |
|
|
|
Post by clowncar on May 5, 2019 11:25:28 GMT -8
The rules were just two seats, bodywork that enclosed all 4 wheels, a single engine, and met some very basic safety standards. “A single engine?” ”Just one.” ”Lightweights! Where’s Werner.... Werner! Back to the drawing board!!” ”Jawohl. At least we’ll have three spares, herr Donohue.” |
|
|
|
Post by Chris K. Hale on May 5, 2019 15:27:49 GMT -8
Actually there wasnt a One engine rule, as the Mac IT Special was a legal, 4 Rotax 775cc engine, Can Am car, although trying to sync up four 2 stroke engines is a very , almost impossible task, it tested at Orange County Int. Raceway , a drag strip that AAR , UOP 101 Shadows and many others tested at, mostly Acceleration, Aerodynamics ( you read right) and Braking... I went to several Can Am tests there with my Dad.. The car did run at Riverside although I dont remember if it qualified..    the car was driven by a Japanese driver Fushida. I will write up another story about this car and my Dad when I have more time.. Chris |
|
|
|
Post by Joel_W on May 6, 2019 5:09:13 GMT -8
Actually there wasnt a One engine rule, as the Mac IT Special was a legal, 4 Rotax 775cc engine, Can Am car, although trying to sync up four 2 stroke engines is a very , almost impossible task, it tested at Orange County Int. Raceway , a drag strip that AAR , UOP 101 Shadows and many others tested at, mostly Acceleration, Aerodynamics ( you read right) and Braking... I went to several Can Am tests there with my Dad.. The car did run at Riverside although I dont remember if it qualified.. the car was driven by a Japanese driver Fushida. I will write up another story about this car and my Dad when I have more time.. Chris Chris, Honestly, I didn't remember this footnote to the Can Am for the life of me, as there were a ton of one ofs over the life span of the Can Am. Thanks to you I did a Google search on it. As you said, it was powered by 4 2 stoke engines that broke the drive shaft every time Fushida tried to accelerate. Seems that the only time the car was entered in a Can Am was 1970 Laguna Seca race. Fastest lap was a 1 29 compared to the Chaparral 2J pole time of 59 sec. Never made the race, and faded away into history shortly after that. My reference to one engine came from memory, not the rules book, of which I don't have. Some how I thought I remembered that some teams, starting with McLaren complained that the 2J had two engines, one being for the fans, which was illegal according to them, as it threw out dirt, grass, oil, etc. on any car following it, as none of the teams could keep up with the 2J through the corners due to it's incredible grip. Unfortunately, the Chaparral sucker engine broke more times then not, so was never a real factor, but when it worked, the car literally was from another world. Anyway, my only point was a general description of the Can Am that it had as few rules as possible, unlike today, where there is a rule for everything, and every single part of the car. Joel |
|
|
|
Post by Joel_W on May 6, 2019 5:56:54 GMT -8
Joel, Since you were the first among Yourself, Ben, and me to receive (although mine DID show up yesterday) to actually put it to the test, disregarding the minor first usage faux pas' what is you impression of said Apoxie Sculpt? I couldn't get into mine, we actually had a fill in gig yesterday. First time playing in 2 years since we shut the band down. Lot's of dust blown off there, BUT great fun. One other question are you going to do the molded screen sections with the real McCoy? I am anxious to see how you finish this one Bill, I found working with it to be very messy to say the least. The mixing of the A & B clays is easy enough, but quite sticky to say the least. Although it didn't take the two min suggested to mix it completely. I found the putty to be somewhat difficult to spread evenly over the large surfaces I was trying to fill, and the deep recess for the Tamiya name was even harder to work. As I said, I applied way to much but less seemed to make smoothing it out with water a real task as I more then once removed all of it from just surfaces with minor cracks or shallows. I did create a gigantic mess to clean up which I accomplished by running water over the entire surface, and then carefully using paper towels around the putty but not touching it. I had visions of a super mess to deal with once dry. But as I said, my fears were unfounded. Once dry, and it dries like a rock. I realized that I needed to find a compromise of just how much to use where the next time I did use it. I'm not even sure that trying to fill deep depressions in one shot was the right way to go. What I was left with was way to much to sand to what you see in the picture of the bottom of the pan. I spent a good two hours sanding with 320 emery cloth, not sand paper, as that's what I always use. However, what surprised me is that using the cloth wet created a wet goopy mess that clogged the paper pcs asap, so I adapted the dry method. For that, I covered my computer system, as my spray booth is aways covered when not in use. I opted to wear my respirator that I wear for painting, not the allergy types that I use at times periodically for dusty work around the house and yard, and I opened the window in the room for more ventilation. I would periodically stop, and damp wipe my workbench to try to control the dust the best I could. Thinking about it, I should have taken all of this to the garage with the door opened. The sanded surface feathered perfectly with not a single chip or crack. I'll post about drilling as I have to reopen a few holes. it was super smooth just with the #320, but as I worked the entire bottom with #400, 600, & #1,000, it was as smooth as the plastic. Priming should be a breeze. As for the two oval openings that I cut the molded screens out of, further investigation shows that those openings are for the intake brake cooling hoses, not the exit of hot brake air. The T160/4 which is my other option build doesn't seem to even have them, The few pictures I actually have of those vent holes are for a later version and there is no screening. Any help would be greatly appreciated. No need to justify not model building over having a gig to play. Sounds like you had a great time, and that's the important thing. Joel |
|
|
|
Post by Ben_B on May 6, 2019 7:03:47 GMT -8
Apoxie and Milliput can be messy to work with. The good thing about it is you can smooth seams without having to allow for shrinkage, so you can shape it close to your final shape while it's still soft. You also don't have to worry about melting the plastic if you apply large quantities of it, like you do with solvent-based putties. I still tend to use too much and end up with more waste than I should at the end. I use the "wet finger" method or wet clay modeling tools to rough everything in. I'll then go back and wet sand to finish. Sometimes, you'll get some small holes or scratches that can be filled with your favorite filler.
Ben
|
|


