|
|
Post by pnance26 on Jan 14, 2021 7:41:46 GMT -8
Dave,
Your pictures are invaluable as tools for this build!
I really appreciate you and the info.
I’m pretty sure I will forego the right side fuel pump assembly and try my hand at fabricating the tank shown there.
I do have another question...
Where is the brake master cylinder located and the brake fluid reservoir. Also, are there any good photos or schematics of the brake lines front and rear? This kit is very light on detail in the footwell with the pedals as well.
By the way, I totaled up my expenses on this build... you really don’t want to know. And I need to order some additional stuff from Robert at RBMotion.
One more query... there are rivets around all the windows and the headlamp covers as well as the “bulge” on the right side door. Are those worth the time and effort and cost? To me, it seems like “in for a penny in for a pound”. But then again...
|
|
|
|
Post by randyd on Jan 14, 2021 16:43:30 GMT -8
Brake master cylinders are part of the pedal box with fluid reservoirs located in the chassis. Pedal box from my 1/24th build... 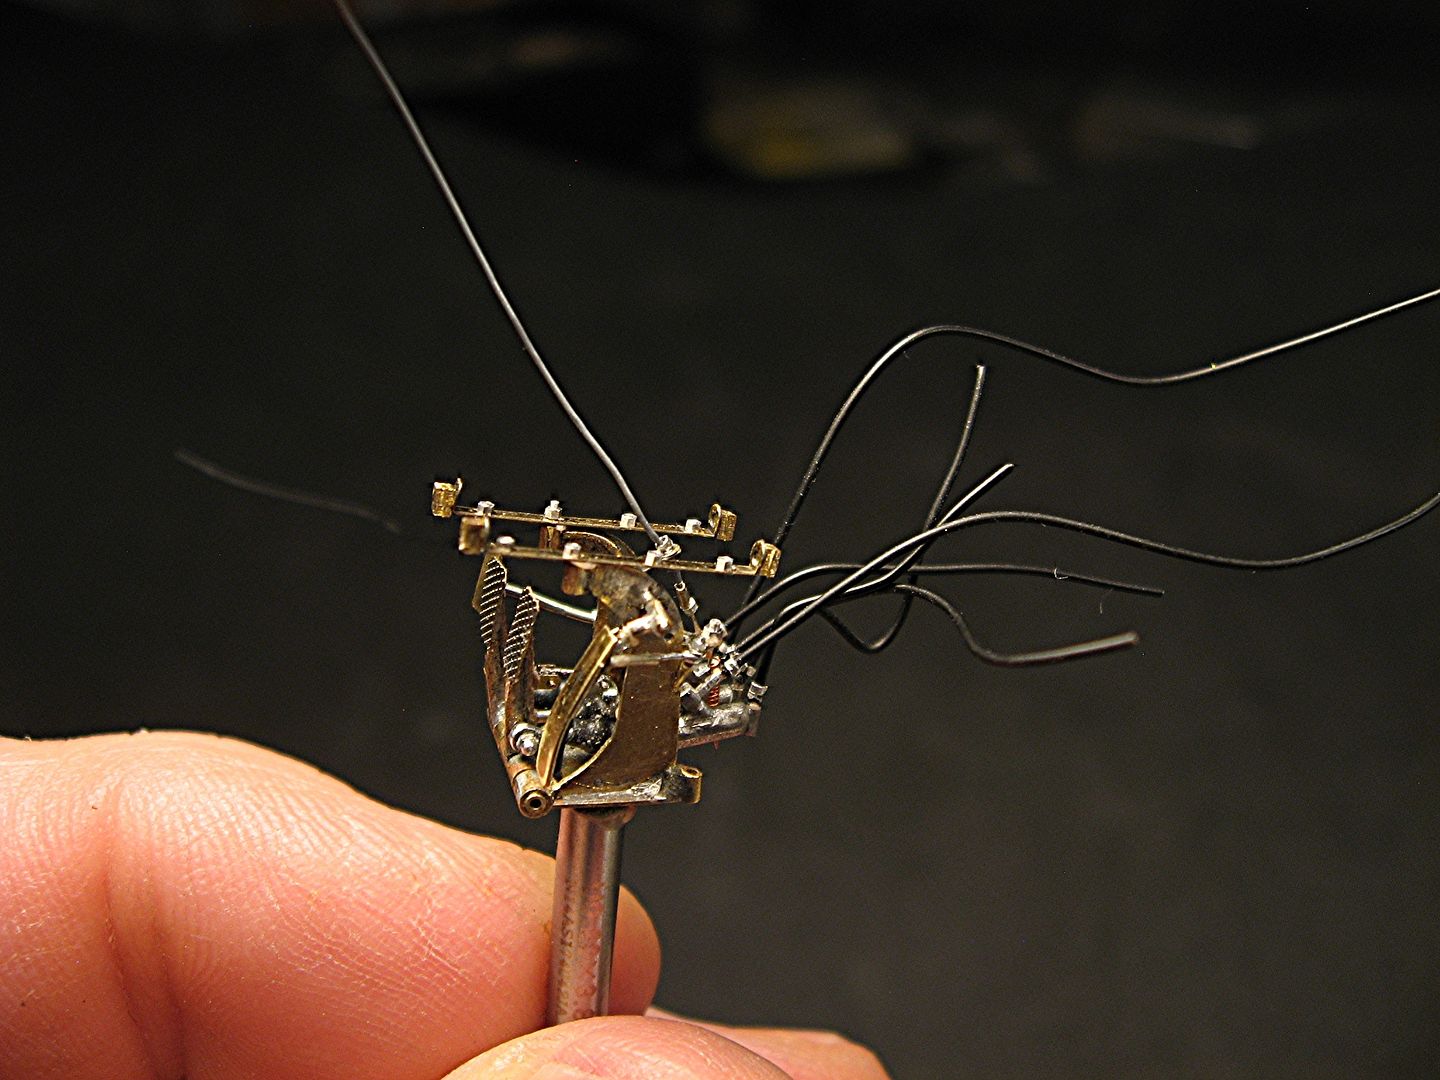 Hard lines going to the reservoirs ....Brake lines for the front.... _IMG_1300_zpsn1euu064.jpg?width=1920&height=1080&fit=bounds) Pedal box drawing... 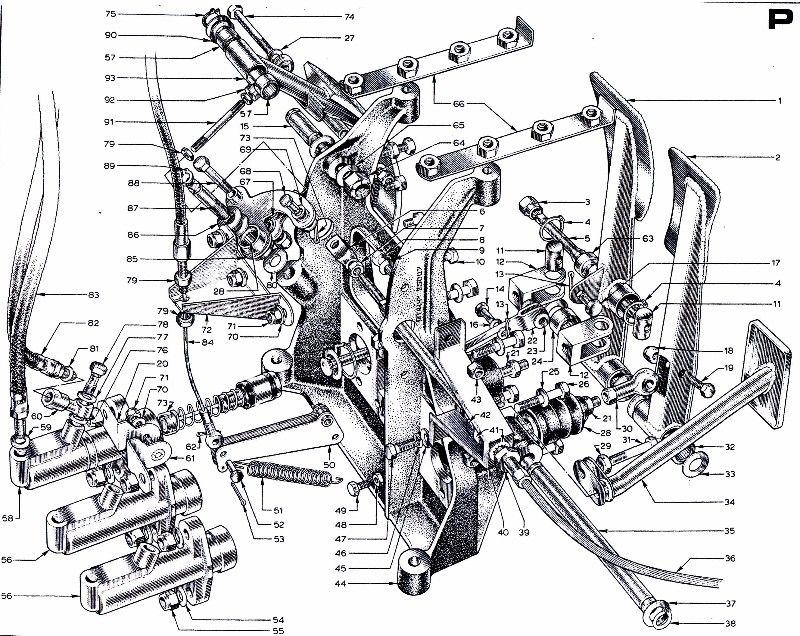 Hope this helps a little . Randy |
|
|
|
Post by pnance26 on Jan 14, 2021 17:00:58 GMT -8
Randy!
Holy crap! That is a lot of detail!
I appreciate it. I’ll have to check it out on my laptop. On my phone, it’s pretty small!
|
|
|
|
Post by arcticwolf on Jan 14, 2021 20:44:03 GMT -8
Randy! Holy crap! That is a lot of detail! I appreciate it. I’ll have to check it out on my laptop. On my phone, it’s pretty small! Laptop?
You should see it on a 60" flat screen TV!!
|
|
|
|
Post by pnance26 on Jan 14, 2021 21:37:33 GMT -8
So I will post a photo on Saturday of what I discovered about the fuel pump question...
It’s a surprise!
|
|
|
|
Post by Joel_W on Jan 15, 2021 5:59:34 GMT -8
Randy,
OMG!! That's detailing to the nth degree for 1/12th scale, even 1/8th scale. I've never seen anything quite like it before, and it's 1/24 scale no less. I'm assuming that it's an all metal/brass kit. Can you share any details about the kit, and your build? I'm really curious, and quite envious to be honest about it.
Joel
|
|
|
|
Post by Chris K. Hale on Jan 15, 2021 6:15:46 GMT -8
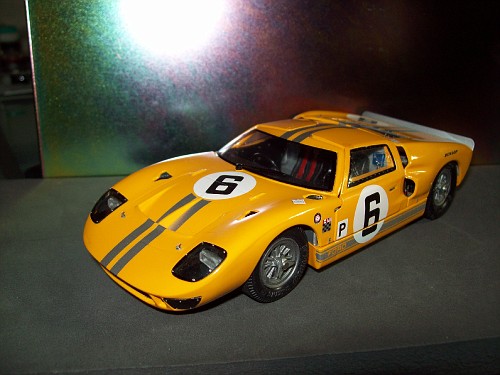 Well kind of hard to see but YES, definitely put the rivets around the headlights and windows.. I did the black edging on the inside using a Sharpie pen, then placed the rivets on the outside I used Photoetched Rivet heads simply dipped each in Clear Testors Gloss Coat, the old style stuff, then placed them with a fine tweezers equally around about 8 on the headlamps and similar on the windows. I didnt want to drill the Clear Plastic because it scratches and is very brittle to use actual rivets. It brought the headlamps to life . I also placed some Metal Dots around the interior door panels 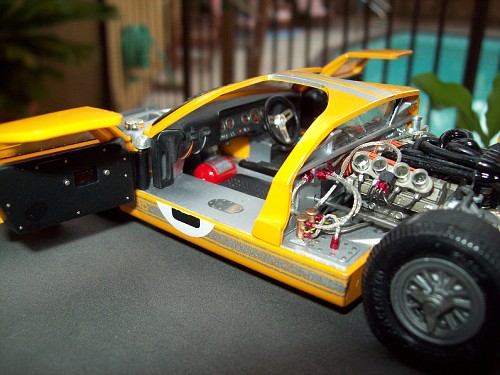 and that really showed in the 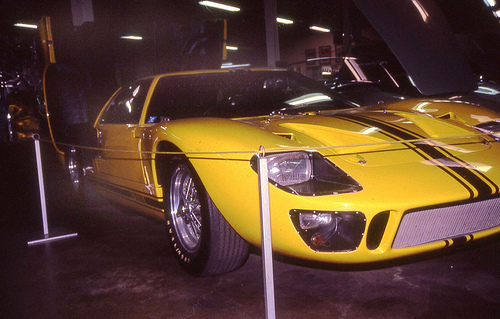 pics. This is 1/25 scale but You can do it in 1/12. Here is a weird TIP!! I had a 3 pound Ankle weight that split out and inside are thousands of small metal Dots, different sizes, they look like they are punch outs from some other product but really round, I did see some oval and square too. About 1/64 to 1/8 in size I use them for rivets, bolt heads and the like, Very Useful. Last pic shows the rivets on the actual car that was in the Briggs Cunningham Museum. I miss my friend Briggs and going to the Museum, hanging out with Briggs, listening to his stories of Lemans and all the great tracks, all while we sat in all the Cunningham and other real race cars. I also put rivets on the glass window on the firewall..and turn signal len's..Chris |
|
|
|
Post by 4wheels on Jan 15, 2021 6:30:01 GMT -8
Randy, I'm assuming that it's an all metal/brass kit. Can you share any details about the kit, and your build? Joel Pretty sure that's all scratchbuilt! |
|
|
|
Post by Joel_W on Jan 15, 2021 14:30:14 GMT -8
4Wheels,
Now I'm even more impressed. Of course I'm now more depressed when I look at my own builds.
Chris,
Your 1/25th scale GT40 also abounds with a ton of detail everywhere I've looked in those few pictures.
joel
|
|
|
|
Post by pnance26 on Jan 16, 2021 7:54:22 GMT -8
So I did get a few hours this last Thursday to do a little painting and drilling... There are 108 holes that needed to be enlarged. Using my pin vise/drill, I actually worked a blister onto my right hand just below the finger. Ouch... then a light mist coat of matt black. Should I be using a semi-gloss instead?  Got some paint on some engine parts including the distributor cap...  So here is the big reveal... in going through the Holman-Moody book, I found this photo of the right side of the bulkhead in the MkII engine bay at LeMans. Notice that there is a tank (that is missing completely from the kit) and a single fuel pump (not three as shown in the kit photo).  |
|
|
|
Post by pnance26 on Jan 16, 2021 8:19:51 GMT -8
And I painted over the hideous gold manifold cover and oil pan on the engine. Don't think that was very original... I wish I had enough chutzpah to remove the inaccurate manifold cover and replace with a more similar one that I got the other day. Maybe after assembly of the engine parts it will be easier...
|
|
|
|
Post by 2lapsdown on Jan 16, 2021 8:26:53 GMT -8
I'd leave the seat matte black and try buffing it with soft cloth to give it a little sheen
John
|
|
|
|
Post by 4wheels on Jan 16, 2021 8:32:11 GMT -8
The page 129 picture I kept referring to! |
|
|
|
Post by Chris K. Hale on Jan 16, 2021 8:54:10 GMT -8
I'd leave the seat matte black and try buffing it with soft cloth to give it a little sheen John I often spray the item matte, let it dry and then using an index finger wipe the side of your nose to get the oil off (natural you know) then rub it into the matte finish paint, it will give a slight sheen and highlight the highs and lows not to mention make it look like leather that has been used.. A technic my father showed me while he was building his R&C Concours Champion winning Ferrari 206sp back in 1966.. Chris |
|
|
|
Post by pnance26 on Jan 16, 2021 9:30:48 GMT -8
I'd leave the seat matte black and try buffing it with soft cloth to give it a little sheen John I often spray the item matte, let it dry and then using an index finger wipe the side of your nose to get the oil off (natural you know) then rub it into the matte finish paint, it will give a slight sheen and highlight the highs and lows not to mention make it look like leather that has been used.. A technic my father showed me while he was building his R&C Concours Champion winning Ferrari 206sp back in 1966.. Chris That would be quite the description on a show card at a model show "seats hand rubbed with nose oil"! LOL! I will give it a try... now is this before or after I apply the PE circles that go on the seat? |
|