|
|
Post by arcticwolf on Jan 1, 2022 19:53:16 GMT -8
It's looking great my friend. All that carbon fiber decalling is why I won't build modern cars - my hat's off to you!
|
|
|
|
Post by afx on Jan 1, 2022 20:06:03 GMT -8
Nice work Joel with the carbon fiber decals and the detail painting.
|
|
|
|
Post by Joel_W on Jan 2, 2022 6:34:58 GMT -8
Paul & JC,
Thanks guys for checking out my build to date, the decaling with all that Carbon Fiber has been a challenge, but I really like decaling as it's one of my favorite parts of any build.
And Paul, I know how much you dislike decaling, but don't let all the CF decals become a deciding factor in not building current cars. Most of the CF with this build is in the detail up set I bought (1st time and most likely the last time I go that route). Usually I just use Tamiya Nato Black or any darkish Gray/Black to simulate the CF, once glossed you need to get really up close to see that there's not close weave pattern, and honestly it's never been an issue with me.
joel
|
|
|
|
Post by chrissmith on Jan 2, 2022 18:01:38 GMT -8
You have been busy! Looks fantastic…
|
|
|
|
Post by Joel_W on Jan 3, 2022 7:10:02 GMT -8
Chris,
Thanks for stopping by and liking my efforts to date. Not exactly a MFH kit, but it's about the most complex plastic kit I've built in quite some time, and there's no full suspension, engine or drive train.
joel
|
|
|
|
Post by chrissmith on Jan 4, 2022 17:32:35 GMT -8
That is a lot for a curbside kit, yet your doing a fantastic job😉
I would love to see what you could do with a large scale kit
|
|
|
|
Post by Joel_W on Jan 5, 2022 8:54:44 GMT -8
Chris,
Thanks so much for the thumbs up, it's greatly appreciated.
joel
|
|
|
|
Post by mustang1989 on Jan 7, 2022 4:53:55 GMT -8
Maybe I had missed this earlier but this................is just insane!!  You've got a lot more patience with decals like that than I do brother. Amazing work Joel. 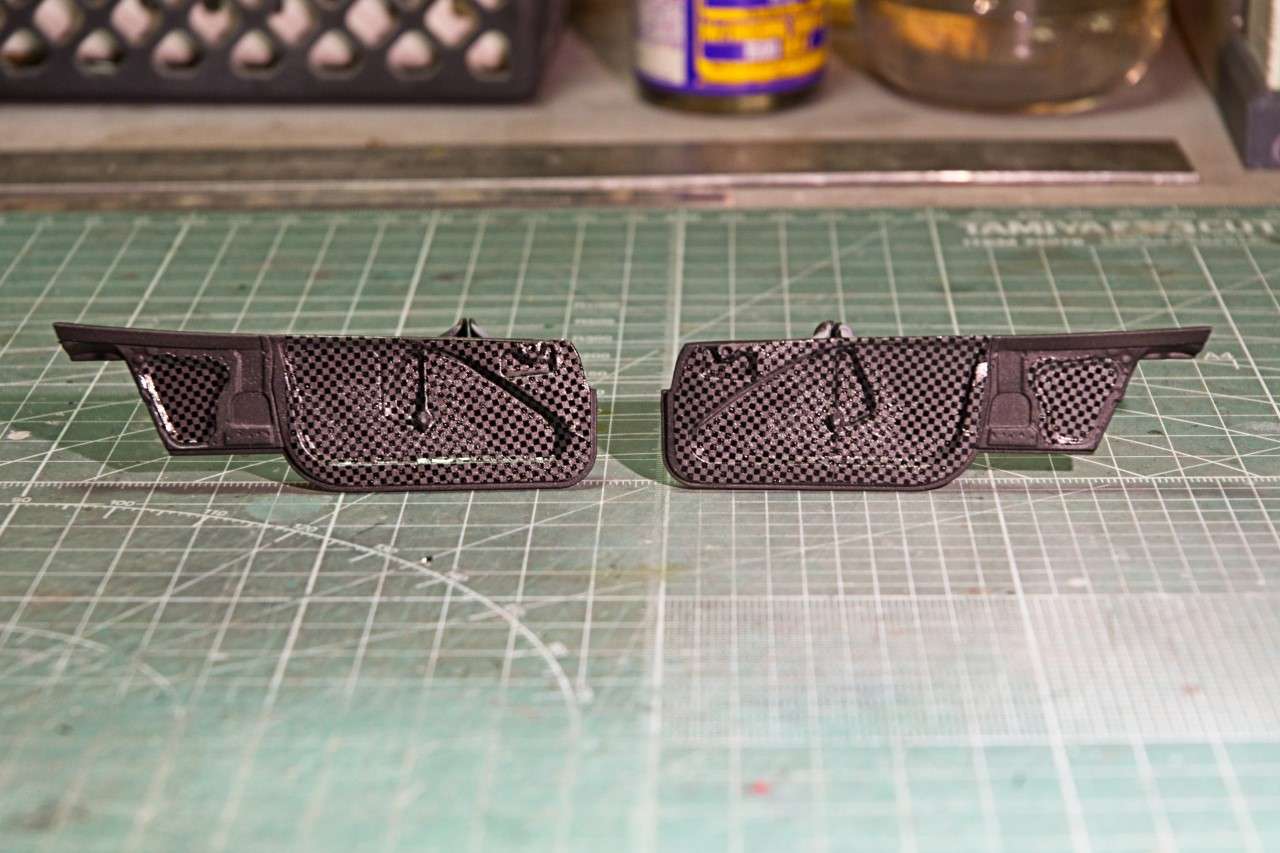 |
|
|
|
Post by Ben_B on Jan 8, 2022 2:28:42 GMT -8
Great work on the carbon fiber, Joel!
Ben
|
|
|
|
Post by Joel_W on Jan 8, 2022 6:33:40 GMT -8
Ben,
Thanks so much for you thumbs up. If nothing else it's a long process to get all of these decals on.
joel
|
|
|
|
Post by Joel_W on Jan 8, 2022 6:40:54 GMT -8
Spent a good deal of time this week working on the 6 way racing harness. The kit only has decals and they’re marginal at best. One of the reasons that I bought the Nunu detail up set is that they include Black ribbon which is correct for these BMW M8 GTE cars plus all the PE needed for the various buckles and latches. The instructions for the detail set gives you the correct length that each belt needs to be, but you still have to add an additional length to each one as you need to attach or glue the end to the back of the belt after it passes through the buckle/latch. I usually use regular ACC for this as PVA glue takes way to long to start to tack up. As usual, these ribbons like almost all I’ve used from various sources just fray every time I cut them. I’ve tried brand new #11 and #10 blades, brand new PE cutters but they all frayed just the same. and the fraying makes it just about impossible for me to get the ribbon through the PE part slot even when I cut it at an angle. Ben suggested Medical Cloth tape, but i didn’t have any. What I had was a plastic type of medical tape that I got from the eye surgeon 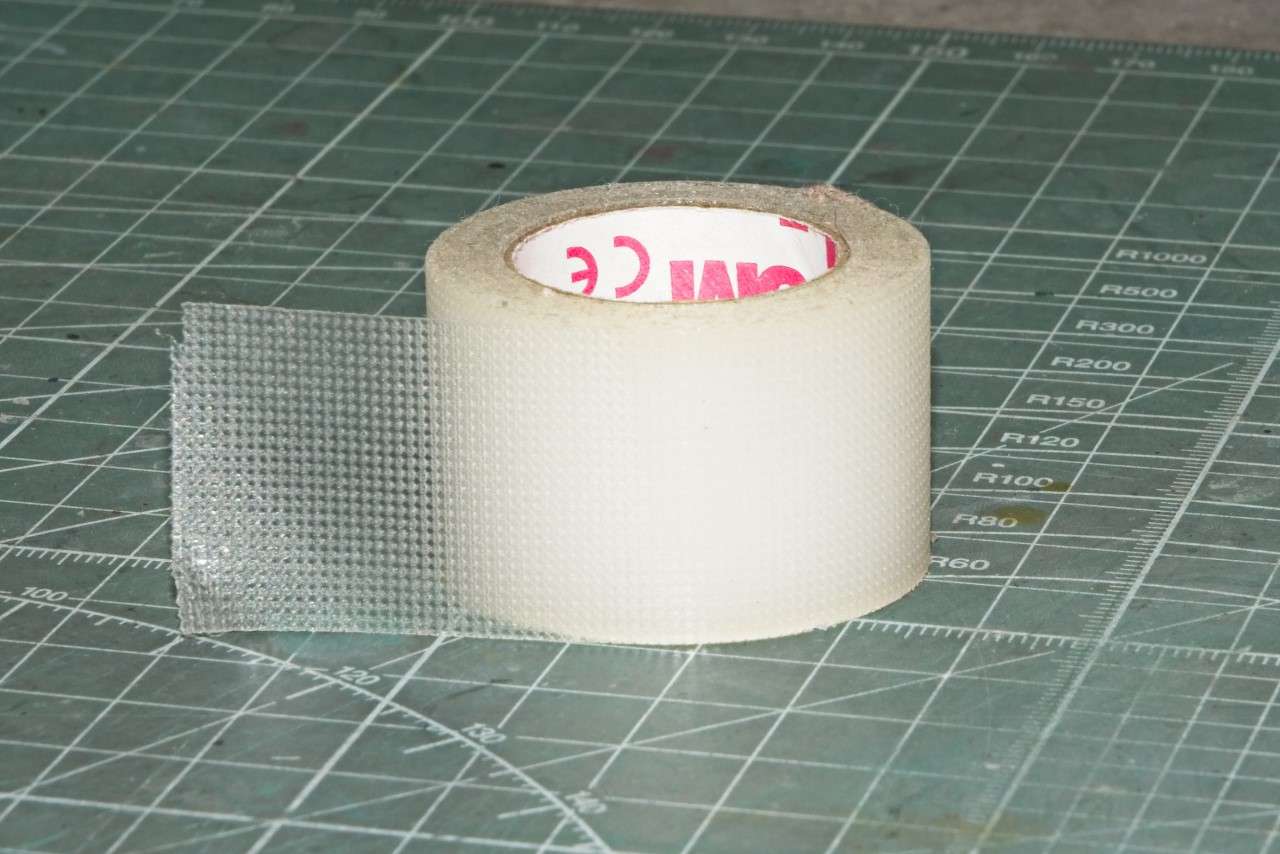 Easy to cut, doesn’t fray, and the adhesive has just enough stick. I painted each piece with a Black Magic marker which dried in a few min. Looks good. Next time I use it, I’ll try some Mr. Color Lacquer Flat Black and see how that works. To complete the harness assembly I needed to apply the Sabelt yellow logos. Strange that the detail upset doesn’t have them and neither does the kit decals as just supply decals for the Harness assembly. So into my decal box for misc. decals and sure enough I have several on a sheet from Indy Cars. I applied them just like I would any decal, but skipped the Micro Sol and went straight to my Solvaset. A few doses and the decal just snuggled right into all those nooks & crannies. What usually is a super frustrating job that I try to avoid at all costs, turned out to be a pretty enjoyable experience. Go figure!! Here’s what the 6 way seat harness looks like installed.  I tried to move around the belts for a more natural look after the driver got out, then everyone laying perfectly. Either way works, it’s just my preference. joel |
|
|
|
Post by Joel_W on Jan 15, 2022 8:39:36 GMT -8
Little actual modeling time this past week, but I still managed to forge ahead and complete the interior. Added the two gas pipes that run from right behind the driver’s seat to the duel intakes for the gas tank. The detail PE set included the driver’s elastic restraint that wraps around the seat and attaches to the cockpit frame. The PE set has the restraint as two separate pieces that you’re supposed to use the long rear leds of each so they can meet behind the seat. Sounds easy, but you can’t install them till the dash and roll cage is in place. I really struggled with how to install them with the roll cage getting in my way no matter what I tried. 1st issue was actually getting the rear of each to kind of roll around the seat and then finding a attachment point to glue the front of the PE strap to. The right side one was shall I say a real pain to align correctly. But the left side for a parked car is completely wrong. In order for the driver to enter/exit, it has to be released from the dash attachment point so that it just hangs down the side of the seat. Now this is PE and it doesn’t like bending as though it was a flexible material. I annealed it and tried to roll it so it would lay in the open position. Next, I air brushed both pieces with Mr. Finishing 1500 Black primer, but just looking at it the primer loved to chip off, so touch up after touch up was needed. Still, it doesn’t look half bad once installed in the cockpit.  Next up I glued the large intake in place and then the door cards. Stepped back to admire my work. Dumb Ass me forgot to take pictures before the door cards were installed, so now photographing the finished interior became a real challenge. One that I just couldn’t get the pics I wanted. 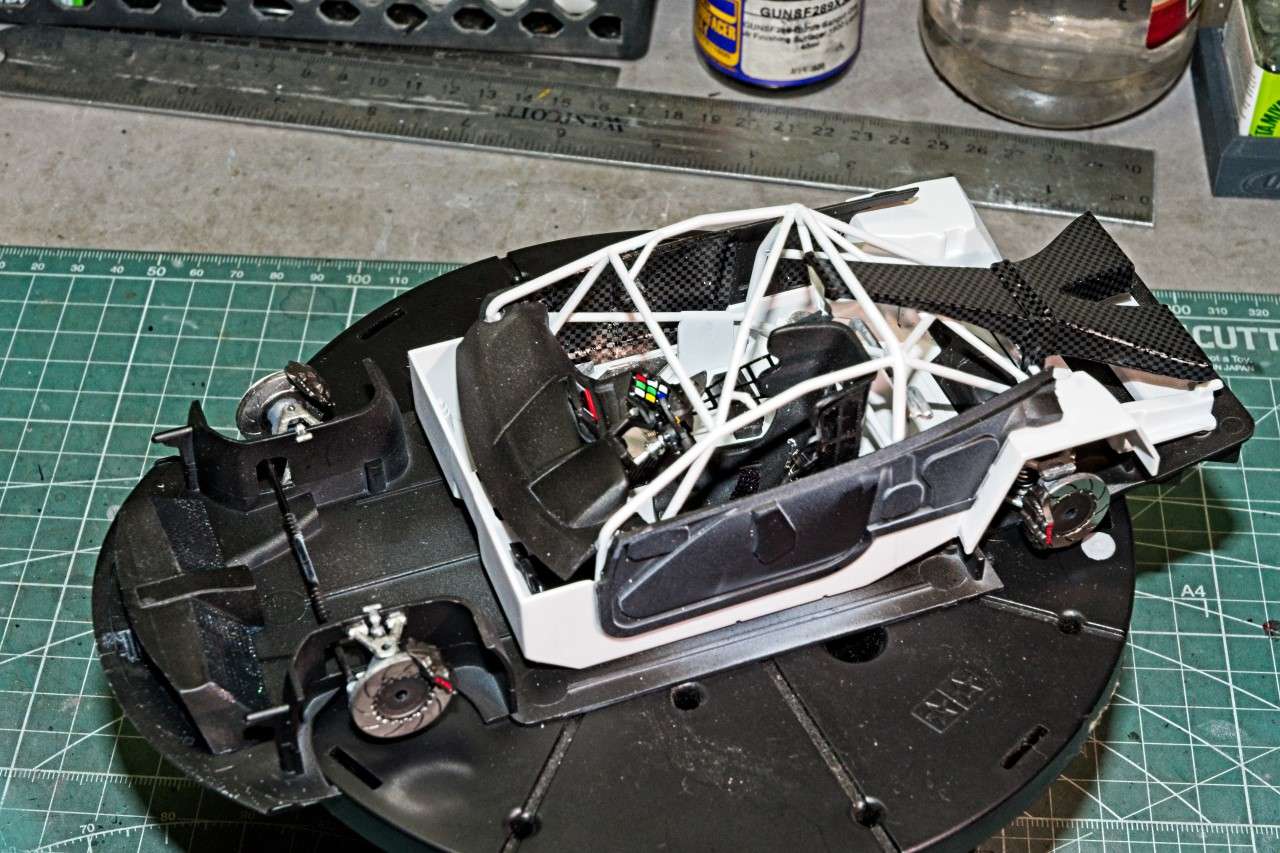 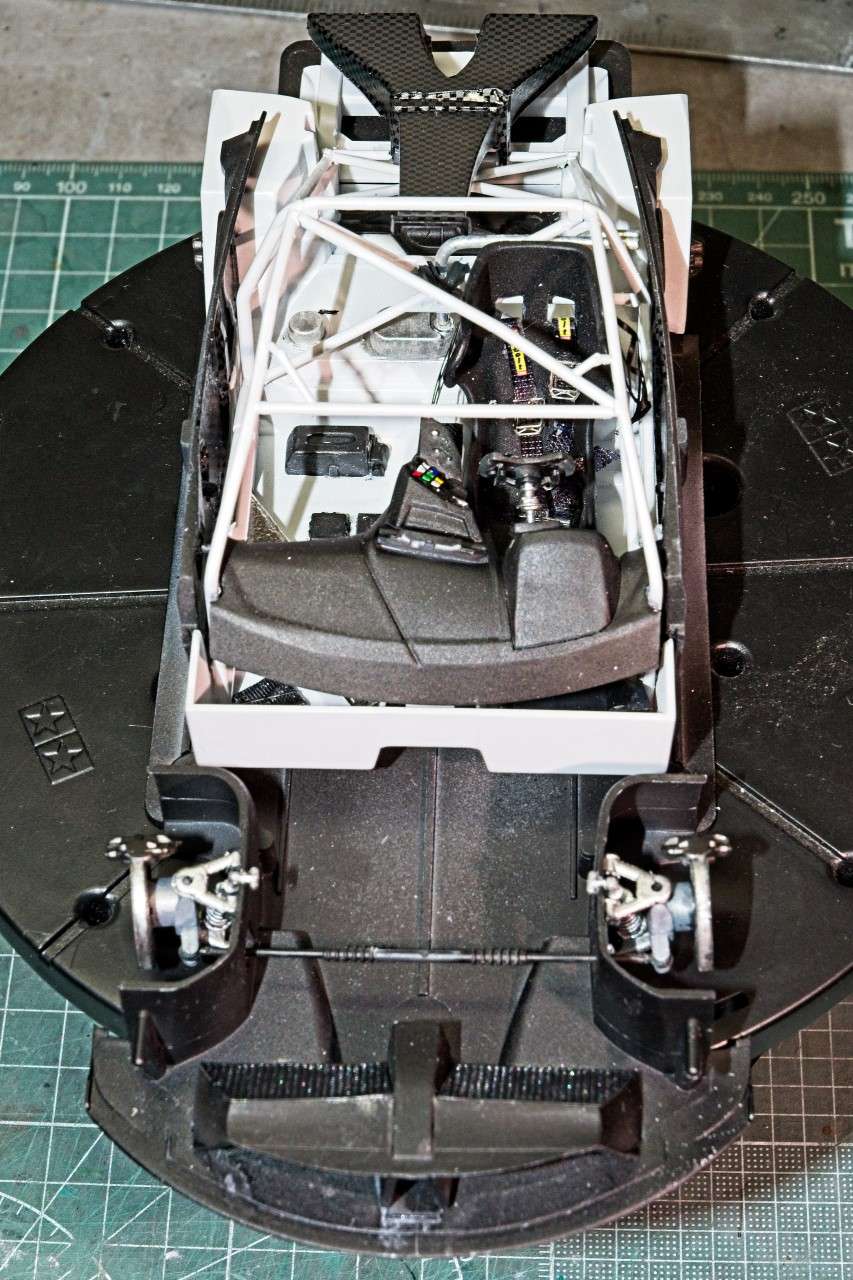  My attention turned to finally finishing the tires. I had previously primed the 4 wheels with Mr. Finisher 1500 Black, so the next step was to try to match the non-stock Aluminum color of the wheels. I ended up using a mixture of Tamiya Titanium Silver and Titanium Gold. When dry I added a Black wash to each wheel hub. The tires are nicely molded with no centerline seam. At least ones that I could see. I glossed the tires with Pledge then added the SK decals. When dry a coat of Microscale Matt to dull the overall finish of the tires only. 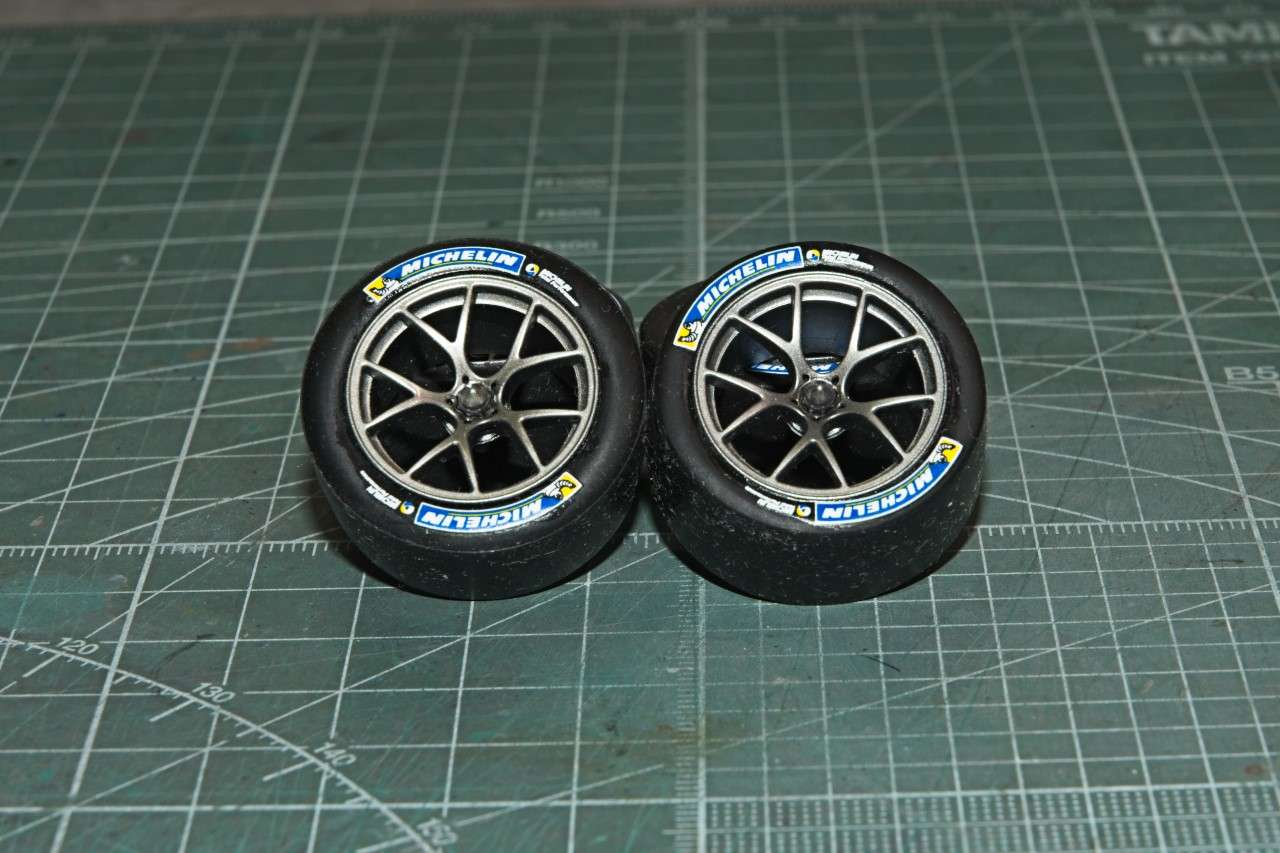 joel |
|
|
|
Post by afx on Jan 16, 2022 4:56:00 GMT -8
Coming along nicely Joel.
|
|
|
|
Post by Joel_W on Jan 16, 2022 6:23:31 GMT -8
JC,
Thanks for your thumbs up on the progress of my work to date, it's always greatly appreciated.
joel
|
|
|
|
Post by Ben_B on Jan 17, 2022 3:47:57 GMT -8
The wheels and interior turned out great, Joel!
Ben
|
|


