|
|
Post by 2whl on May 25, 2019 11:44:59 GMT -8
Small update. After studying the instructions, I was a little concerned about the strength of the joints for the rear suspension mount. All of the rear suspension attaches to this mount. I decided to use JB weld for metal to assemble the parts. 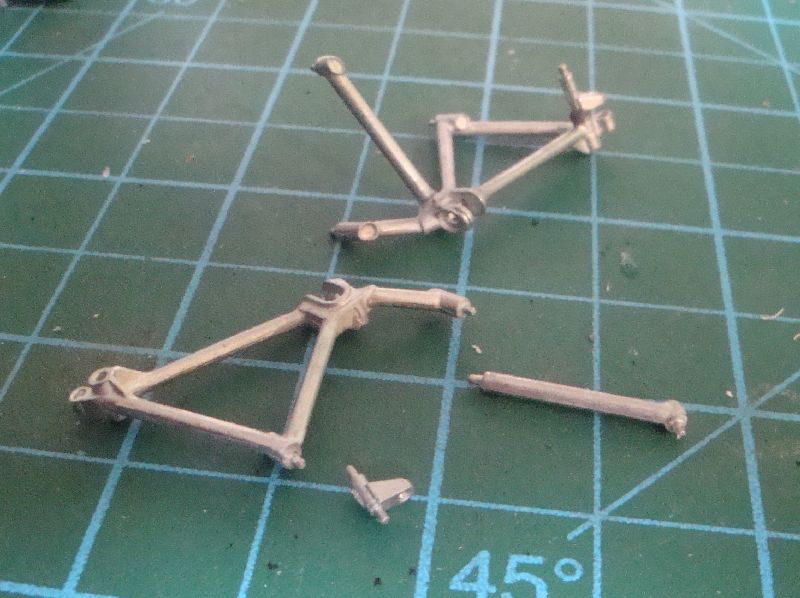 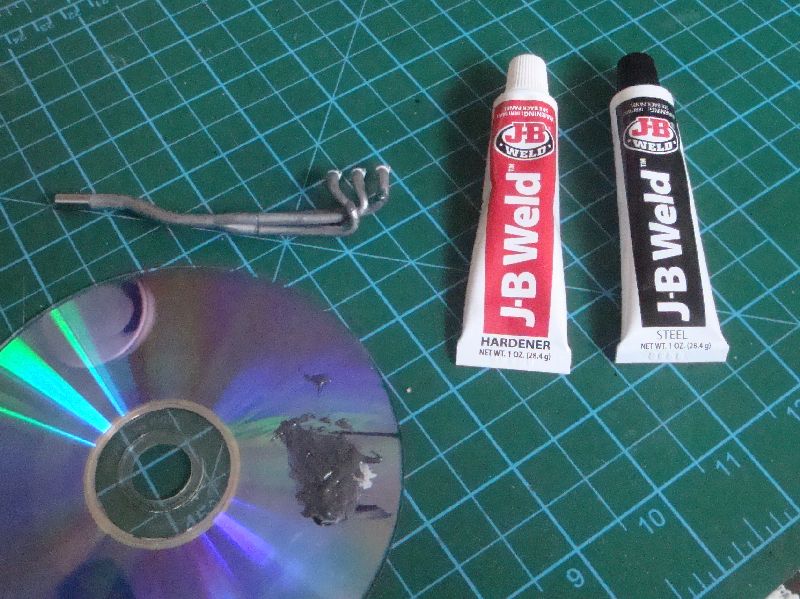 Once the parts get painted, I will be attaching the mounts to the engine with JB Weld 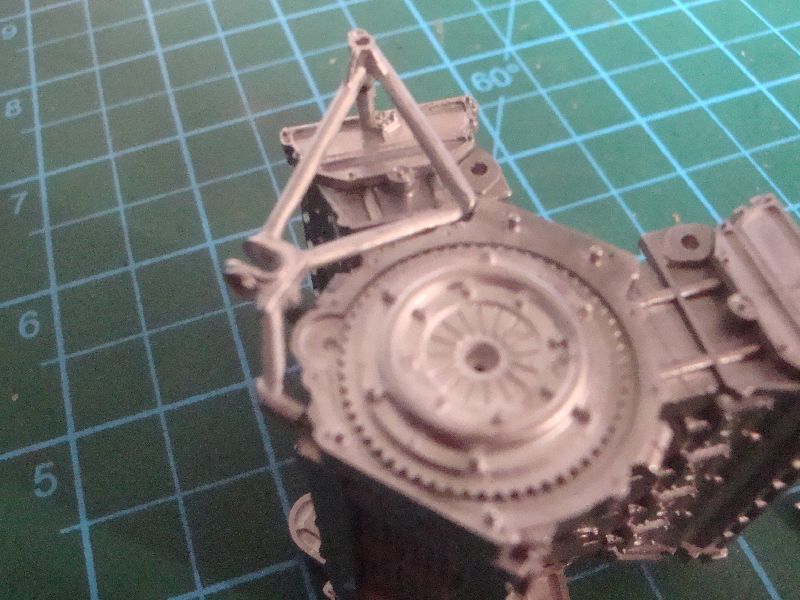 |
|
|
|
Post by tatocorvette on May 25, 2019 15:15:55 GMT -8
Looking really good! The magnetic tumbler looks like a great tool for white metal parts.
|
|
|
|
Post by Joel_W on May 26, 2019 6:12:23 GMT -8
the assembly of the engine suspension parts really looks good. One thing for sure is that this is no short term build, so one needs to be able to stay focused and committed to finishing it. That just might be my downfall, as the longest build I've ever completed was just 6 months, and that was a struggle to not loose interest.
Joel
|
|
|
|
Post by 2whl on Jul 7, 2019 16:09:39 GMT -8
the assembly of the engine suspension parts really looks good. One thing for sure is that this is no short term build, so one needs to be able to stay focused and committed to finishing it. That just might be my downfall, as the longest build I've ever completed was just 6 months, and that was a struggle to not loose interest. Joel Thanks Joel. Staying focused is my downfall. Besides being a bit hit-or-miss on my building time, I also have a number of kits started and tend to jump around between them as the mood strikes me. That being said, I did spend more time on the engine. There is a plate on the lower side that is located by 10 small pins. 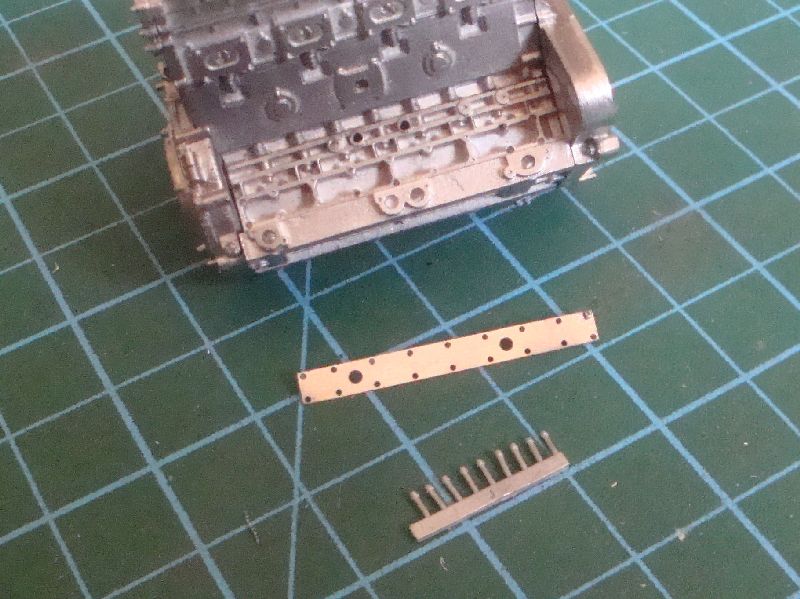 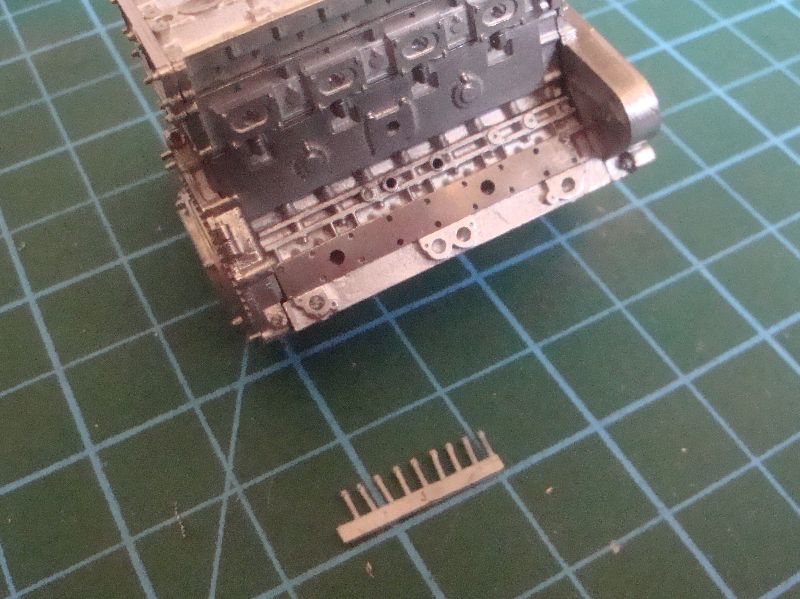 Plate and pins in place and CA'd 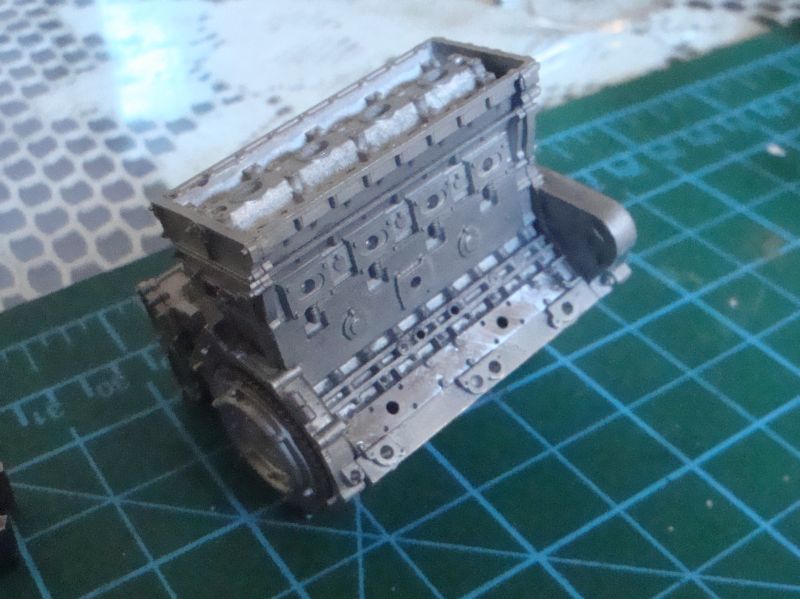 There is also a bunch of tiny bolts that need to be glued to the valve covers and the front motor mounts. After about 4 eye-straining hours, I got the side plate and one valve cover done 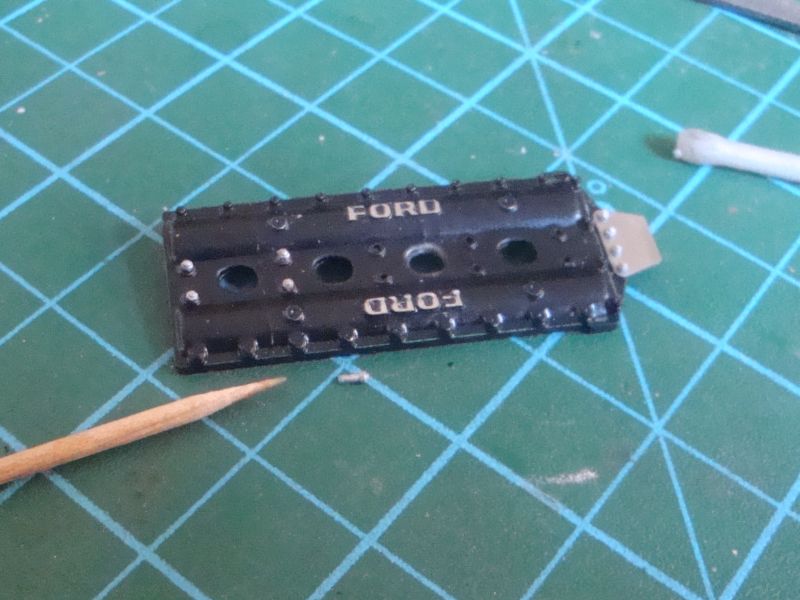 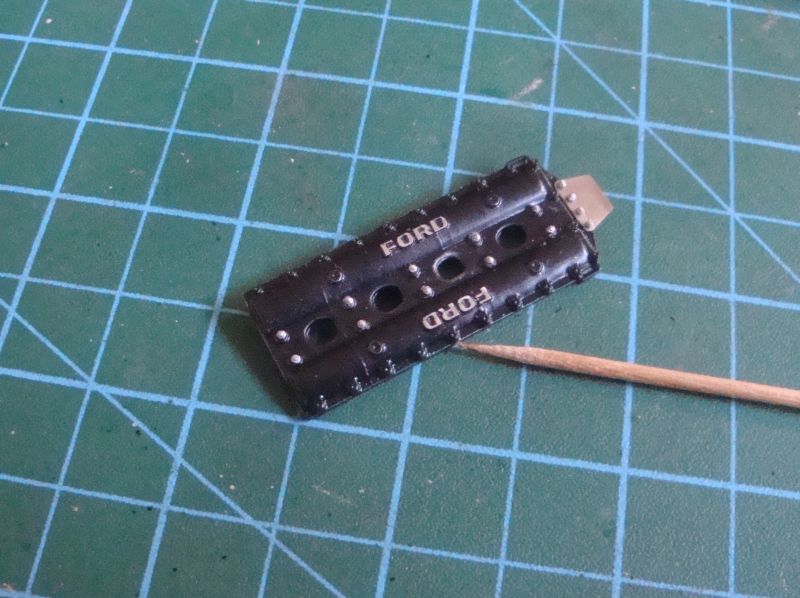 |
|
|
|
Post by garydavis on Jul 7, 2019 18:36:07 GMT -8
You're doing some great work here 2whl. Making this engine look real for sure.
|
|
|
|
Post by Joel_W on Jul 8, 2019 5:18:07 GMT -8
2whl,
The level of detail is just beyond what I thought was possible. The valve cover is a model all by itself. Sure hope that you've got a Optivisor #5 or stronger.
Joel
|
|
cc
Full Time Ride
  
Posts: 141
|
Post by cc on Jul 8, 2019 10:04:08 GMT -8
2whl, Im glad this came up as i missed see it. This is going to be a great build and info sharing that Im going to watch closely. Working in metal takes a skill Im still learning. Im going to be a sponge and soak it all up. LOL.
CC 😎
|
|
|
|
Post by 2whl on Jul 11, 2019 12:34:58 GMT -8
2whl, The level of detail is just beyond what I thought was possible. The valve cover is a model all by itself. Sure hope that you've got a Optivisor #5 or stronger. Joel Joel, I use a desk lamp and some +6.0 readers 2whl, Im glad this came up as i missed see it. This is going to be a great build and info sharing that Im going to watch closely. Working in metal takes a skill Im still learning. Im going to be a sponge and soak it all up. LOL. CC 😎 CC, soak up as much as you want. If you have ANY questions, don't hesitate to post them up and I'll do my best to answer them. Sharing what I'm learning is part of the fun. Since I'm working on the engine, a reference picture is appropriate. 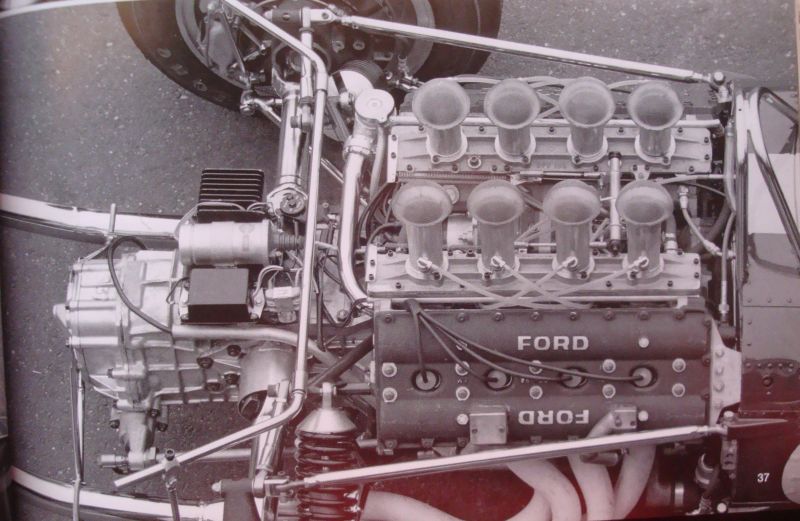 Valve covers on and intakes placed in to position to check the throttle crossover 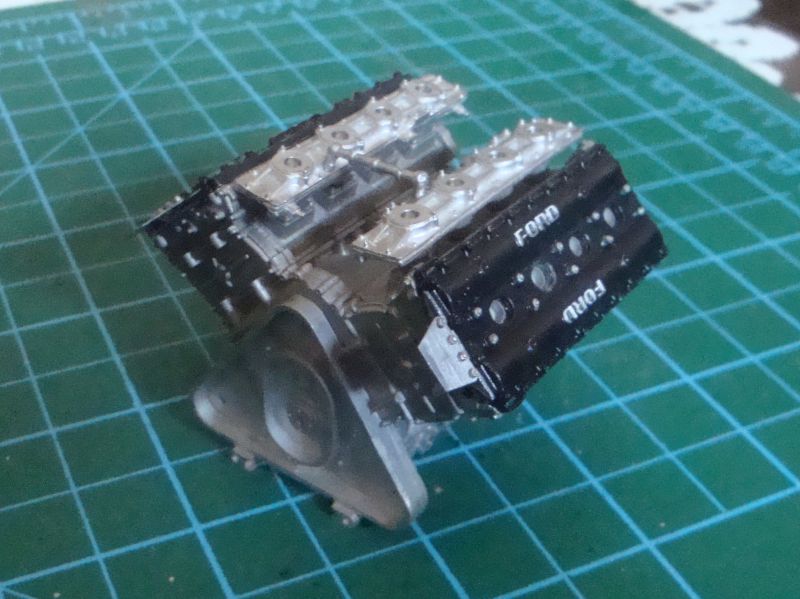 I decided to spend some more eye-straining hours on the p/e parts for the intakes 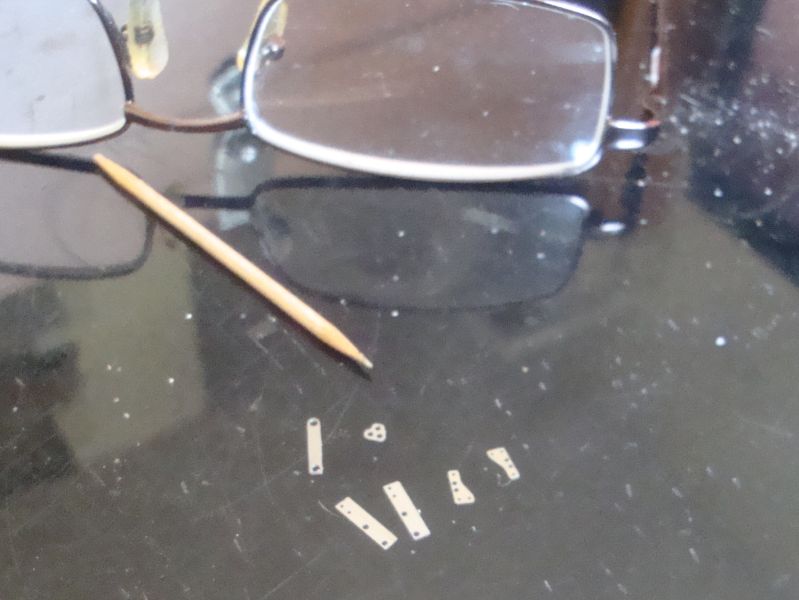 Bending this tiny p/e is tiring. 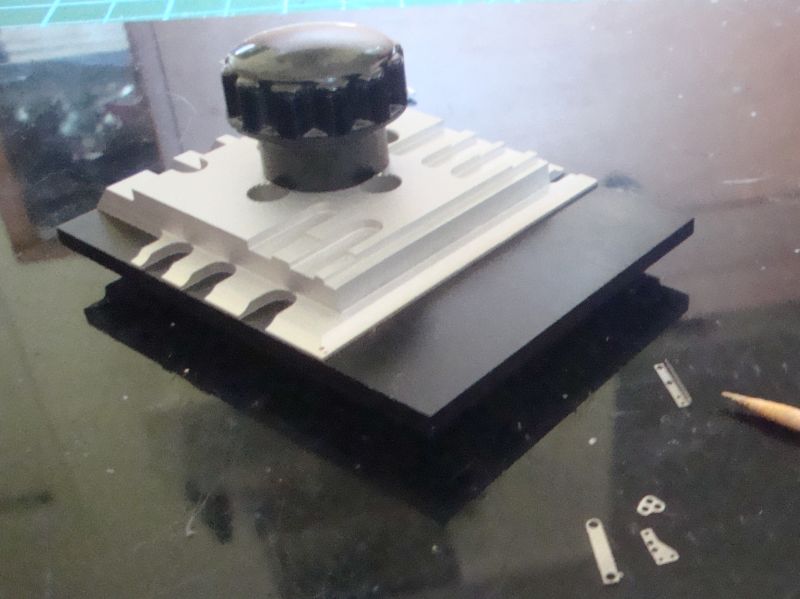 I had a bit of trouble with this throttle spring. It needed to be stretched, but I didn't realize it until after I tried to install it. 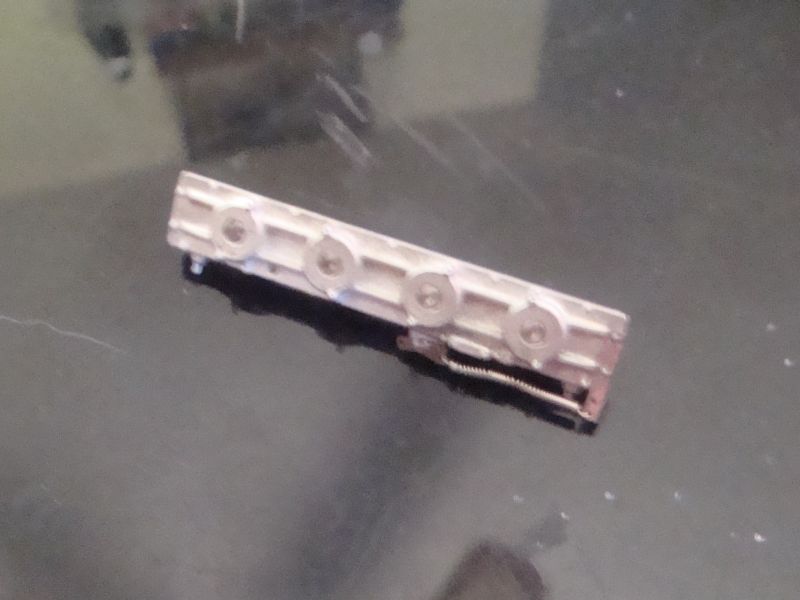 So for the other side, I pre-stretched the two that were to be installed' 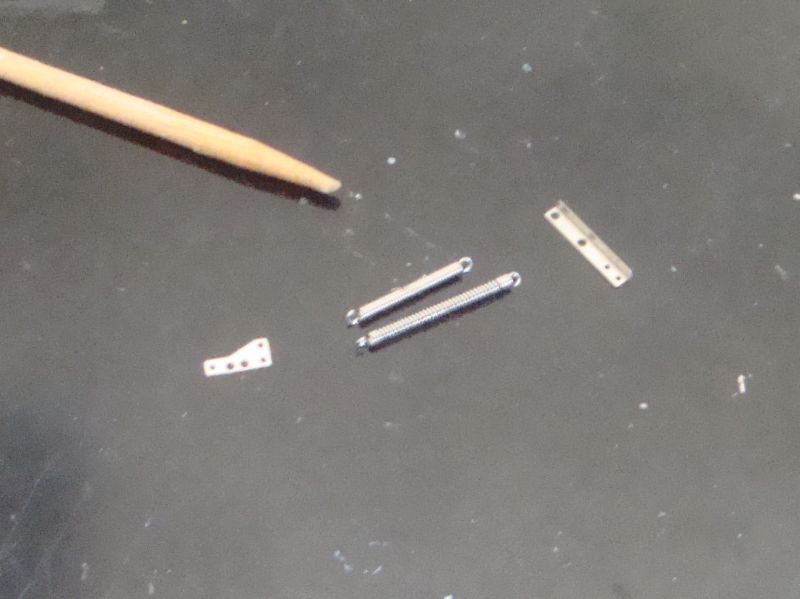 This side came out better. 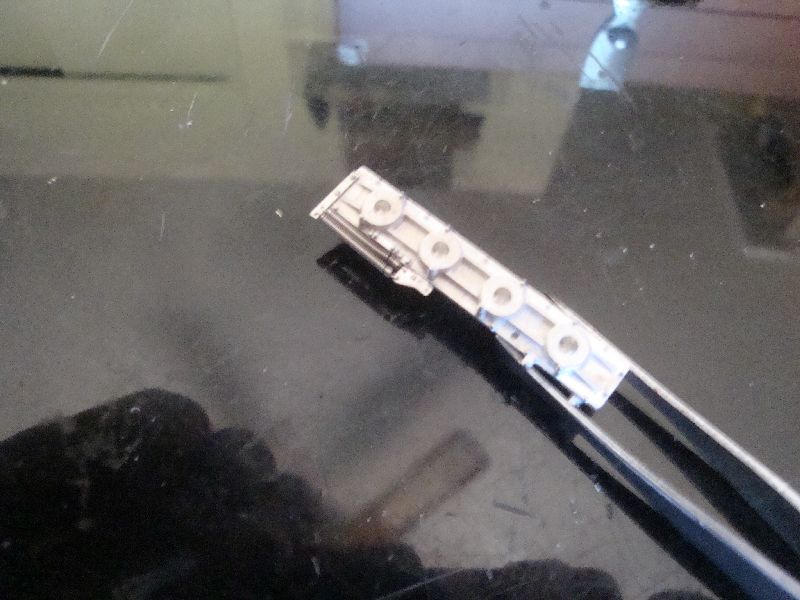 |
|
|
|
Post by Joel_W on Jul 11, 2019 12:46:27 GMT -8
2whl,
The 2nd set of throttle springs looks absolutely perfect. I can't even imagine how difficult it was to bend those pcs of PE.
Joel
|
|
|
|
Post by arcticwolf on Jul 19, 2019 22:23:35 GMT -8
I was about to ask that question. What do you use to glue the metal parts together? Or more specifically, metal to plastic?
|
|
|
|
Post by Joel_W on Jul 20, 2019 4:12:35 GMT -8
I was about to ask that question. What do you use to glue the metal parts together? Or more specifically, metal to plastic? Same questions about gluing as Arcticwolf has. I can see extra thin CA glue, but epoxy and thick CA glues just seems to me as causing all sorts of fit issues as they spread the parts further apart then what you had during dry fitting. It's easy enough to sand/file plastic down a few thousands, but metal is a whole different ballgame. Joel |
|
|
|
Post by 2whl on Jul 22, 2019 9:33:41 GMT -8
I was about to ask that question. What do you use to glue the metal parts together? Or more specifically, metal to plastic? Same questions about gluing as Arcticwolf has. I can see extra thin CA glue, but epoxy and thick CA glues just seems to me as causing all sorts of fit issues as they spread the parts further about then what you had during dry fitting. It's easy enough to sand/file plastic down a few thousands, but metal is a whole different ballgame. Joel So for articwolf's first question, I use an assortment of CA glues and other stuff I have discovered. Usually from Home Depot. 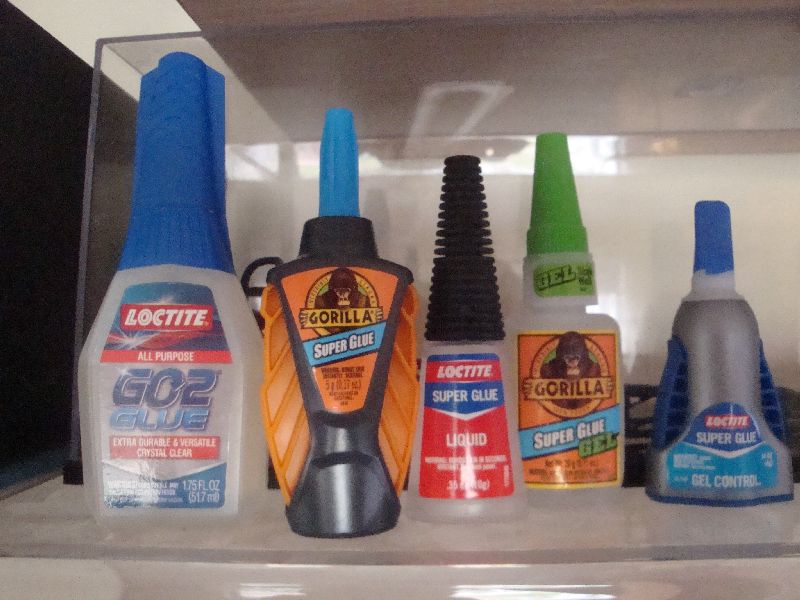 The GO2 is very thick, almost like a two-part after it has been mixed. I haven't used the two Gorilla glue types, but I have used the two Loctites. The one in the center is very thin and is capable of wicking between parts. I also have some J-B Weld that I use for high strengh areas. To answer Articwolf's 2nd question, none of the MFH kits use plastic.....except for clear parts. The parts that look like plastic, such as the body of this car, are in fact very nicely cast resin. Being slightly more porous than plastic, the CA glues work fine between the WM and the resin. Like plastic kits, I use a white glue on the clear parts. On the throttle plates above, I held the PE parts on the WM parts, and wicked the thin stuff in. I haven't really run into any problems (yet) with the thickness of the glue joint. But to date, I have only completed one MFH kit. So I'm actually still a rookie at white metal kits. But I have taken the advice of others in that I test fit.....then test fit....and test fit once again. The thing I have learned about these kits is that nothing fits together like a Tamiya kit. An experienced friend of mine told me to treat it as a collection of parts that need to be hand fit together. So I think(guess) with all of the test fitting going on, I manage the get the joints sloppy enough to account for the thickness of whatever glue I'm using. Joel, the WM parts aren't that much harder than plastic. So filing and sanding isn't that much of a job. I've found I like it better because I tended to adjust the plastic kits a bit too much. I've been fitting (playing with..lol) the main monoque pieces 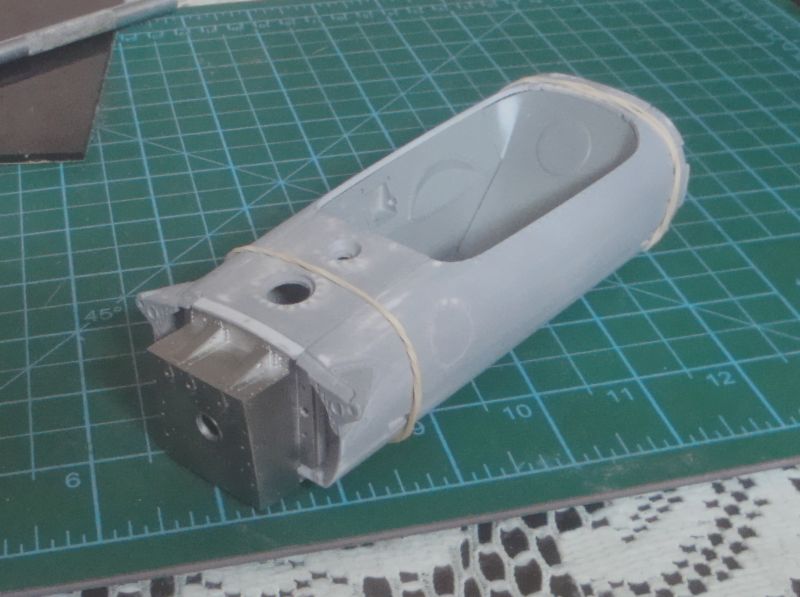 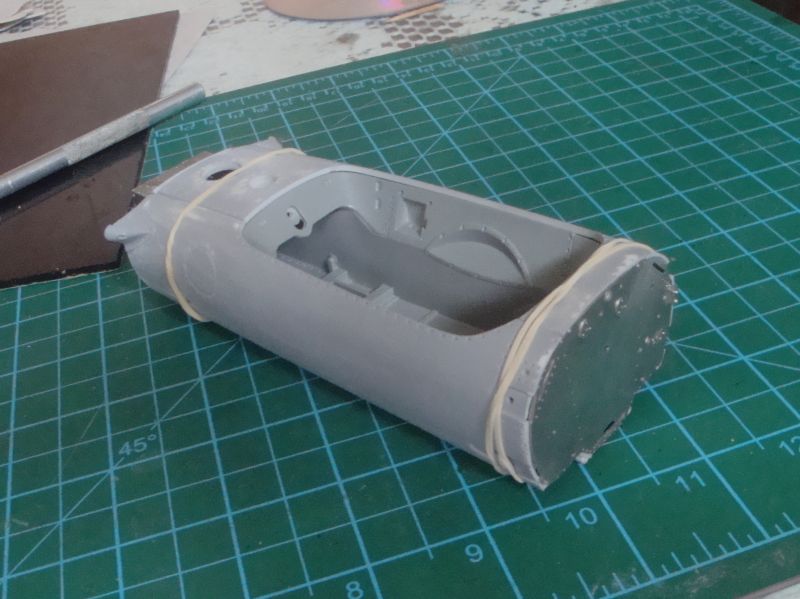 The left side engine auxillary parts are on. A combo of thin and thick CA was used. 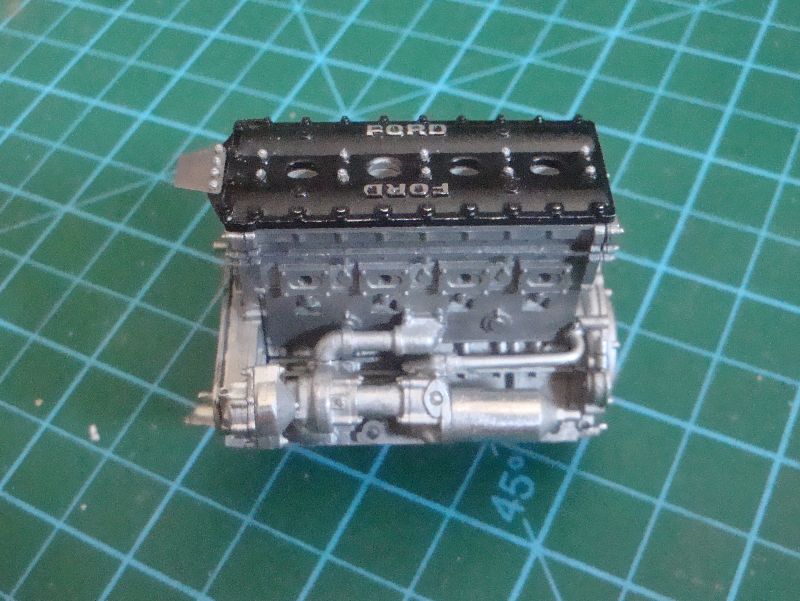 The first right side parts are these two pipes. I am in the process of learning to bend the PE hose clamps around the hoses. 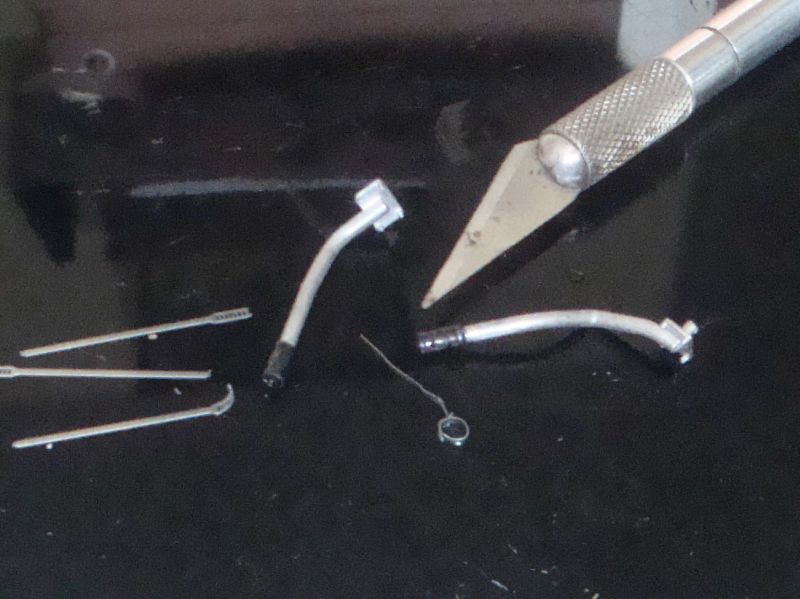 1112 |
|
|
|
Post by Joel_W on Jul 22, 2019 12:12:27 GMT -8
1Whl,
Thanks for all the detailed explanations, it's very slowly coming into focus for me.
I've never used the G02 CA but being super thick is a something I can use as a filler over traditional putties. I do use both of those Gorilla CA glues, and I can tell you that the Gel is on the thick side, and the regular is at best average, but no where like a super thin type like the Loctite. I do have the 5 min epoxy like the rest of us that I rarely use, and a two part putty type similar like Milliput that I always forget to order. I bought it at Home Depot and it does work just fine.
There is one Multi Media kit that I want to build, and that's the Gurney 1967 winning F1 Eagle. I just don't want to spend a full year's model fund, then either never attempt it, or worse, screw it up. I still can't understand why none of the traditional companies have kited the Eagle. I'm sure that the Gurney family would be thrilled as a lasting memory to The man himself.
The last huge hurdle is all the super small PE parts. I've only got one eye, and that's average at best. I already wear two different pairs of Bi-focals as I couldn't use to Tri-focals, and now I wear my Optivisor #5 for just about everything including reading directions.
Joel
|
|
|
|
Lotus 49
Jul 22, 2019 14:07:30 GMT -8
via mobile
Post by 2whl on Jul 22, 2019 14:07:30 GMT -8
Joel, the GO2 is not a CA. I'm not sure how to categorize it, but it doesn't dry complete hard. But it's not like a silicone either. Sort of half way between the two. So gap filling with it would not work. I originally bought it to fix a wood joint in a chair. It was strong enough to take the stress of the chair joint, so I tried it on another MFH kit were I needed strength.
It's funny you mention the multi-media Eagle. I got into MFH kits when I saw both the MFH 67 Eagle and a Ferrari 312 67 in 1/20th for sale on F1M. Being an addict of the computor game Grand Prix Legends, I wanted both of those kits and they were at a killer price. After getting the kits and looking them over, I decided to get a subject I was not as fond of to practice on and hone the new set of skills I would need to build those kits. Then it snowballed into 1/12th. Now I have both the Ferrari and Eagle in 1/12th. I should probably transfer my WIP of the Eagle to this site so the guys here can see it.
|
|
|
|
Post by Joel_W on Jul 23, 2019 4:53:45 GMT -8
2whl,
Thanks for the info on the G02. For now I really can't see any use for it, but who knows as my multi media experience will be starting later this year.
I was shocked when you mentioned that you were addicted to GPL that came out in 1998. So was I. I started with Indy Car2, but when GPL came out, it was like nothing before it. I bought a Thomas Steering wheel after a few shall we say serious discussions with my wife, upgraded my PC with AMD's best CPU & new motherboard, and when the Voodoo 5000 came out, I got one. Of course none of that helped me become a better driver then mid pack. Well, after years of GPL I just lost interest and sold the Thomas Wheel for what I paid for it. Now I keep on looking at where sim racing is today, and I'm trying to convince myself that buying a Thrustmaster T300-RS and better peddles isn't for an old man, but I'm slowly loosing that mental fight. For a Sim I'm only looking at Assetto Corsa as it has great AI off line racing, plus a ton of add ons of every kind. As for a computer, my new computer which I named Eagle 5 is a mid level gaming PC that I had built, so I'm OK in that department as well for now.
I can't imagine how anyone can get through one of those 1/12 kits as the level of skill is so far behind what I'm at these days. And yes, pleas bring the Eagle WIP over here.
Joel
|
|