|
|
Post by shunter on Jul 11, 2019 12:57:41 GMT -8
Looks great, I like the white version, colours stand out more.
|
|
|
|
Post by Joel_W on Jul 12, 2019 5:54:28 GMT -8
Looks great, I like the white version, colours stand out more. Shunter, Thanks so much for stopping by, and liking the White version too. I was really torn between the two color schemes. White is such a common base color, that when I have the opportunity to use a different color, I almost always go that route. But in this case the graphics are so colorful, that the White just seemed to make them pop a whole lot more then the Cobalt Green does. Joel |
|
|
|
Post by Joel_W on Jul 14, 2019 10:50:33 GMT -8
Last week my update post ended with the decals being gloss clearcoated. I gave that clearcoat 3 full days to dry and cure, then the rest of this week was dedicated to finishing the glosscoat. 1st step was a very light wet sanding with Tamiya's 3,000 sponge. Followed by a wet light sanding with Alpha's 6,000 & 8,000 emery cloth, then a wash in warm running water, and into my drying box to dry overnight. Now comes the fun part of the process for me. I've tried a few brands of polishing systems: MCW 2 part, Novus 3 part, and Gravity's 3 part liquid polishes, and so far I've liked the Gravity system the best. I started with the course polish, then the fine polish, and lastly the finish polish, always applying and working the polishes in the same order around the shell: right side, front, left side, rear, engine cover, and finally the roof. At this point all the surfaces were finger touch smooth, and really shiny. My best effort todate by a wide margin. I still have a ways to go, but as my confidence increases, the final product continues to look better & better. Now is the time that I apply Tamiya's recessed panel line wash around the doors, hood, and trunk as needed. I let the wash dry then gently remove the excess with a semi damp Q-tip dipped in Turpenoid. The places where I touched the panel lines come clean ASAP. And finally it's time for the 1st of two wax coats. I'm still using the Gravity Protective Synthetic wax GC311, but once gone I'll be switching over to my Meguiar's Gold Class wax. The 2nd coat is the very last job before the build is finally across the finish line. I'm not sure how well the smoothness & shine shows up in the pictures compared to last weeks pictures, but up close and personal it's world's better then what I started with. I'm still amazed how spots and small issues I can't see or just miss, pop right up in these nearly one to one pictures. Oh well, no real way to fix some of those sanding and polishing issues now. 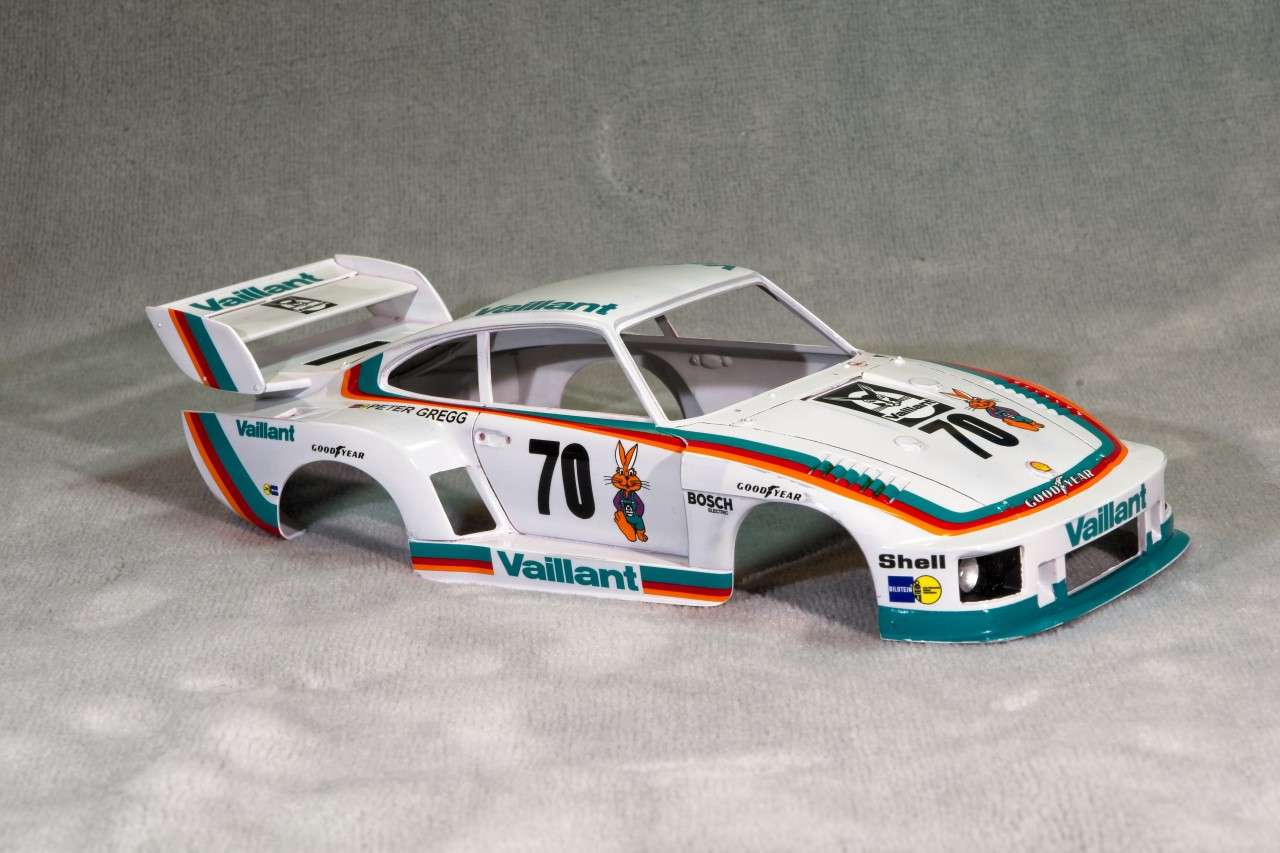 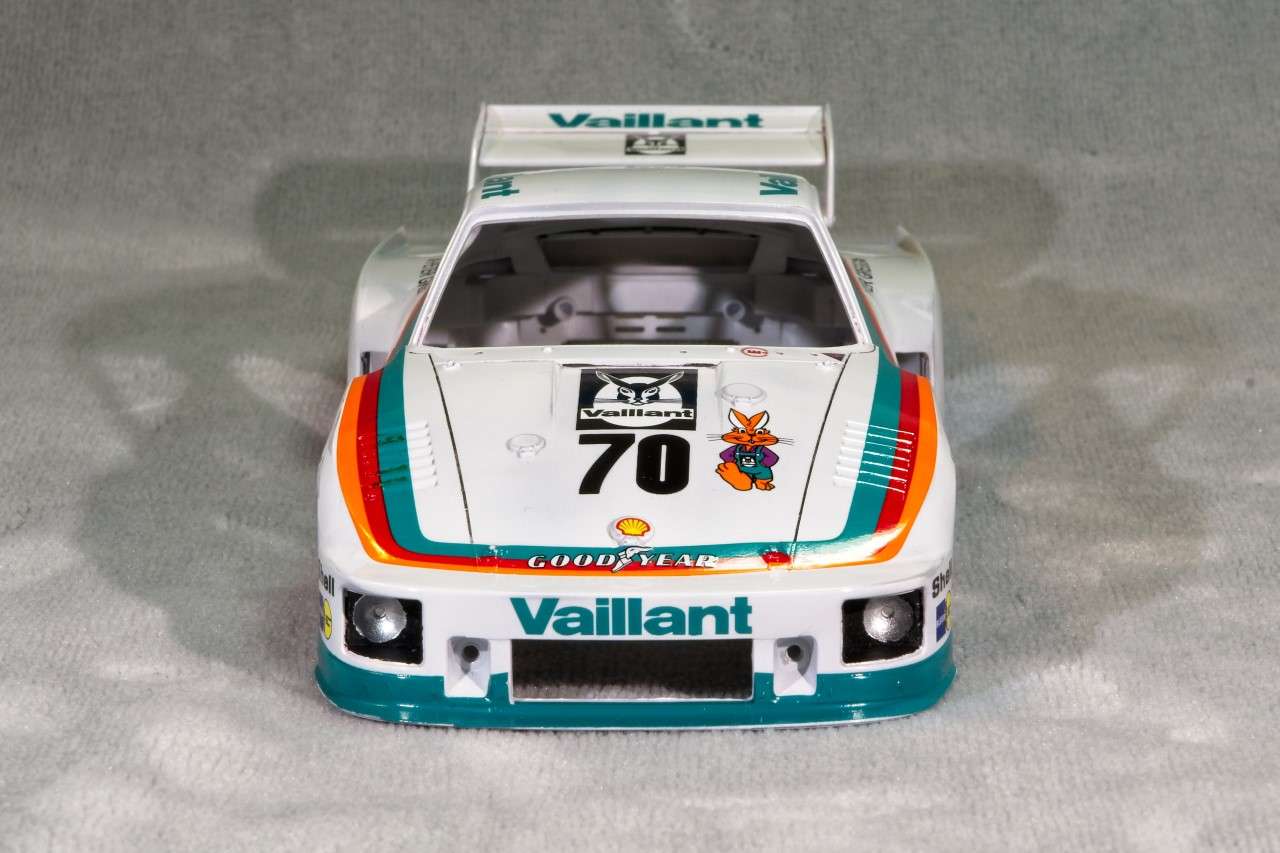 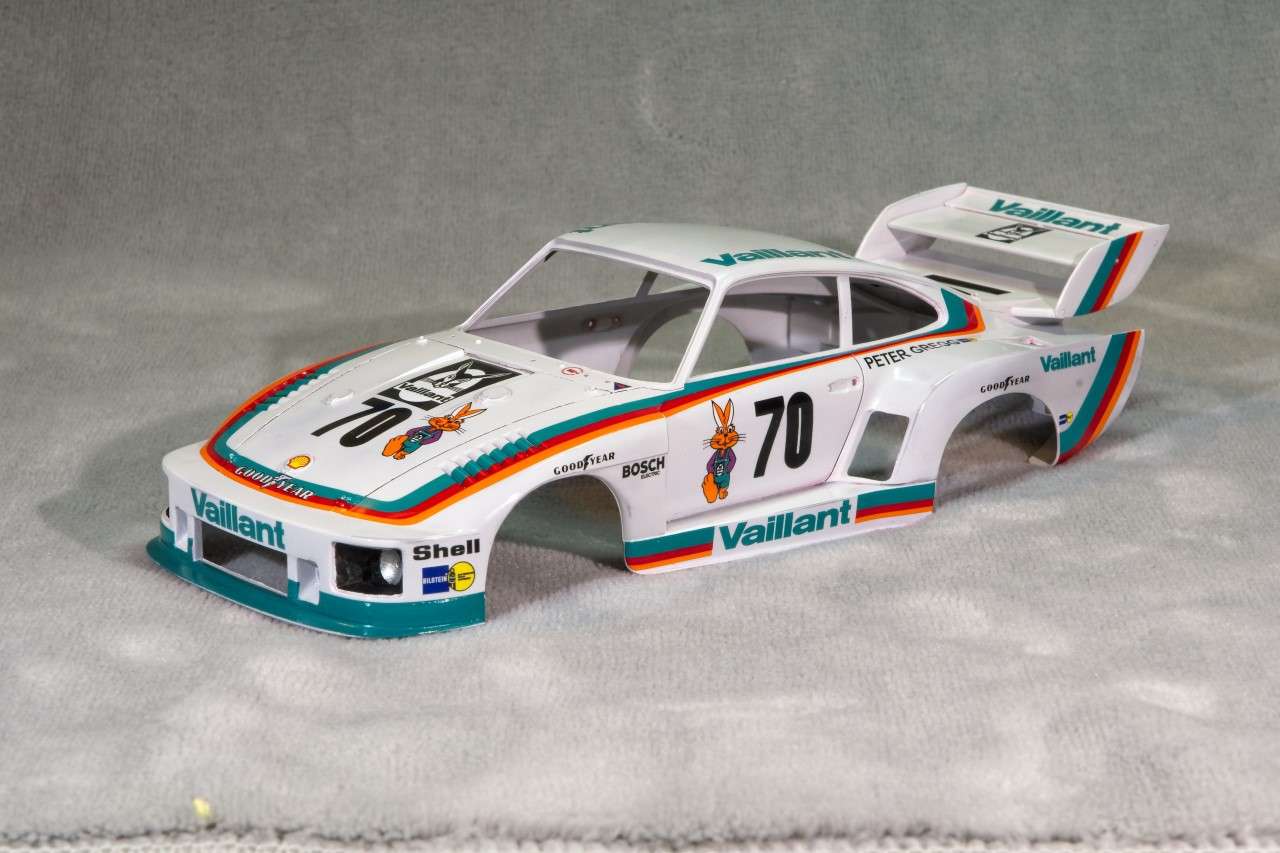 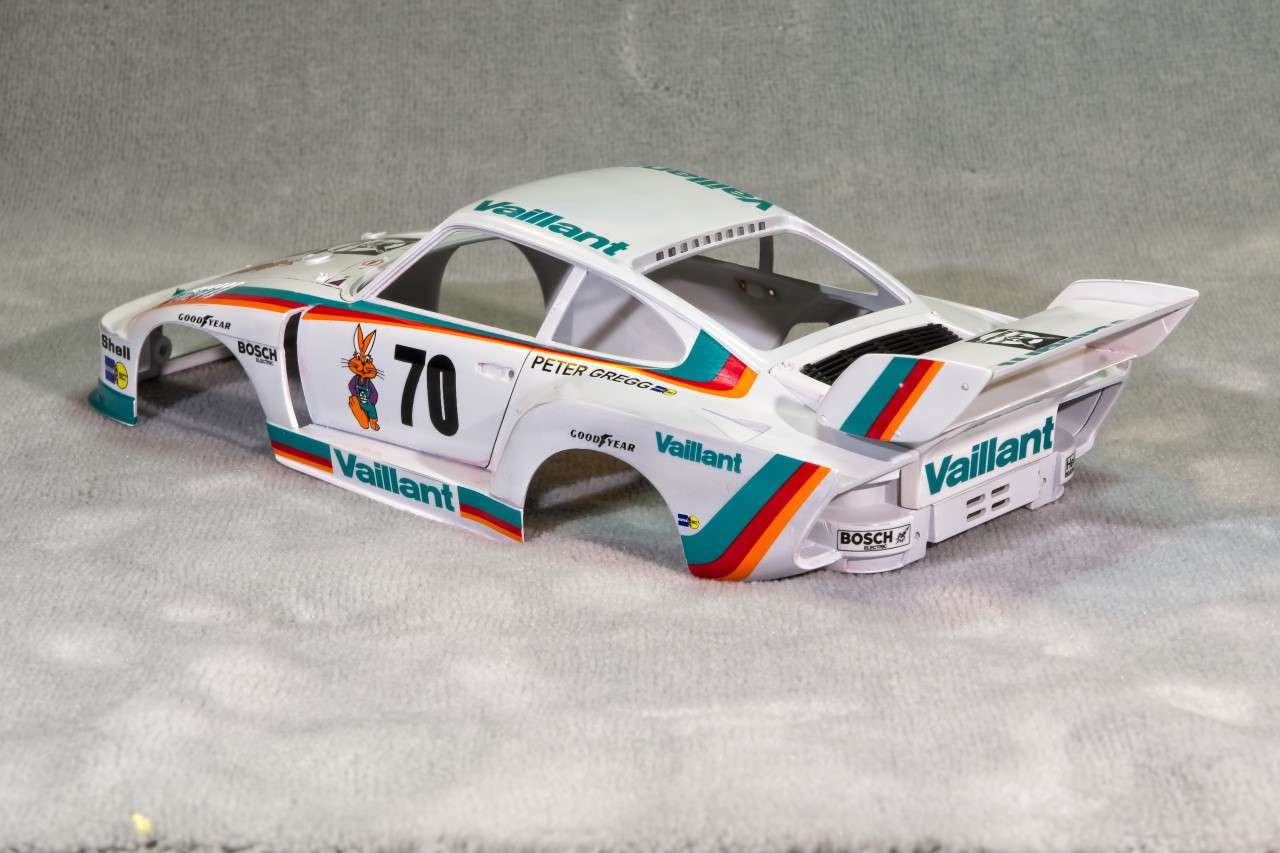 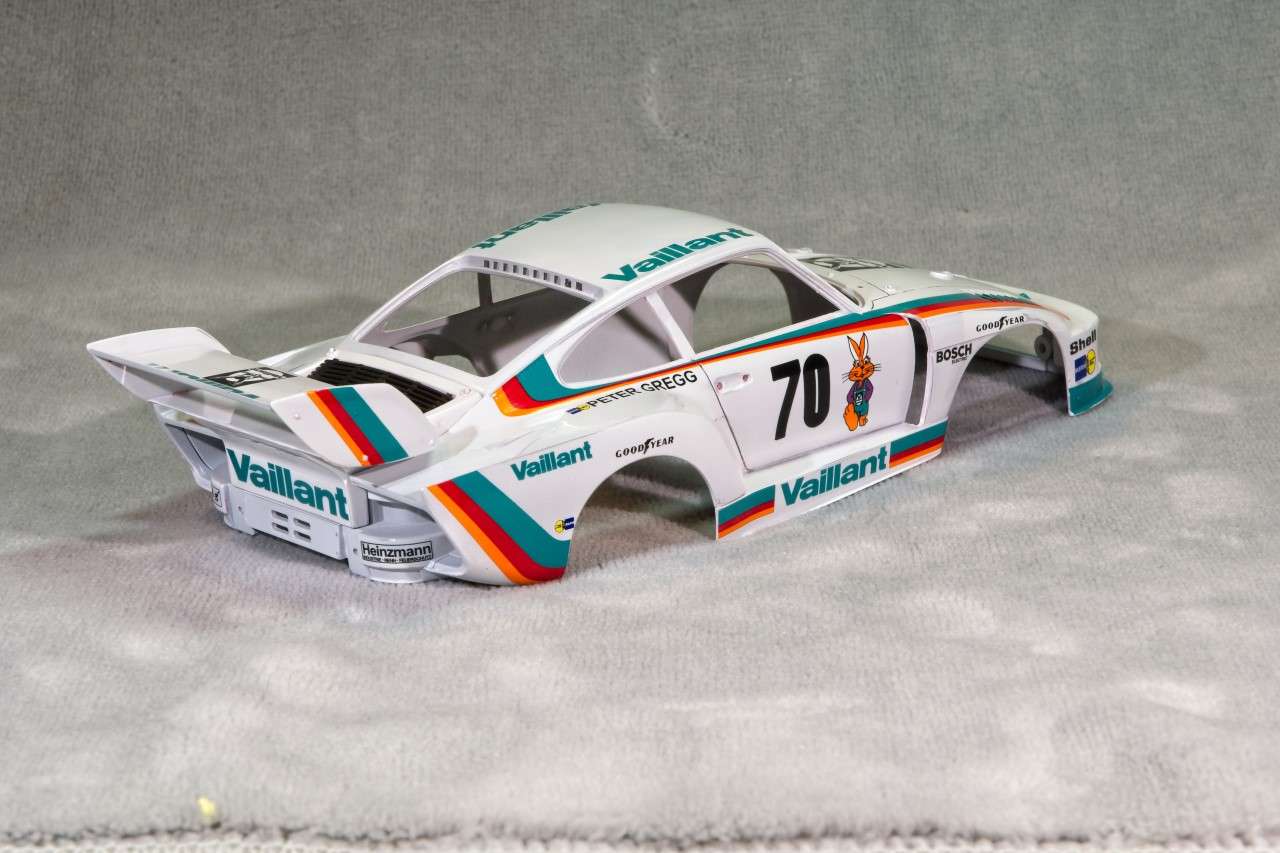 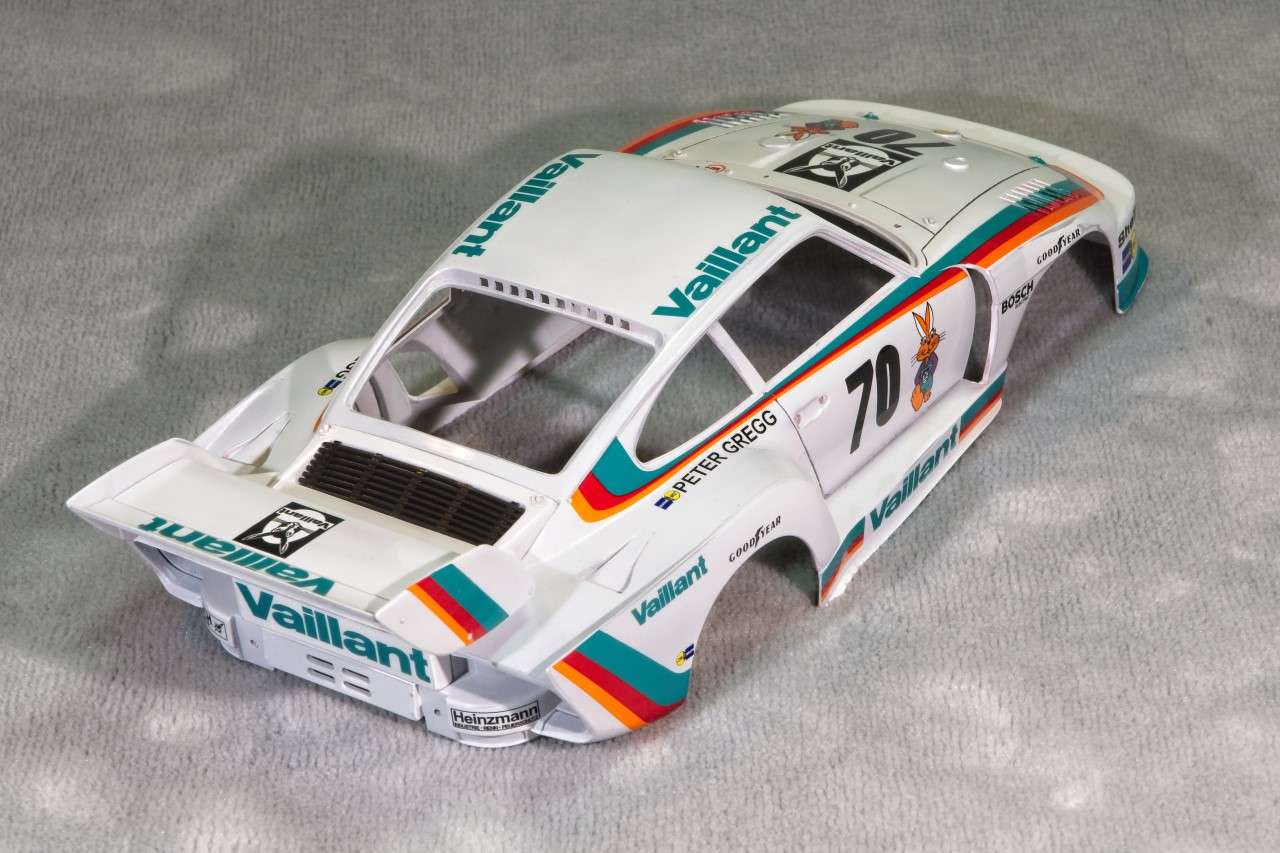 After painting the two rear brake air intakes grills that are in front of the rear wheel wells, as well as the front grill, I really didn't like the more or less solid plain flat Black look. They just didn't look like grills. So I tried dry brushing the fronts of all three grills with Tamiya Nato Matt Black, which is a very dark Gray. The effect adds a little implied depth to the grills, but it's still not what I'm looking for. I'll give it a a few more applications and see if that helps. Anyway, here's what they look like as of now.  Thanks to all for stopping by and checking out my Porsche 935 K2 build to date. It's always much appreciated. Joel |
|
|
|
Post by Chris K. Hale on Jul 14, 2019 12:25:23 GMT -8
Very Nice Joel, your polishing process is a lot of work and it came out great. I cant to see the finished model You have done a great job... Chris
|
|
cc
Full Time Ride

Posts: 141
|
Post by cc on Jul 15, 2019 11:14:05 GMT -8
Joel, there you go teasing us again. LOL. It’s looking great. The wash brings out details. What is turpenoid? Waiting with popcorn to see it cross the finish line 🏁
CC 😎
|
|
cc
Full Time Ride
Posts: 141
|
Post by cc on Jul 15, 2019 11:18:49 GMT -8
Joel, there you go teasing us again. LOL. It’s looking great. The wash brings out details. What is turpenoid? Waiting with popcorn to see it cross the finish line 🏁
CC 😎
|
|
|
|
Post by Joel_W on Jul 15, 2019 11:44:55 GMT -8
Chris,
Thanks for those most kind words. Yes, it's a lot of work, but I'm just not comfortable with the 2K Urethanes health wise.
Joel
|
|
|
|
Post by Joel_W on Jul 15, 2019 11:48:16 GMT -8
CC,
Thanks for your Thumbs up. I really appreciate it.
Odorless Turpenoid is a very mild Turpentine substitute for thinning Artist oils. Works great with Enamels as well. I buy these artist supplies at either AC Moore or Michael's. Also, cheap as dirt.
Joel
|
|
|
|
Post by clowncar on Jul 15, 2019 14:52:55 GMT -8
A blow-by-blow surface-finishing master class.
Also: We’ve briefly discussed this before, but based on observation of your results here, on stark white, Tamiya Panel Line Wash sounds like something I’ll want in gallon jugs.
Am buying popcorn in anticipation of how you’ll attack putting all the clear parts in that body shell. Roll on, little slantnose.
|
|
Deleted
Deleted Member
Posts: 0
|
Post by Deleted on Jul 15, 2019 21:38:01 GMT -8
Joel,
I keep looking at the "beast" and a very old, very cool tune by "AMBROSIA" keeps playing in my head, "Nice, Nice, Very NICE"!
|
|
|
|
Post by Joel_W on Jul 16, 2019 7:13:31 GMT -8
A blow-by-blow surface-finishing master class. Also: We’ve briefly discussed this before, but based on observation of your results here, on stark white, Tamiya Panel Line Wash sounds like something I’ll want in gallon jugs. Am buying popcorn in anticipation of how you’ll attack putting all the clear parts in that body shell. Roll on, little slantnose. Granted, I do have a tendency to repeat my procedures per build, but at my age I'm not so sure that I can do much about it as I forget what I've done 5 min ago. Trying to remember that I posted such and such procedure would be nearly impossible. The Tamiya panel line wash comes in 3 basic colors: Black, Dark Brown, and Gray. I have all 3. The Gray is absolutely useless as it really doesn't show up very well over black. The Black is the best by far. The Brown was a color I used for some applications on aircraft that really doesn't apply to cars. I've also mixed the gray with the Black to soften the color for less contrast, but again, it was mostly for aircraft applications. So just by the Black in the Gallon jug. As for the clear parts, so far I've masked and both air brushed and hand painted the black rubber borders on the front, rear, and side glass. I haven't even looked at the light glass as yet, but unless the fit is nearly dead on, I'll hand paint the edges to help blend them in. I'm sure that in real life the fit wasn't the greatest. Joel |
|
|
|
Post by Joel_W on Jul 16, 2019 7:16:54 GMT -8
Joel, I keep looking at the "beast" and a very old, very cool tune by "AMBROSIA" keeps playing in my head, "Nice, Nice, Very NICE"! Bill, Glad your liking the "Beast" as it's been one of, if not my most enjoyable build to date. so much so that I'm ordering one or two Beemax kits from Spot model as long as they have the detail up sets available. I've looked at the Cruze a few times, but the sets are sold out, and the next version doesn't come out till the fall. BTW, I'll have to Google that tune as I really have no idea as to what it is. Joel |
|
|
|
Post by Joel_W on Jul 19, 2019 9:04:45 GMT -8
Well, the final lap has been completed, and the Porsche 935 K2 has crossed the finish line with the addition of all those details I left till the very end to prevent breakage, and or just plain loosing them. I've always dreaded the front headlights, lens, and detail painting till the end as I usually screw something or things up. Well, this time I actually got it right. I hand painted the light housing flat black, then the bulb receptical silver. The instuctions really have no callout for the silver other then the picture. Looking at it now it really meant not to paint it anything as the bulb will completely cover it. I had to carefully remove the Silver paint so that the glue would hold the bulb in place. The front lens fit is excellent, and was glued in place with Tamiya Extra Thin. I completely forgot to decal the rear end engine plate that should be Aluminum, so that was done. Next came what looks like rear metal bumpers. I've got pictures of them in Gloss White & in Black, so I decided to go with Black just to add a little more interest to the rear end. And finally the rear brake light lenses that I painted with Tamiya Clear Orange & Clear Red were glued into their respective places. All the glass had it's rubber trim done in Mig Ammo Flat Black. The front and rear glass I masked and then air brushed, but the side windows proved to be way to frustrating trying to mask them, so I spent a good few hours very carefully hand painting them. When dry, I cleaned up the raised edges with a sharpened point of a Q-tip. They actually came out looking pretty good. Then the Glass was glued into their respective places with several drops of Tamiya Extra thin applied with a very fine paint brush. Works great instantly holding the glass in place, and I've yet to have any issues with fogging. The small details were glued into place on the sill right in front of the windshield including the single windshield wiper. Next up was the Glossy Black fender mirrors. And then the last two detail parts: the door handles. Well, I was cleaning up the last of the two handles when it just popped right out of my tweezers and flew to God only knows where. I searched every drop of my workbench, under it, the shelving next to it, the carpet, and even the compressor stand. But it was gone. Only the dreaded Capret Monster knew where he'd hidden it, and he sure wasn't going to be telling me any time soon. So I decided to try and cobble one out of strip plastic the following day. The time had come to try to make a door handle as I was positive that the Carpet Monster was still having a good laugh. I keep my hand tools in a Black plastic tray which I've already searched 3 times the previous day, but I took another look anyway, and the Carpet Monster must have taken pitty on me 'cause there was the door handle out in plain site in the middle of the bin!! I wasted no time in gluing it into place as I thanked Mr. C. Monster over & over again. And with that the Beemax Porsche 935 K2 is in the books. Thanks to all for following my build and staying the course, as it's always much appreicated. As for my next build, the plan has always been one closed wheel car, then one open wheel car, so up next is Tamiya's 1/20 scale Iconic Lotus 25 Coventry Climax. Joel 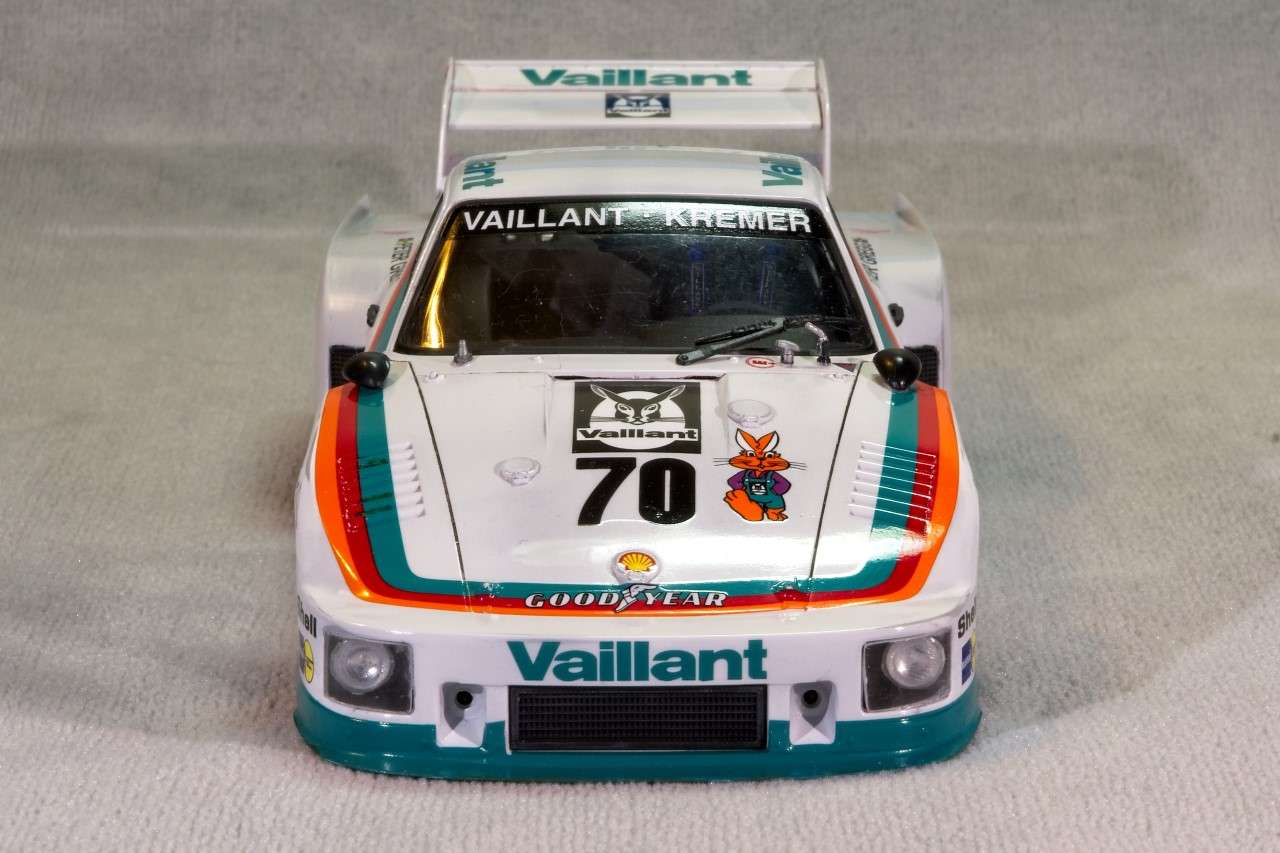  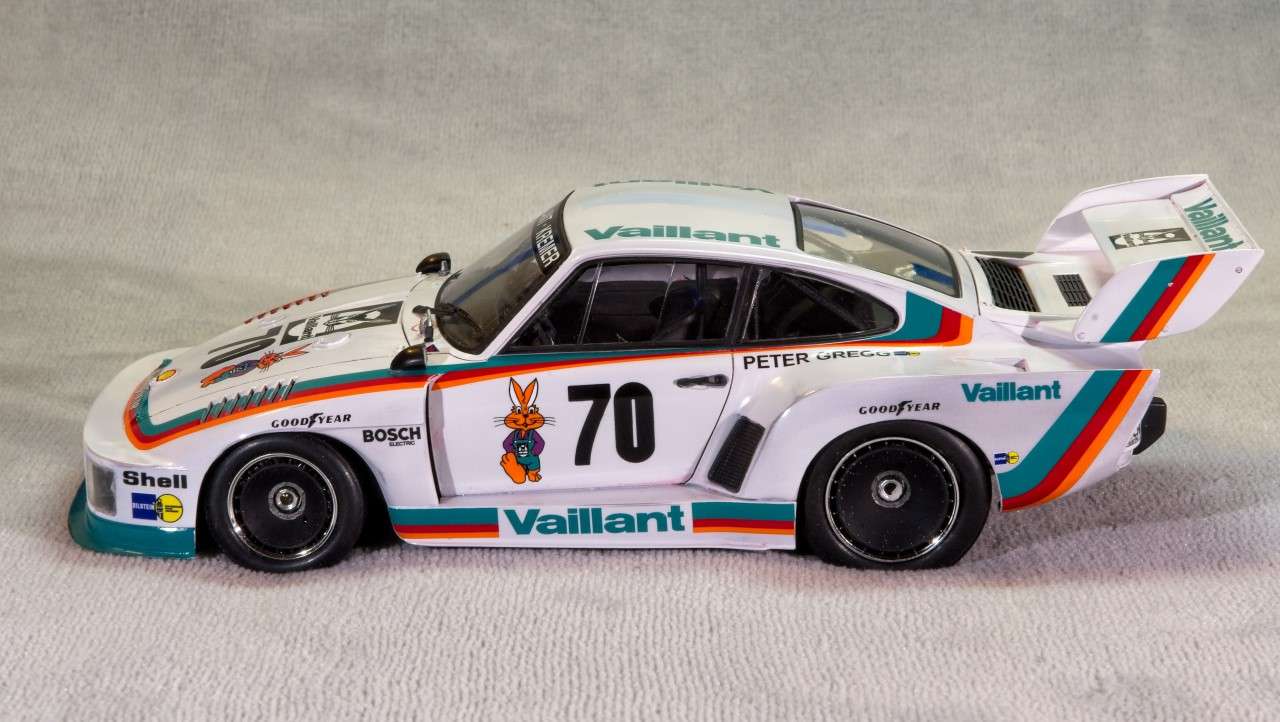 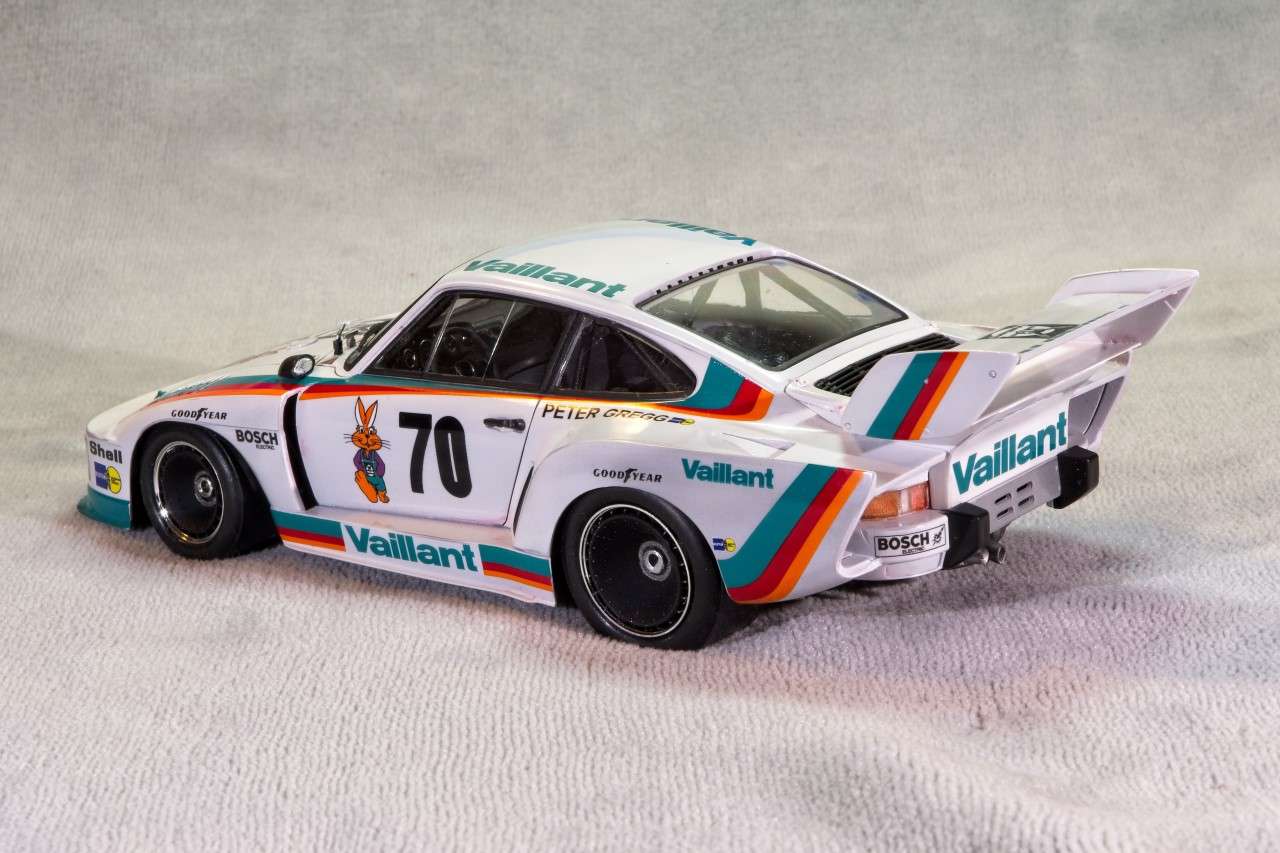 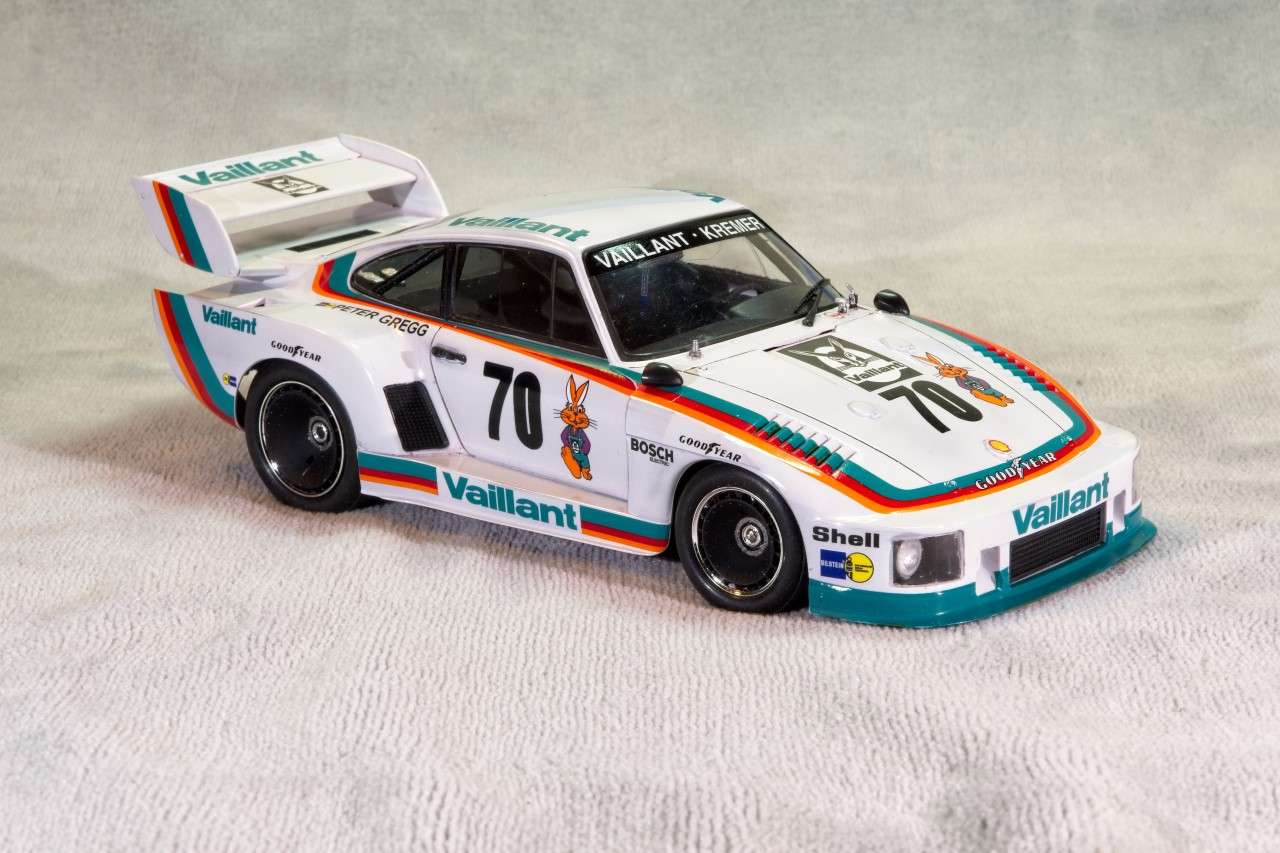 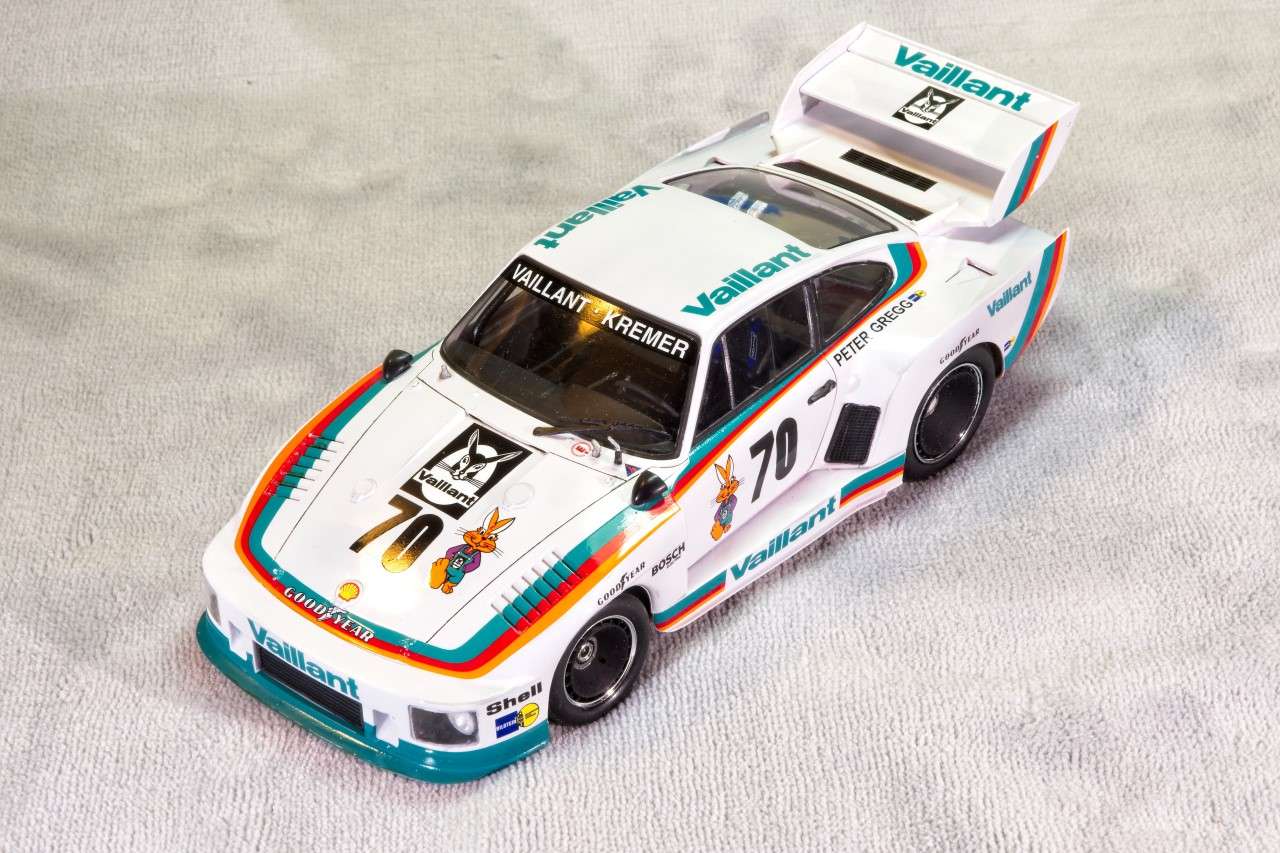 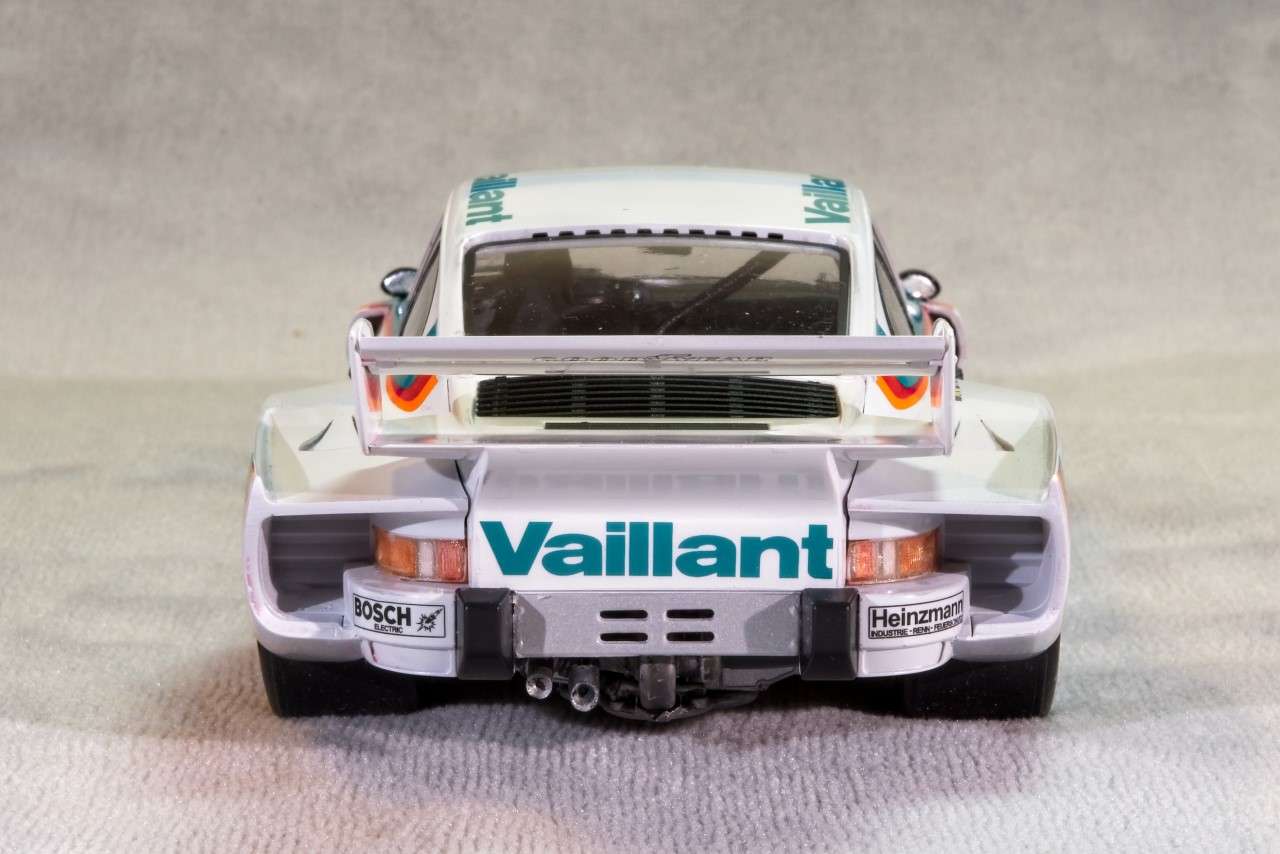 |
|
|
|
Post by afx on Jul 19, 2019 9:27:19 GMT -8
Turned out great Joel - nice work.
|
|
|
|
Post by Ben_B on Jul 19, 2019 9:27:35 GMT -8
Wow, Joel, that’s beautiful! Another great build!
Ben
|
|


